

App Download Link
You can download SUPIR app from here : https://www.patreon.com/posts/99176057
It has 1-click installers for Windows (only Python 3.10.11 and Git should be sufficient), RunPod (official Pytorch 2.2.0 template) and Massed Compute template Creator > SECourses
App Info
SUPIR: Scaling Up to Excellence: Practicing Model Scaling for Photo-Realistic Image Restoration In the Wild 1 click installer scripts.
SUPIR Sampler and Text CFG Comparison : https://imgsli.com/MjU2ODQz/2/1
Gemini 2.5 Pro prompt to get image description for free :
describe this image for sdxl. write single line prompt to regenerate it exactly same. make the prompt extremely detailed
Use Default preset for highest loyalty and Replicate preset for adding more details
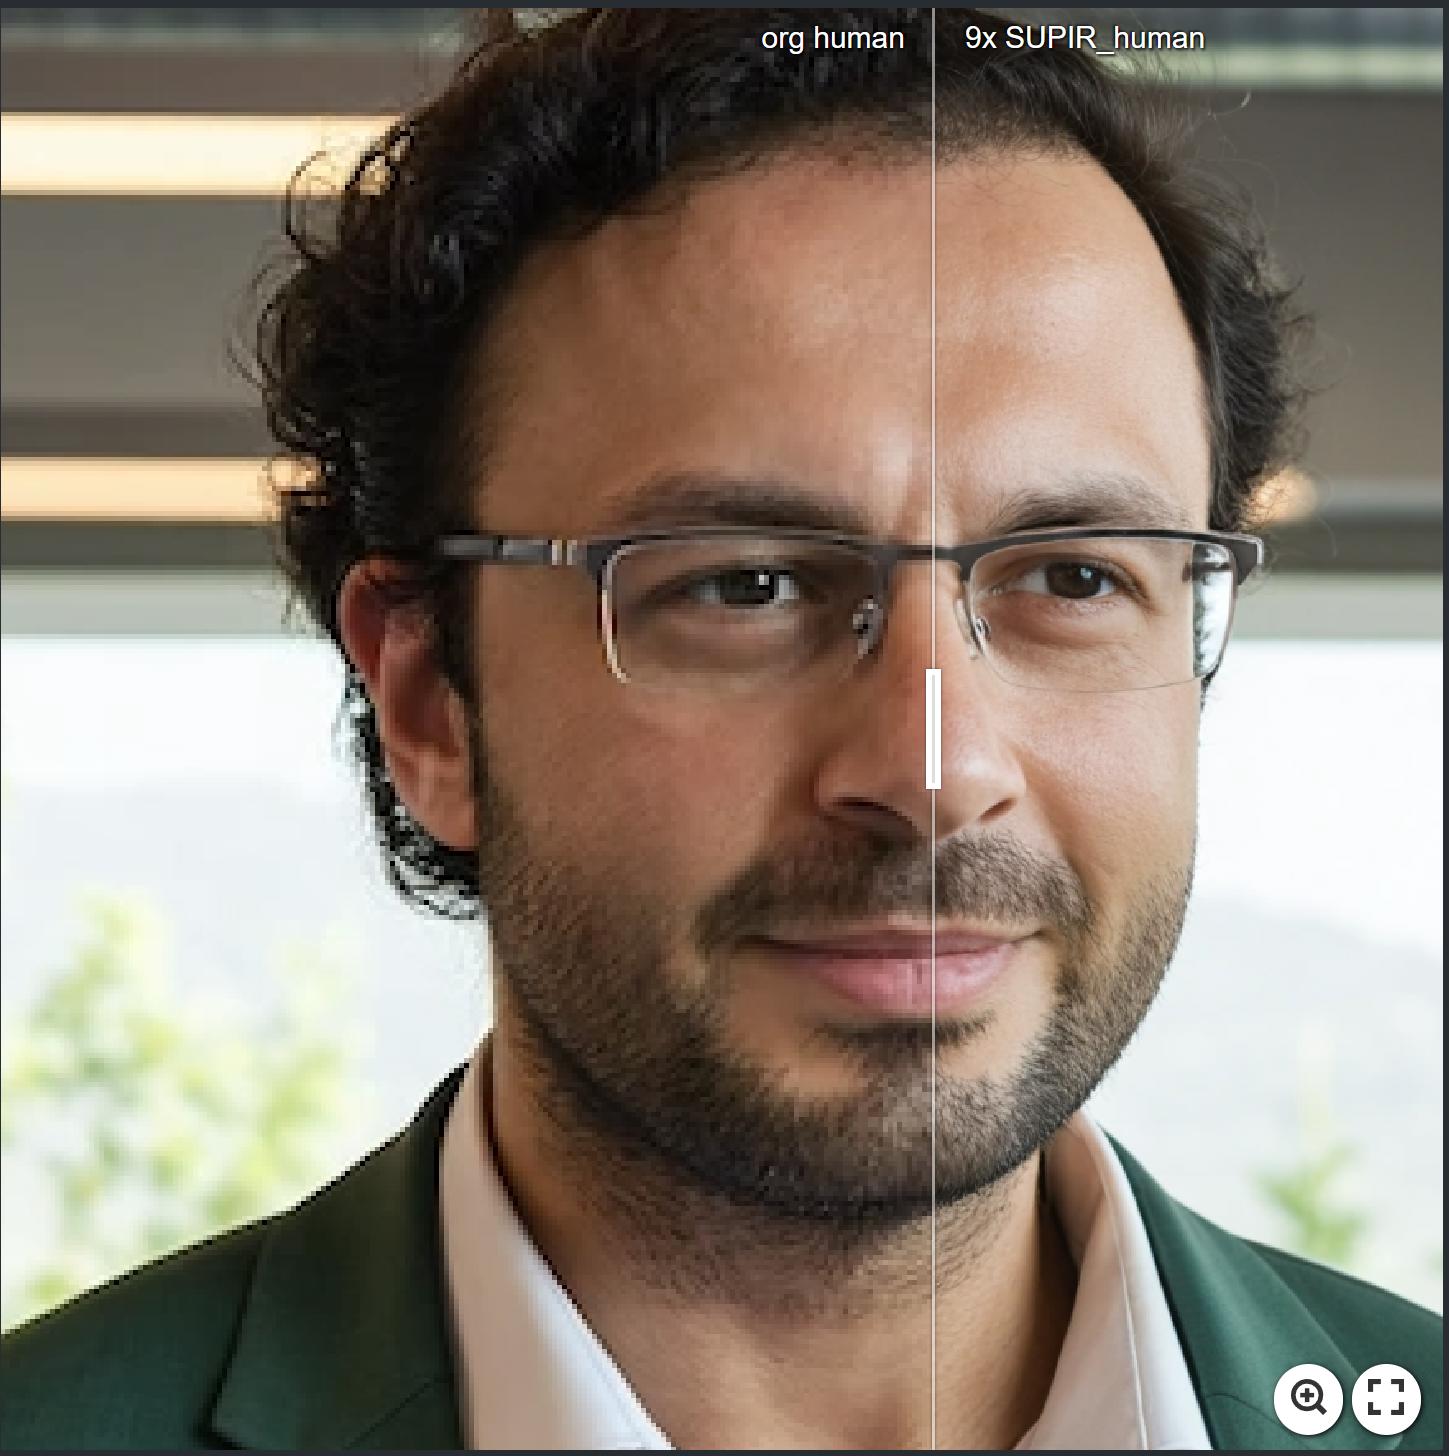
Human upscale from 1024x1024 to 3072x3072 (3x upscale and total 9x resolution) with face restore comparison
Owl upscale from 1024x1024 to 3072x3072 (3x upscale and total 9x resolution)
Video Tutorials
Tutorials are older but hopefully a newer one will be made and they should be still useful
Complete Guide to SUPIR Enhancing and Upscaling Images Like in Sci-Fi Movies on Your PC
How To Install SUPIR On RunPod and Massed Compute
How To Install & Use SUPIR : SOTA Image Upscaler On RunPod — 1 Click Easy Install & Run
6 September 2025 Update V91
Libraries upgraded to Torch 2.8, CUDA 12.9, xFormers 0.0.33, Flash Attention 2.8.3
You don’t need to have CUDA or anything else installed and it should work with Python 3.10.11 and Git installed
When compiling libraries, I added support for all GPUs starting from RTX 1000 to 5000 series including other GPUs like A100, H100, B200, L40, etc
Compiled for TORCH_CUDA_ARCH_LIST=6.1;7.5;8.0;8.6;8.9;9.0;10.0;12.0
Press enter or click to view image in full size

Downloader script is 100% improved and now it is 100x more robust even for slow connection internets
It has 100% continue feature + SHA256 hash check feature now
To upgrade libraries, extract latest zip file and overwrite files
Enter inside SUPIR folder and delete venv folder
Then run Windows_Install_or_Update.bat file
Installation process is also now way faster for Windows, RunPod and Massed Compute
To fresh install extract zip file into drive like E:\SUPIR_v91
Just execute Windows_Install_or_Update.bat file
Then once installation finished use Windows_Start_SUPIR_app.bat file
If you have RTX 2000 or 1000 series still should work but if you get error please report me and try If_Regular_Install_Fails_On_RTX_2000_or_Below_GPUs.bat
If your download of models fails for any reason, you can always run Windows_Fix_Model_Download.bat
It will resume and also hash check downloaded files
Windows Requirements
Python 3.10.11 and Git should be sufficient
If you get error also make sure to have FFmpeg, CUDA 12.9, cuDNN 9.12, C++ Tools, TensorRT and MSVC
Follow this post to install all : https://www.patreon.com/posts/111553210
Follow this video to install all along with above post : https://youtu.be/DrhUHnYfwC0
2 September 2025 Update V87
With V87 full screen image preview bug fixed
For update run Windows_Update_Version.bat
30 August 2025 Update V86
We have added the new requested features
Feature 1 : Skip already upscaled images in target folder option when doing batch processing
This is simply resume
Feature 2 : In Face options Only Face Restoration
This will apply SUPIR upscale to only face and rest of the image will be deterministic Lanczos upscale (simply exactly same when you downscale back to original resolution)
Feature 3 : Now when doing both batch and single processing, it will show extra screen
Actually this was added for batch processing but due to Gradio limitations, single processing will display too
This screen will be displayed at left top
Press enter or click to view image in full size
Fix : Cancel button should work perfectly fine for Single and Batch processing now
With V86 from V85, messages displayed at the top panel fixed + improved
For update, use latest zip file, extract and overwrite, and run Windows_Update_Version.bat
27 August 2025 Update V80
New Feature : First Downscale to Match Target Upscale Size
When enabled, the image is first downscaled using high-quality Lanczos algorithm to match the target resolution (after max megapixel/resolution constraints), then upscaled by the specified factor. This can help achieve more consistent results when working with size-constrained outputs.
So lets say your input image is 2000x2000 = 4 mega pixels
You want to sharpen and increase quality with 4x upscale but that would make it 16 mega pixel which is quite not possible
So set Max Megapixels = 4
Set Upscale Size = 4
And enable First Downscale to Match Target Upscale Size checkbox
So it will first downscale image into 500x500 and then it will upscale into 2000x2000
To update just use latest zip file and run Windows_Update_Version.bat
1 June 2025 Update V74
Zip file updated — now installs latest official xFormers
Windows_Resume_Fix_Model_Downloads.bat updated to be more robust
Delete venv folder and run installer again if you get any errors
23 May 2025 Update V73
New option Skip LLaVA if .txt caption exists added to LLaVA section
If you uncheck this, it will re-generate a caption for the image each time when you run it
Just run Windows_Update_Version.bat file it should work
RunPod and Massed Compute installers upgraded to Torch 2.7 and CUDA 12.8 so now supports RTX 5000 series as well including older GPUs like 4000 series, 3000 series, RTX A6000, H100, A100 etc
Linux users can use RunPod or Massed Compute installers
17 April 2025 Update V69
Image MetaData saving and loading back improved and some bugs fixed
Presets / Configs saving and loading back improved and some bugs fixed
2 Extremely important new features added
Max Megapixels (0 = no limit) : Lets say you set 10x upscale and maximum 3 MegaPixels, then it will upscale it until reaches exactly 3 Megapixels resolution
Max Resolution (0 = no limit) : Lets say you set 10x upscale and maximum Resolution as 1536, then it will upscale it until the bigger dimension of the image reaches 1536px
Previously Estimated Output Resolution was displaying inaccurate resolutions and now it should display 100%
Estimated Output Resolution should also accurately display what you will get when using Max Megapixels and Max Resolution
Cancel button will now cancel the generation immediately — this bug fixed
There were some errors with loading presets fixed
Now when you save a preset, it will be auto selected and loaded back
Your last saved and loaded presets will be remembered now when you restart the application
Selecting a preset from dropdown list will auto load
In some cases face restore and then combining restored face was not working
Now it should work in all cases, please report me if fails in any case and this really improves quality of faces significantly
The slider and where the image cut off was mis-aligned this issue fixed
Now supports avif image format as well
Run Windows_Update_Requirements.bat to update
A new feature Compare Images tab implemented
It will list last 20 generations where you can pick and compare or you can upload images and compare
Kaggle notebook update and fixed
Now it will download models like 8 times faster also
New older GPUs install added
If you have RTX 2000 series and below GPUs please use Windows_Install_Older_GPUs_RTX_2000_And_Below.bat file
Now supports RTX 5000 series as well (includes RTX 3000, 4000 too)
Older Update Logs
https://github.com/FurkanGozukara/Stable-Diffusion/blob/main/App_Updates_Change_Logs/SUPIR_App.md
How To Install
Download latest zip file from the attachments and extract files wherever you want to install
Double click windows_install .bat and let it install and download necessary models
Requires 12 GB VRAM without LLaVA. Tested on RTX 3060
Make sure that your VRAM usage is not bigger than 500 MB before starting the SUPIR
If you want to use LLaVA you can use our better installer : https://www.patreon.com/posts/90744385
LLaVA is not mandatory as shown in full tutorial video : https://youtu.be/PqREA6-bC3w
Massed Compute (Recommend Cloud) :
Please register via this link : https://vm.massedcompute.com/signup?linkId=lp_034338&sourceId=secourses&tenantId=massed-compute
We have a special coupon for all GPUs : SECourses
If you want to learn more about GPUs and prices read this link : https://www.patreon.com/posts/126671823
Select RTX A6000 or Better GPU — like L40S or A6000 ADA or A100 or H100
Then select our image SECourses from Creator dropdown
Then follow Massed_Compute_Instructions_READ.txt
Same as my any other Massed Compute installer script
Example tutorial for learn how to install and use Massed Compute
(Starts at 12:58) : https://youtu.be/KW-MHmoNcqo?si=G1WbG-Qw4ujWvOtG&t=778
RunPod (Cloud):
Please register via this link : https://get.runpod.io/955rkuppqv4h
Then follow Runpod_Instructions_READ.txt
Same as my any other RunPod installer script
Use the template written in Runpod_Instructions_READ.txt file
Example tutorial for learn how to install and use RunPod
(starts at 22:03) : https://youtu.be/KW-MHmoNcqo?si=QN8X8Sjn13ZYu-EU&t=1323
Extra Features
1 click install including automatically downloading necessary models
Generate any number of images each time with different seed
So you can generate 200 different images with different seeds at 1 click
Every generated image saved in outputs folder automatically
Display progress via progress info of Gradio including each image generation speed
This info displayed at the CMD / terminal as well
Improved more useful Gradio interface
Randomize seed feature
Includes pip freeze info for future library fixes
Auto installers for both Windows & RunPod (Any Linux)
Supports VRAM optimizations and now works at 12 GB GPUs
Tested on RTX 3060
Make sure that your VRAM usage is not bigger than 500 MB before starting the SUPIR
How To Use
The biggest difference making thing is under SUPIR options Text Guidance Scale
This will impact how much add new details or stay loyal to the original image
Next big thing is Sampler
EDM is more loyal to the original image but DPMPP2M can add more details
S-Churn and S-Noise doesn’t make much valuable difference but you can test
In the Advanced Options
Linear CFG and Linear Stage2 Guidance can make difference so you can try them
All generated images will be automatically saved inside outputs folder
If you also want to use LLaVA we have better LLaVA scripts which supports 4-bit, 8-bit and 16-bit loading
But even with simple captions it works great you can just type
Image comparison sliders to Test : https://imgsli.com/ , https://web-toolbox.dev/en/tools/image-compare-slider , https://www.diffchecker.com/image-compare/
Here example. All default except Linear Stage2 Guidance is enabled and set 0.5
input image : input_1.png
Basic Caption : a trex dinosaur in jurassic park
Output : basic_caption.png
Press enter or click to view image in full size
Better caption : A gigantic dinosaur with sharp teeth is standing in a lush green landscape with mountains in the background. The sky is partly cloudy, and the dinosaur appears to be in motion, possibly running or lunging forward. The setting seems to be reminiscent of prehistoric or Jurassic environments, likely intended to represent the natural habitat of such a creature.
Output : better_caption.png
Press enter or click to view image in full size
Camel
Press enter or click to view image in full size
A family photo
Press enter or click to view image in full size


