🔽DOWNLOAD🔽
https://civitai.com/models/1386234/comfyui-image-workflows
Overview
The archive contains the following workflows:
T2I_V20:
is for creating new images with every possible feature (pose control, style transfer, refiner, etc.).BasicT2I_V20:
is a streamlined text-to-image experience without the advanced IP-Adapter, OpenPose, or Refiner steps, making it faster and simpler to use.VPred_V20:
is specifically for models that require v-prediction sampling, which is a different way the model interprets noise during generation.Detailer_V20:
is not for creating new images, but for improving ones you already have.
Requirements
Most of the requirements can be downloaded directly in the ComfyUI Manager.
🟥T2I_V20
🟨BasicT2I_V20
🟦VPred_V20
🟩Detailer_V20
Custom Nodes:
🟥🟨🟩🟦 ComfyUI-Manager (by Comfy-Org)
https://github.com/Comfy-Org/ComfyUI-Manager🟥🟨🟩🟦 ComfyUI-Impact-Pack (by ltdrdata)
https://github.com/ltdrdata/ComfyUI-Impact-Pack🟥🟨🟩🟦 ComfyUI-Impact-Subpack (by ltdrdata)
https://github.com/ltdrdata/ComfyUI-Impact-Subpack🟥🟨🟩🟦 ComfyUI-Easy-Use (by yolain)
https://github.com/yolain/ComfyUI-Easy-Use🟥🟨🟩🟦 rgthree-comfy (by rgthree)
https://github.com/rgthree/rgthree-comfy🟥🟨🟩🟦 ComfyUI-Image-Saver (by alexopus)
https://github.com/alexopus/ComfyUI-Image-Saver🟥🟨🟩 ComfyUI Essentials (by cubiq)
https://github.com/cubiq/ComfyUI_essentials🟥🟨🟩 ComfyUI_UltimateSDUpscale (by ssitu)
https://github.com/ssitu/ComfyUI_UltimateSDUpscale🟥🟩 pysssss Custom Scripts (by pythongosssss)
https://github.com/pythongosssss/ComfyUI-Custom-Scripts🟥🟩 ComfyUI-FBCNN (by Miosp)
https://github.com/Miosp/ComfyUI-FBCNN🟥🟩 ComfyUI's ControlNet Auxiliary Preprocessors (by Fannovel16)
https://github.com/Fannovel16/comfyui_controlnet_aux🟥 ComfyUI_IPAdapter_plus (by cubiq)
https://github.com/cubiq/ComfyUI_IPAdapter_plus🟥 ComfyUI_Comfyroll_CustomNodes (by Suzie1)
https://github.com/Suzie1/ComfyUI_Comfyroll_CustomNodes🟥 z-tipo-extension (by KohakuBlueleaf)
https://github.com/KohakuBlueleaf/z-tipo-extension🟥 ComfyUI-ppm (by pamparamm)
https://github.com/pamparamm/ComfyUI-ppm🟥 ComfyUI-Lora-Manager (by willmiao)
https://github.com/willmiao/ComfyUI-Lora-Manager
Models Checklist:
You only need to download the models for features you are planning to use e.g. if you don't use the refiner you dont need to download the sd_xl_refiner_1.0 model.
Checkpoints:
🟥🟨🟩🟦 Any SDXL/Pony/Illustrious/NoobAI model 📂/ComfyUI/models/checkpoints
https://civitai.com/models/1203050/fabricated-xl
https://civitai.com/models/827184/wai-nsfw-illustrious-sdxl
https://civitai.com/models/989367/wai-shuffle-noob
https://civitai.com/models/140272/hassaku-xl-illustrious
🟥 SDXL Refiner model 📂/ComfyUI/models/checkpoints/SDXL
https://huggingface.co/stabilityai/stable-diffusion-xl-refiner-1.0/blob/main/sd_xl_refiner_1.0.safetensorsVAE:
🟥🟨🟩🟦 Any VAE model 📂/ComfyUI/models/vae/SDXL
https://huggingface.co/stabilityai/sdxl-vae/blob/main/sdxl_vae.safetensorsControlNet:
🟥🟨🟩 control-lora-canny-rank256.safetensors 📂/ComfyUI/models/controlnet/SDXL
https://huggingface.co/stabilityai/control-lora/blob/main/control-LoRAs-rank256/control-lora-canny-rank256.safetensors
control-lora-depth-rank256.safetensors 📂/ComfyUI/models/controlnet/SDXL
https://huggingface.co/stabilityai/control-lora/blob/main/control-LoRAs-rank256/control-lora-depth-rank256.safetensors
🟥 noobaiXLControlnet_openposeModel.safetensors 📂/ComfyUI/models/controlnet
https://civitai.com/models/962537?modelVersionId=1077649 (for NoobAI or Illustrious)
or
🟥 OpenPoseXL2.safetensors 📂/ComfyUI/models/controlnet/SDXL
https://huggingface.co/thibaud/controlnet-openpose-sdxl-1.0/blob/main/OpenPoseXL2.safetensors (for SDXL)
🟩 noobaiInpainting_v10 📂/ComfyUI/models/controlnet/
https://civitai.com/models/1376234/noobai-inpainting-controlnetIP-Adapter:
🟥 noobIPAMARK1_mark1.safetensors 📂/ComfyUI/models/ipadapter
https://civitai.com/models/1000401/noob-ipa-mark1 (for NoobAI or Illustrious)
or
🟥 ip-adapter-plus_sdxl_vit-h.safetensors 📂/ComfyUI/models/ipadapter
https://huggingface.co/h94/IP-Adapter/blob/main/sdxl_models/ip-adapter-plus_sdxl_vit-h.safetensors (for SDXL)
🟥 ip-adapter-faceid-plusv2_sdxl.bin 📂/ComfyUI/models/ipadapter
https://huggingface.co/h94/IP-Adapter-FaceID/blob/main/ip-adapter-faceid-plusv2_sdxl.binCLIP Vision:
🟥 CLIP-ViT-H-14-laion2B-s32B-b79K.safetensors 📂/ComfyUI/models/clip_vision
https://huggingface.co/laion/CLIP-ViT-H-14-laion2B-s32B-b79K/tree/main
🟥 clip_vision_g.safetensors 📂/ComfyUI/models/clip_vision
https://huggingface.co/stabilityai/control-lora/blob/main/revision/clip_vision_g.safetensorsUpscale Models:
🟥🟨🟩 4x_foolhardy_Remacri.pth (or any other 4x ESRGAN model) 📂/ComfyUI/models/upscale_models
https://huggingface.co/FacehugmanIII/4x_foolhardy_RemacriDetectors (YOLO/SEG): Place detector models in ComfyUI/models/ultralytics/bbox or /segm. This workflow requires detectors for:
🟥🟨🟩🟦 Hands (hand_yolov9c.pt) 📂/ComfyUI/models/ultralytics/bbox ⚠Required for detailers since it's loaded as the pipe default
https://huggingface.co/Bingsu/adetailer/blob/main/hand_yolov9c.pt🟥🟨🟩🟦 Faces (face_yolov9c.pt) 📂/ComfyUI/models/ultralytics/bbox
https://huggingface.co/Bingsu/adetailer/blob/main/face_yolov9c.pt🟥🟨🟩🟦 Eyes (Eyeful_v2-Paired.pt) 📂/ComfyUI/models/ultralytics/bbox
https://civitai.com/models/178518/eyeful-or-robust-eye-detection-for-adetailer-comfyui🟥🟨🟩🟦 NSFW (ntd11_anime_nsfw_segm_v4_all.pt) 📂/ComfyUI/models/ultralytics/segm
https://civitai.com/models/1313556/anime-nsfw-detectionadetailer-all-in-one🟩 Adetailer for Text / Speech bubbles / Watermarks 📂/ComfyUI/models/ultralytics/segm
https://civitai.com/models/753616/adetailer-for-text-speech-bubbles-watermarks
Recommendations
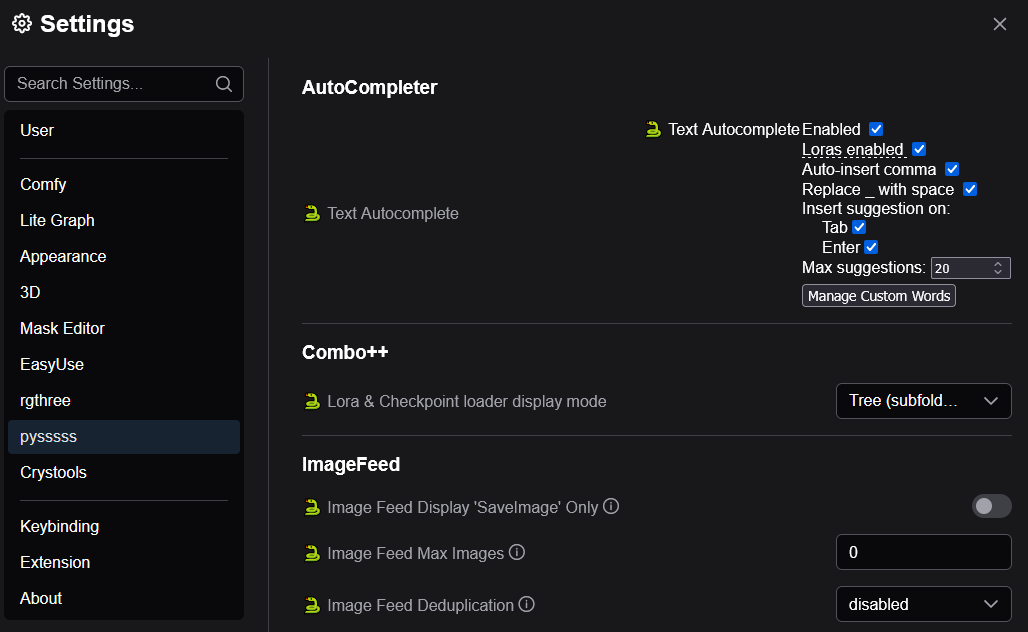
Enable Autocompletion in the settings tab under pysssss. It's also recommended to press Manage Custom Words, load the default tag list and press save.
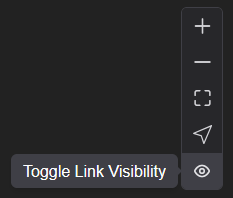
Also disable Link Visibility for better viewing clearity since it can get quite clustered.
Prompt Syntax
anime //normal tag
(anime) //equals to a weight of 1.1
((anime)) //equals to a weight of 1.21
(anime:0.5) //equals to a weight of 0.5 (keyword:factor)
[anime:cartoon:0.5] //prompt scheduling [keyword1:keyword2:factor] switches tag at 50%embedding:Cool_Embedding
(embedding:Cool_Embedding:1.2) //change weight (same as for normal tags)<lora:Cool_LoRA> //unspecified LoRA weight (default 1.0)
<lora:Cool_LoRA:0.75> //specified LoRA weight 0.75
<lora:Cool_LoRA.safetensors:0.75> //also possible to include the file extension__coolWildcard__ //use wildcard
__other/otherWildcard__ //wildcard in a sub folder
Image Resolutions
Recommended Values: [1:1] 1024x1024, [3:4] 896x1152, [5:8] 832x1216, [9:16] 768x1344, [9:21] 640x1536, [1:1] 1536x1536, [2:3] 1024x1536, [13:24] 832x1536T2I_V20
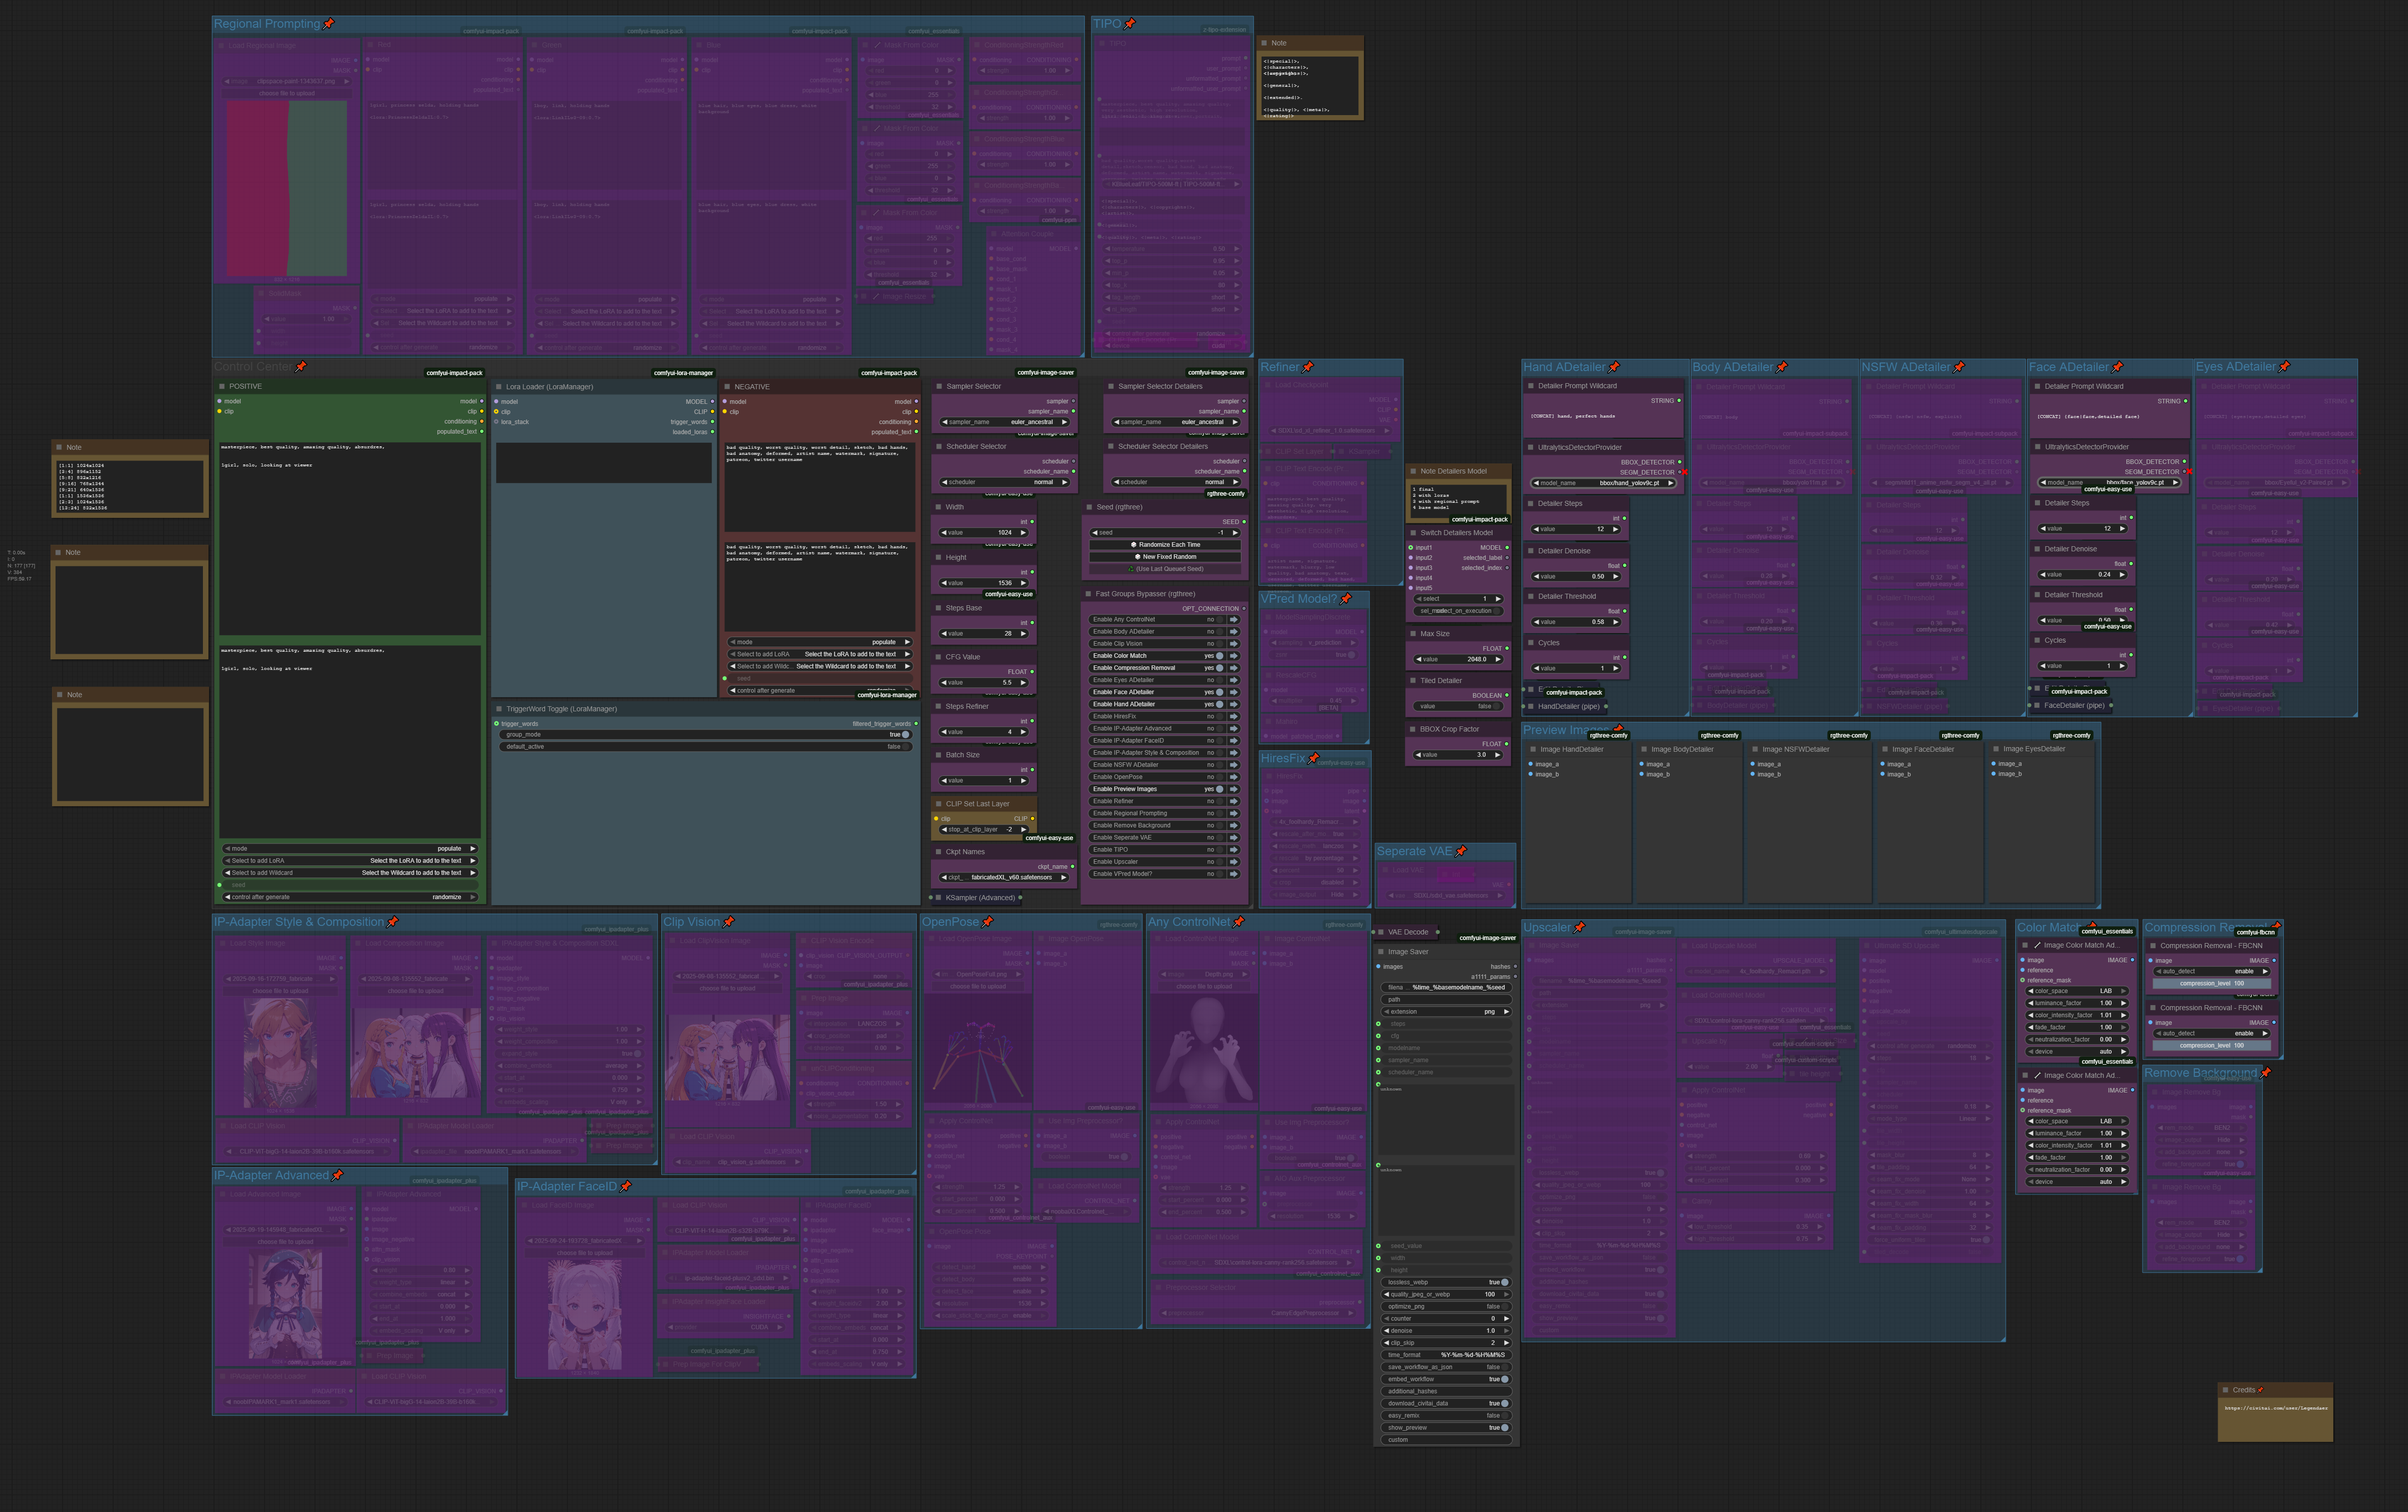
This is the main workflow for creating new images. The descriptions below explains each component in more detail.
Control Center
The purpose of the Control Center is to centralize the most common settings and provide master on/off switches for the workflow's major features, making it easy to manage without navigating through the entire workflow.
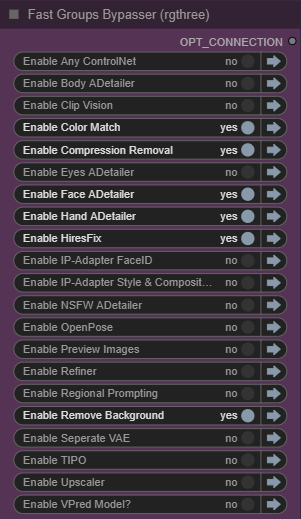
Fast Groups Bypasser (rgthree): This is the core of the control system. Each toggle (e.g., Enable HiResFix) is linked to a group of nodes. Setting a toggle to "no" effectively removes that entire group from the generation process.
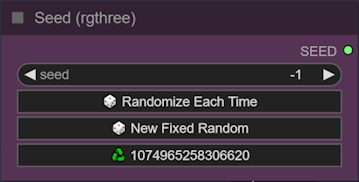
Seed (rgthree): A master seed control for all generation steps. (-1 means random)
Ckpt Select: Select the main SDXL model used for generation in the Ckpt Names node.

Width & Height: The base resolution of the generated images.

Scheduler & Sampler: Select the main scheduler and sampler for the generation process. They act as the engine that guides the noise removal process. Different samplers can produce slightly different results in terms of style and convergence speed.

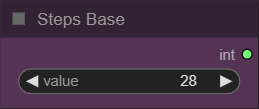
Steps Base: The steps used for the base image sampler.
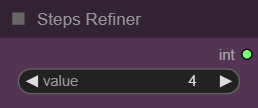
Steps Refiner: The steps used for the refinement process if enabled in the Fast Groups Bypasser node.
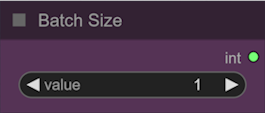
Batch Size: determines how many images are generated in a single run when you press "Queue Prompt
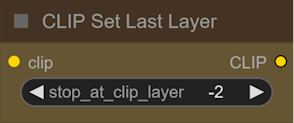
CLIPSetLastLayer: A setting that tells the model to ignore the final layers of the text interpretation model (CLIP). This can sometimes lead to more aesthetic or creative results, especially with anime-style models.
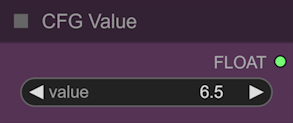
CFG Value: A setting that controls how strongly the AI should adhere to your text prompt. Higher values mean stricter adherence.
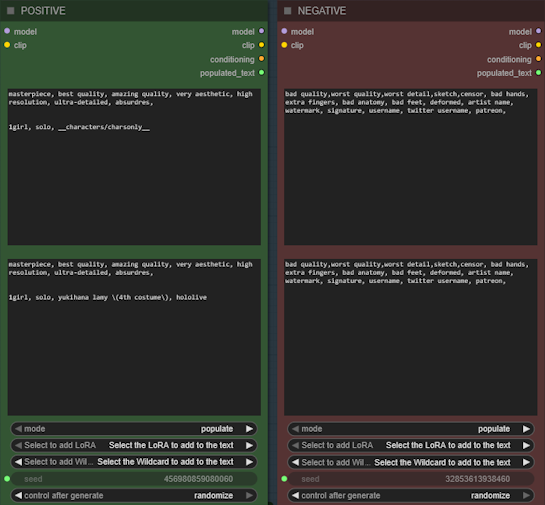
POSITIVE & NEGATIVE: This where you write your text prompt. You can use certain syntax to manually include embeddings, LoRAs and wildcards. However you can also click the "Click to add LoRA" and "Click to add Wildcard" at the bottom of the node to choose from a list of the available ones.
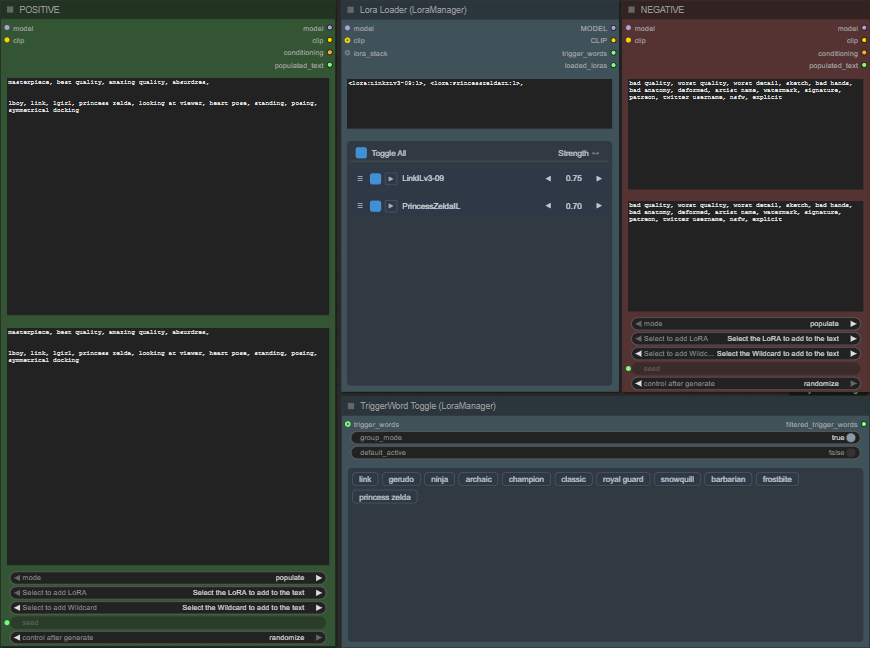
Lora Loader (LoraManager): You can also use the Lora Loader to add your LoRAs and if detected it also allows you to easily add trigger words.
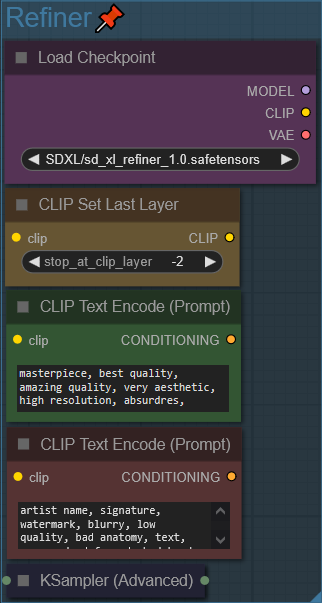
Refiner
The Refiner performs a second diffusion pass on the image using a dedicated refiner model. This step doesn't change the composition but enhances fine details, textures, and overall image sharpness.
Enable/Disable the Refiner in the Fast Groups Bypasser node and adjust the number of steps in the Steps Refiner node.
HiRes Fix
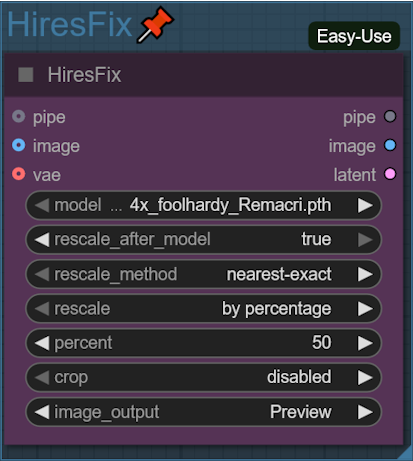
The HiRes Fix performs an initial, controlled upscale of the generated image (base+refiner) before the more intensive detailing passes. This adds resolution and detail without straying from the original composition.
Enable/Disable the HiRes Fix in the Fast Groups Bypasser node.
Detailer Chain/Pipeline
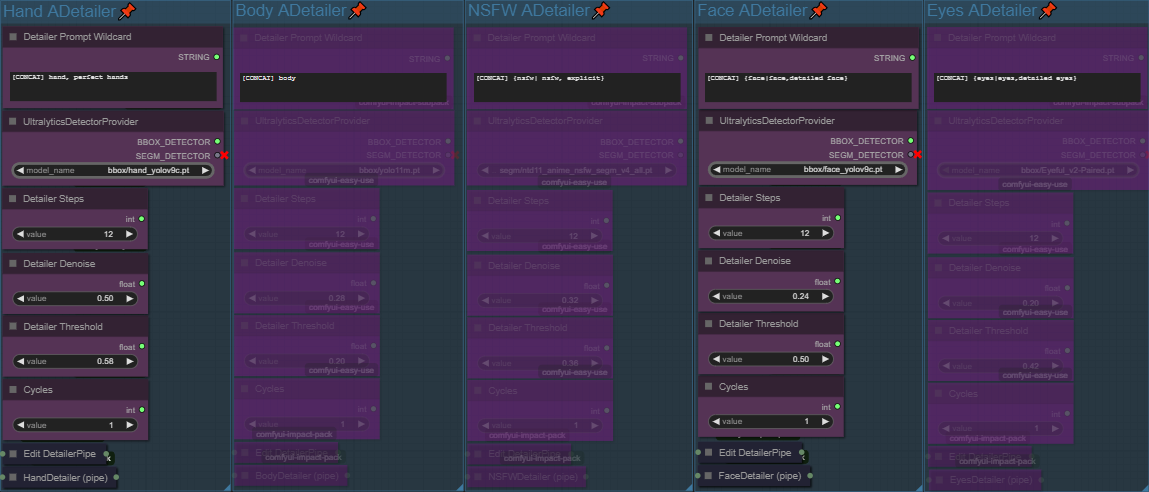
Uses specialized object detection models to find and redraw specific parts of the image with extreme detail. This is the core of the workflow's refinement process, tackling common problem areas sequentially. The output of one detailer becomes the input for the next. The Denoise strength controls how much freedom the model has to change the detected area. It's a value from 0.0 (no change) to 1.0 (total redraw). The bbox threshold is the confidence level the detection model must have before it acts.
HandDetailer➔BodyDetailer➔NSFWDetailer➔FaceDetailer➔EyesDetailer
You might also wanna change the detailing prompt e.g. {hand, perfect hands| hand, good correct hands} into something different that aligns better with your goal in mind.
Enable/Disable the Detailers in the Fast Groups Bypasser node.
Color Match
Corrects any color shifts that may have occurred during the numerous detailing and upscaling passes. This ensures the final image retains the intended color palette of the initial generation.
Enable/Disable the Color Match in the Fast Groups Bypasser node.

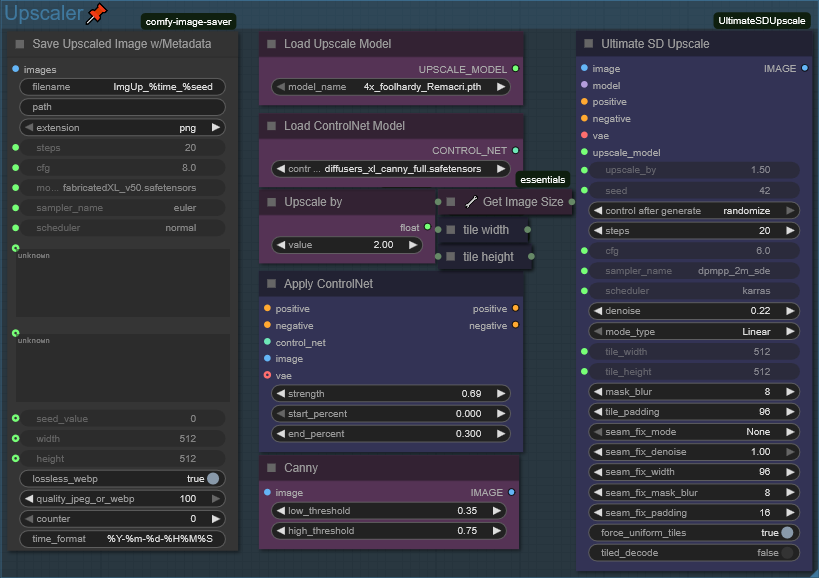
Upscaler
Performs the final, large-scale upscaling with the help of an controlnet after all detailing passes are complete, resulting in a high-resolution final image.
Enable/Disable the Upscaler in the Fast Groups Bypasser node.
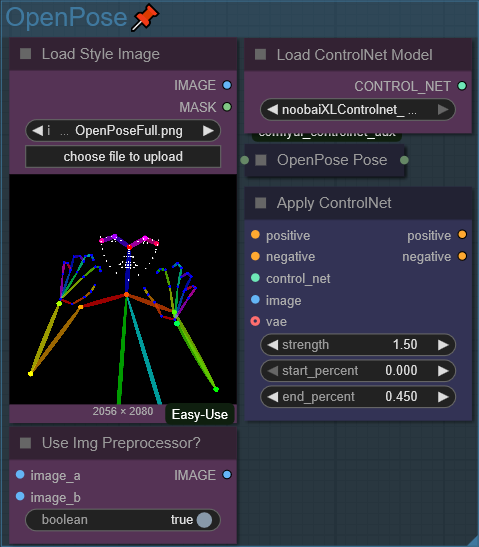
OpenPose
Applies precise and complex character poses using a reference image, overriding the natural posing the model might otherwise choose. Find the LoadImage node and upload the image you want to use as the structural basis for your generation. If the image is already preprocessed for set Use Img Preprocessor? node to off. (Resource for poses: https://github.com/a-lgil/pose-depot)
Enable/Disable OpenPose in the Fast Groups Bypasser node.
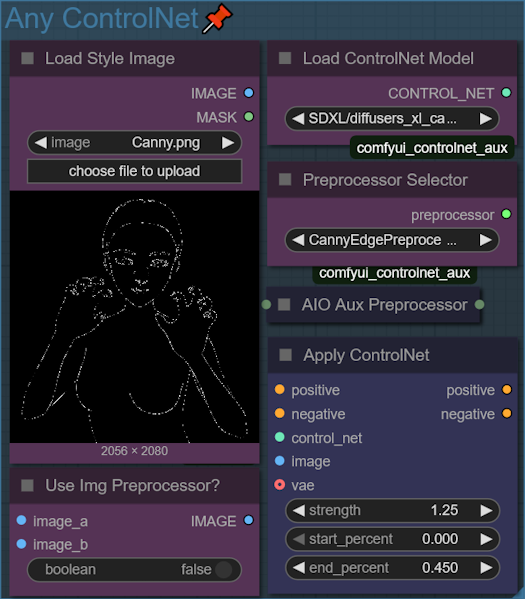
Any ControlNet
Flexible system designed to let you apply any type of ControlNet to your image generation through a few simple dropdown menus. Find the LoadImage node and upload the image you want to use as the structural basis for your generation. If the image is already preprocessed for set Use Img Preprocessor? node to off. (Resource for poses: https://github.com/a-lgil/pose-depot)
Go to the ControlNetPreprocessorSelector node and click the dropdown menu and choose the type of control you want to apply.
Go to the ControlNetLoader node and click the dropdown and select the model file that corresponds to your chosen preprocessor.
Enable/Disable Any ControlNet in the Fast Groups Bypasser node.
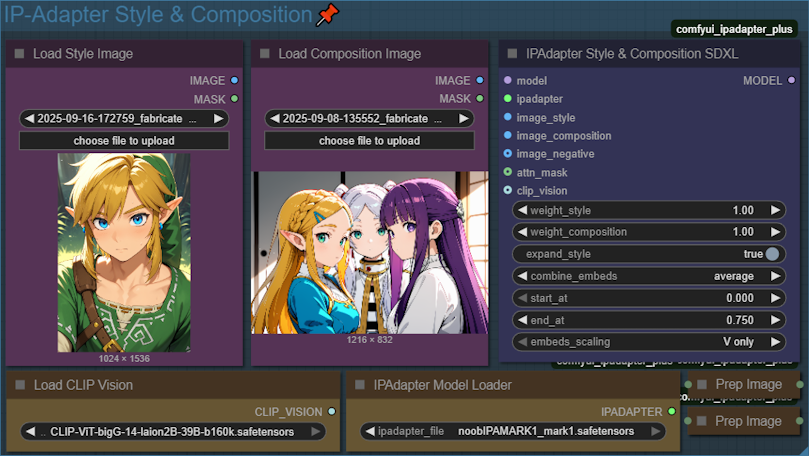
IP-Adapter Style & Composition
Transfers the overall aesthetic including color palette, lighting, mood, and compositional elements from a reference image to the generated image.
Enable/Disable IP-Adapter Style & Compostition in the Fast Groups Bypasser node.
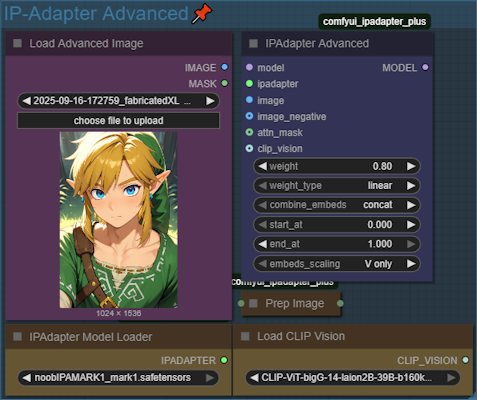
IP-Adapter Advanced
Encodes a reference image into embeddings and injects them into the diffusion process so generated images inherit that image's style, composition, or identity.
Enable/Disable IP-Adapter Advanced in the Fast Groups Bypasser node.
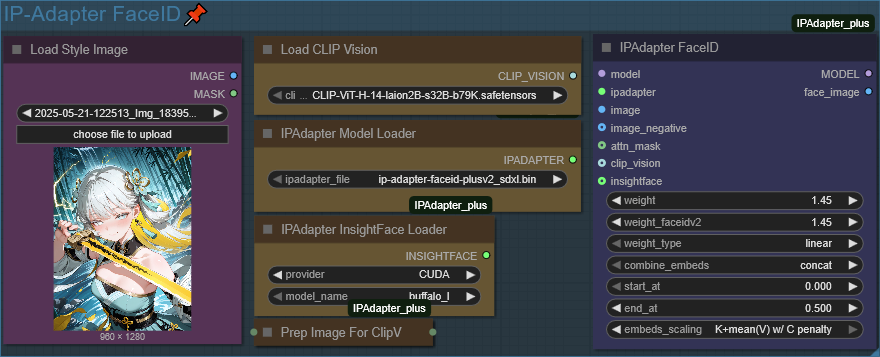
IP-Adapter FaceID
Accurately transfers the facial identity from a reference portrait to the generated character. This is more precise than using a standard IP-Adapter for faces.
Enable/Disable FaceID in the Fast Groups Bypasser node.
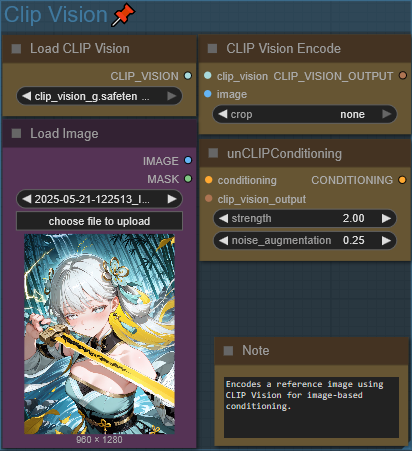
Clip Vision
Allows the model to "see" and understand an image in a way that's similar to how it understands text.
Enable/Disable Clip Vision in the Fast Groups Bypasser node.
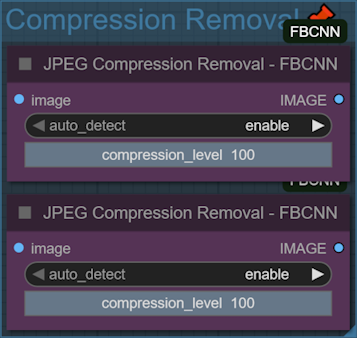
Compression Removal
This is a JPEG artifact/compression removal tool.
Enable/Disable Compression Removal in the Fast Groups Bypasser node.
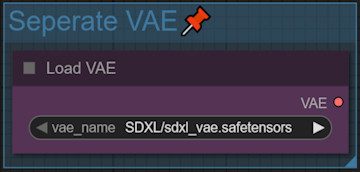
Seperate VAE
This group acts as a switch, allowing you to choose between using the VAE that's built into your main model (.safetensors checkpoint) or using a standalone, high-quality VAE file. This component responsible for translating the image from the AI's internal "latent space" into a visible image (pixels).
Enable/Disable Seperate VAE in the Fast Groups Bypasser node.
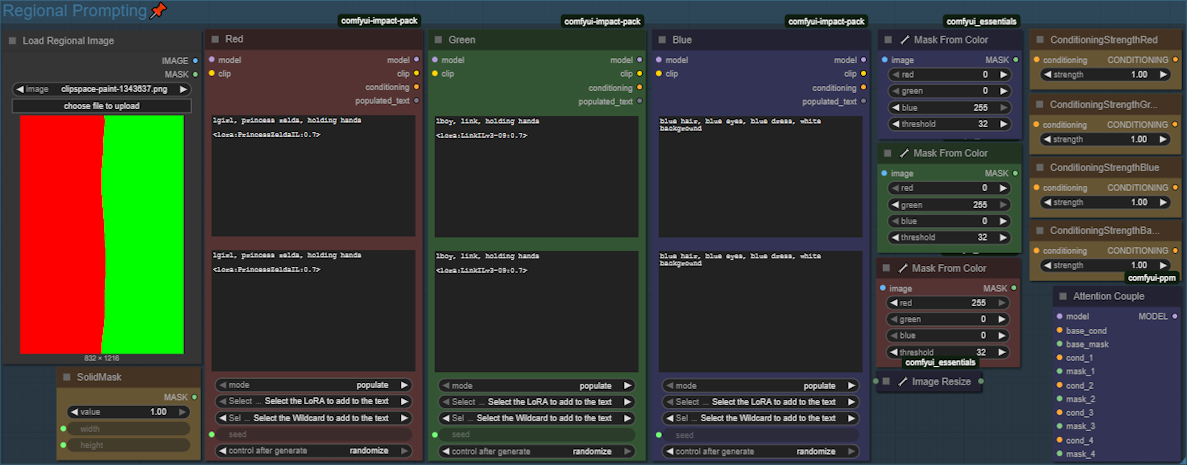
Regional Prompting
Regional prompting allows for detailed control over image generation by applying different text prompts to specific areas of an image.
The process begins by defining the different regions of your image using a simple, color-coded image. The Load Image node is used to import a image with three distinct colors: red, green, and blue (If you open the image in the MaskEditor and select the paint brush, you can also adjust the areas manually). Each color corresponds to a specific area that will receive its own unique prompt. The POSITIVE & NEGATIVE Nodes will act as a global prompt. I would also recommended applying a ControlNet for better control of the composition.
Enable/Disable Regional Prompting in the Fast Groups Bypasser node.
Using VPred Model
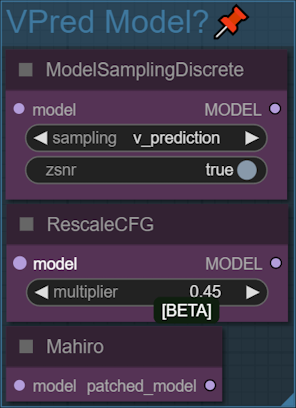
Used when loading a VPred checkpoint for this workflow, make sure to also select sampler/schedulers accordingly.
Enable/Disable VPred Model? in the Fast Groups Bypasser node.
Background Remover
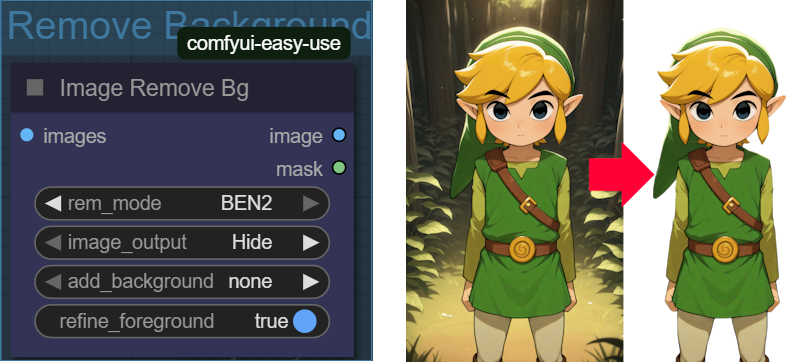
This node isolates the main subject of an image by removing its background, which is useful for creating transparent PNGs or compositing subjects onto new backdrops. The rem_mode dropdown allows you to select from different background removal models, such as BEN2. You can also choose to add a solid color background and refine the foreground edges for a cleaner cutout. Works better with images that have sharp or well-defined edges.
Enable/Disable Remove Background in the Fast Groups Bypasser node.
BasicT2I_V20
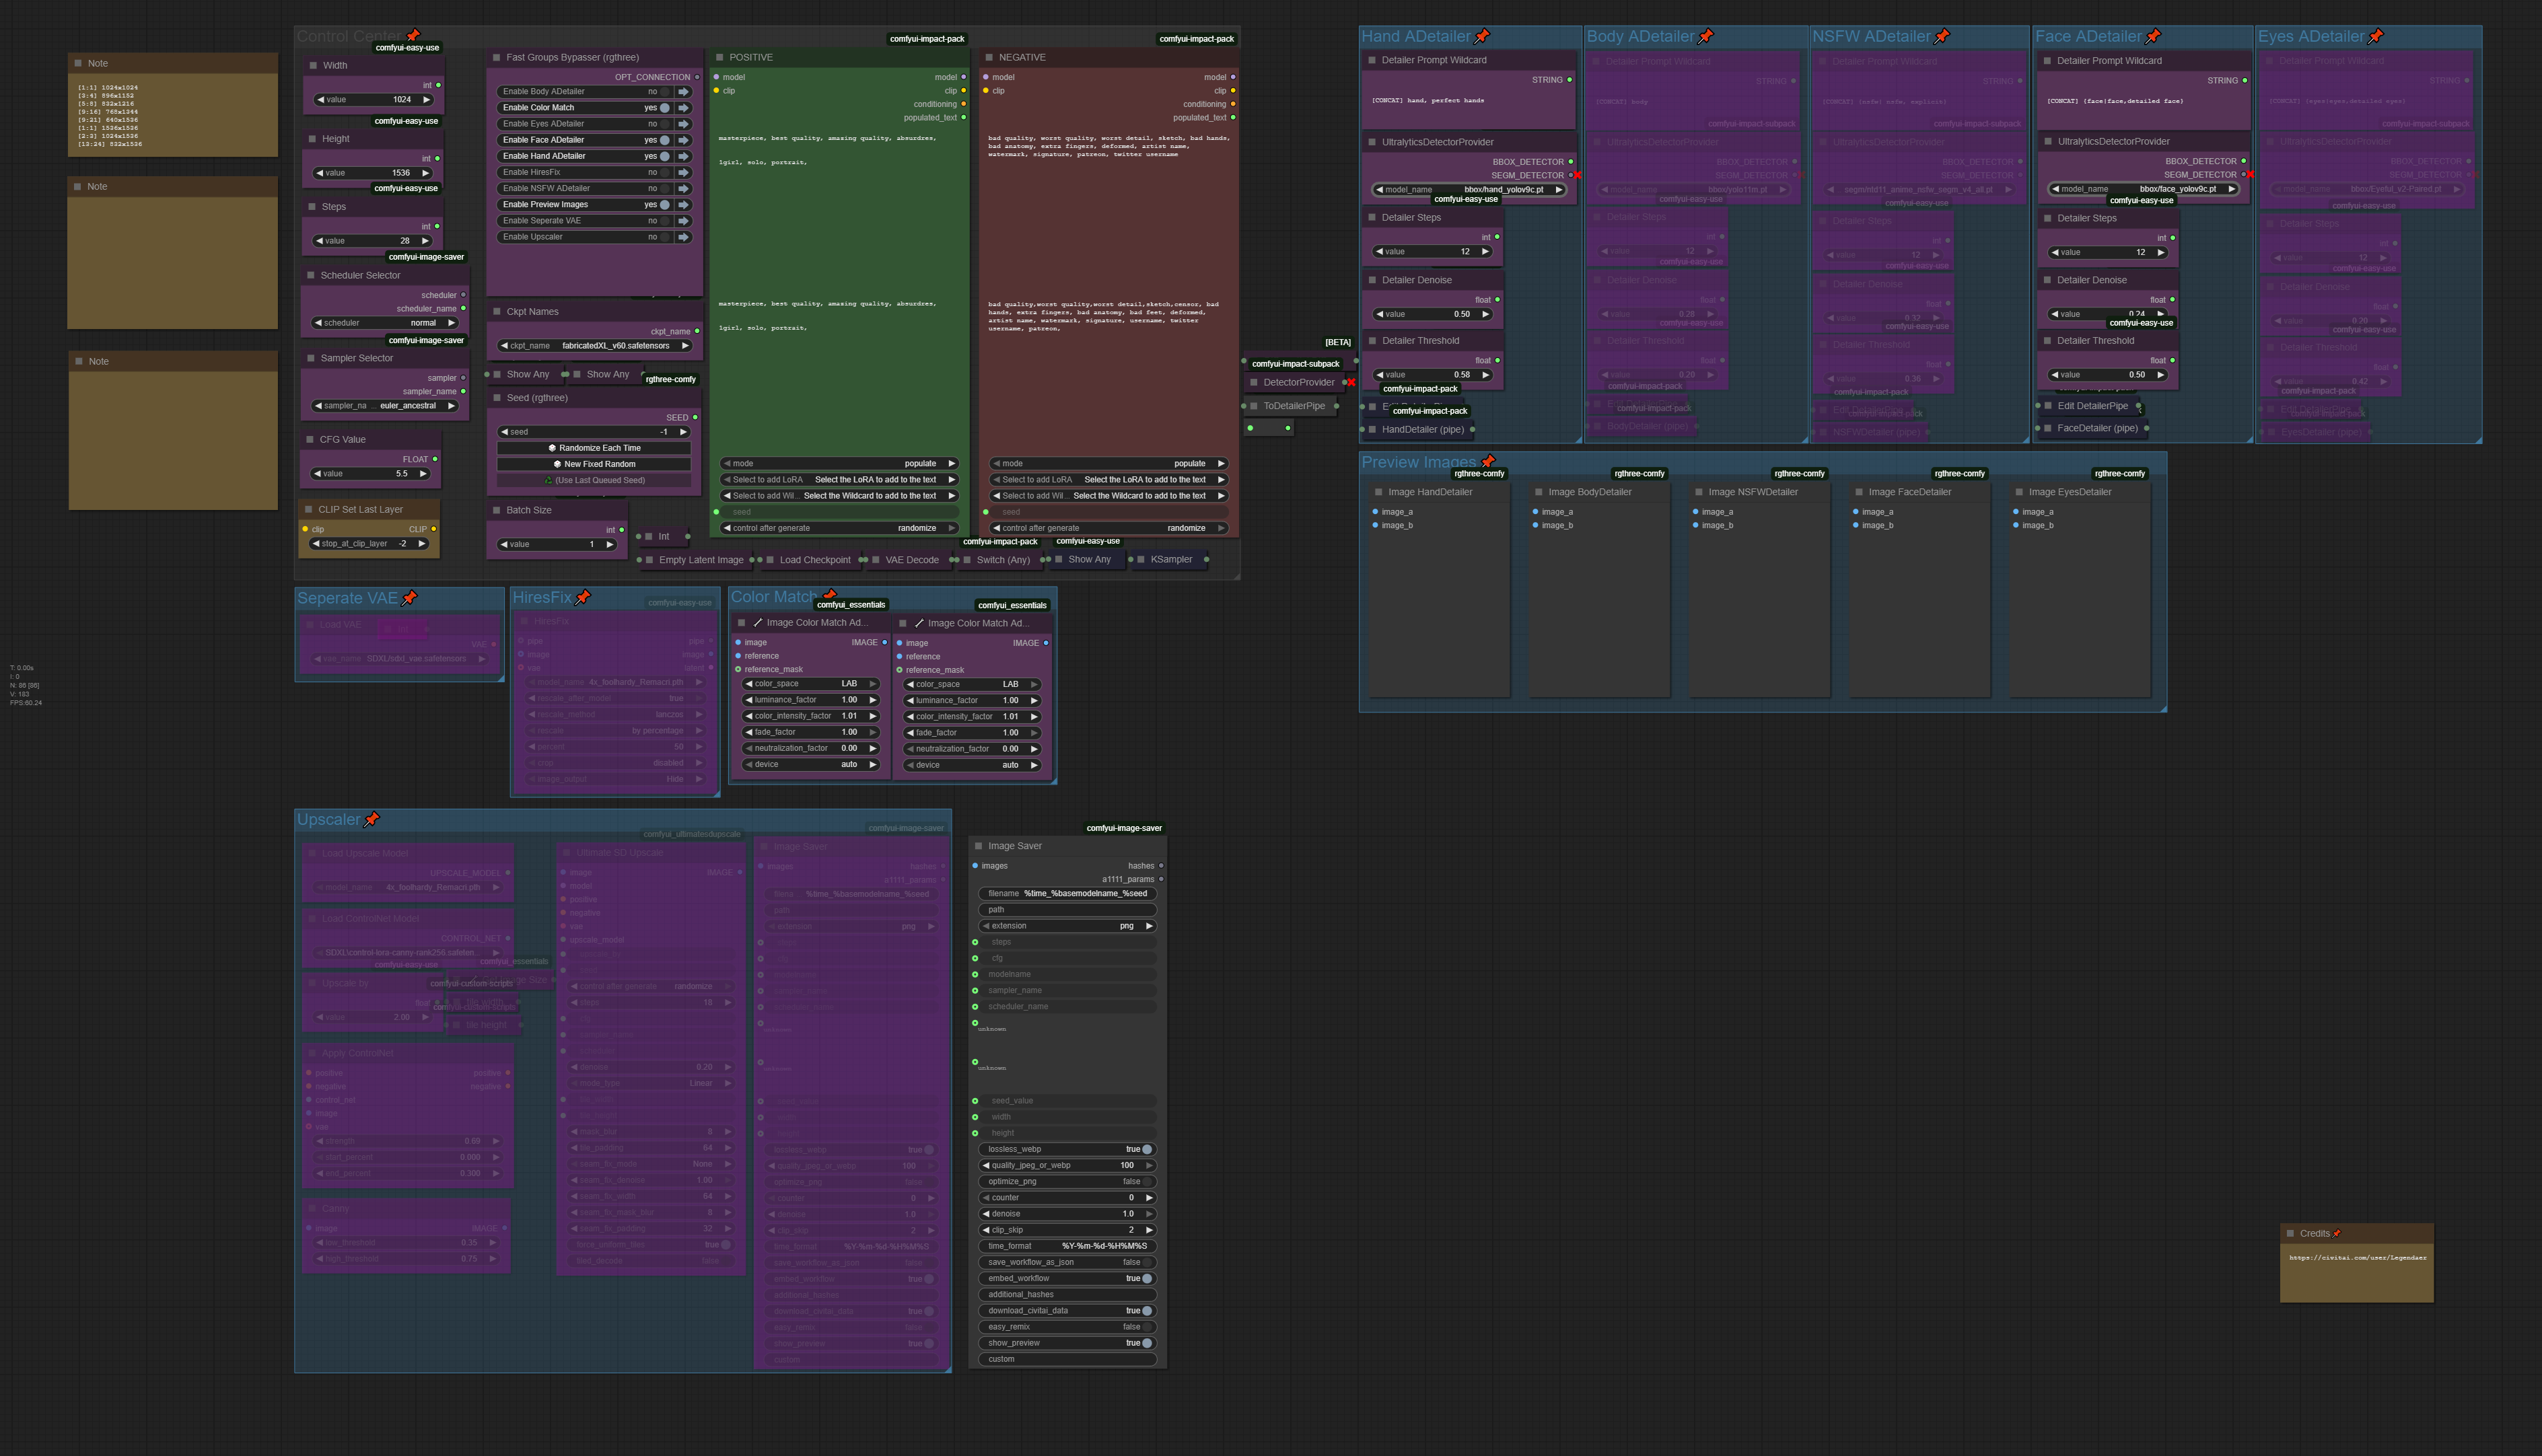
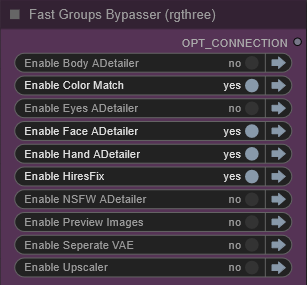
This is a simplified version of the T2I workflow, designed for faster and more straightforward image generation. It includes the core features for creating high-quality images without the advanced control and adapter nodes.
Control Center
This section contains all the essential settings for generating an image, such as the model, resolution, sampler, and text prompts.
For a detailed explanation of each option (Seed, Ckpt Select, CFG Value, etc.), please refer to the Control Center description under the T2I workflow.
Workflow Features
The following features are included in this workflow. You can enable or disable them in the Control Center.
For a detailed breakdown of what each feature does, refer to the corresponding section in the T2I guide above.
HiRes Fix
Detailer Chain/Pipeline
Color Match
Upscaler
Seperate VAE
VpredV20

This workflow is specifically configured for checkpoint models that require v-prediction sampling.
Control Center
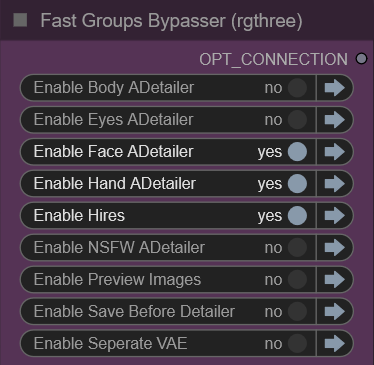
Includes the main settings for image generation. Ensure you select a VPred-compatible model and an appropriate sampler/scheduler.
For a detailed explanation of most options, refer to the Control Center description under the T2I workflow.
Workflow Features
HiRes: Upscales the base image for higher resolution.
Detailer Chain/Pipeline: Finds and redraws specific parts of the image. Refer to the Detailer Chain/Pipeline section in the T2I guide.
Seperate VAE: Allows you to use a standalone VAE file. Refer to the Seperate VAE section in the T2I guide.
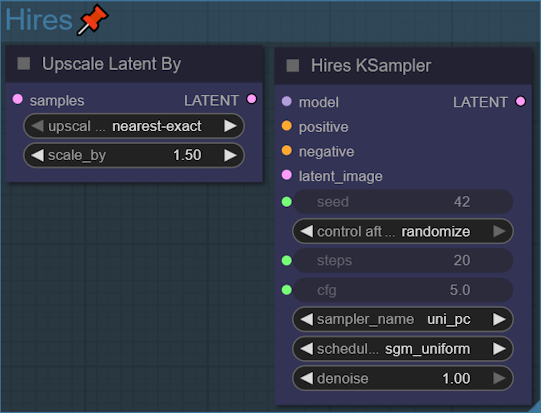
HiRes
The HiRes performs an initial, controlled upscale of the generated image (base) before the more intensive detailing passes. This adds resolution and detail without straying from the original composition. Enable/Disable the HiRes in the Fast Groups Bypasser node.
Detailer_V20

This workflow is not for creating new images from text. Instead, it's a powerful tool for improving, upscaling, and modifying existing images.
Control Center
Load your image and adjust the core settings for the detailing process.
For a detailed explanation of the common options (Seed, Ckpt Select, Sampler, etc.), refer to the Control Center description under the T2I workflow.
Workflow Features
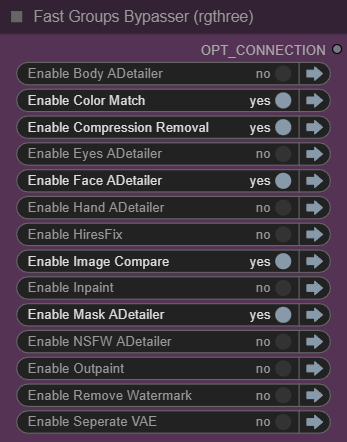
Mask ADetailer: Uses a specified mask to redraw parts of the image with detail. To edit the mask, right-click the loaded image and select Open in MaskEditor.
Inpaint: Repair, remove, or replace a specific part of an image. Right-click the loaded image and select Open in MaskEditor to paint over the area you want to change.
Outpaint: Expands the canvas of an image, generating new content beyond its original borders to create a larger scene.
Watermark Remover: Automatically detects and inpaints watermarks to remove them from an image.
HiRes Fix: Refer to the T2I guide for details.
Detailer Chain/Pipeline: Refer to the T2I guide for details.
Color Match: Refer to the T2I guide for details.
Compression Removal: Refer to the T2I guide for details.
Seperate VAE: Refer to the T2I guide for details.
Upscaler: Refer to the T2I guide for details.
Mask ADetailer
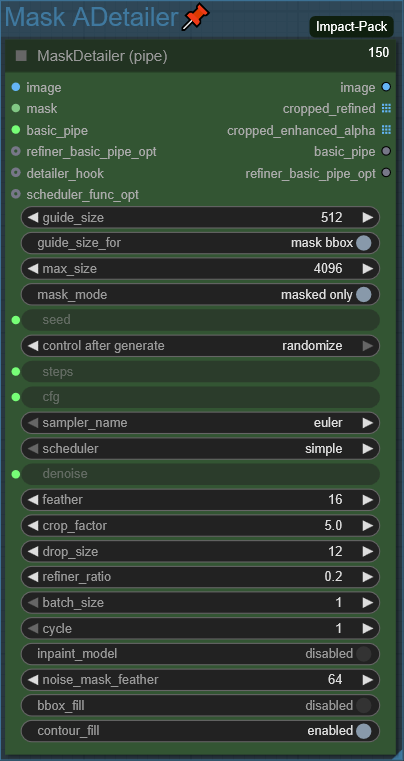
Uses the specified mask to redraw parts of the image with detail. To edit the mask right-click the loaded image and select Open in MaskEditor.
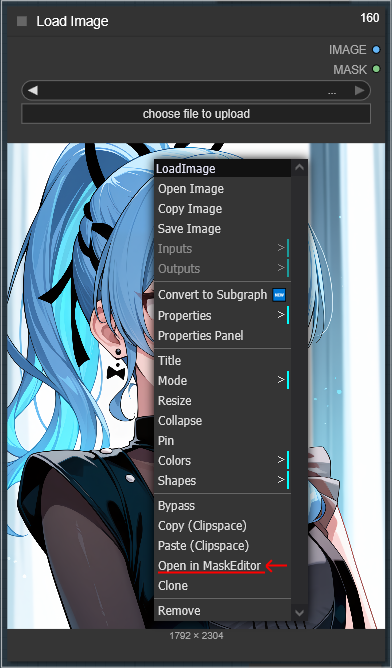
Enable/Disable the Mask Detailer in the Fast Groups Bypasser node.
Inpaint
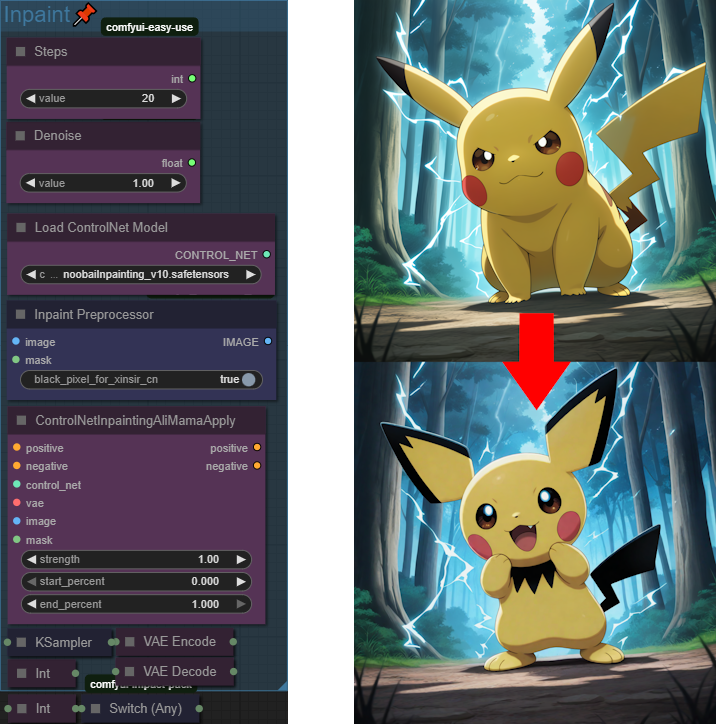
Inpainting is used to repair, remove, or replace a specific part of an image. By providing a mask, you can tell the model exactly which area to regenerate. To use it, right-click the loaded image and select "Open in MaskEditor" to paint over the area you want to change. The model will then use your text prompt to fill in the masked section, allowing you to remove unwanted objects or alter details like clothing and facial expressions.
Enable/Disable Inpaint in the Fast Groups Bypasser node.
Outpaint
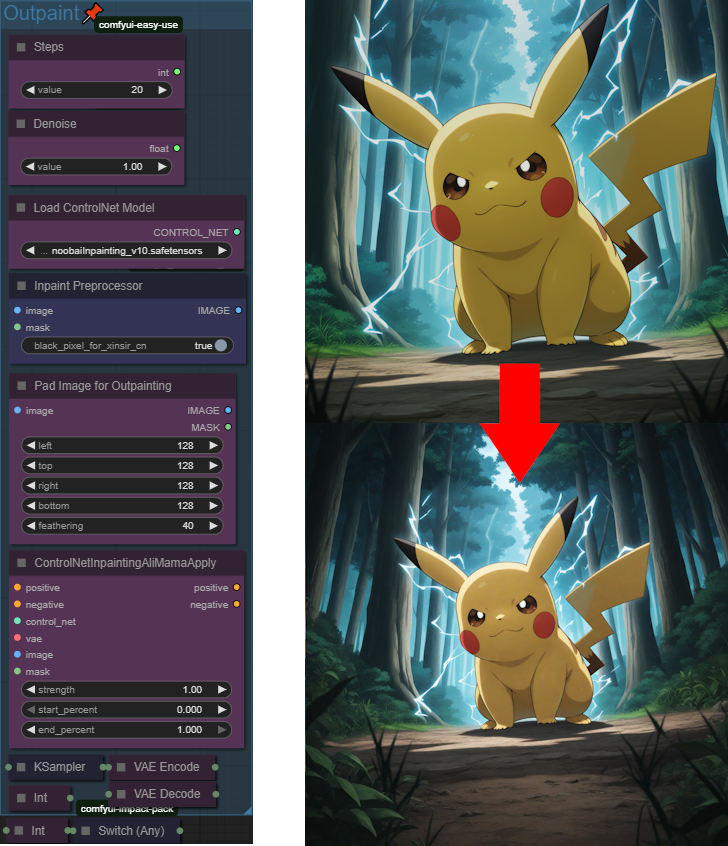
Outpainting expands the canvas of an image, generating new content beyond its original borders to create a larger scene. This process is useful for extending a scene, adjusting the composition, or adding new elements. You use a node to add padding around the original image, defining the areas to be filled. The model then generates new imagery in these extended areas based on your prompt, seamlessly blending it with the existing picture.
Enable/Disable Outpaint in the Fast Groups Bypasser node.
Watermark Remover
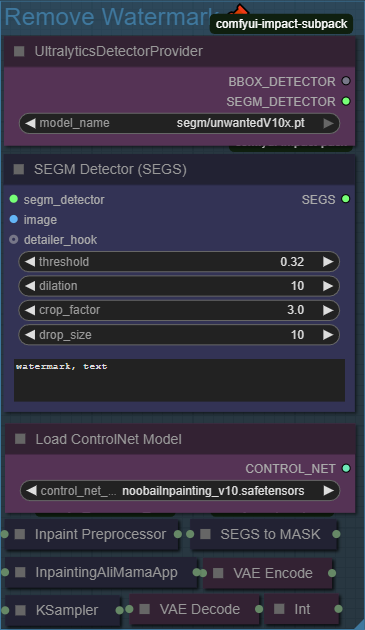
This group is designed to automatically detect and remove watermarks from an image. It uses a specialized model to intelligently detect watermarks and inpaints them to effectively erase them, which can be useful for cleaning up images.
Enable/Disable Remove Background in the Fast Groups Bypasser node.
FAQ❔
Q1: How do I install all the required Custom Nodes?
A: The easiest way is to use the ComfyUI-Manager. After installing the Manager, you can use its Install Missing Custom Nodes feature, which will automatically find and install most of the nodes required by these workflows.
Q2: A model download link is broken. What should I do?
A: If a Hugging Face or Civitai link is down, try searching for the model filename directly on the respective sites (e.g., search for "4x_foolhardy_Remacri.pth" on the Hugging Face Hub). There are often alternative links provided.
Q3: How do I use a different LoRA?
A: In the POSITIVE or NEGATIVE prompt nodes, you can either manually type <lora:YourLoraName.safetensors:1.0> or, more easily, click the Click to add LoRA text at the bottom of the node. This will open a list of all your installed LoRAs, and you can click to add one with the correct syntax.
Q4: What are wildcards and how do I use them?
A: Wildcards are files that contain lists of words or phrases. When you use a wildcard in your prompt (e.g., haircolor), the workflow randomly selects one line from the corresponding haircolor.txt file for each generation. This is a powerful way to create a lot of variation automatically.
Installation: Place your wildcard .txt files in the ComfyUI/custom_nodes/ComfyUI-Impact-Pack/wildcards folder. You can create subdirectories for organization.
Usage: In the prompt node, type the filename surrounded by double underscores. You can also use the "Click to add Wildcard" helper at the bottom of the prompt node.
Q5: The Detailer nodes have Denoise and bbox threshold settings. What do they do?
A: Denoise: It controls how much the detailer can change the detected area. A low value (e.g., 0.2) makes subtle fixes, while a high value (e.g., 0.5) gives the model more freedom to redraw the area completely. Start low and increase if the details aren't fixed.
Bbox Threshold: This is the model's confidence score. A value of 0.3 means the model will only act if it's at least 30% sure it has correctly identified a hand, face, etc. If the detailer isn't activating, you can try lowering this value slightly.
Q6: The face detailer is changing my character's expression or features. How can I fix this?
A: To fix this, you can provide a more specific prompt for that detailer.
For a single subject: Find the Detailer Prompt Wildcard for the face detailer. Change the wildcard prompt e.g., "[CONCAT] {face|face,detailed face}" to the features you want to preserve. For example: "detailed face, dark red eyes, angry, annoyed expression".
For multiple subjects with different features: If you have multiple faces detected and want to apply different expressions or features to each, you can use a special syntax within the wildcard prompt box. Use [SEP] to separate prompts for each detected face.
Example: "[ASC] 1girl, happy, smile [SEP] 1girl, angry, frowning [SEP]"
In this case, the first detected face will get the "happy, smile" prompt, and the second will get the "angry, frowning" prompt.
You can learn more about advanced syntax (like changing the order) in the official documentation.
https://github.com/ltdrdata/ComfyUI-extension-tutorials/blob/Main/ComfyUI-Impact-Pack/tutorial/ImpactWildcard.md#special-syntax-for-detailer-wildcard
🔽DOWNLOAD🔽
https://civitai.com/models/1386234/comfyui-image-workflows


