I will now present the following code to create triggers in the old-school way. This program efficiently and conveniently allows you to assign tags to large datasets. Let's take the following example to understand its utility: Suppose you have downloaded a database of images from a complete anime series. The database contains over 20 main characters and 500 images. With this program, you can assign a trigger to each character within a few minutes. This way, you can create a library that stores all the characters from an anime and makes them incredibly easy to invoke. All you need to do is write the trigger, which can be the character's name.
The program offers two modes of operation. In one mode, when it's turned on, the program will create new text files with tags for each image. In the other mode, when it's turned off, the program will add the tags to an existing text file, such as those created by automatic tag generation programs.
Importantly, this program does not require GPU consumption. Therefore, remember to connect to a GPU-free environment to enjoy unlimited use of the program.

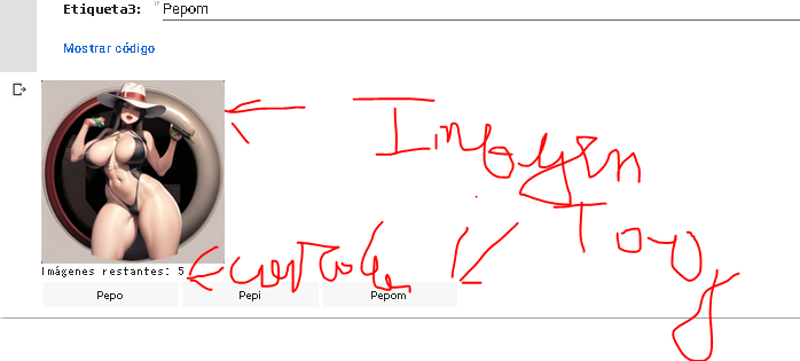
Modo Prendido:

Modo Apagado:

#@markdown ### ⚔️ Indicate if the model will create new .txt files or modify existing ones! 🗡️
#@markdown Ahoy, Captain! Before setting sail on this adventure, we must decide whether the model will create new .txt files or modify existing ones. Choose wisely, as this will affect the fate of the treasures we will discover.

import os
from google.colab import files
from PIL import Image
from IPython.display import display, clear_output
from ipywidgets import widgets, VBox, HBox

# Path of the folder containing the images
EeveelutionsCollection = "EeveelutionsCollection" #@param {type:"string"}
images_folder = f"/content/drive/MyDrive/Dataset/{EeveelutionsCollection}"


# Create a list to store the image labels
labels = []

# Program state (True: on, False: off)
program_state = False  #@param {type:"boolean"}

# Function to label the current image
def label_image(label):
    if program_state:
        # Add the label to the list
        labels.append(label)
        print(f"Label added: {label}")

        # Hide the labeled image
        clear_output(wait=True)

        # Load the next image
        load_next_image()
    else:
        # Offline mode, save the label to an existing text file
        save_label_to_existing_file(label)
#@markdown ### ⚓️ Assemble each button to create your favorite tags representing characters or concepts you want to trigger! 🗡️
#@markdown Ahoy, sailor! This is where you can let your imagination run wild and create your own tags. Each button represents a unique character or concept that you can use to label the treasures you find on your journey. Choose wisely and unleash the power of your pirate tags!

# Function to save the label to an existing text file
def save_label_to_existing_file(label):
    if current_image <= len(images):
        image_path = images[current_image - 1]
        image_filename = os.path.basename(image_path)
        txt_filename = os.path.splitext(image_filename)[0] + ".txt"
        txt_filepath = os.path.join(images_folder, txt_filename)

        if os.path.exists(txt_filepath):
            # The text file exists, add the label
            with open(txt_filepath, "r") as f:
                content = f.read().strip()
                if content:
                    content += ", " + label
                else:
                    content += label
            with open(txt_filepath, "w") as f:
                f.write(content)
            print(f"Label added to existing file: {txt_filename}")
        else:
            print(f"No text file exists for the image: {image_filename}")

    # Load the next image
    clear_output(wait=True)
    load_next_image()

# Function to load the next image
def load_next_image():
    global current_image, buttons_layout

    # Check if there are remaining images to label
    if current_image < len(images):
        # Load the current image
        image_path = images[current_image]
        image = Image.open(image_path).resize((200, 200))

        # Display the image using the IPython.display widget
        display(image)

        current_image += 1

        # Print the remaining image counter
        print(f"Remaining images: {len(images) - current_image}")

        # Update the buttons
        display(buttons_layout)
    else:
        # All images have been labeled
        if program_state:
            # Online mode, save the labels to new text files
            save_labels()
        print("All images have been labeled")

# Function to save the labels to new text files
def save_labels():
    for i, label in enumerate(labels):
        image_path = images[i]
        image_filename = os.path.basename(image_path)
        txt_filename = os.path.splitext(image_filename)[0] + ".txt"
        txt_filepath = os.path.join(images_folder, txt_filename)

        with open(txt_filepath, "w") as f:
            f.write(label)

        print(f"Text file generated: {txt_filename}")

# Get the list of images in the folder
images = [os.path.join(images_folder, filename) for filename in os.listdir(images_folder) if filename.endswith(".jpg") or filename.endswith(".png")]

# Initialize variables
current_image = 0
buttons_layout = None

# Create buttons for the labels (To create another button, add one more, remember that you must assign a tag to each image, but also remember that you can remove a tag with other tools)
Label1 = "Pepo" #@param {type:"string"}
Label2 = "Pepi" #@param {type:"string"}
Label3 = "Pepom" #@param {type:"string"}

button1 = widgets.Button(description=Label1)
button1.on_click(lambda x: label_image(Label1))

button2 = widgets.Button(description=Label2)
button2.on_click(lambda x: label_image(Label2))

button3 = widgets.Button(description=Label3)
button3.on_click(lambda x: label_image(Label3))

# Create the horizontal layout of buttons (If you create another button, verify this)
buttons_layout = HBox([button1, button2, button3])

# Load the first image
load_next_image()
Explanation:
The code imports necessary modules like
os,google.colab,PIL,IPython.display, andipywidgets.The code prompts the user to enter the path of the folder containing the images using the variable
EeveelutionsCollection.The code constructs the
images_foldervariable by concatenating the base path and theEeveelutionsCollectionvalue.The code creates an empty list
labelsto store the image labels.The code sets the initial state of the program using the
program_statevariable.The code defines a function
label_imageto label the current image based on the button clicked.The function checks the
program_stateand adds the label to thelabelslist if it is on. It then hides the labeled image, loads the next image, and updates the buttons. If theprogram_stateis off, it calls thesave_label_to_existing_filefunction to save the label to an existing text file.The code defines a function
save_label_to_existing_fileto save the label to an existing text file associated with the current image. It checks if the text file exists, appends the label to its content, and saves the updated content. If the text file doesn't exist, it prints an appropriate message.The code defines a function
load_next_imageto load and display the next image in the folder. It checks if there are remaining images, loads the current image, displays it, updates the counter, and updates the buttons. If all images have been labeled, it calls thesave_labelsfunction to save the labels to new text files.The code defines a function
save_labelsto save the labels to new text files. It iterates over the labels, gets the corresponding image path, constructs the text file path, and writes the label to the text file. It then prints a message indicating the generated text file.The code gets a list of images in the specified folder, filtering for files with ".jpg" or ".png" extensions.
The code initializes the
current_imageandbuttons_layoutvariables.The code creates buttons for the labels specified by the user, attaches click event handlers that call the
label_imagefunction with the corresponding label, and stores them inbutton1,button2, andbutton3.The code creates a horizontal layout (
buttons_layout) containing the buttons.The code calls the
load_next_imagefunction to load and display the first image.
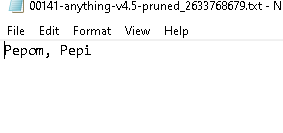
Ahora tenemos las imagenes etiquetadas:
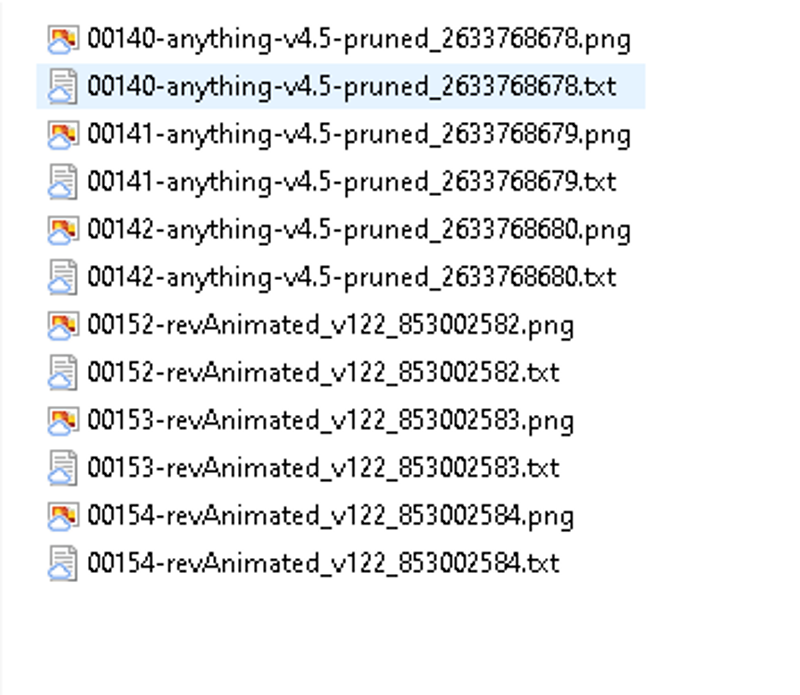
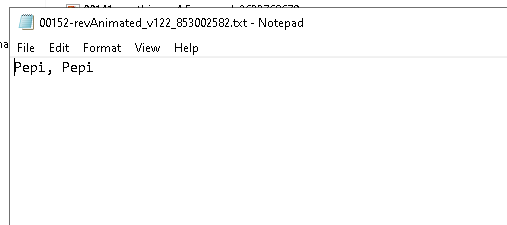
Now, only one detail remains. Typically, the most common mode of operation is to use the offline mode, where we utilize another program to apply automatic tags. Then, we execute the code to create triggers, where these triggers will generally be the main keywords. However, there is a slight issue: the program places the last added tag in the last row of tags, while many machine learning codes consider the first tag as the primary one. Therefore, the following code is presented, which moves the last tag to the first position for all text files. (It takes a few long seconds to synchronize, so please be patient.)

import os
#@markdown ### ⚔️ Sort the Drunkards! 🗡️
#@markdown 🏴☠️ **Treasure Folder Path**: Enter the path to the folder containing the files to be sorted! ⚔️🏴☠️
# Path of the folder containing the text files
EeveelutionsCollection = "EeveelutionsCollection" #@param {type:"string"}
txt_folder = f"/content/drive/MyDrive/Dataset/{EeveelutionsCollection}"
# Get the list of text files in the folder
txt_files = [os.path.join(txt_folder, filename) for filename in os.listdir(txt_folder) if filename.endswith(".txt")]
# Rearrange the labels in each text file
for txt_file in txt_files:
with open(txt_file, "r") as f:
content = f.read().strip()
if content:
# Get the existing labels and convert them into a list
existing_labels = content.split(", ")
# Reverse the order of the labels
reversed_labels = existing_labels[::-1]
# Convert the list back into a string
reversed_content = ", ".join(reversed_labels)
# Save the content with the rearranged labels
with open(txt_file, "w") as f:
f.write(reversed_content)
print("The drunkards have been sorted like true pirates! ⚓️🏴☠️")Explanation:
The code imports the "os" module, which provides a way to interact with the operating system.
The code prompts the user to enter the path of the folder containing the files to be sorted, using the variable
EeveelutionsCollectionto store the input.The code constructs the
txt_foldervariable by concatenating the base path and theEeveelutionsCollectionvalue.The code uses the
os.listdirfunction to get a list of filenames in thetxt_folderdirectory.The code filters the list of filenames to include only those ending with ".txt" and constructs the
txt_fileslist by joining thetxt_folderpath with each filename.The code iterates over each
txt_filein thetxt_fileslist.For each
txt_file, the code opens the file in read mode using theopenfunction and reads its content into thecontentvariable.If the content is not empty (i.e., it has labels), the code splits the content into a list of labels using the
splitmethod and assigns it to theexisting_labelsvariable.The code reverses the order of the labels in the
existing_labelslist using slicing and assigns it to thereversed_labelsvariable.The code converts the
reversed_labelslist back into a string by joining its elements with ", " using thejoinmethod and assigns it to thereversed_contentvariable.The code opens the
txt_fileagain, this time in write mode, using theopenfunction.The code writes the
reversed_contentinto thetxt_fileto save the content with the rearranged labels.Finally, the code prints a message to indicate that the drunkards (labels) have been sorted like true pirates.
Open in collab
Open in the cat
Financial assistance: Hello everyone!This is Tomas Agilar speaking, and I'm thrilled to have the opportunity to share my work and passion with all of you. If you enjoy what I do and would like to support me, there are a few ways you can do so:
Ko-fi (Dead)
