Intro
In this guide, we'll explore the steps to create Loras using Stable Diffusion dataset tag editor and Google Collab. For this workflow we are gonna make use of AUTOMATIC1111. This guide will covers various aspects, including images crop, dataset tag editing and collab trainer setup.
Prerequisites
Google account
A dataset of 40 images ( or ~10 images if not available)
Steps
Step1: Install Dataset tag editor
Begin by installing the Dataset tag editor extension within the Stable Diffusion web user interface going into the extension tab.
Select "Available" then press "Load from:"
Type "stable-diffusion-webui-dataset-tag-editor" inside the search bar and press install.
Restart the interface.
Step2: Dataset creation - Image crop to same size
Navigate to the Birme.
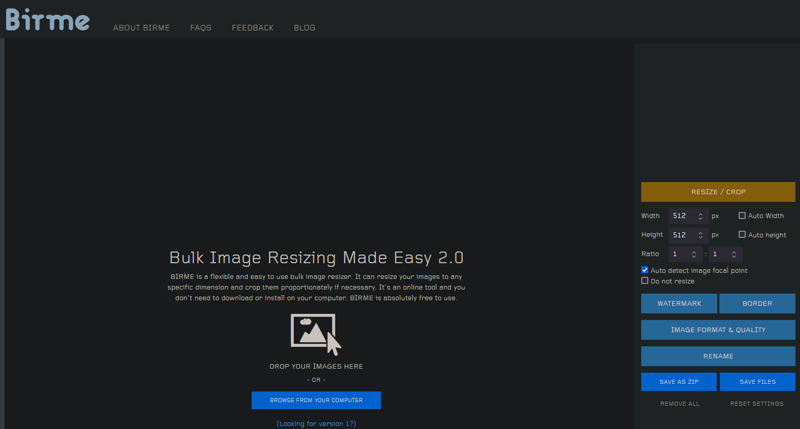
Drag and drop images that we are using for dataset inside that window and set:
Width 820;
Height 1440;
The dimensions may vary depending if your dataset is landscape or portrait, if you don't know what to insert, I recommend setting both Height and Width to 1024 and center the character.
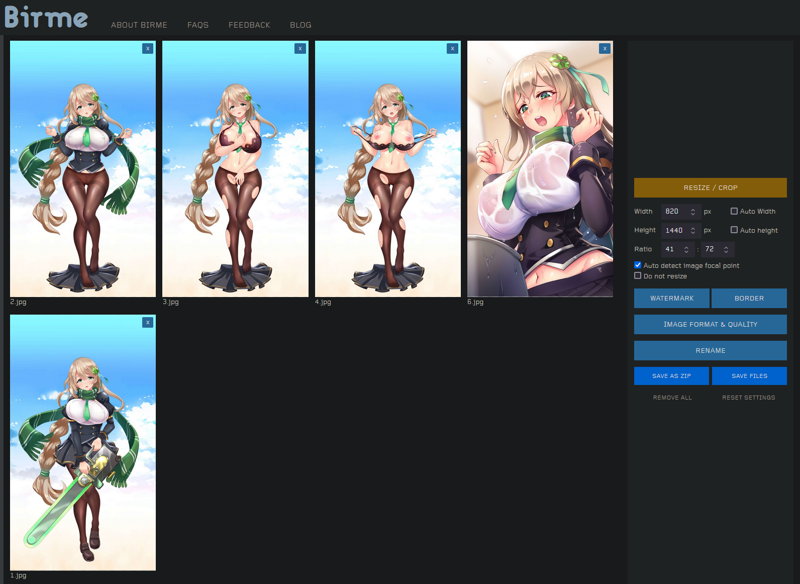
Once done, press "Save Files" or "Save as Zip":
Save Files = will save each resized image one by one in the download folder;
Save as Zip = will create a zip file with all the image resized (eventually we need to unzip);
Step3: Dataset creation - Rename file (optional)
Just for order purpose i'll suggest to rename each image from 0 to 999 etc.

Step4: Dataset creation - Tag editor
Open Automatic1111 and move to "Dataset Tag editor" tab
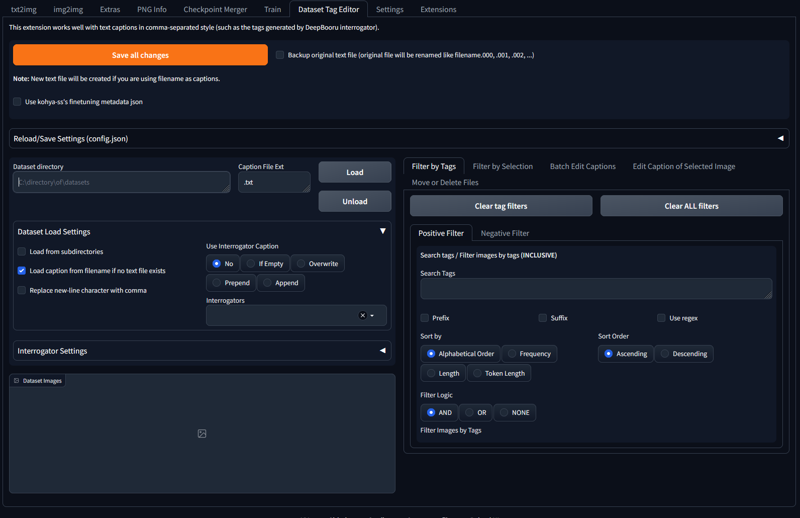
Set as follow in the image:
Dataset directory: "folder where you have all the cropped images";
Use interrogator Caption: Append;
Interrogators: DeepDanbooru;
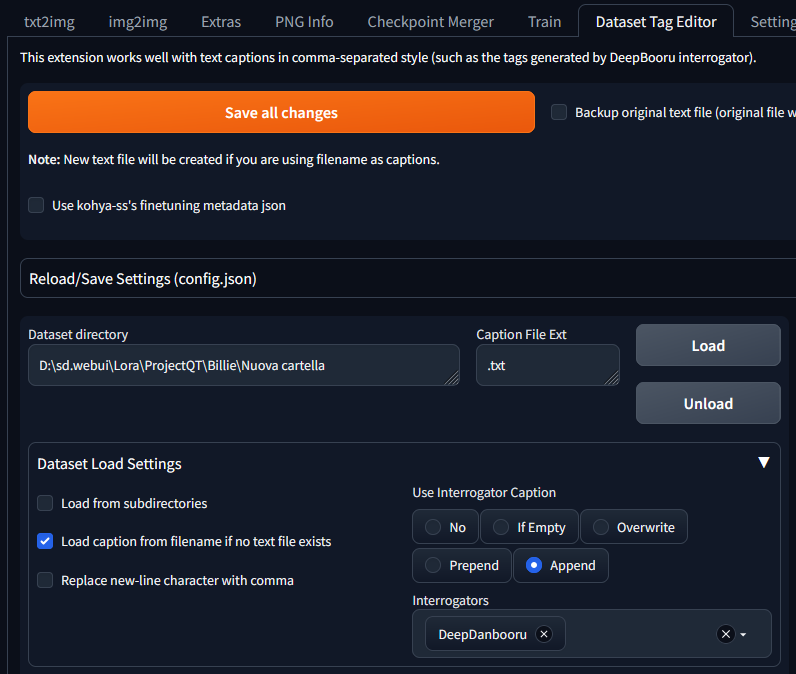
Press Load, it will load all the images in the folder and run the autotag for each image using booru tags:
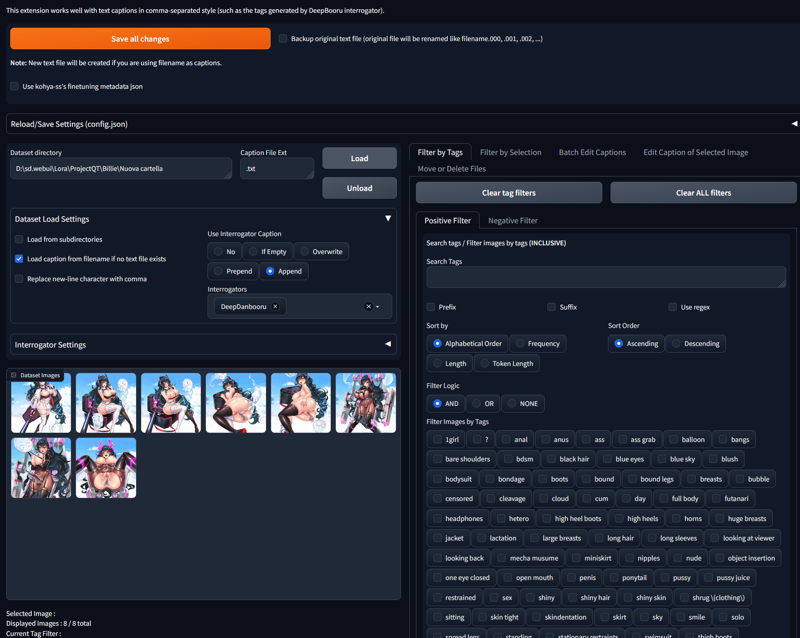
Select one of the image and move to "Edit Caption of Selected Image" tab:

Press "Copy and Overwrite" button, this wil copy the caption in the box below;
PS: if you check the box "copy caption from selected images automatically" it would do that for each image swap automatically;
Edit tags in the edit caption box and remember to put as first tag the activation/keyword like the image below:
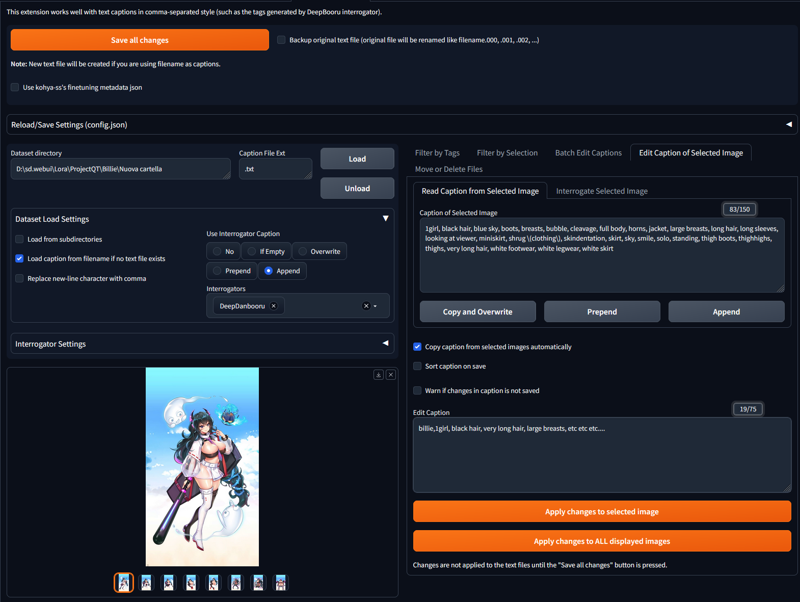
Once edited all the tags to describe each features of the character separated by a comma "," press the button:
Apply changes to selected image = this will save tags and edit only for the selected image;
Apply changes to ALL displayed image = this will apply the same edited tags to ALL the images in the folder;NOW
if you are crazy like me you can go edit tags for each image one by one to describe exactly each pose, clothes and action XD
OR
just describe only the physical appearance like hair color and lenght , eye color etc...
After edited each images at once OR one by one, press the "Save all changes" button, this will create .txt file inside the image folder:

Close Automatic1111 or just press "Unload" button :D
Step5: Google Collab - Setup
Log into your google account and move to Drive;
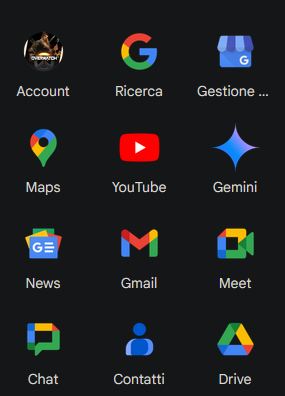
Swap from "Homepage" to "My drive"

Create a folder called "Loras"

Inside Loras creeate another folder called with the activation/keyword tag, in my cas was "Billie", this would be used to give the nameto.safetensors file in output once the process it's done.

Inside the "Billi" folder create a new one called "dataset"

Inside the "dataset" folder you have to load your image + txt file but:
If your dataset is 40+ : load everyting in the dataset folder;
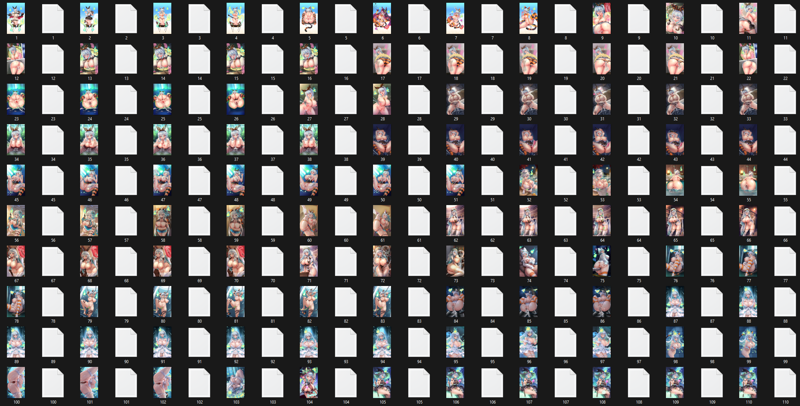
If your dataset is ~10 : create copy of each image + txt to reach the 40 images (DO THAT ONLY IF THERE ARE NO AVAILABLE IMAGE FOR THE DATASET);

Done.
Step6: Google Collab - Hollowstrawberry Lora Trainer XL Legacy
While into your google account;
Open the hollowstrawberry Lora trainer XL Legacy;
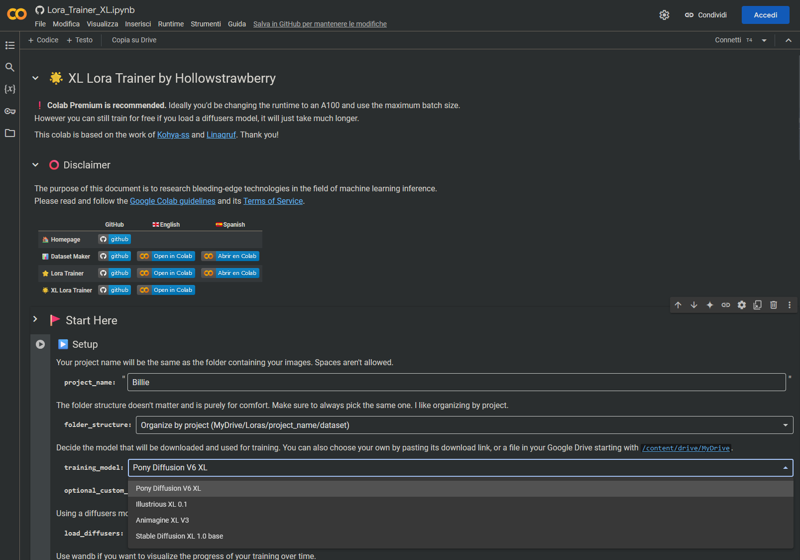
Set "project_name" with the name of the folder inside the drive folder, in my case Billie;
Training model:
if you want to create a Pony model: choose pony diffusione V6 XL;
if you want to create a Illustrious model: choose Illustrious XL 0.1;
In the advanced tab set the Optimizer to "Prodigy"

When it's all configured just press the "play" button to start the process:

Follow the login process during the step and let him cook!
Once all it's done you will find inside your Drive folder, an "output" folder:

Inside this folder you will find 10 epoch file name-01.safetensors to name-10.safetensors. I'll suggest you to download the epoch "name-10.safetensors" that's the best one at least for me, if you want you can try other epoch too.
Enjoy creating loras !
PS: To create this lora we used the free version of google collab, there is daily limit of lora creation that could be created in a day. Solution would be pay for a subscription/create multiple account/wait a full day before creating a new lora :D
Check out my profile for example outcomes:
https://civitai.com/models/489694?modelVersionId=1202838
https://civitai.com/models/181734/amy-project-qt-pony-and-sd15
With these steps, you'll be able to create your own Pony or Illustrious Lora.
Cover image by CaelitusArt
![Lora Training Workflow [Pony - Illustrious XL]](https://image.civitai.com/xG1nkqKTMzGDvpLrqFT7WA/c906fc57-f62d-4f3b-9401-62941e6d5ed9/width=1320/Lora.jpeg)