My initial notebook was in two parts: the first step of using ComfyUI to extract the unet, clip_g, clip_l, and vae components in GPU mode, and the second step of converting and quantizing the unet to the llama.cpp quantization in CPU mode.
With the help of AI, the first step no longer uses ComfyUI. Instead, it uses the extraction and necessary modification scripts to make all the extracted components compatible with ComfyUI. With this change, the whole process runs in CPU mode seamlessly.
Also, the notebook is designed with dynamic path management. As a result, once the required input fields are completed, the whole script can run all at once without any additional user intervention.
The link to the notebook:
https://colab.research.google.com/drive/1xRwSht2tc82O8jrQQG4cl5LH1xdhiCyn?usp=sharing
V_Prediction custom Node
For v_prediction quantized models, you will need this custom node to force-set v_prediction mode.
https://github.com/magekinnarus/ComfyUI-V-Prediction-Node
Updates to the SDXL quantized models and clips
More models are uploaded to the repo:
https://huggingface.co/Old-Fisherman/SDXL_Finetune_GGUF_Files
Step-by-Step Guide
1. Downloading a model
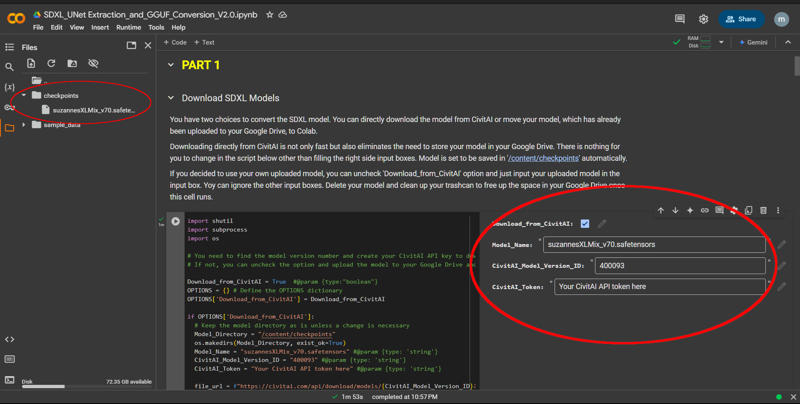
You have a choice of downloading the model from CivitAI or accessing your Google Drive for your uploaded model. If you are using your uploaded model in your Google Drive, make sure to place your model in the root directory of your drive.
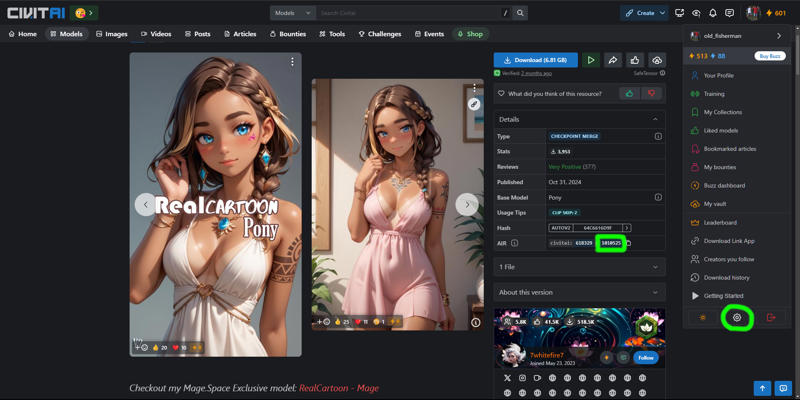
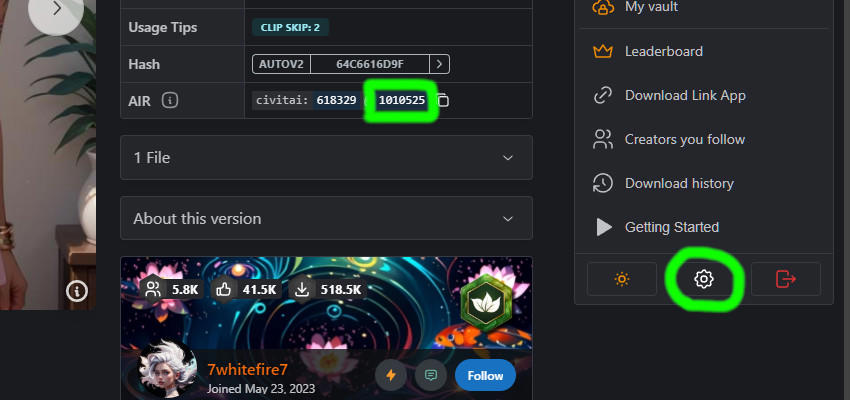
To download a model from CivitAI, you need to generate an API key and get the version ID of the model to be downloaded. If you click on your profile on the top-right and navigate down the menu, you will see the icon for settings at the bottom. Click it and scroll down to the API key generation section. The model version ID can be found on the model page as circled above.
2. Extracting unet, clip_g, clip_l, and vae components from the model
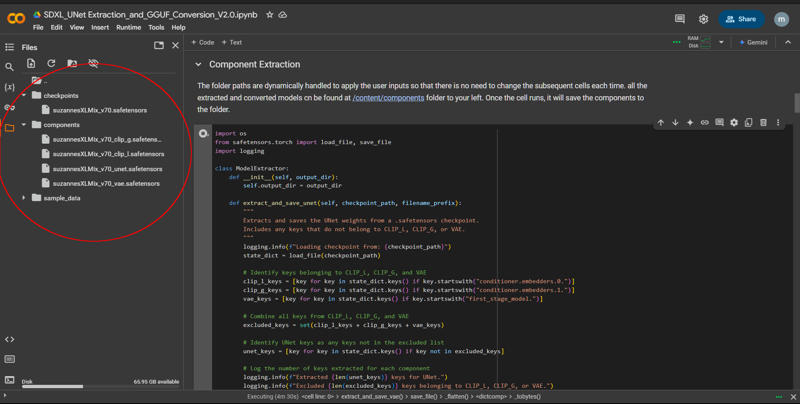
Once the model is downloaded or transferred by the preceding cell, you can run the next cell. Path management is dynamically done, and the resulting components will be located at /content/components as shown above.
3. Adjustment for clip_g and clip_l
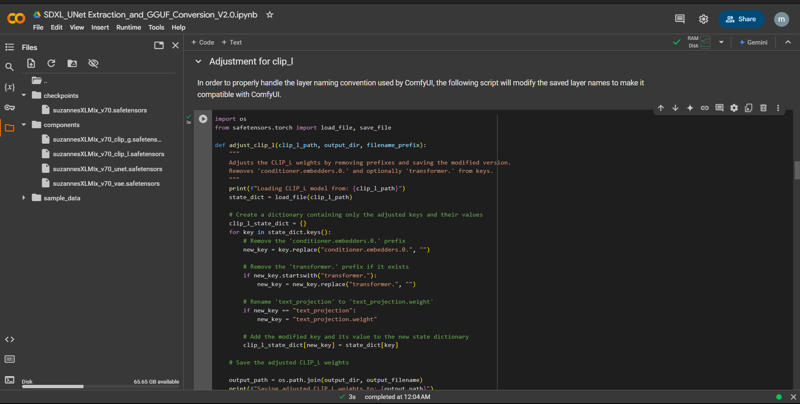
There are three cells to meet the naming convention of ComfyUI and to add the missing layers. Just run the cells in order, and the updates will be automatically applied.
4. llama.cpp installation
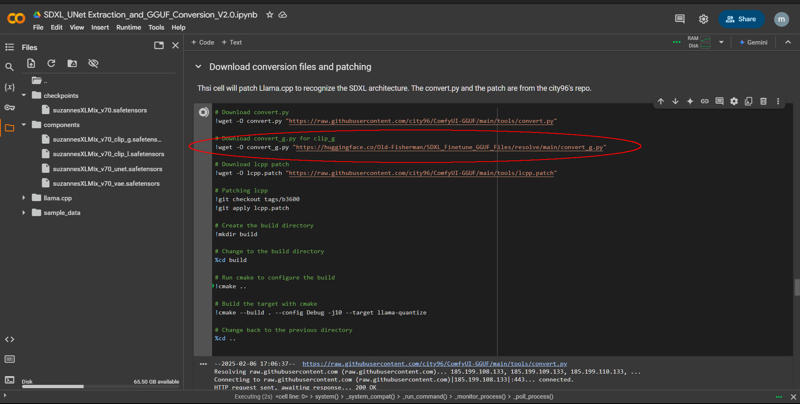
In Part 2, you can just run two cells in order. The first cell installs llama.cpp and the second cell downloads the scripts needed for conversion and quantization and applies the patch. In the second cell, you may notice the convert_g script that converts the clip_g component to the gguf format. It works, and you can convert clip_g to an F16 gguf file. However, I haven't completed the modification to the patch necessary to quantize the model to Q8, Q5, or Q4. I will update the notebook once the patch is ready.
5. Quantization
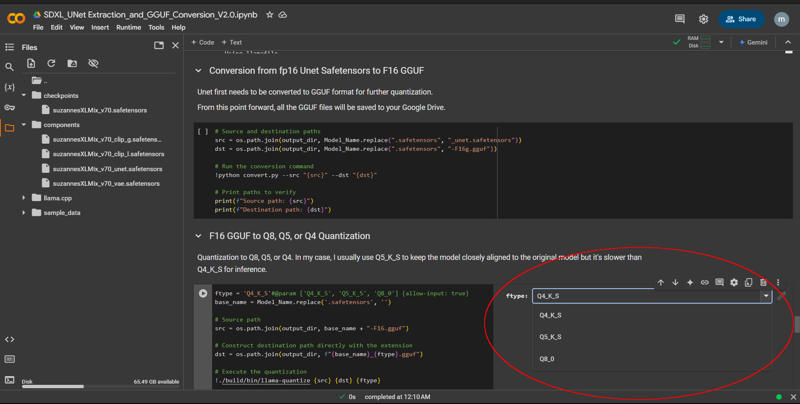
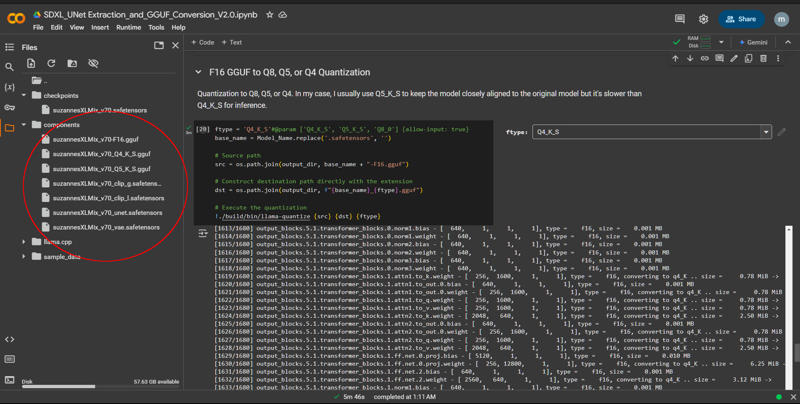
Other than the very first cell, there is only one other place you need to add an input to determine the quantization type (ftype). Once the type selection is made, you can just run the cells in order. If you want to make another quantization type (Q5 for example), you can select a new one from the menu and run the last cell.
Once this is done, you can download whatever modules you need from the folder list to your left. Select a component and right-click will give you the option to download. And that should do it!
