
LTX models
https://huggingface.co/Lightricks/LTX-Video/tree/main
LTX fine tunes
LTX fine tune model has been paywalled with bait and switch bs. I wont link to it, its out there if you want to find it and PAY for it... I will no longer be using the model for my uses.
VAE - https://huggingface.co/spacepxl/ltx-video-0.9-vae-finetune
Searge LLM Prompting
https://github.com/SeargeDP/ComfyUI_Searge_LLM
Model
This article will be referring to V6 of this workflow.
https://civitai.com/models/1072696/ltx-image-to-video
Damit!!!!!! FIX THIS ARTICLE THING! REwriting this 4 times is NOT FUN! Save works 1/4 of the damn time... then everything done is gone... ffs.
Note : default override is set at 14.
10 works best IMO. set at 1.2 scale. 0 rescale. But can do rescale 0.2 to 0.5
10 holds animations better, while 14 can make them more fluid.
Both can be used with 10,14
I forgot to set that up properly.
Example video shows the diff between them.
LTX
Advantages
Fast
Low vram
25 fps
realistic
Disadvantages.
Composition
Nudity
Only simple animations
lower resoltions
I will be going over each section and its settings.
Model Loading and Main image
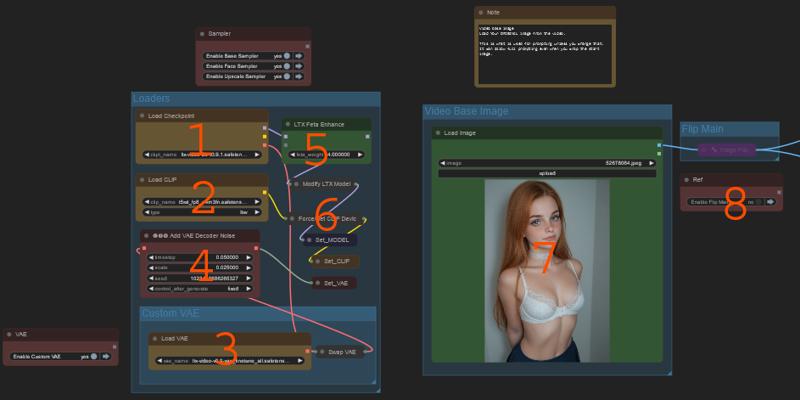
LTX model loading, and of the models
Clip Loading
Vae Override - If disable it uses the vae in the model.
Vae noise - dont know what it does, seems to help faces a bit
5 Feta Enhance node. New and no idea what it does.
Force clip into ram node. Optional.
The main image loader, this is used to load in the full original image for use
this is used mainly for the prompting.
Flip the main image again used in prompting
Image Setup
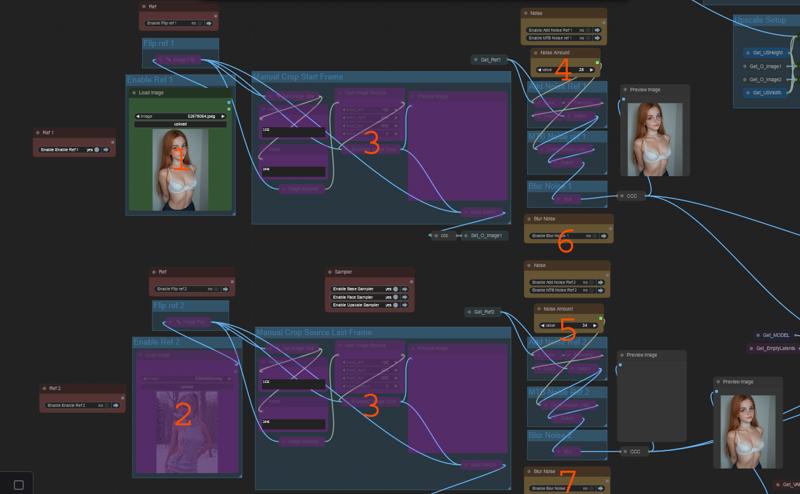
The first image insert loader. This defaults to being the start image Above is a flip option
The second image insert loader. This defaults to being the end image Above is a flip option
These are manual crop nodes to crop each image before processing.
This is just an initial crop used to set perspectives. These are further cropped if needed to match your video size.
This can help change output. Cropping at hips, or such can help walking.
Noise for image 1.
below
Noise for image 2
2 options MTB or normal. Both work just different.
Noise amount changes the amount of movement you get
Use as little noise as you can, try without. More noise means less detail.
Blur
below
Blur
This allows you to blur the image after applying noise. This can help dull motions and blur noise to attempt to stop blocky face animations.
this can be used alone sometimes but it has little effect
Main video Options
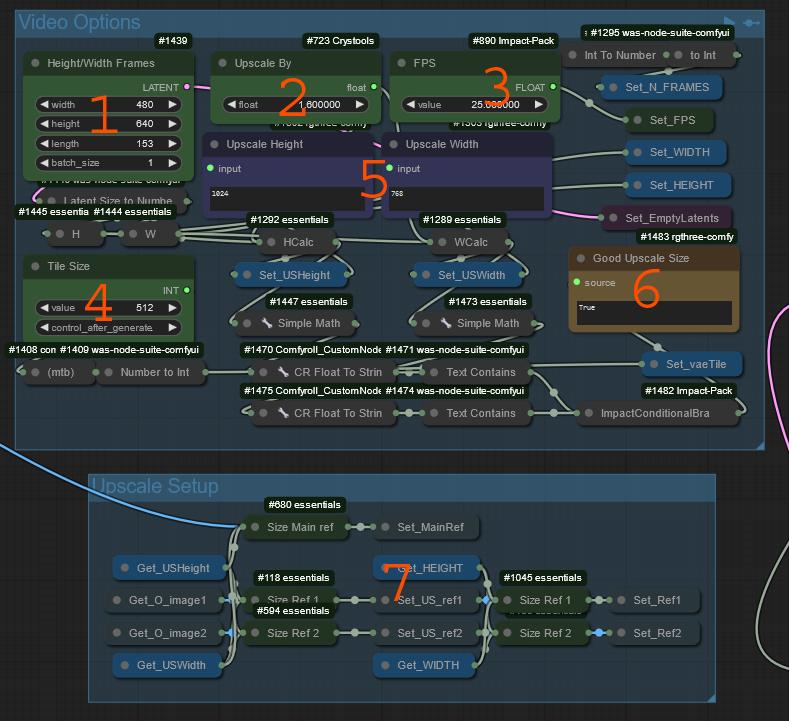
Height/Width and number of frames for the video is set here.
640x480 base with 1.5 upscale seems best.
768x512 can work but upscale can get a bit too big for ltx
The following resolutions offer the least distortion in movement tall and wide
384x288 - 2x upscale
512x384 - 1.5 - 2x upscale
640x480 - 1.6 upscale
768x576 - 1.5 upscale
800x600 - 1.4 upscale
Movement seems tied to 4:3 aspects, you can go outside that. But movement tends to distort and block the further you go from 4:3 in both directions 512x512 works. but movement is skewed, 768x512 works but again skews the movement slightly. This skew shows mostly is up down face movements that will appear blocky when not proper aspect.
Upscale percent you want to try.
FPS of the video, this should stay at 25 for best results.
This is the size of all of the VAE decode/encode nodes. Set the according to your vram.
Upscale size planned
This will populate when you run the flow.
This is a check to see if the upscale size you have is compatible with LTX.
Because you are upscaling by percent, it does not check sizes. If you dont match a size LTX wants it will crop the output. This messes up any extends.
This will show true if the upscale sizes are divisible by 32.
This will show false if either of the sizes are not correct and will be cropped for LTX.
This is just busy work. Setting all ref images to correct sizes
Main thing here is it crops the upscale first. To ensure the crop matches. This means if you change the upscale size it will re-render the base again.
Insert Options
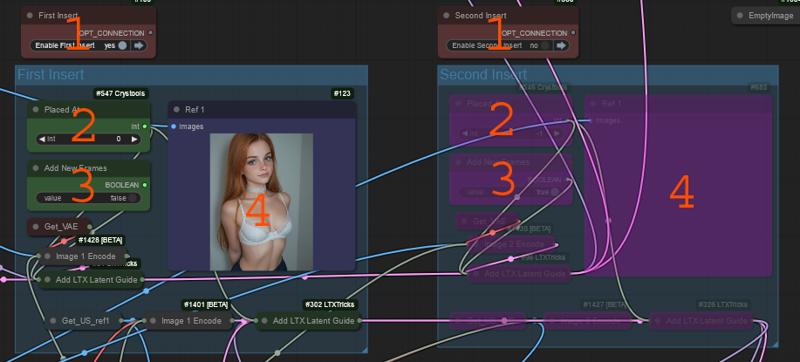
This area inserts the one or 2 images into the latent batch.
By default this insert the frames to the first/last 8 latents in the latent batch replacing them.
This turns on the first or second insert, these need to be enabled to use the image.
Placed at
This is where the image will be placed. 0 means first image -1 means last image
This may also have the ability to insert into the middle. I cant figure out how atm.
Add New Frames
This changes the insert, into an add. This adds 8 new latents to the front/back of the video latents.
This increases the frame count by 8 for each of the images that uses this.
This can help with motion in some situations. It can allow the animation to begin earlier if you notice it stalling at the start and begin mid video. Or it can help the video wander further from the base image background.
This is just the preview of the image that will be inserted.
This can produce looped videos with the same image in both start and end slots.
This can be used to set last frame only, adding new frames is usually needed for this.
When using this to interpolate between 2 images, adding new frames is usually needed.
Manual Prompts
This is the main prompts, Positive and negative. They are used either directly or sent through the enabled prompt helpers.
Pre
This is the main prompt if nothing else is enabled. This and the negative are it.
If florence is enabled this is set to show before the florence prompt
If searge is enabled this will be sent to the searge prompt as the starting prompt.
Post
This is only used with florence, and it adds to the end of the florence prompt
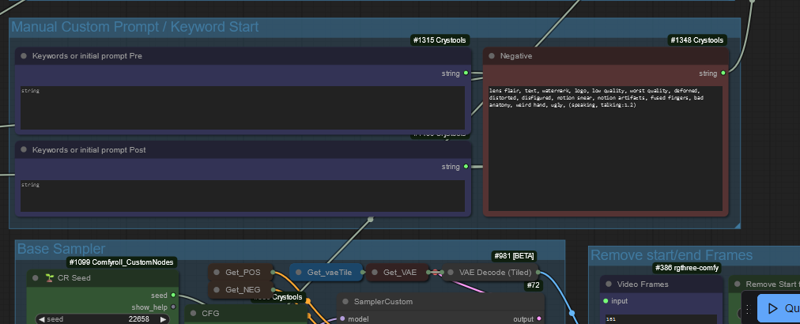
Negative is GLOBAL.
Florence Image Captions
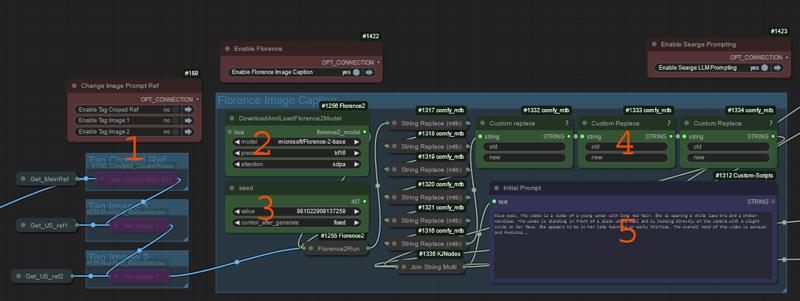
This is part of the optional prompting help. This can be used alone or with the other options.
This lets you choose what you will caption
Default with no selection, it uses the main image ref.
Option 1 is use cropped main image ref
Option 2 is the first insert image.
Option 3 is the second insert image.
This loads Florence Models and Sets Precision
This is florence seed. Change this if you dont like what its spitting out.
Custom replaces.
These allow you to replace florence words like standing, sitting, with action words you want to see them perform.
This is the final florence prompt sent onward.
Searge LLM Prompting
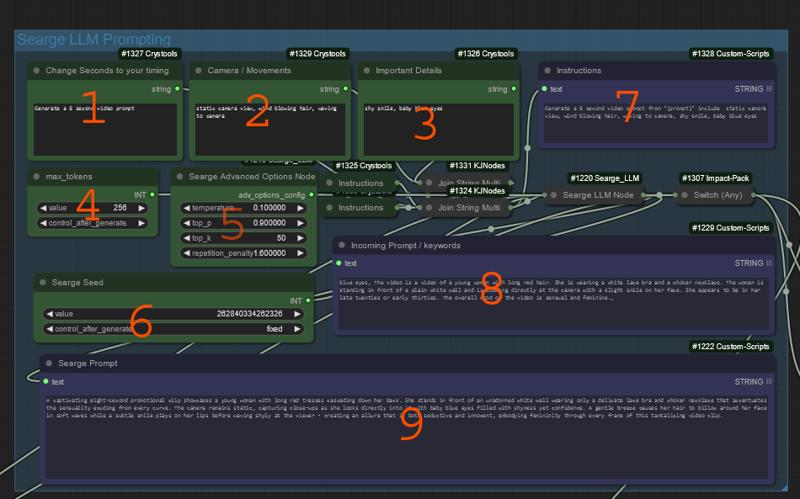
This is searge. This takes input keywords or prompts and turns them into video prompts for us.
1-3 are used to construct an instruction for searge,
This is used to tell searge to make a video prompt from our input
I use this to tell it the length of the video or it tends to run on a bit too much.
This is where i add anything i want included for sure. Camera movements, walking etc.
The keyword include is placed before your keywords.
This is where i add things i dont want included that are showing up
This can be used to stop certain motions like a bird sitting on branch, searge will want to make it fly. You can say, dont include flight
This is the max tokens searge can output. Set this how you wish. 256 worked for me.
Advanced searge options.
Experiment here, as i dont know enough to tell you what is best.
Searge Seed. Change this anytime you dont like what its spiting out
This is the sent instruction set combining the three include boxes beside it.
This is the incoming prompt, either from florence, or your keywords from below.
This is the final searge prompt sent to the sampler.
Base Sampler
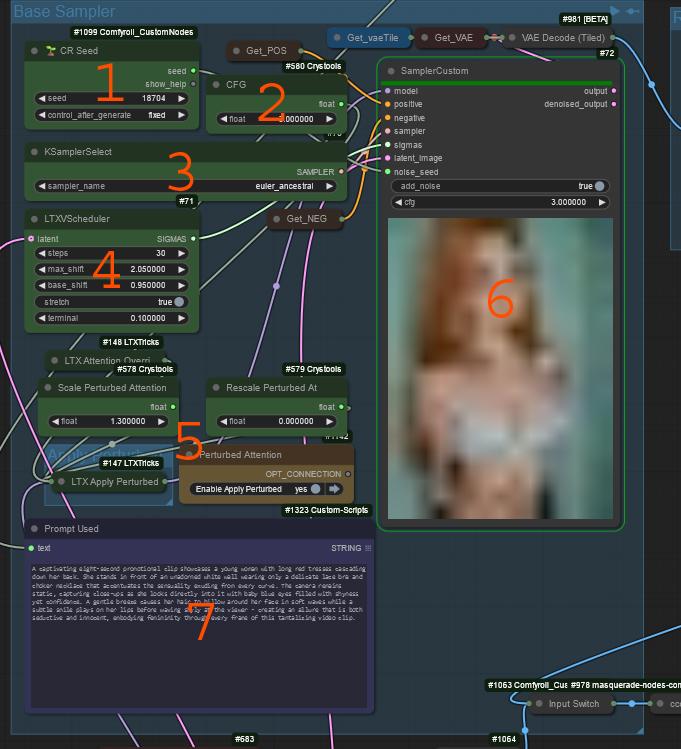
Main render area
Seed for the base render
CFG Default 3 (range 1-6)
Higher may listen to prompt better but it may burn the images.
Eular A is my choice, the other ancestrals work. Up to you what you like and get working.
Scheduler
Max/Base shift defailt 2.05 .95 (my range 1.3-4, 0.6-1.6)
This can help movement distortion, sometimes with up/down movement you get distortion in face/other areas that can be partially solved with this.
I think of this like a spring, the max is how far it can stretch, and the base is the how much it can rebound.
This does not seem to effect movement amount, just the stiffness of the motion
Lower base shift seemed to help get more body movement. (breasts)
This can be hard to set, but up seems to help some videos more than others mostly when you have quick up/down movements like walking/jumping
Stretch
This can help control motions that are too wild.
Can help faces hold through movements.
This can help the same distortion from up/down movements as above
Limits the animation, you will be more smaller movements but more controlled.
Perturbed Attention
Perturbed attention forces the render to focus on the entire image/video cohesion OVER your prompt. This helps the videos stay coherent but can be less what you ask for.
Scale - 0-6 default 1.5 i usually go from 1 - 3 depending on the video
This sets strength of the perturbed attention. Think of this as the opposite of the CFG.
CFG - says listen to my prompt
Rescale
0 means perturbed happens the entire render
1 turns off perturbed attention for that render
Scale this to turn it off at a certain point 0-1
This sets how much perturbed attention backs off at the end of the video(image)
Im finding just 1.3 and 0 defaults work well
This is just the sampler used in the base render
This is the prompt used in the render.
Note LTX attention override node is hidden, open to edit,
default is 14, however 10,14 works well, as does just 10.
14 seems to be fluidity of movement, and 10 seems to hold the animation together better.
Post Video Options
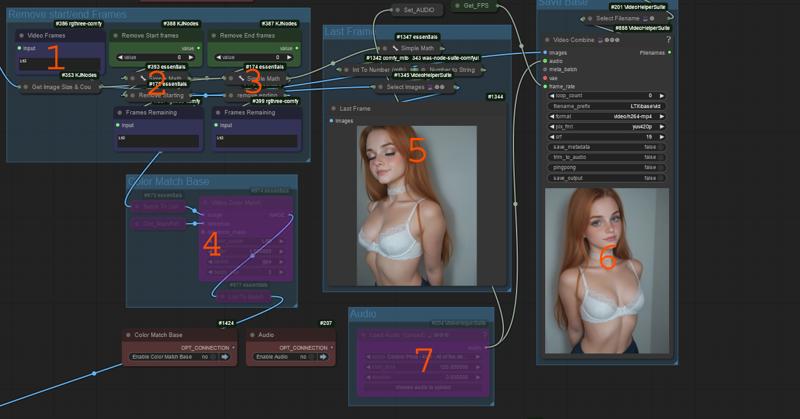
(same both for upscale and base now)
Shows the number of frames coming out of the sampler
Allows you to remove starting frames from the video
Allows you to remove ending frames from the video
Allows you to color match the video base to the original image.
Displays the final frame for you to copy if extending.
Saves the video base.
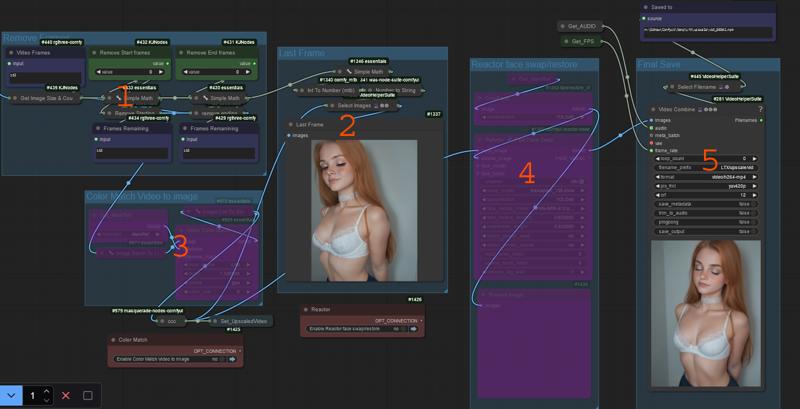
Difference is only reactor at #4 for upscale if you want it. Some cant install it, it can be deleted if not used.