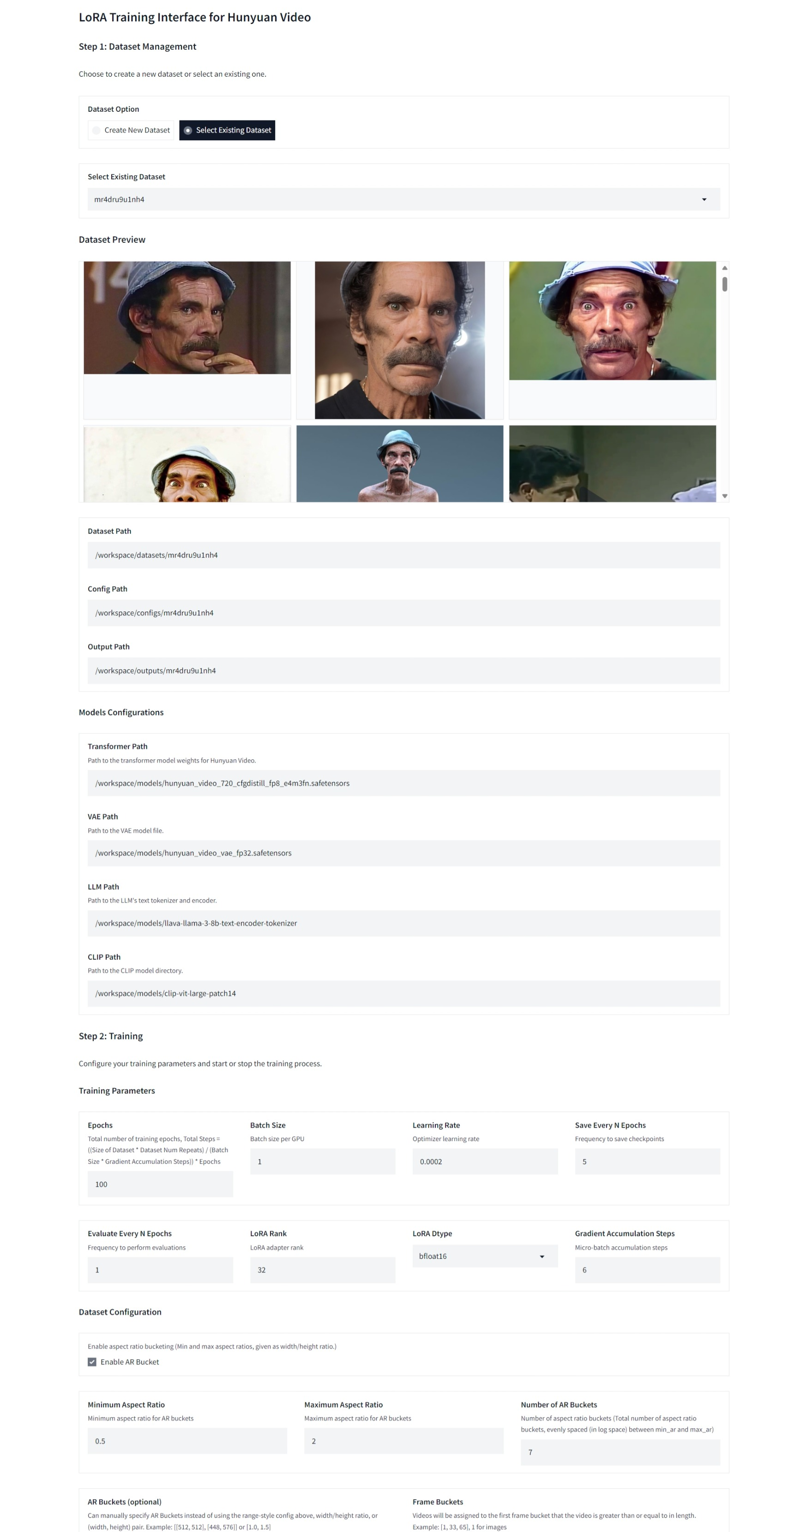
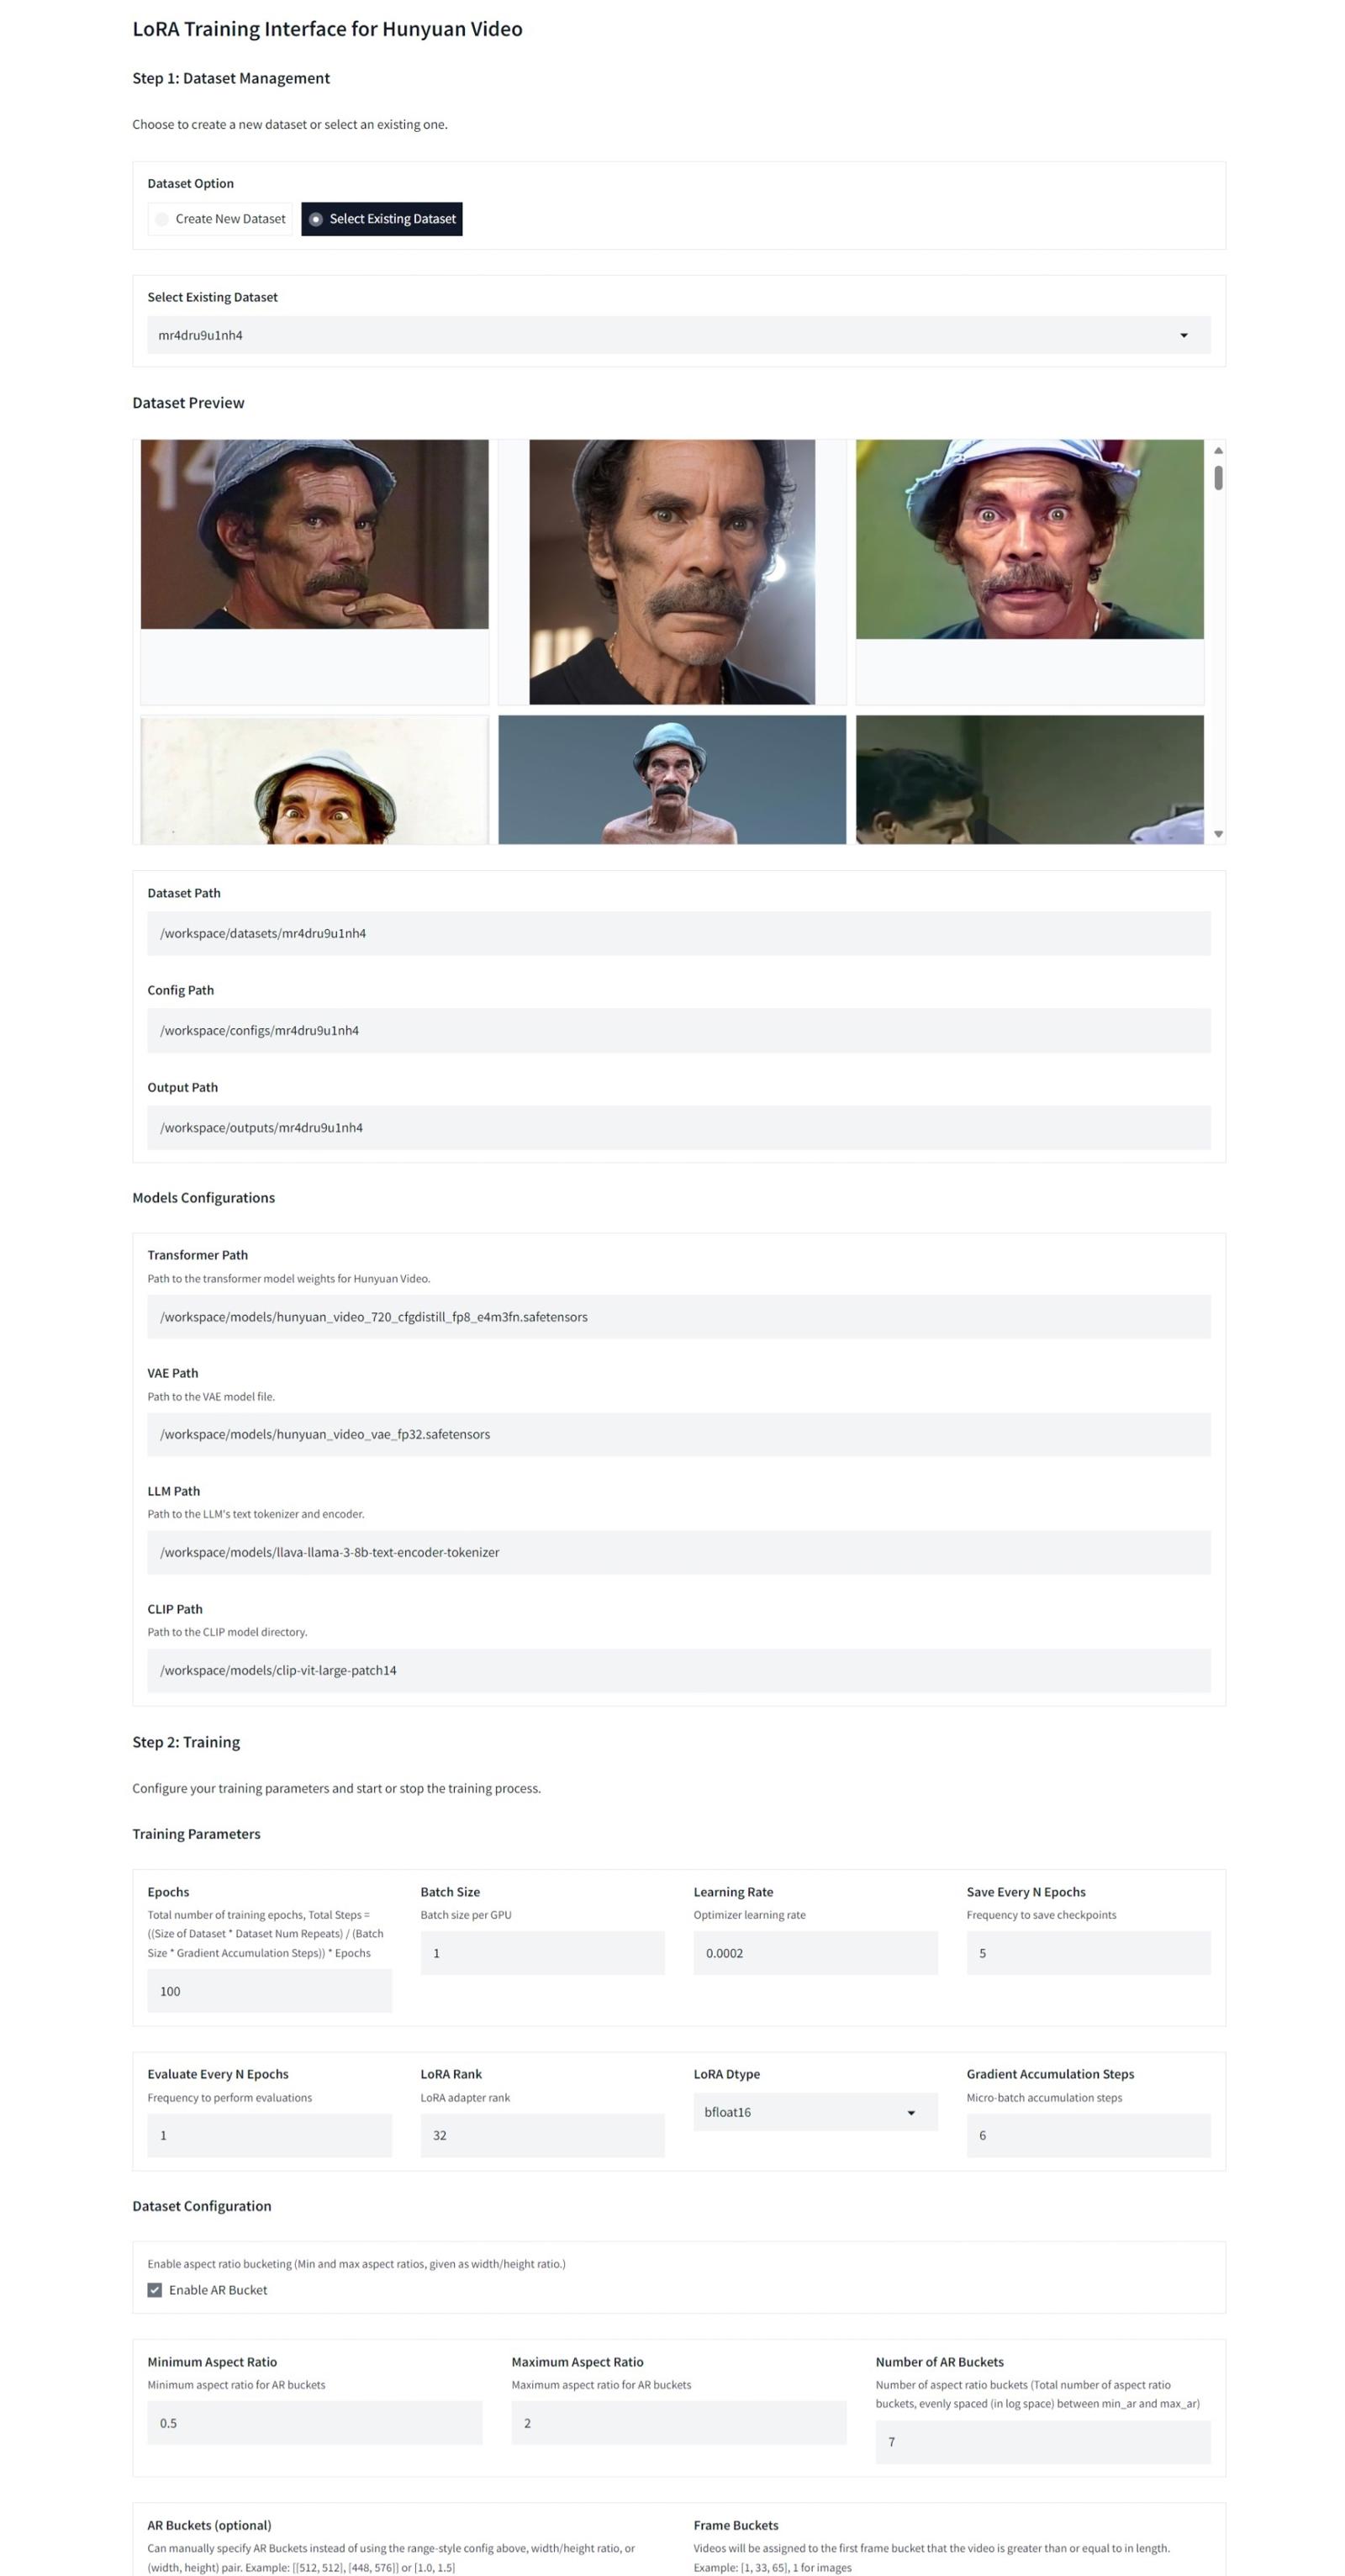
20-03-2025 - Added a new experimental interface (alisson-anjos/diffusion-pipe-ui at new-ui)
This guide details how to use the pre-configured Docker image for Diffusion-Pipe to train diffusion models with an intuitive interface. The interface and Docker image are provided by a fork of the official Diffusion-Pipe repository, available at https://github.com/alisson-anjos/diffusion-pipe-ui. Feel free to contribute to the repository! While the interface code might not be the best, it works effectively for its purpose.
This article covers running locally with Docker, configuring on platforms like RunPod and Vast.AI, building datasets, and using captioning tools.

Running Locally with Docker
1. Install Docker
Get Docker here: Official Docker Installation Guide.
Tutorial Videos:
Note: If you are on Linux and using an NVIDIA GPU, install the NVIDIA Container Toolkit for full GPU support.
2. Update the Docker Image
Before starting, ensure you are using the latest version of the Docker image:
docker pull alissonpereiraanjos/diffusion-pipe-interface:latest
3. Running the Container (I highly recommend mapping the volumes instead of running the basic command)
Basic Execution
If you don’t need to map volumes and just want to start the container with default settings, use the command below:
docker run --gpus all -d \
  -p 7860:7860 -p 8888:8888 -p 6006:6006 \
  alissonpereiraanjos/diffusion-pipe-interface:latest
Execution with Mapped Volumes
To reuse your local files (models, datasets, outputs, etc.), map the host directories to the container directories. Use the following command:
docker run --gpus all -d \
  -v /path/to/models:/workspace/models \
  -v /path/to/outputs:/workspace/outputs \
  -v /path/to/datasets:/workspace/datasets \
  -v /path/to/configs:/workspace/configs \
  -p 7860:7860 -p 8888:8888 -p 6006:6006 \
  alissonpereiraanjos/diffusion-pipe-interface:latest
Note: use -d to run the container in background mode and -it to run it in iterative mode, that is, the container will run in the terminal where the command was executed. If the terminal is closed, the container stops.
Important: Replace /path/to/... with the actual paths on your host system to ensure the correct files are used and saved.
Avoiding Overlay Filesystem Issues
Note: this is just a warning, you don't need to do it if you don't want to, but if you have problems, here's the solution
When running Docker locally, all files created inside containers are saved in the overlay2 layer. This layer has a size limit, and if you don’t map volumes to your host system, you may encounter storage issues as the overlay filesystem fills up.
To check the disk usage by Docker, run:
docker system dfTo prevent this issue:
Map volumes to your host system using the
-voption, as shown in the command above. For example:Training outputs: Map
/workspace/outputsto a directory on your host.Datasets: Map
/workspace/datasetsto a directory on your host.Models: Map
/workspace/modelsto a directory on your host.Configs: Map
/workspace/configsto a directory on your host.
This ensures all files created inside the container appear in the corresponding folders on your host system and do not consume space in the overlay filesystem.
If the overlay filesystem becomes full, clear unused Docker resources (images, containers, cache) using:
docker system prune -aBy properly mapping volumes, you ensure smoother training and prevent storage-related interruptions.
Memory Requirements
When running locally, ensure your system has at least 32GB of RAM. Training requires significant memory, and errors loading the model may indicate insufficient RAM.
If using Docker with WSL2 on Windows, you may need to increase the allocated memory limit for WSL. Follow this guide to configure WSL memory limits
User Report: One user managed to train with only 16GB of VRAM by:
Using videos in 244p resolution.
Reducing video duration to 1 second.
Setting
frames_buckets=[17].Keeping the dataset small to avoid Out-of-Memory (OOM) errors.
While this method is unverified, it may work for constrained setups, I don't guarantee anything, do your tests.
Options Summary
-v /host/path:/container/path: Maps directories from the host to the container.
Example:-v /path/to/models:/workspace/modelsallows you to reuse existing models.-p host_port:container_port: Maps container ports to the host.
Examples:-p 7860:7860: Access the Gradio interface.-p 8888:8888: Access Jupyter Lab.-p 6006:6006: Access TensorBoard.
-e VARIABLE=value: Sets environment variables.
Example:-e DOWNLOAD_MODELS=falseskips automatic model downloading inside the container.--gpus all: Enables GPU support if available.-it: Starts the container in interactive mode, useful for debugging.-d: Starts the container in detached mode (background).
4. Accessing the Interfaces
After starting the container:
Gradio Interface (Configuration and Training): Access
http://localhost:7860.Jupyter Lab (File Management): Access
http://localhost:8888.TensorBoard (Training Monitoring): Access
http://localhost:6006.
Manual Training and Adjustments
If you prefer not to use the Gradio interface, you can open a terminal in Jupyter Lab to execute training commands manually. The container environment comes pre-installed with all necessary dependencies.
Setting separate resolutions for videos and images
In the current version of the Gradio interface, it is not yet possible to configure separate directories or resolutions for videos and images. The interface combines all files into a single dataset (single folder), using a unified resolution setting. However, this feature is planned for future updates.
For now, users can manually configure separate directories and resolutions by editing the training configuration file directly and executing the training manually
Example Configuration:
[[directory]] # IMAGES
# Path to the directory containing images and their corresponding caption files.
path = '/workspace/dataset/lora_1/images'
num_repeats = 5
resolutions = [1024]
frame_buckets = [1] # Use 1 frame for images.


[[directory]] # VIDEOS
# Path to the directory containing videos and their corresponding caption files.
path = '/workspace/dataset/lora_1/videos'
num_repeats = 5
resolutions = [256] # Set video resolution to 256 (e.g., 244p).
frame_buckets = [33, 49, 81] # Define frame buckets for videos.
IMAGES Section:
Set the path to the image directory.
Define a high resolution (e.g., 1024p....).
Use
frame_buckets = [1]to indicate single frames.
VIDEOS Section:
Set the path to the video directory.
Use a lower resolution (e.g., 244p or 256....).
Configure
frame_bucketsbased on the desired frame grouping (e.g., 33, 49, 81...).
Where to Edit:
Modify the training_config.toml file in your configs directory to include these separate sections.
Note: Ensure that the path values match your dataset structure. Captions for each file (both images and videos) must be in .txt format and named identically to their corresponding media files.
Manual Training Command
Activating the Virtual Environment
To activate the virtual environment with all installed packages, run:
conda activate pyenvUse the following command (as an example) to manually start training:
NCCL_P2P_DISABLE="1" NCCL_IB_DISABLE="1" deepspeed --num_gpus=1 train.py --deepspeed --config /workspace/configs/mr4dru9u1nh4/training_config.tomlTraining with Double Blocks
The interface supports training only the double blocks of a model, a feature reported to improve compatibility with other LoRAs. While this is an experimental option, some users have found it beneficial for creating more versatile LoRAs (to use in combination with other loras). To enable this feature, configure the training settings directly in the interface or adjust the training configuration file if running manually.
Running on RunPod
Use the template link below to create your pod:
Choose a GPU:
A GPU with at least 24GB of VRAM, such as the RTX 4090, is recommended.
Important Tip:
If you train frequently, create a Network Volume on RunPod with at least 100GB. This volume will store models and datasets, avoiding repeated downloads and optimizing pod usage.
Start the training directly through the Gradio interface.
Running on Vast.AI
Use the template link below to set up your instance:
GPU Configuration:
Choose a GPU that meets the memory requirements of your training.
Access and configure the training through the interface or via CLI commands.
Training Tips
Resolution and GPU Resources:
Images: Allow higher resolutions, above 1024x1024 (It is not necessarily square, it can be other aspect ratios), and are faster to train.
Videos: Require caution with resolution. On an RTX 4090 (24GB VRAM), resolutions above 512x512 (It is not necessarily square, it can be other aspect ratios) may cause Out-of-Memory (OOM) errors.
Ideal Combination: Mix high-resolution images with low-resolution videos for a better balance between detail and motion.
Video Duration and FPS:
Videos with 33 to 65 frames are ideal for the RTX 4090, I usually have videos of 2 seconds or 44 frames in total duration considering 24 fps, but the duration can be adjusted if it is causing you problems.
Make sure the videos are at 24 FPS, as diffusion-pipe resamples them to 24 FPS, that is, videos that have more than 24 FPS may lose frames when diffusion-pipe resamples them. If this happens, the video may not fit into any of the frame_buckets that were defined, as it is added to the first frame_bucket whose duration (total frames) is greater than or equal to one of the frame_buckets values. If it does not fit into any of the defined values, a message will appear in the log in this format: "video with shape torch.Size([3, 28, 480, 608]) is being skipped because it has less than the target_frames"
Training on Images vs. Videos:
Images: Faster but may produce LoRAs with limited motion capabilities.
Videos: Better for capturing realistic motion. Prioritize videos for motion training and images for capturing detail and style.
Steps to Build the Dataset
1. Search and Download Videos
Look for high-quality videos on sources like YouTube, Pexels, or torrents.
Prioritize videos that:
Have 24 FPS (or adjust later).
Frequently feature the target object/person.
Offer a variety of scenarios, clothing, styles, and angles.
2. Split Videos into Scenes
Use PySceneDetect to split videos into scenes based on visual changes.
Basic Command:
scenedetect -i {path to video} split-videoDownload PySceneDetect: Official Page.
After splitting, review the segments and remove irrelevant or duplicate scenes.
3. Adjust to 24 FPS
Ensure all videos are in 24 FPS, essential for Diffusion-Pipe.
You can do this manually with FFmpeg or use the adjust_to_24fps.py script from the useful-scripts repository.
Manual Option with FFmpeg:
Command
ffmpeg -i {input video path} -filter:v fps=24 {output video path}
Example:
ffmpeg -i .\2.mp4 -filter:v fps=24 2_24pfs.mp4
Automated Script:
python ./adjust_to_24fps.py {directory with videos}4. Split Videos by Frames
Use the split_videos.py script to split videos into segments based on the total number of frames.
Command:
python ./split_videos.py {input directory} {output directory} {frames per segment} -w {number of threads}Example:
python ./split_videos.py ./videos ./segs 48 -w 3
5. Clean Segments
Review the resulting segments and remove:
Those without the target object/person.
Low-quality, static, or duplicate videos.
6. Check Frames in Segments
Ensure all segmented videos meet the defined frame count using the check_frames.py script:
python ./check_frames.py {directory with videos}Example:
python ./check_frames.py ./dataset_final
7. Rename Files
Rename dataset files for better organization:
Use PowerToys on Windows for batch renaming.
Or use the
rename_files.pyscript available in the useful-scripts repository.
8. Generate Captions
Choose a captioner and generate captions for your videos and images.
Recommended Captioners:
Ideal for videos.
Combines LLaVA and Qwen2 to extract initial captions, then refines them using Llama 3.2 for improved accuracy.
Adds trigger words directly into captions.
Outputs
.csvfiles convertible to.txtusing thecsv_to_txt.pyscript:python ./csv_to_txt.py --input_csv "./output.csv" --content_column refined_text --filename_column video_name --output_dir "./segs"
Generates captions (image, video, audio) using Gemini and supports NSFW content.
Outputs
.srtfiles with detailed timestamps, including character recognition when applicableConvert
.srtto.txtusing thesrt_to_txt.pyscript:python ./srt_to_txt.py {path to srt file}Video tutorial on how to use: https://www.youtube.com/watch?v=910ffh5Mg5o
Note: Follow the instructions provided in each repository to install dependencies and set up the captioners. Both tools offer unique advantages depending on the dataset's requirements.
Required Tools
Ensure you have the necessary dependencies, such as FFmpeg and PySceneDetect, installed before running the scripts:
FFmpeg: Download here.
PySceneDetect: Official Page.
Available Features
Gradio Interface: Simplified configuration and LoRA training execution.
TensorBoard: Monitor metrics like loss and training progress.
Jupyter Lab: Manage files, edit datasets, and view outputs directly.
WandB: Advanced metrics monitoring support.
NVIDIA GPU Support: Accelerated training.
Volume Mapping: Reuse local models and configurations.
Planned Improvements
Training Restoration: Allow resumption of ongoing training after interface interruptions.
Sample Generation: Visualize the impact of LoRA training across epochs.
Final Tip: Before each new training session, ensure the Docker image is up-to-date to take advantage of the latest features. Use:
docker pull alissonpereiraanjos/diffusion-pipe-interface:latest
.jpeg)
