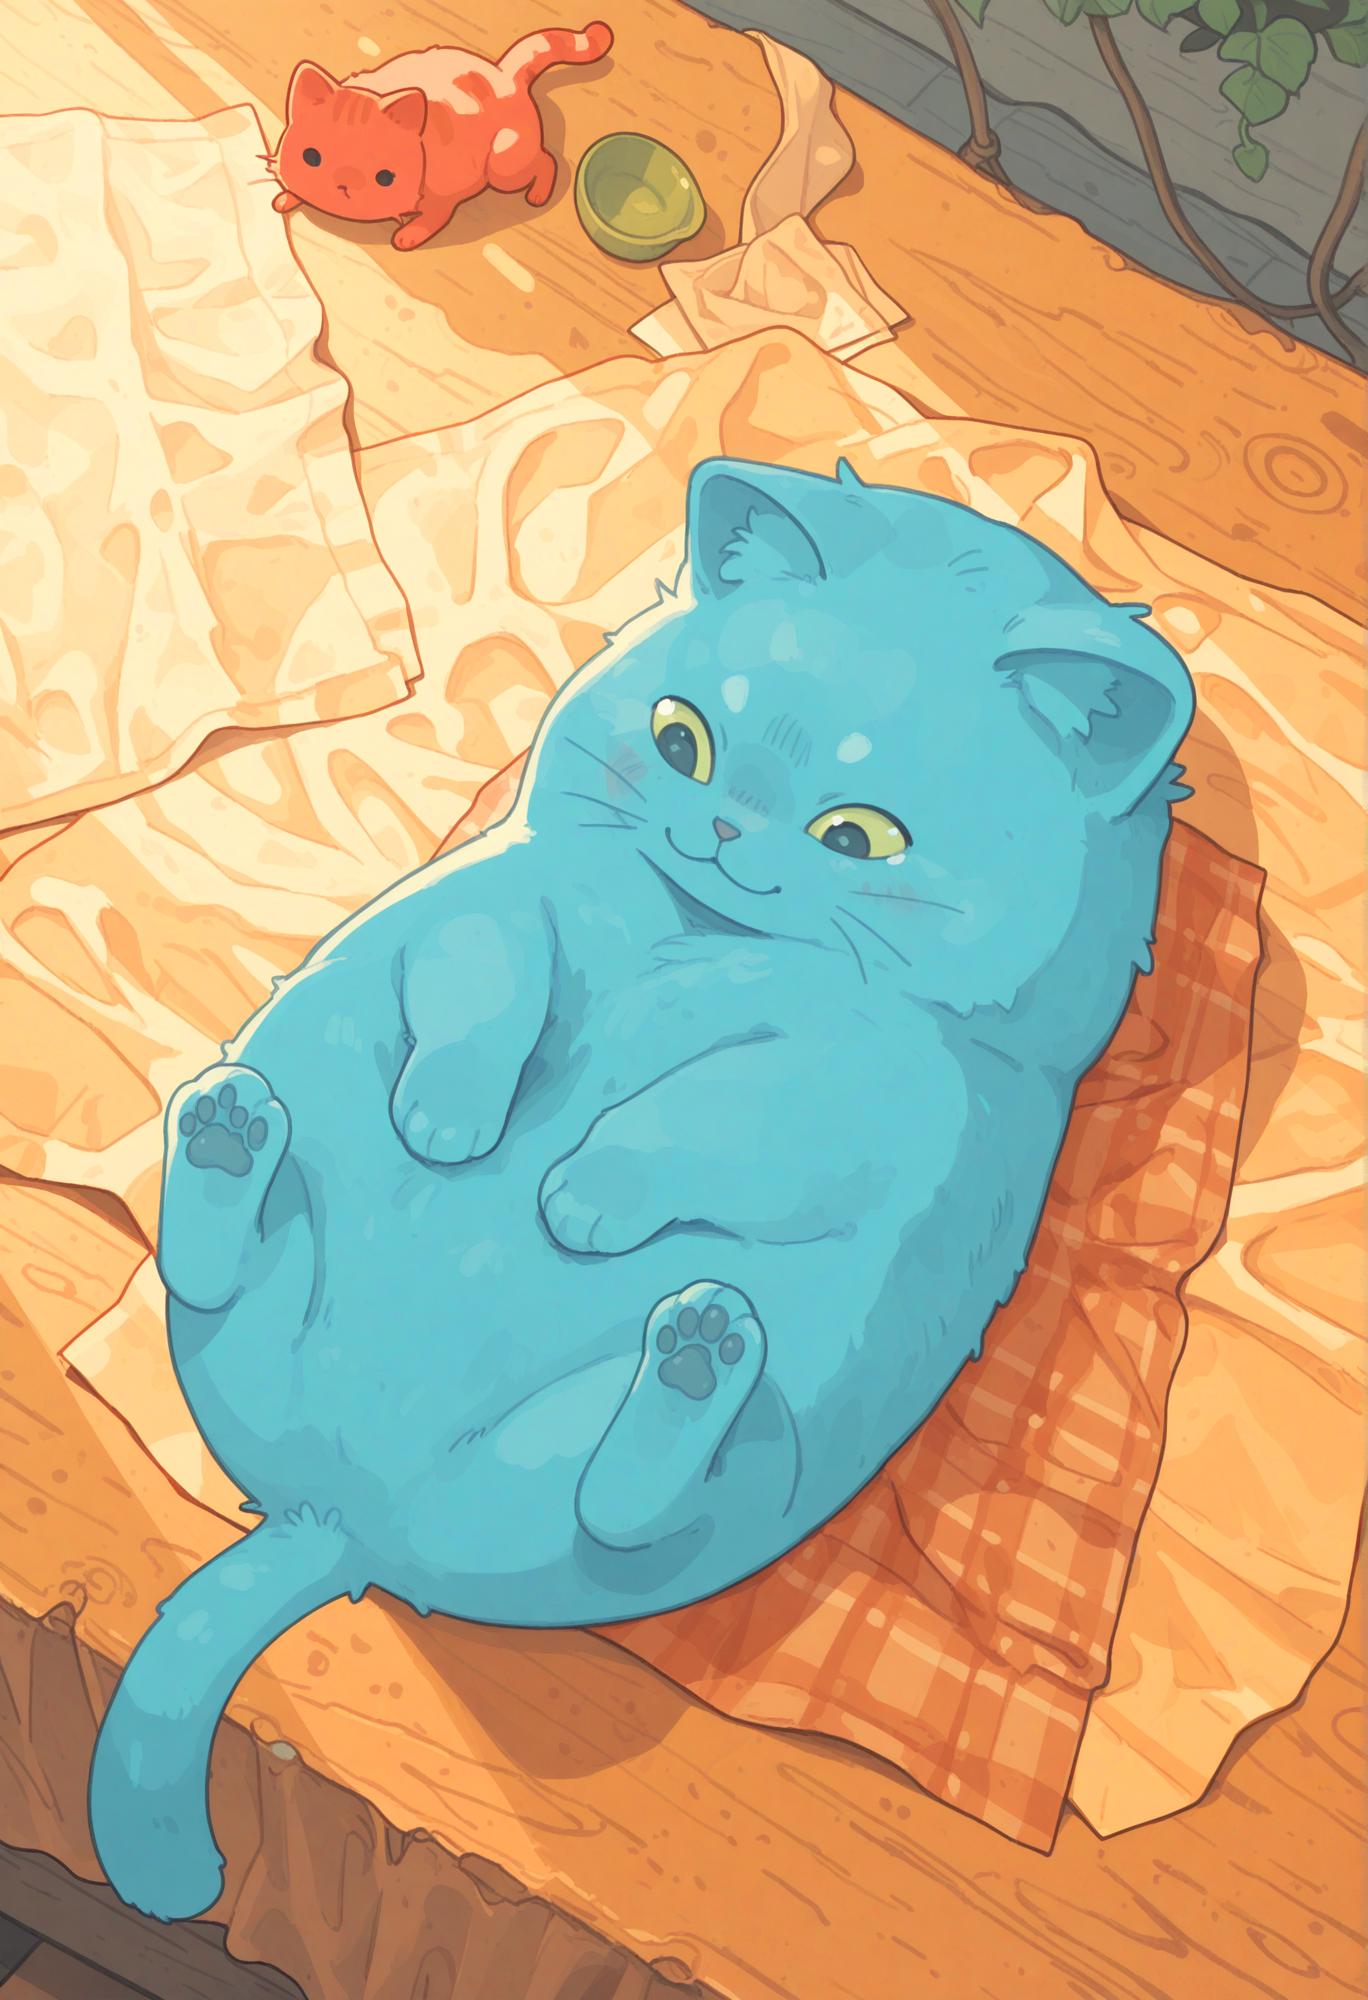
Have you tried generating images with the new NoobAI vpred model, only to fail miserably? That’s exactly what happened to me. While this model boasts incredible knowledge and adheres to prompts better than any SDXL anime model I’ve tried, the results were just ugly and inconsistent.
That’s why I started experimenting with different settings to make it work, and I’ve finally reached a stage where I’m reasonably satisfied with the results. Now I want to share my smdb NoobAI - vpred workflow with everyone.
On the workflow page you’ll find examples of what the base NoobAI model can achieve without using any LoRAs. I’m still amazed by this model’s capabilities every day, and I hope you’ll enjoy exploring it as much as I do.
Of course any suggestions to further improve the workflow are more than welcomed.
Features
Flexible. Base NoobAI vpred model is used for maximum characters and artists knowledge, LoRA compatibility, composition and styles diversity. You can generate anything from flat-colors 2D art to semi-realistic 2.5D.
LoRAs can be applied directly from the prompt with Automatic 1111 syntax
<lora:lora-name:weight>.Most of the other Automatic 1111 syntax is also supported, see below for more info.
Prompt wildcards support.
Fast. 1368x2000 image is generated in about 40 seconds on weak RTX 3060.
Relatively simple. You should be able to generate good images with default settings.
Reduces jpeg and gradient artifacts.
Optional image post-processing. No more yellow tint, dark images, washed colors etc.
Ability to tweak desired level of details without LoRAs.
You can save images with a1111 metadata embedded compatible with Civitai.
Installation
Install or update to latest versions of ComfyUI and ComfyUI Manager. There are a lot of guides and videos how to do this.
Load workflow from JSON file or sample image, open Manager and click "Install Missing Custom Nodes". Install every missing node, select "nighty" if asked for node version.
If you encounter error about First Block Cache node search for WaveSpeed in the Comfy Manager or install this node manually.
Another useful extension is ComfyUI Custom Scripts. It provides tags and LoRAs prompt autocomplete.
Enable "Reroutes Beta" feature in Settings -> Lite graph.

Resources
Base model
I am using vanilla NoobAI vpred 1.0 as a base model for maximum flexibility. Of course nothing stops you from using another models if you wish, even base Illustrious. Put this model into models/checkpoints directory.
Refiner model
There are tons of options here, you basically can use and Illustrious model. I will mention a few I have tried and liked.
Noobai-Cyberfix-V2 (vpred) should be very close to base NoobAI but have improved anatomy. Tends to give darker images. Adjust with Color Correction gamma and contrast if needed. I like to use it as upscaler model.
Falafel MIX seems to have some bits of WAI model that I know little about, looks like another descendant of Illustrious. Anyway this model is good with backgrounds and don't change original artists styles much. There is also cyberfix variant that is even better with anatomy but artist styles are weaker and looks more AI generic.
Vixon's Noob Illust Merge is all round good universal model. It is one of the few merge models that can tolerate "non-anime" faces and renders NoobAI artist styles pretty close. I also like that it almost never adds random details. Result images may look a bit washed out, user Color Correction panel to boost saturation.
KNK NoobiComp is great if you want to keep original artist styles intact. It is one of the strongest models in this regard.
ZUKI cute ILL is great for 2D art. Slightly overrides styles and changes characters faces to more "anime-like". Also adds a lot of details.
For stronger semi-realism you can use something like Rillusm or CyberIllustrious - CyberRealistic but I don't have much experience with them.
Put these models into models/checkpoints directory.
Pixel upscaler model
Put 4x-NomosUni_span_multijpg fast upscaler model into the models/upscale_models directory.
Prompt wildcards
If you want to use prompt wildcards put them into the wildcards directory.
Workflow settings explained
Models
Keyboard hotkey (1)
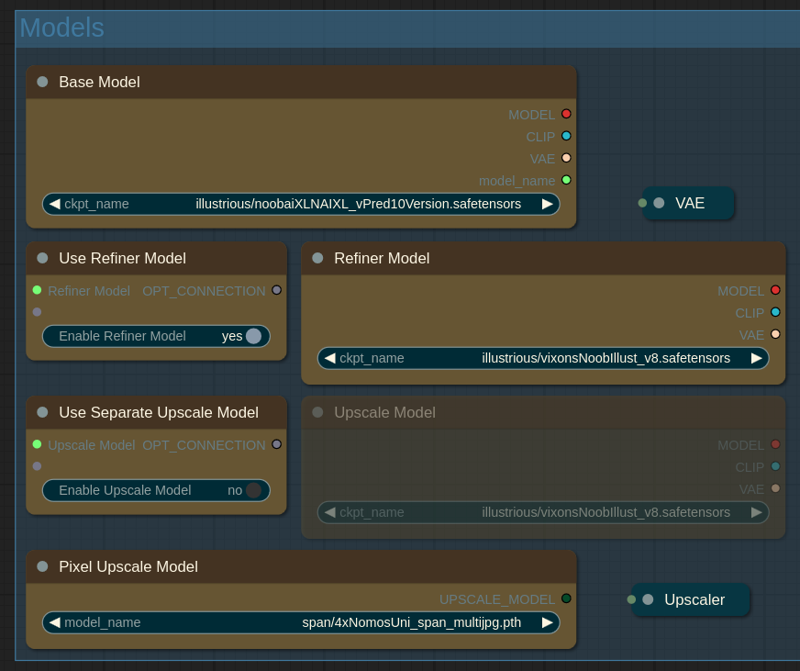
In this panel you can choose all the models.
Base Model: this model is used for initial generation and largely determines final image composition, tags knowledge, styling and prompt adherence. I use NoobAI vpred.
Use Refiner Model / Refiner Model: enable if you want to use refiner model. Refiner model finishes last steps of initial generation. It can help with aesthetics, anatomy and remedy some of the quirks of the base vpred model.
Use Separate Upscale model: enable if you want to use third model for upscaling stage or if you don't use refiner. Otherwise refiner model is used.
Pixel Upscale Model: model to do pixel upscale stage.
(advanced) Fallback Upscale Model: what model to use if upscale model is not selected. 1 - base model, 2 - refiner model (default). You most likely don't need to touch this setting.
Prompt
Keyboard hotkey (2)
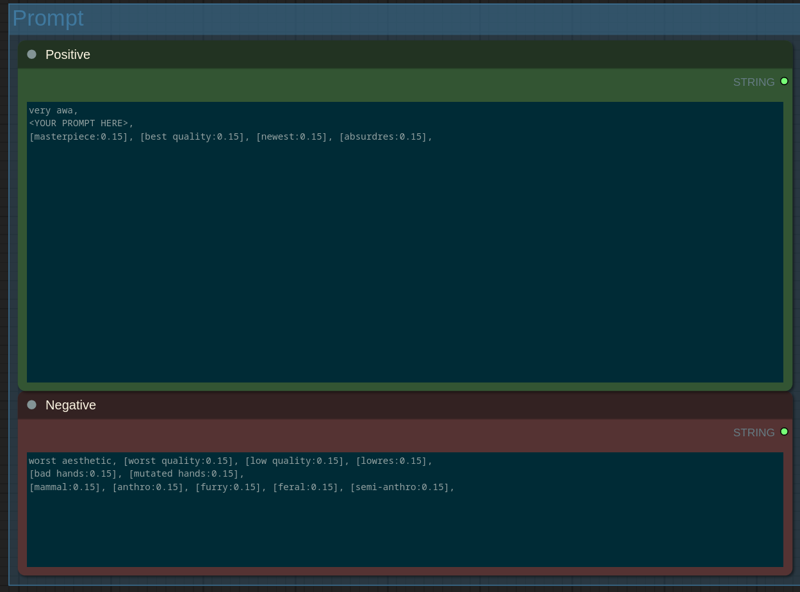
On this panel you enter your prompt.
Type your prompt after
very awa(not a typo).Use Danbooru and e621 tags exactly as you find them on corresponding wikis.
Most of the Automatic 1111 advanced syntax is supported. You can apply LoRAs with
<lora:lora-name:weight>, useBREAKandANDkeywords, schedule tags etc. See syntax guide if needed.Default positives and negatives I have included in the workflow give me good results while keeping the results flexible.
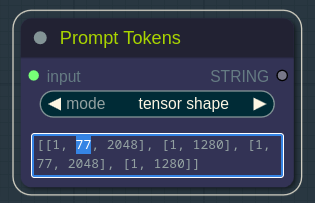
SDXL models demonstrate best prompt adherence if prompt length is not longer than 75 (77) tokens. You can check current positive prompt length in the Prompt Tokens node after queening the generation.
Prompt wildcards support
Put wildcard files into the wildcards directory inside ComfyUI path. Than you can insert them into the prompt with this syntax __wildcard-directory/wildcard-file__. If you want to learn more about using wildcards, check the Mikey Nodes documentation.
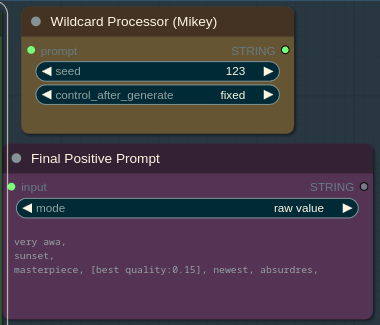
Seed in the Wildcard Processor node determines what line will be chosen from the wildcard file(s).
You can see final prompt after wildcards substitution in the Final Positive Prompt node.
txt2img settings
Keyboard hotkey (3)
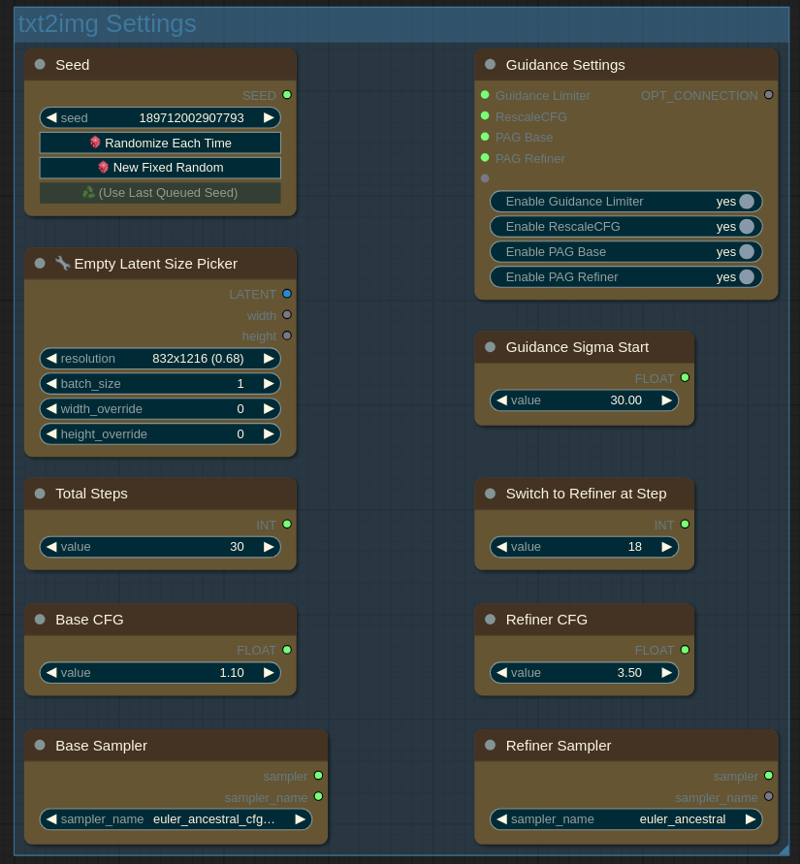
On this panel you can change txt2img generation settings.
Seed: same as Automatic 1111. You can randomize seed each time, use fixed seed or reuse seed from last generation.
Empty Latent Size: size of initial image. Start with batch size 1 for max quality, see "known issues" below.
Total Steps: total number of steps = base + refiner.
Switch to Refiner at Step: when to switch to the refiner model. The lower this number is the more influence will have refiner over the base model. Sweet spot is usually 18...24.
(advanced) Base CFG: CFG value for the base model.
(advanced) Refiner CFG: CFG value for the refiner model.
(advanced) Base Sampler: sampler for the base model.
(advanced) Refiner Sampler: sampler for the refiner model.
(advanced) Adjust Details: increase or decrease desired level of image details. 0 is default (no changes). Usually works fine from -2 to 2.
(advanced) Guidance Limiter: Limits CFG at low steps. This can improve image quality if first steps introduce nonsensical details.
(advanced) Guidance Sigma Start: sigma at which Guidance Limiter (if enabled) should stop limiting.
(advanced) Enable RescaleCFG. In theory prevents image burning. From my experience it has little effect with CFG++ samplers but works nice with the normal ones. Can also improve hands and reduce limb mutations. Check what works best for you.
(advanced) Enable PAG Base / Refiner. Perturbed-Attention Guidance is said to improve prompt adherence and image composition in the cost of generation time. Enabling it at base stage changes image composition drastically and burns colors a little. Enable for maximum prompt adherence or to generate bold contrast artworks.
Some base model txt2img generation settings I have tested:
euler CFG++ / euler a CFG++ / CFG 1.0...1.5 / PAG ~0.5
euler / euler a / CFG 3.0-5.5 / PAG 2.5...3.0
CFG++ samplers provide better prompt adherence especially with CFG 1.3...1.4, but resulting images can be too contrast. If you want lighter colors try normal euler or eualer a samplers.
For refiner model these settings should work:
euler / euler a / CFG 3.0-5.0 / PAG 2.5...3.0
Euler a generates more details than euler.
Upscale Settings
Keyboard hotkey (4)
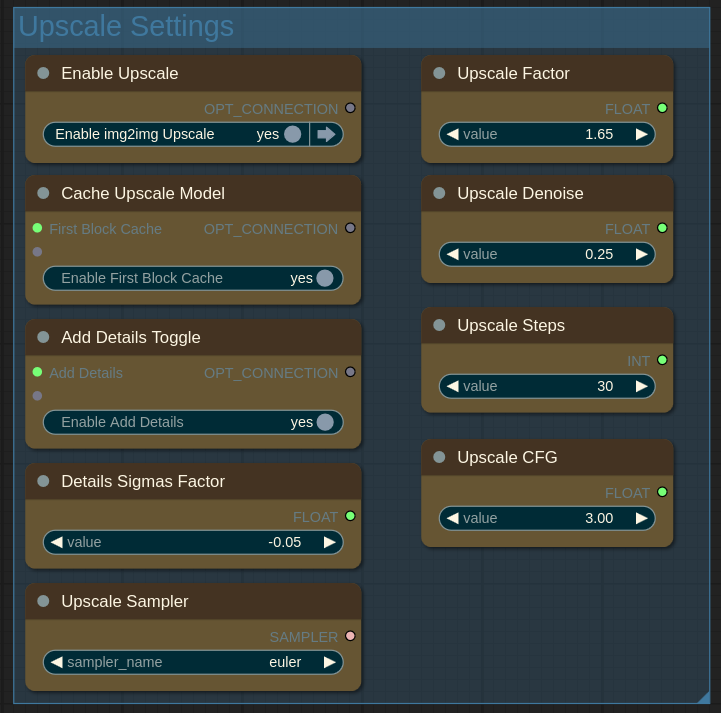
On this panel you can change upscale settings.
Enable Upscale: this upscale stage is similar to "HiRes Fix" in a1111. It is generally recommended to have it enabled. But you may wish to disable it for example to quickly search for good seed and then re-eanble to upscale just the images you like.
Upscale Factor: larger factor will give you more details but you can't ramp it up indefinitely because the model will start to hallucinate.
Upscale Denoise: how much upscale model can change the initial image. Perhaps the most important setting on this panel. Larger values give upscaler more freedom to change image composition and style. Low and high values are both useful. For example if you see extra finger or strange limbs artifacts that are not present on the initial image you can increase denoise to give upscaler model chance to properly change the composition or lower it to stick with the initial one. Usual range is 0.25...0.65.
Cache Upscale Model: use First Block Cache to speed-up upscaling. Disable if you see broken output after upscaling.
Add Details Toggle: if enabled Detail Daemon is used to add some extra details during upscaling.
(advanced) Details Sigmas Factor: how much details to add if "Add Details" option is enabled. Larger negative numbers mean more details to add. Usual range is -0.01...-0.1. Positive numbers will reduce the details.
(advanced) Upscale Steps: number of upscale steps.
(advanced) Upscale CFG: CFG for upscale stage.
(advanced) Upscale Sampler: sampler for the upscale stage.
Output
Keyboard hotkey (0)
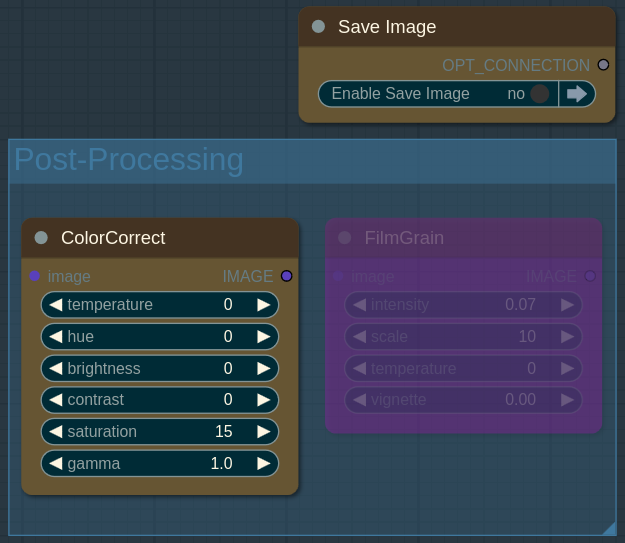
On this panel you will see the final images and can do some Post-Processing.
Save Image: if enabled upscaled images will be saved to
output/smdb-noobaidirectory. Images will have a1111 metadata embedded so you can upload them to Civitai with proper prompt and resources recognition.Color Correct: simple but very effective tool to improve resulting image quality. For example you can make colors more vivid with saturation, remove yellow tint of some artists with temperature etc. Reduce gamma to 0.9 if image has crushed blacks.
Film Grain: highly subjective, but I like a little bit of film grain for my 2.5D images. It gives them extra texture.
You can disable Color Correct or/and Film Grain nodes by right clicking and selecting "Bypass" or pressing Ctrl+B. Re-enable by pressing Ctrl+B again.
Known issues
For unknown reason batch size 2 generates worse quality images than batch size 1. I don't know if this is limitation of my 8Gb VRAM GPU but anyway try to start with batch size 1 and than compare the results with batch size 2.
I will be glad if you post your images on the workflow page. If you have any questions leave the comments below.
