
Some time ago, I posted on a Facebook group about old school role playing games and illustrations a few medieval fantasy themed pictures that I generated with Flux and Forge. The pictures were quite well received until someone noticed that there were "probably AI generated". My pictures were then quickly removed from the group, because AI art was forbidden there.
I was a bit disappointed of course, but I especially have the feeling that there are some misconceptions, regarding AI art.
The first biggest misunderstanding actually comes from the words articifial intelligence, because of course, there is nothing intelligent in the process of generating pictures. Humans are intelligent, computers are not.
The second big misconception I see is some people think that any AI picture just take one click to produce. And so AI art is not art, because it is just the product of the computer.
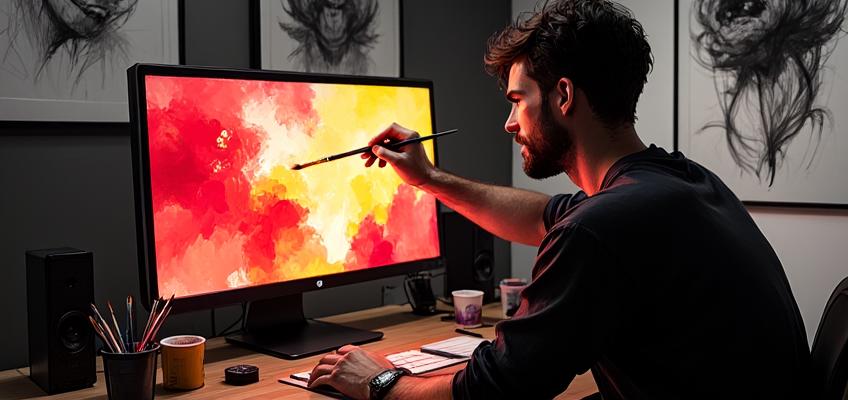
Of course, it is not that simple. Because AI is not producing my art, it is the tool that allow me to produce my art. The tool, just like the pen and the paper, just like any tools, it requires training, practice and perseverance to master and to get proper results.
Through this modest article, I will try to explain the work that it represents for me to create the images that I want to see and that will allow me to materialize the universes that I have in mind. To make art, in other words...
Style and composition
If I want to produce distinctive and striking pictures, whether with AI or with traditional tools like pen/paint/paper, there are two essential things to respect: style and staging.
Through years of practice, artists, painters, drawers manage to create their own distinctive style. They achieve this through years of work in mastering their tools. This is here where AI help the most, as it is possible to find countless models (or LoRA) to easliy allow to reproduce either the style of a particular artist or which define their own.
So defining my own personal style is not easy but there are solutions. I know what kind of pictures I want to produce, and therefore I can use various ressources, to find the proper mix of them to finaly generate something that can be me.
But style is not all. The staging and composition of pictures is also determining.
To put it simply: you can't produce good AI photo if you can't produce good photo at all. Because the rules that make a good photo are the same as those that make a good AI photo. AI can help here also but basically, a good picture will require the artist's feelings in the composition...and the artist's mastery in AI tools to render his feelings into the picture's composition.
ControlNet - how to get the most control over the picture
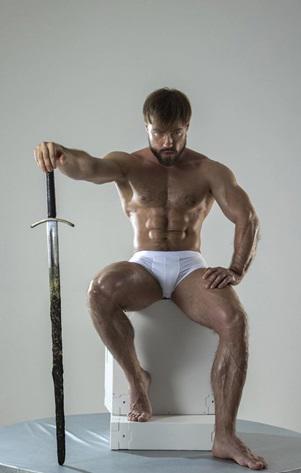
The starting point to produce a picture is - just as for most of classic drawings - to find a model. Here I want something as close as possible to the idea I have and I want to illustrate.
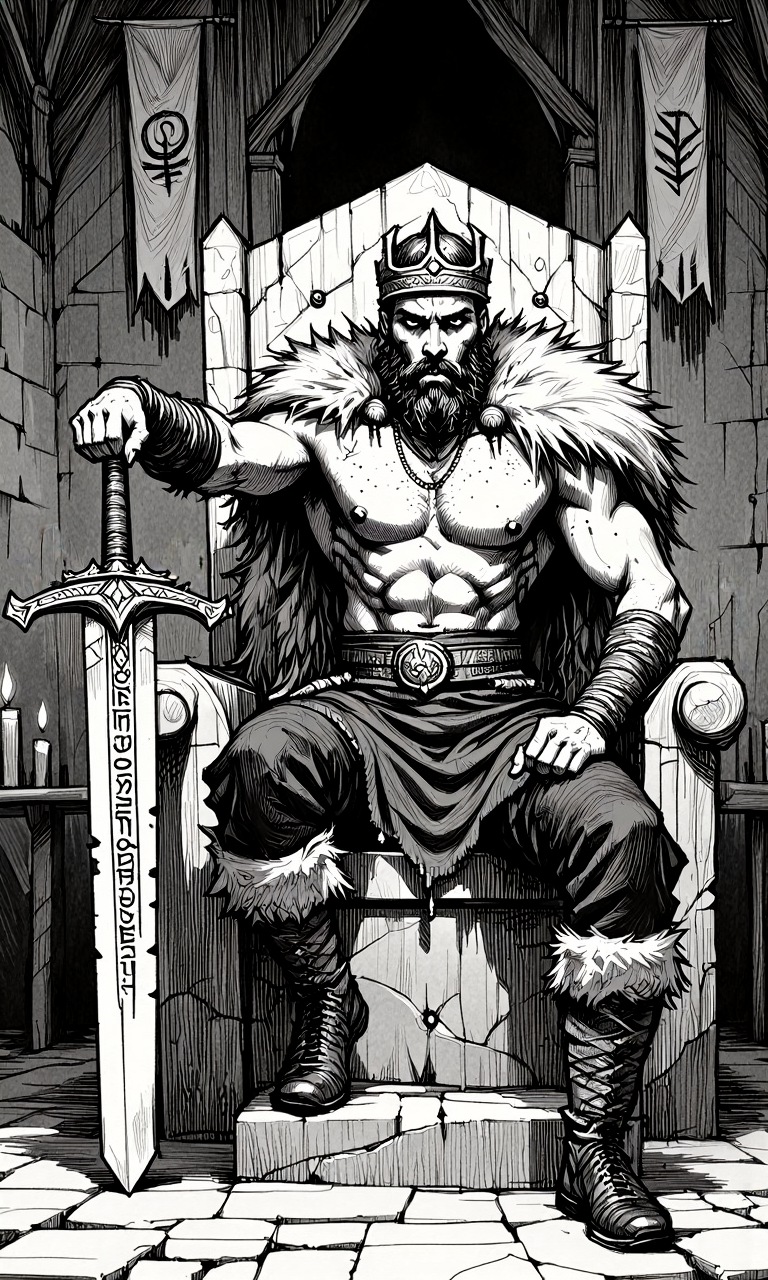
So let's say I want to produce a picture of a barbarian king, siting fiercely on his throne. Something like the old Conan the Barbarian, sitting on the throne of Aquilonia at the end of that famous movie.
There are many available models I can find, on the Internet, in books or comics I own. A quick search on Google and I found this perfect one :
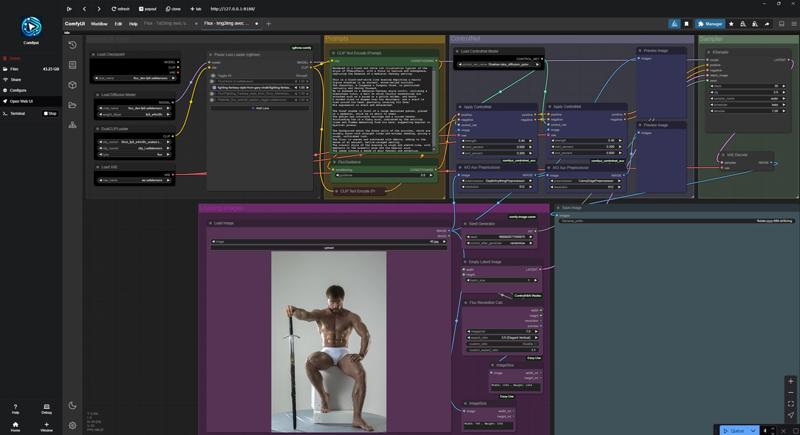
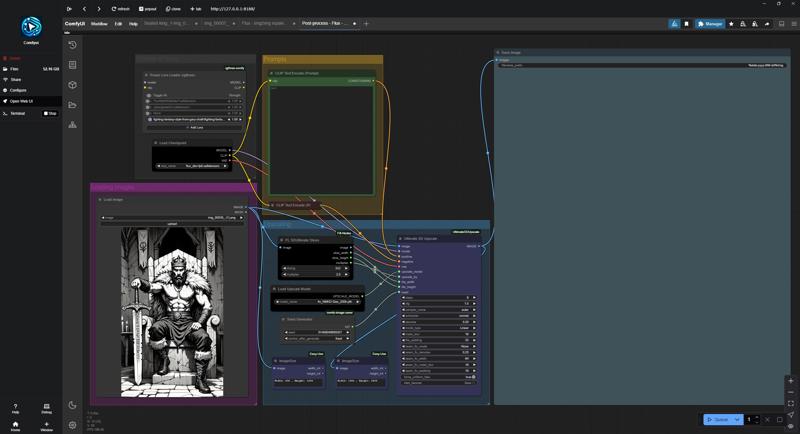
The next step is to prepare and configure the workflow to produce a picture based on this model. For this I will use ControlNet workflows in ComfyUI.
The prompt I used is this one : cflxillst, monochrome, greyscale
This is a black and white ink illustration with a focus on texture and atmosphere, capturing the essence of a medieval fantasy setting.
The image is a highly detailed illustration of a barbarian king, seated on his massive stone throne, exuding raw power and authority. His fierce gaze is filled with dominance and battle-hardened wisdom. His fit, muscular and scarred torso is bare, revealing years of combat and conquest. He wears a heavy iron crown, dented and worn, symbolizing a ruler forged through battle rather than birthright. Draped over his shoulders are thick, luxurious furs, offering both warmth and a regal presence. His left hand rests on the pommel of his enormous sword, its blade planted firmly into the ground before him. The weapon is ancient and battle-worn, with runic engravings along the steel, a symbol of his warrior lineage. His right arm rests on his knee, adding to the sense of strength and power. His lower body is covered in rugged, loose-fitting trousers, allowing for agility in combat, and he wears supple leather boots, perfectly fitted for both battle and long marches.
The throne room is dimly lit by flickering torches, casting long shadows on the stone walls, adorned with primitive banners and battle trophies. The floor is rough stone, worn smooth by countless warriors who have knelt before him.
The atmosphere is intense and regal, yet savage, embodying the might of a warrior-king who rules not through diplomacy, but through sheer strength and unwavering dominance.
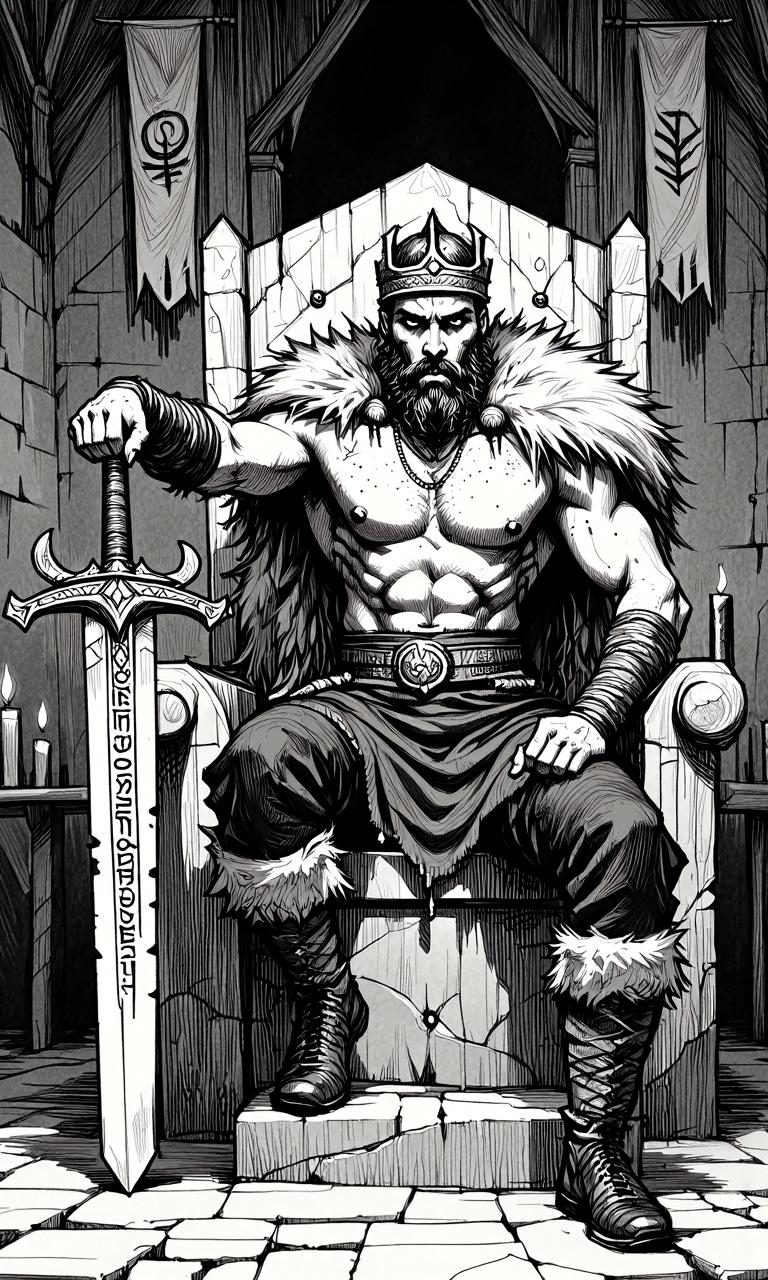
After several tries, I get this result. It is very good : the illustration match the pose of the model, all specified elements are there (the iron crown, the hand on the pommel of the sword, the fur etc.).
The king's imposing presence is well rendered and the style of the image is exactly what I like and exactly what I'm looking for: cartoon-like traits but with great precision in the details and well-respected proportions.
However, there are still some flaws that need some rework: there is the hint of a sixth finger on the king's right hand. The sword hilt is weird and a candle is oddly placed on the armrest of the throne:
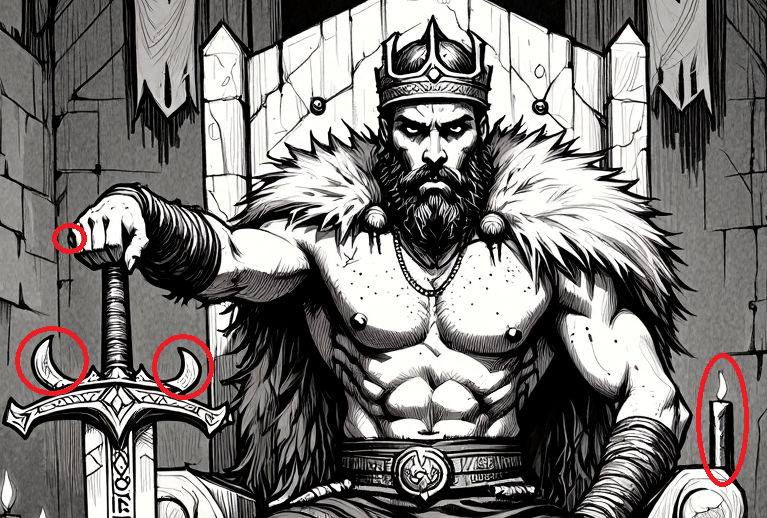
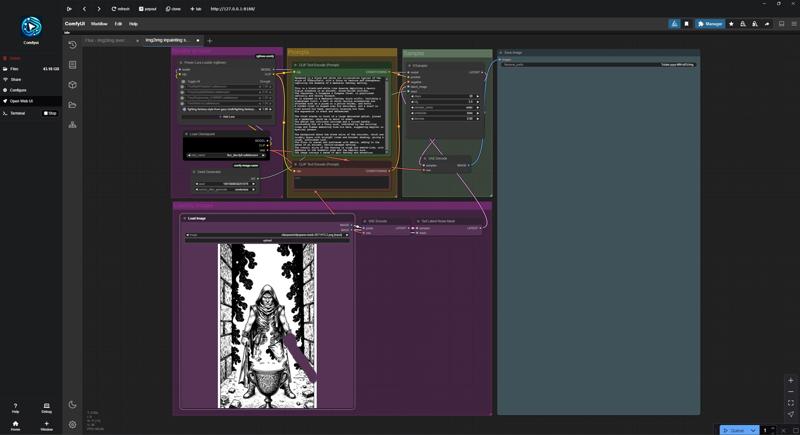
To reworks one or several part(s) of the image, I use inpainting workflows. This is the one I use:
The result is far better now:
This inpainting process can be reiterated as long as the final result need reworks. For instance, I could have changed the strange designs on the banners in the background, but for now, the picture is good enough.
The final step before completeing the work is optional. Depending on the final usage of the image, I may need to upscale it to a larger dimension (more appropriate if I wish to print a poster for instance).
For this, I can use a third upscaler workflow for this task:
Et voilà ! This barbarian king is even more impressive than Conan !
More control ! Draw your own sketches
ControlNet gives you already the best control you may wish over the produced images. However, as an artist, I may need even more control, so that the end result precisely fit with the idea I had in mind when starting the creation process.
This enhanced control come from the starting point of the creation: instead of a random model picture found on Google, I will prefer to start with my own sketch. That way, I am sure that the final picture perfectly match my own idea of the subject to illustrate and the staging of the image.
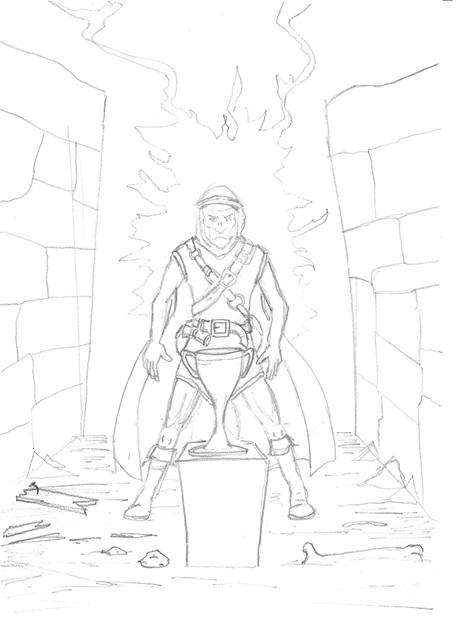
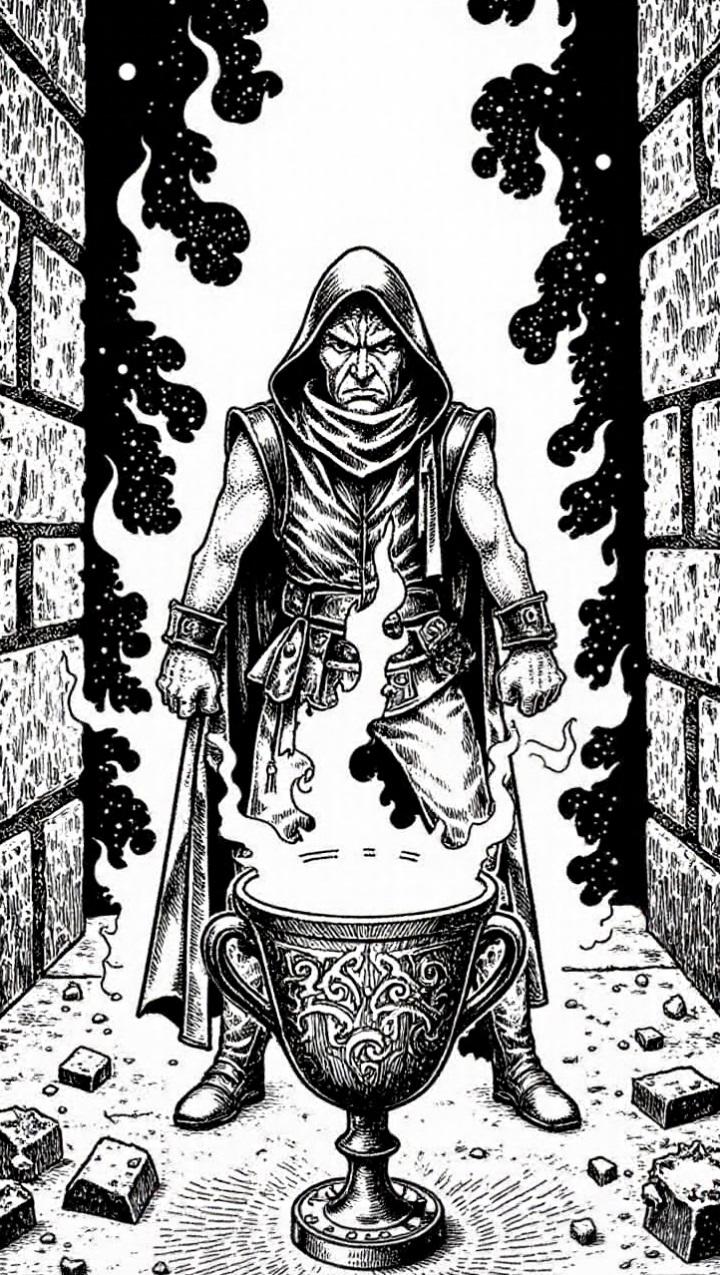
For this second image, the subject will be a tough adventurer exploring a dungeon and finally reaching the treasure : a magic golden chalice! Something like Indiana Jones taking the golden statue at the begining of the Raiders of the Lost Ark !
Here is the sketch I made:
The prompt is : Rendered in a black and white ink illustration with a focus on texture and atmosphere, capturing the essence of a medieval fantasy setting.
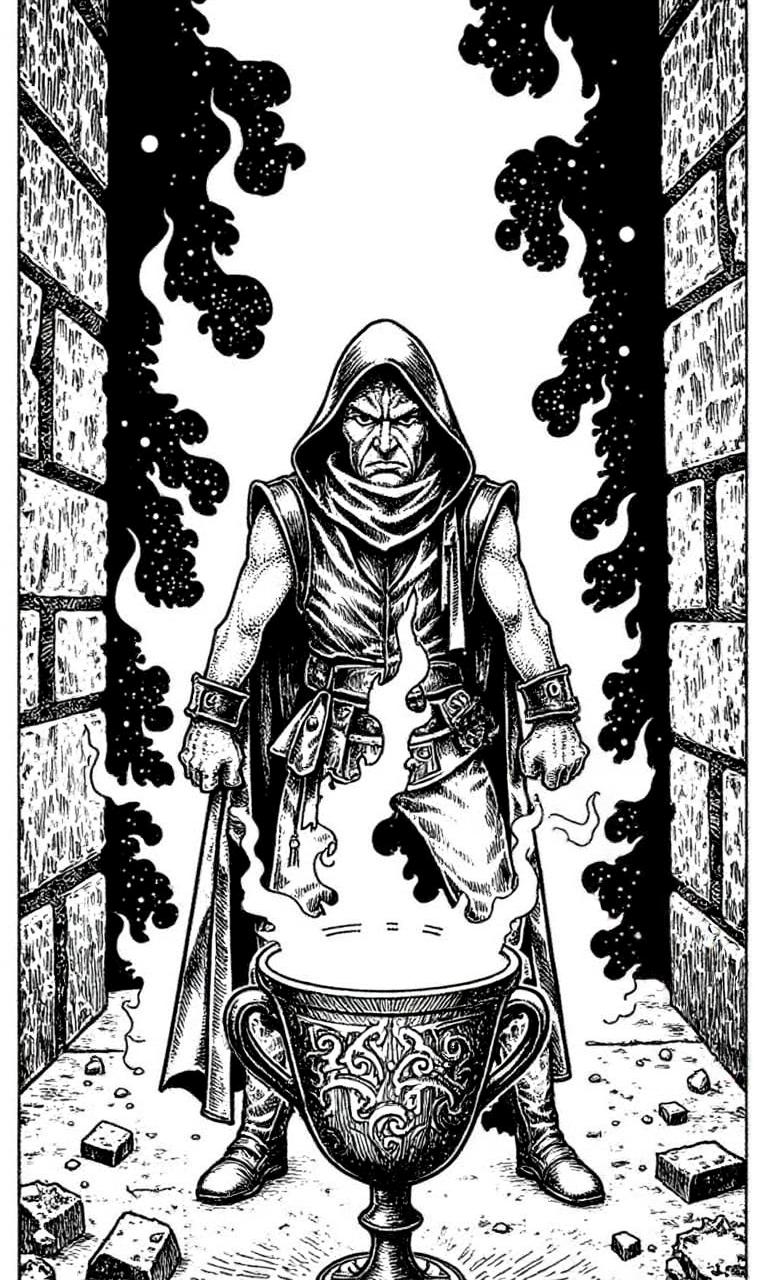
This is a black-and-white line drawing depicting a heroic figure standing in an ancient, stone-walled corridor. The character, a Dungeons & Dragons thief, is positioned centrally and facing forward. He is dressed in a medieval-fantasy style outfit, including a sleeveless tunic, a belt with a sheathed sword, and boots. A hooded cloak is draped over his shoulders, and a scarf is tied around his head, partially covering his face. His expression is stern and determined.
The thief is standing in front of a large, ornate goblet which he is about to steal. The goblet has intricate carvings and a curved handle. Surrounding him is a fiery aura, indicated by the swirling lines and flames emanating from his back, suggesting magical or mystical powers.
The background shows the stone walls of the corridor, which are crudely drawn with straight lines and minimal shading, giving a rough, unfinished look. The floor is uneven and scattered with debris, adding to the sense of an ancient, battle-ravaged setting. The overall style of the drawing is rough and sketch-like, with emphasis on the dramatic pose and the magical aura.
The image conveys a sense of epic fantasy and adventure.
From here, the process will be roughly the same as above. The important difference here is that naturally, I have total control over the final result since I precisely decided the composition and staging of the image myself.
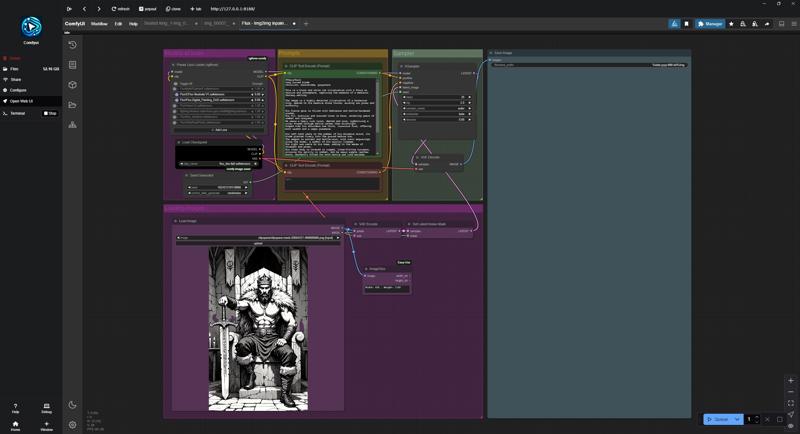
Here is the result I get from the main controlnet workflow. The picture is really good ! It nicely matches my sketch model.
However, things are rarely perfect at the first try, so again, there are a few flaws : the sword is bizarre and for some reasons, the image is cropped at the bottom :
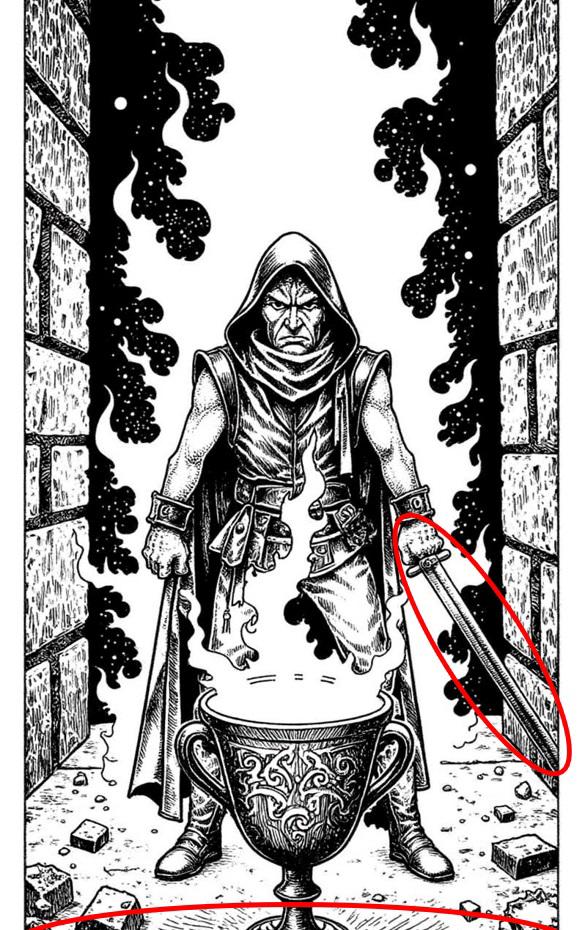
Just as previously, the sword can be corrected through an inpainting workflow:
It may requires a few tries, but in the end, I actually simply had the sword removed. After all, it wasn't even in my original sketch (I removed it also from the prompt):
About the cropped bottom of the picture, this is trickier but there are solutions. For this I use an outpainting process to extend the picture from the bottom:
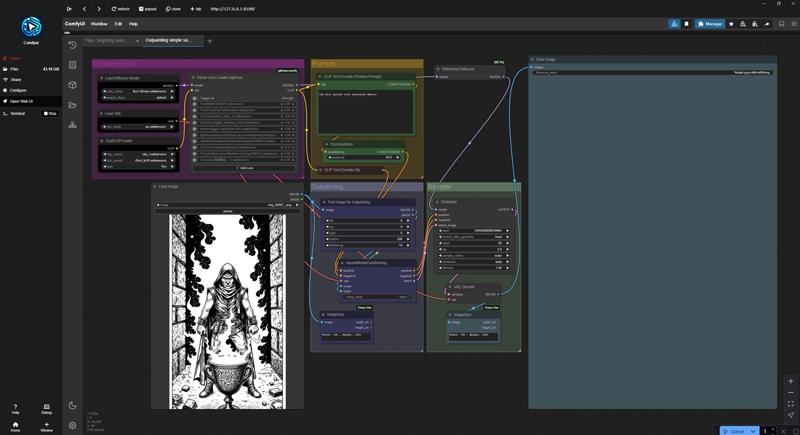
The result is quite good ! We can see that the ground has been partially completed with the magical aura behind the character. This is a bit odd but that is good enough for our purpose, as we don't need that much extension and this part of the picture will be cropped:
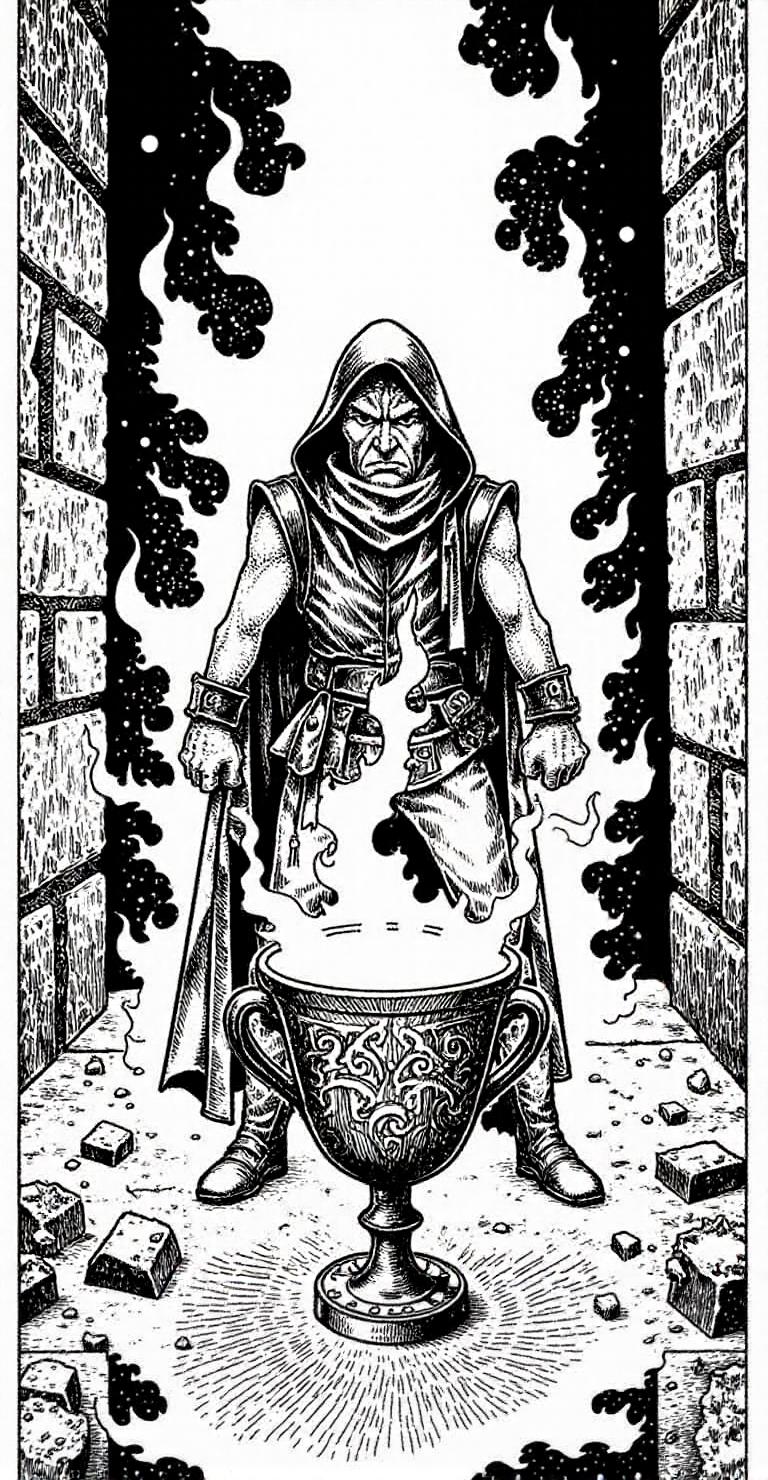
So, to finalize the picture, I now just need to crop it, that will cut the two white borders on the sides and the space ground.
Eventually, I can upscale the picture to higher dimensions if required. Et voilà !
More ways to control the image
The initial model of the image is very important to get the maximum control of the resulting picture. There are many other ways to produce this model, if there is no specific reference picture to be found, or if you completely lack any skills to draw a sketch of your thoughs. It is possible to be creative.
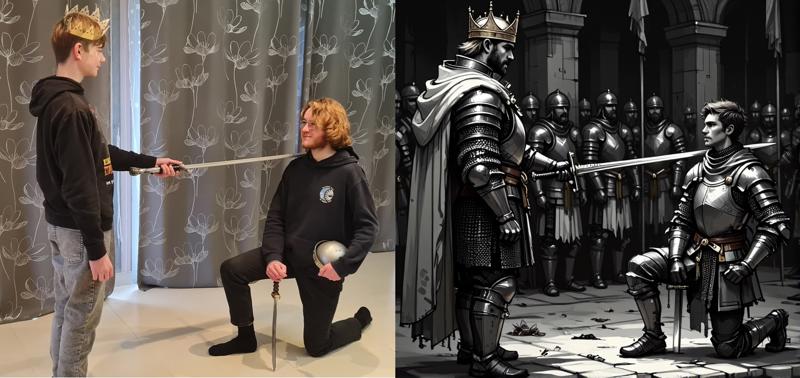
Stage your thoughs with the help of family or friends:
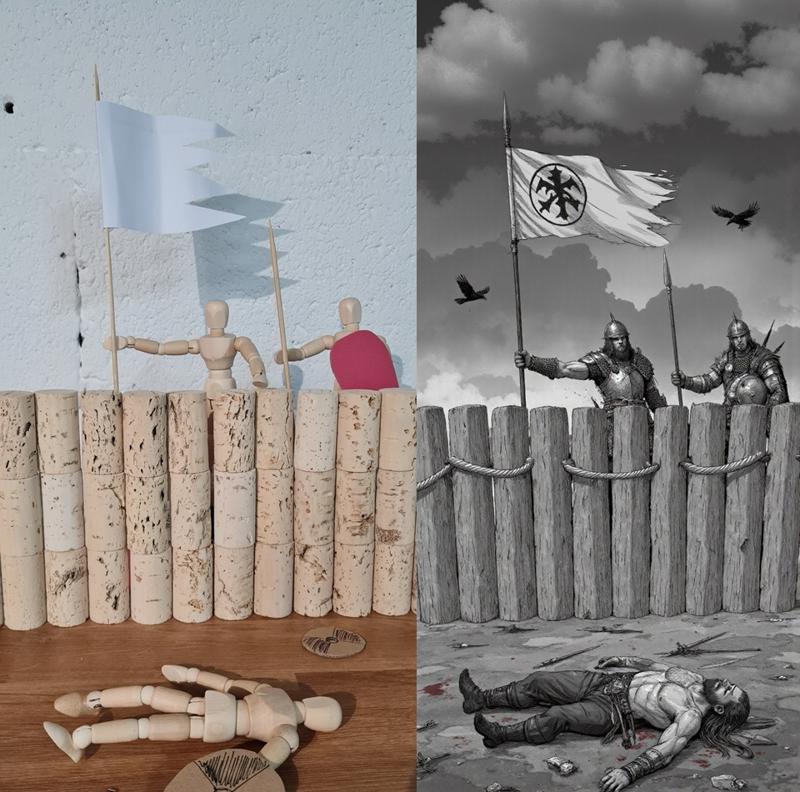
Use one or several articulated mannequin(s), and build a mini scenery:
Take advantage of your impressive collection of Warhammer figures (if you're into fantasy or grim dark future):

Image enhancement : the elven princess
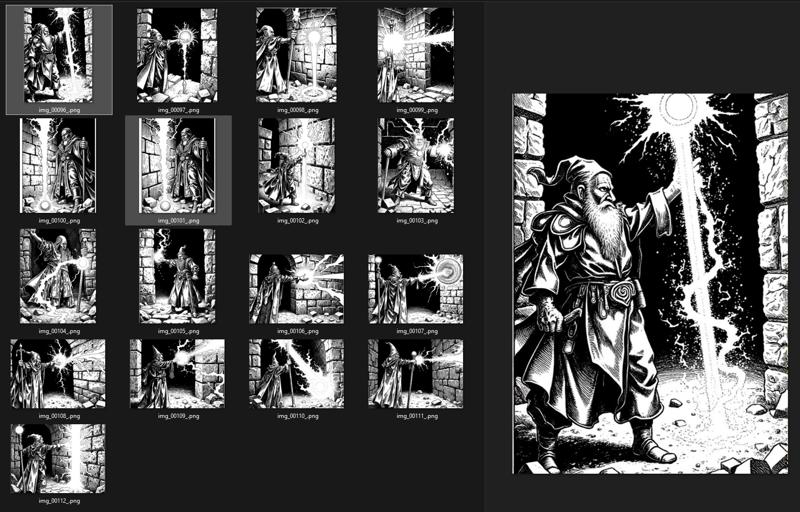
Sometimes, it may be difficult to produce a complex picture in one go. There are always some details are need to be reworked and the more complex the picture is, the more tricky it can be. However, it is possible to build complex images iteratively, one layer after another.
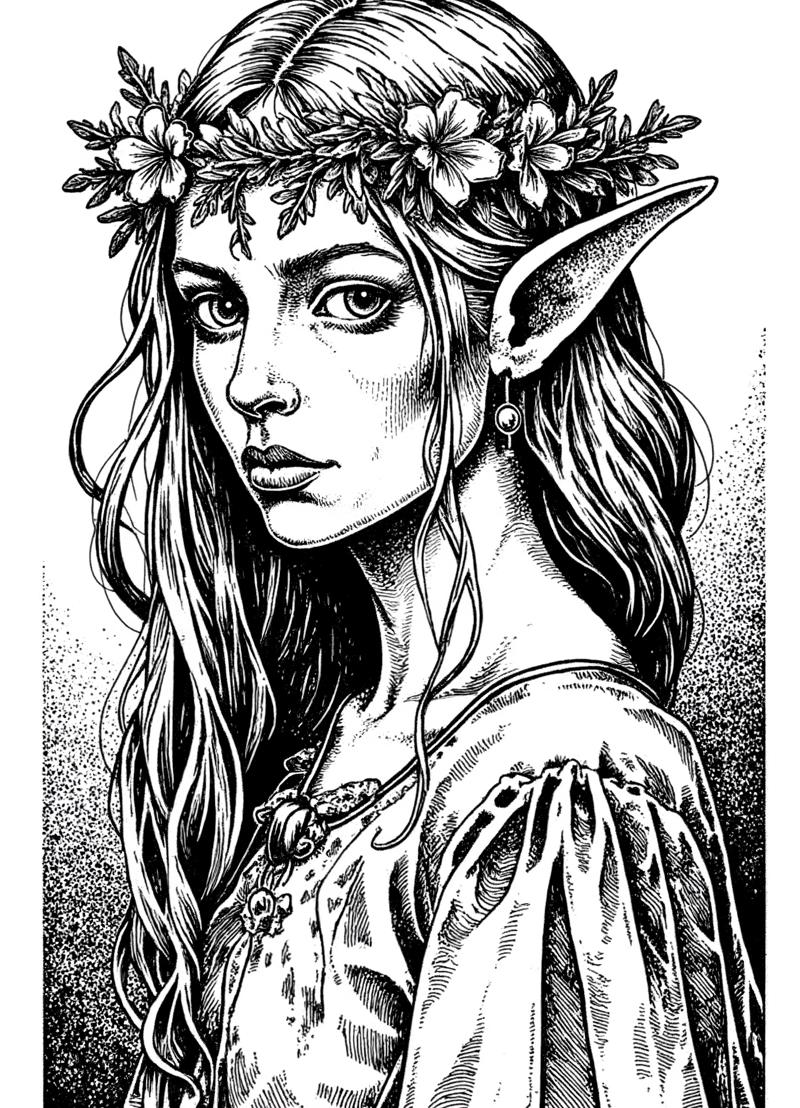
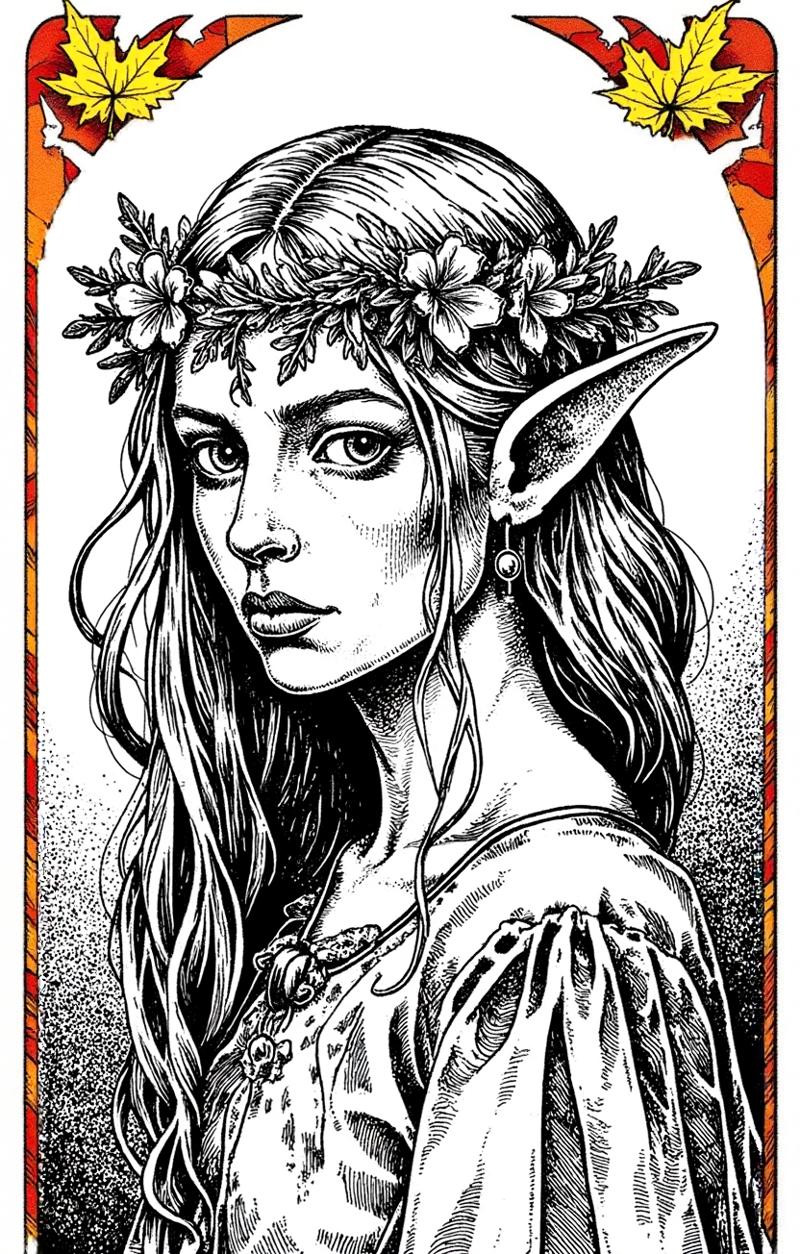
This is the portrait of an elven princess:
The prompt of this picture is: Rendered in a black and white ink illustration with a focus on texture and atmosphere, capturing the essence of a medieval fantasy setting.
A detailed portrait of a mysterious elven princess, her striking, enigmatic gaze filled with wisdom and grace. Her delicate features are ethereal, with high cheekbones, almond-shaped eyes, and pointed ears subtly visible beneath her flowing, silver-blond hair. A crown of fresh wildflowers, intricately woven with soft petals and delicate vines, adorns her head, emphasizing her connection to nature. She wears a simple yet exquisitely embroidered white tunic, the fine needlework shimmering subtly under the soft light. The fabric drapes elegantly over her slender form, with light, flowing textures that suggest a timeless, otherworldly elegance.
The background is mostly blank, minimalist and softly blurred, designed to enhance the subject's presence without distraction.
A gentle glow outlines her silhouette, adding a dreamlike aura to the scene. The lighting is soft and diffused, casting subtle shadows that accentuate the delicate contours of her face and the fine embroidery of her tunic. The color palette is soft and harmonious, with muted pastels and natural tones evoking the serenity of an elven realm.
This photo is almost perfect, although the top of his head is cut off. The minimalist background is nice and helps to emphasize the character. However, the image could still be improved as it lacks a bit of depth.
So, we use the same outpainting workflow as previously to extend the picture above the princess. Then, through the inpainting workflow, we can add a colored frame around the character, to enhance the picture without losing the focus on the main character:
In this very simple example, it could have been difficult of get both the colored frame around the black & white character right from the start. Instead, I was able to focus on getting a good looking princess without bothering about the frame, and afterwards get the proper border once the main character is secured.
Important last thing !
Reading this, it all seems easy and obvious. It is not.
It is not that easy to generate good pictures and very often, it is an iterative process of fine tunning of the generation parameters, try & repeat until something correct is produced.
And it is even more difficult to produce the picture that match the initial idea I had !
It is a lot of work. And in-between, there are many funny or weird results:
I hope you will find this modest article useful. Please feel free to give me some feedback in the comments section below. Correct me if I'm wrong, or help me update this small guide.
And I hope you will keep having as much fun in generating art as I do !