As many of my subscribers and those I've talked to already know, I'm a huge fan of ComfyUI. I not only use it actively but also promote its advantages and help those who decide to switch to this interface. I won’t go into details about installing ComfyUI—there are plenty of great YouTube videos for that. However, for users who are used to generating images directly on the website, I want to point out that ComfyUI can be used for free, even on a low-end PC. All you need is access to Google Colab. If you're interested, I can create a separate guide on how to run ComfyUI in Colab!
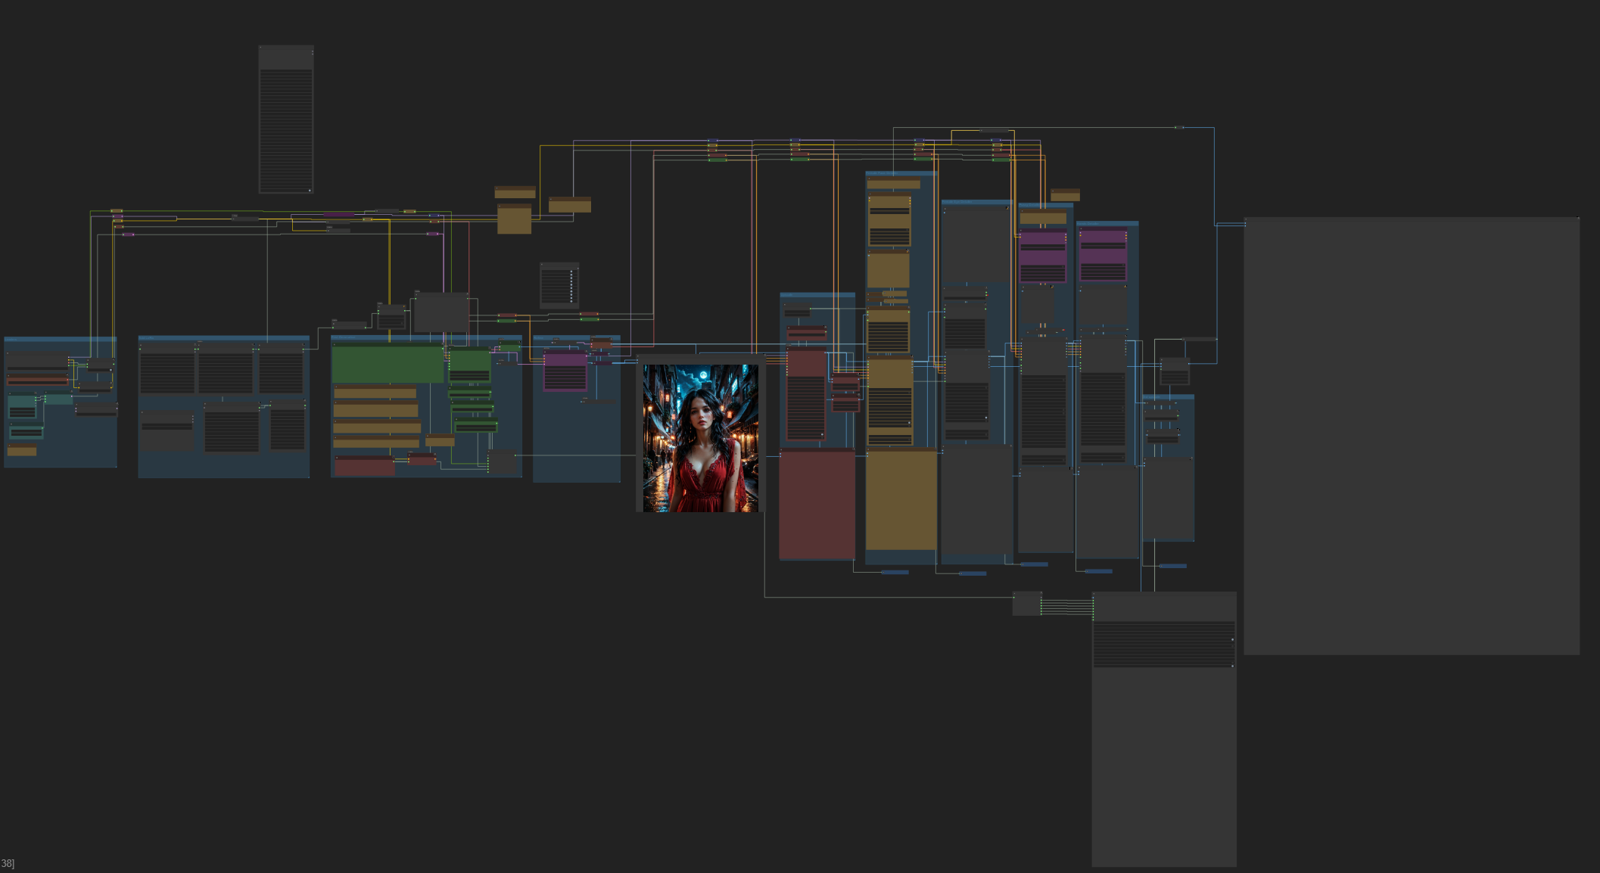
Now, I want to introduce you to my workflow. It took me almost a year to simplify it while maintaining high-quality generations. At first glance, it might seem big and complex, but in reality, it's now twice as compact as it originally was.
My workflow includes:
1️⃣ Main generator – responsible for the base image creation.
2️⃣ Refiner – enhances details and removes small artifacts.
3️⃣ Upscaler – increases resolution without quality loss.
4️⃣ Additional detailing nodes – refining face, eyes, hands, genitals.
5️⃣ Final upscaler – maximizes quality before saving.
6️⃣ The most important node – Image Saver – allows you to save metadata and upload it to Civitai.
We will go through each node block separately. I'll explain the settings so you can understand:
✔ which parameters can be adjusted for better results,
❌ and which ones are best left untouched to avoid breaking anything.
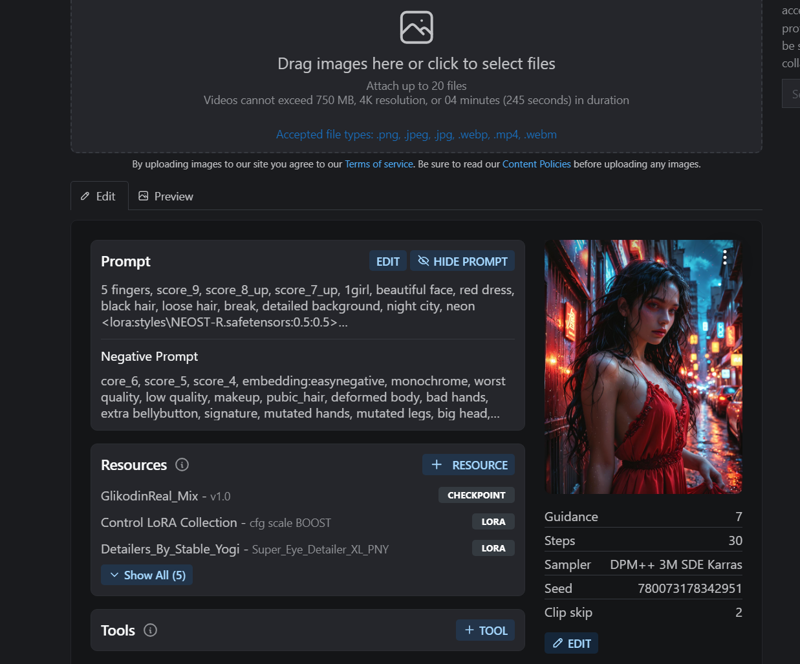
So, let's start from the very beginning. The screenshot below shows the first group of nodes, which allows us to select a model using Checkpoint Loader with Name (Image Saver). Of course, I want to promote my own model, but any SD 1.5, SDXL, or Pony model (except Flux) will work here.
Here you can also find settings for VAE, canvas size, Clip Skip, and other parameters. This group is quite intuitive, so we won't go into details.
my model link https://civitai.com/models/1226944/glikodinrealmix
One important node to mention is ModelMergeSimple. This node allows you to use two checkpoint models simultaneously. It does slow down the generation process significantly, but my 3070 GPU with 8GB of memory handles this task just fine.

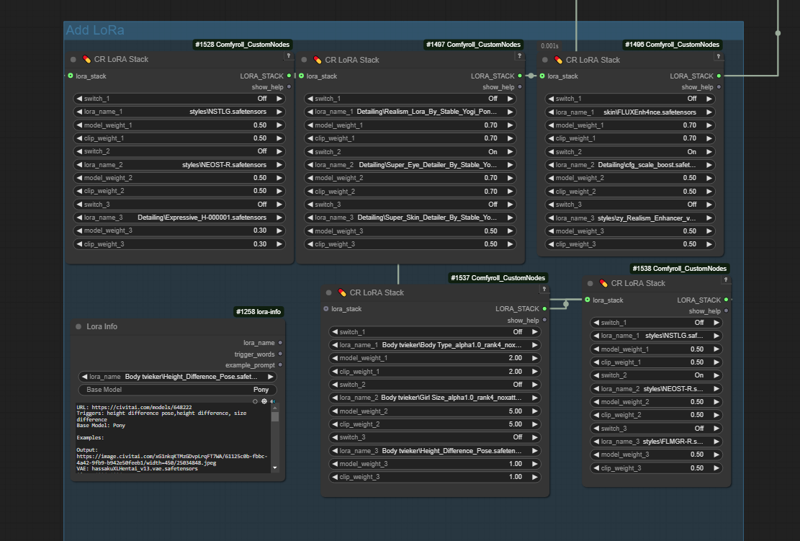
The next group is Add Lora. I used 💊 CR LoRA Stack nodes. Some might say they're not the most convenient, but I use them because they are the only ones that allow proper metadata saving for Civitai.
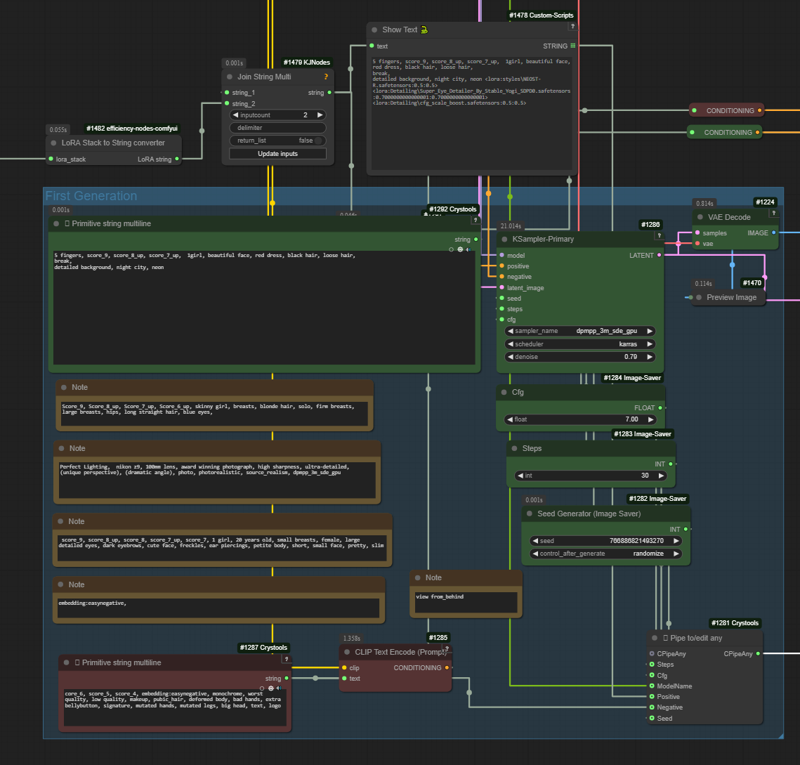
These nodes represent the most important step: first generation. This group contains nodes for entering the prompt and generation settings for the image. The screenshot also shows my "notes on the side" — if they bother you, feel free to delete them.
I won’t go into details about generation settings, as they are unique to each model. When downloading a new checkpoint, be sure to read the documentation and pay attention to parameters like sampler, step count, CFG Scale, and denoise.
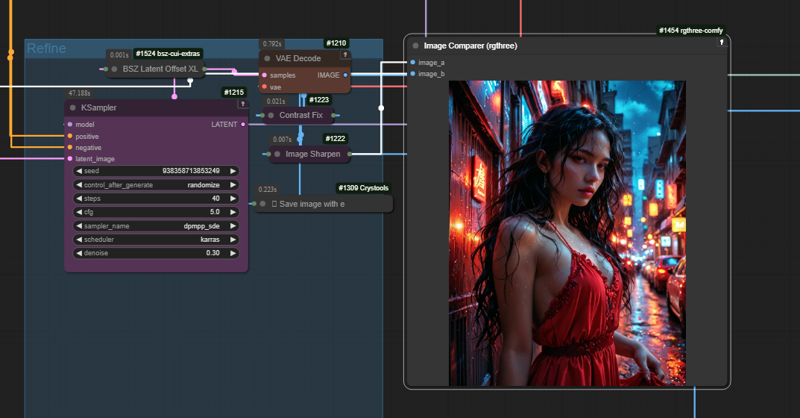
The next step is Refiner. This is a rather controversial set of nodes, but I decided to keep it in my workflow. However, it’s worth noting that it’s always in bypass mode for me. Still, I’ll explain its settings as it will help understand the general concept of image generation.
The Refiner is used to improve the first generated image, adding details, fixing hand mutations, and other small errors. The main setting here is denoise. The value of this parameter will determine how much the image changes after refinement. The other settings (step count, CFG Scale) can be adjusted as you see fit.
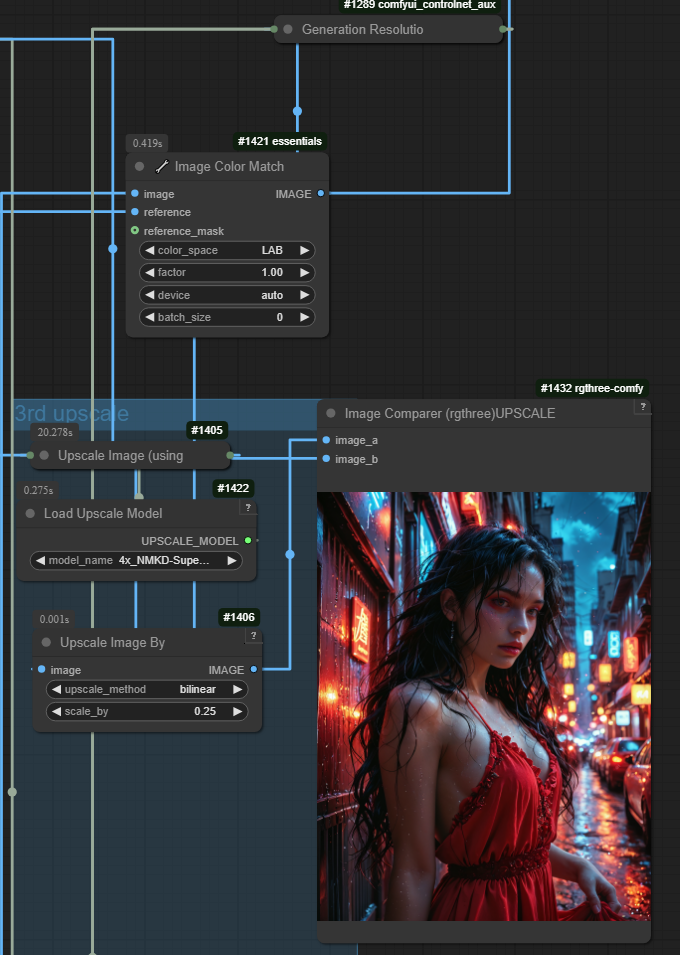
The next step is the upscaler. The main setting you should focus on is Load Upscale Model. My recommendation is to use the Ramachi model. Another important parameter is upscale_by — set the value between 1 and infinity (optimally between 1.5 and 2).

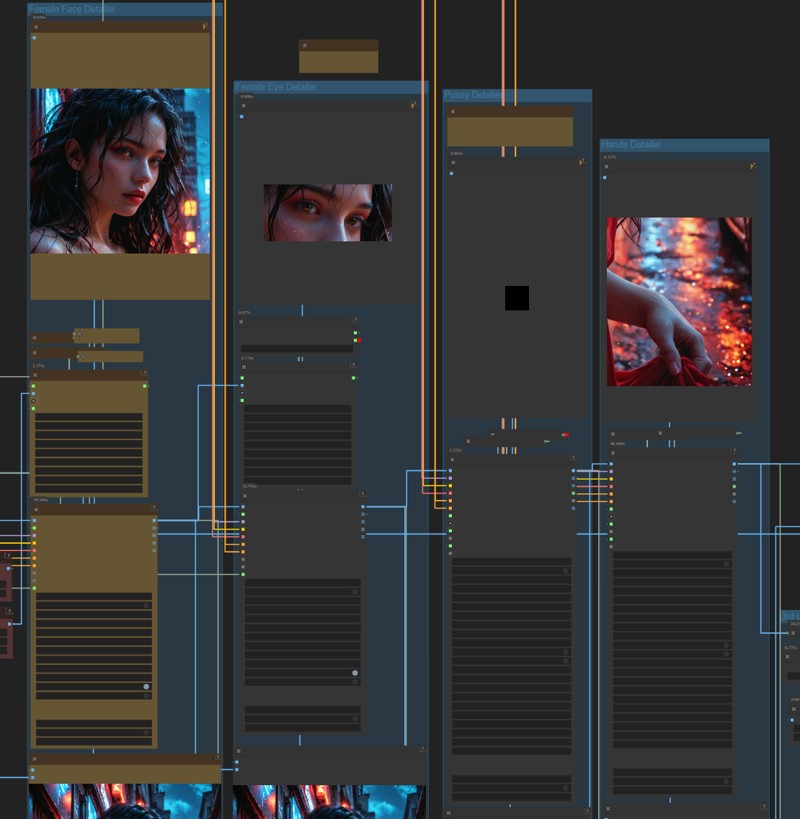
The most interesting step, which will make your generations truly deserving of being called masterpieces, is the complex of nodes: face, eyes, genitals, hands. You can also experiment with the steps and CFG Scale parameters, but the key parameter will be denoise. It’s the value of this setting that will determine how much the area within the mask will be "corrected."
I’ve added one more simplified upscaler. Its goal is not to increase the image size, but to remove blur and make the image sharper.
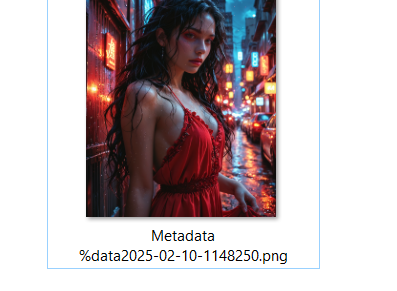
The final step in my workflow is the Image Saver node set. Specify the file name and path for saving. After that, simply drag the images, and the metadata will automatically be uploaded to Civitai.

If you have any suggestions to improve my guide, I’d be happy to hear them! If you have any questions about setup and installation, feel free to ask — I’ll be happy to help. And please, upload your creations to Civitai 🙏. It’s really important to me to improve my model and refine my workflow.