for English version: https://civitai.com/articles/11762/run-hunyuan-video-with-rtx-4090-for-comfyui-on-runpodio-cloud-gpu
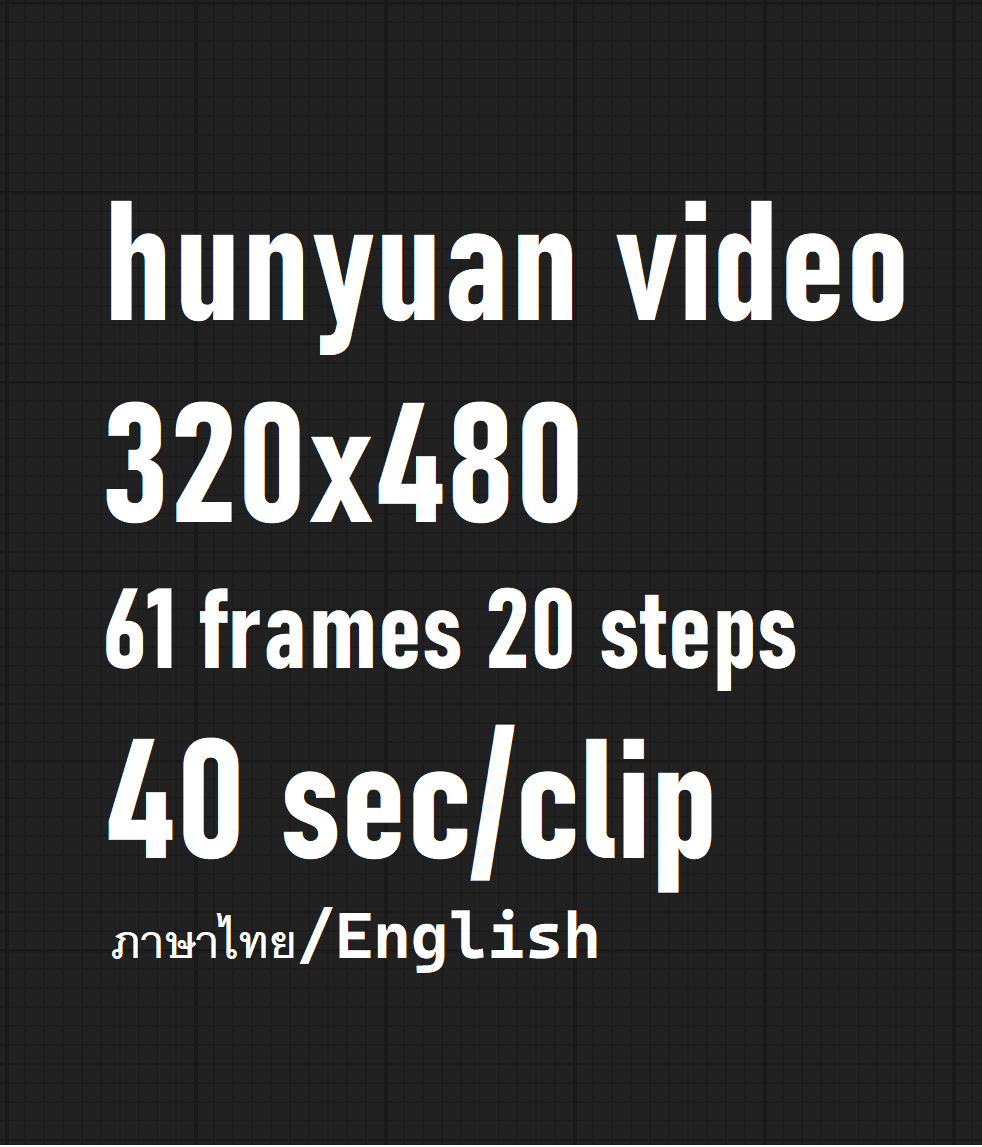
480x320, 61 frames, 20 steps, <40s per clip
ผมจะมาแนะนำเทคนิคการประหยัดขั้นสุดในการเจน video ของ hunyuan ครับ
ในบทความนี้ ผมใช้ runpod.io ในการรัน comfy ui เนื่องจากเป็น GPU Cloud ที่ราคาถูกและยังมีให้ใช้งานตลอดด้วย
Tip #1
เลือกใช้ community cloud เพราะราคาถูกลง 50%
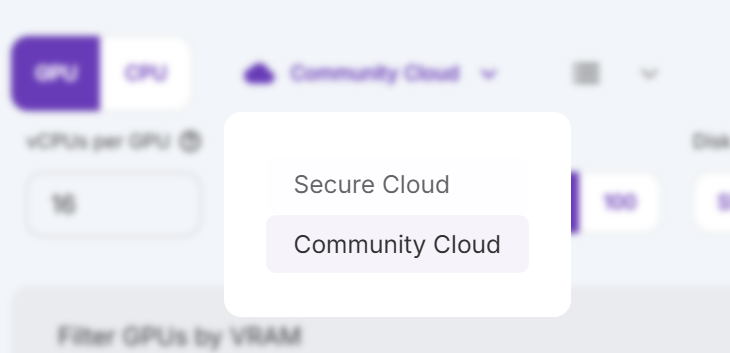
ข้อดี
ราคาถูกลง 50%
ข้อเสีย
ไม่สามารถใช้ร่วมกับ storage ของ runpod ได้ เลยจะต้อง setup comfy และ download model ใหม่ทุกครั้ง แต่ก็ใช้เวลาไม่นาน ประมาณ 15 นาที ถ้าเราใช้ หลายๆ ชั่วโมงก็ถือว่าคุ้มแล้วกับ 15 นาทีที่เสียไป
Tip #2
เลือกใช้ RTX 4090 เพราะเร็วสุดสำหรับ hunyuan video และราคาถูกมาก ผมลองใช้ GPU อื่นๆ เทียบกัน แม้ว่า vram จะเยอะกว่า 4090 แต่ใช้เวลานานว่า 4 เท่าเลย
Tip #3
เลือก spec แรงเท่าไหร่ก็ได้ เพราะเค้าคิดแค่ราคา GPU เช่น
RTX4090/6 vCPU/36GB ram/300Mb network
RTX4090/32 vCPU/128GB ram /1000Mb network
สเปคสองเครื่องนี้ราคาเท่ากัน

Tip #4
จากข้อ 3 ถ้าเราเลือก spec สูงๆ เครื่องมักจะไม่ว่าง ให้เรารอ ไม่เกิน 30 นาที ก็มีคนปล่อย
แต่ถ้าเรารอไม่ไหว ให้เราค่อยๆ ลด spec ลงที่ละนิด
Tip #5
ระหว่างรอ #4 ให้เรา config pod ไปพลางๆ โดยเลือก GPU อะไรก็ได้ แล้วก็ลงไป config ด้านล่าง
เลือก pythorch 2.2.0 template
disk 20 สำหรับระบบปฏิบัติการ
volume 80 สำหรับ model, lora, output file
port 8888, 8188
encrypt volume


Tip #6
รัน script ที่เตรีมไว้ เพื่อ install comfy ui, package manager และ download models
copy script นี้ไป save ใน text editor ได้เลย พวก notepad หรือ vscode ตั้งชื่อ runpod-comfy.sh
#!/bin/sh
apt update && apt install libgl1-mesa-glx aria2 -y && echo "Cloning ComfyUI, ComfyUI-Manager..."
cd /workspace

git clone https://github.com/comfyanonymous/ComfyUI.git comfy
cd comfy
python -m venv env
. env/bin/activate
pip install --upgrade pip

git clone https://github.com/ltdrdata/ComfyUI-Manager.git custom_nodes/ComfyUI-Manager
git clone https://github.com/kijai/ComfyUI-HunyuanVideoWrapper.git custom_nodes/ComfyUI-HunyuanVideoWrapper
git clone https://github.com/rgthree/rgthree-comfy.git custom_nodes/rgthree-comfy
git clone https://github.com/WASasquatch/was-node-suite-comfyui.git custom_nodes/was-node-suite-comfyui
git clone https://github.com/kijai/ComfyUI-KJNodes.git custom_nodes/ComfyUI-KJNodes
git clone https://github.com/Kosinkadink/ComfyUI-VideoHelperSuite.git custom_nodes/ComfyUI-VideoHelperSuite
git clone https://github.com/Fannovel16/ComfyUI-Frame-Interpolation.git custom_nodes/ComfyUI-Frame-Interpolation
git clone https://github.com/adieyal/comfyui-dynamicprompts.git custom_nodes/comfyui-dynamicprompts
git clone https://github.com/pythongosssss/ComfyUI-Custom-Scripts.git custom_nodes/ComfyUI-Custom-Scripts
git clone https://github.com/cubiq/ComfyUI_essentials.git custom_nodes/ComfyUI_essentials

echo "Installing requirements..."
pip install -r requirements.txt
pip install opencv_python==4.11.0
pip install sageattention

pip uninstall torch torchvision torchaudio -y
pip install torch torchvision torchaudio --index-url https://download.pytorch.org/whl/cu124
pip install -r ./custom_nodes/ComfyUI-Manager/requirements.txt
pip install -r ./custom_nodes/ComfyUI-HunyuanVideoWrapper/requirements.txt
pip install -r ./custom_nodes/rgthree-comfy/requirements.txt
pip install -r ./custom_nodes/was-node-suite-comfyui/requirements.txt
pip install -r ./custom_nodes/ComfyUI-KJNodes/requirements.txt
pip install -r ./custom_nodes/ComfyUI-VideoHelperSuite/requirements.txt
pip install -r ./custom_nodes/ComfyUI-Frame-Interpolation/requirements.txt
pip install -r ./custom_nodes/comfyui-dynamicprompts/requirements.txt
pip install -r ./custom_nodes/ComfyUI-Custom-Scripts/requirements.txt
pip install -r ./custom_nodes/ComfyUI_essentials/requirements.txt

export GRADIO_SERVER_NAME="0.0.0.0" &&

python main.py --listen &

aria2c -x 4 -o ./models/diffusion_models/hunyuan_video_720_cfgdistill_bf16.safetensors "https://huggingface.co/Kijai/HunyuanVideo_comfy/resolve/main/hunyuan_video_720_cfgdistill_bf16.safetensors?download=true"
aria2c -x 4 -o ./models/vae/hunyuan_video_vae_bf16.safetensors "https://huggingface.co/Kijai/HunyuanVideo_comfy/resolve/main/hunyuan_video_vae_bf16.safetensors?download=true"
จากนั้น พอเราเปิด jupyter แล้ว ให้เลือก terminal แล้วลาก script จาก windows ไปได้เลย
แล้วก็ทำการ run script โดยใช้คำสั่ง
chmod +x runpod-comfy.sh
sed -i 's/\r$//' runpod-comfy.sh
sh runpod-comfy.sh
note: บรรทัดที่ 2 คือถ้าใครใช้ windows มันจะมีอัขระเพี้ยนๆ มันจะรันบน ubuntu ไม่ได้ เราต้องคลีนออกก่อน


รอสักพักจนเสร็จ ประมาณ 15 นาที เราก็จะสามารถเข้า comfy ui ได้ผ่านทาง 8188

Tip #8
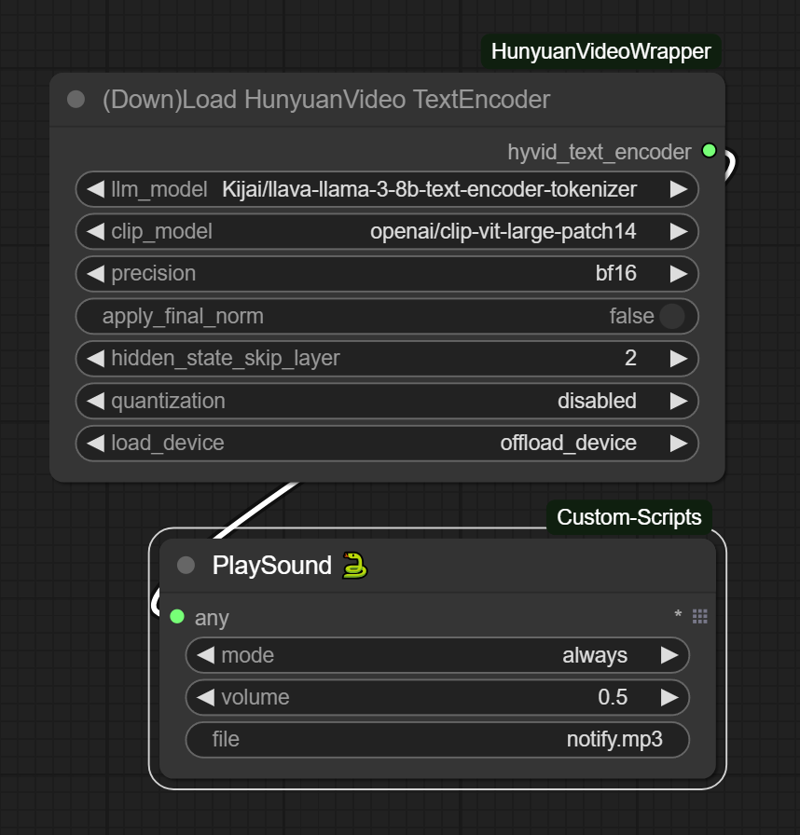
ใน script จะทำการ start comfy ui :8188 ก่อน แล้วค่อย download model เราสามารถที่จะเข้า comfy ui ได้แล้ว ระหว่างที่ยังโหลด model ไม่เสร็จ
เมื่อเข้าแล้วไปรัน node text encoder ก่อนได้ เพราะ node นี้จะ auto download model ของ text encoder อีกประมาณ 3-5 นาที
และเมื่อทุกอย่างพร้อมแล้ว ให้ refresh สักรอบ ก็สามารถใช้งานได้เลย
อันนี้เป็น workflow ที่ผมใช้งานอยู่ download workflow
Tip #9
ใช้ค่านี้ จะทำให้ gen video เร็วขึ้น และโหลด model เร็วขึ้นเช่นกัน
fp8_e4m3fn_fast
sageattn_varlen

ใครที่สนใจใช้งาน runpod.io สามารถคลิ๊กไปลองเล่นได้เลย เค้าให้ทดลองใช้ฟรี 5$ หรือใช้ RTX4090 ได้ราวๆ 12ชม. (คลิ๊กที่ลิ้งนี้นะครับ เป็น referral link ของผม)