Beginner's Guide - How To Create A Character Lora
Creating a Character Lora can be a fun and rewarding process, but it requires careful attention to detail to ensure that your character comes to life as you envision it. In this guide, we'll walk you through the necessary steps, from generating the perfect images to tagging them for optimal performance. Whether you're a beginner or have some experience, this step-by-step process will help you make your own Character Lora easily. The intent of this guide is to make this process as easy to understand as possible and easy to follow by anyone.
1. Generating Images
The first step is to generate clear and high-quality images of your character. Here’s how to do it:
- Outfit & Proportions: Ensure your character is wearing their most recognizable outfit. Focus on unique accessories and correct proportions to capture their essence.
- Multiple Angles: Generate images from various angles — front, side, back, and even a close-up on the face to help with facial features. The more angles you capture, the better the Lora will understand your character’s design.
- Background: Keep the background simple. Choose solid colors like blue, white, or black. Avoid complex backgrounds (e.g., a bookstore with shelves), as it can distract from your character.
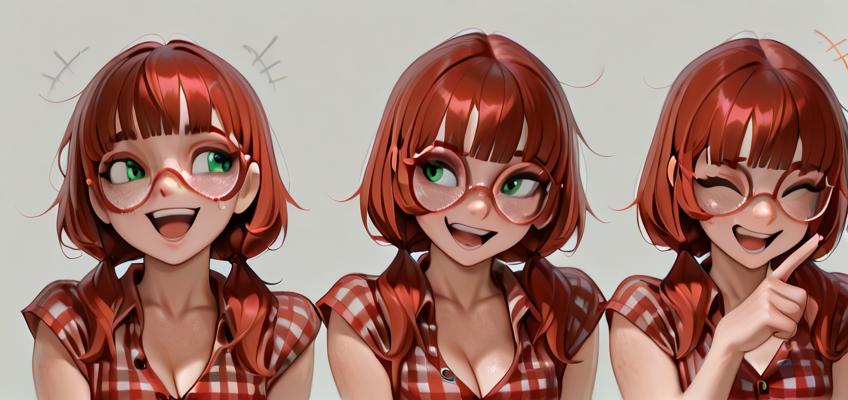
Tip: You can crop out extra versions of the character from generated images if necessary (if two versions appear in one image, for example).
The size of the images does not entirely matter so long as it has the needed information in there, and making sure they are high definition photos to better capture details. Having your subject in multiple positions and poses helps as well so the training process can work with their movements. I personally put "standing" into the generation for each of these images as it gives a decent amount of variance and shows the entire body.
Something to keep in mind while creating images (if you generate them). You do not have to worry about how an image looks if it isn't the "style" you want for the character. The style will not be baked in, so it is more important that the checkpoint properly displays the proportions, colors, etc that you want. If clothes do not sit right on a character, but the style is right, and another checkpoint gives you the proper clothes fit then consider building a data set on that checkpoint. You can always use the trained Lora to get the "style" you want after it has trained the proper proportions and fit of the character.
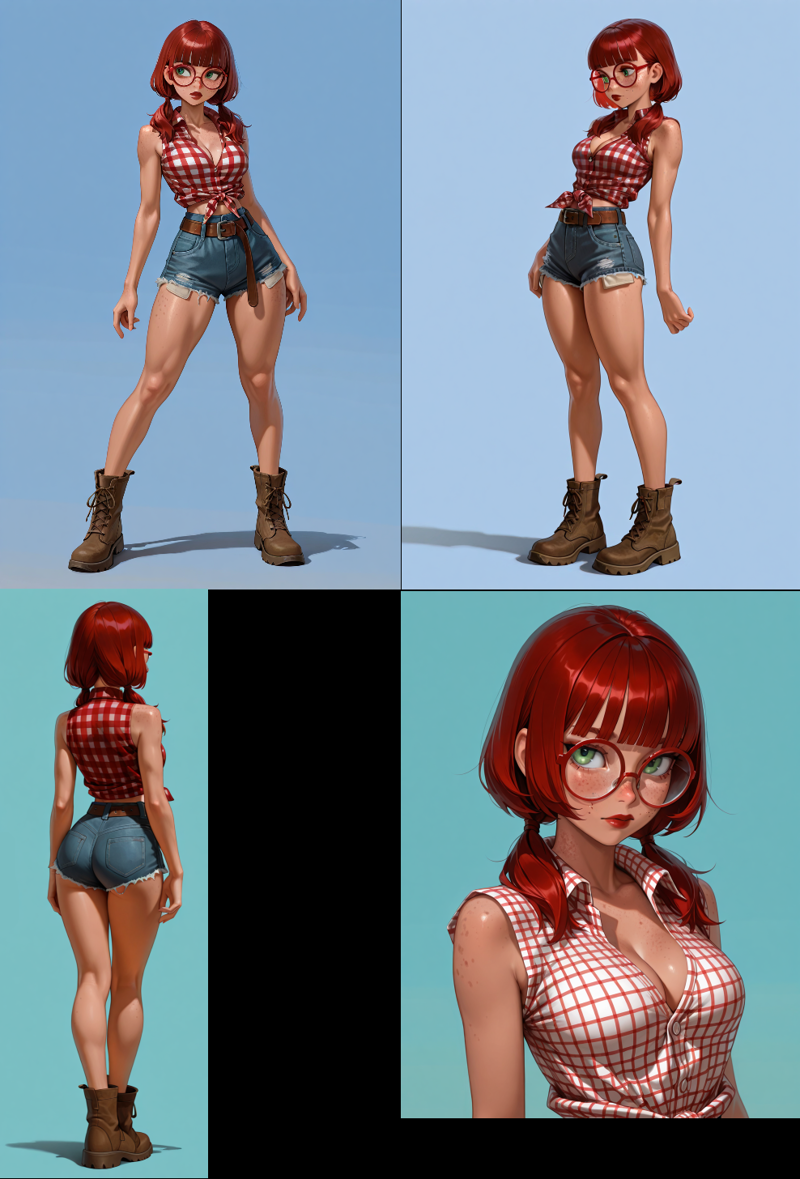 These four images show an example of what you would ideally have for your character Lora. This shows a full body view from the front, side, and back, and a close up on the face/upper body. Though in this example, we would not want this upper body shot as it has the wrong shirt colors.
You can see here that Ophelia has red hair with a unique hair style, slightly muscular legs, a trim build, and medium breasts. These are many of her "Innate" features which will be discussed in the portion of tagging. Ideally you have many images to help the learning process. I tend to have about 20+ from the front, 20+ from the side, 10+ from the back, and about 10 for the close ups. If you have multiple outfits, you will want to repeat this process for each one.
2. Organizing and Cleaning Up Images
Once you have your images, it’s time to organize and clean them up.
- Remove Unwanted Details: Clean up any extraneous elements in the images, such as artist tags or additional parts you don’t want. This will make sure the Lora’s focus remains on the character and their key traits.
- Uniformity: Ensure that the size, shape, and colors of your character are consistent across all images before moving on to the tagging process.
This is a process that can easily be done in a program such as paint. This allows you to crop the image to ensure any additional figures are out of the image, artist tags are removed (with a simple background I can just paint right over them), and other similar details. The image's dimensions do not matter, especially with a simple background, so long as the needed details are shown.
3. Tagging Your Images with TagGui
Note: This can be done on the site with the built in tagger, but I recommend TagGui instead because it gives more control and is generally easier to work with.
Tagging is one of the most crucial parts of creating a Lora. It’s essential to get the right balance between details and flexibility, which will influence how the Lora generates the character in future prompts.
Recommended Tool: TagGui
TagGui offers more control and flexibility than the built-in tagging tools, allowing you to easily manage the tags for each image. [Here’s the link to TagGui](https://github.com/jhc13/taggui/releases).
TagGui:
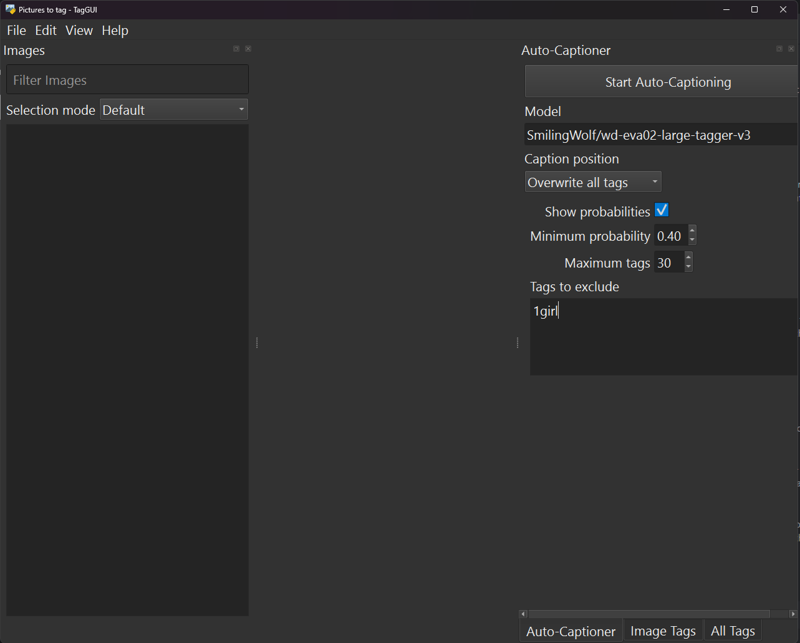
Shown here is the UI for TagGui with the recommended model for tagging. This can be easily downloaded and placed in here. Once you have this set up, direct it to the folder with your images and have them load up.
The blacklisting is generally important as you can list your "innate" tags there, but it's ideal that you leave it blank or just put in 1girl/1boy as I did as you don't want that to be a taggable item. Something you want to show up in the tags of the images I have shown is things like "Simple Background", "Solo", and the like. These are important as you will see when I explain more about tagging below.
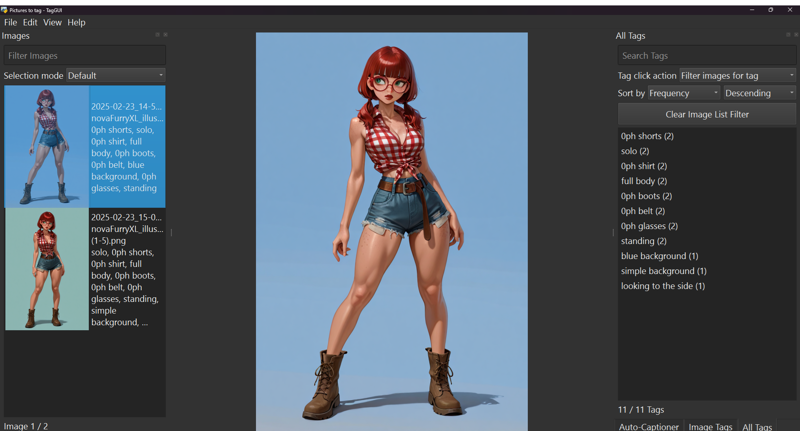
This shows the interface after autotagging all the images (only two in this example). Under the "All tags" tab you will see a counting of what tags are shown and how many times. The auto tagging process with not (by default) double tag an item. It may however tag something such as "red shirt, shirt, t shirt, short sleeved shirt" in one image. This is each individual item it has seen and that will be your job to combine.
!!!IMPORTANT NOTE:!!!
Do NOT add a trigger word during this process. That is added later and can mix up the tags and the learning process.
Three Types of Tags:
A. Innate Tags (Default Features):
These tags define your character’s essential attributes — things like "1boy," "1girl," hair color, eye color, body size, etc. These tags will be baked into the Lora and should be used cautiously. The intent of these tags is that when you use the trigger word (in this case it was 0phelia) it will generate a girl with her body structure, hair color, hair style (if you desire), and other similar features you want to be "default".
A note to remember: If your character has medium breasts, and the tagger shows both medium and large breasts, remove the medium breast tag (making it innate), leaving only large breasts (visual tag). This ensures the Lora remains flexible and adaptable.
B. Remembered Tags (Clothing & Accessories):
These tags are the specifics of your character’s clothing and accessories. With the posted example of Ophelia her shirt is a white shirt, collared shirt, sleeveless shirt, red-striped shirt, and it has cleavage. Each of these tags will show up on (hopefully) each image she is wearing it. This allows me to remove each instance of those and put in a single tag for it. With this, you want to have a unique identifier (0ph) as well as a known term (shirt). Therefore, on each image she would have the above tags removed and have "0ph shirt" put on each.
This allows the lora to have a simple unique adjective (0ph) and a known tag (shirt) to trigger it.
C. Visual Tags (What You See):
These tags are for what’s visible but doesn’t fall under the first two categories. For instance, the background color, camera angles, or even things like lighting or shadows can be included here. If one image has an issue (e.g., a blue shirt instead of the intended green), you can either delete the image or tag it appropriately. If you have a single character in the image this is also where you would "categorize" tags such as "solo, full body, arms at sides" and the like. These tags are things you see, but aren't "important". You don't want these baked in.
Note: These are generally auto populated by the tagging system and will rarely need to be updated or changed.
To summarize tags:
Innate: Seen by the tagging system, but then removed so they can be baked into the trigger word
Remembered: Seen by the tagging system, but combined and "simplified" for easier prompting
Visual: Seen by the tagging system (or you), and left prompted so they are not baked in
4. Tagging Process
Now that you understand the three types of tags, here’s how to proceed:
- Tag each image using the TagGui autotagger (or have them tagged by the on site tagger)
- Use the "All Tags" tab to help you work out what the program has seen. This allows you to properly group your tags into the three categories above as stated.
- Next make sure the total count per image doesn’t exceed 75 tokens. This means that if the image has more than 75 tokens after you have adjusted your tags then you determine what is best to remove from an individual image. This is done on the "Image Tags" tab.
- Scroll through each individual image as you ensure they are not over 75 tokens and check them one final time to ensure nothing is too far off. That would include finding an image as shown above with the wrong colored shirt and deleting it. If you remove it from TagGui, it will delete the image and it's matching .txt file if there is one.
5. Preparing Files
Finally, zip all images and text files together for upload. This will ensure everything is neatly packaged and ready for the next step.
6. Uploading to Civitai
Once everything is tagged and ready, go ahead and upload your zip file to Civitai.com. Follow the platform's instructions for uploading a Lora model, and you’ll be good to go
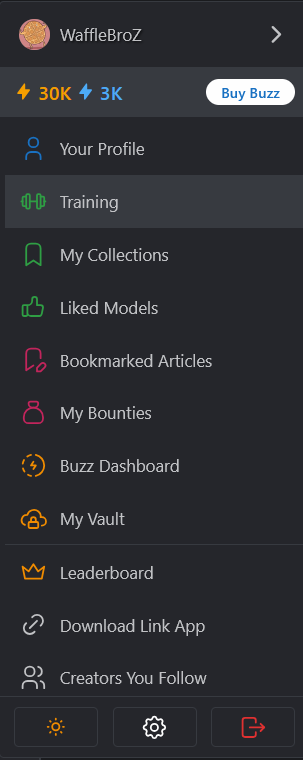
 To begin the training process, go to this spot on your drop down menu.
This will bring up the following page:
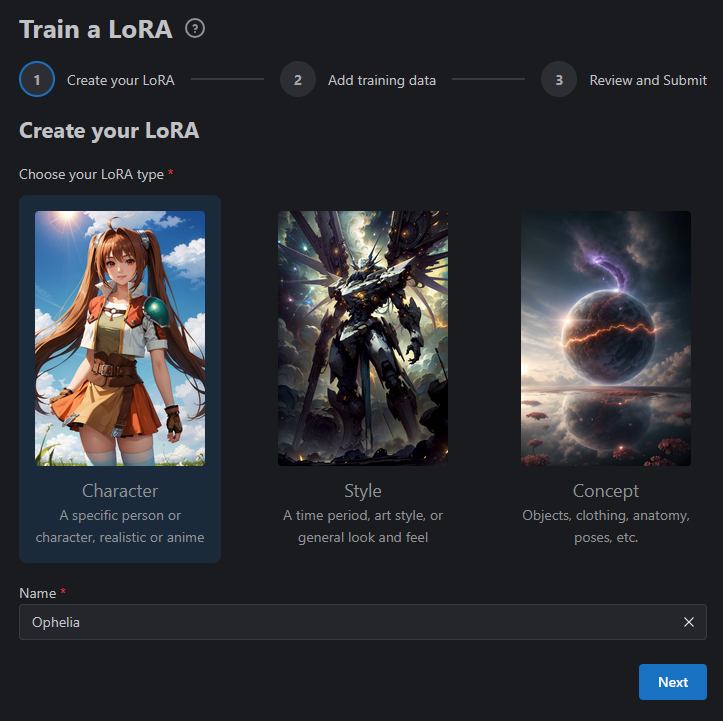 We have decided to do a character so we selected it here, we have named it, and then hit Next.
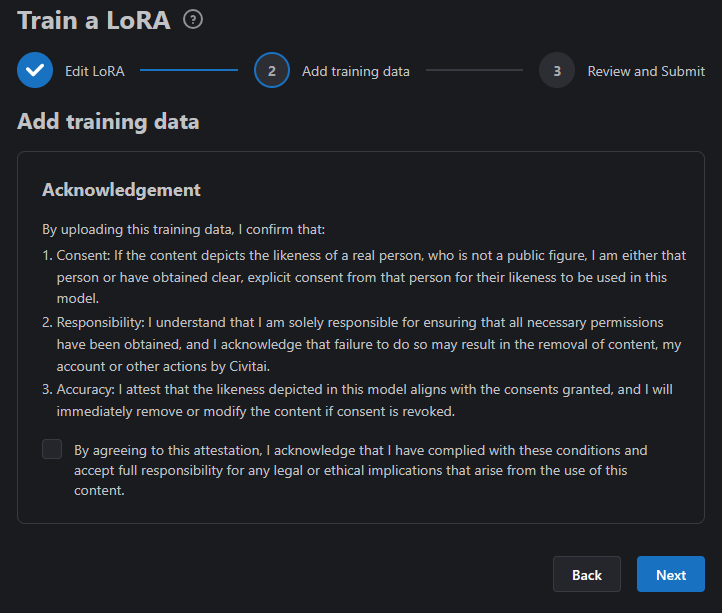 Review this information and if you agree check the box.
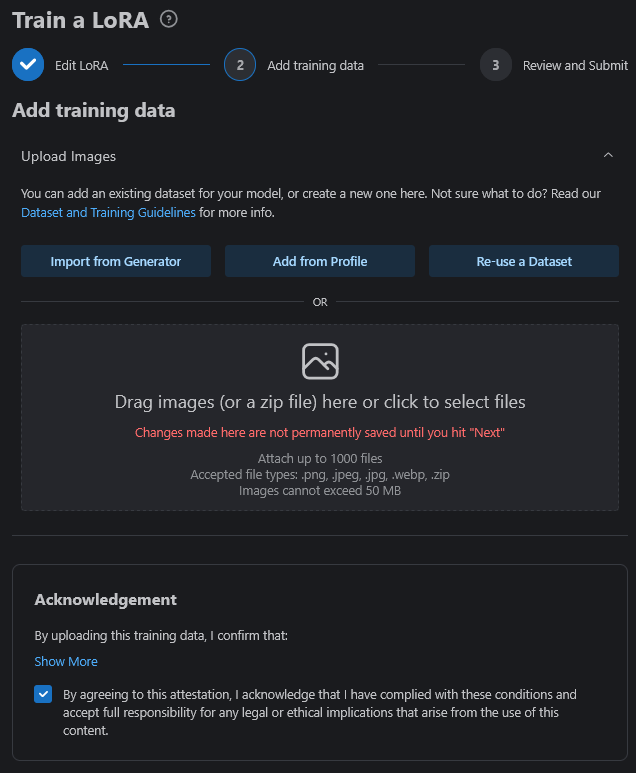 The page will change to this. This is where you would upload your .zip file with tagged images to. If you prefer to use the onsite tagging you upload the images here and it will tag your images.
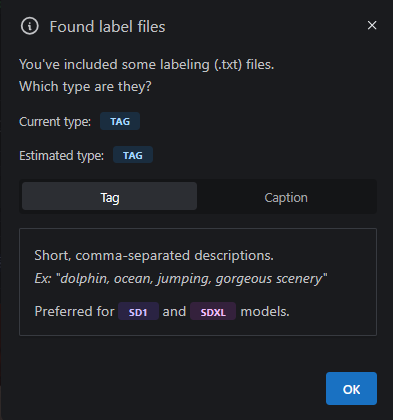 From the uploaded .zip file we get this pop up window. This is telling us that Civit has found label files (the .txts) with your images. Since we used TagGui this would mean we want this to be "tag" type. The caption type is slightly different and is used with Flux and some with Illustrious. Tags are fine for SDXL, Pony, and Illustrious. If this is set how you like, press OK.
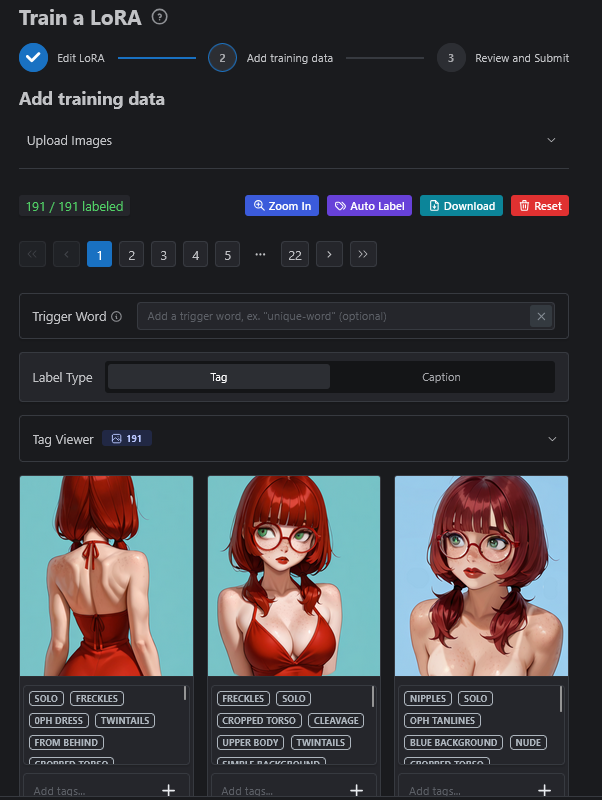 The page has changed again and will display your images with their tags. This is the data set I used for Ophelia previously. If you did not use TagGui, this will be your place to tag the files (below the images as you see here) using the above tagging rules. This is also the place to add your trigger word. You want a trigger word that is unique (not known by the checkpoints) that can trigger all of your innate tags. For Ophelia here I kept it simple with 0phelia.
When finished with this step (good to review tags again if you are new to this) then scroll down.
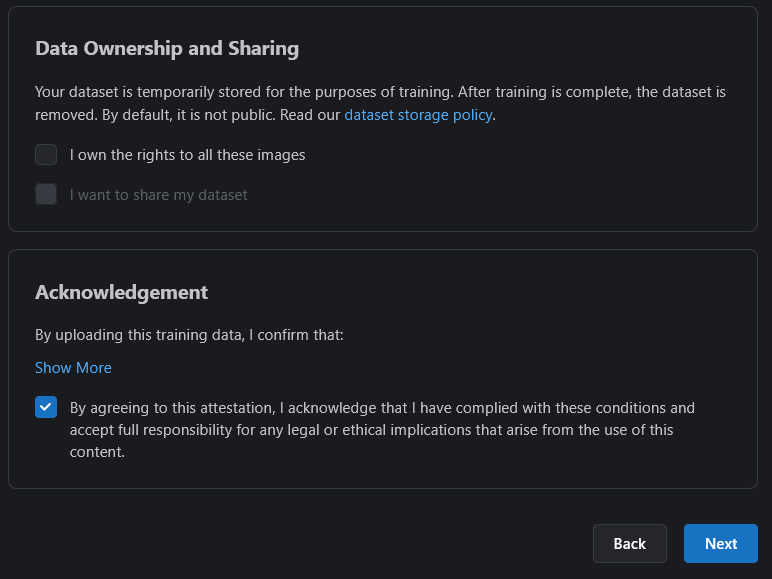 The first checkbox would only apply if they are your artistic drawings or creations and generally does not apply to something AI generated. Therefore, leave it unchecked.
Check the Acknowledgement after you read it (if you agree) and hit "Next"
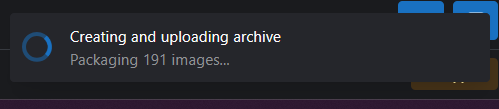 And now, we wait...
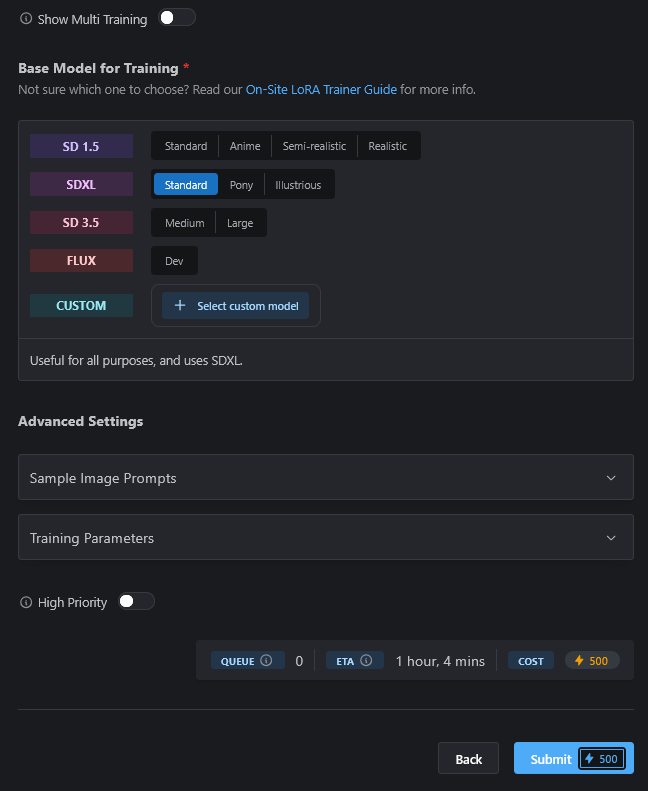 Now comes the time to define what kind of Checkpoints we want to use. As you can see, SDXL has "Standard" highlighted, but you can choose Pony or Illustrious depending on what you want this to work with.
Note: You do not have to train a Pony Lora on Pony for example.
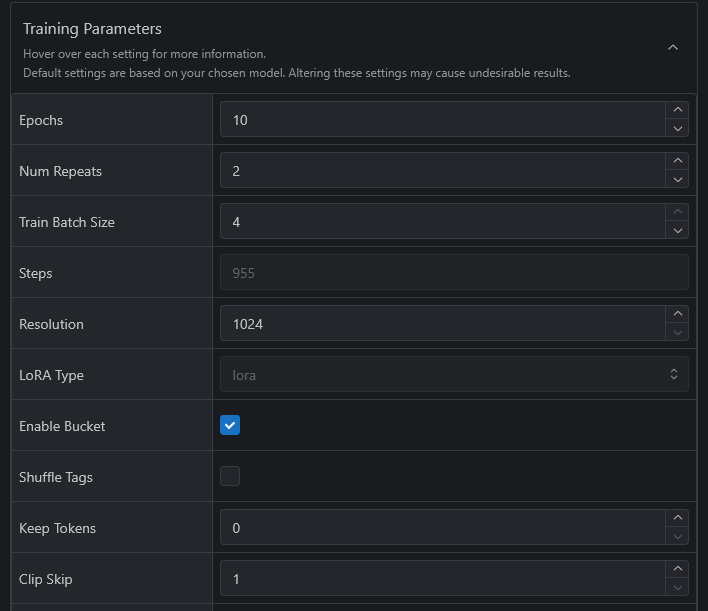
 If you break down the Training Parameters tag you will see the above.

It is ideal to check "Shuffle Tags" and keep 1 token. What this will do is have the training process shuffle all your tags around so that no one of them has too much weight. By keeping a single token, it keeps your trigger word (0phelia in my case) as the first tag. This means that my Lora will have all of the weight put onto this one tag which is good. This is my primary innate tag.
 A bit further down you will also see Network Dim and Network Alpha. These numbers can be changed to 8 each which will help with a simple trained character Lora. Honestly I am not 100% sure what this does, but I have had great success with this with the Loras I have made, even when others have issues training things.
From CCFantasy86 on the Discord:
"Basically, network dimension (sometimes called network rank) is how much or little you want to make subtle adjustments during training. In short, it's how many things affect the weight each time. Higher dimension means more things affect the weight, giving more accurate results (unless overtrained) but result in much larger files and more resources required (and likely that little pesky yellow triangle of "this costs more" as well as slowdowns if used for on-site generations). The more images you have in your dataset, the lower the dimensions can be and still give a good result. Network alpha is how much those weights are pushed by those elements. Higher number means more radical change. Rule of thumb is to use half the dimension value for your alpha value. So if you got 8 dimensions, alpha should generally be 4."
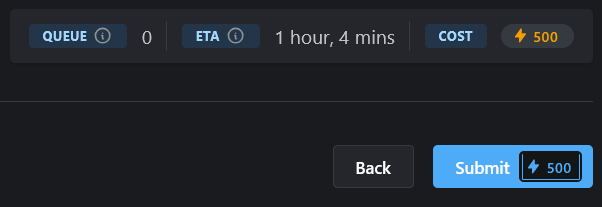 And the last thing to do before you take a break is to click on the "Submit" button. This can use Blue or Yellow buzz and will begin the long process of training the Lora.
The site will confirm that you want to do this and make sure you haven't missed anything: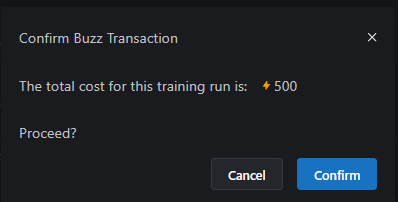 At this point, make yourself a nice dinner or take a nap and it should hopefully be done in about an hour (as stated).
Generally you get an email, or you can come back to this page by clicking on "Training" in your drop down menu.
It's ready!

The ideal thing to do at this point is to click on this trained model to advance to the page with the epochs.
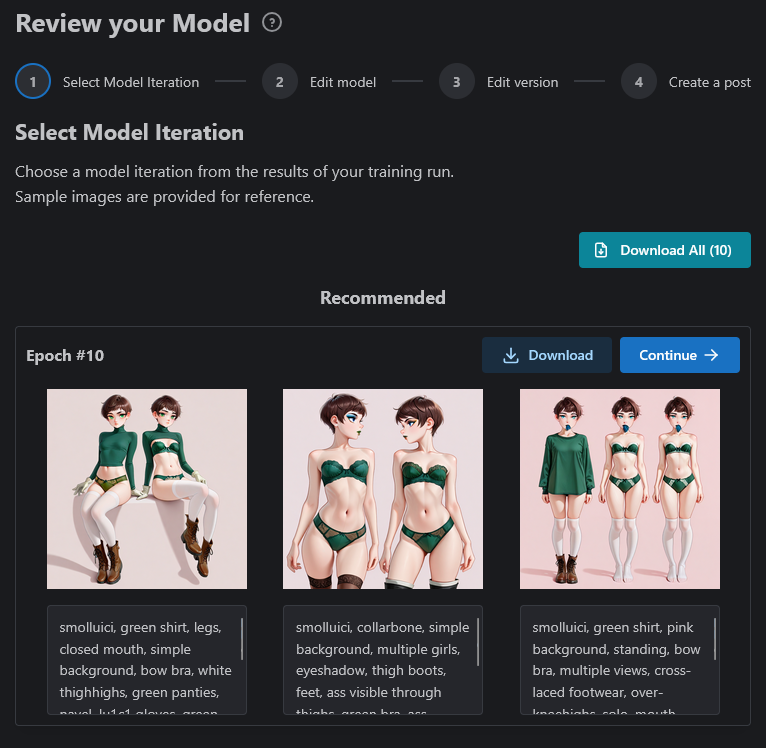
The way we have set this up the trained Epochs (10 of them) will attempt to make images with your trained Lora options. An Epoch is a safetensors file, which is the same as a published Lora, that will be turned into your published Lora. An epoch is one round of training from start to finish. One round is usually not enough to get a good result, so we use multiple epochs. These images generally do not look the best as they are built from the base model. The above you see are from Illustrious 0.1.
From this point there are a few options. If you generate on your home machine, click the download all and continue to the next step. If you generate on site, you have two options now:
1. Choose one of the 10 epochs to publish and cross your fingers. Usually one between 6 and 9 tends to be the best one, but not always. If you decided to go this route, publish the Lora using the sample images as your images for the Lora and then update them with the Lora itself by editing the post.
2. This idea is untested, but makes sense to me. You can download the 10 epochs and then "publish" them to the site to test with, then delete the bad ones. Publishing the chosen Epoch will be listed at the end. If you decided to go this route, continue on with the guide.
Now for testing Epochs:
If you have gone with choice 2 above, or downloaded to test on your own machine. Load up each individual epoch and test your trigger word and your primary remembered tags. You may need to give an action such as "standing" and a "from front" camera angle, but the more unburdened your prompt is the better.
Test each one and when you have chosen the one you like it is time to publish.
 Once you have selected which Epoch you want (and renamed it if you choose) then click on Upload model.
On the following screen you will need to fill in the following:
Name: Self Explanatory
Type: This is a Lora, so select Lora
Category: You made a character. Simple.
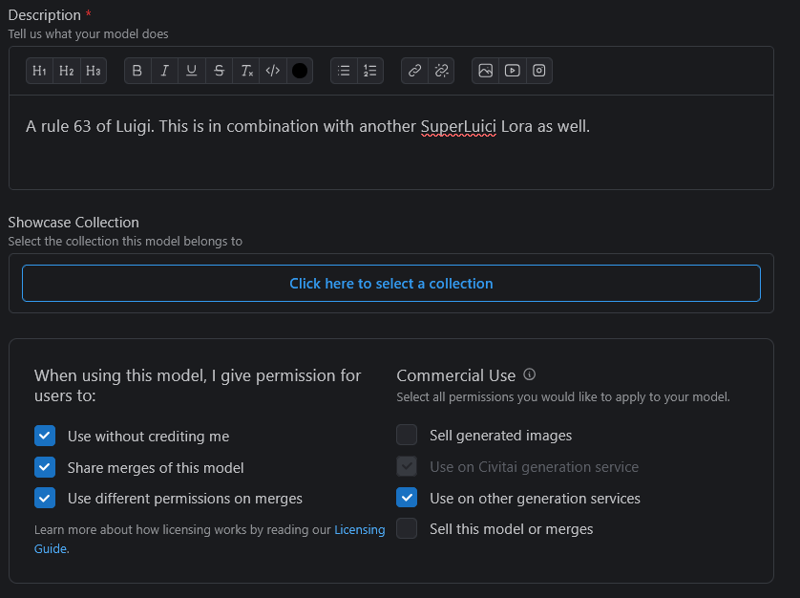
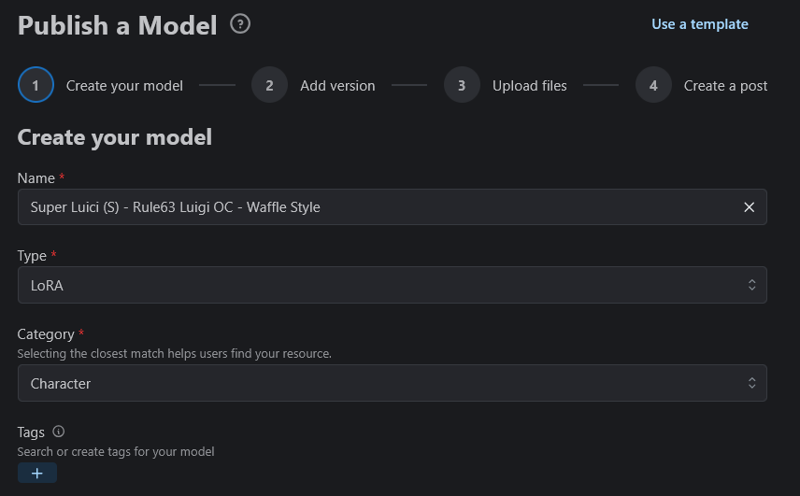 Description: Have to have something. Who is this character. What do they do?
The check boxes below are up to you. I personally set them as you see them below.
 Is this resource showing a real person? If so, it cannot be used on site and cannot be published.
The final two check boxes I tend to leave unchecked, but what this means is that by intending to produce mature themes (a sex position perhaps) it would hide this from a gentler search.
Cannot be used for NSFW generation will block generations (on site) with certain words. This can be ideal if used with something like a children's playground.
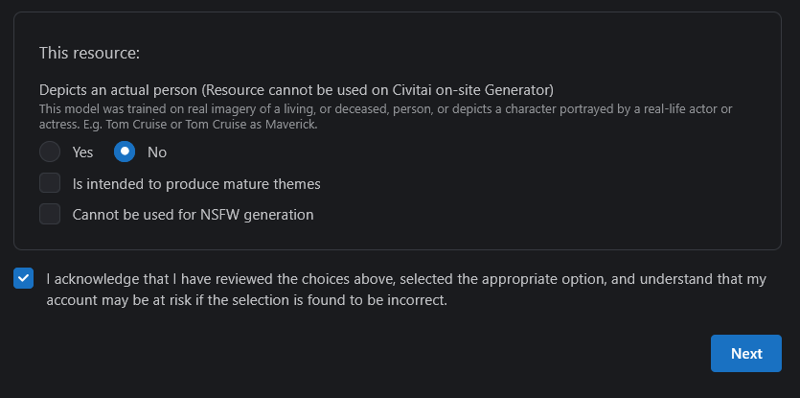 Acknowledge as always and hit next!
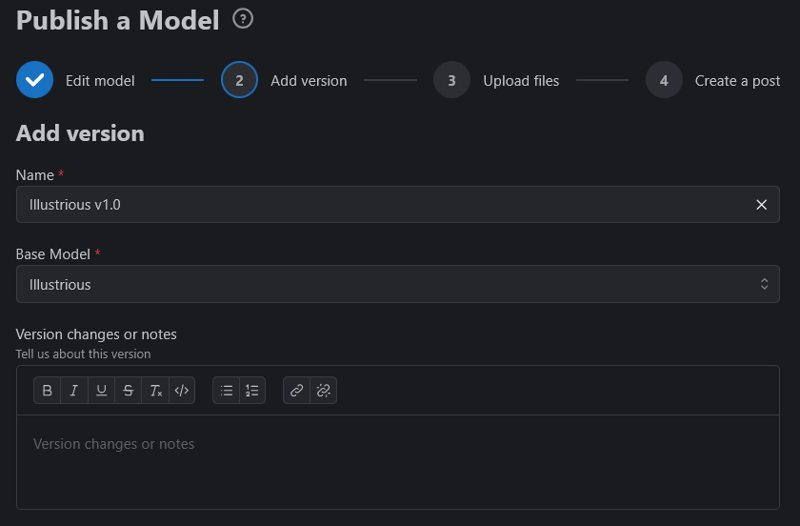 For the name I usually name it by the type it is (Illustrious) and a simple version number. This allows you to stack other versions such as Pony or SDXL or put in different versions down the line.
Base Model: Select what you trained it on.
Version notes can be left blank, but what did you change since last time?
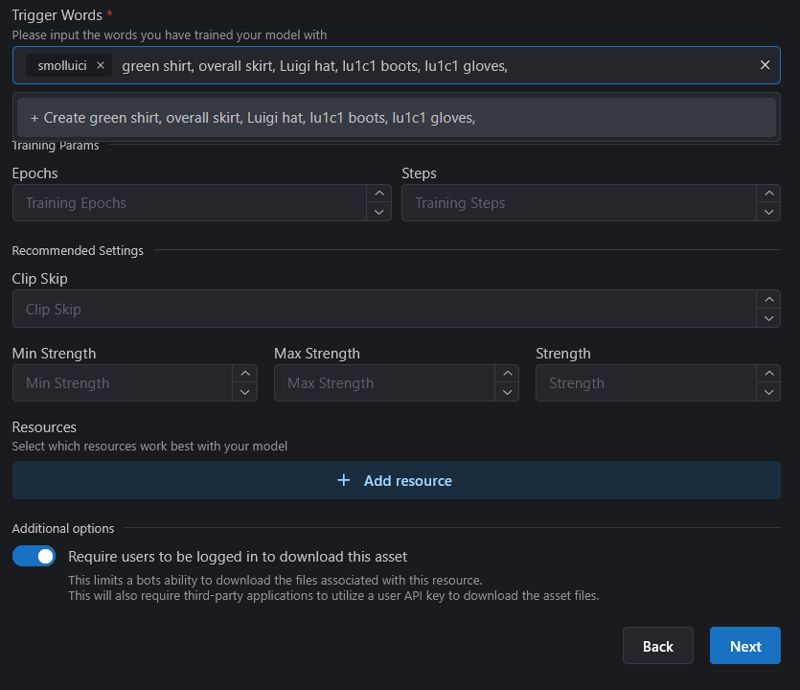 The all important trigger words! As you can see here, I have the first trigger word, which is what my innate tags are tied into as the first word by itself. On this Lora it is "smolluici". Then I group together my remembered tags (I do them with outfits) so they are easy to copy and paste when generating.
The rest don't entirely matter, but can help others when learning more about them. This information will auto populate if you are publishing straight from the epoch page earlier.
I also always click the "Additional Options" slider as it helps to stop SOME bots. Hit Next.
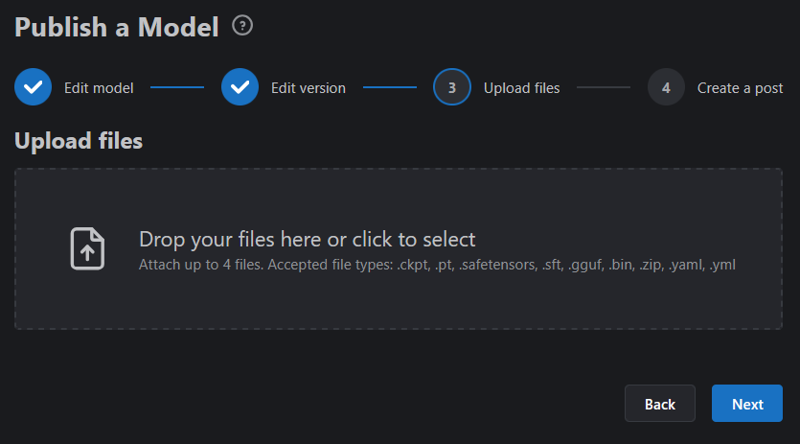
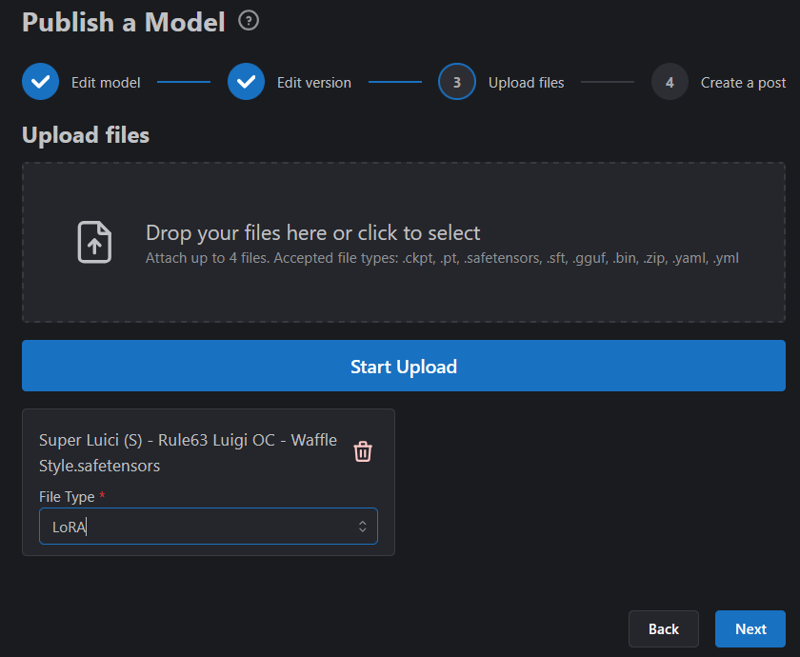 Drag and drop. Select Lora. Start Upload. When it's uploaded, hit Next.
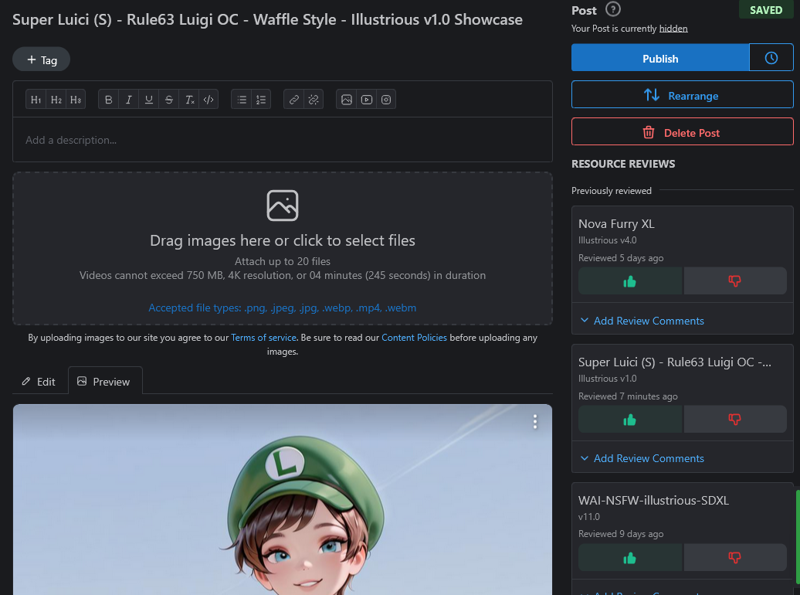
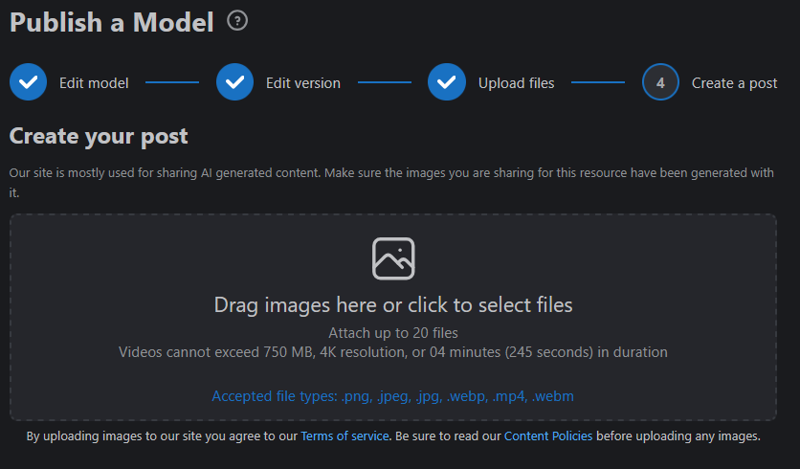 Final step! Post some images showing off what your model can do!
 Now for the BEST part. Enjoying the fruit of your labors!
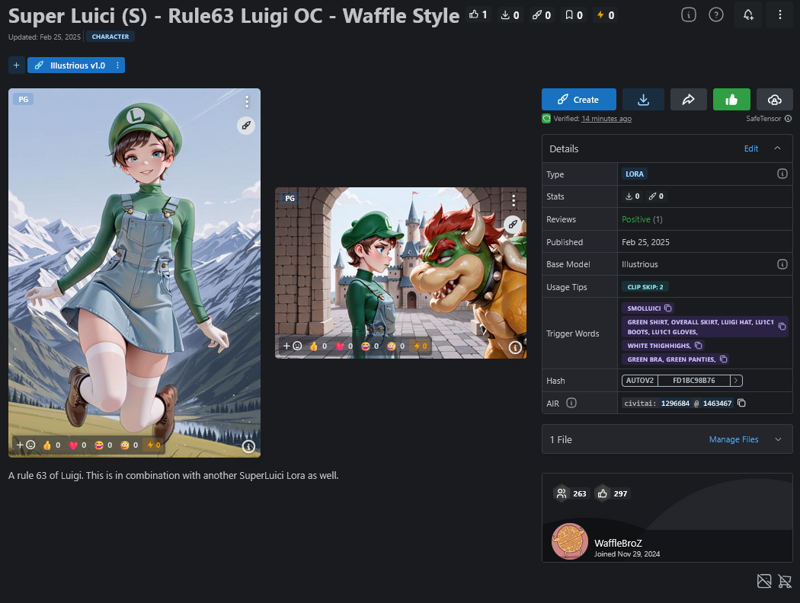 Share your Lora with all of CivitAi on the Discord, to your friends, gen tons of images and flood the image boards. Be proud of what you have made!
Huge thanks to Demian Dei from the Discord for helping me to work out the initial process that got me into making these. And also a huge thank you to Souls for helping me to organize my scattered thoughts into a coherent guide.