
Introduction
A few people have asked how I create Story Articles. They've seen my (NSFW) short stories, and want to try something similar. (Thanks to mksa for the nudge!)
TL;DR
I keep it simple: I use the native CivitAI features, and drag-drop images from my PC into the content area. Read on for what turned into a much longer article than I had imagined when I started it. 😅
Audience
This guide is primarily for first-time article writers who want to learn the basics so they can share their stories with the CivitAI community.
I'll also share some tips and recommendations that any writer may find helpful.
Caveats
I don't claim to be an expert on any of this, and am just a fellow CivitAI user. I'm sharing what has worked for me.
I won't be covering creative or artistic topics like writing or image generation. I may share writing ideas later.
I'm not covering 3rd party tools for creating comics or other more involved approaches. (I haven't used them myself...but am exploring.)
I'm using a web browser on my PC to create this guide. If you're on mobile or some other device, the screens may look different and you may need to adapt the workflow.
CivitAI has a brief intro to articles at the end of this help page.
Please add comments or suggestions for how to improve this guide.
Before you Start
Check out what others have written before diving in yourself. You'll get inspiration for styles of layouts and stories.
➡️ From the CivitAI main list of options, pick Articles:
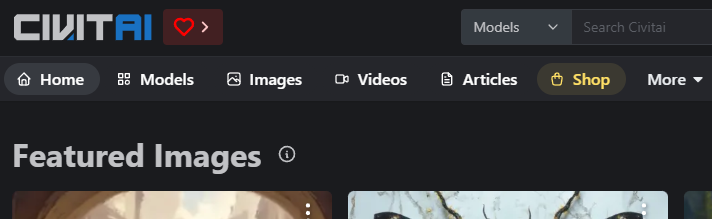
➡️ Then if needed, use the > icon to scroll over to find the "Story" category and click that:
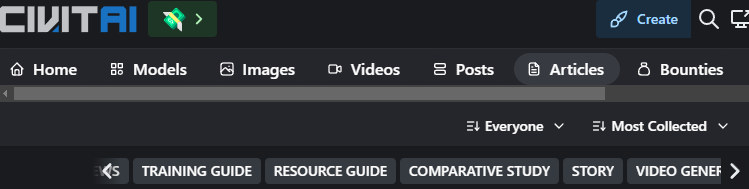
Note that the "Story" Article type is relatively new. Story authors were mostly using the "Musings" category before, and you may still find some stories there. You can also check out all the other article types.
Cautions on Saving Work
It's best if you have the text and images of your story complete and ready before you create your article on CivitAI.
The Article editor Save behavior is flaky at best. Despite saving drafts, I have lost a LOT of work. I'll do a save, go back to editing, and it basically reverts to the prior version. (Other writers have confirmed similar experiences.)
Do as I say, not as I do: Write your story offline, and paste it here when ready to assemble the pieces.
Even if you do that, Save often. After a save, you'll be in a "Preview" mode. I recommend refreshing the page again, then go back into Edit mode. And check that your last edits were in fact saved.
Getting Started
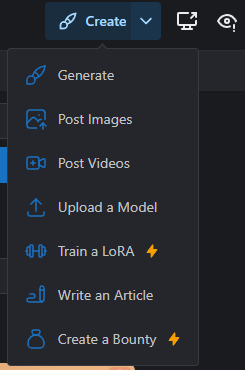
➡️ First, from the CivitAI "Create" drop-down, select "Write an Article."
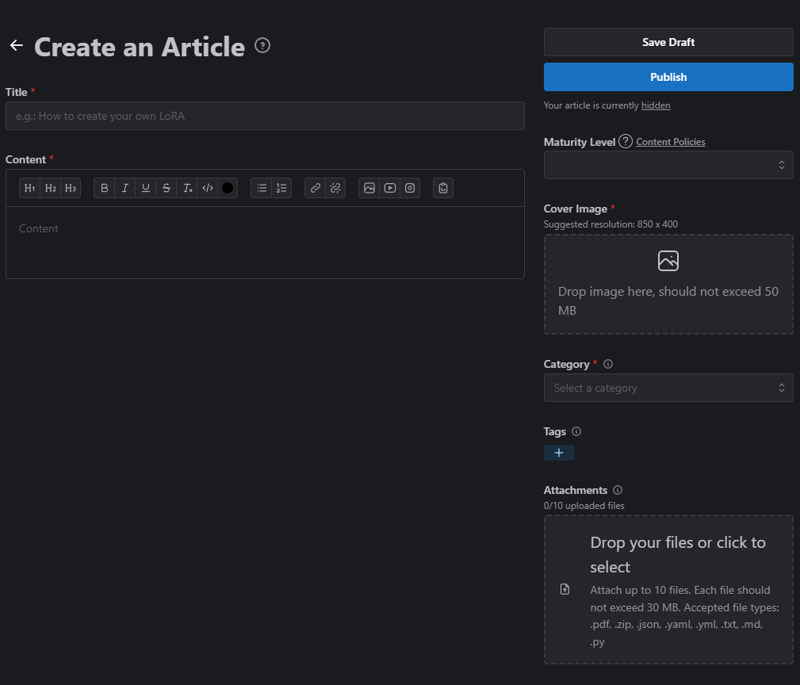
➡️ You will arrive at the blank Article template below.
PROTIP I recommend just filling out the basics first, saving a draft, and then doing the rest later. That way you can focus on editing the main story area, knowing the required stuff is done. Everything you can edit can be changed later. So don't stress over it the first time.
MOBILE On mobile, all the options shown in the right column above will be at the very bottom of the page.
Required Items
All items with a red asterisk * must be completed before you can save, including the cover image.
Hover over the tooltips ( ? and i ) for more info on the field.
Title: For Story titles, be creative - but avoid really long names. Mimic the title of a book, blog, or magazine article. If you are doing a series, pick a title format and stick with it. (e.g. Tales of Adventure - Part 1).
Content: The main story text and images go here. I recommend entering placeholder text to start, e.g. "Story goes here...", and finishing the other required items. Then come back and finish later.
Maturity:
Click the drop-down to choose the appropriate maturity rating.
Review the ? tooltip and Content Policies and TOS, and abide by them.
PROTIP My advice is pick the next higher level than what you think it should be. Err on side of caution.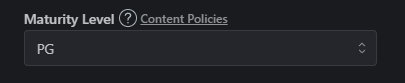
Cover Image:
850x400 is the target resolution. Max file size is 50MB - which is a lot.
The image will get cropped to the middle on narrow views - so pick an image that will work when center-cropped.
As with the Story itself, you can use a placeholder image and add a final one later.
This image gets an automatic rating, like other images on CivitAI.
The cover image is like a book cover. It can serve as a "hook" when readers are browsing articles.
I recommend matching the rating of your image to the rating of the story - it helps potential readers find stories of interest.
Category: Pick Story for fiction writing. There are many other article types, but for this guide I'm only covering Story. (For this article, however, I choose "Training guide".)
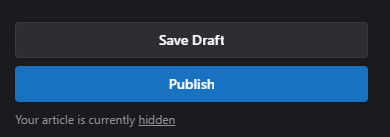
Save Draft
When the required items are done, click the "Save Draft" button.
The work is saved, but the content is only viewable by you, aka "hidden" (hover over the hidden link to see more info).
Do NOT click Publish until you're ready to make the article public.
Editing Draft articles
To get back to your Draft articles, go to your profile, click the "Articles" tab, then click the "Draft" tab at the top of the page.
Clicking the link for a draft will take you back into edit mode.
FYI, you can have multiple drafts in progress. I currently have 4 (!).
Unpublish and Edit
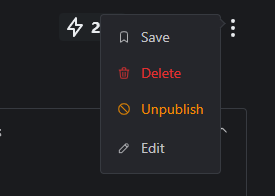
If you do accidentally Publish before you're ready, you can Unpublish from the 3-dot menu of your published article.
The 3 dot menu is also where you'll go to Edit a draft.
The 3-dot menu appears in the top-right, next to the Title.
Optional Items
Tags: I suggest you add a few tags to help readers find your article based on their interests. Tags are typically a single word.
Potential tag types:
Genre (sci-fi, romance, erotica)
Style (comic,short story)
Orientation (hetero, lesbian, gay, etc)
Other specific traits (topics,kinks)
Reminder: Keep within the CivitAI TOS with tags too.
The Tag feature, at least for me, doesn't have autofill. So look at what others have used, or just do your best.
Attachments: I have never used this feature, but the accepted file types imply it's mostly for coding-related files (.zip, .json, etc.)
And that's it for the basics.
Now onto the main attraction....
Content, aka The Story
You can simply type text into the Content area, click Publish, and you're done.
Or, you can get really fancy with it and import work you've done in a 3rd party tool. (Not covered in this guide.)
Or, if you're like me, you strike a balance, using the native Article features and adding generated images throughout
I'm still evolving my approach, but for the Content itself:
I use a mix of headings, bolding, and other basic formatting to give the story structure, flow, and dynamics.
I use frequent line breaks for pacing. I even exaggerate it at times - 1 line, full break, then the next line.
I drag-drop images directly into the page.
PROTIP Article length is subjective, but most agree you should avoid very long articles. Consider splitting a very long story into separate Articles, and link between them. (Credit: NoTalentAIHack)
PROTIP I prefer a blend of images and text. I aim for a max of a half page of text between images. Roughly half the article vertical space is images. For scenes with detailed action, I will use more images and less text.
On Dialog (What People Say)
Dialog is often a key part of storytelling, and there are many ways to do it. Again, check out how others have handled it for inspiration. I have yet to land on a consistent approach.
I sometimes do this:
John: "Did I do something wrong?"
Jane: "Not yet," she says with a smirk.
I've also done it more like you would in a novel, which can feel more natural, but you have to be clear who is saying what
John shoots Jane a worried glance.
"Did I do something wrong?" he asks.
"Not yet," she replies with a smirk.
The Content Toolbar
I do recommend you go beyond just entering plain text into the Content area.
The Toolbar has some of the main basic formatting options you'll want to explore.
It appears at the top of the content area:

Clicking any of these icons will apply the setting to the location of your cursor or the highlighted text. Clicking again removes the setting.
Note that a mini toolbar appears when you highlight text, with a subset of features.
H1-H3: These are "heading" levels
A heading is a named section or sub-section.
I sometimes just use all H2's for section headings.
For subheadings, the lower numbers are the parent sizes. For example, put H2s under an H1.
The headings have default larger font sizes.
Adding headings also automatically creates a table of contents, using the heading text as labels. It appears in the top-right, and the headings serve as links to each section.
Headings are optional, but are helpful for longer stories - think of them like Chapters.
The next 5 icons are self-explanatory: Bold, Italics, Underline, Strikethrough and clear formatting
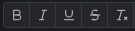
</> Code Block: Looks like this -
This is a code block. It's intended to show actual code. But for stories, I sometimes use it for things like text messages, or info in a heads up display. It's a fun option to mix up the formatting.Color: The "dot" is to color the highlighted text. Just another option in the toolkit - use sparingly.

Bulleted and Numbered lists: (like this list).

Type "tab" to create an indented bullet, like this.
Hyperlinks.:
Select the text to be linked, click the link icon, then paste in a full hyperlink/URL.
For my stories, I use links for 4 main things:
Cross linking multiple articles, e.g. parts of a story.
Linking to Posts of the images I use in the story.
Linking to my story Collections
With inspiration from MidSpin and others, I've tried adding direct links to Spotify songs, as a "soundtrack" for some stories.
Images and More
The next 4 icons are for images, YouTube videos, Instagram posts, and surveys.
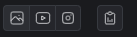
I have never used YouTube, Insta, or Surveys. If you have, please mention in comments.
I do insert images... but I never use that icon.
I drag-drop images from my desktop directly into the Article page, after inserting my cursor where I want the image to go.
Note: The max image size to insert is 5MB .
I have yet to hit a limit for total images inserted.
NOTE: I have not found a way to move or re-order images once inserted. (If you know how to do this, please add a comment.)
Other Formatting / Layout Options
Rule Lines: If you type 3 dashes, "---", on a blank line it will insert a whole line of dashes. When saved, they turn into a solid horizontal line, or "rule". (I've used a few in this article.) Rules make a more clear break between sections or content.
Soft Returns: Holding shift while typing a Return is called a "Soft return", and reduces the gap to the next line below. You can also use it to create a break for a bulleted item, without creating a new bullet. (Credit: NanashiAnon)
Emojis: Thanks to ZairaSass for the tip on using right-click to view the emoji option... so you can do this: 👀 (I'm on a PC, so not sure how it works on other platforms.)
Other Section Options
These are things I do, and may or may not be of interest to you. Other writers have other approaches that you should also explore.
Intro Notes
I typically add italicized notes to the top of my page with info I want readers to know before they dive in.
I do mostly NSFW stories, so I mention that.
I also add a caveat about inconsistent AI imagery. Some people have strong opinions about aspects of AI images - I'm more about storytelling, and ask folks to just accept some variation.
If it is a multi-part story, I cross link to all parts of the story.
Copyright and Disclaimer
I include the following at the end of all my stories.
Copyright © 2025 DarkFun. All rights reserved.
This is a work of fiction. Names, characters, places, and events are products of the author’s imagination or used fictitiously. Any resemblance to actual persons, living or dead, or real events is purely coincidental. Characters depicted are of legal age and consenting adults.
All images generated locally by DarkFun with ComfyUI using models from the CivitAI community.
Image Posts, Links, and End Note
Also in the Footer:
Because this IS CivitAI, I aim to post most or all the images from the story, including metadata. I add a link to the relevant posts.
I add Spotify song links if I'm using them as a suggested soundtrack.
I usually end with a "note from the author."
Tips from Other Writers
Images posts: When you create image posts for an article, cross link from the description or comment in that post back to your article. It helps potential readers find your work, and connects all the related content. Use the hyperlink tool to link a text description to your article, to avoid showing the whole URL. From: NoTalentAIHack
Other Article / Story Guides
Here are some other guides you may find helpful. Please comment or msg me with others!
Now Your Turn!
So that's it!
That's a recap of how I use CivitAI to create fiction Story articles.
I am going to select "Publish" myself now... but I'll very likely be coming back and making edits over the coming days/weeks.
I look forward to any comments, feedback, and suggestions.
Now, off you go! 👋
Share some stories! 📝
DarkFun