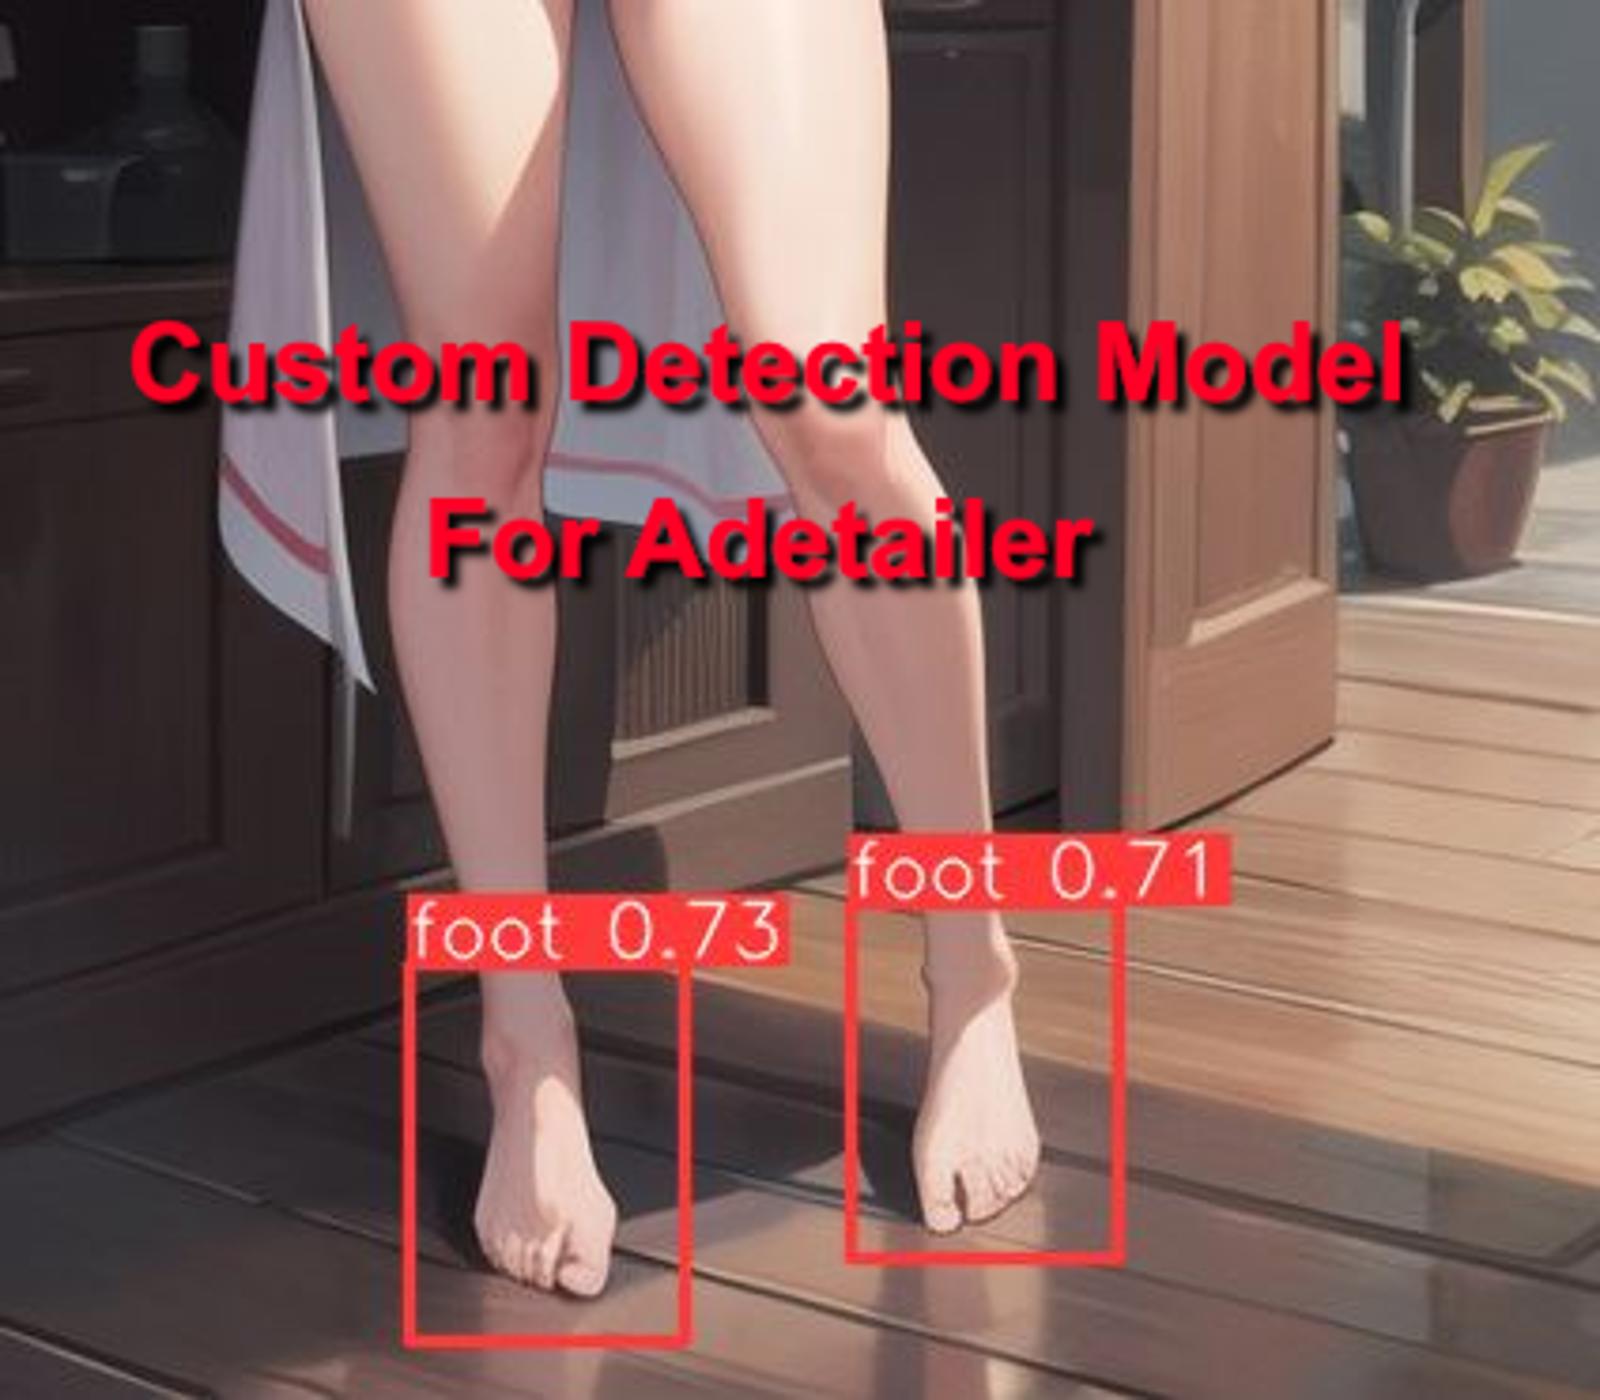
Introduction
This guide will walk you through the steps involved in creating a custom adetailer model, similar to the hands and face models that are already available. It assumes you have basic knowledge, such as knowing how to create a Python virtual environment, but don't worry, I'll be adding images each step of the way so you can easily follow along.
Python version 3.8 or higher is required, and the guide is based on Python 3.10.6 since that is the one I'm using.
Feet model is at the bottom if you just want that or if you're looking for a custom job, my commissions are open so drop me a chat request detailing what you want and your budget.
Section 1: Preparing
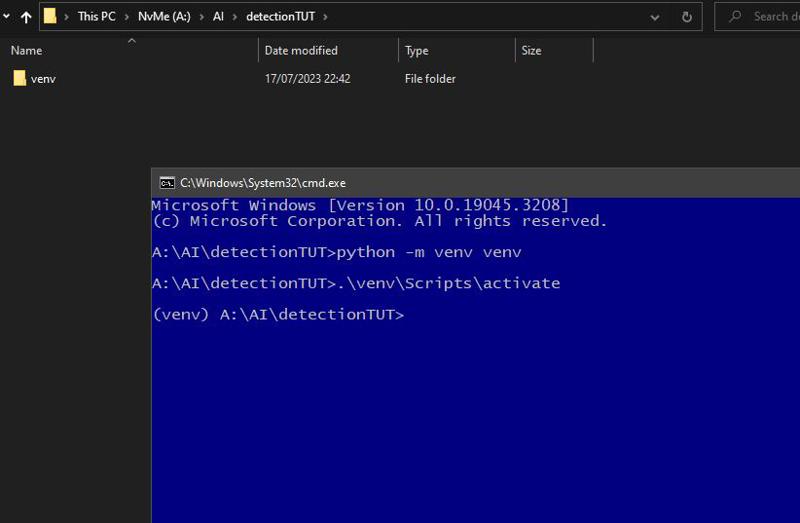
Step 1: Set up the Environment
Make a folder called "detection" (or any preferred name).
Use the terminal and create a Python virtual environment inside the "detection" folder.
Activate the virtual environment.
Step 2: Install Ultralytics
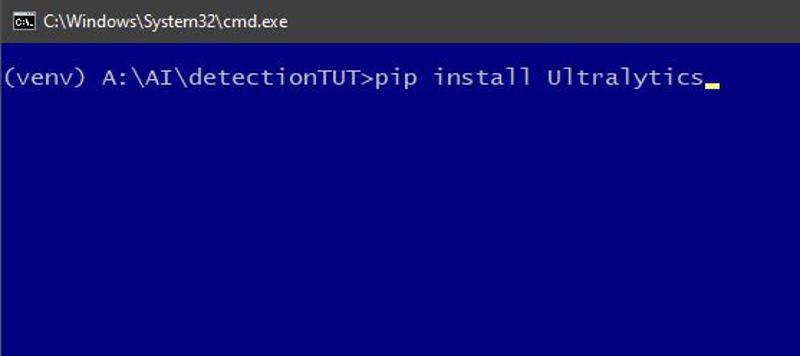
With the virtual environment activated, install Ultralytics using pip:
Step 3: Check Torch Cuda Availability (Important)
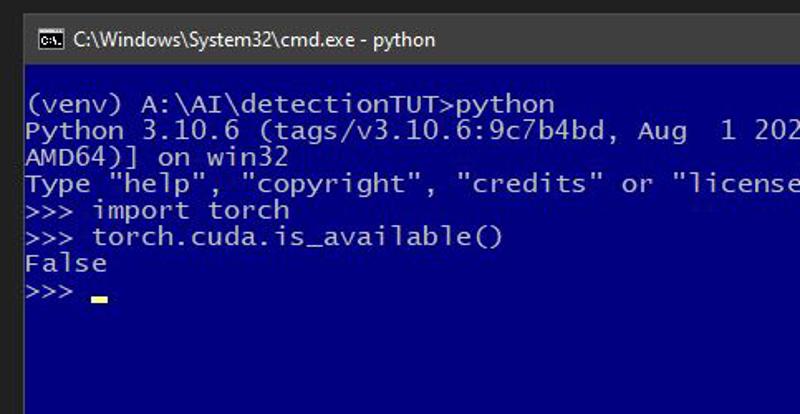
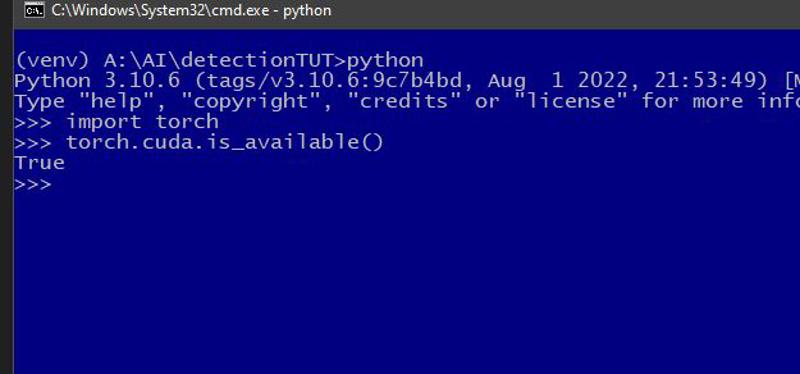
In the virtual environment, open the Python interactive console (
python).Check if Torch CUDA is available by typing the following commands:
import torch
torch.cuda.is_available()
If it returns "True," skip Step 3-A. If it's "False," proceed to Step 3-A.
Step 3-A: Install Torch with CUDA Support
In the virtual environment, uninstall existing Torch and torchvision:
pip uninstall torch torchvision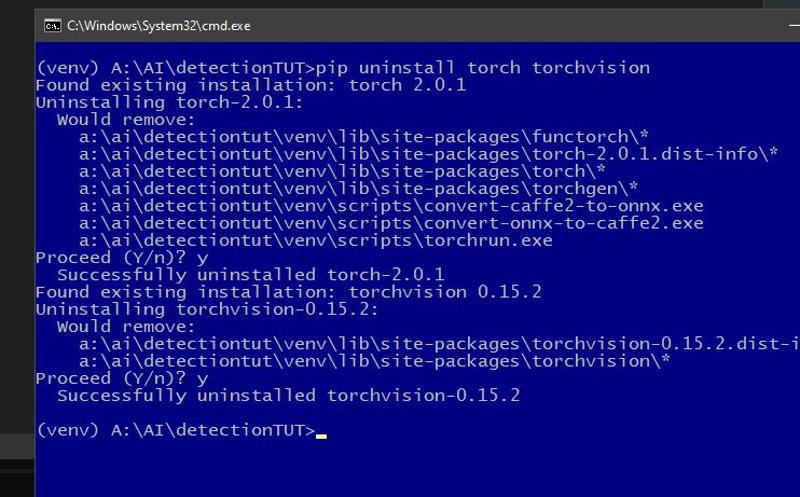
Install Torch with CUDA support:
pip3 install torch torchvision torchaudio --index-url https://download.pytorch.org/whl/cu117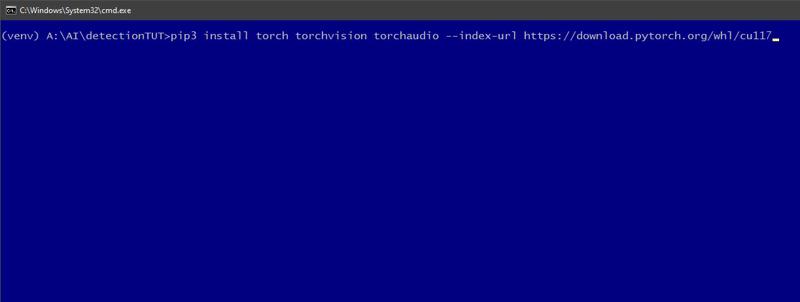
Recheck Torch CUDA availability using the steps mentioned in Step 3.
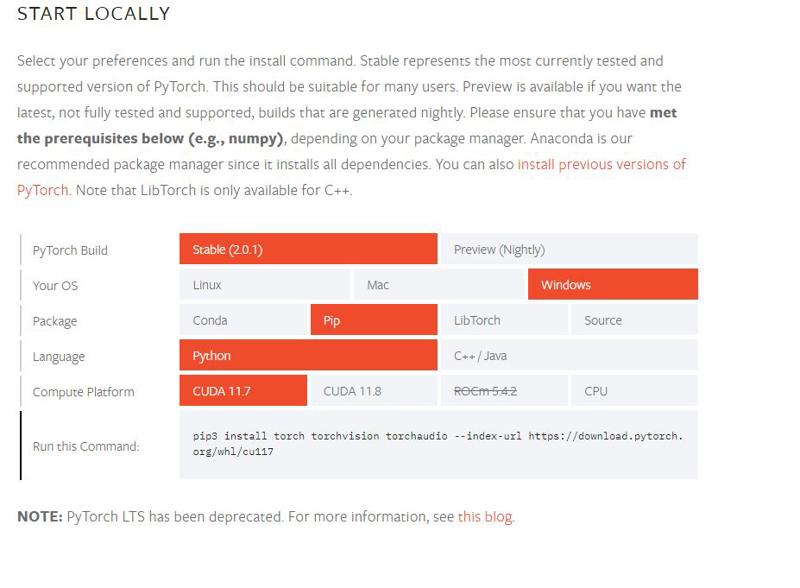
If that didn't work, you can try installing a different version of torch and hope it works.
Step 4: Download labelImg
Download the release binary labelImg from GitHub and place the executable file wherever you prefer. You only need the .exe file. For example:

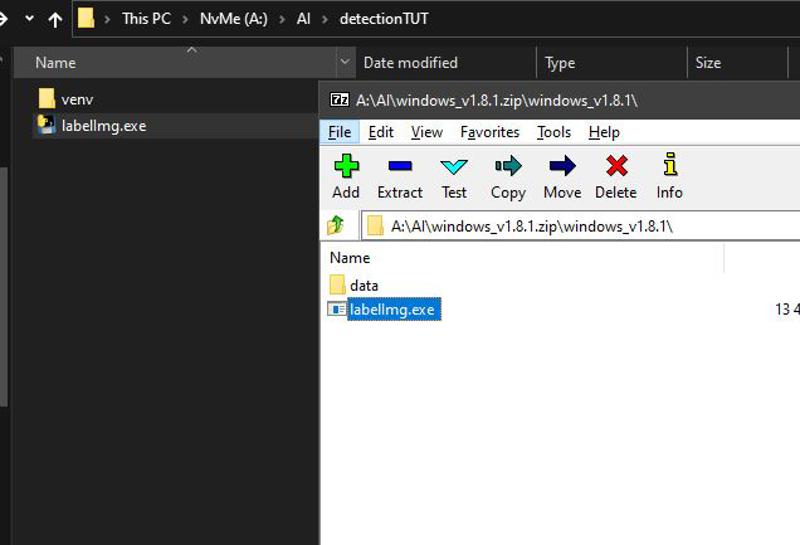
Step 5: Create Dataset Folders
Create two folders named "dataset" and "output." You can place them anywhere you like (e.g., next to your venv and labelImg.exe file for better organization).
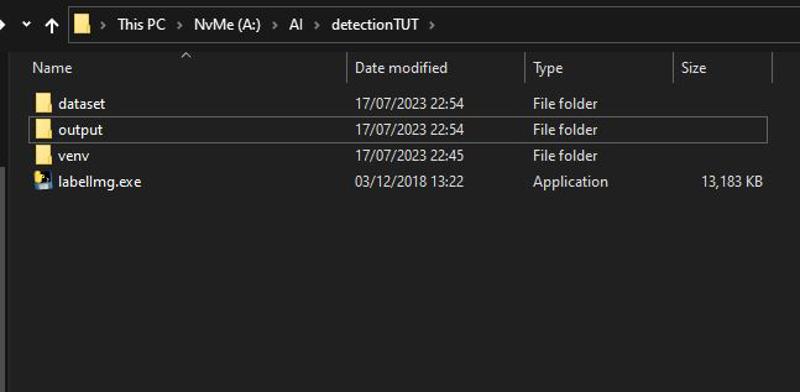
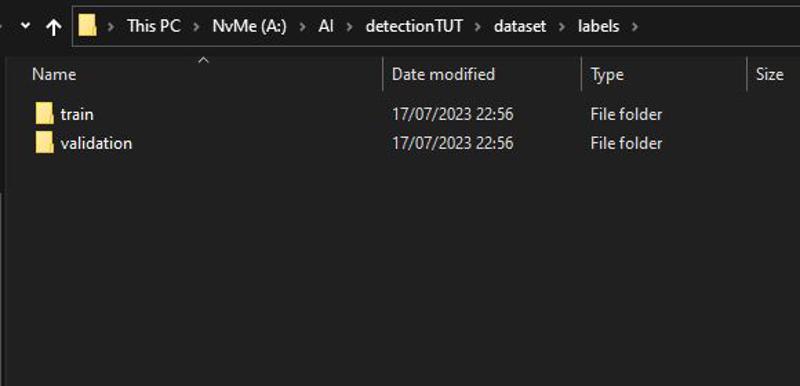
Step 6: Structure Dataset Folder
Inside the "dataset" folder, create the following structure:
dataset
|_ images
|   |_ train (Your training images go here)
|   |_ validation (Cropped images with a good mixture of non-train data)
|_ labels
|   |_ train (Location of the box made in labelImg)
|   |_ validation (Labels of images containing the thing you're training)
|_ data.yaml (Simple config file pointing to train and validation data)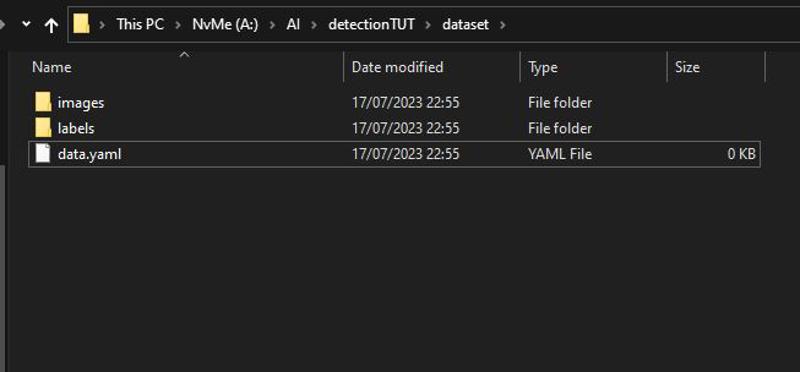
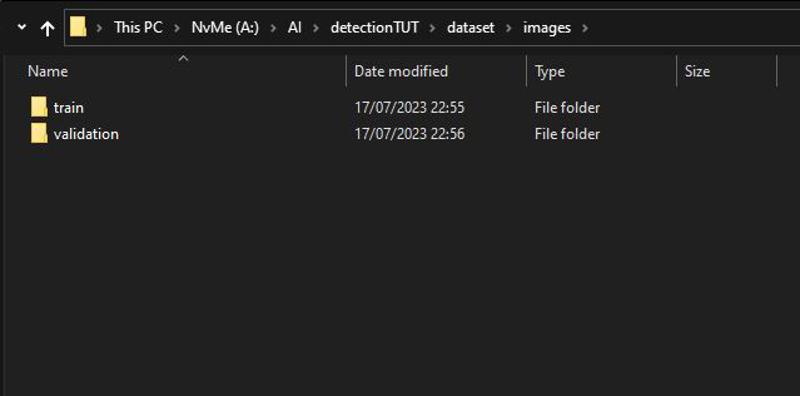
Step 7: Download and Resize Images
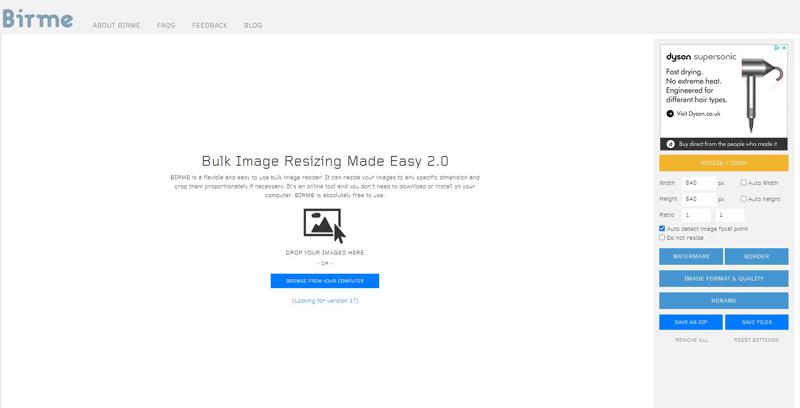
Download all your images to the "images/train" folder.
Use Birme to batch resize the images to your desired resolution (e.g., 512x512, 640x640).
Step 8: Label Training Images
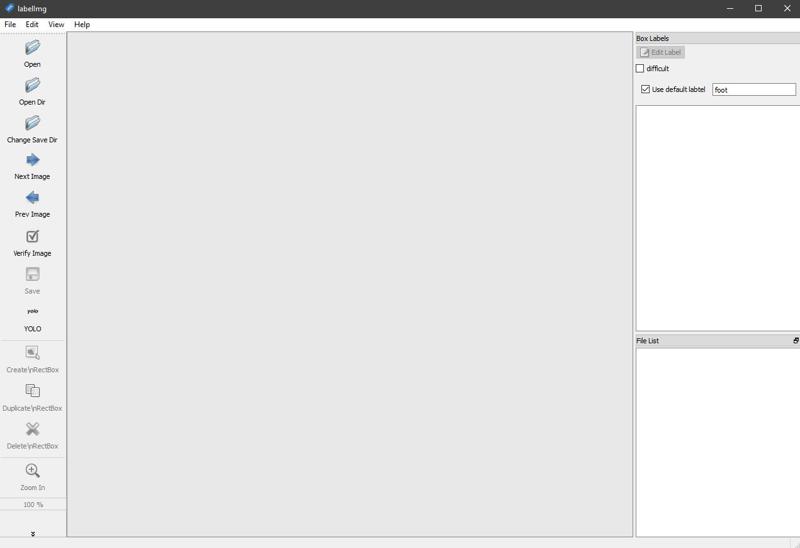
Open labelImg.exe and perform the following steps:
Tick the "Use default label" box and enter your label name. (eye, foot, etc.)
Set the format to "YOLO" under the save icon on the left.
Use "Open Dir" to point to your "images\train" folder and if prompted a second time, point that to the "labels\train" folder, if not then proceed to the next point.
Use "Change save dir" to point to your "labels/train" folder.
Your images will be loaded in the bottom right "file list" box. Just double click the first one and get to work.
Step 9: Label Validation Images
You now need to do the same, but this time gather a mixture of images to put inside your images\validation folder. These should consist of images that do not contain the thing you're training and images that do. So if you were training feet, you'd want to throw some new feet images in there and some images that do not show feet. They should also be cropped the same as your train images. This allows you to see how your model acts on new or never-before-seen data.
It's pretty straight forward, but you click "create rectbox" and draw a box over whatever it is you're training. The keyboard shortcuts really speed this up. w, d, and a are pretty much all you need to use. d is the next image, a is the previous image, and w is creating a rectangle box. So you'll just sit there, press w, draw your square, press d, rinse, and repeat till done (obviously skipping the ones that don't have your thing in them for the validation image set). If you're getting an annoying popup every time you go to the next image, make sure you check view > auto save, and it'll auto save for you.
Once you've gone through every image and labelled them, you'll have a folder full of .txt files with the same name as the images, and inside those .txt files will be the coordinates of the box location and should look something like this:
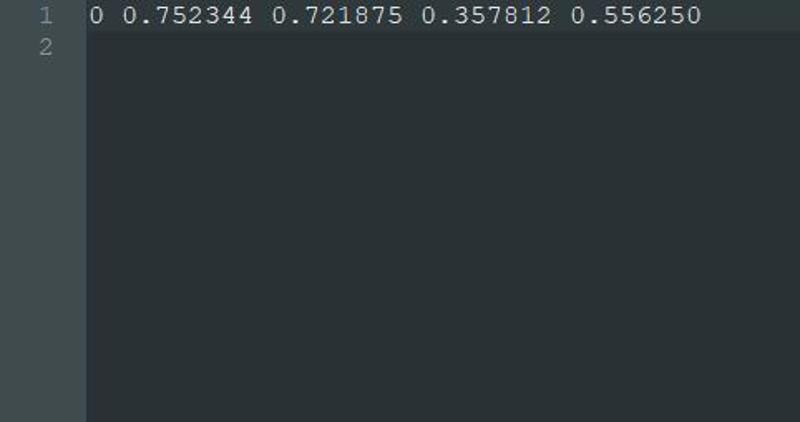
If it looks completely different, you used the wrong format.
0 is the index number and the others are the coordinates of the box.
Section 2: Training
Step 10: Configure data.yaml
Edit the data.yaml file to specify the paths of your train and validation data and the corresponding class names.
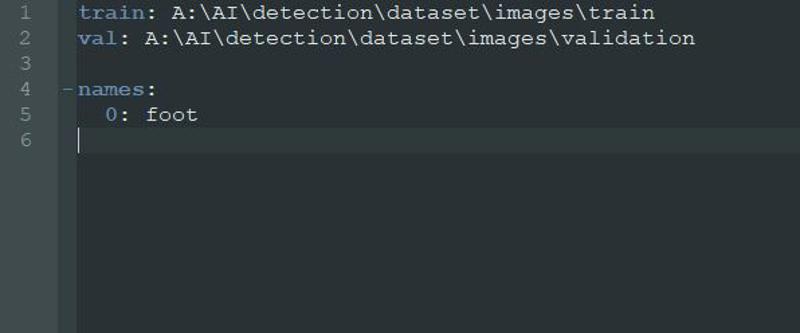
Step 11: Train the Model
Now that you've done all that, you can finally get to training. This will entirely depend on your GPU and is kind of like training a LoRA, so experiment as you wish. I'll give you the basic example, though, so you can train and get a model out of it.
With your venv activated on a console, the format looks like this:
yolo train data="location of your data.yaml file" model=yolov8n.pt project="location of the output folder" batch=5 epochs=300 imgsz=640
data: This is the location of your data.yaml file.
model: This is the existing model you'll use to train your data on. It's recommended to use an existing model to train. The model you pick will download automatically, and they come in different sizes. yolov8n,yolov8s,yolov8m, yolov8l, and yolov8x. Different models offer different performances:
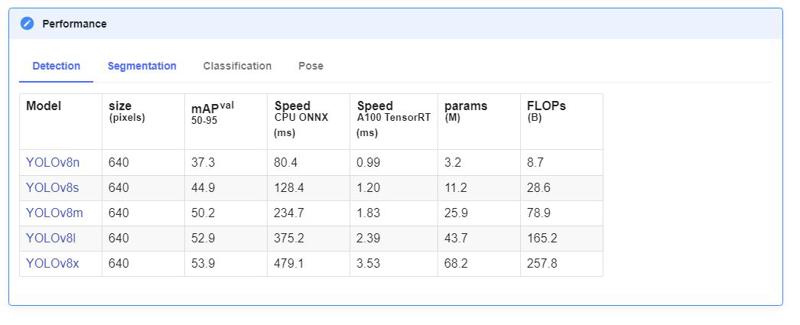
More info can be found here: https://docs.ultralytics.com/models/yolov8/#supported-modes
The n varient was used for hands and face, and it comes out pretty well, so I also use that one.
project: The location you want the project to save to.
batch: How many batches it'll train per epoch. More batches are faster, but at the cost of resources, so you'll have to test what works for you and your system.
epochs: How many total epochs/steps it'll do before it finishes.*
imgsz: The size of your images.
Step 12: Monitor Training Progress
When you're ready, you can press enter to train and wait for it to finish.
*During the training process, it may stop training early if it observes no improvement in the last 50 epochs. That is the patience value, and you can change it by using patience=value_here in your command or 0 to disable it so it goes through the whole training process without stopping early. So if you want it to stop only if it goes 100 epochs without improvement, you'd set patience=100 somewhere in your yolo train command.

Section 3: Evaluating and Fine-tuning
Step 13: Evaluate Results
Once it's finished, you can go to the outputs folder, and there will be a train folder. Inside will be lots of different information you can use to determine the performance of your training results. I'm not qualified enough to understand half of it, so I just dumb it down and look at the pictures. Most importantly, the val_batch_labels and val_batch_pred pictures:
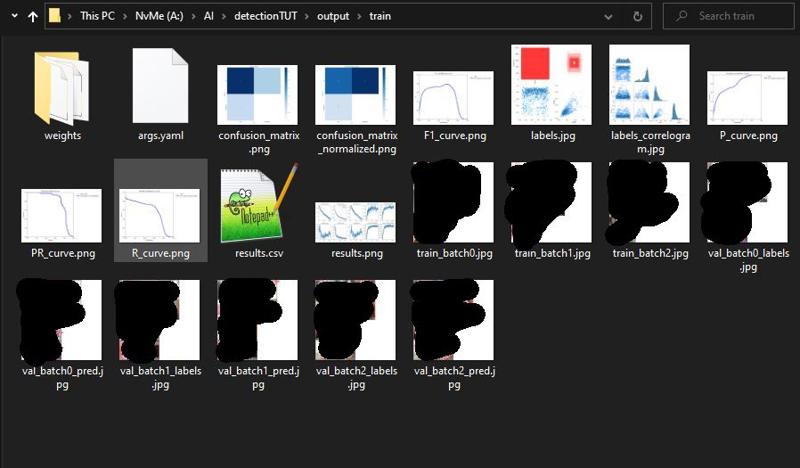
censored
The val_batch_labels are batches of your validation images that you labelled with the rectangles, and the val_batch_pred pictures are batches of the same images, but this time it's your model predicting where it thinks the item is based on your training data, so you can see how it performs vs. new data as it has never seen it before.
You'll see a red box with your label on it and a weight value. This is the threshold for how "sure" the AI is with its prediction. Closer to 1 means it's very sure, but if it's < 0.5, it's not that sure. In adetailer, you can set the threshold to whatever you like, so if you want it to be 70% "sure", you'd set it to 0.7, and anything below that, it'll not target even if it was in fact correct, so keep that in mind.
Step 14: Retrain or Use Model with Adetailer
Based on your evaluation, you may retrain the model with different settings (e.g., epochs, batch size, larger dataset, etc.).
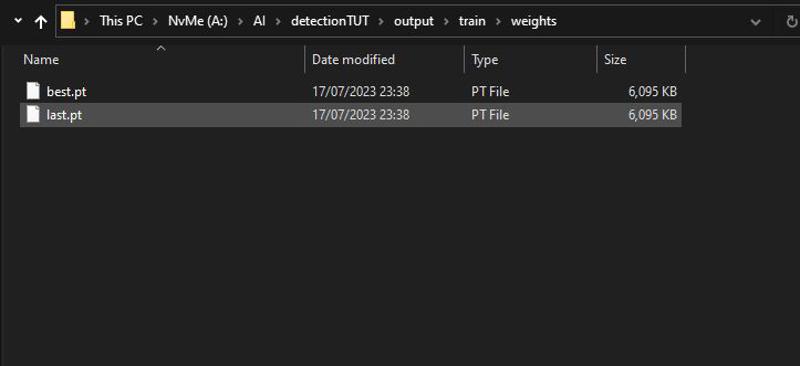
Alternatively, use the last.pt and/or best.pt files found in the weights folder for further evaluation using Adetailer with automatic1111. Just place them inside your models\adetailer folder and use them.
Conclusion
That is about it, but there are so many more arguments you can use and things I haven't covered here because it's just too long or I have no idea on the "best settings" as it's one of those things that require a lot of experience, but this is enough to get you started and you can experiment on your own. You can set weight decay, warmup epochs, dropout, lr0 (initial learning rate), lrf (final learning rate), and many other options. Here are the arguments you can use whilst training:
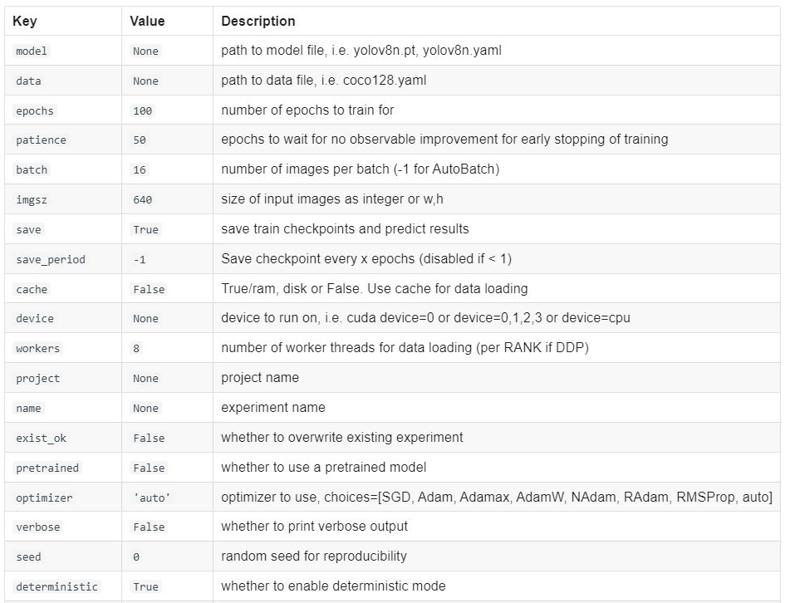
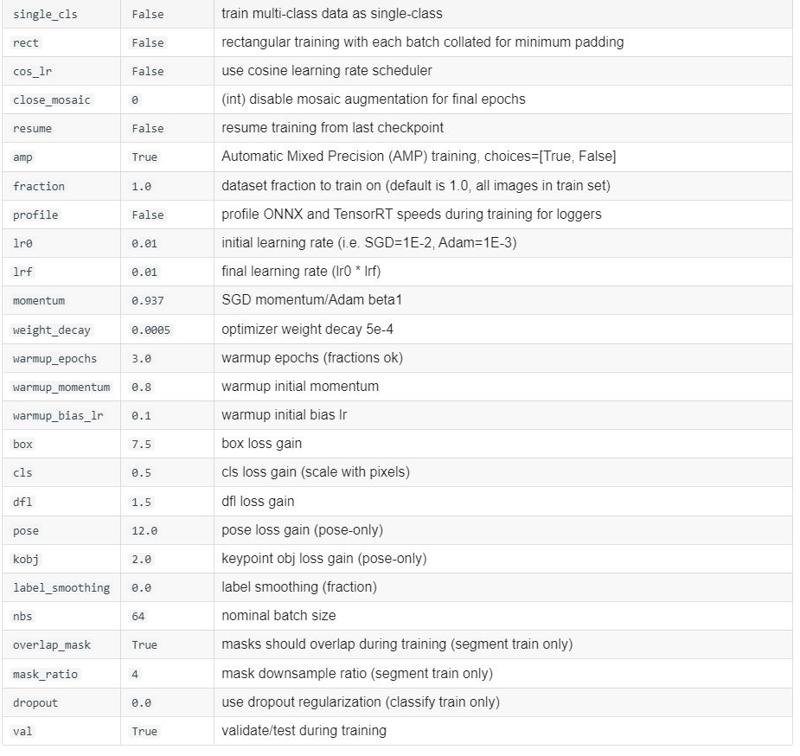
Check out the ultralytics docs for more information: https://docs.ultralytics.com/modes/train
Here is the feet model: https://mega.nz/folder/QtswgKgA#OOgw0nl2dNYa4QMN6j4zEg
Place the .pt file into your models > adetailer folder and use it as you would any other adetailer model
