0. Preface
I would like to show how to generate more controllable AI image using Illustrious model and ControlNet Canny preprocessor
The Canny preprocessor converts images into black-white line images and control the output
I would use this as an example
This article is for users with some experience of generative AI images
This is just a little thought of a non-expert
For more about ControlNet, ask Google
I'm using:
Platform: reForge (local)
Graphic Card: GeForce RTX 3060
RAM: 32GB
1. Generate image
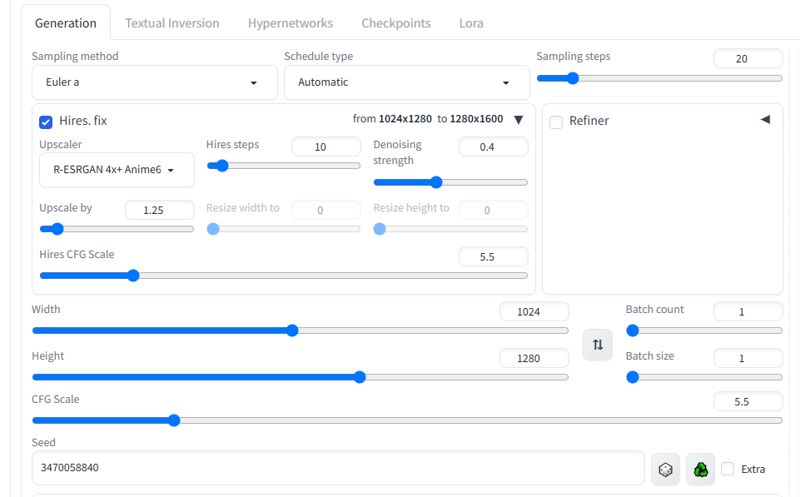
First, generate something using txt2img and HiRes
You can inspect the image using "PNG info" in WebUI
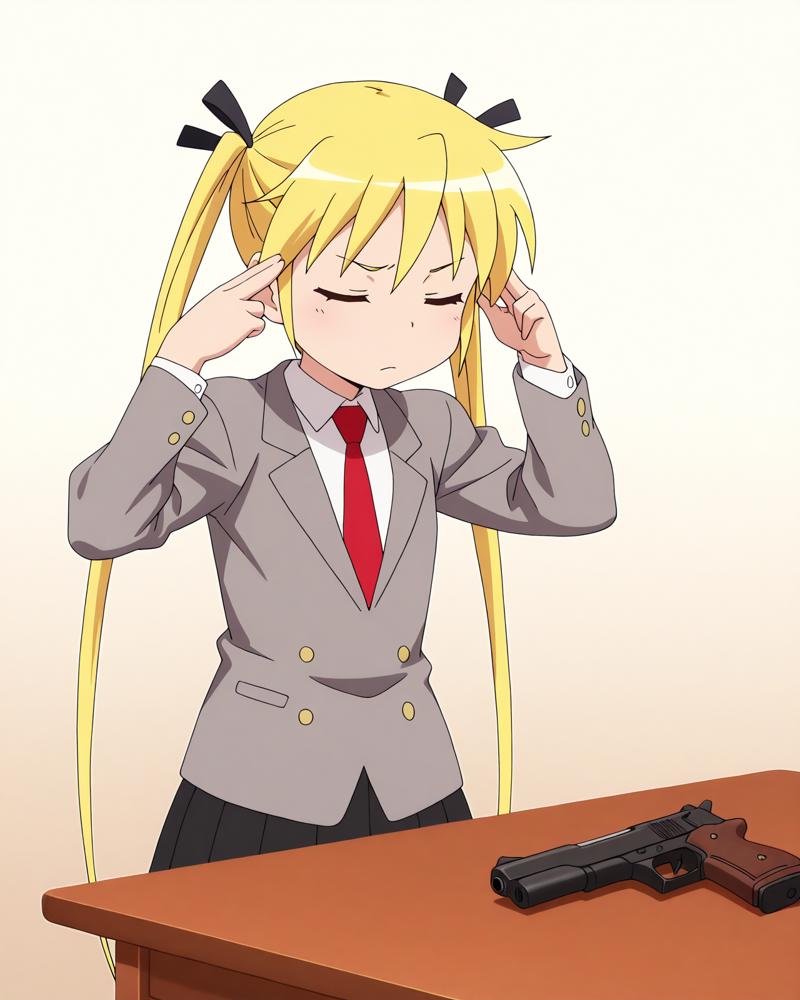
(Used Checkpoint and Lora 1 2 3 4)
She is Sonia, an assassin from Anime Kill Me Baby. I wanted her to lifted the pistol up using her mind but failed
I'm not happy with some details either
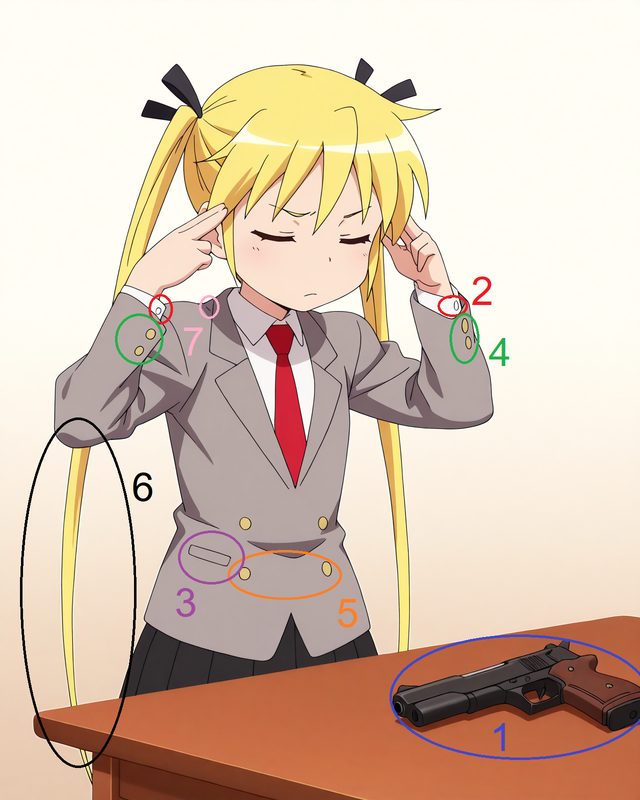
As mentioned, the pistol isn't lifted up. I used this Pizzakinesis LoRA, but it can't lift objects up other than food (I haven't tried in depth). Besides that, the composition is correct
For me, details are important. The character designs of KMB is simple but clean. These lines are redundant and not existed in official designs
see above
The buttons are slightly higher
see above
The hair is misplaced. This is one of the common problem of generative AI images.
Unnoticed redundant line
Since AI can't achieve, I do it myself
So I do some rough editing using graphic editor (such as Photoshop and GIMP)
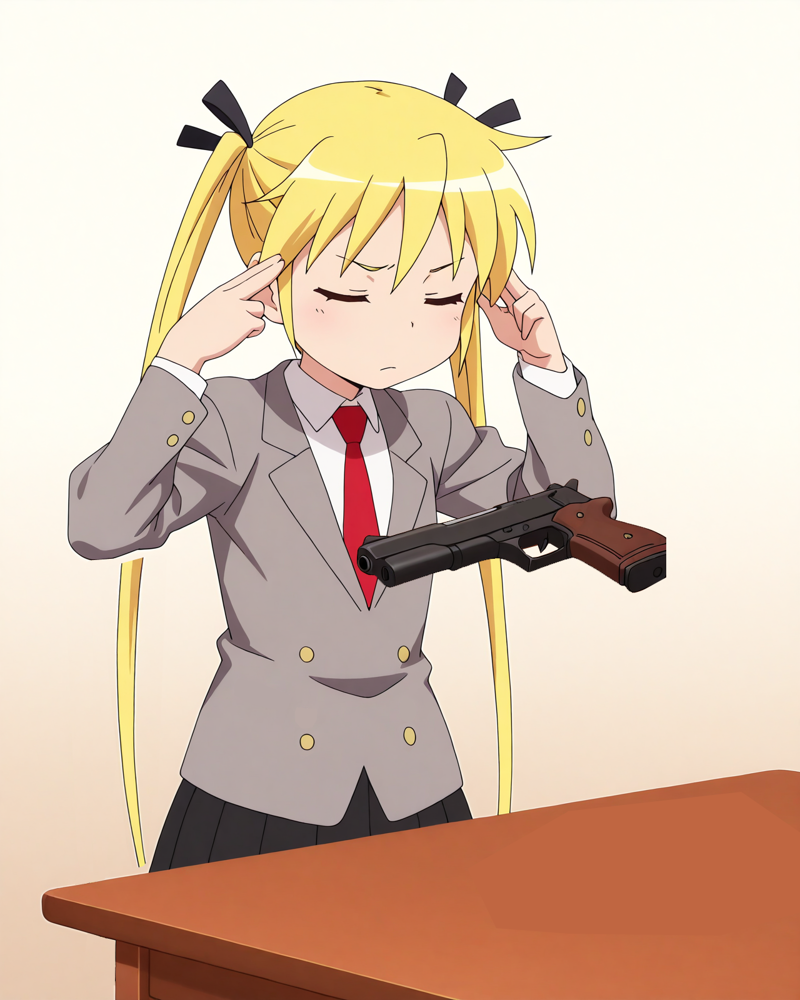
Done
But as you see, the hair is not attached, and part of the pistol is missing.
This isn't over yet
Next, I will put it into ControlNet Canny preprocessor
2. Using ControlNet Canny
Expand "ContorlNet Integrated" tab (or something like that) in webUI
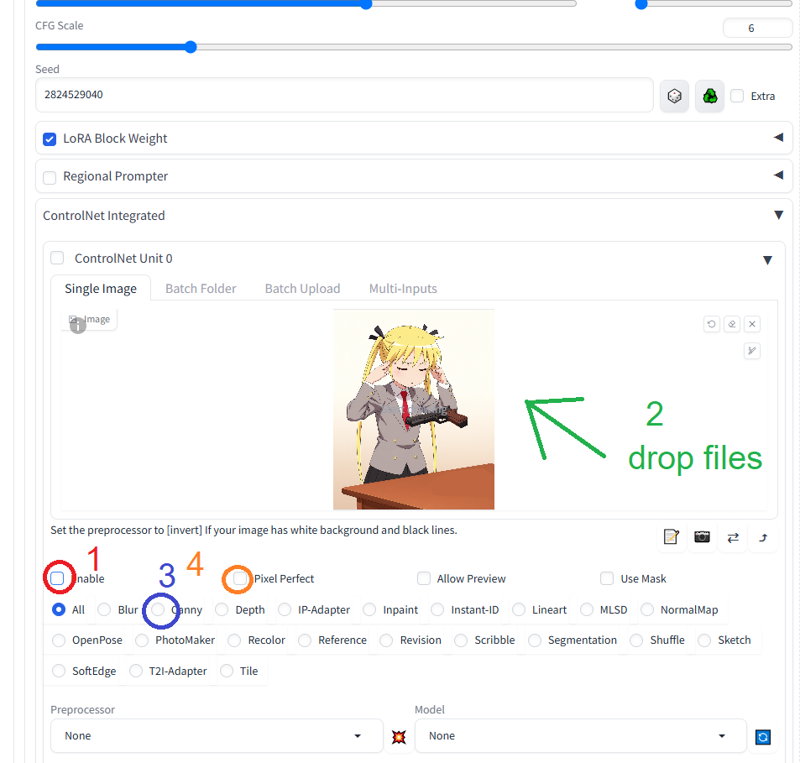
Enable ControlNet Unit 0
drop the image
choose "Canny"
choose "Pixel Perfect" for original resolution

If you're using Canny for the first time, download the model HERE and put it into "models" folder of ControlNet
If you don't know how to use ControlNet, ask Google
Click the button to run the preprocessor (A)
If you just put the model into ControlNet folder, click the refresh button to reload the model (B)
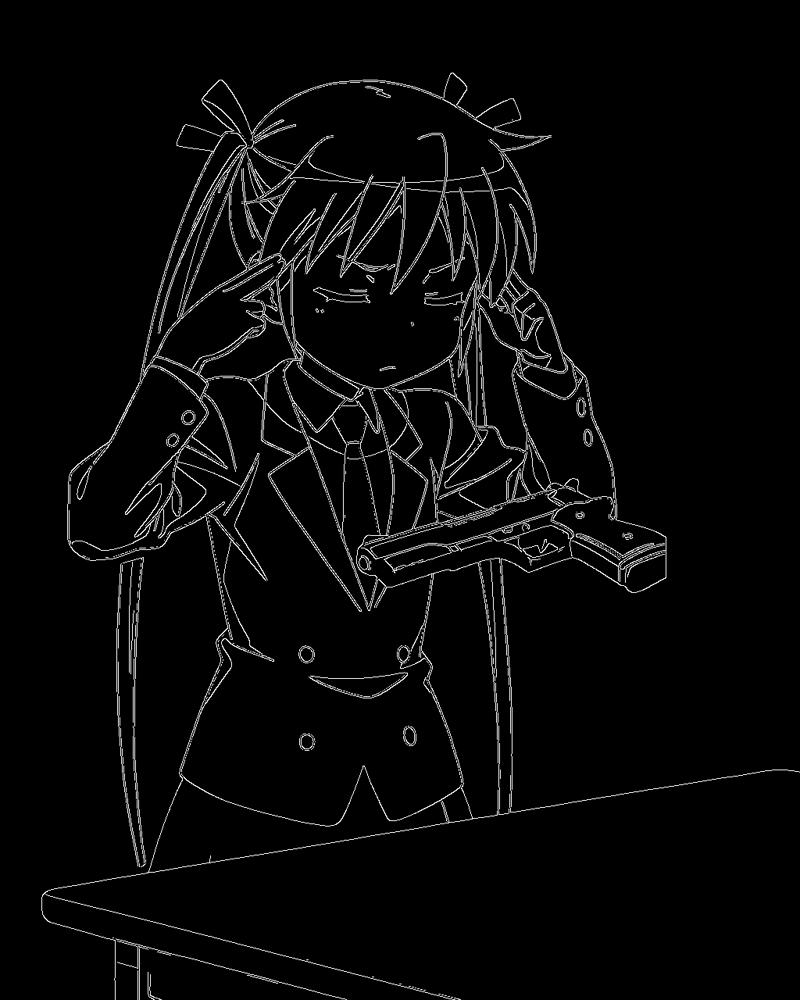
Canny preprocessor detects the outline of the image and converts it into an image with black background and white lines, then the ControlNet reads the B/W image
You could disable "Pixel Perfect" and set resolution manually
Also, you can control the accuracy of the preprocessor by adjusting Low Threshold and High Threshold (for details, ask Google).
Run the preprocessor again after adjusting threshold or resolution
Next, I will edit the B/W image using Photopea, an online image editor
3. Editing Canny image
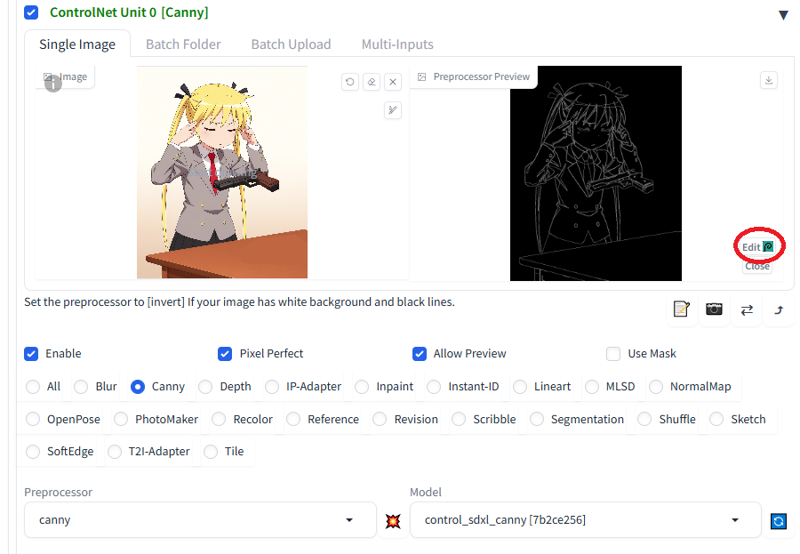
Click "Edit" and you will see a pop-up window. Click "OK" to proceed.
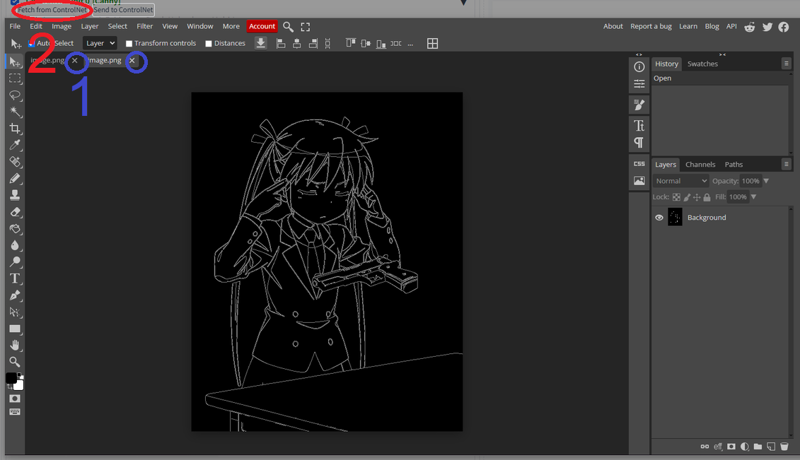
Close all the windows (1) and click "Fetch from ControlNet" (2)
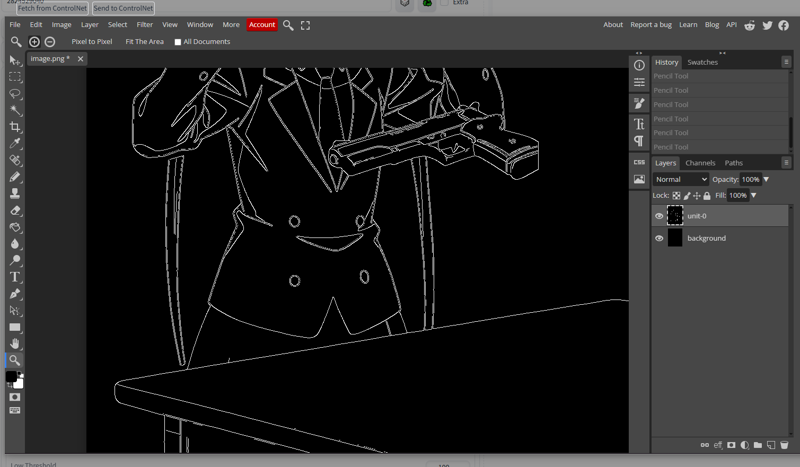
Make sure that name of the imported image layer is "unit-0" (matched with the Unit number in use)
If not, please rename it
Right-click on the layer and choose "Rasterize"
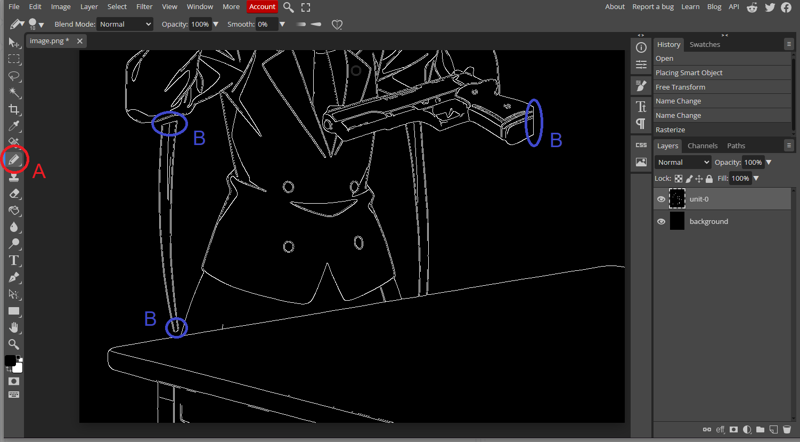
Click "Pencil Tool" (A)
Don't use non-binary "Brush Tool"
Use black pencil tool to erase and open these lines (B)

If finished, click "Send to ControlNet" on the top left corner
After
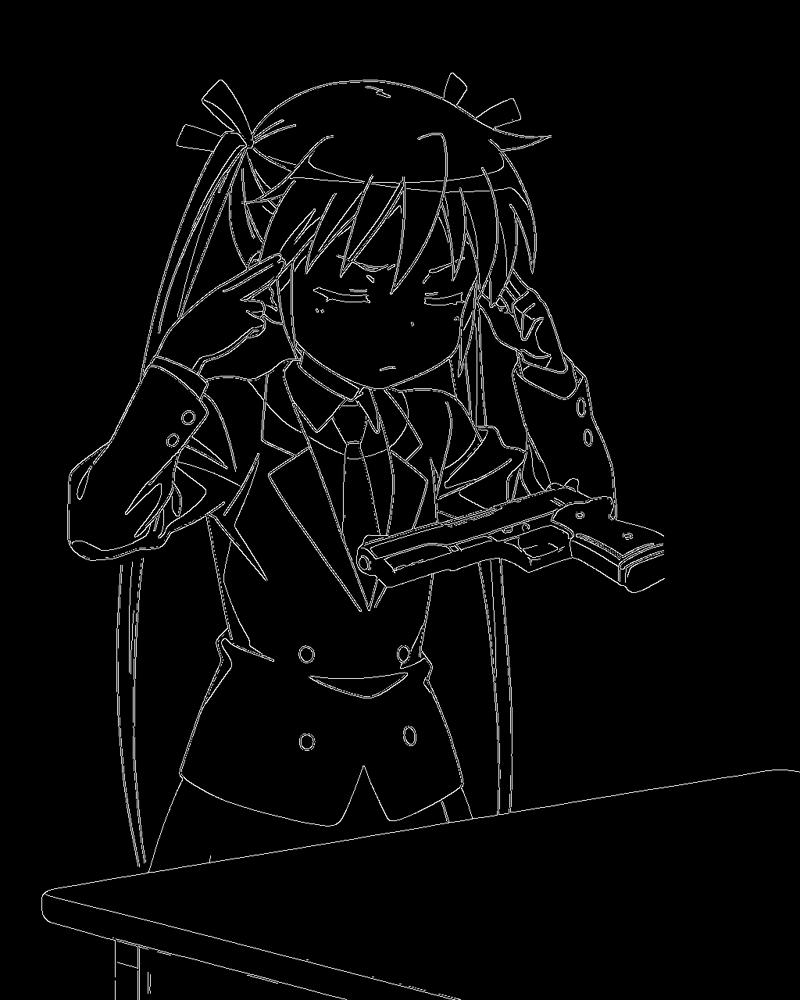
You can use this as Canny image. You can found the original one HERE (1024x1280)
The image above is compressed. Using that may generate different results
Drop it into Photopea and renamed the layer as"unit-0"
Layers with a wrong name can't be sent back to ControlNet
Also, you can save/export edited B/W images as .psd/.png files
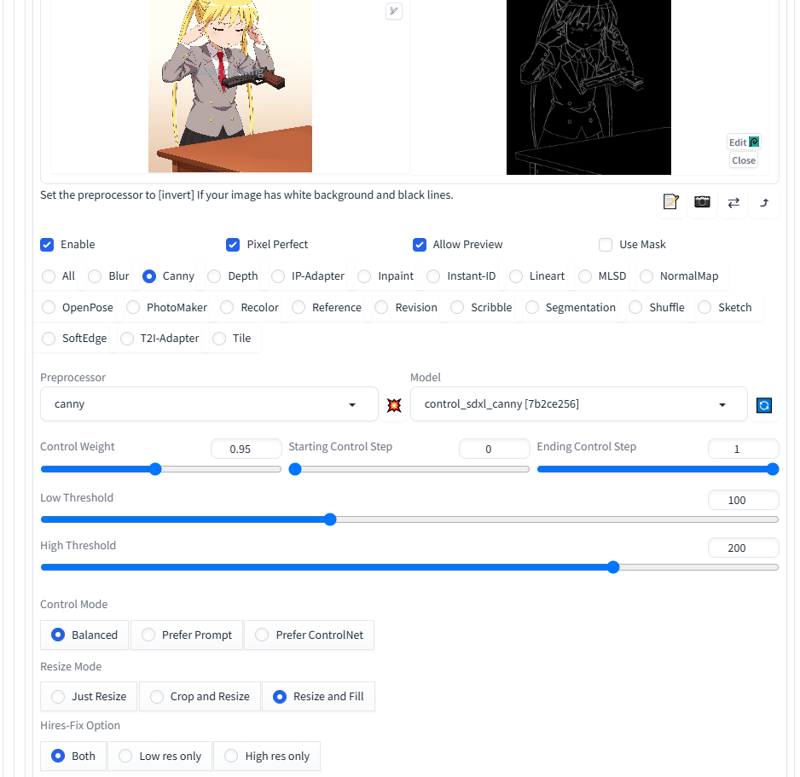
Back to WebUI, set the Control Weight to 0.95 for a little bit flexibilities
Prompts should also be modified to match the output target
Delete "hand gun", "floating", "gun on table" in the prompt
Click "Generate" and see the result
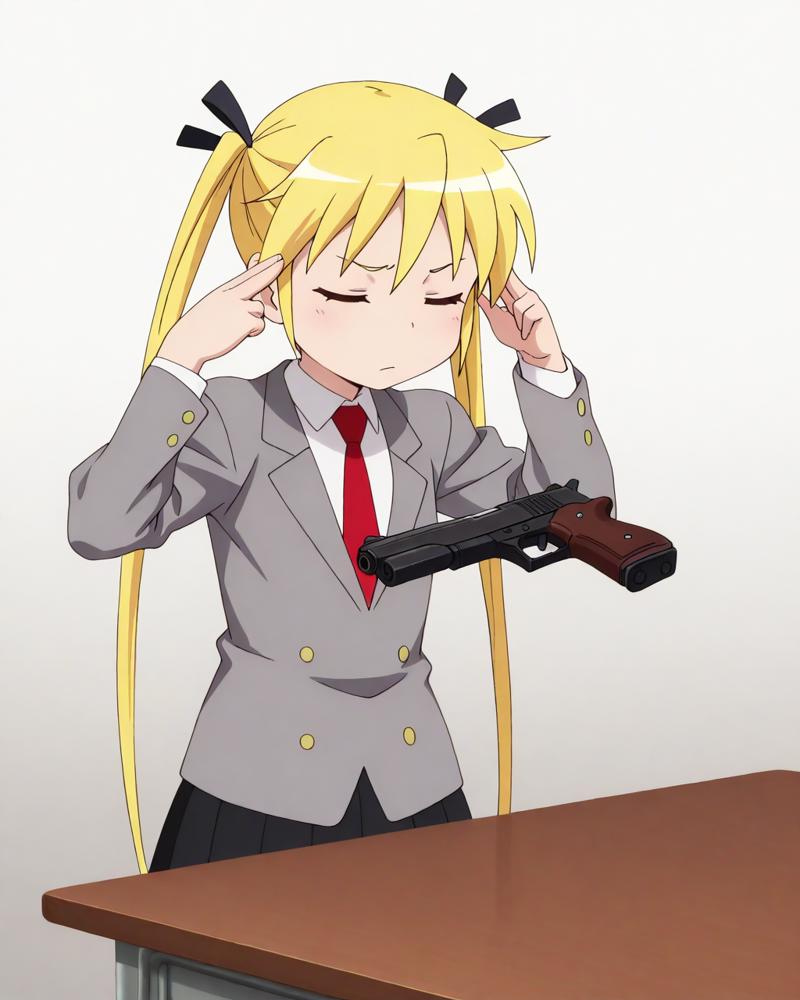
You can see the AI completed the missing lines of the pistol and hair
THAT'S THE MAGIC
My request is met, but the AI can do more
4. Prompts and parameters
Canny only controls the lines
The output results still depend on prompts and other parameters
So different results can be obtained by modifying these parameters with the same Canny images
I want to change the table to wooden table, so I replace "table" with "wooden table" in prompt
Also, CFG scale is changed from 6 to 5.5 and a new seed is used
Finally I enable Hires Fix for a better result
Here is the result
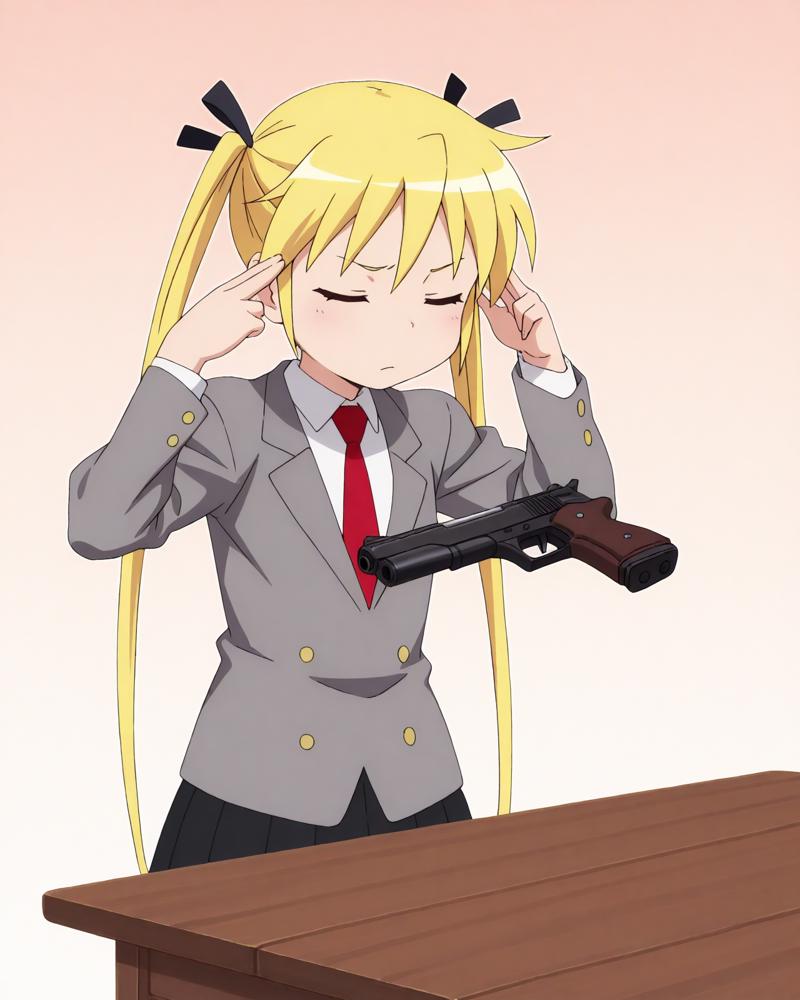
Although there are some unnoticeable flaws, I'm happy with that
Actually, it took me some time
You can continue to adjust for perfection, but that's all
REALLY?
In order to show the possibilities, I generated some images below
For dramatic effect, I added this explosions LoRA and set the weight to 0.8
delete "gradient background" and add "outdoors, explosion, raining, dramatic lighting" in prompt, and generate
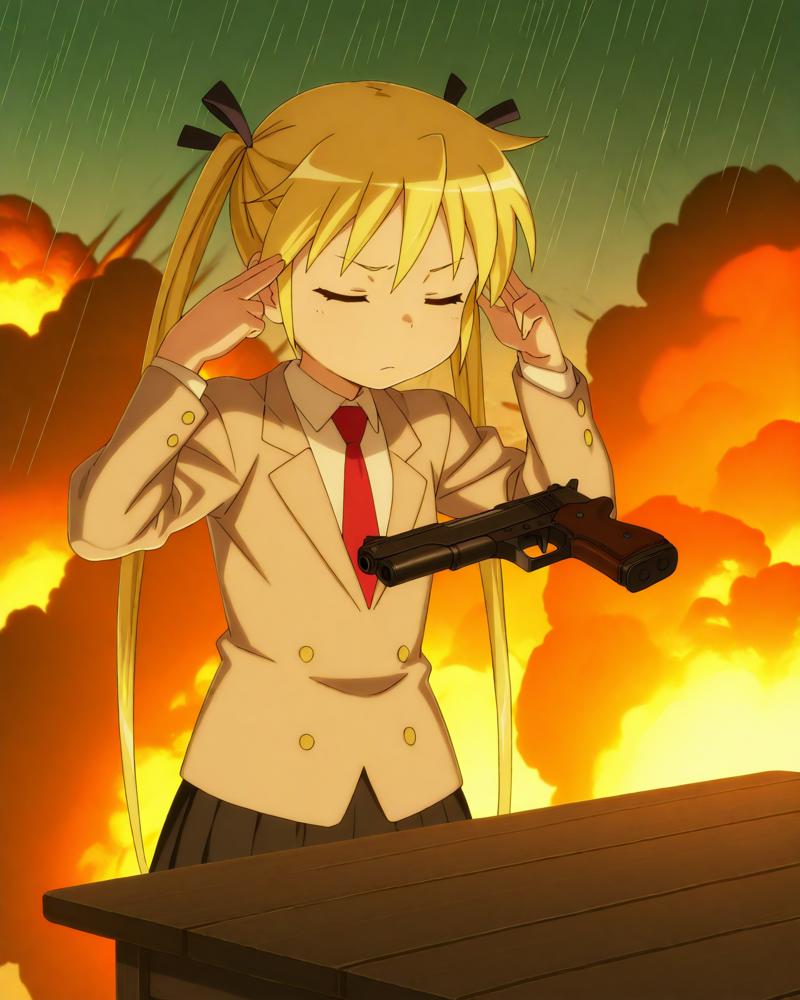
The background, color and lighting are changed
In Photopea, I remove her twintails carefully and send the image back to ControlNet
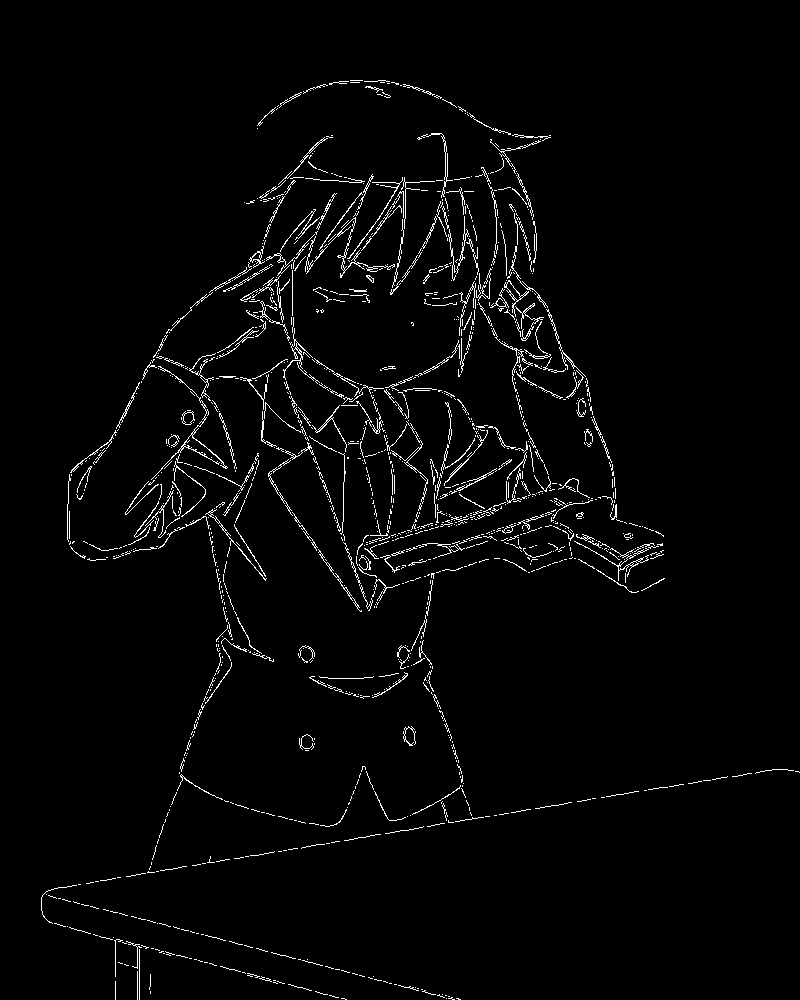
Set the control weight from 0.95 to 0.9 for some flexibilities
delete "twintails, hair ribbon" in the prompt, and generate
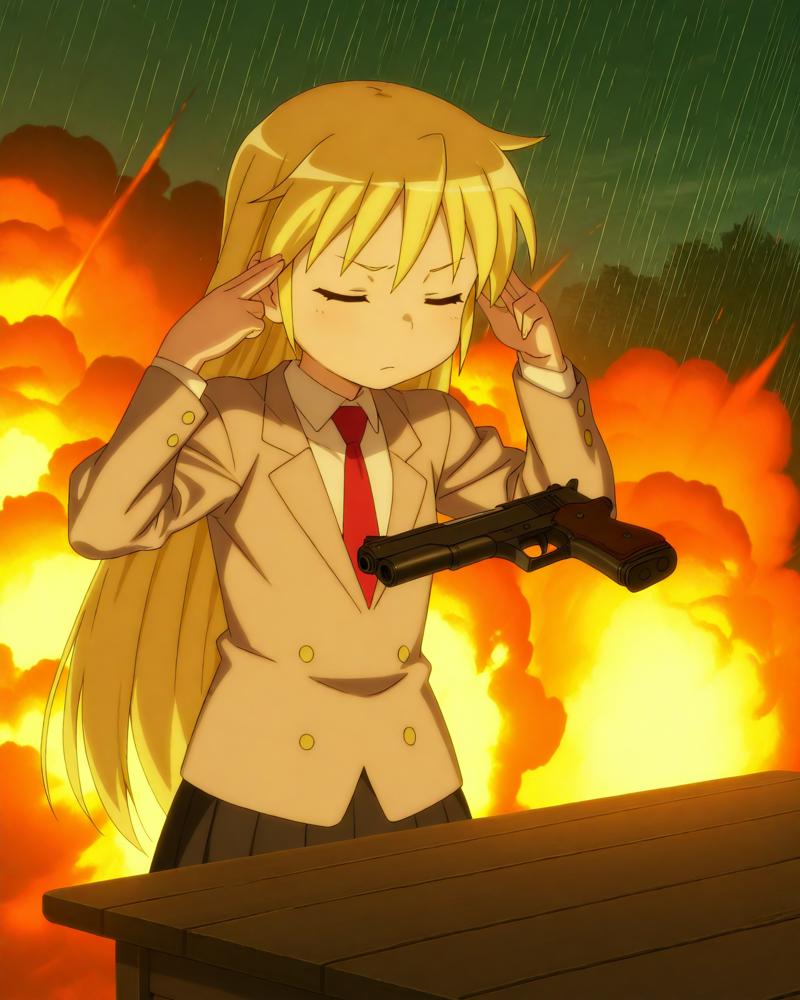
Her hairstyle has changed. AI generated missing part of hair and it's look good
Using black pencil tool to remove her closed eyes and eyebrows in Photopea like this
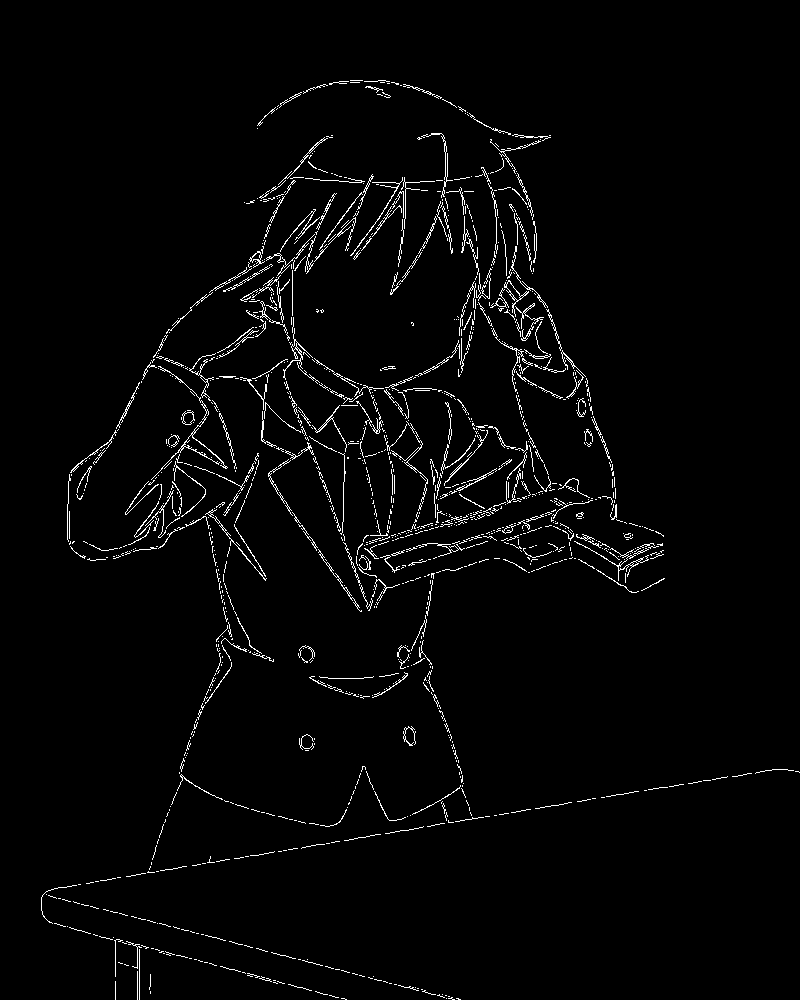
Replace "closed eyes" with "yellow eyes", add "surprised" in prompt, and generate
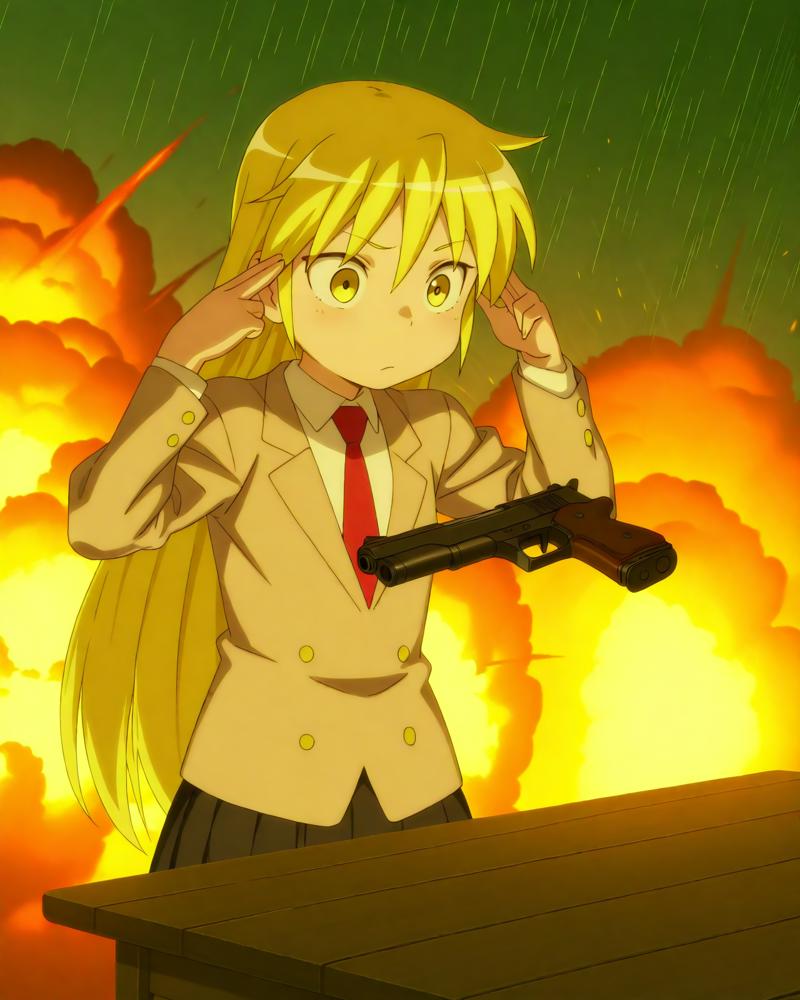
Now her eyes was opened and surprised by her superpower
5. Conclusion
People often said that the prompts are magic spells
If the prompts are magic spells, I would say that the Canny images are magic circles
We can control the lines of the output images through Canny, and control other elements through prompts and LoRA
Although it's time and labor consuming, IT'S FUN
I think Canny works very well with Illustrious
Notes
You can skip the photoshopping and edit the Canny images directly in Photopea, but it's up to you
Please keep the Canny images carefully
Images can't be regenerated perfectly without Canny images even all parameters are correct
