
Hey all! Partially by request, and partially as thanks for 1k followers, I'm writing this article to inform anyone interested on how I approach image generation.
Table of contents:
1. Basic process rundown
1.5 Getting Started
2. Checkpoint and style keyword differences
3. Refining, upscaling and checkpoint mixing
3.5 Init Image
4. Prompt engineering
5. Conclusion
1. Basic process rundown
Firstly, your process will differ slightly depending on which software you are using. If you are primarily generating online (using Civitai or another comparable resource), your options are extremely limited. The only benefit to this that I can see is if you have a very old computer, as local generation is gated by your hardware.
Personally, I use SwarmUI for all my gens. It's a fork of ComfyUI, and can be found here : https://github.com/mcmonkeyprojects/SwarmUI
The installation instructions are easy to follow, and they have an extensive tutorial/FAQ available that will cover most of your questions. So, in this guide I will be using examples from this application, if you are using different software the general theory should still apply, but you will likely have to find the equivalent features/settings/syntax for yourself.
1.5 Getting Started
Now that you have your local software set up, it's time to download a checkpoint to work from. There are many available on Civ, and their specialties and quality vary greatly. My recommendation would be to use an Illustrious based model, currently, I find they have the best prompt recognition, consistency and user friendliness. Some options that I can personally vouch for include:
https://civitai.com/models/621659/smooth-mix-illustrious-or-pony - Great for 2.5d and anime. My current favorite checkpoint.
https://civitai.com/models/503815/nova-furry-xl - Furry focused, very good at making anthro content, not great with backgrounds
https://civitai.com/models/827184?modelVersionId=1410435 - Great anime checkpoint, Anything from @Wai0731 is good, you can't go wrong
https://civitai.com/models/443821/cyberrealistic-pony - Pony-based checkpoint, still one of the best for realism in my opinion, often takes more trial and error to achieve desired results
https://civitai.com/models/1141653/spicymix - A little-known checkpoint that I find amazing for refining/upscaling, more on that later.
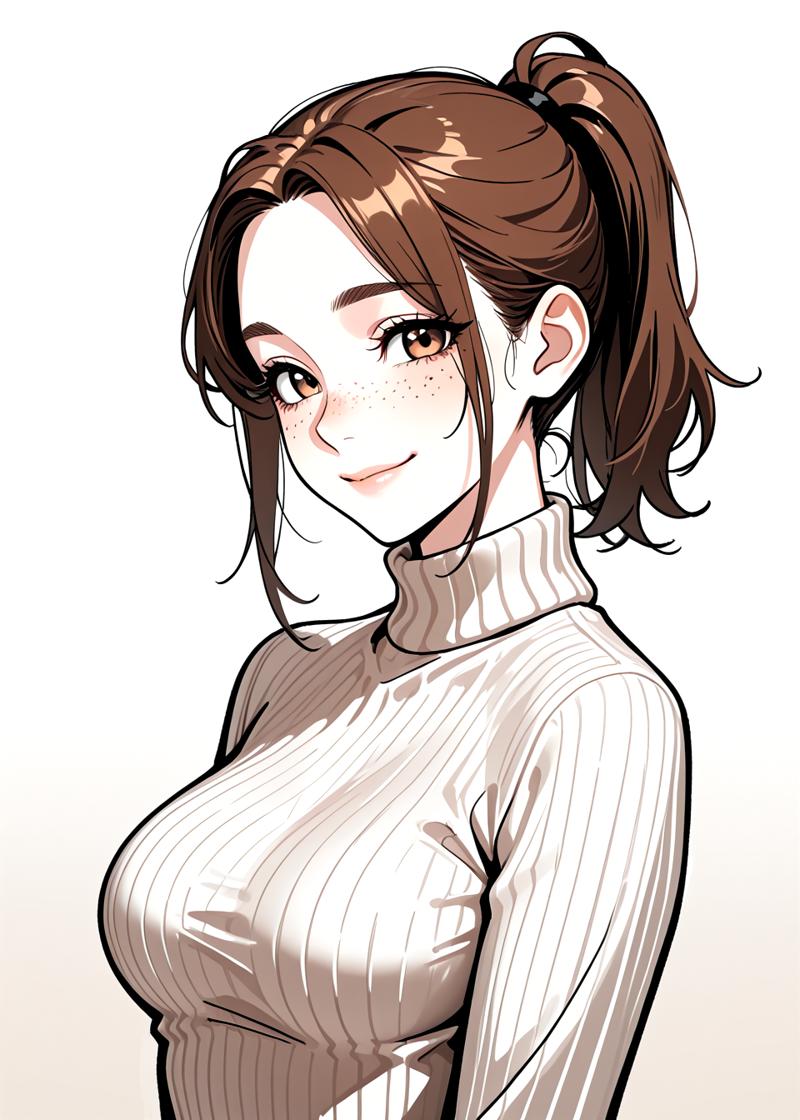
So now that you've downloaded your checkpoint and slapped it into the correct folder, it's time to start cooking! Here are some basic settings to serve as a starting point for your generations.
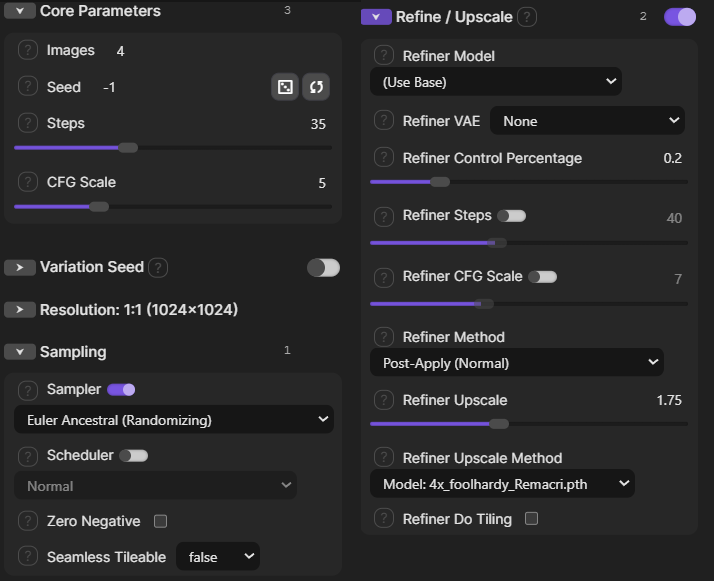
Alternatively, if you have a slower computer, keep the upscaling at 1 until you get a generation you are happy with, then crank it up to increase the quality. Anything above 2.25 is overkill and will often scramble the image.
Be aware: Changing image resolution will dramatically alter the outcome! Try different dimensions and ratios, landscape, portrait, etc.
2. Checkpoint and style keyword differences
As touched on before, checkpoints are the baseline for your image generation, and your output will vary widely, even with the same prompt, using different checkpoints. Experimentation is the essence of AI generation. Generate a set, identify the undesired results, tweak the prompt, and repeat until you are happy with the result. Depending on prompt complexity, this can be a long and arduous process.
Words that affect the overall style of the composition can be quite powerful, some of which include:
Anime

Realistic / (Hyperrealism)
Cartoon
Line art/ Sketch
3. Refining, upscaling and checkpoint mixing
An important part of making high quality images is Upscaling. You'll see by default, 'Use base' is selected. This means the upscaling of the image will be done with the same checkpoint as the image is generated with, which is generally the preferred option. This maintains image consistency during the upscaling process.
Refiner control percentage is how much power you give the refining process to change the base image. Feel free to play around with the range, I typically use 0.15 - 0.3
Refiner steps (disabled by default): how many passes the refiner does in changing the base image
Refiner CFG (disabled by default): Same as normal CFG, but for the refiner process
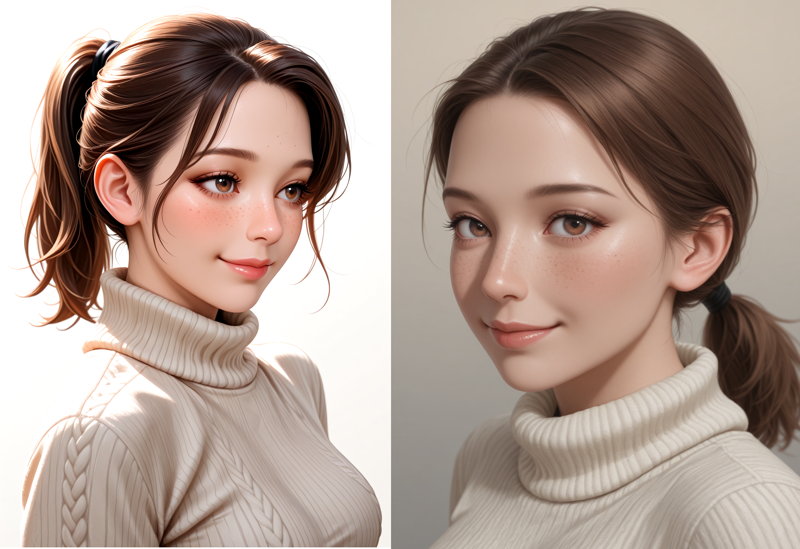
An interesting technique you can use for image variety is changing the checkpoint your refiner is using to something else. In this case, You'd likely want to turn your 'Refiner steps' on and bump up the control percentage, giving the refining checkpoint more impact in your final image. This is an extremely versatile way to create your own image style by mixing and matching checkpoints. You can start with an anime image and refine it using A realism checkpoint, for instance, to make a realistic anime girl. You can generate an image on a checkpoint the is great for background and prompt following, but not great for details (eyes/hands), and then refine that image with a checkpoint that fixes its flaws. I highly recommend playing around with these settings yourself.
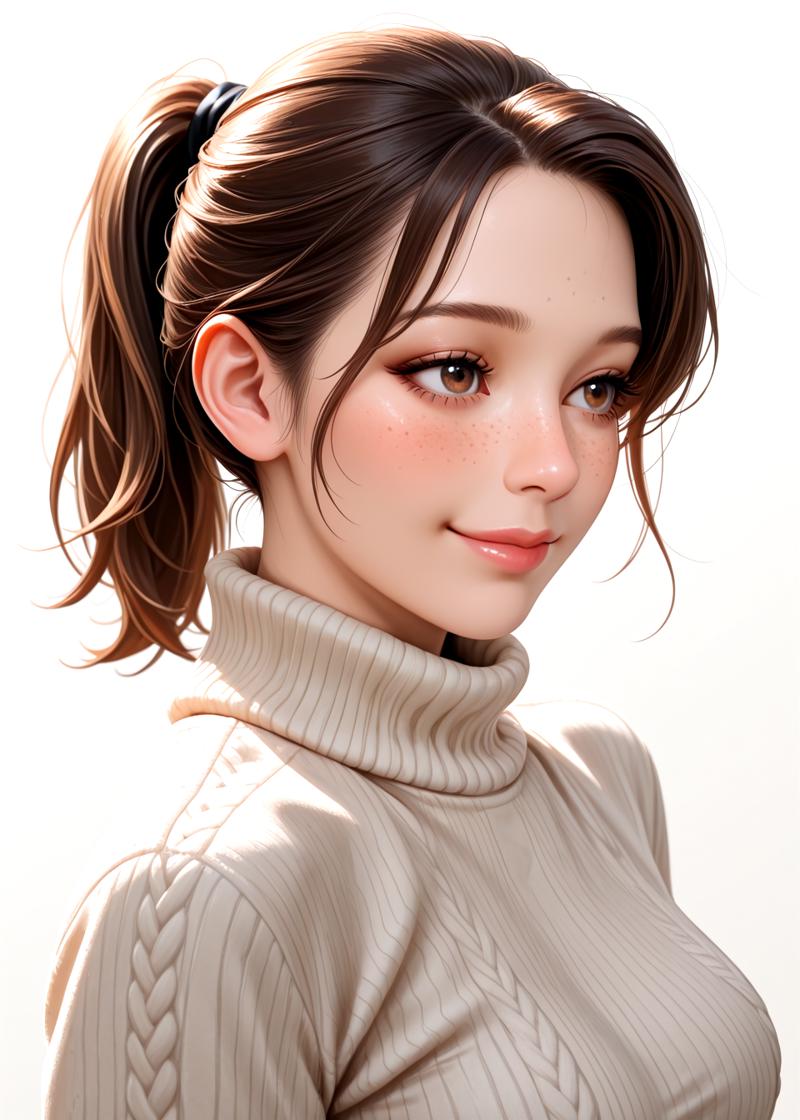
Example, reusing the parameters from the last point:
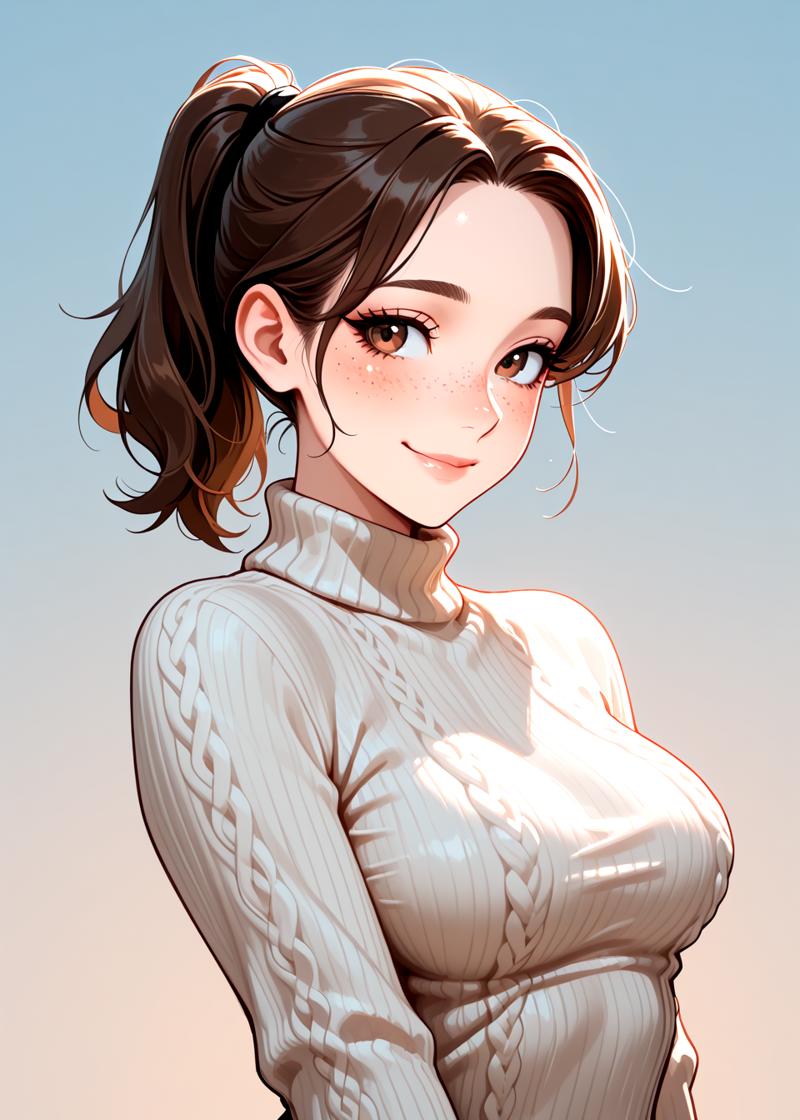
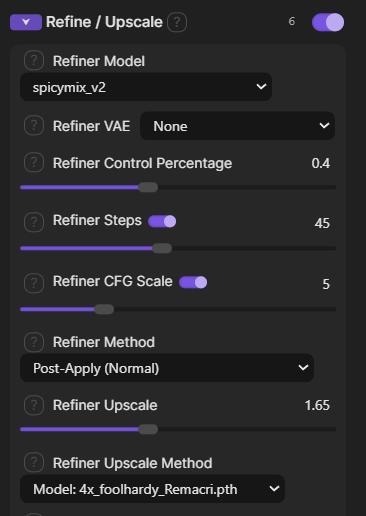
Using these parameters for upscaling, everything else is the same:
You can see how much the image changes!
I personally often use Smoothmix as the base, and Spicymix, or https://civitai.com/models/1110783/ilustmix as the refiner.
3.5. Init Image

This is a really handy tool for further refining an image that you like, but needs subtle changes. Say you generate an image that has messed up hands, but otherwise is exactly what you want. You can drag the image into the 'init image' tab, (make sure the option is enabled), keep your same prompt, and generate. It will spit out the same image with slight variations, you can also prompt additional changes as usual, all while maintaining a very similar image output. Small things like hair or eye color, hand position, clothing, expression, the way certain ahem 'body parts' look, etc. all while maintaining the same overall image composition... I find it very useful.
Play around with Init Image Creativity until you achieve the desired results, lower = less change, anything over .75 has potential of drastically altering the base image.
4. Prompt Engineering
Arguably the most important part about AI image generation is prompting, and there are number articles and videos on the subject that are better, and go into more detail than I could. If you are new to the space or looking to refine your gens, some concepts to research include:
Concept Bleeding - Where certain words have unintended impact on the overall composition, eg, "Dark" when you are aiming for a dark atmosphere or night time image, ends up changing hair or clothing color, or skin color. Specificity is important, as well as using alternate words to describe your intended result. Synonyms are your friend. In this case, "Dark room", "Night", "deep shadows" etc. try different things experiment, you'll get there!
Using <Break> / BREAK and other UI syntax - Something you need to get used to thinking about in more advanced compositions is how the AI interprets the order of your prompt, and the grouping of ideas your are presenting. If you are aiming for an image with multiple actors, all with different traits, it's helpful to <break> the descriptions up to help generation consistency. Example:
(background description, quality tags, camera angle, 2girls)
<break>
(1st girl description, pose, clothing, expression, etc.)
<break>
(2nd girl description, pose, clothing, expression, etc.)
Using Control net - This is fairly complicated and would take too long to go into detail, but I recommend looking it up if you can't get the results you're looking for using <break>. Basically it allows you to draw in the areas of the image, and assign them values in the prompt.
Variables and Wildcards - A really fun way to add diversity to your generation without having to manually change the prompt every time. The format used in SwarmUI is as follows:
Base generation:
Day, beach, sand, ocean, sky, from above, high angle view,
<break>
1girl, blonde hair, blue eyes, wearing swimsuit, medium breasts, looking at viewer, smile
This will get you very similar results every time.
Example:
Now we'll use some variables!
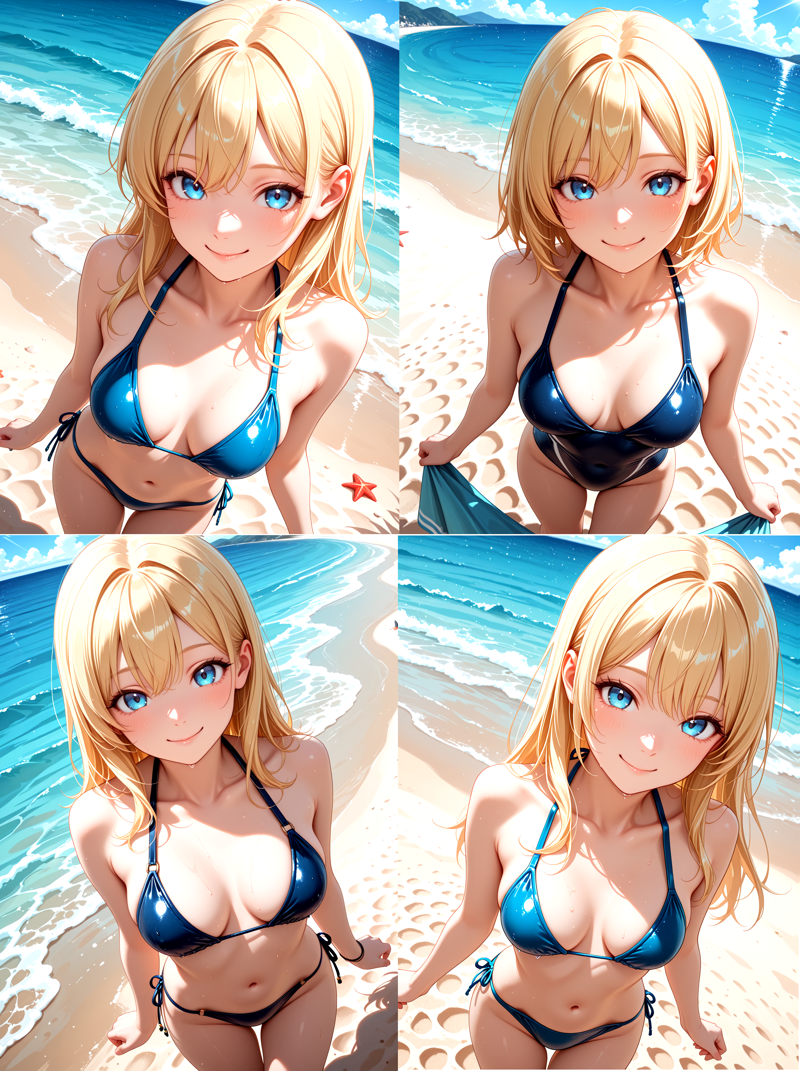
Generation with variables:
Day, beach, sand, ocean, sky, <random: from above, high angle view || Dutch angle || From behind || From side, side profile>
<break>
1girl, <random: blonde || Brown || Black || Blue || Pink> hair, blue eyes, wearing swimsuit, <random: medium || Large ||Small> breasts, looking at viewer, <random: smile || Smirk || Pout || Frown || Grin>
Example:
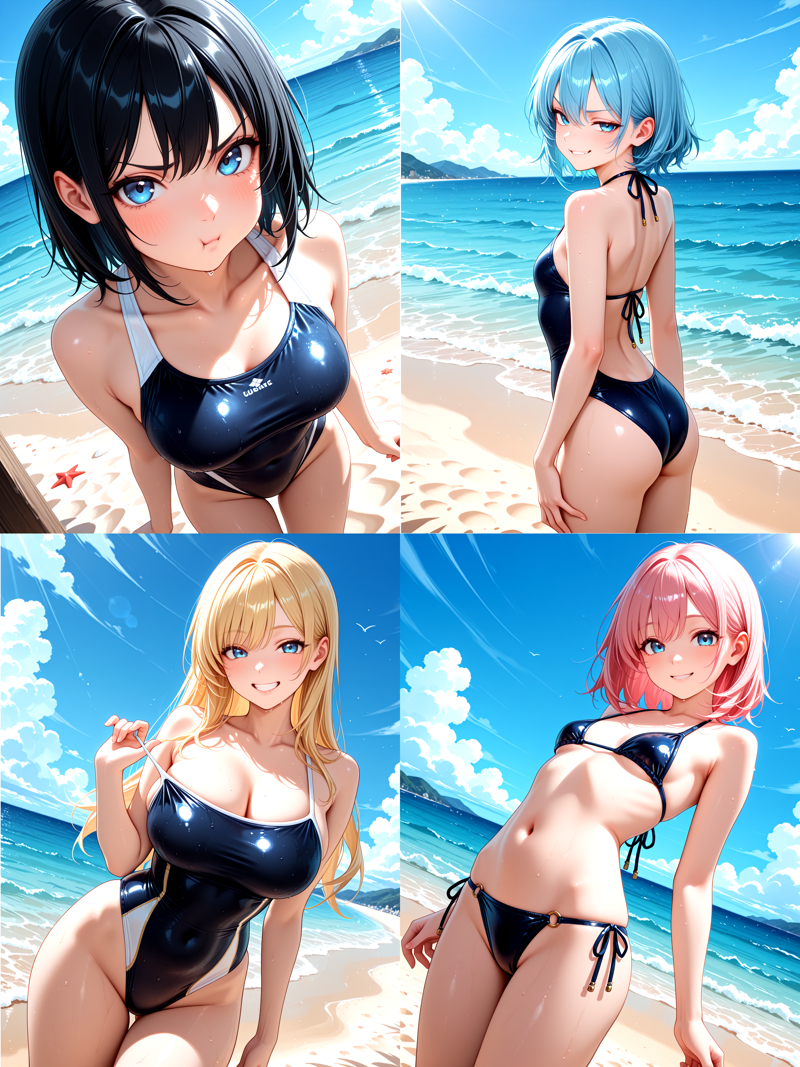
Now the same prompt will generate dozens of different images!
You can go absolutely nuts with variables, I find them quite fun. Wildcards are much the same, simply using an external .txt file to define the changes, they save on prompt space. I'd recommend checking the FAQ for more info on these concepts as well as syntax.
WARNING: Syntax will vary depending on the software you are using! Make sure you check how to implement these concepts correctly on your UI!
Useful extension:
https://civitai.com/articles/6394/how-to-make-civitai-detect-the-metadata-of-your-images-created-with-swarmui
Conclusion:
Trial and error is 95% of making AI art. Don't get discouraged if your first attempt at a concept or image doesn't work out. Try Identifying the issues you are having, try and link them with your prompt, change a few things, and try again.
Be wary of over-prompting. Too many vague concepts will generally end up with unintended results. the more simplistic the prompt, the more likely you will get what you want.
Learn by emulation: Check out other posters' metadata! Look at what tools they are using, and how they arrange their prompt! This is one of the easiest ways to learn!
Anyway, I've rambled on long enough. There is so much to cover, I've barely scratched the surface!
Thanks everyone for following and reacting to my content, I've had a blast, Hopefully you've learned something new.
Message me anytime with questions, comments, concerns, suggestions, requests!
Thanks for 1k!
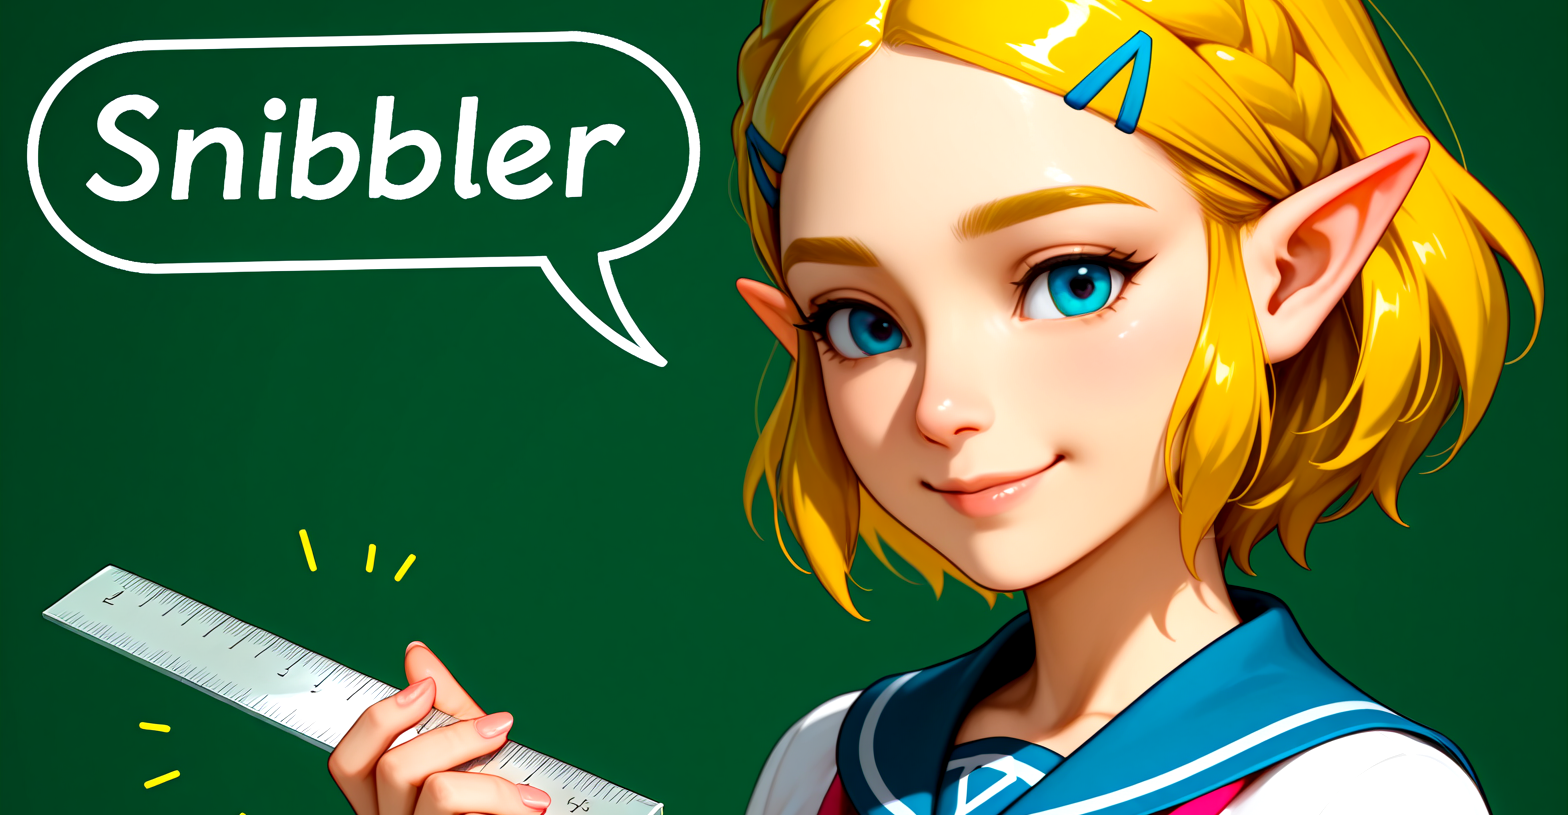
-Snibbler