.jpeg)

Hello and welcome !
Thanks for checking out WD Offline tagger:
This is an offline image tagging tool designed to help creators, LoRA trainers, and dataset curators generate clean, customizable captions for images using high-quality tagging models.
This tool is based on the excellent work from SmilingWolf and inspired by the CLI-only wdv3-timm project.
It has been extended and wrapped in a user-friendly Gradio interface with many extra features for better control and flexibility.
🎯 What does it do?
It allows you to:
🖼️ Tag a single image manually with visual preview
📁 Process entire folders of images in batch mode
♻️ Retag existing images with new thresholds or settings
✍️ Output
.txtcaption files compatible with LoRA, DreamBooth, Kohya scripts, etc.⚙️ Choose your model, thresholds, resize options, prefix, and tag filters
📊 Visualize and export top tags from your dataset (CSV & Plot)
✨ Key Features
✅ Offline & local — after downloading the model once, everything works without internet
✅ Supports .png, .jpg, .jpeg, .webp image formats
✅ CUDA acceleration, with options for torch.compile, TorchScript, autocast, and more
✅ Automatically generates .txt files named after each image
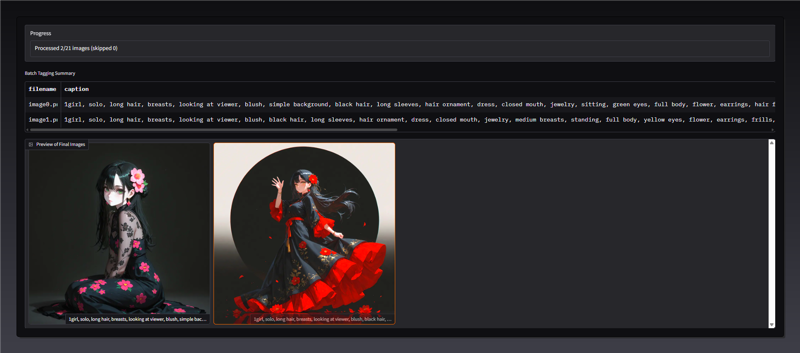
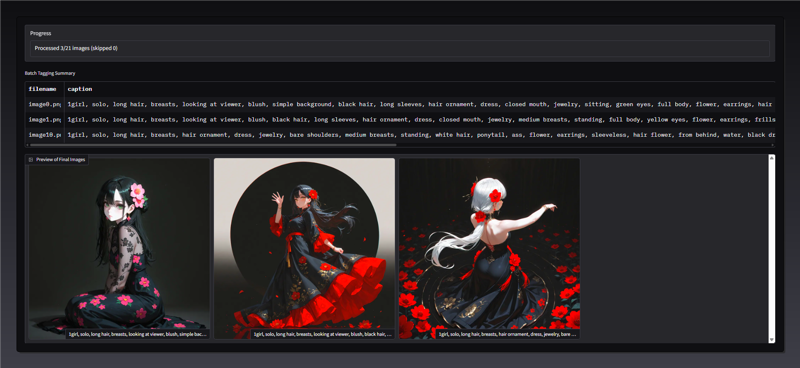
✅ Batch tagging with live progress, image previews, and safe error skipping
✅ Plot top tags visually and export all results to CSV
✅ Advanced tag control: prefix injection, exclude words, underscore cleaning
✅ Flexible UI + full CLI support for power users and script automation
✅ Built-in error logging (batch_errors.log if needed)
------------------------------------------------------------------------------------------------------------
🔄 V2 Update (April 16, 2025)
New features added based on community feedback:
🆕 Smarter Output Handling
- If no output folder is selected → .txt files are saved next to each image
- If output folder is selected → all captions are saved there, using the original image names
- Added a stop process to simply stop the process
🧩 Append Mode
- A new option to append tags to existing .txt files
- Automatically avoids duplicates
- Merges new tags and sorts them by confidence score for better readability and training efficiency
> Big thanks to @reaper557 for the suggestion!
To use the updated version, you can download the ui.py and replace the old one with the new one in your folder project.
> IMPORTANT<
If you didn't install the tool before, you should follow the instructions below after the previews 👇
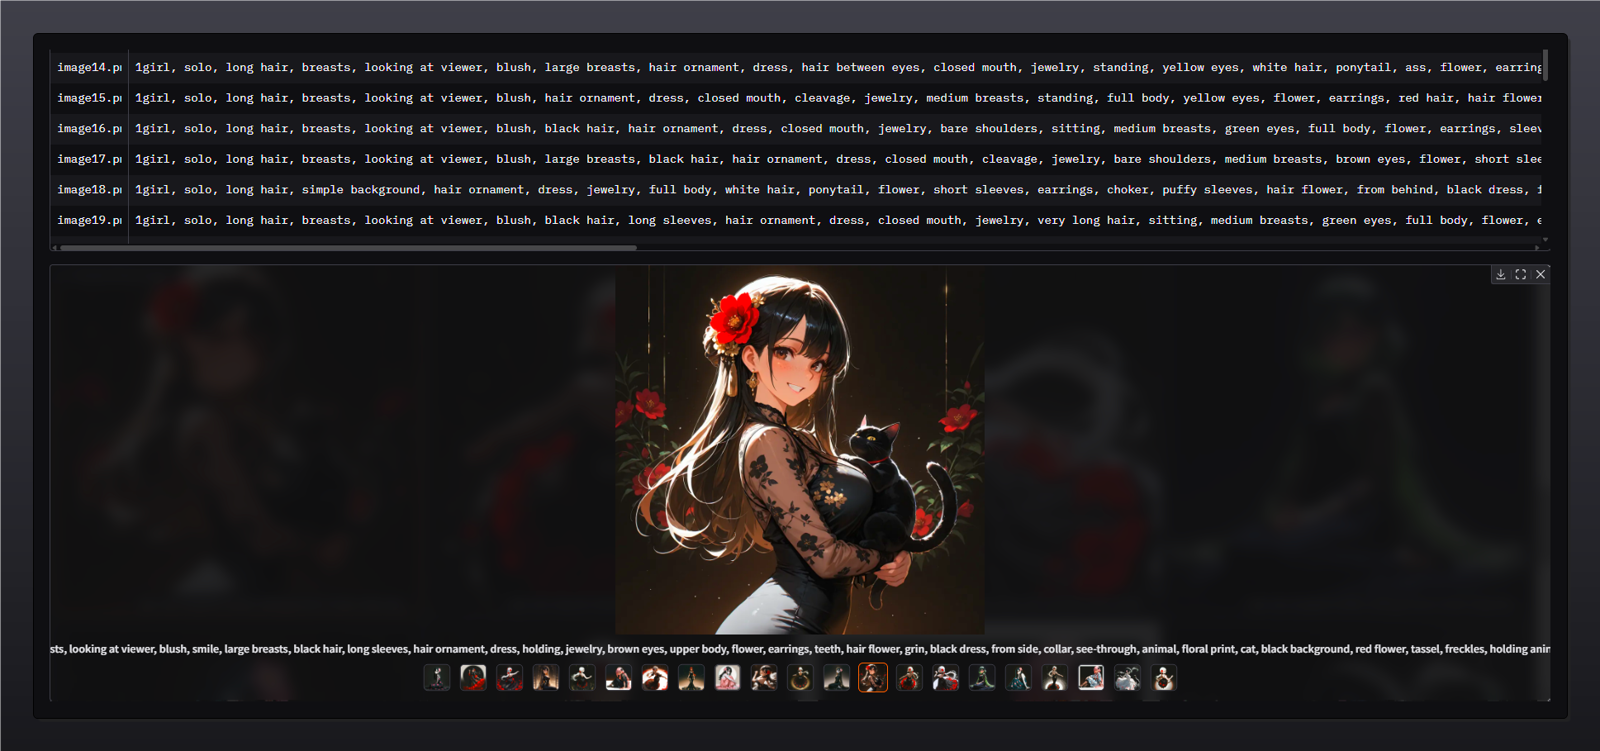
The generated captions will be shown in the UI with the corresponding image.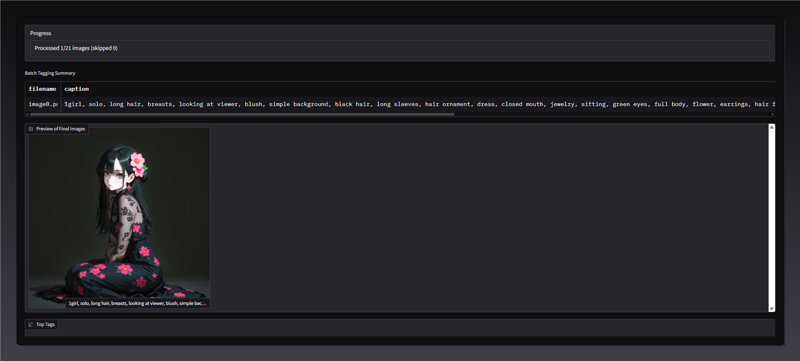
Plots: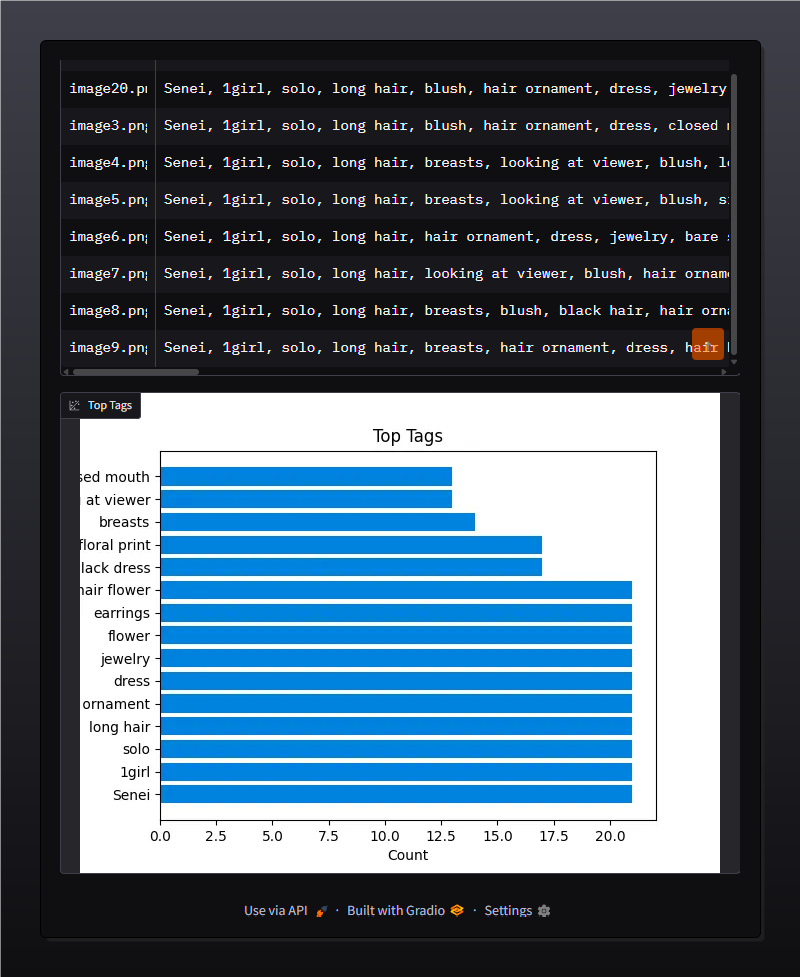
How to install:
clone the repository and enter the directory:
git clone https://github.com/neggles/wdv3-timm.git
cd wd3-timm
Create a virtual environment and install the Python requirements
On Windows (or just want to do it manually), you can do the following:
Create virtual environment
python3.10 -m venv venv
Activate it
venv\scripts\activate
Upgrade pip/setuptools/wheel
python -m pip install -U pip setuptools wheel
At this point, you can install PyTorch (GPU or CPU)
For cuda use:
python -m pip install torch==2.5.0 torchvision==0.20.0 torchaudio==2.5.0 --index-url https://download.pytorch.org/whl/cu124
For cpu use:
python -m pip install torch==2.5.0 torchvision==0.20.0 torchaudio==2.5.0 --index-url https://download.pytorch.org/whl/cpu
Before installing requirements, it's very important that you download the zip with the script and the new requirements.txt, once you've downloaded it just pull the .py and the .txt in the /wdv3-timm folder.
You can copy and paste every files from the zip to your project folder.
Install requirements
python -m pip install -r requirements.txt
Launching UI or CLI
(venv): python ui.py
CLI example:
python ui.py batch C:\path\to\images --model swinv2 --clean_tags --generate_csv
✅ Tested on:
NVIDIA RTX 4080 Laptop GPU (Windows11)
NVIDIA GTX 1660 Ti Laptop GPU (Windows 10)
Python 3.10
If you appreciate the time and effort put into this, feel free to drop a follow, a like, or a tip... It means a lot! 🙏
Thanks for being here, and happy tagging 🎉