
Introduction and Requirements
Recommended Checkpoints for QR Code Generation
ControlNet Models
ioclab/ioc-controlnet (brightness model)
Style Recommendations - LoRA Models
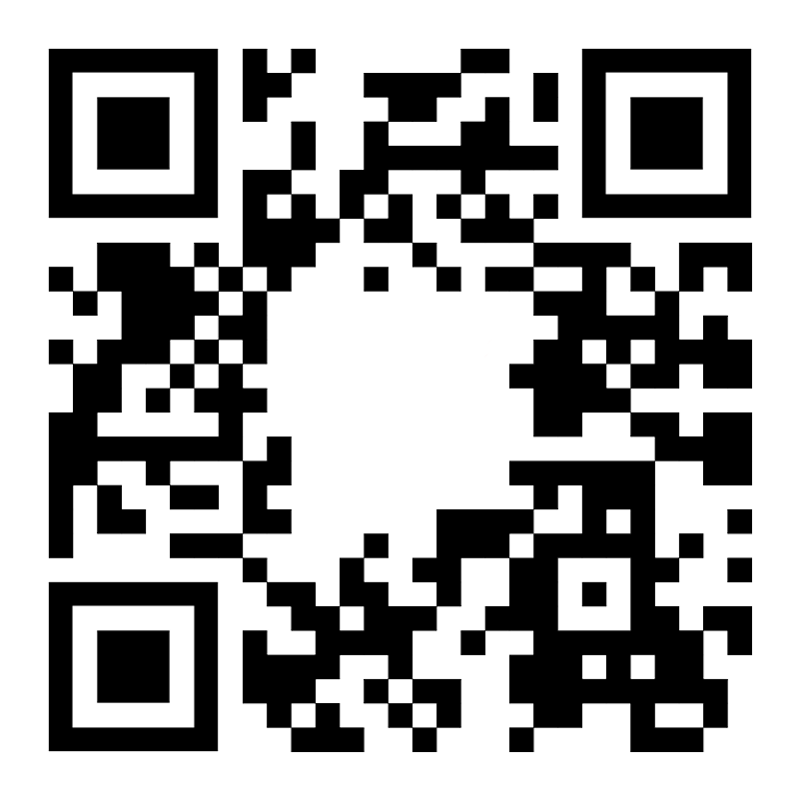
QR Code Guidelines
As a rule of thumb, the bigger the white margins around the QR, the most readable the QR code will be.

If in your QR code generator an option to set "Error Correction Level" exists, set it as high as possible.
If you like an image but it doesn't scan, you can either:
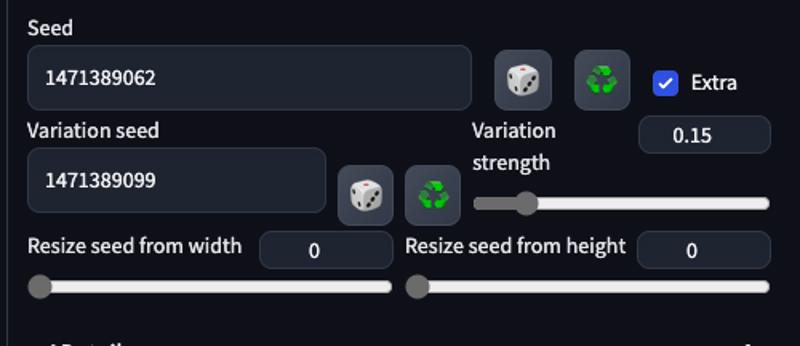
Keep a fixed seed and lower the Starting Control Step
Keep a fixed seed and introduce small seed variations through the seed "Extra" checkbox

Depending on the workflow you are using, the target resolution massively influences the ease of scan of you QR code. The most flexible resolution is 768x768px. Workflows using the Controlnet QR Pattern (QR Codes) v1.0 require 920x920px. So be mindful of finding the right resolution for your workflow.
Using a PNG transparent version of the QR without logo (in some cases) seems to help SD to fill all parts of the image with art.
URL Guidelines
URL Length
The length of the URL itself seem to affect the degree of success of the generation. The shorter the URL the higher the degree of success.
URL Shorteners
tinyurl (search on google)
url.zip (not recommended, they kill URLs quickly)
Make sure to login into the URL shortening you'd like to use, as otherwise your shortened URL will most likely be killed after a set amount of time and your QR will stop working too.
QR Code Generators
QR.io: QR Code Generator | Create QR Codes (with logo insert option!)
https://qrcode.antfu.me/ (advanced AI tool with highly customisable shapes)
QR Code and 2D Code Generator - Kerem Erkan
Recommended settings:

Negative Prompt Bonus
Include this in the negative prompt to reduce roundedness in the QR code, which would make it unreadable:
(round, circle:1.2)
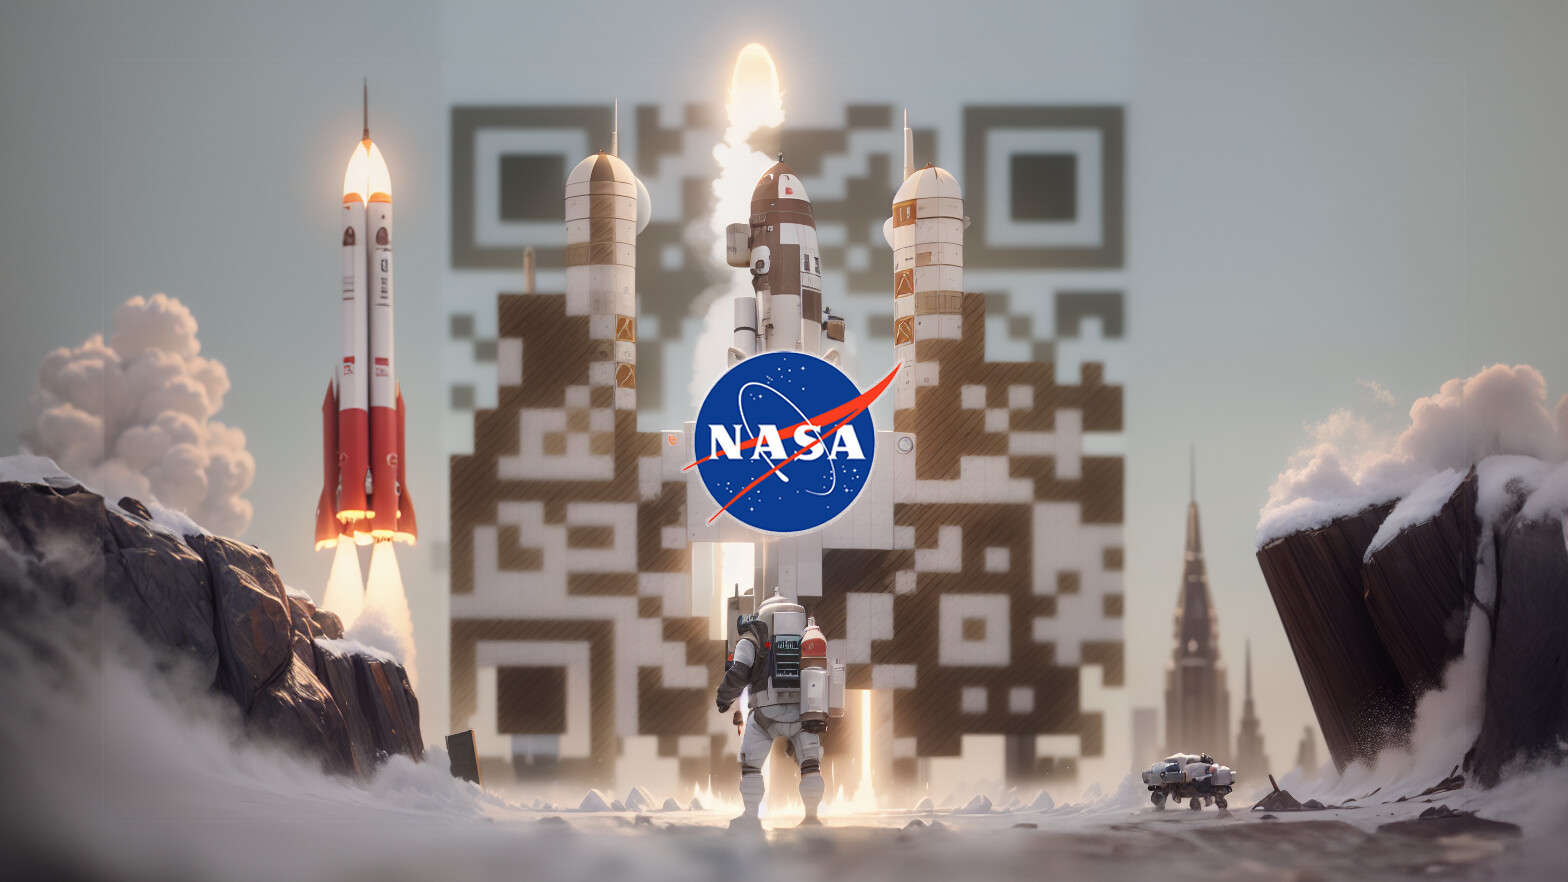
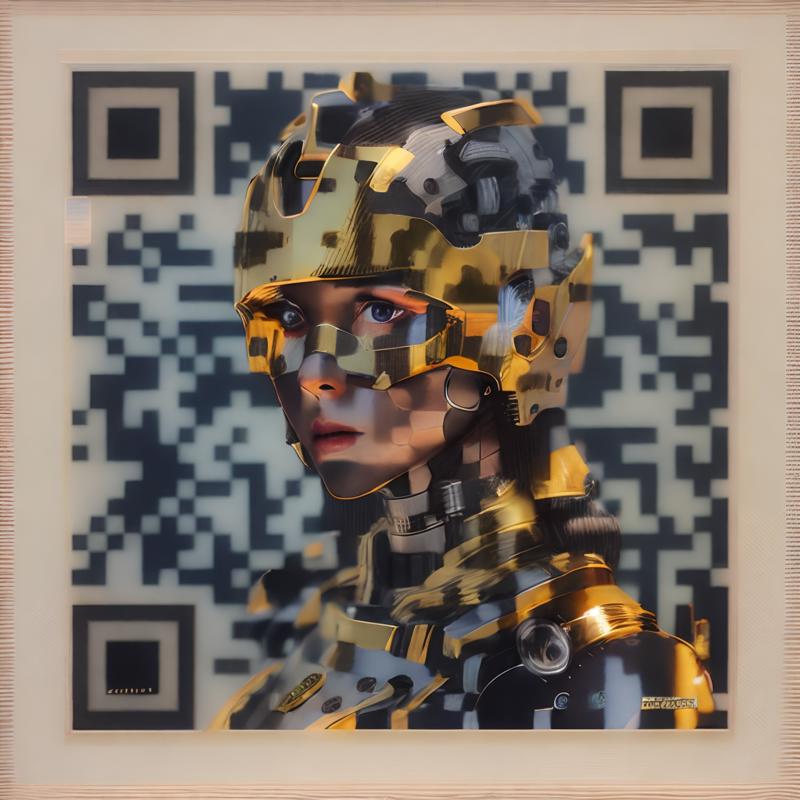
QR With Logos
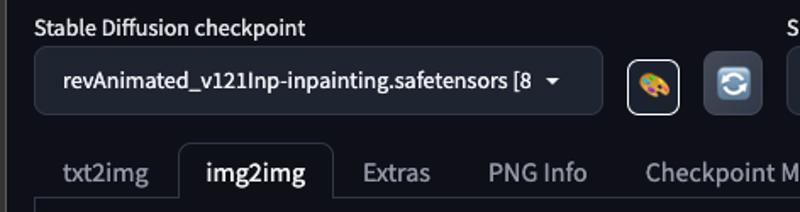
When working with QR with logos, you might want to use an img2img upload mask. In that case, make sure to use an inpaint version of the preferred model. As it yields far better results.
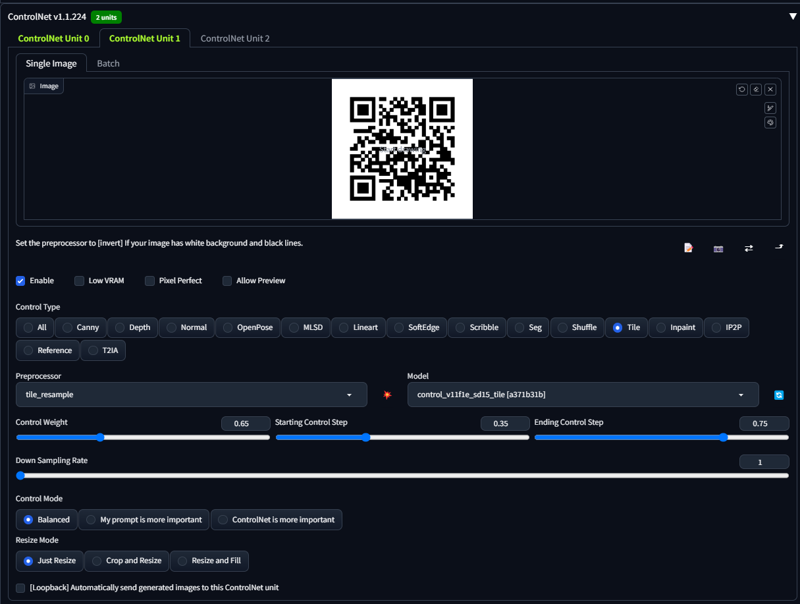
Workflow № 1 control_tile_v11f1e_sd15_tile
AUTOMATIC1111 Tab:
img2imgRecommended Checkpoint:
revAnimated_v121Inp-inpainting.safetensorsVersion 1.21 for Inpainting: ReV Animated - v1.2.1-inp | Stable Diffusion Checkpoint | Civitai
revAnimated_v122.safetensorsVersion 1.22: www.civitai.com/models/7371/rev-animated
Clip skip:
1or2Generate and download QR Code with Logo for your URL: QR.io: QR Code Generator | Create QR Codes
LORA Models:
Prompts: https://pastebin.com/CxmpA2pM
Recommended Checkpoint: revAnimated
Clip skip:
1or2Resize Mode:
Just resizeSampler:
DPM++ 2M KarrasSampling Steps:
20Tested Image Resolutions (Start Resolution and Output Target Resolution):
768x768px
Hires. Fix:
Hires. Fix Recommended:
No
CFG Scale:
7Denoise Strength:
1
ControlNet
Play with ranges depending on checkpoint/image you are generating.
Resize Mode:
Crop and ResizeControlNet
Unit 0:Preprocessor:
tile resampleModel:
control vilfle_sd15_tileStarting Step:
Best results are achieved when starting control step is between 0.23 and 0.33
If the codes can't be scanned, lower the starting control step 🔗
If the generations look to much like a QR code, increase the starting control step.
Starting Control Step:
Recommended:
0.1
Ending Control Step:
Recommended:
0.45
Control Weight:
Recommended:
1
Control Mode:
Balanced
Workflow № 2 control_v1p_sd15_brightness
Models for Controlnet:
control_vilfle_sd15_tile [e3b0c442]control_v1p_sd15_brightness [5f6aabed]
AUTOMATIC1111 Tab:
txt2imgRecommended Checkpoint: Deliberate v2
Clip skip:
2Image Resolution (Start Resolution and Output Target Resolution) :
768x768pxor512x512pxResize Mode:
?Sampler :
DPM++ 2M KarrasSampling Steps :
15Hires. Fix:
Hires. Fix Recommended:
No
CFG Scale:
7
ControlNet
Play with ranges depending on checkpoint/image you are generating.
Resize Mode:
Crop and ResizeControlNet
Unit 0:Preprocessor:
noneModel:
control vilfle_sd15_tileControl Weight
Recommended:
0.5
Starting Step:
Recommended:
0.35
Ending Control Step
Recommended:
0.60
Control Mode: Balanced
ControlNet
Unit 1:Preprocessor:
noneModel:
control_v1p_sd15_brightness [5f6aabed]Control Weight:
Recommended:
0.35Recommended Testing Range:
Starting Step
Recommended:
0Recommended Testing Range:
Ending Control Step
Recommended:
1Recommended Testing Range:
Control Mode: Balanced
ControlNet
Unit 2:Preprocessor:
noneModel:
control_v11f1p_sd15_depth [cfd03158]Weight:
Recommended:
1
Starting Step
Recommended:
0
Ending Control Step
Recommended:
0.2
Control Mode:
Balanced
Workflow № 3 control_tile_v11f1e_sd15_tile
AUTOMATIC1111 Tab:
img2imgPrompt: https://pastebin.com/jwbuuf5X
QR Code model for Controlnet: ioclab/ioc-controlnet (brightness model)
AUTOMATIC1111 Tab:
img2imgRecommended Checkpoint: revAnimated
Clip skip:
2Tested Image Resolutions (Start Resolution and Output Target Resolution):
512x512px,768x768pxor1024x1024pxResize Mode:
Just ResizeSampler:
DPM++ 2M KarrasSampling Steps:
15Hires. Fix:
Hires. Fix Recommended: Only at 512px and below
CFG Scale:
7Denoise Strength:
0.75
ControlNet
Resize Mode:
Crop and ResizePlay with ranges depending on checkpoint/image you are generating.
ControlNet
Unit 0:Preprocessor:
noneModel:
control_tile_v11f1e_sd15_tileControl Weight:
1Starting Control Step
Recommended:
0.1Recommended Testing Range:
Ending Control Step
Recommended:
0.45Recommended Testing Range:
Control Mode:
Balanced
Workflow № 4 monster-labs/control_v1p_sd15_qrcode_monster
QR Code model for Controlnet: DionTimmer/controlnet_qrcode at main
AUTOMATIC1111 Tab:
txt2imgPrompts: https://pastebin.com/sbkge254
Checkpoints for Stable Diffusion:
icbinpICantBelievelts_final.safetensorsICBINP - "I Can't Believe It's Not Photography" - Final | Stable Diffusion Checkpoint | Civitai
wget https://civitai.com/api/download/models/89464 --content-disposition
icbinp|CantBelievelts_finallnpainting.safetensorswget https://civitai.com/api/download/models/89658 --content-disposition
Clip skip:
1Sampler:
DPM++ 2M KarrasSampling Steps:
27Resolution Recommended:
1024x1024Hires. Fix
Hires. Fix Recommended: Only below
1024x1024Upscaler:
LatentDenoising Strength:
1Upscale by:
2Hires steps:
0/13
CFG Scale:
7
ControlNet:
Play with ranges depending on checkpoint/image you are generating.
Resize Mode:
Crop and ResizeControlNet
Unit 0:Preprocessor:
invert (from white bg & black line)Model:
control_v1p_sa15_qrcode_monsterControl Weight:
Recommended:
1.25Recommended Testing Range:
1-2
Starting Control Step:
Recommended:
0Recommended Testing Range:
0-0.2
Ending Control Step:
Recommended:
0.75Recommended Testing Range:
0.70 - 0.9
Control Mode:
Balanced
Workflow № 5 control_v1p_sd15_brightness

First off - We need a QR Code - I highly recommend this website, as it allows you to change the "fault tolerance" to 30%. This is going to allow us further diffusing all while still having a code that scans. Keep in mind, the shorter the URL, the less complex the pattern will be, making diffusing easier.
Next we will be focusing on the txt2img tab with the "Rev\_Animated" - then - adding in your prompts.

Once our prompt is set, follow the settings below.

Lastly, we move onto ControlNet. We will be uploading the picture of our QR Code into ControlNet unit 0 & ControlNet unit 1. The settings are as follows.

These settings should get most prompts a working QR Code. However, if you find your specific image is not scanning you will need to adjust the following settings until it properly scans.
1. Control weight on both ControlNet units.
2. Starting control step on both ControlNet units
3. Ending control step on both ControlNet units
These will allow you to fine tune your image to get the desired result + a working QR Code.
I genuinely hope that this guide has offered a comprehensible and enlightening glimpse into QR Code Workflows. If there are any queries you'd like to raise, or if you have any additional tips that could enrich this guide even further, I encourage you to post them in the comments. Your contributions are valuable and can help in refining and expanding this guide, as well as benefiting others who discover it. I appreciate your engagement and support — thank you!
