You have certainly noticed that Pony & illustrious models sometimes struggles with faces and eyes? This is especially the case when the focus of the picture is not on the face.
But it is not always about faces and eyes: sometimes, the pictures are good but...still not good enough. They seem a bit blurry, or there's always that small odd detail in the picture...
Here, I wish to share with you a ComfyUI workflow that I set up to enhance my pictures.
The idea is very simple: it is about chaining several sampling steps in the generating process.
The complete enhanced image generation workflow
Please, find the attached workflow:
Txt2img with upscale, sharpening and color enhancement.json
This is the complete workflow explained:
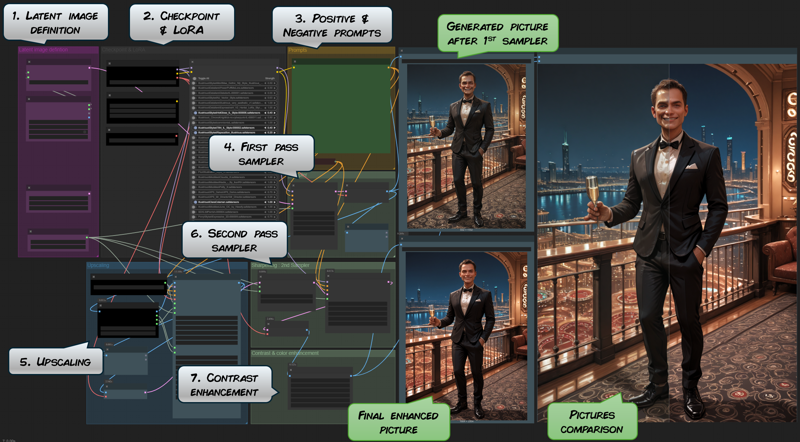
In this workflow, the steps 1. to 4. are the basic Text to Image generation process. You can adapt it to your checkpoint and LoRA preference and of course, adjust the generation parameters accordingly.
The upscale step is not actually required. Depending on your computer performances and your checkpoint, you may be able to directly generate high definition pictures that don't need to be upscaled. However, it could be a good idea to generate low-rez pictures and then upscale only the best ones: that will save a lot of time!
This upscale process however also include a sampling pass that will also slightly enhance the upscaled result.
Then, the sharpening of the picture is the 2nd pass sampler at step 6. For better image refinement, we also add some noise to the picture before the sampling.
Here, this 2nd sampler parameters will depends on your settings and on your own taste regarding the enhancement of the original picture. So don't hesitate to adjust the denoise value or the steps.
Finally, I noticed on some pictures that the sharpening step also added some kind of white veil to the image. That's why we have added the final color and contrast enhancement step.
Here again, this step depends on your parameters, tastes and original picture. So feel free to increase the different color & contrast parameters, or to simply deactivate this node.
Segmented workflows for easier use
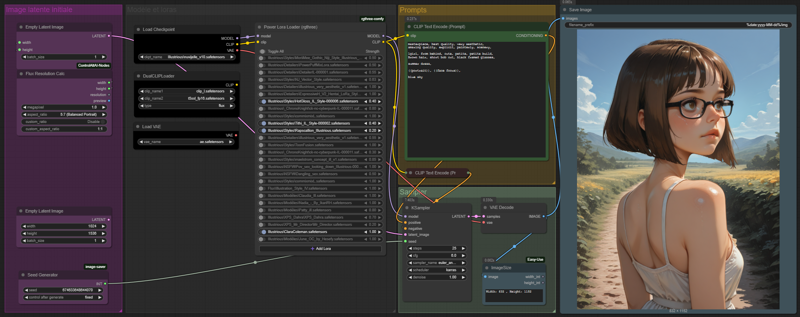
I also divided the workflow in two separate parts: the basic image generation and the post-process enhancement.
That way, it is more convinient to use, you can easily and quickly generate pictures without spending time to enhance them all. Then, once you are ok with a picture you got, then you can use the post-process workflow to enhance it.
The basic image generation workflow:
Txt2img basic generation.json
The post-processing workflow:
Txt2img post-process (upscale, sharpening and color enhancement).json
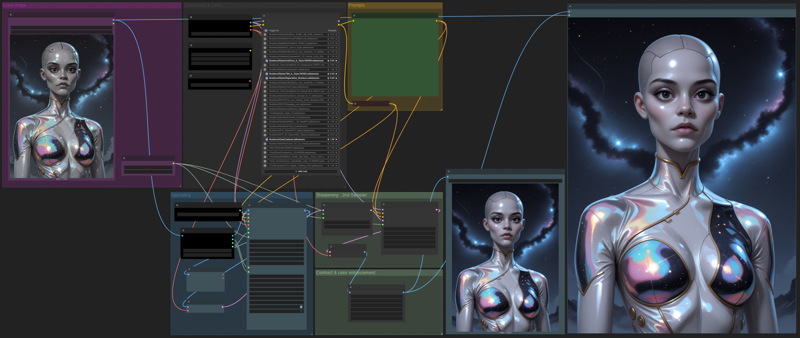
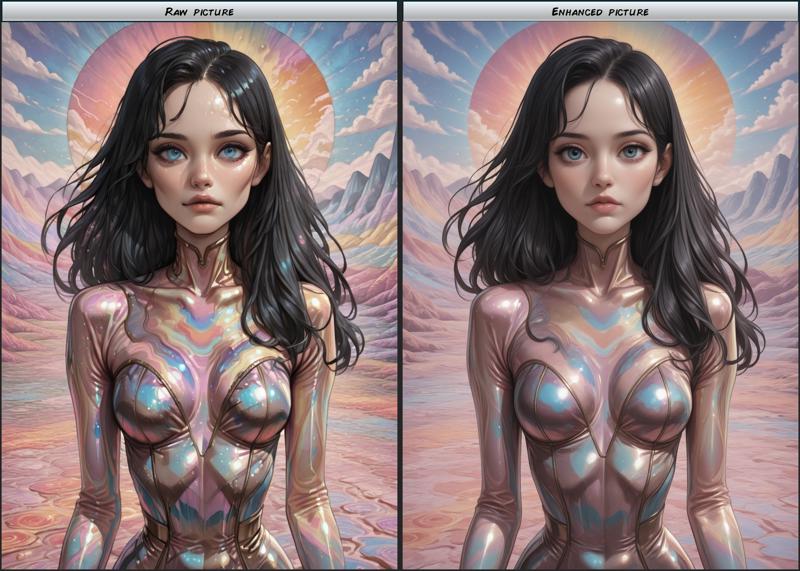
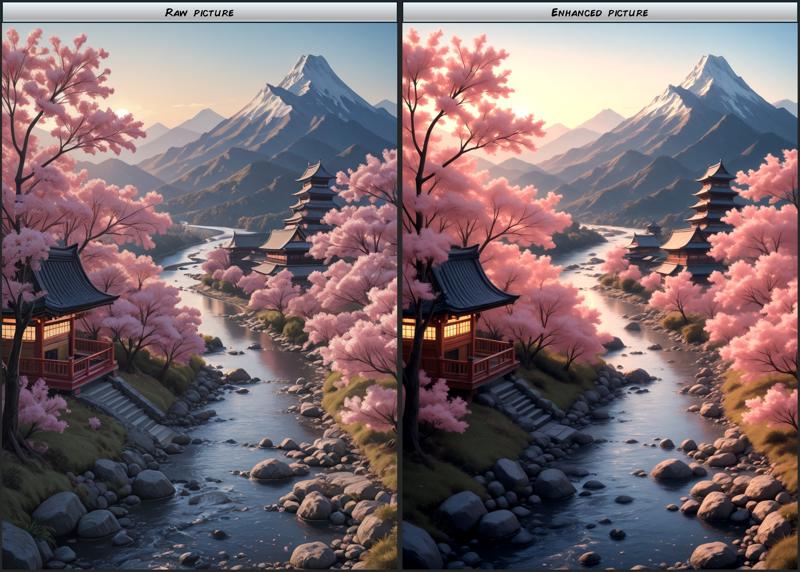
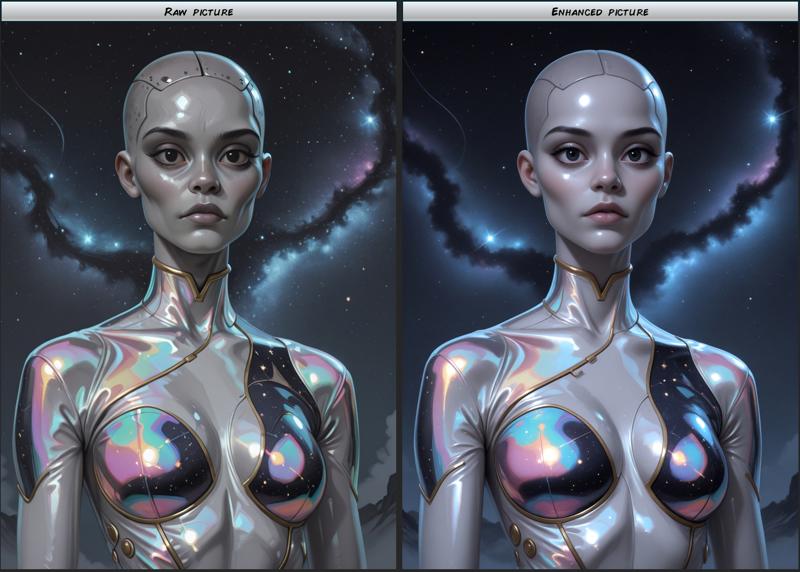
Samples results from the post-processing
Here are some samples resulting from that workflow:
