

Hey guys! I thought it would be helpful to give you an image guide! When I was a beginner, these guides helped me make better images and save buzz, so why not make my own! Let’s get into it! Feel free to leave suggestions in the comments if I missed anything!
Quick prompting tip:
When looking at people’s metadata in images, you may be confused to see things like parentheses surrounding prompt words. In your prompt, surrounding a prompt word/phrase (or multiple) in parentheses emphasizes the words weight or importance in your prompt. So if your prompt word isn’t quite working in your image, try putting it in one or even multiple parentheses like (this) or ((this)).
Also keep in mind that the higher your word/phrase is in your prompt, the more weight it has. This isn’t essential to keep in mind but it’s good to know.
Models and Lora:
Models are the biggest way to change the overall style and Lora availability for every image you make. If you see a Lora you like on the home page, but can’t find it in your Lora search bar in the generation hub, that’s because the Lora isn’t compatible with your Model. Make sure both the Lora and model are both compatible before using.
PS: you can use incompatible Lora in the Lora search bar by toggling “Advanced Search” on. Do take note that this might take away the effectiveness of that Lora.
My general ranking of different models is as follows:
1: Illustrious (would rec ✅)
2: NoobAI (would rec ✅)
3: Pony (not great but fine)
Illustrious and NoobAI are my favorites for their quality AND (most of the time) compatibility with one another.
My Model Recommendations:
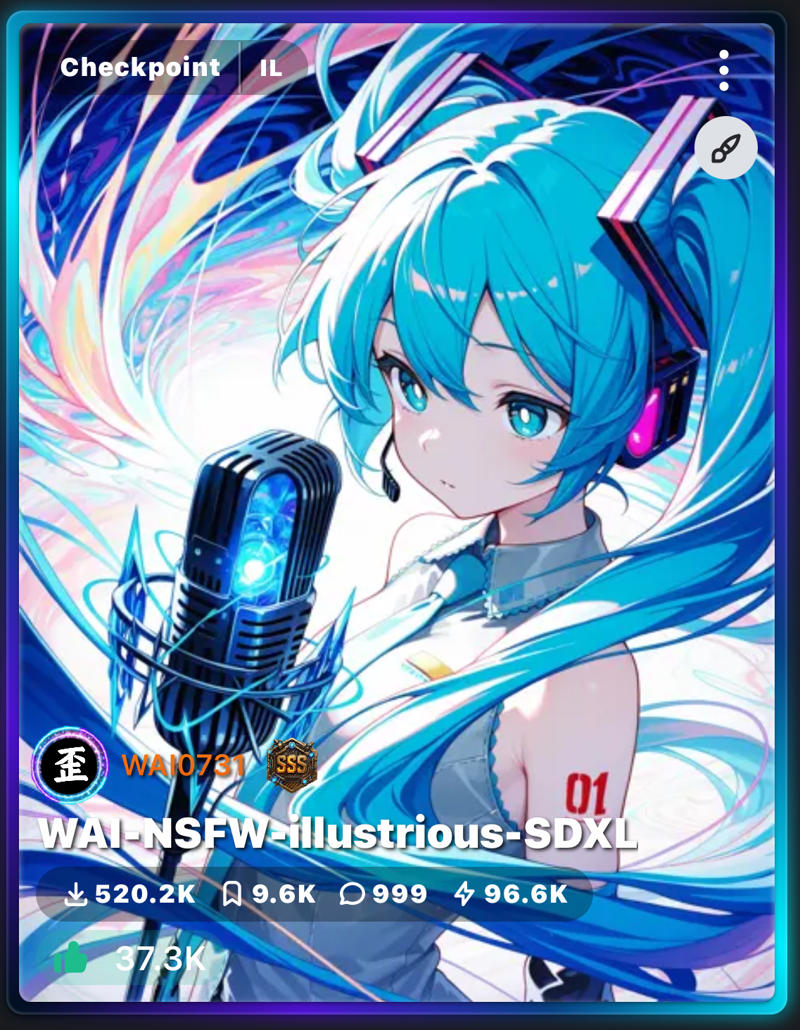
WAI-NSFW (Illustrious): (best all-rounder)
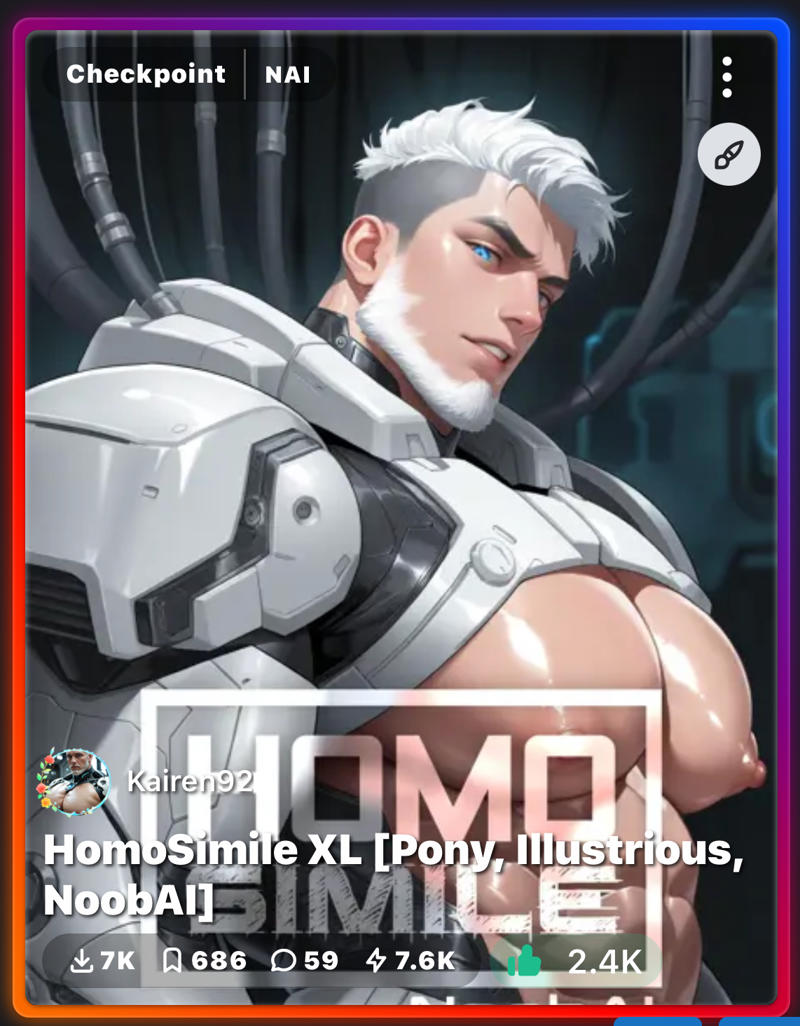
HomoSimile (NoobAI): (best gay all-rounder; bara particularly.) (Loras are not required for many art styles as they can be typed a certain way in your prompt, so if u wanna use an artstyle but don’t wanna increase your generation price, consider this one.) (keep in mind that that’s not something exclusive to this model, but this model is one of the BEST at it.)
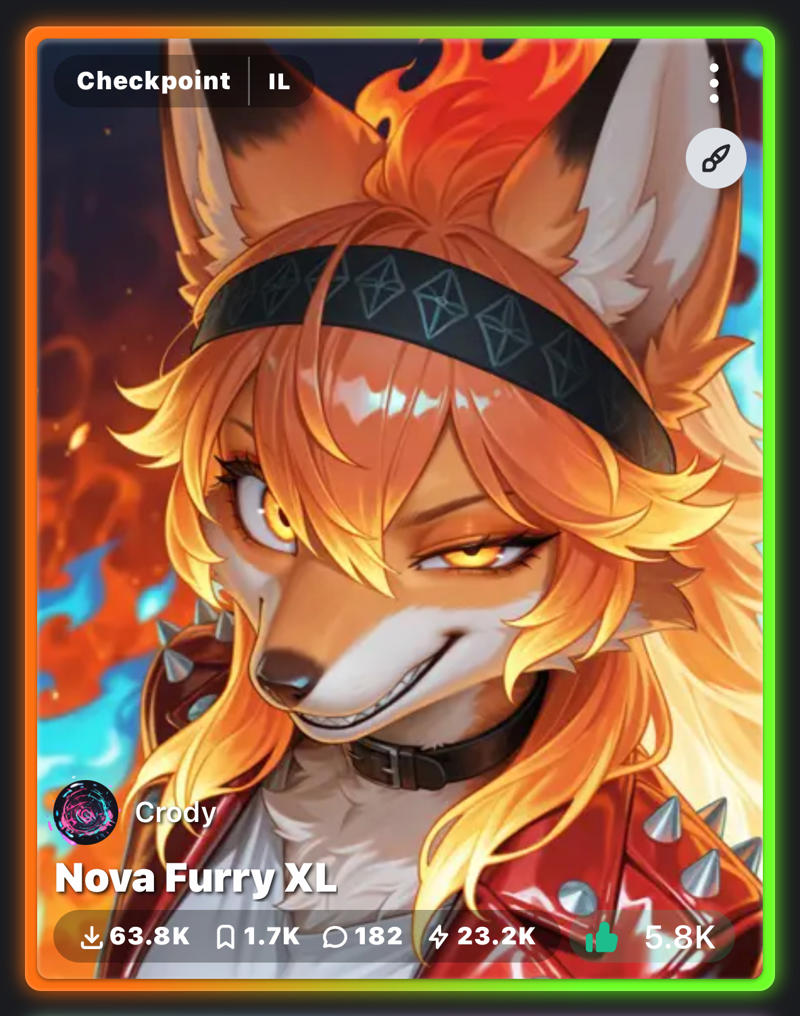
Nova Furry (Illustrious): (can you guess what this model is best at)
Lora Costs:
A while back CivHQ published an update making images cost higher the more Lora you use and the longer your prompt gets (just know your prompt has to be QUITE long for the price to increase. I’m not going to outline everything here, but just know that the steps for cost increase go 0, 1-3, and then idk the rest 😅 Lora weight does NOT effect the price.
CFG Scale:
How high you should put this depends on the model you use. For example, HomoSimile recommends somewhere around 4.0 while WAI-NSFW recommends 7.0. Simply read the model’s description and it should tell you how high to put it.
SAMPLER:
IF YOU ARE USING THIS SAMPLER… STOP IT!!!
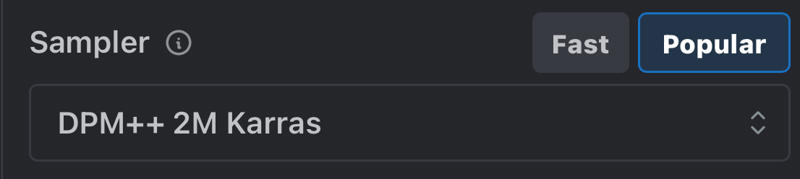
It may be the most popular, but it’s also more
EXPENSIVE! Unless you’re a super mega AI nerd who NEEDS to use this sampler, stop using it.
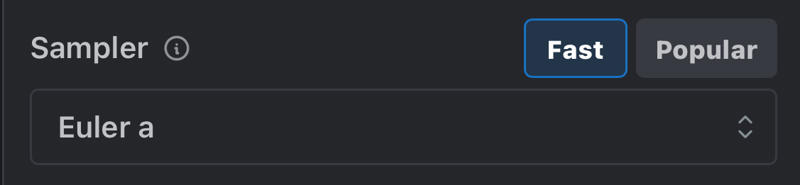
Euler a is faster AND cheaper. My MOST POPULAR POSTS ON MY ACCOUNT use this sampler. There is no difference in quality between the two samplers except that one will drain your buzz faster. Using Euler A is the BIGGEST STEP toward buzz saving, that is of course, after…
STEPS:
Fast, Balanced, and High are good benchmarks to show you how much buzz an image will cost, but the buzz amount can also change from an increase or decrease in 1 step! For example, one portrait image with 1-3 Lora costs 6 buzz when using 30 steps
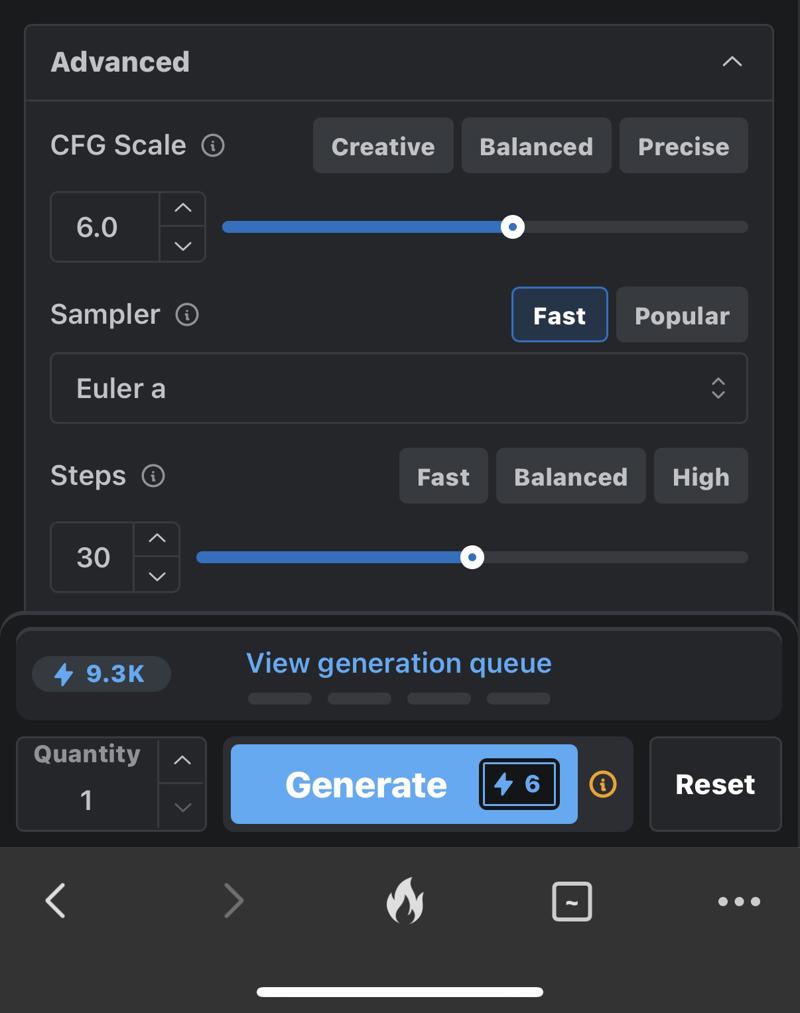
but decreasing by ONE STEP to 29 takes away a whole buzz in cost!
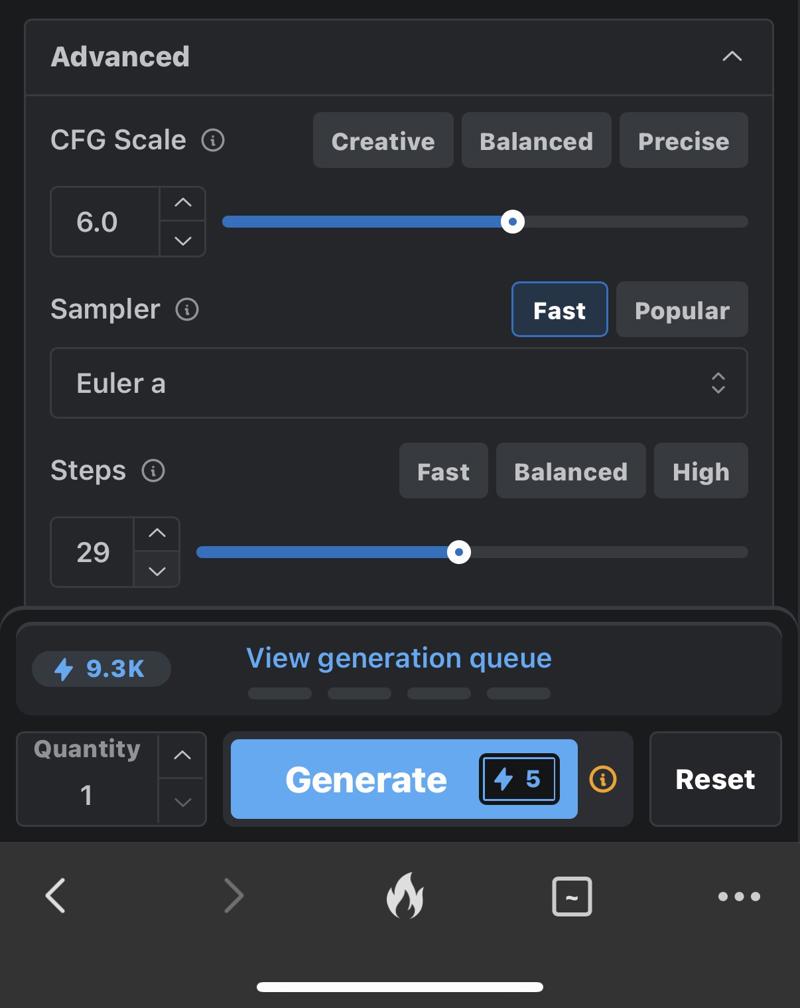
This is a VERY important buzz saving strategy, so keep it in mind when generating! Also keep in mind that your most efficient step level is somewhere around Balanced.
This also applies to Hi-Res Fix.
HI-RES FIX:
“But Steefy! Balanced isn’t good enough!! 🥺🥺I’m so close to getting it right. I like the pose and all… but there’s either a detail missing, or a pupil all weird looking, or the quality isn’t high enough! What do I do Steefy? How do I add an extra burst of quality to my image and fix minor errors without completely changing it?”
Well do I have the thing for you!
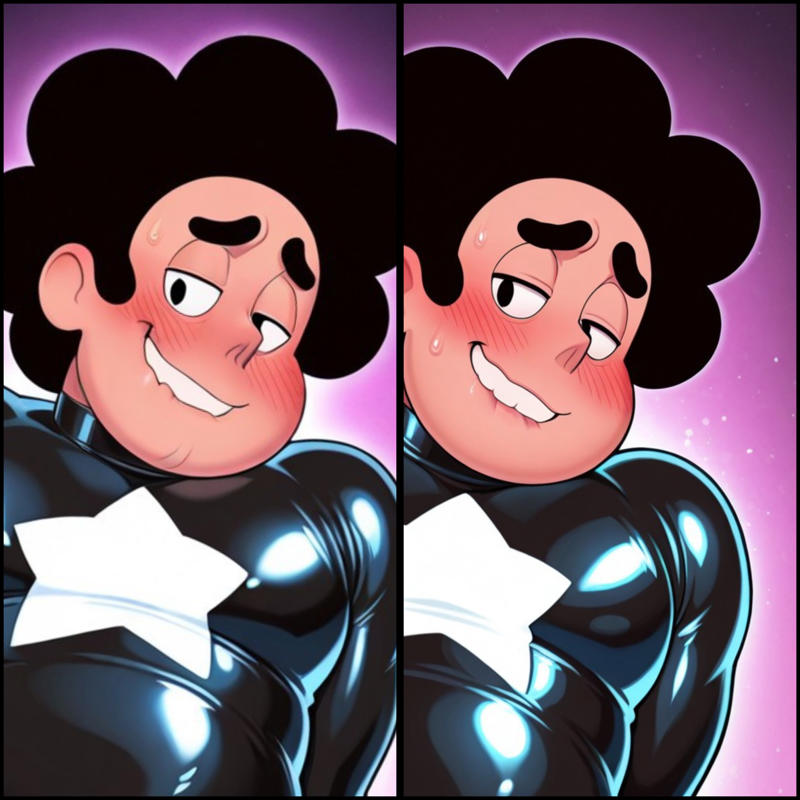
For every image that I post, I click the three dots of the generated images and click “Hi-Res Fix.” Using this function not only acts as an upscaler, but also as a tool that can all around fix mistakes and polish your image!
Here are some examples! (Hi-Res Fix on the right)
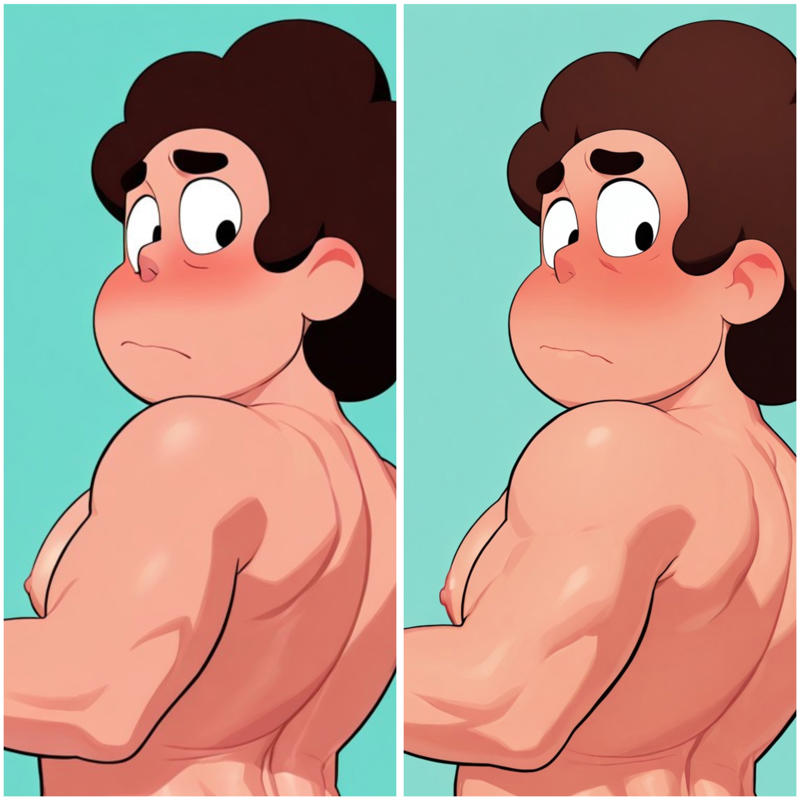
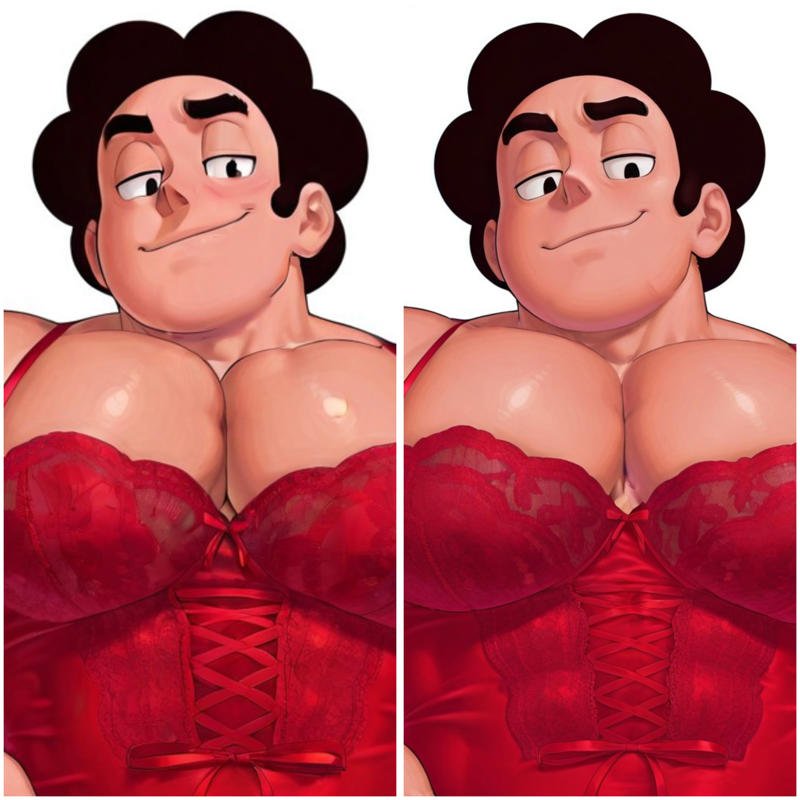
When you use this, you have access to a new tool: denoise.
Denoise basically is the scale of how much you want to change your original image. Like most scales, the price increases for how much the denoise increases.
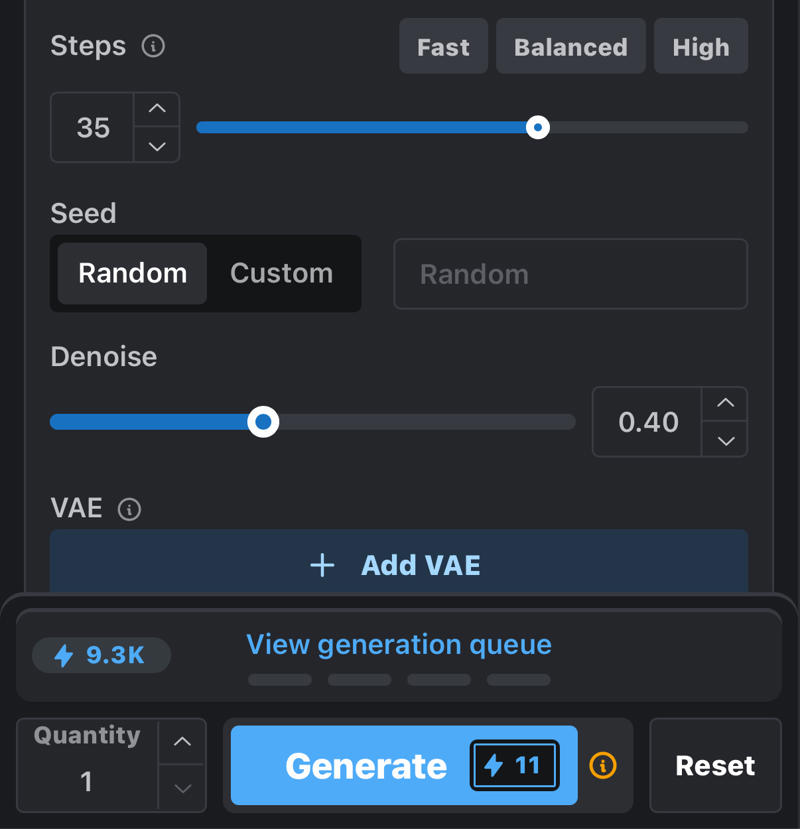
Here’s my usual guide:
0.00-0.40 —> Your image is not/barely changed. 0.40 is usually what I use unless there is a decently large mistake. Is what I used for the 3 example images.
0.45 —> Intermediate. May get 0.00-0.40 results or 0.50-0.60 results.
0.50-0.60 —> This is as high as you should usually go. This weight should be used when trying to fix large mistakes like missing pupils or fingers.
0.65 and onwards —> At this point Hi-Res Fix becomes very expensive. I haven’t experimented with this too much but I would just recommend trying generation again.
In the image there’s also an “Add VAE” option. VAE’s are basically Loras for Hi-Res Fix. You can use them to give your images an extra kick or color or quality. I don’t think they’re that important but keep them in mind.
Well that’s all from me! As I’ve stated before, please feel free to leave recommendations in the comments! I hope this helps you save buzz on your generations! :)
Steefy