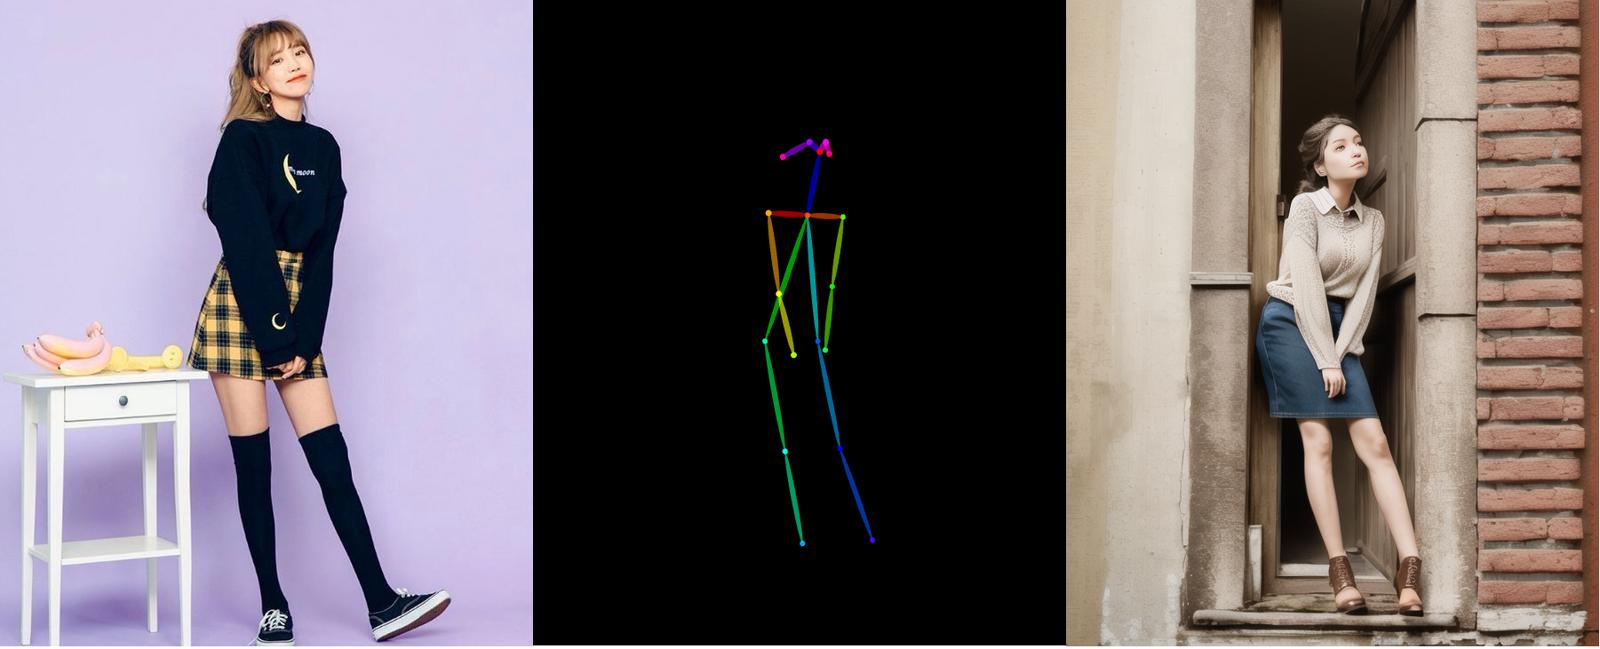
What are Controlnets?
Think of control nets like the guide strings on a puppet; they help decide where the puppet (or data) should move. There are several controlnets available for stable diffusion, but this guide is only focusing on the "openpose" control net.
Which Openpose model should I use?
TLDR: Use control_v11p_sd15_openpose.safetensors
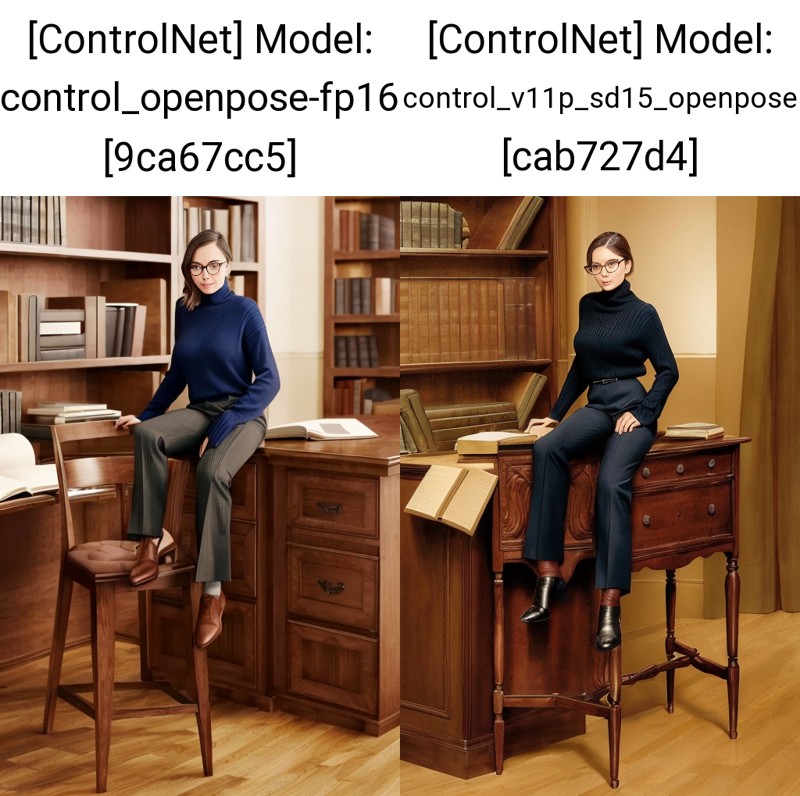
This guide covers the control_v11p_sd15_openpose.safetensors model. There are other openpose models floating around such as:
control_sd15_openpose.safetensorscontrolnetPreTrained_openposeV10.safetensorst2iadapter_openpose-fp16.safetensors
Any of these except the t2iadapter_openpose-fp16.safetensors models work similarly, if not identically. I was not able to get poses out of t2iadapter_openpose-fp16.safetensors at all.
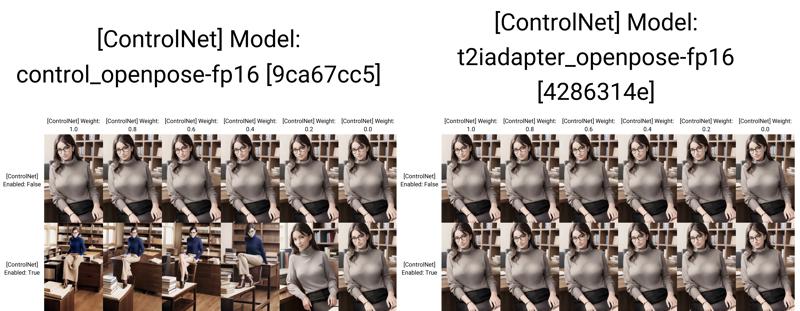
Identical results from control_openpose-fp16, control_sd15_openpose, and controlnetPreTrained_openposeV10.
Installing
Install the v1.1 controlnet extension here under the "extensions" tab -> install from URL
if you already have v1 controlnets installed, delete the folder from
stable-diffusion-webui/extensions/<controlnet extension>
Download the
control_v11p_sd15_openpose.pthandcontrol_v11p_sd15_openpose.yamlfiles here.place the files in
stable-diffusion-webui\models\ControlNetReload the UI. After reloading, you should see a section for "controlnets" with
control_v11p_sd15_openposeas an optionDownload some poses on Civitai or make your own (later in this guide).

Using Openpose with txt2Img
Enter prompt and negative prompt
Select sampler and number of steps
Drag the black wireframe into the ControlNet field
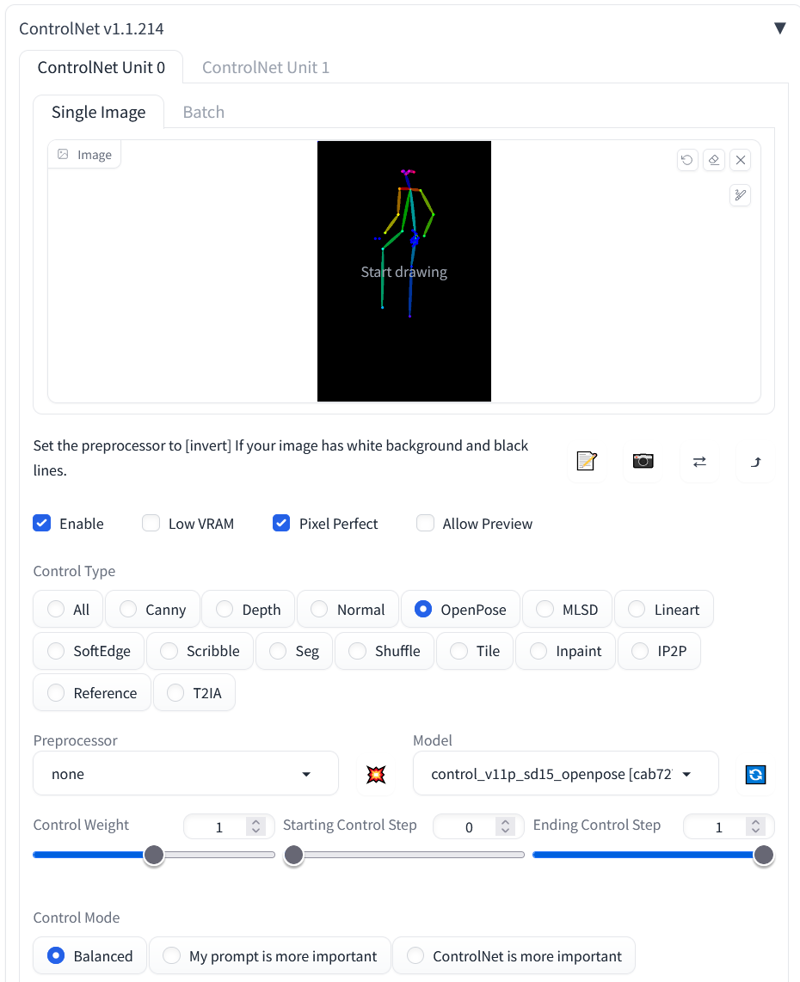
Controlnet settings:
Enable: Checked
Pixel Perfect: Checked (or same aspect ratio is OK)
Preprocessor: None
Model: control_v11p_sd15_openpose.pth
Weight: 1*
Rest of settings default
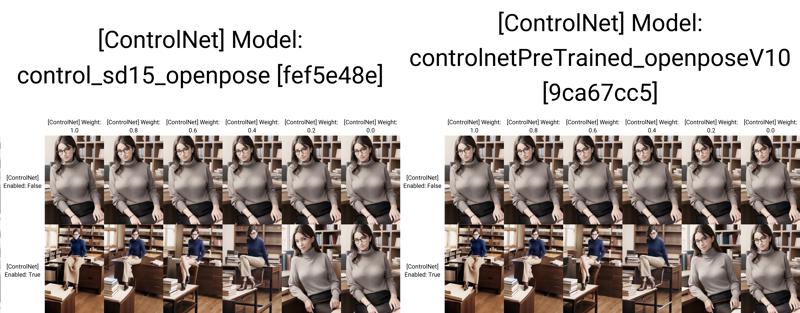
*setting the weight to less than 1 may capture the pose in a more general manner. See the generation grid below for comparision
Generate!
Troubleshooting:
Enable is checked?
Preprocessor is none?
Deleted openpose v1.0 extension and models?
using control_v11p_sd15_openpose?
How does this work?
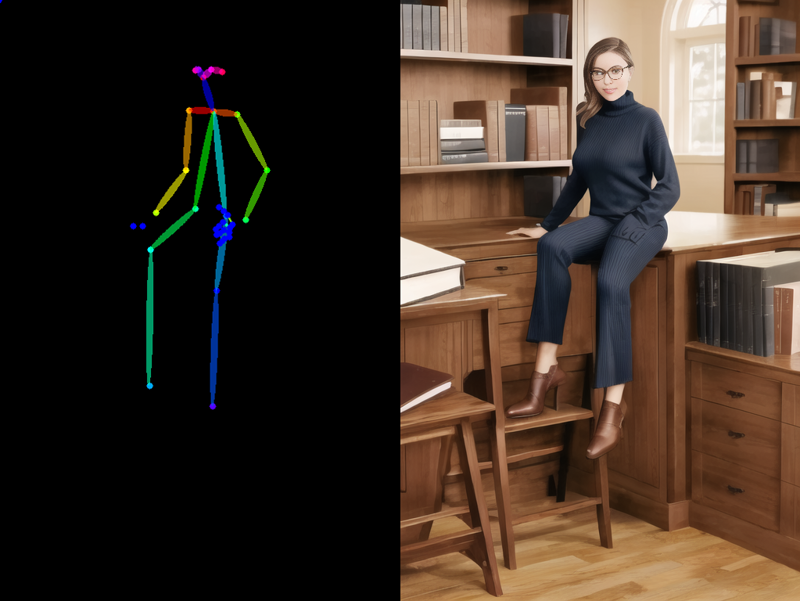
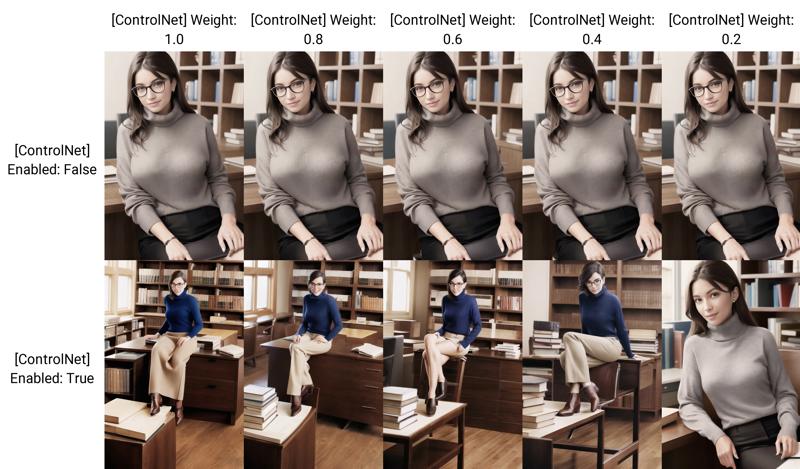
The openpose model with the controlnet diffuses the image over the colored "limbs" in the pose graph. This allows you to use more of your prompt tokens on other aspects of the image, generating a more interesting final image.
Changing the weight will continue to apply the pose in a more generalized way until the weight is too low. In the example above, between 0.4.-0.2 weight was too low to apply the pose effectively.
Generate new poses
There is a great extension which allows you to generate an openpose from an existing image. You can also use it to create poses from scratch, or edit poses generated from an image.
Install the openpose editor under the "extensions" tab -> install from URL
Reload the UI.
Go to the "3d Openpose" Tab
Detect from image
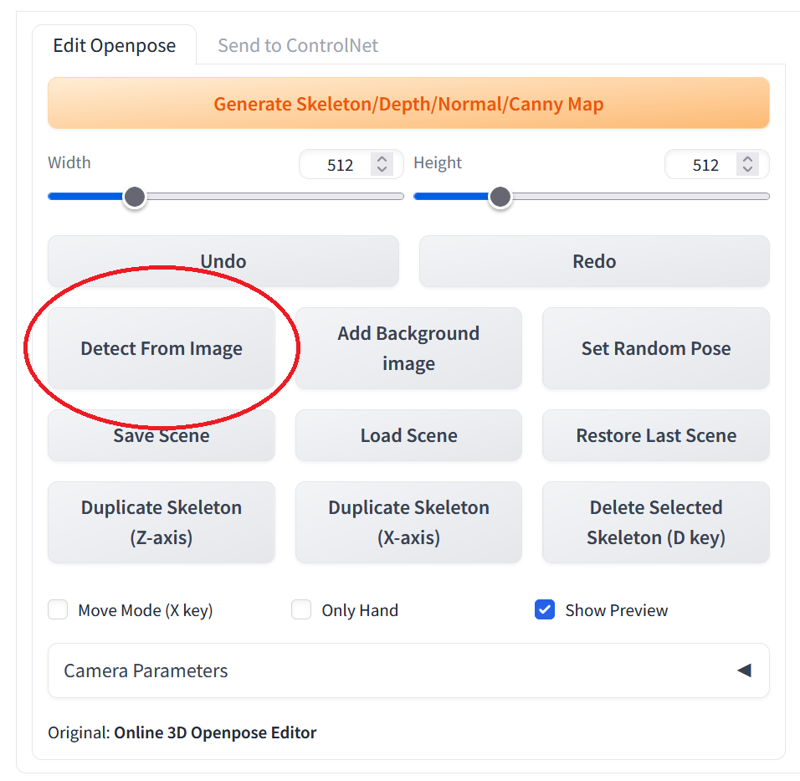
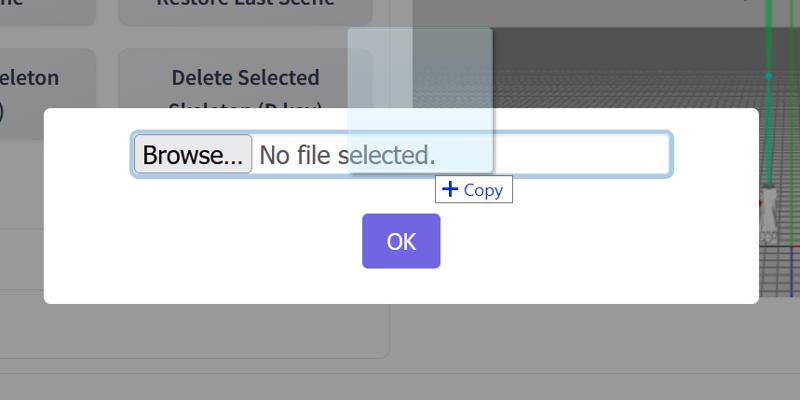
Browse for the image or drop it on the "browse..." button
Set canvas width/height to the same as the input photo (same aspect ratio is OK).
If the preview looks good, click "Generate Skeleton/Depth/Normal/Canny Map"
For the skeleton set the ControlNet number to 0. For every other output set the ControlNet number to
-.Expand the "openpose" box in txt2img (in order to receive new pose from extension)
Click "send to txt2img"
optionally, download and save the generated pose at this step
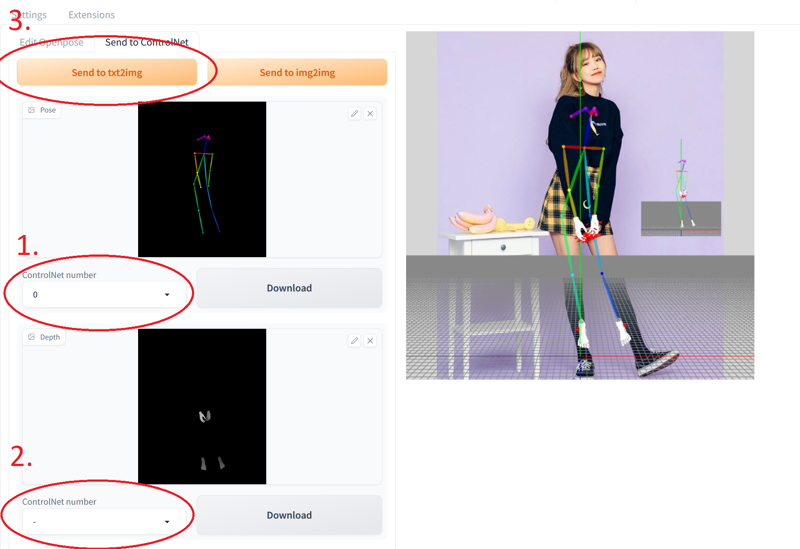
Your newly generated pose is loaded into the ControlNet!
remember to Enable and select the openpose model and change canvas size
Final result:


