Introduction
In this guide, I will explain the differences and use cases between the different inpainting modes. This is meant to be a very simple guide so I will not cover advanced topics such using inpainting with extensions or how to fix certain things with inpainting exclusively.
This guide assumes that you are using the A1111 Stable Diffusion webui or forks. The knowledge here might not applicable to other UIs..
8/25/23 - fixed a massive understanding of the technical; I ended up misunderstanding the technical details of inpainting after playing around with other uis. I'll probably avoid getting too technical here.
TL;DR
Inpainting Original + sketching > every inpainting option
What is Inpainting?
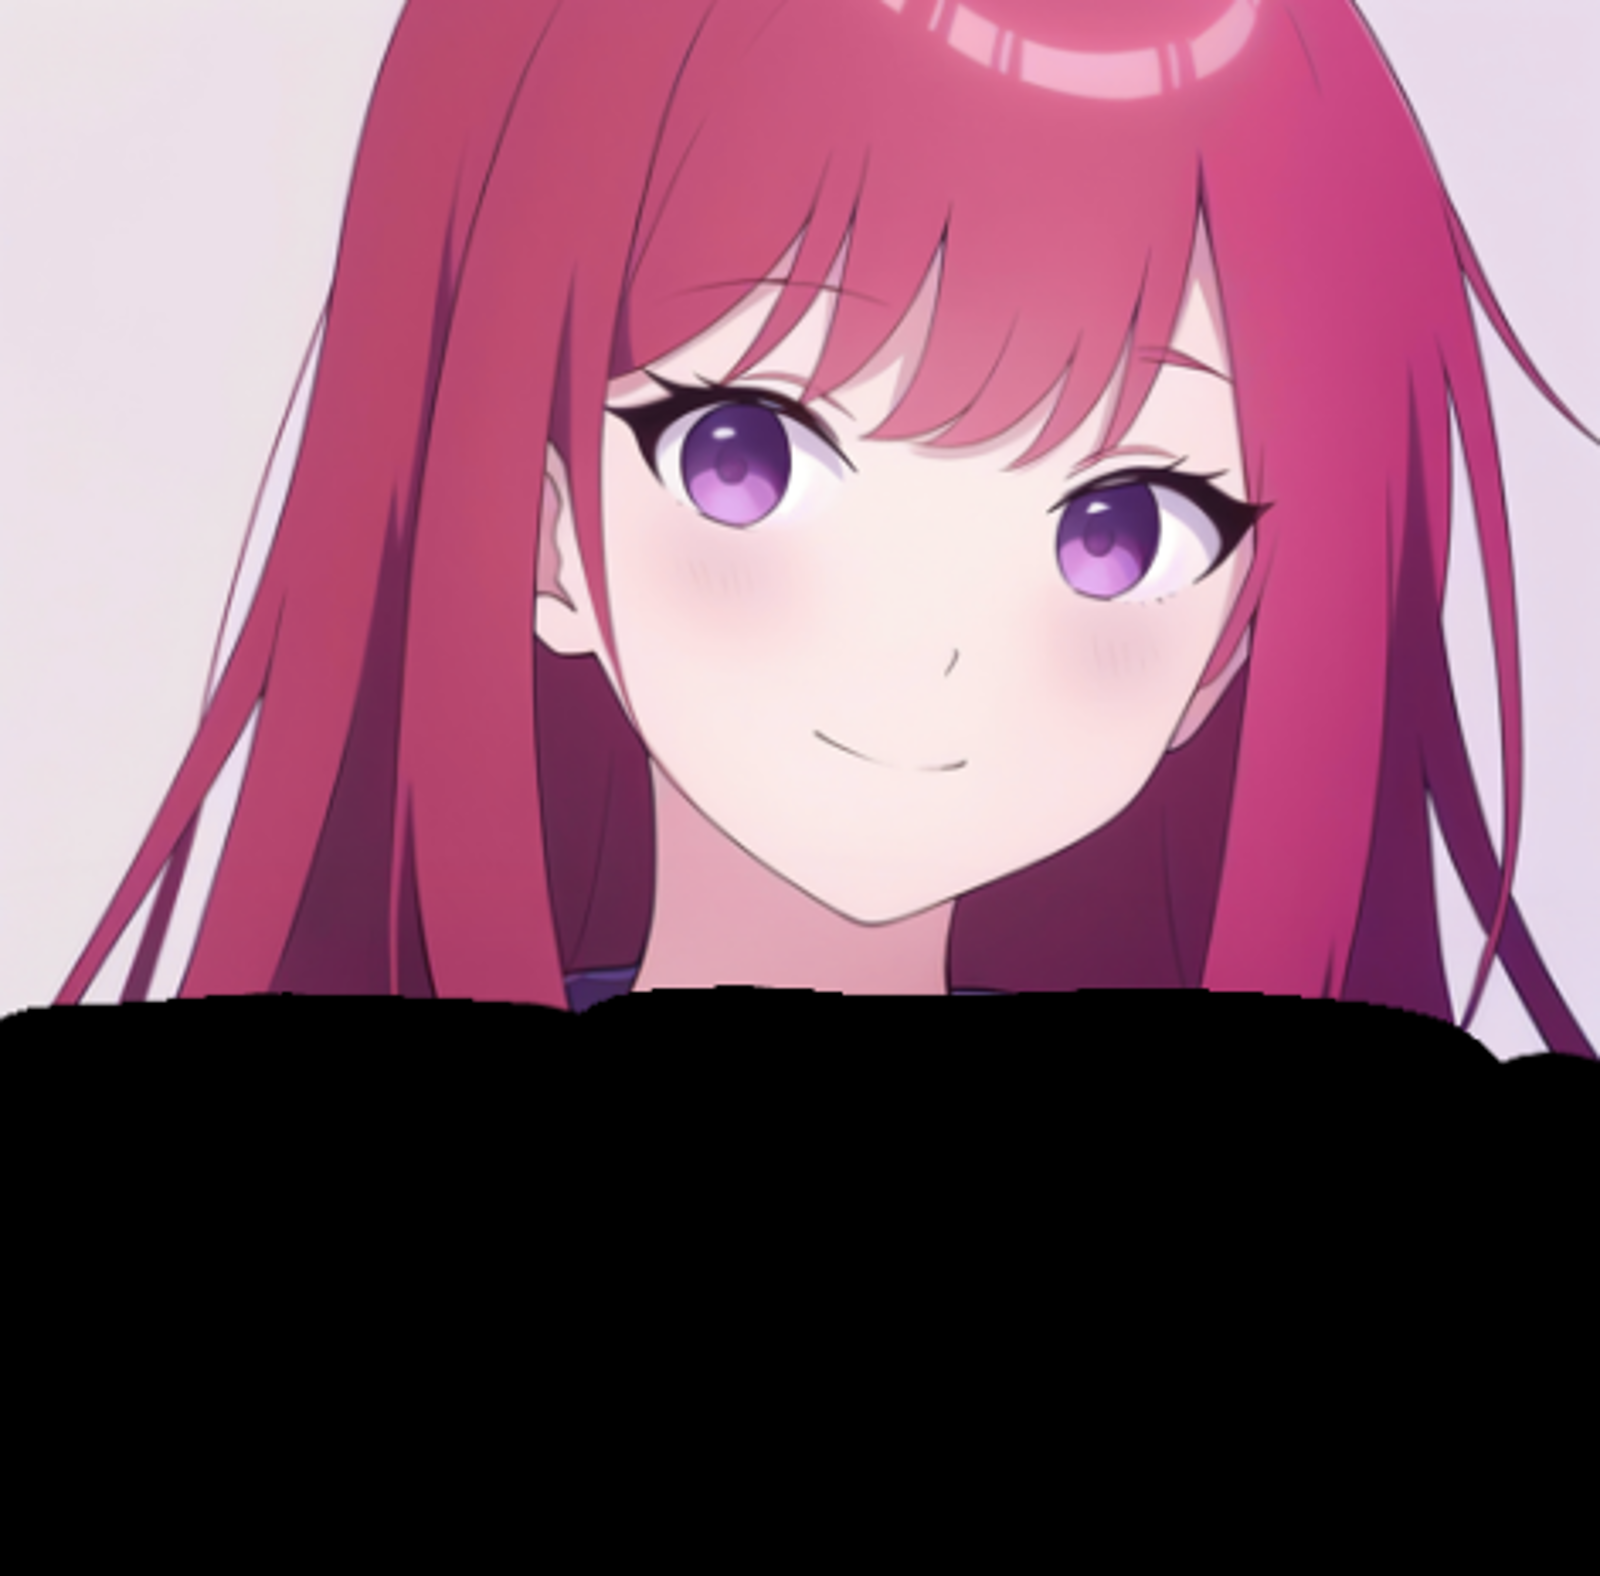
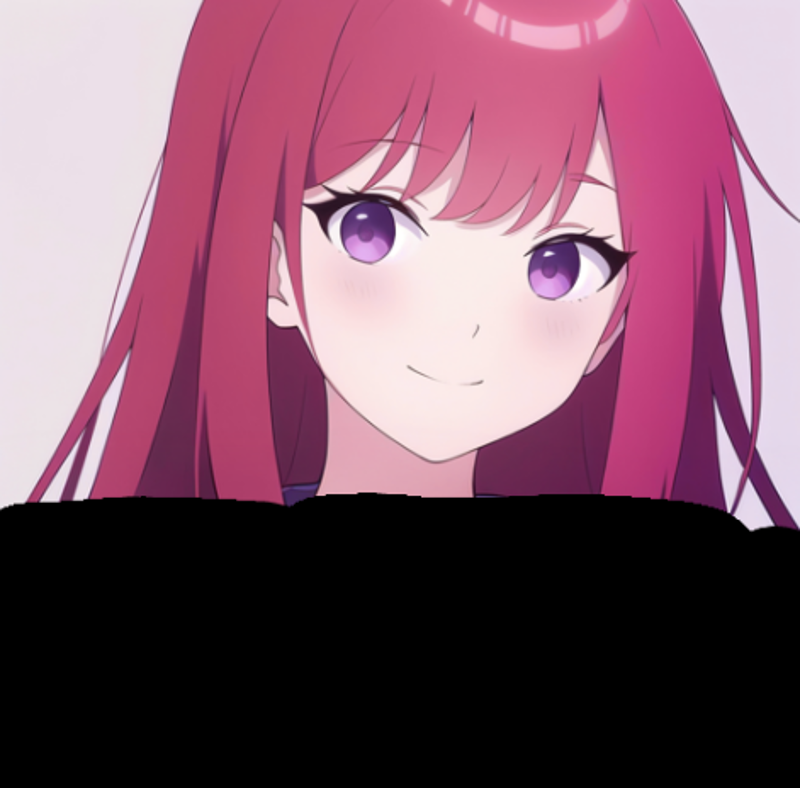
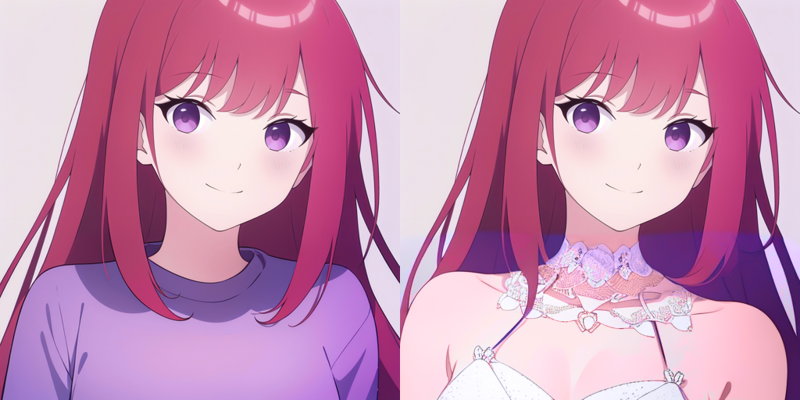
In simple terms, inpainting is an image editing process that involves masking a select area and then having Stable Diffusion redraw the area based on user input. It is typically used to selectively enhance details of an image, and to add or replace objects in the base image.
Black Area is the selected or "Masked Input"
Left - Original Image | Right - After inpainting 'White Dress' was used the positive prompt
Inpainting has some notoriety for being time-consuming or being difficult to use for newcomers which can be very frustrating. While I cannot guarantee that this guide will help you, I do hope that it can give some perspective on how the inpainting process works behind the scenes.
Diffusion Models
Before I begin talking about inpainting, I need to explain how Stable Diffusion works internally. Do note that this is a very toned down explanation for simplicity.
As a generative Diffusion model, Stable Diffusion generates images by creating static noise and then iterates on that noise based on user-defined settings. For diffusion models, all images are treated as noise but levels of noisiness differ. For example, a simple fill of black in MSPaint is considered as noise for Stable Diffusion but it wouldn't be considered as noisy compared to the image below. It is typically easier for Stable Diffusion to work with noisy images over a simple fill.
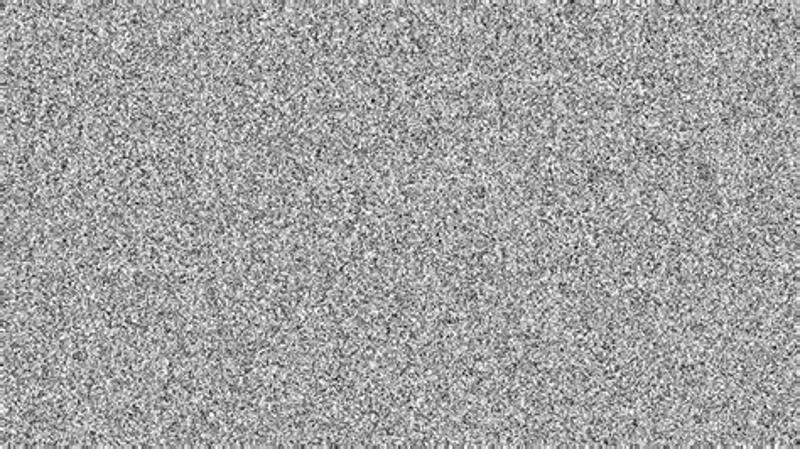
(Example 1) Static Noise as what a Diffusion model sees
Consequently, this does mean that without suitable noise, generative diffusion models will struggle to produce suitable images. Being able to control "noise" is a key skill for mastering inpainting. While this sounds very complex, any amount of pixels is considered to be noise and being able to draw at least basic shapes is a valuable skill for inpainting.
Inpainting Settings
How To
Creating a mask
First you need to drag or select an image for the inpaint tab that you want to edit and then you need to make a mask. To create a mask, just simply hover over the image in inpainting and then hold left mouse button to brush over your selected region. The black area is the "mask" that is used for inpainting.
Prompting for Inpainting
Prompts are used to help guide the output of inpainting. Further prompt engineering during inpainting does not have a noticeable impact unless you are trying to add something new to the base image. In this case, all you need to do is to add your desired changes to the very front of the positive prompt.
For simplicity, you can reuse the same prompt that you used during you used in txt2img or use a prompt from the img2img interrogate feature. Alternatively, you have the option of only having your desired changes in the positive prompt and removing everything else. Personally, I haven't seen a worrisome difference between the two so it's up to personal preference.
Inpainting Exclusive Settings

The first time you open the Inpainting tab in img2img, you will immediately see several new options. This can be overwhelming at first so I will try to explain it in order.
Existing Img2Img Settings
The same options for img2img exist for inpainting since inpainting technically functions as a img2img behind the scenes. The most important setting to pay attention to for inpainting is the denoising strength. As a reminder, a denoising strength of 0 keeps the image the same and a denoising of 1 completely alters the image.
Batch Count and Batch Size
For inpainting, it is recommended to produce several images at once and then choose the best result from the output. I generally recommend being able to produce 4 images at once. This is so you have enough variety to choose from but is generally fast enough to iterate over. Use either (Count/size 4/1),(Count/size 2/2) or (Count/size 1/4). Higher batch size runs faster but requires more VRAM.
Mask Blur
This setting controls how many pixels of blur will used blend the inpainted area and the original image. A higher value will increase the size of blurred region while a 0 value does not apply a blur. Not applying a blur tends to adds a sharp edge to the image after inpainting due to color differences.
Personally, I keep to keep this value at a very low amount. I do this for two reasons: First, there should be some blur so the inpainted section fits into the full image better. Secondly, the sharp edges could be treated as a different line for ControlNet preprocessors. It's not a prefect solution but it helps decrease the amount of manually editing I need to do before upscaling. I won't cover ControlNet here since that is out of scope for this guide.
Mask Mode
This setting is rather straightforward, it determines what area should be changed during the inpainting process.
Inpainted Masked - Uses the selected area
Inpaint Not Masked - This changes everything that is not masked
Mask Content
This settings controls the how the masked area will be treated during inpainting. Each mode has it's own quirks and it's own niche use case. I will be explaining these modes out of order so it's better to understand how it works.
Original
This mode uses the original masked image as the base during the inpainting step. As a result of this, the original setting will try to preserve the basic colors and shape of the masked image. You will typically need a fairly high denoising strength in order to produce different results. This usually requires 0.7 denoising strength or higher. In the image below, you see that the purple color is still preserved at a denoising strength of 1. This does mean that original has problems when it comes to recoloring objects as the original color will always end up as an artifact in the output or ends up affect the color tone of the result. This is an extreme example to highlight the fault of original but you can still occasionally get away with recoloring.
Unfortunately, this does mean for recoloring, photoshop is still the superior option.

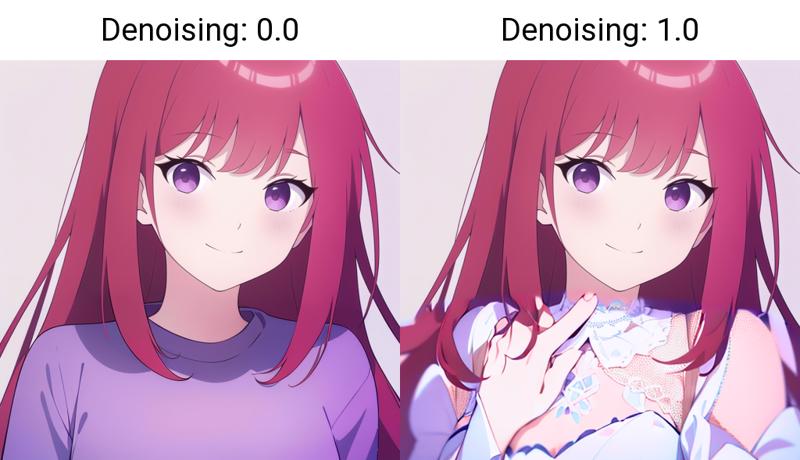
The high denoising strength is usually required because there is no extra "noise" added to the image. Without extra "noise", Stable Diffusion will struggle to produce something new. However, because original has a strong tendency to preserve the original coloring and shape, we can use this fact to our advantage in order to guide the inpainting output.
In this example, I will inpaint with 0.4 denoising (Original) on the right side using "Tree" as the positive prompt.
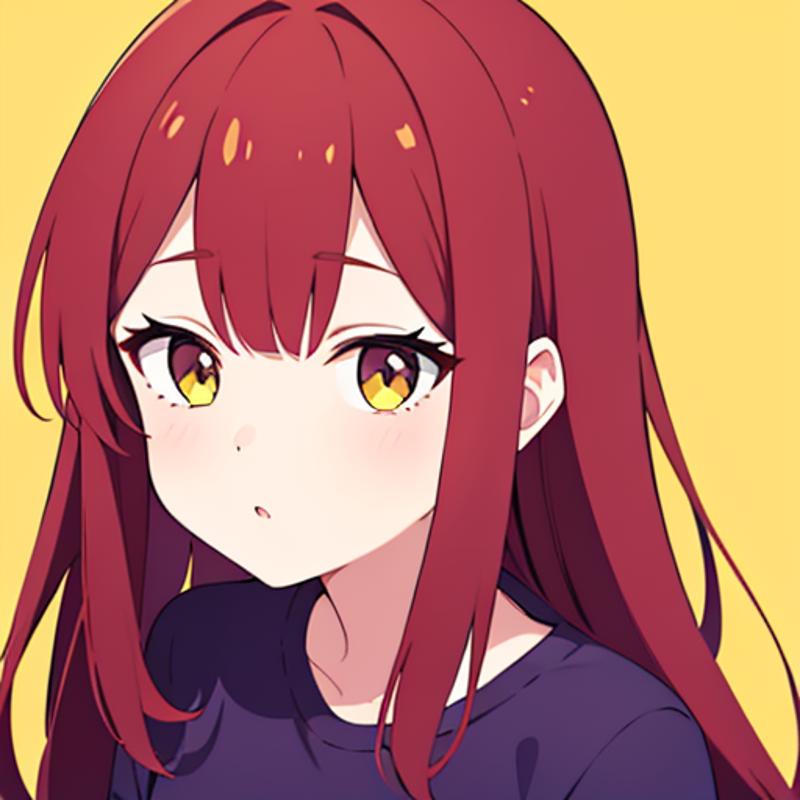
As a result, a tree is produced, but it's rather undefined and could pass as a bush instead.
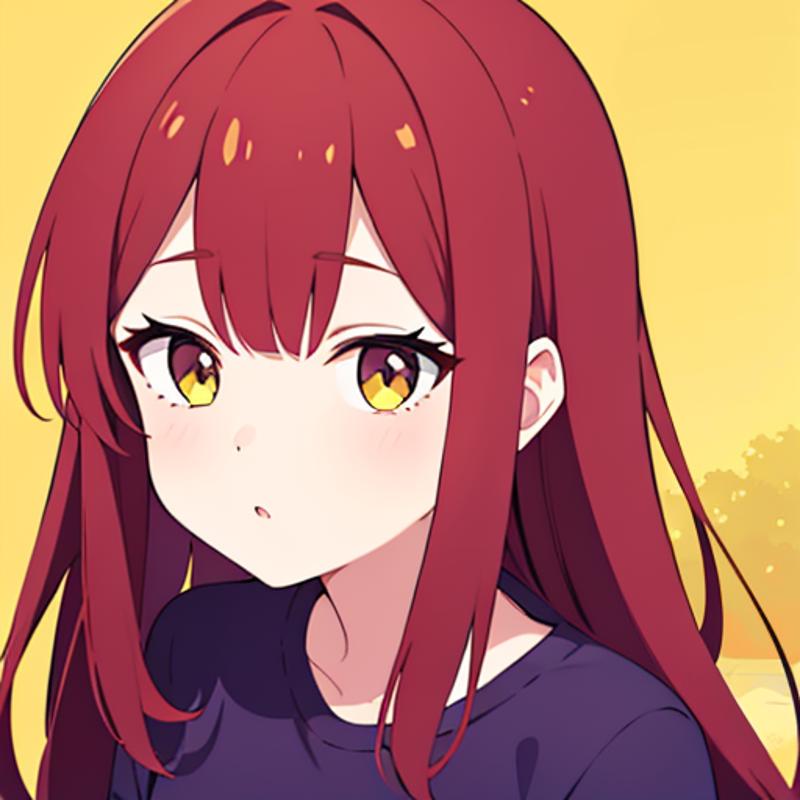
In the next example, I will inpaint using the same settings but I will add some "noise" or a base sketch to the image.
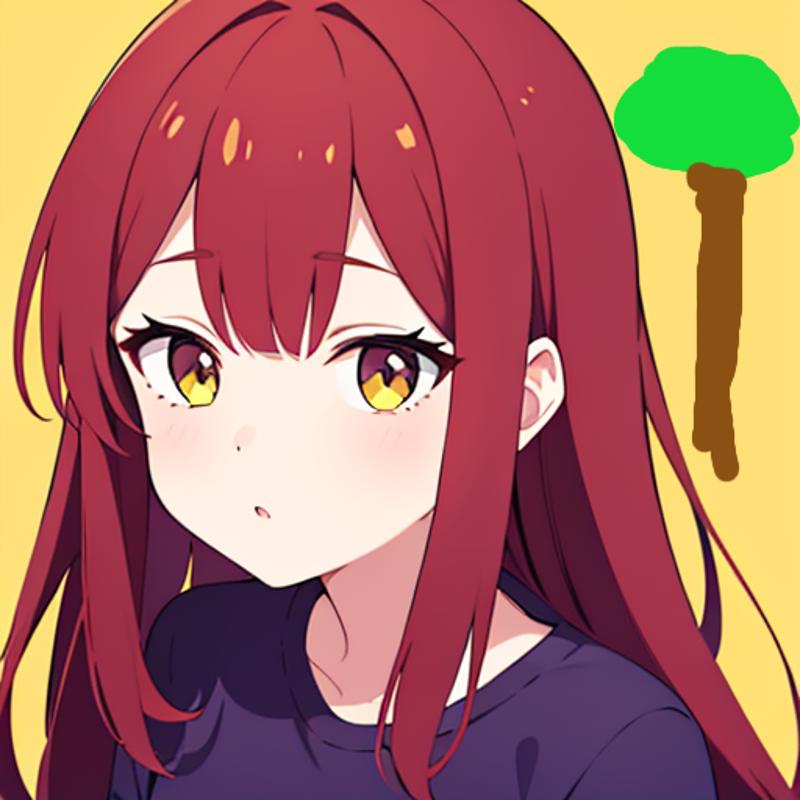
After running generate, here is my result below.
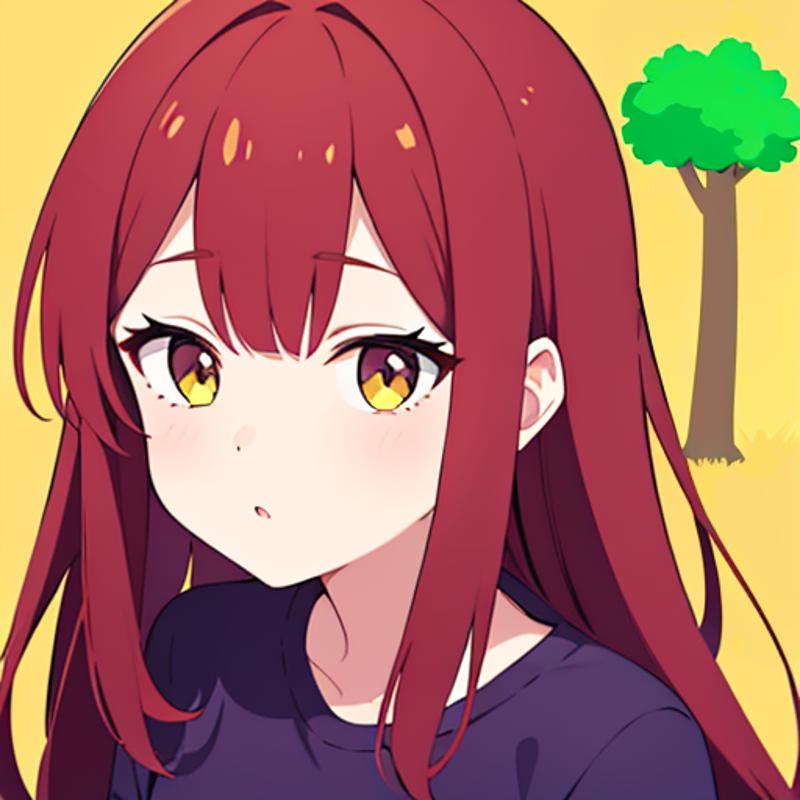
As you can see, original was able to enhance the quality of my sketch and the result is discernably a tree compared to the prior example without adding extra "noise".
Of course, there is the option of increasing the denoising strength to force a tree into the image but there are some weakness with that approach. Below, you see a XYZ plot with different step amounts and denoising strength without the extra sketch/noise added. Most notably, there isn't a lot of consistency between each denoising strength.
Steps only help improve inpainting results, the more you want the image to differ at a high denoising strength. It is not very helpful at a low denoising strength.
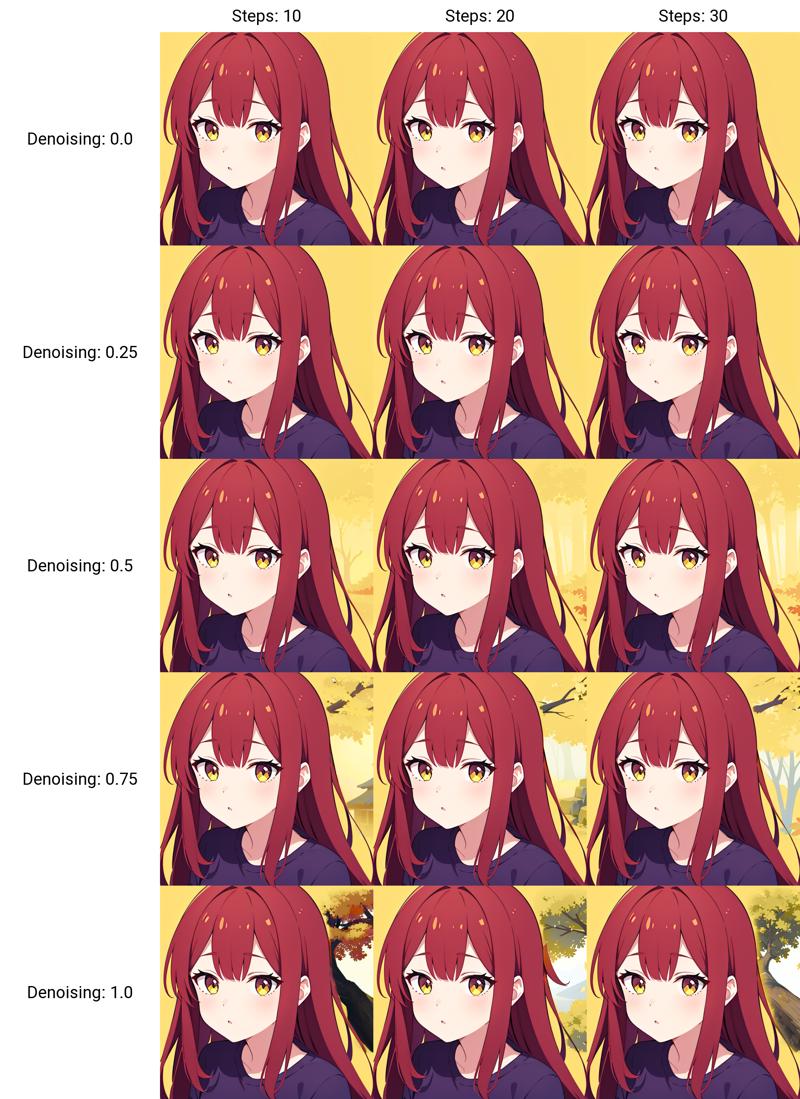
I mentioned before that original has a tendency to preserve color and shapes so without adding "extra noise" to define your tree, the inpainting results will try to use same coloring as the base color regardless of the denoising strength. Adding well defined noise or sketches to the base image will help guide the output in a more controllable manner. It's not entirely prefect but there is more precision with colors and shapes. Below you will find an XYZ plot using the "extra noise" for inpainting with differing step amounts and denoising strengths.
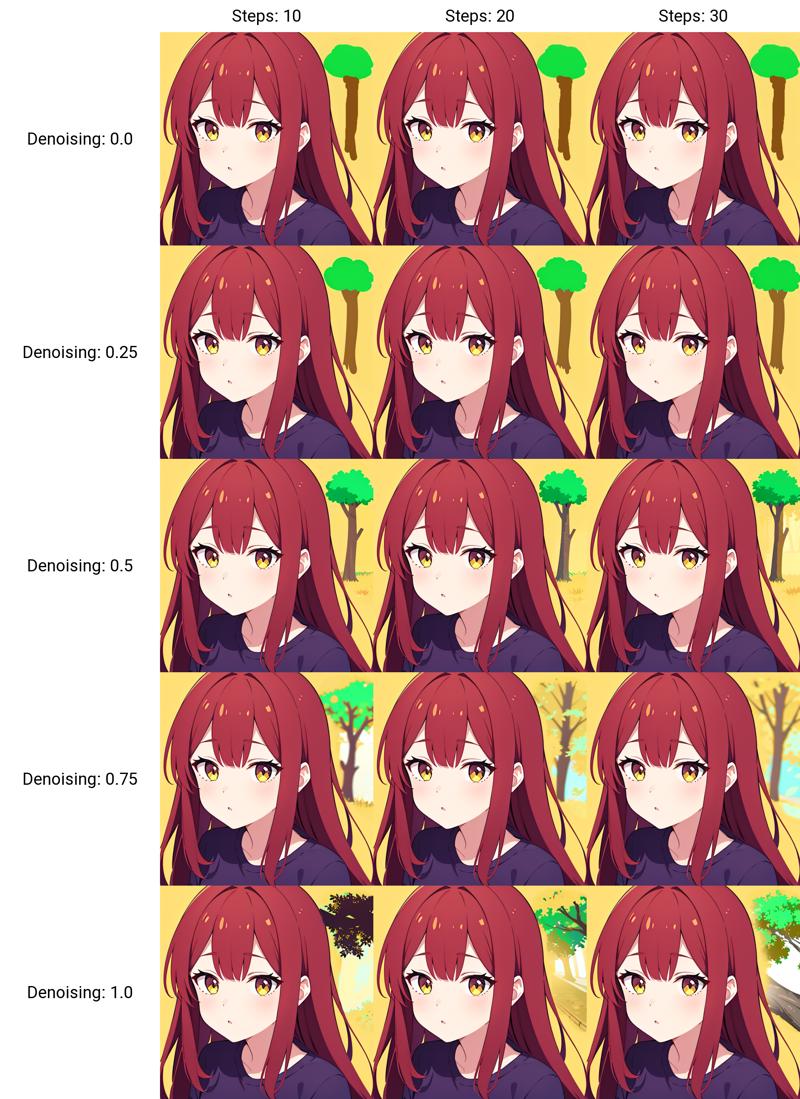
Using this knowledge, the better you are at making basic sketches, the more you can lower the step count and increase the speed of your generations. Alternatively, if you are bad at sketching, you can use photobashing instead. This can helpful towards speeding up your overall creation time.
Original is still the mode that you end up using a vast majority of the time while the other modes exist more as a form of convenience.
Advantages
Enhance Sketches
very lenient on mask shape
Disadvantages
coloring has a strong impact on the final result
not very suitable for recoloring
Latent Modes
These modes act as a convenient way to add noise to the inpainting process without having to do additional manual edits. Anything you can pull with the latent modes, you can do with original with some level of editing.
These modes are helpful for adding something new to image if you do not have a very clear idea of your basic shape and coloring. The main downside to these modes is that because they attempt to redraw the image, the masked area is every important as it tends to destroy the underlying image. Additionally, since these modes modify the base image during inpainting step, they all require higher denoising strengths compared to original.
Advantages
Great at adding new objects
More flexible with colors
Disadvantages
very reliant on mask shape/very destructive
not very flexible with denoising strengths
may not fit with the original image as well
Latent Nothing
I will be explaining latent nothing next in order to help make sense of the other options aside from original. In the latent nothing setting, latent zeros are used as a base image during the inpainting step instead of the original image under the mask. Latent Zero is term used to describe a space that is the equivalent to empty space or empty noise. For people, this looks like a shade of brown with some distinct rippling effects.
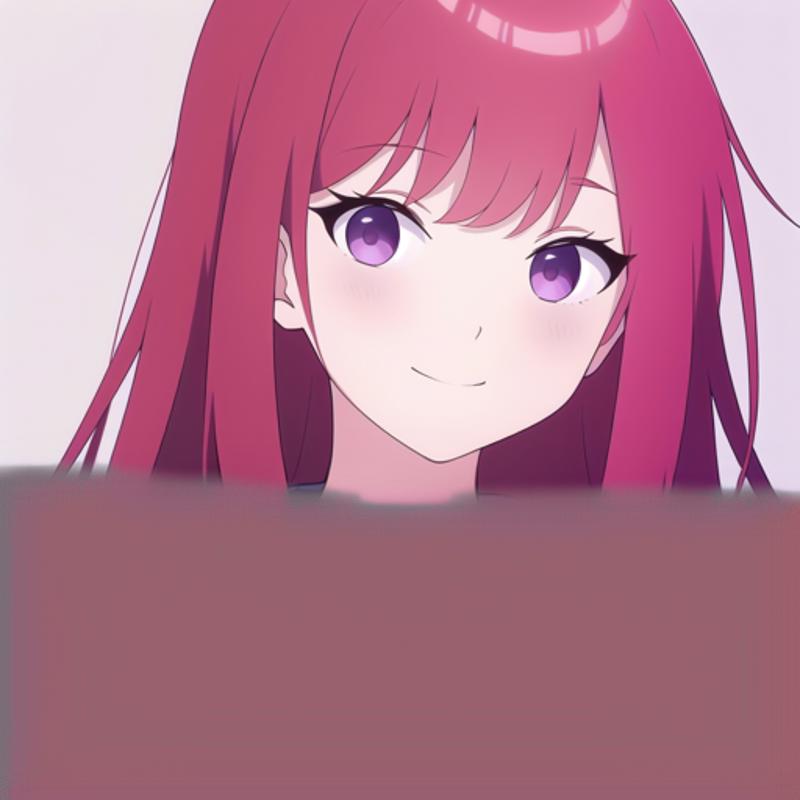
The main purpose for this mode is to create an image from scratch without having the base image as interference. This is particularly helpful for recreating background details.

You can also use latent nothing for editing the main subject of your image but this will require a higher denoising strength.

This mode can recreate and recolor objects without leaving the previous color as an artifact but the main downside is that latent nothing does not respect body proportions ,shapes or perspective as well as original. The final output can be discolored or certain body parts looking out of place. However, you can still get lucky and it ends up working out.
Advantages
Great for adding new backgrounds
Disadvantage
Bad for editing subjects
Backgrounds tend to be very simplified
Fill
I personally remember this mode as "Latent Blur" since this is how this mode functions. Fill works very similar to latent nothing but it creates a blur copy of the nonmasked area and uses that as a base for inpainting.
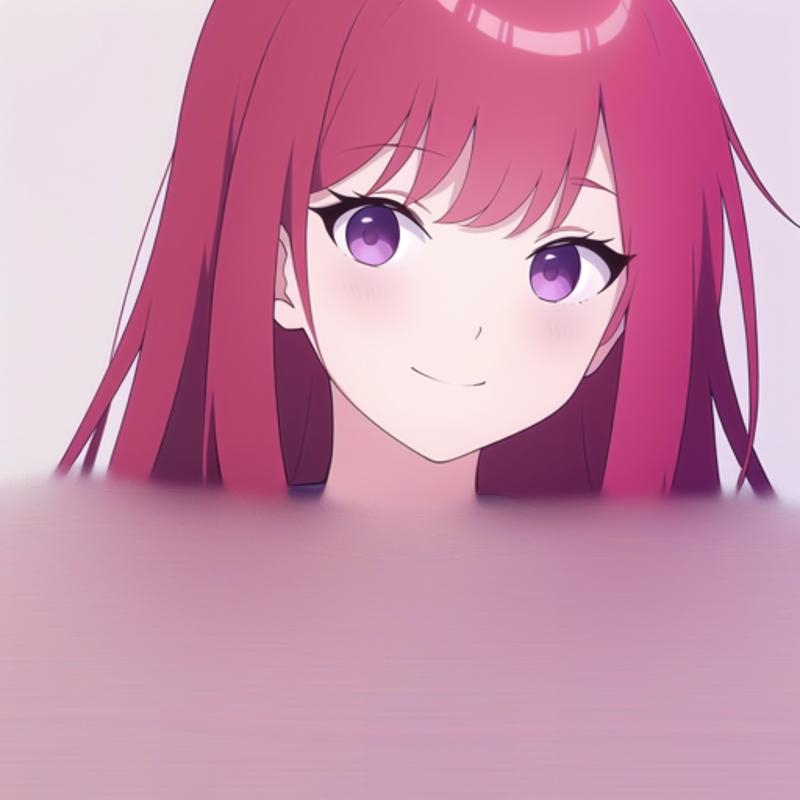
This allows the final output to retain the color scheme of image but not the overall base shape. This mode is particularly useful for adding new objects to the image while keeping the light tones in a landscapes based image. The main downside of this mode is that it uses the color that appears the most in the image so if your character takes up a majority of the image and you have a darkened or bright scenery, fill will likely reuse the color from the character versus the environment.

Like latent nothing, fill is the most suitable for editing background details where the main difference is maintaining the previous color tone. While this is not a very good example, you can see how below latent nothing gravitated towards a brownish color while the above with fill gravitated towards the red color. Occasionally, fill and latent nothing can produce the similar looking results at higher denoising strengths.

Advantages
Great for adding new backgrounds while retaining similar color scheme
Can create backgrounds that slightly more complex than latent nothing
Disadvantage
Can hard to control the color output at times
color bias
Latent Noise
This setting adds a new batch of chaotic noise to the masked area in order to completely redraw it during the inpainting process.
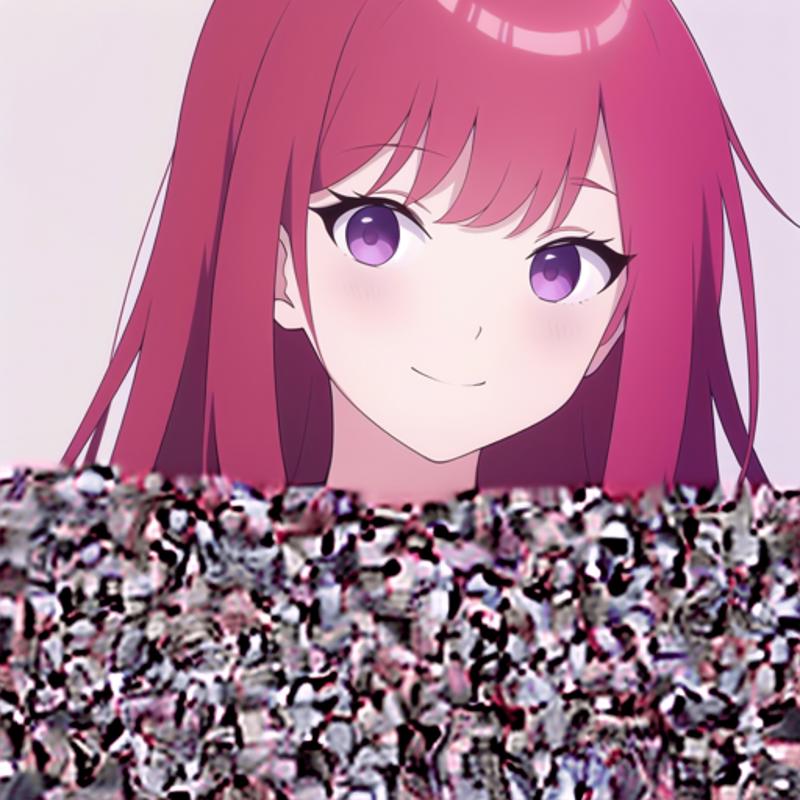
The main advantage is since the noise from this mode is very chaotic, you are more likely able to get complex designs compared to the other modes.

As a result, this mode's main strength is subject replacement or addition.
Using Original to change the girl into a cat.

Using Fill to change the girl into a cat

Using Latent Nothing to change the girl into a cat

Using Latent Noise to change the girl into a cat

The main downside is that is mode will always require a very high denoising strength of 0.7 or higher.
Advantages
Great for adding new objects
Produces a higher level of detail compared to fill and latent nothing
Great for complete subject replacement
Disadvantages
Requires a high denoising strength to produce outputs
very destructive
Inpaint Area
This setting controls the reference area that will used during the inpainting process.
Whole Picture
The mode uses the whole image as a reference point which allows the final output to match better with overall image. This setting can be used for every masked content mode.
Only Masked
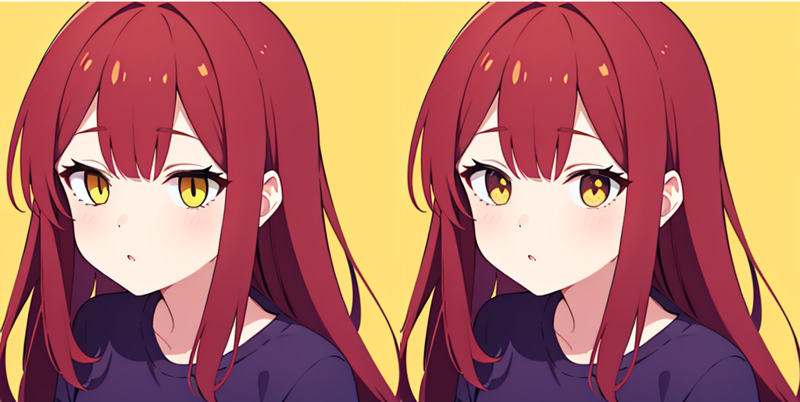
This mode treats the masked area as the only reference point during the inpainting process. Only masked is mostly used as a fast method to greatly increase the quality of a select area provided that the size of inpaint mask is considerably smaller than image resolution specified in the img2img settings. The way that this mode works is that it crops the masked area, upscales the image to the according specified img2img size, runs img2img to increase the quality and then pastes it back into the final image. This feature allows you greatly improve the image resolution without the need to upscale the entire image. It is mostly a convenient hack to get good image quality without the need of generating an image in higher resolutions such as 2k or 4k.
In the example below, I am using a base 512x512 but inpainting with only masked at 768x768 for the eyes. You may need to zoom into see the results but the overall of the eyes are sharper.
Left (Whole Picture) | Right (Only Masked)
Original image
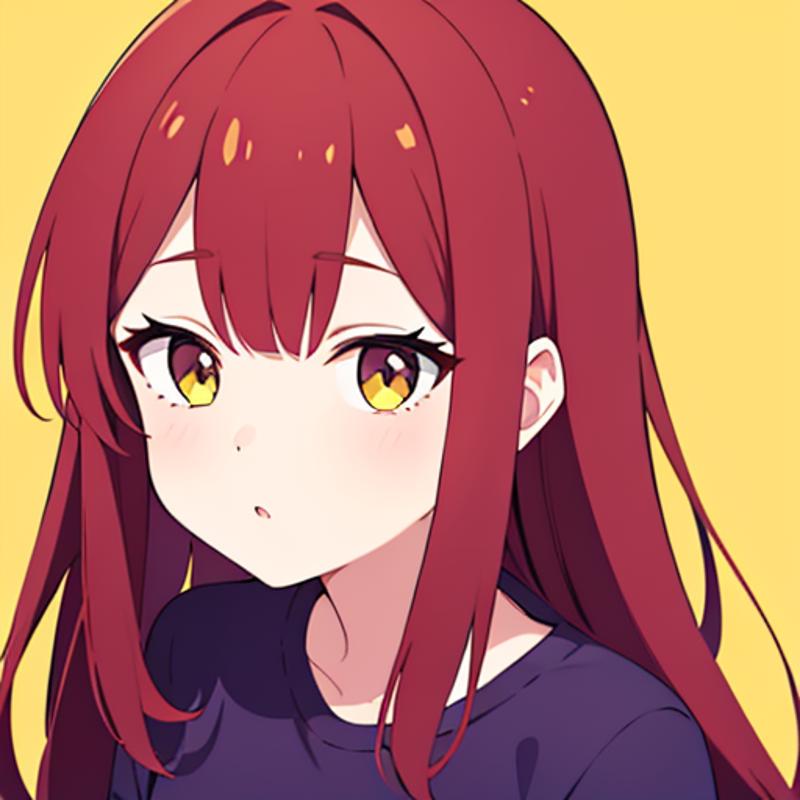
The main weakness of this mode is that because the inpainted area is used as the only reference point, and you may end up with another copy of your prompt in the final result if you increase your denoising strength too high.

I have not been able to consistently trigger this error but usually when it occurs it is a problem with the denoising strength. I typically only use only masked paired with original using a denoising strength or 0.5 or lower.
Only masked padding,pixels
This settings controls how many additional pixels can be used as a reference point for only masked mode. You can increase the amount if you are having trouble with producing a proper image. The downside of increasing this value is that it will decrease the quality of output.
0 padding

32 padding

Ideally, you want to leave this value as low as possible. There's an annoying feature with the auto1111 webui where after you send the output back to inpaint, the resolution sliders change to the original image size.
Miscellaneous Tips
General Inpainting Process
Inpainting is an iterative process so you want to inpaint things one step at a time instead of making multiple changes at once. After inpainting has completed, select the best image from the batch and then hit send to inpaint. Just repeat this process as until you have your desired image.
Blur Issues
After inpainting, it is natural to find a ton of blurs in the overall images. My current approach towards eliminating all of the blurs at once is to do an img2img pass at a low denoising strength around 0.2 ~ 0.35. This does come with the side effect of slightly altering the image so that is something to watch out for. Additionally, try using controlnet canny or lineart to help keep the overall shape intact. You can consider manually blending the final inpainting with the img2img result if it differs too greatly.
Ancestorial Samplers
These are samplers that have the letter a added to the end of the name such as Euler a, DPM2++ Karras a. These samplers are noisy compared to other samplers so they can help with getting better results for inpainting. As a result, even if you reuse the same seed, you can get different results after restarting the webui at a different time. I have noticed that ancestorial samplers are better for getting a color match with the overall image. I personally haven't seen too much of a difference between samplers for most of my inpainting work but I mostly deal with anime-based artwork so this can differ for other artstyles.
Inpainting Models
An inpainting model is a special type of model that specialized for inpainting. Personally, I haven't seen too much of a benefit when using inpainting model. I have occasionally noticed that inpainting models can connect limbs and clothing noticeably better than a non-inpainting model but I haven't seen too much of a difference in image quality. The other thing I like to mention about inpainting models is that they prefer smaller prompts where you only specify your desired changes. They don't seem to work as well when using a large prompt. You can find the recipe for making an inpainting model for any model on reddit.
Example) Using simple prompting
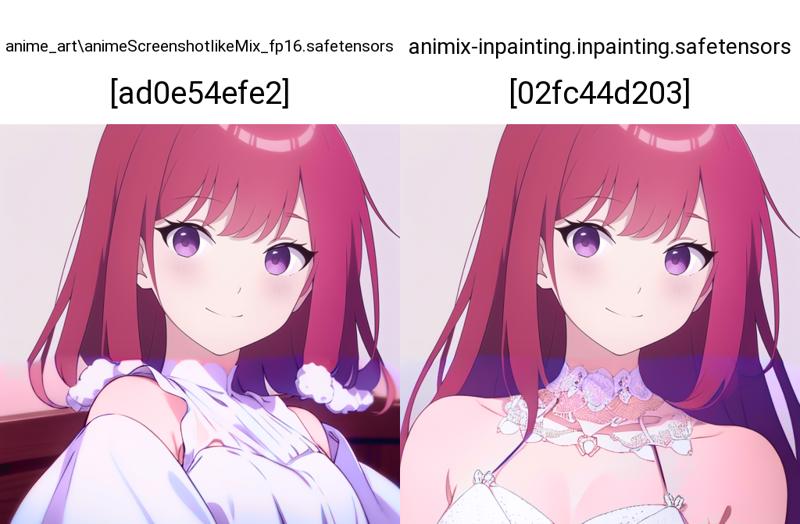
Example) Using original prompt
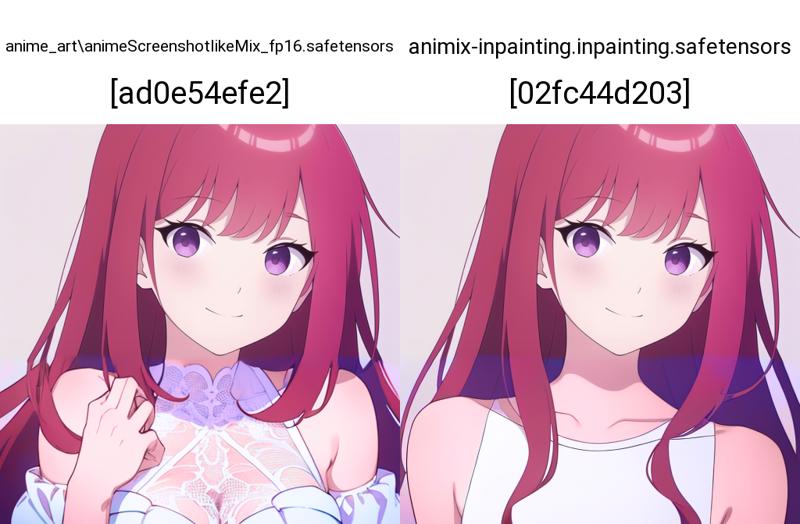
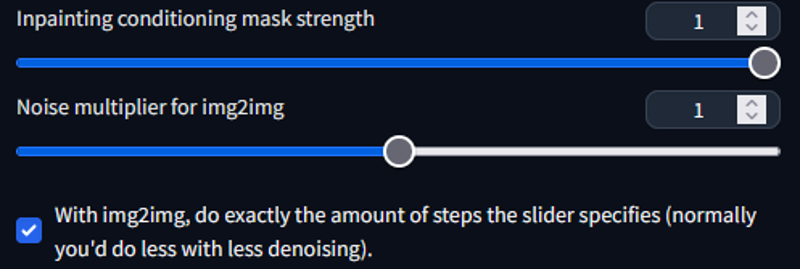
The other benefit of using an inpainting model is that you have the option of using 'inpainting conditional mask strength' option in the advanced settings in the webui. This setting lets you control how strongly an image should conform to the original shape. Personally, I haven't found a need to play around with this setting so this an option that you can experiment with if you are having trouble.
Step Count Impact
Step count doesn't seem to have a large impact on inpainting so it is possible to lower the count from what is normally used in txt2img. Personally, I have been using 10 steps without any problems. I don't recommend setting the steps too low since Stable Diffusion still needs to iterate on the noise.
Does Mask Size matter?
Yes and no.
For Original:
When trying to add something new to image, a larger mask size can be important towards helping Stable Diffusion making a better blended output but at the same time it can be destructive to the nearby objects. Ideally, try to keep the mask size contained to what you want to change as much as possible to avoid any unnecessary artifacts.
The case for mask size doesn't matter is that inpainting is a blending tool so mask size doesn't necessarily affect the result of the inpainting result but just how the image is blended together.
For Only Masked
Size matters since it's directly tied how to well the image quality is improved.
Inpainting Limitations
Inpainting is not perfect and there are limitations ;however, this more tied to base model rather than the process itself. For example, if you try to add something to the base image that does not exist in model or a character LoRA, then inpainting will fail due to lack of information in the model. Inpainting can also fail if a checkpoint or LoRA is overfit and can make edits to certain areas very difficult to recreate such as the hands or face. This usually makes it difficult to add custom accessories to a character as denoising will just remove any edits in the image. In this scenario, it's best to look for a LoRA that will allow you to add what you want.
Reasons for keeping a LoRA tied to a prompt is that a LoRA can help with maintaining the overall color scheme of the character. If the LoRA is excluded, there is a risk of messing up the color composition over being able to add the object. If your character has a distinct shade of hair or eye color, removing the LoRA can cause you lose the color. In this scenario, it's best to keep your masks limited to your desired area as much as possible and then add or remove the LoRA as needed.
Occasionally, having different LoRAs of the same character be helpful as some of these LoRAs could be flexible or overfit in certain areas. My basic example is that somebody could train a LoRA that captures the character's proportions well but fails to capture the detail of their accessories. Conversely, somebody could make a LoRA that captures their accessories but does a bad job on pose flexibility. If you don't want to bother with using multiple LoRAs, you always have the option of waiting until somebody creates a better LoRA.
When to use a Character LoRA during inpainting?
For making edits only and not replacing the character, I generally recommend using LoRAs only when you need to edit the face or need to add accessories. This is just personal preference, I don't have anything to help support this claim.
If you're trying to add different characters into an image, it's always better to work with one character LoRA at a time.
Advanced Noise Settings
There are some advanced noise settings located in the "Stable Diffusion" section in the settings tab.

I personally haven't toyed too much with this and I don't expect much of a difference from playing with these sliders. But to explain, the "inpainting condition mask strength" is supposed to control how much the output conforms the original image. From my personal testing, I haven't seen any changes with this setting.
Noise multiplier seems to add more noise? during the inpainting process. This causes the image to change more overall but I have found that it noticeably doesn't respect the original image's proportions.
img2img steps. This adds more noise to the image which can improve quality. Apparently, img2img secretly changes the step count in the background to something lower if this setting is not enabled.
ControlNet Inpainting
Advanced topic that requires an article by itself. The short explanation is that it does a better job at preservation of character details such as body and hair while being able to make edits. I personally haven't used this particular mode too much unless I want something specific due to performance results.
Inpainting results look too similar
This is usually due to a lack of noise. You can try to use other inpainting setting such as latent noise, increasing the denoising strength or by adding random manual edits. I can't explain what is the best method since that depends on the use case.
Conclusion
This ended up being a lot longer than what I originally expected but this should give you a gist of what each setting does for inpainting. Thanks for reading and maybe you learned something useful!
Changelog
8/24/23
a111 about/comfy disclaimerinpainting is technically a blending toolonly masked section updated for relevencyupdated tips on blurring, mask size, ancestorial samplers, and inpainting conditioning strengthadded more details to my own personal tips (I encourage people to experiment; sharing what I am using so far for more transparency)
8/25/23
reverted changes from yesterday due to a personal misunderstanding after playing around with comfyui.

