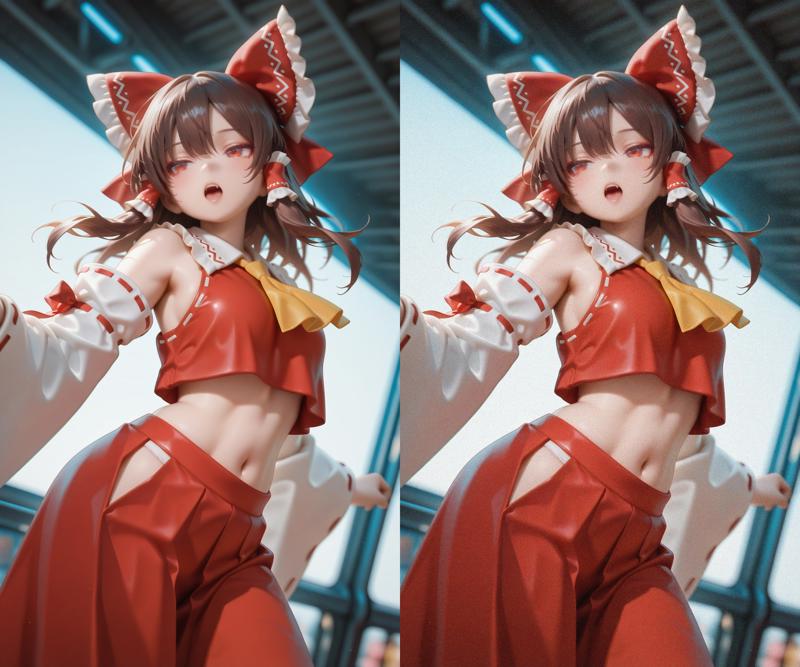
✨Miaoka_image_effects – 为 A1111 WebUI 添加后处理噪点效果的脚本
By MIAOKA
🐾 MiaoMiaoHarem Dogma 的完整生态终于实现。
🐾 The complete MiaoMiaoHarem Dogma ecosystem is finally here.
项目地址:sssyyyfff/miaoka_image_effects
🧠 简介 | Introduction
众所周知,Dogma 风格图像具有独特的颗粒感,这是其核心视觉特色之一。但在模型训练过程中加入稳定的噪点非常困难,稍有不慎还可能造成训练数据污染。
因此在我开始训练模型时,就思考是否能通过后处理方式来添加噪点。我调研了许多方案,发现只有 ComfyUI 有现成的插件节点,而A1111 WebUI 却缺乏类似的实现。
作为 A1111 的深度使用者,为了自己、也为了和我一样偏好 A1111 的朋友,我决定亲自开发这个脚本,为 MiaoMiaoHarem Dogma 补上生态中最后一块功能缺失。
It’s well known that Dogma-style artwork includes a signature noise/grain effect that enhances its unique aesthetic. However, adding stable noise during model training is difficult—and can easily corrupt your dataset.
So when I started building my Dogma model, I asked myself:
Why not add noise after image generation as a post-processing step?
After testing many approaches, I found that only ComfyUI offers noise plugins. But as a loyal user of A1111 WebUI, I wanted a native solution—both for myself and for other users like me.
This script is my answer, and now, the MiaoMiaoHarem Dogma ecosystem is truly complete.
✅ 功能特点 | Features
🎨 支持 txt2img / img2img 的自动噪点增强
Adds noise automatically to images generated via txt2img / img2img🔧 可调噪点强度(默认轻微颗粒感,支持精细控制)
Adjustable noise strength (from subtle 1% to noticeable 30%)🆚 可选输出对比图(原图 vs 加噪图)
Optional comparison output (original vs noisy image)🕒 图片命名自动加时间戳,避免文件重名
Auto timestamped filenames to avoid overwrites🧩 原生 A1111 扩展支持,一键安装
Native extension support for A1111 – install and use instantly
📦 安装方法 | Installation
bash复制编辑
git clone https://github.com/sssyyyfff/miaoka_image_effects.git
将 miaoka_image_effects 文件夹放入你的 A1111 WebUI 的 extensions/ 目录下,然后重启 WebUI。
Place the miaoka_image_effects folder inside your A1111 WebUI’s extensions/ directory and restart the WebUI.
⚙️ 使用说明 | Usage
打开 WebUI,进入
txt2img或img2img页面在脚本栏(Script)中选择
Add Noise After Generation设置噪点强度(建议 15% 为细腻颗粒感,30% 为明显效果)
可勾选“生成对比图”查看前后差异
点击“生成”即可!
Open WebUI and go to
txt2imgorimg2imgIn the script dropdown, choose
Add Noise After GenerationSet noise level (15% = fine grain, 30% = noticeable effect)
Enable "Show comparison image" if needed
Click
Generateand done!
🖼 示例 | Example
原始图像加噪图像 (30%)

示例图位于 examplessd_add_noise/ 目录中
Example images are stored under examplessd_add_noise/ folder
📄 许可证 | License
本项目采用 Creative Commons BY-NC-SA 4.0 许可协议:
✅ 可自由分享与修改
❌ 禁止商业用途
🔁 衍生作品需使用相同协议共享
This project is licensed under CC BY-NC-SA 4.0:
✅ Free to share & remix
❌ No commercial use
🔁 Derivatives must use the same license
详细信息查看:LICENSE 文件
❤️ 感谢 | Thanks
特别感谢所有使用 A1111 WebUI 并支持原创开发的用户。
If you like this project, consider giving it a ⭐ star on GitHub!
