.jpeg)
UPDATE - I added a copy of the final post production image to the article in case you want to see the how the final image was assembled.
While Photoshop is a powerful too when it comes to editing images, I feel there are three issues with it as a part time artist.
It's one more tool you have to pay for...
There is a steep learning curve (especially if you don't use it every day)...
For most of my images it is like using a bazooka to kill a fly...
If I was spending a lot of time doing post production work on a single image, Photoshop could be a really useful tool. My advice is always use the tools that you feel most comfortable with and to heck with what everyone else claims are the right tools.
For example Tatsuo Horiuchi, an artist based in Japan, has received international attention for his artwork. His tool of choice... Microsoft Excel. Check out his story here.
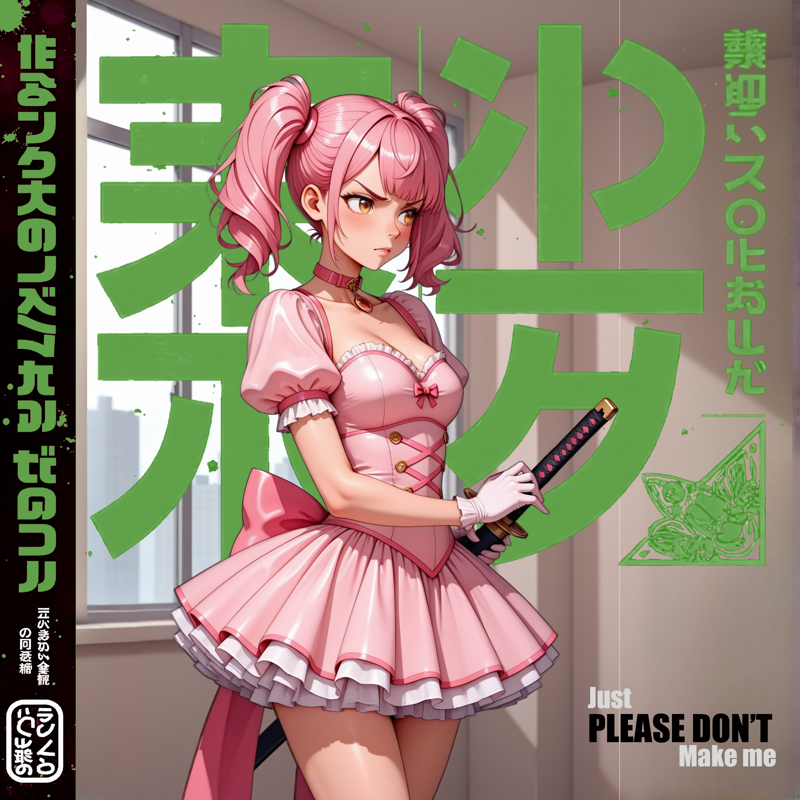
I'm not suggesting you use Microsoft Excel, but as for myself I've found that the easiest, fastest and cheapest application for my post production needs in Microsoft PowerPoint. I can already sense the majority of readers might be moving onto the next article, but for those of you interested in sticking around I'll provide you a quick example of my process I use to create images such as my recent manga covers and my recent dinosaur fight.
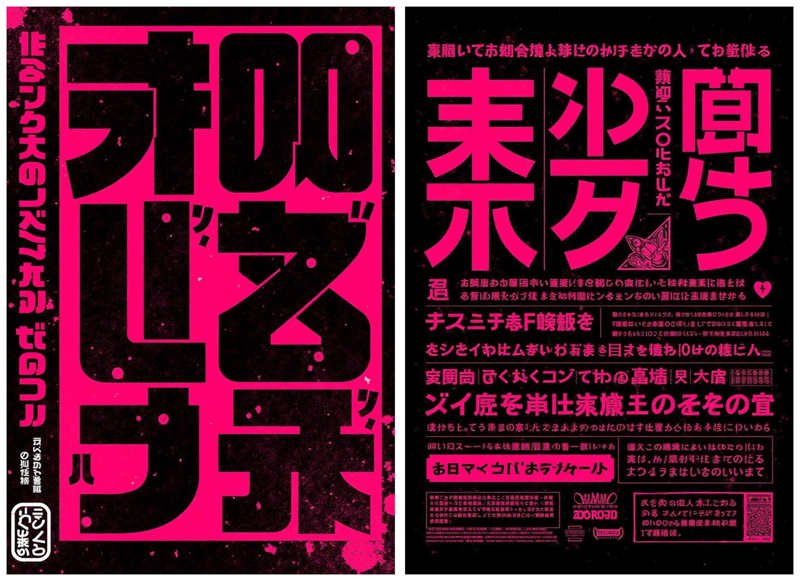
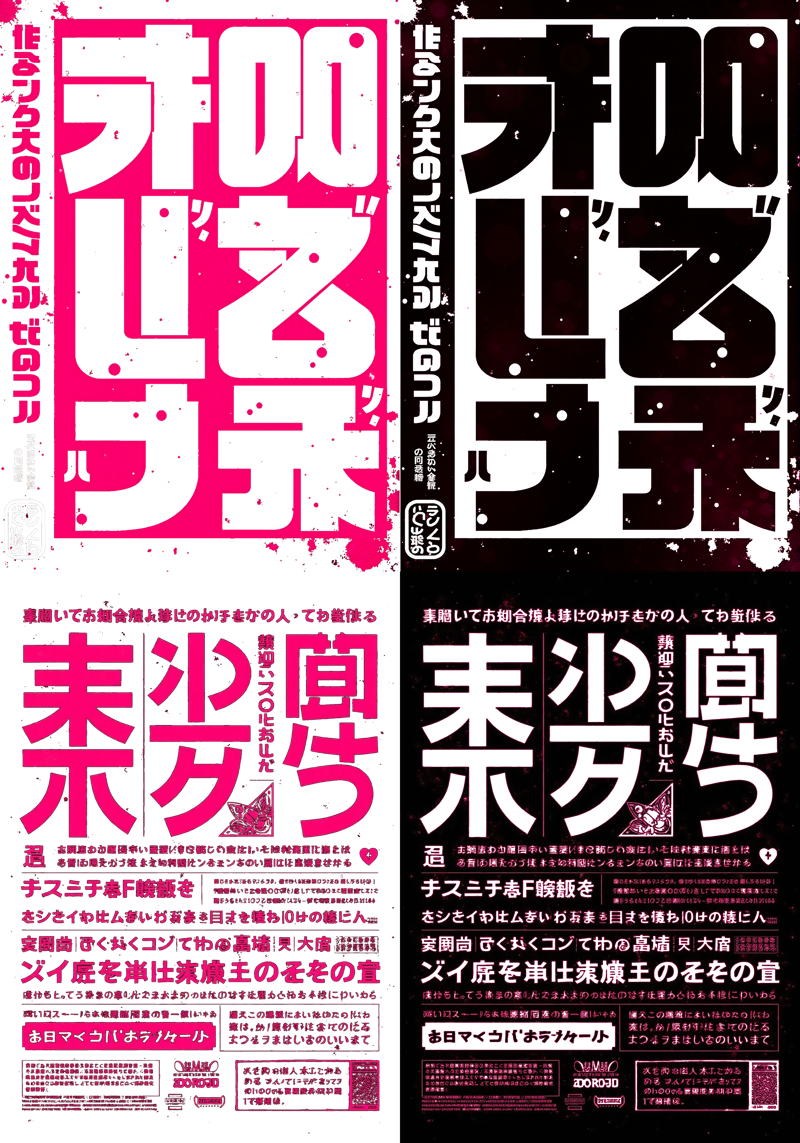
I know there are some folks that rely on in/out painting everything. For myself I enjoy getting some of the images I need and then building a collage. I recently came across YFG Fonts - Japanese Manga Posters and wanted to incorporate it into something... sometime... somehow...
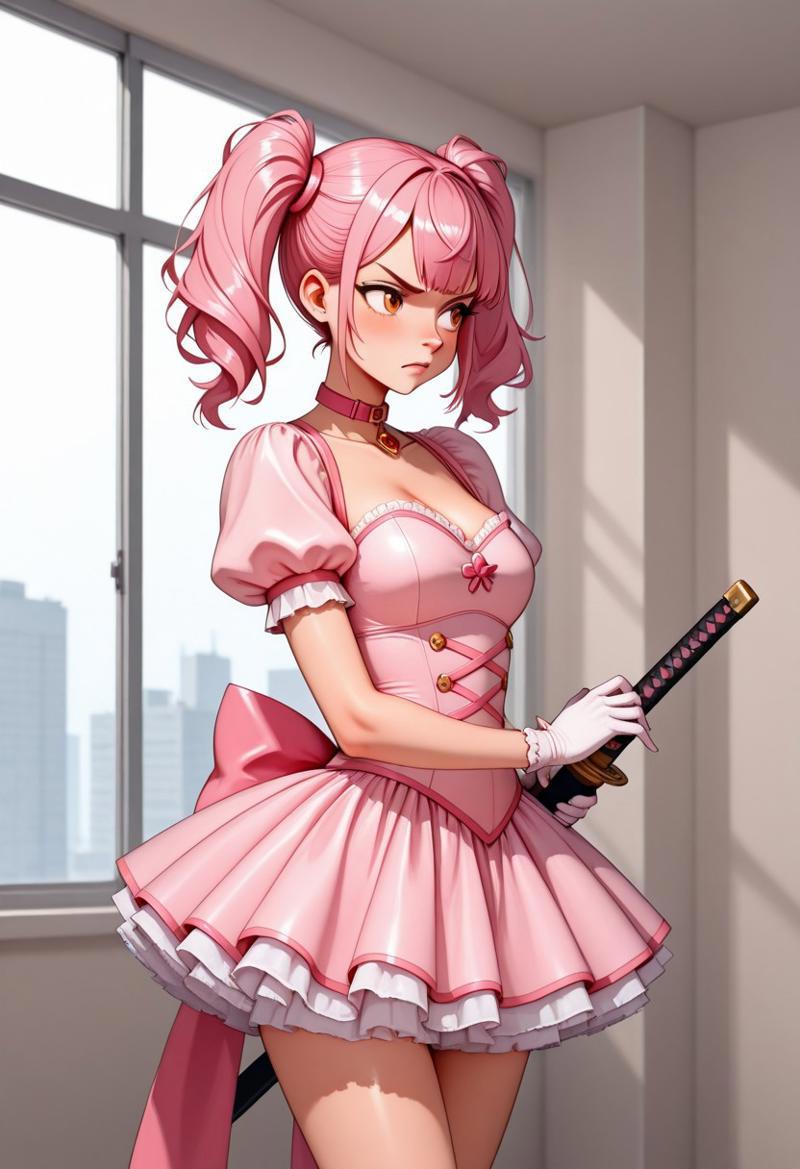
One day I found myself with what I felt were good images with a rather unexciting background. Admittedly, my attempts to create great backgrounds are often happy accidents and seldom purposeful.
So armed with my trusty PowerPoint license, a vision for an image and a stubbornness to keep things as simple for my neurodivergent noodle as possible I went to work.
Using YFG Fonts I produced two 'text only' images [imgA & imgB]. Once output, I upscaled the images and created higher resolution versions to get crisper lines and even more contrasting colors.
I personally use OpenArt for a lot of my AI post production work. It has great functionality to not only remove background, but to then invert the selection so you can delete the foreground. I've also found some online tools that allow you to remove a single color. The end result was .png files that preserved the transparency while giving me the images I needed for the project.
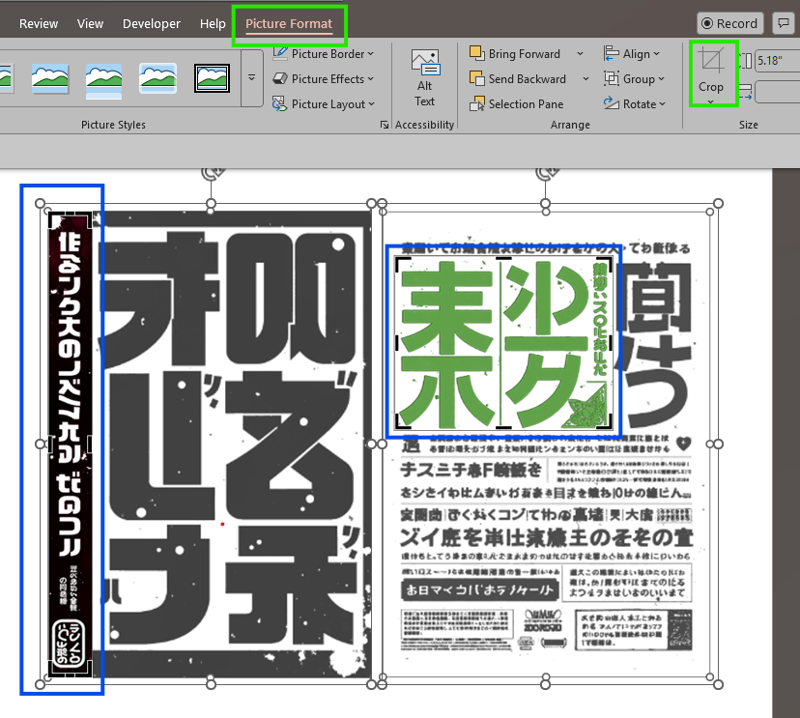
Dropping the .png files into PowerPoint I then used Picture Format>Crop to get the portions from the two images I needed for the final picture. I wanted to use the tall skinny image for the left edge border and I wanted the characters with the moth in the corner for the background.
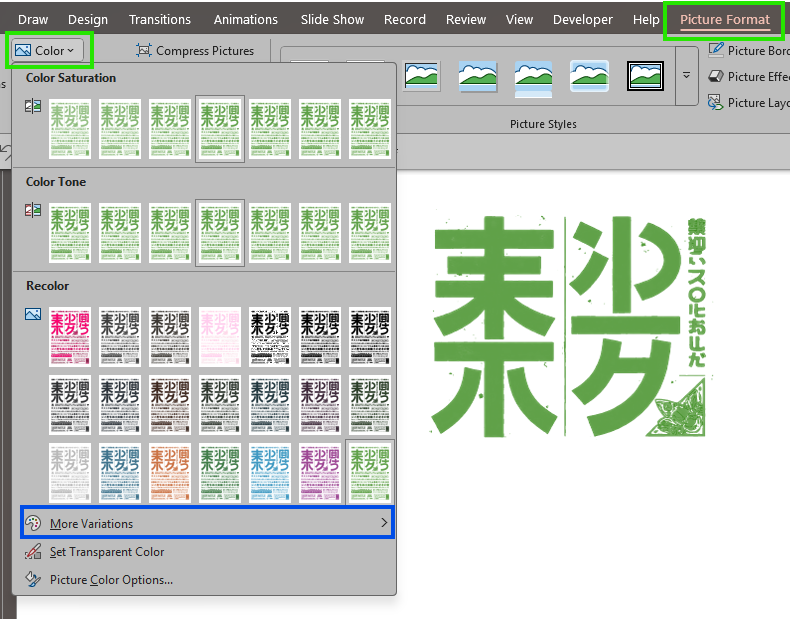
Another cool trick with PowerPoint is that with Picture Format>Color>More Variations I'm able to take a single image of the background image and color shift it to any other color I need.
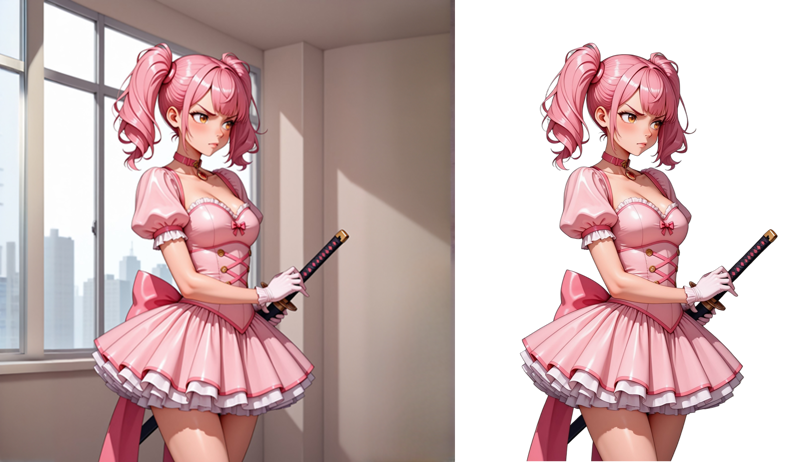
With the text complete the next step was using OpenArt to Extend the original image and then to also do a version of the image with the background removed.
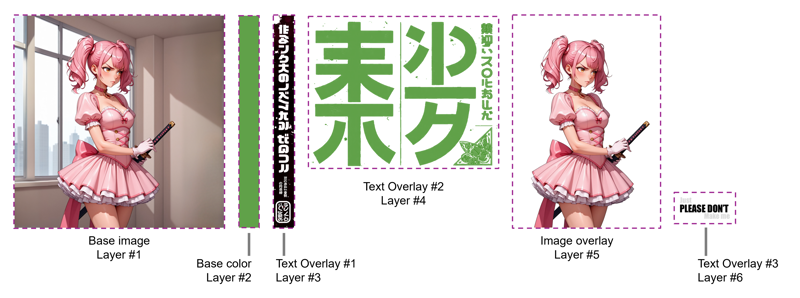
Once that step is complete, I have all the components I need to layer my image.
The base layer is the extended image which serves as the background.
Next, since the wide border text has knockout text I need to add a colored shape so the clear letters then appear green.
Then the wide border text rests on top of that and is aligned to the left edge of the image.
The green moth text goes next and I position it in the background covering up Lulu with her sword in the base image.
Next I take the transparent cut out of Lulu with the sword and I align her to the background image thus putting her in front of the text.
Finally, I add a small textbox with some copy to bring it all together
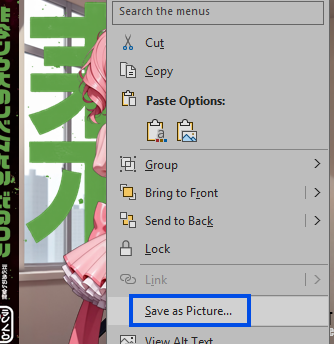
The end result is an image that should look as if no manual post production work was done. BE ADVISED you need to pay close attention to your alignments and sizes of shapes, pictures and objects so as to prevent any noticeable flaws or imperfections. Once you have everything finished, select all the objects and group them together (Ctrl+G on PC). Right click on the image and select Save as Picture
With that you turn a presentation application into a layout and design tool. Hopefully you find this guide useful and let me know in the comments if you'd like me to do walk throughs of some of my other projects or highlight some of the other cool capabilities and features in PowerPoint.