This is short and fast guide on how to make comfy workflow from 0. Best way to understand how comfy works is to make your own workflow. If there is interest for fast simple guides on comfy like this, please leave a comment on what would you like to know about comfy.
There is instructions on comfy github page on how to install and get it running https://github.com/comfyanonymous/ComfyUI
Manager for node installing https://github.com/ltdrdata/ComfyUI-Manager
1. Starting from 0
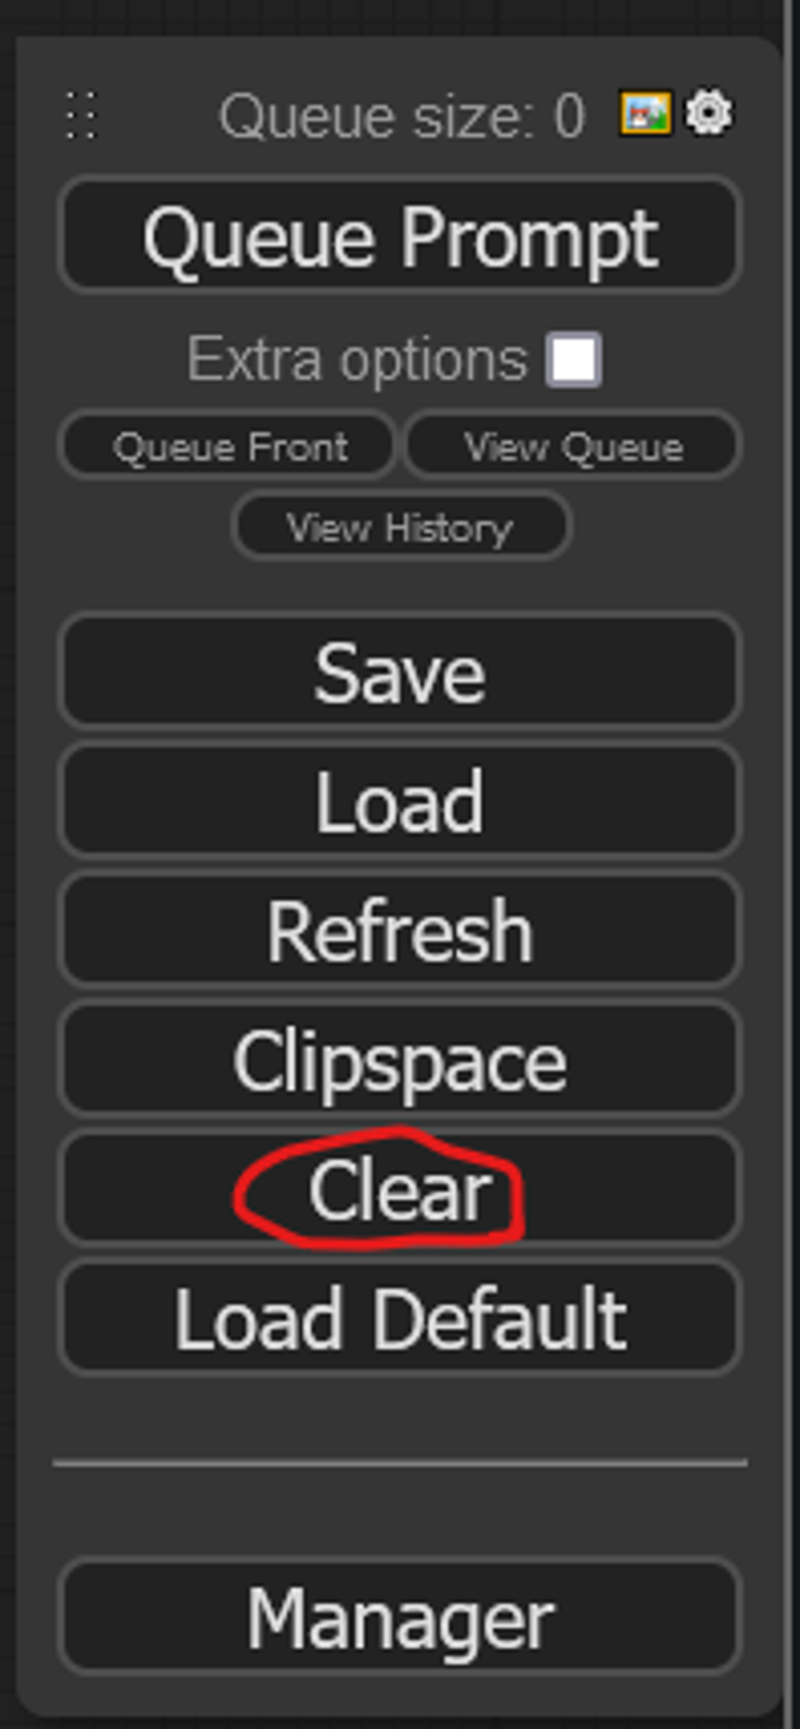
First thing we are going to do is start from nothing. This can be done by pressing clear from menu
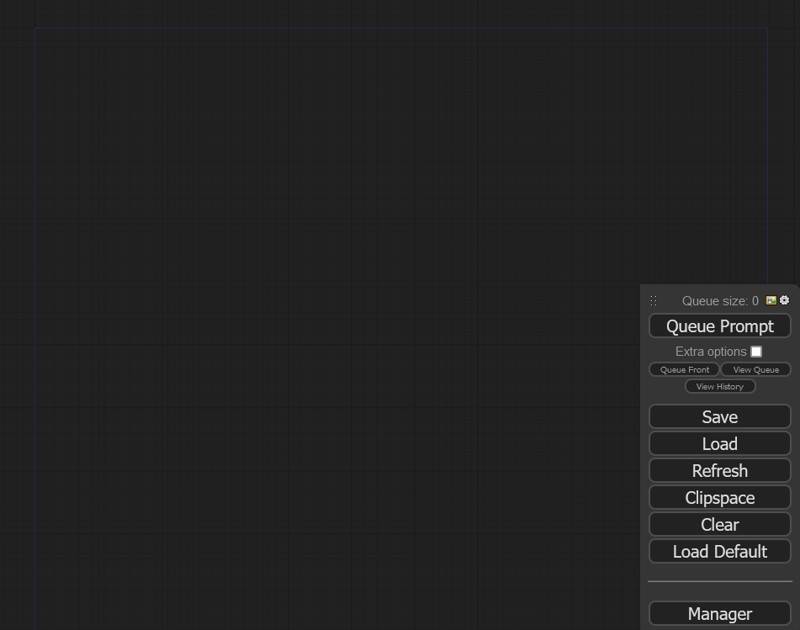
After confirming clear you are left with canvas of nothing
2. Adding nodes
There are 3 ways to add nodes:
Right click -> add node

Double click left mouse button on empty area and you can search

Drag from point of node to empty area and let go. It will give nodes related to that point.


3. Nodes
It is good idea to think what you want to do. From that point it is easy to go forward. We want to generate image.
3.1. First nodes
What do we need to generate image? We need checkpoint. Lets search on the node search for checkpoint. This was done double clicking left mouse button on empty area.
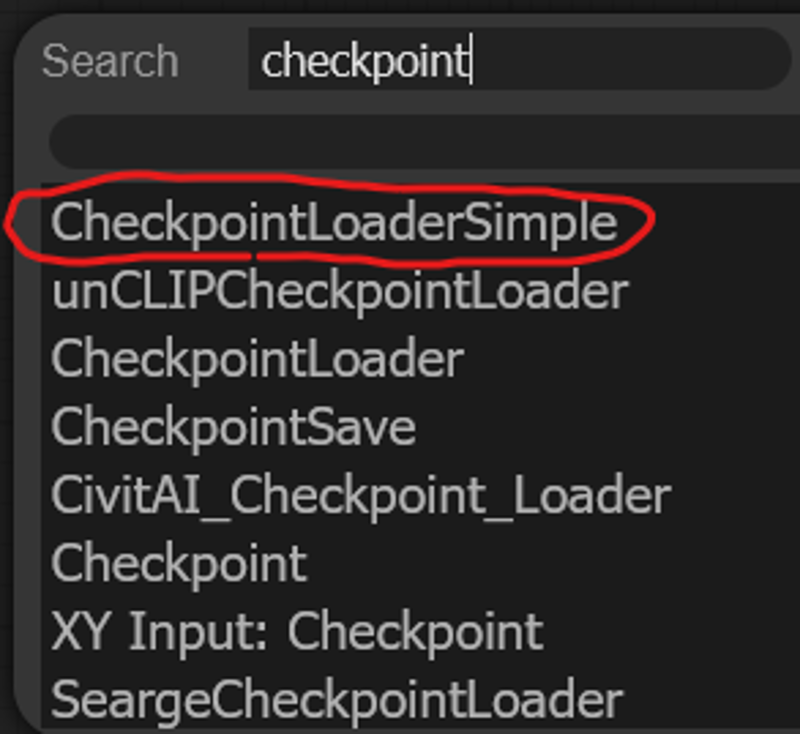
Checkpoint loader sounds like something that would help us. Lets make it.
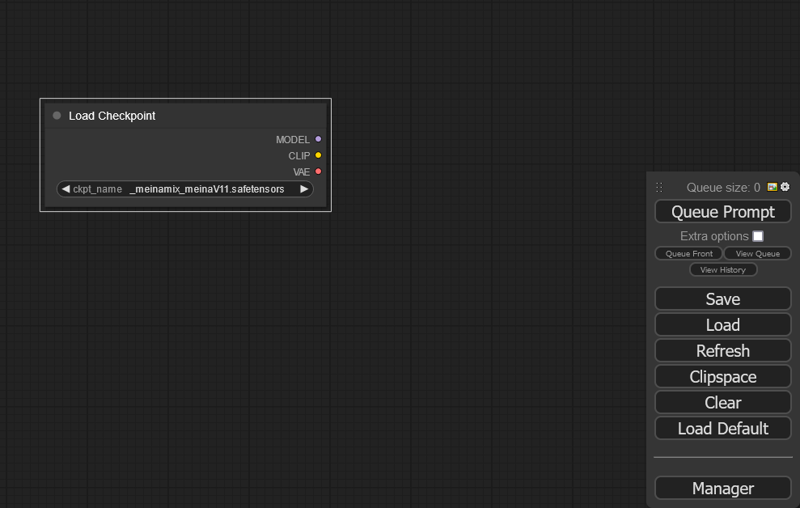
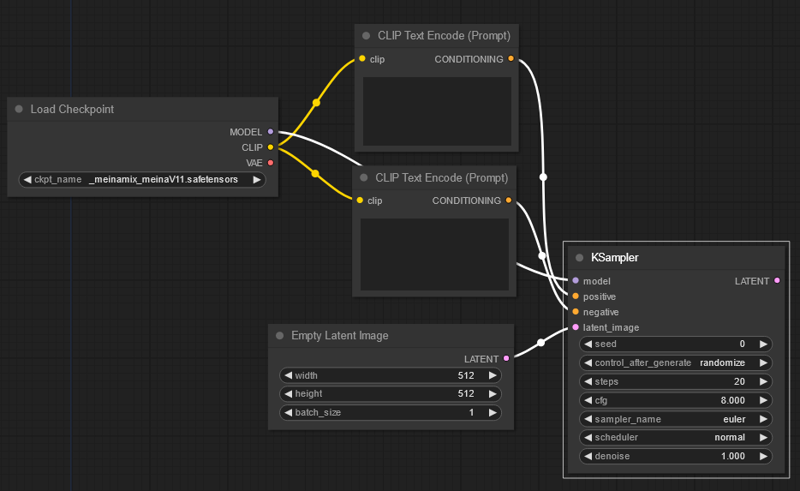
Now we have 3 things we need to connect to from the checkpoint loader.
Model.
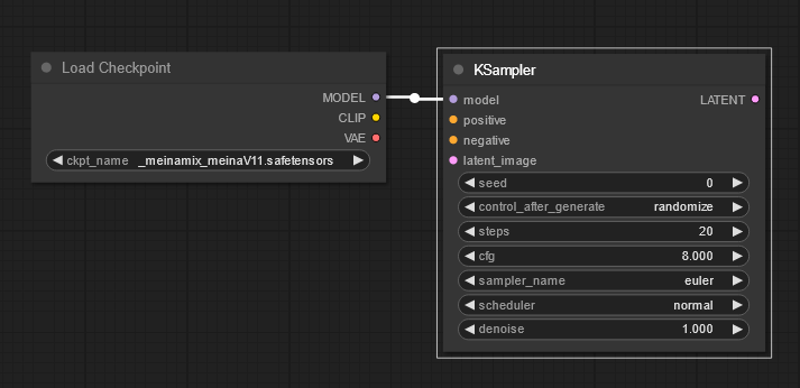
If we drag and drop from the model point we get some recommendations for what we could possibly want. We need sampler and there is sampler recommendation on the list., so lets take KSampler as our next node.
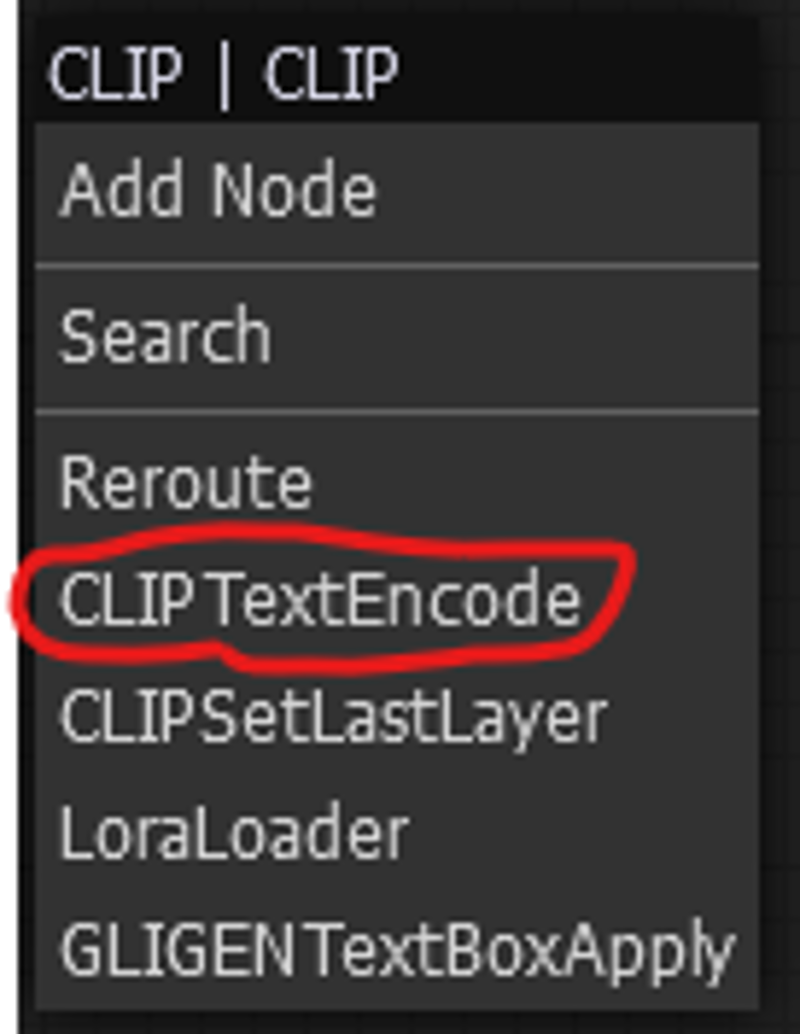
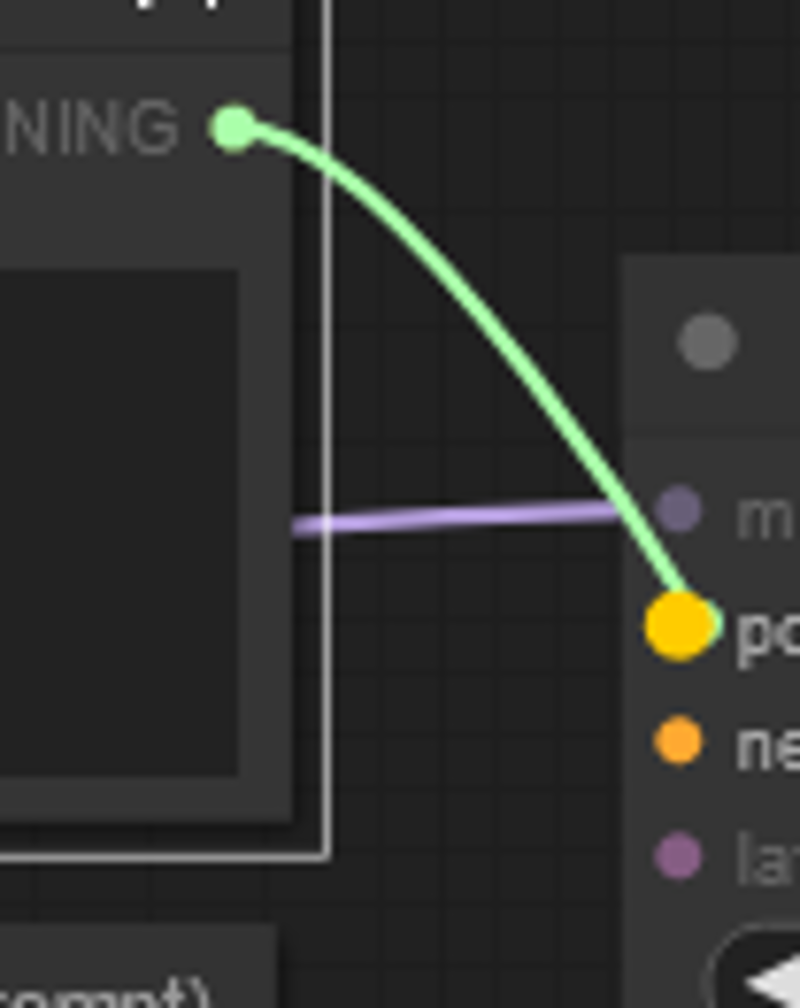
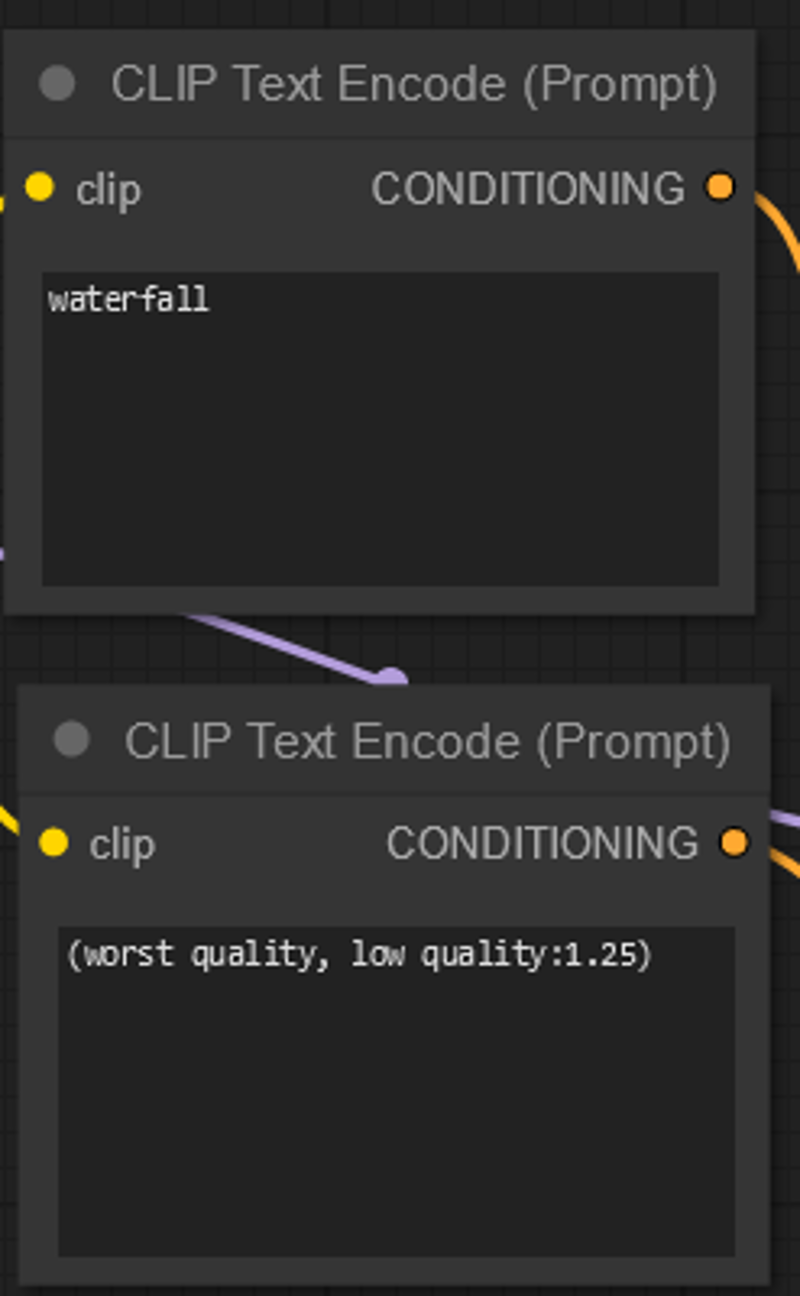
Next we have CLIP, for it we need text encode where we write our positive prompt and negative prompt. So lets drag and drop from CLIP point to empty area and see if it recommends us what we want. There is CLIP TexEncode that sounds like something we need. We are going to need 2 text encodes to play us an negative and positive prompt. So lets make 2 of them.

Only thing left on the Checkpoint loader currently is VAE. We are going to get back to this on later.

3.2 Sampler
Now lets fill rest of the things the sampler wants.
Positive and negative
We made 2 text encode nodes, now we need to connect them to positive and negative slot in the sampler.
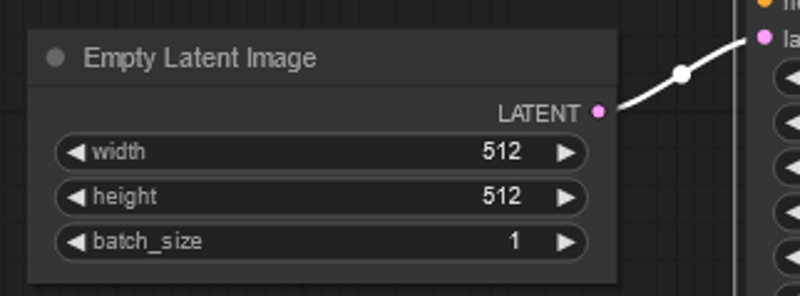
Latent image.
Sampler needs empty latent image from which it can start to generate image for us. Lets find what we need from the right click menu this time. (Your menu might look different with less options, these there are custom nodes you can install from the manager on the right side)

Now lets connect empty latent image to our KSampler. With latent image we choose the resolution of the image we will generate.
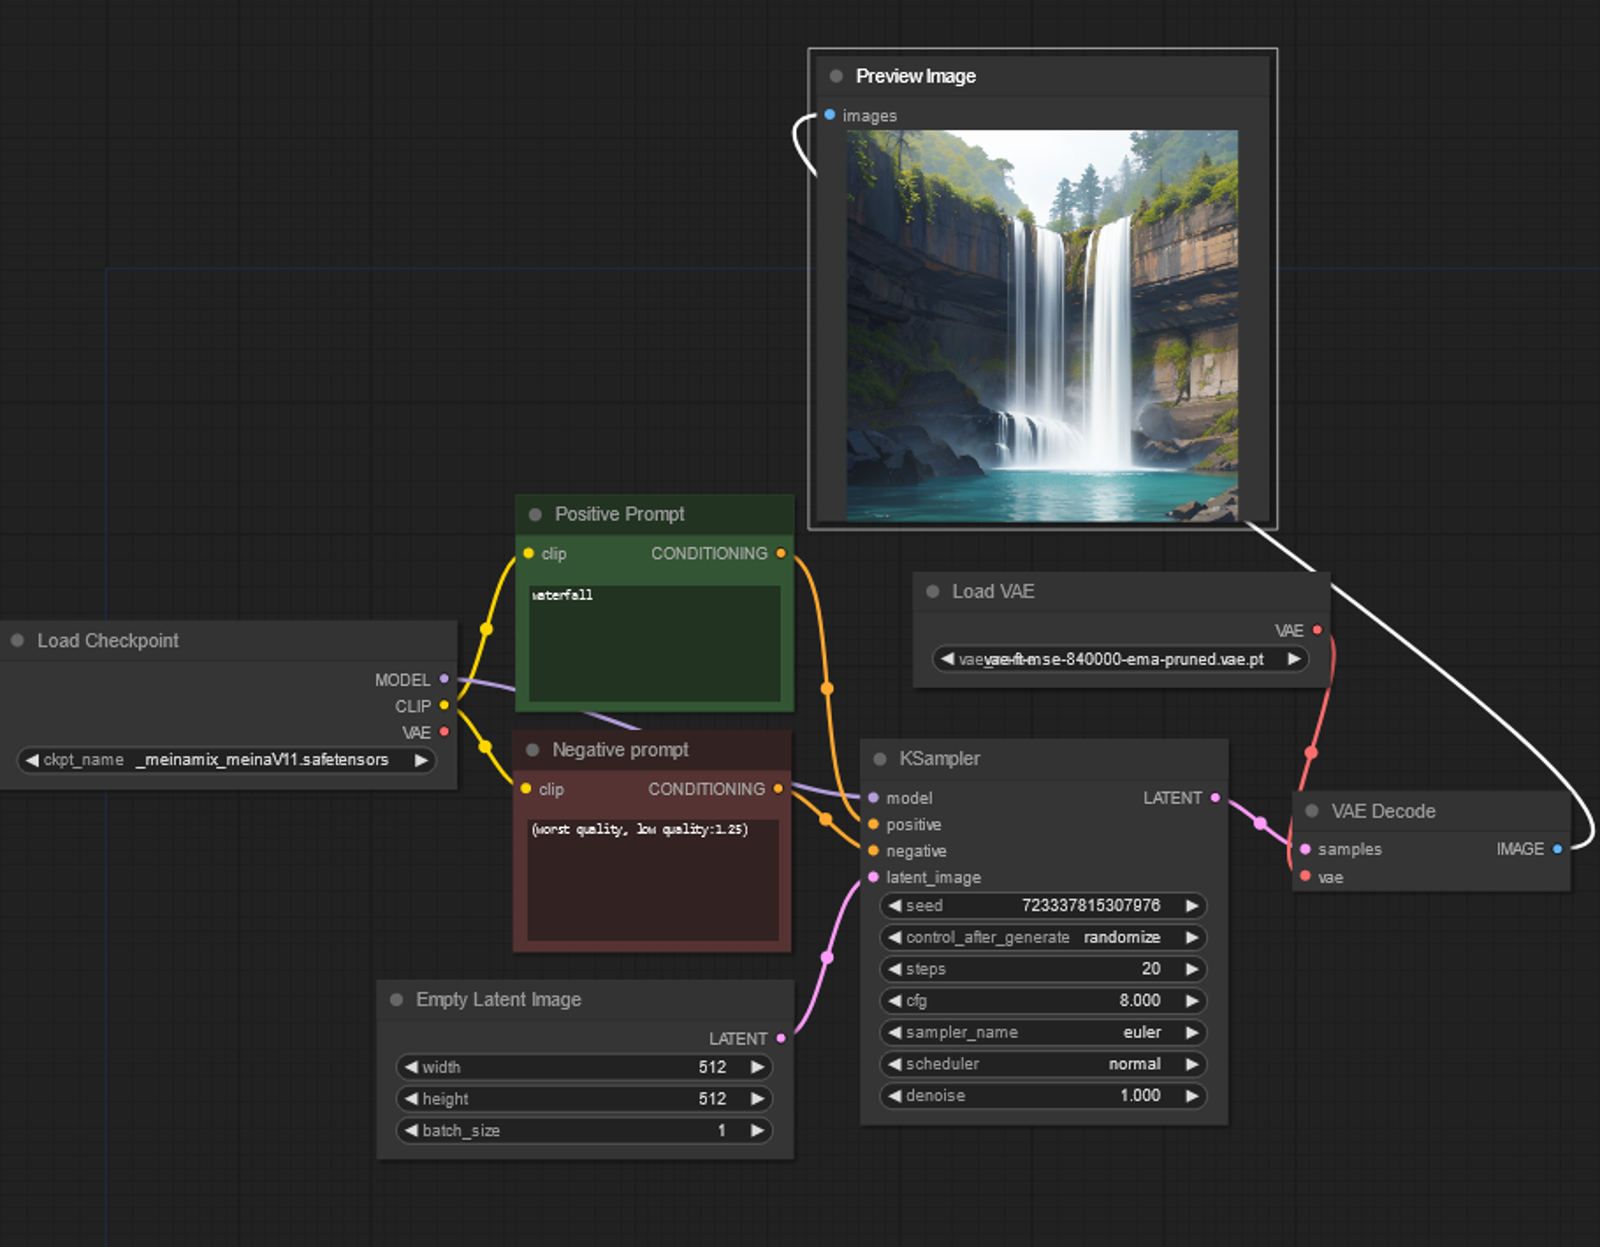
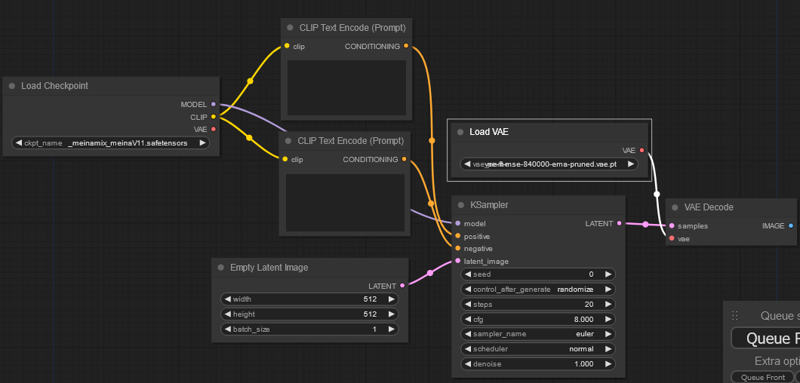
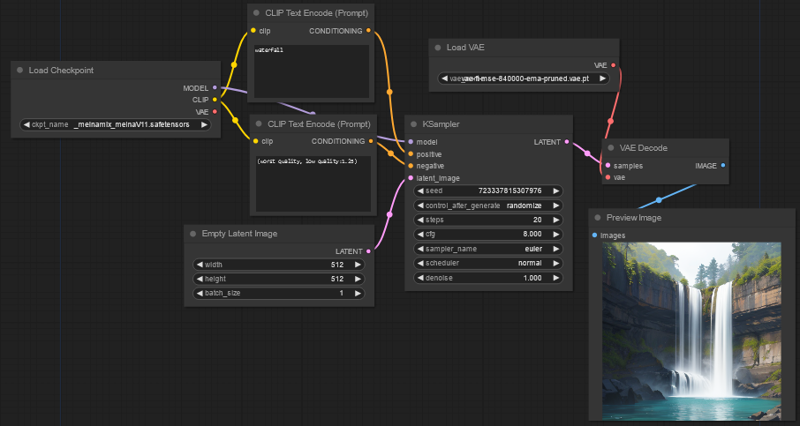
Our workflow looks like this so far:
Now lets continue from the KSampler. On the other side we have LATENT point that needs to be connected somewhere. Lets drag and drop from the latent and see what it recommends.
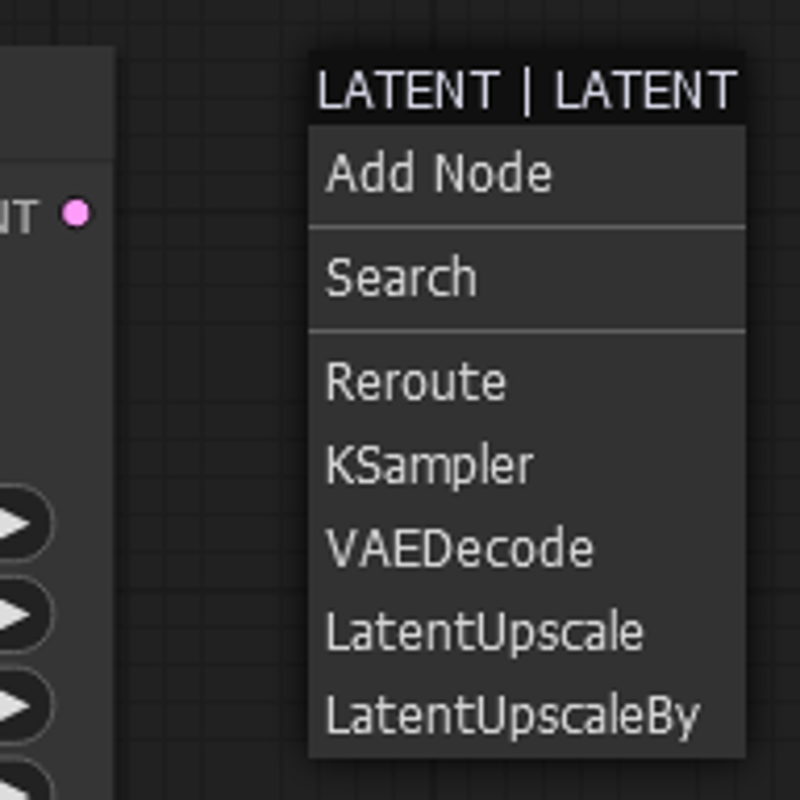
We are going to need to decode the image from latent to normal image. So lets take VAEDecode.

Now we again have VAE point that needs to be filled. We have 2 choises
We connect from the Checkpoint loader that has VAE. This uses baked VAE of the checkpoint.
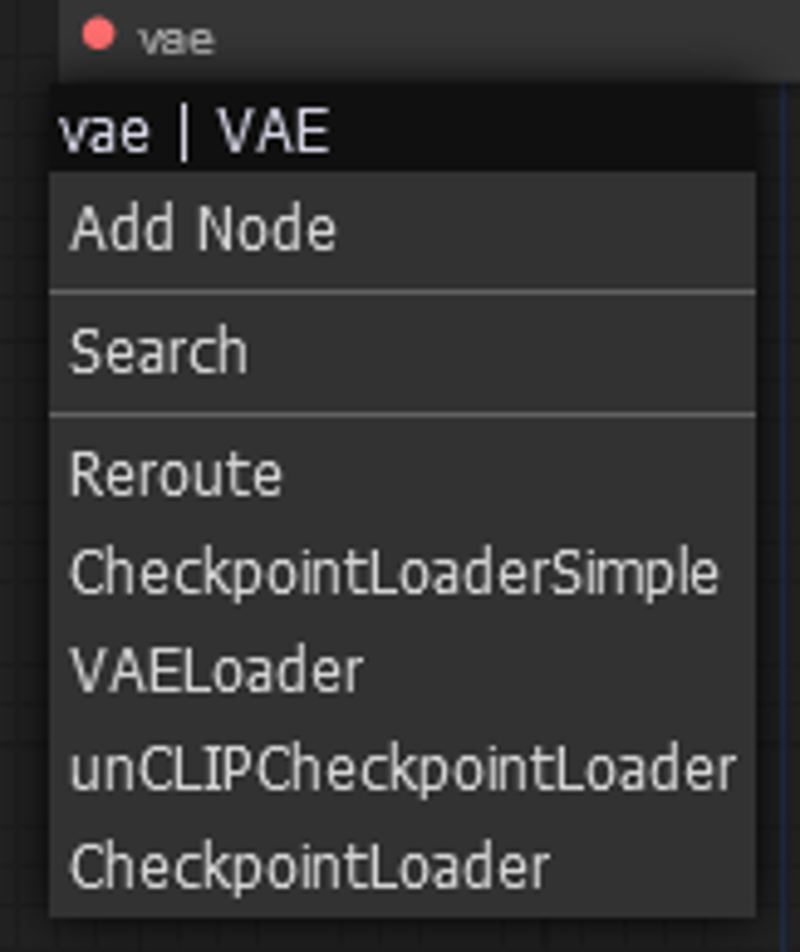
We make VAELoader that lets us decide the VAE
I am going to make VAE loader to be able to choose the VAE i want to use. Drag and drop from VAE point in the VAE Decode. It gives us VAELoader option. Lets choose it.
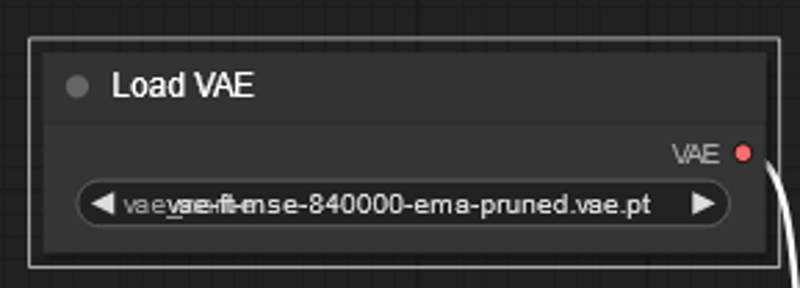
Now our workflow looks like this:
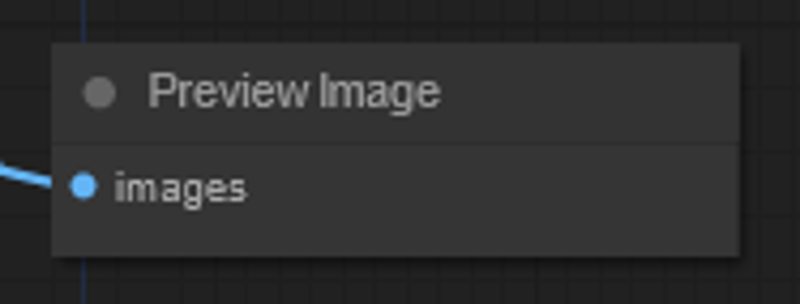
Now only thing we have left is to output image. Lets drag and drop from the VAE Decode image point.
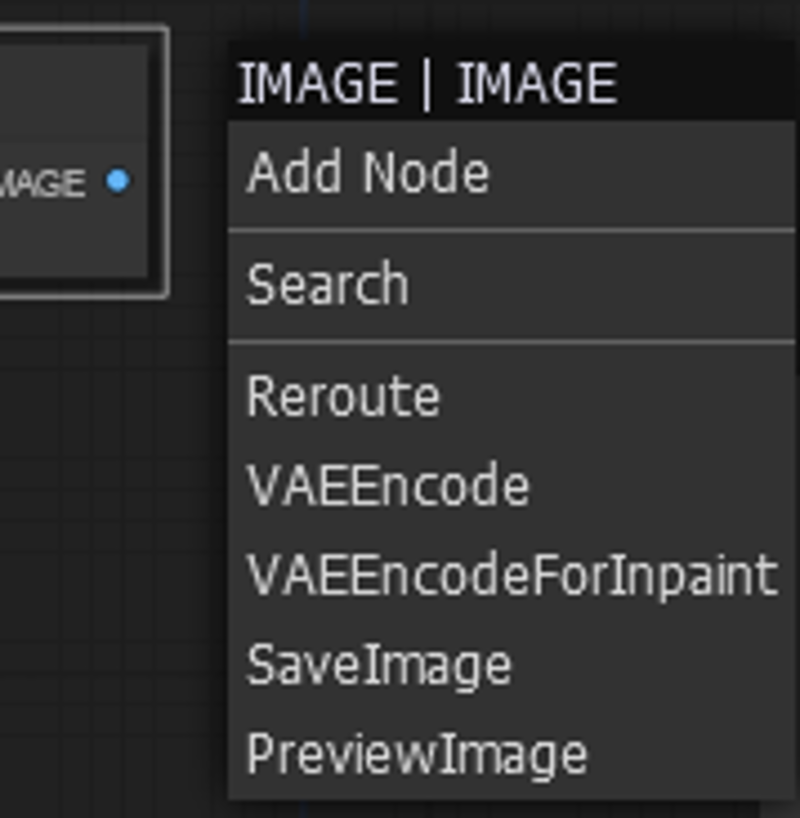
PreviewImage sounds like something we would like. It is pretty small, you can resize every node from the right corner of the node.
Now we have everything connected so lets write something on the positive and negative prompt.
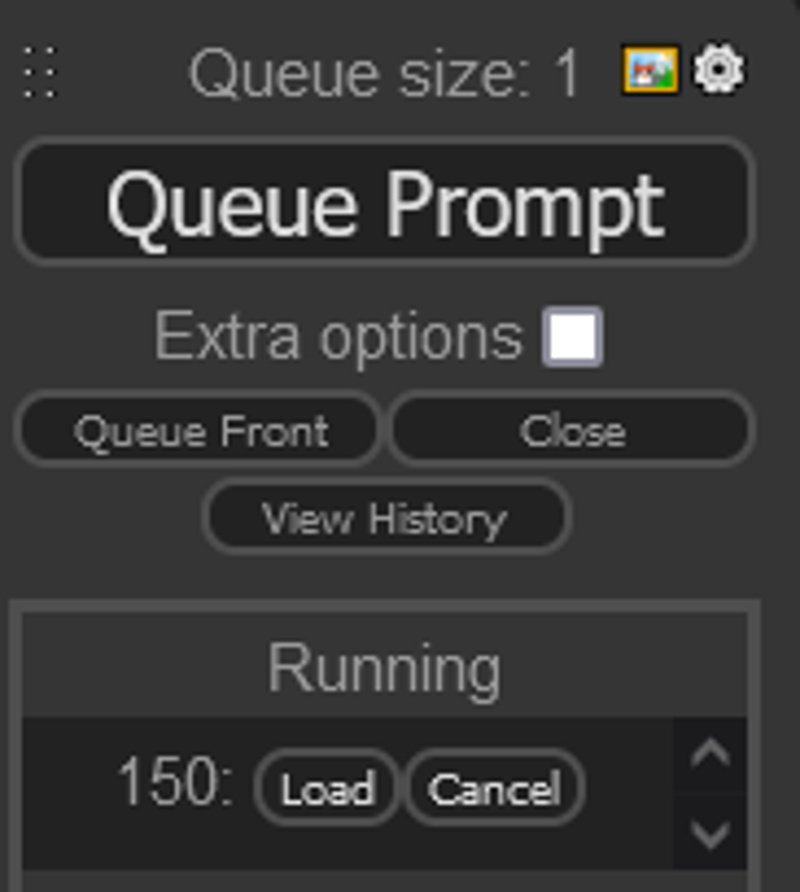
After that, lets press Queue Prompt
IT WORKS. We have acquired image generation (~ ̄▽ ̄)~.
You can save the workflow from pressing save in the right menu. From Load you can load the workflow. I added the workflow i created for this tutorial as attachment.
This is just the beginning. The idea was to show the concept of making nodes and understanding how to build workflow.
If there is interest in simple style tutorials on comfy like this, please leave a comment and i create more of them. (~ ̄▽ ̄)~
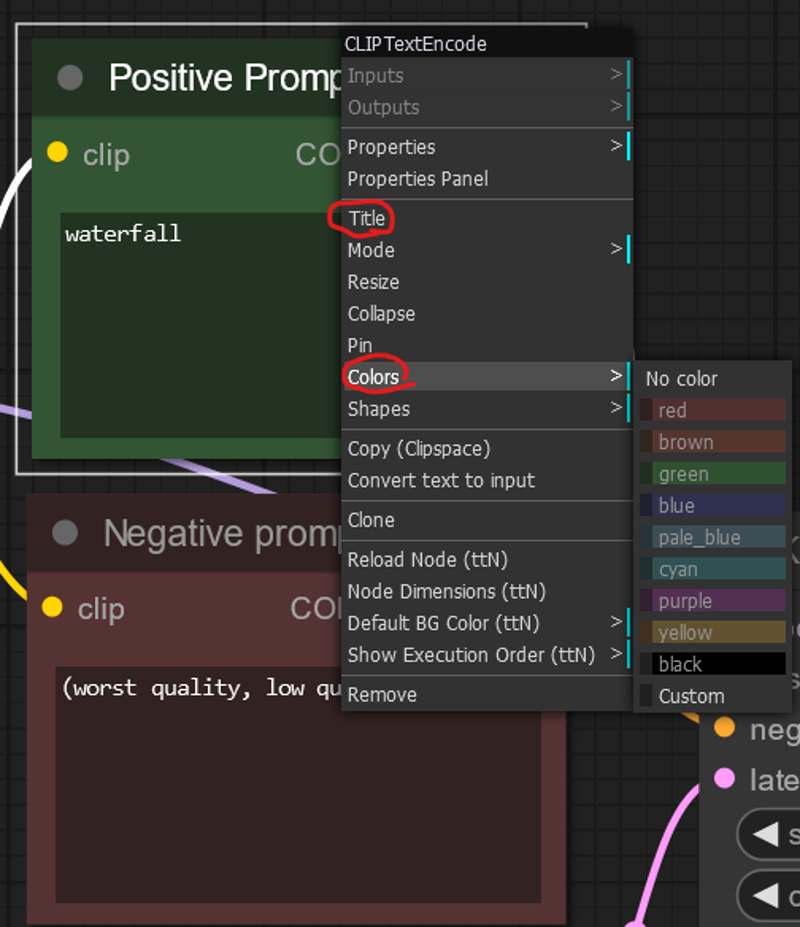
You can edit the nodes with colors and change the names if you want to. Right click on the node and you get options related to the node.