Hello everyone! I promised to make my "guide" on multi-character LoRA for Illustrious using the "Little Tiaras" as an example, and I decided that CivitAI is the best platform for this. This isn't exactly a guide, but I want to share what has personally worked for me. If you have improvements or suggestions, please write them in the comments.
This information is mainly applicable to those who can train locally using kohya_ss. Unfortunately, I'm not familiar with the training settings on CivitAI or other programs. However, the rest of the information should be useful to you.
(This guide is translated from Russian using ChatGPT)
So, let's begin.
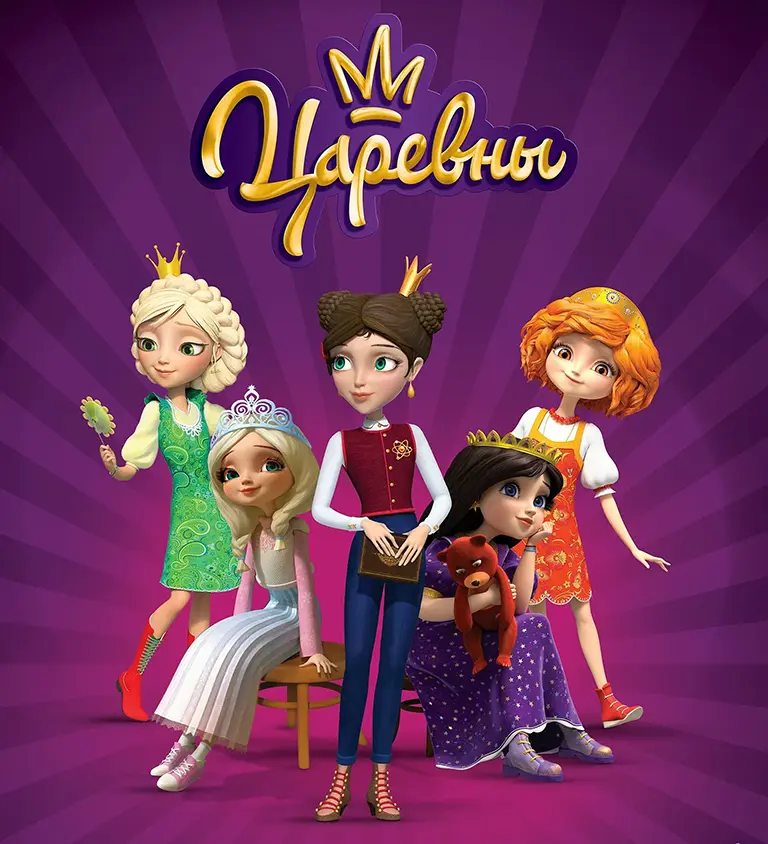
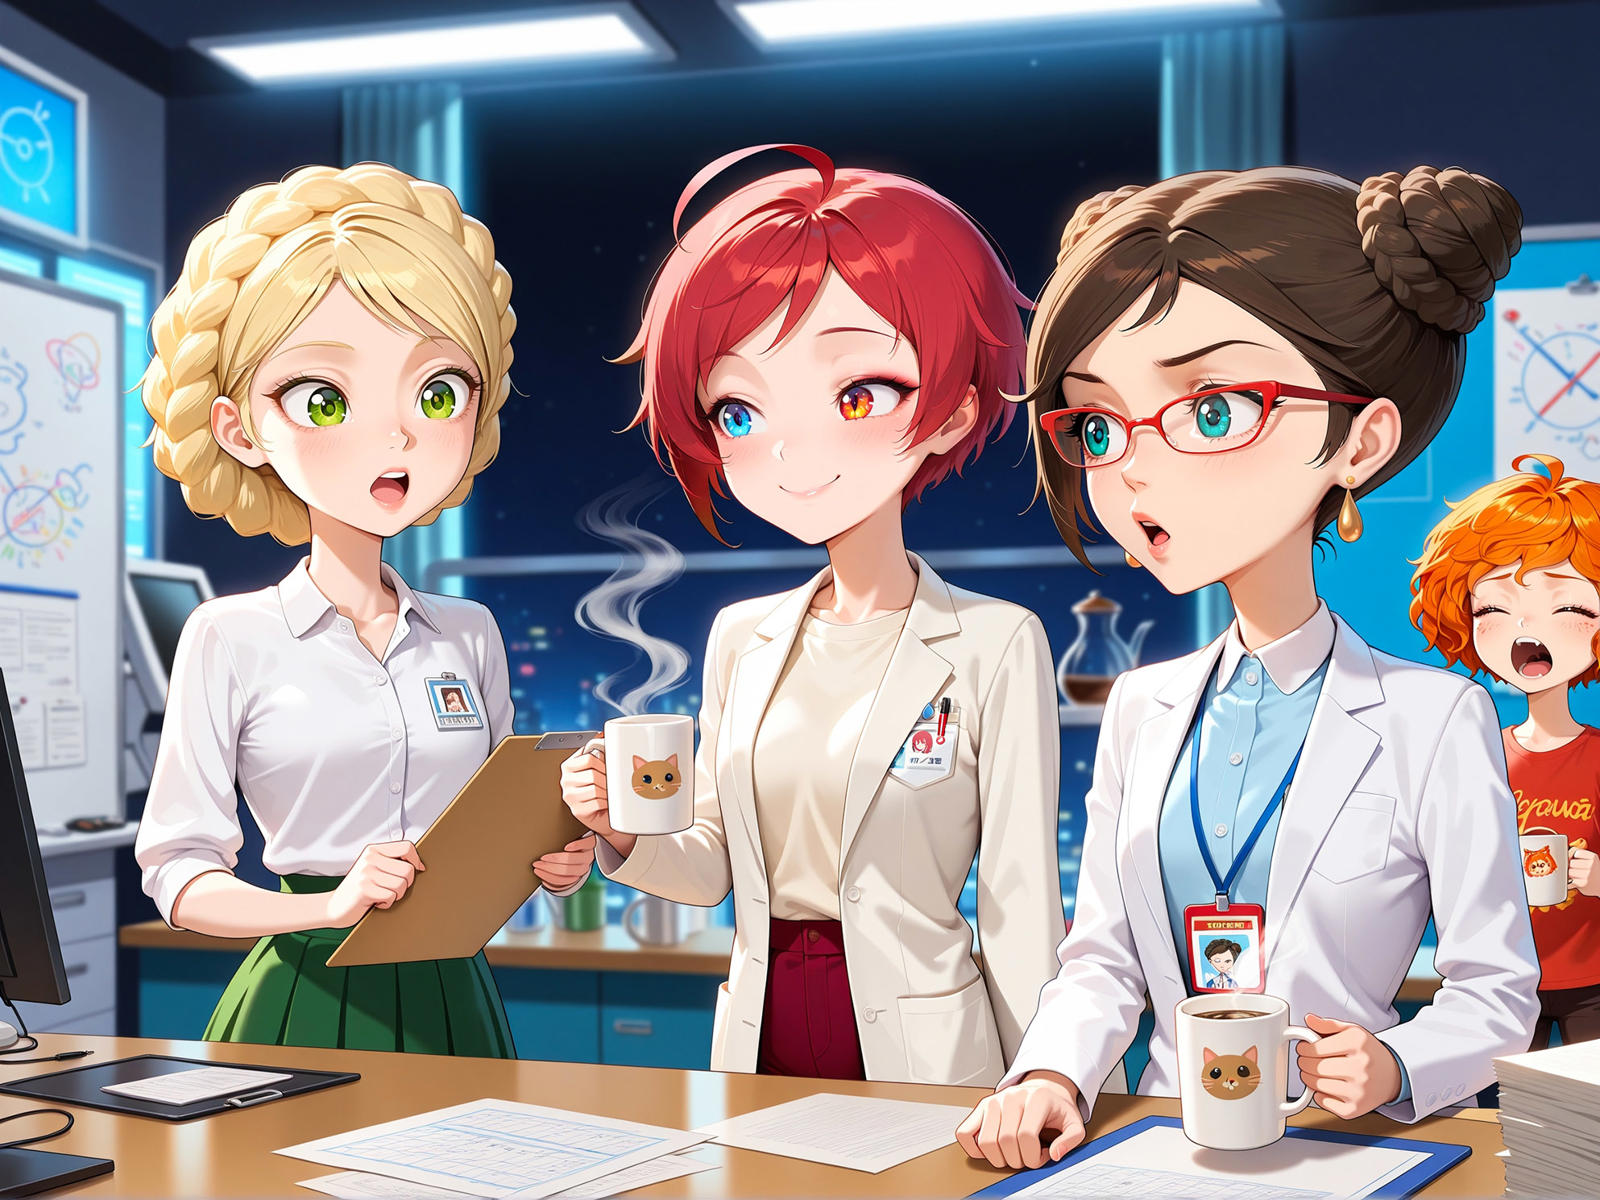
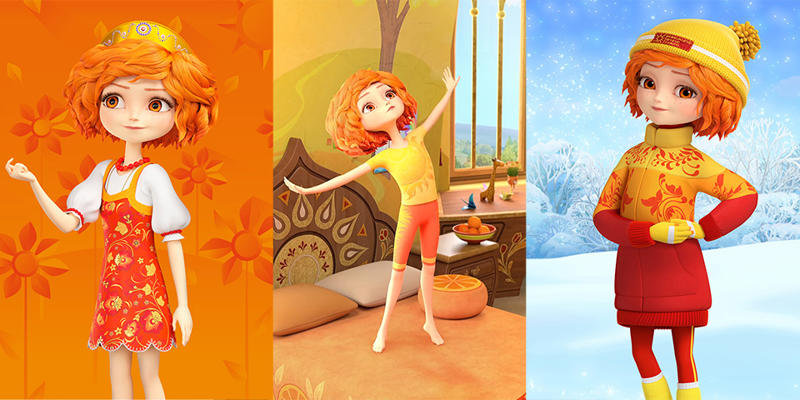
Let's say you've decided to create a LoRA for one or more characters from a cartoon. In our case, it's "Tsarevny" (Little Tiaras), an animated series by the "Melnitsa" studio.
1.Creating a Dataset
The first step is, of course, to take A LOT of screenshots:
Download your source material in the best possible quality, sit down, watch it, and take screenshots of your characters. If you are training a single character, try to ensure that others do not appear in the background, unless you are confident you can crop them out properly or carefully remove them in Photoshop.
Keep in mind that you will later need to crop these frames to the following formats:
1024x1024, 768x1024, 1024x768, which are 1:1, 3:4, and 4:3 ratios.
If you have several characters and want to generate them together in one frame later, take screenshots of group shots where they appear together.
Screenshot Requirements:
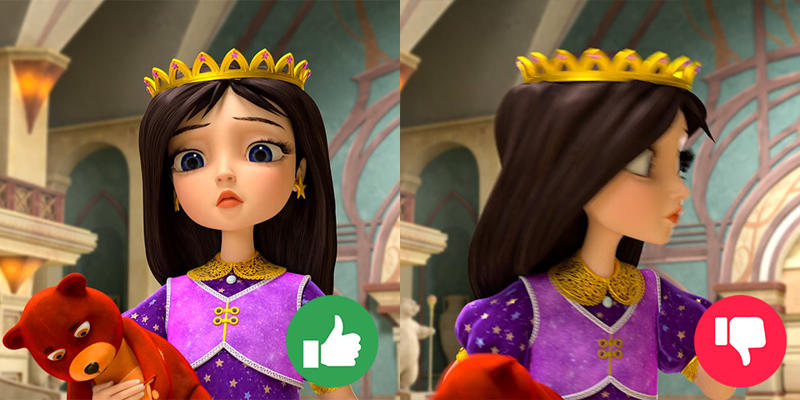
The characters in the frame should be as close to a resting state as possible. Avoid frames where the character is in the middle of a movement or conversation.
Also, avoid cluttered frames and overly complex backgrounds. The frame should be as clear as possible for the neural network to understand. Imagine you had to understand who and what is in the frame based on the images alone.
If a character appears in different clothes, such shots are highly encouraged. They will help the neural network separate the character from their primary outfit.
(Honestly, my dataset is far from perfect, it could be much better, but it works :D)
You should have a minimum of 18-20 frames for each character. But the more, the better.
If you add group shots, again, the more the better, but aim for at least 10-20 frames.
2. Processing the Dataset
So, you've taken a bunch of screenshots. If you haven't sorted them into folders yet, it's best to run them through an upscaler first, as the quality of the source material often leaves much to be desired. The "Extras" tab in Automatic1111 and Forge is suitable for this, as are third-party upscalers like Topaz PhotoAI.
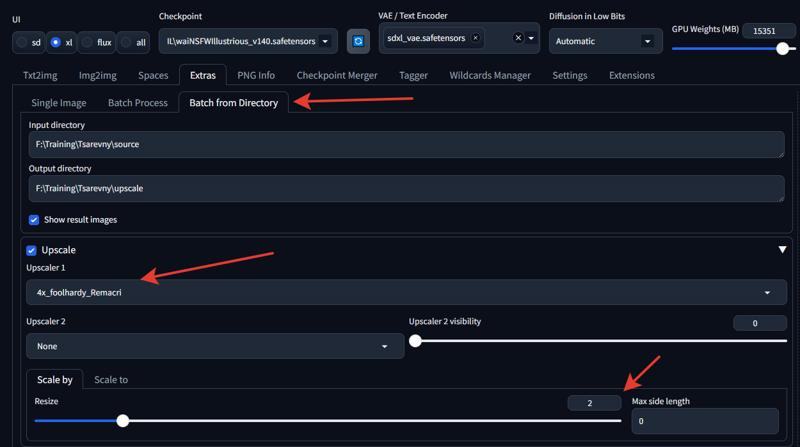
A 2x upscale will be sufficient; otherwise, with many frames, it will take forever. I recommend the Remacri upscaler, but others will work too.
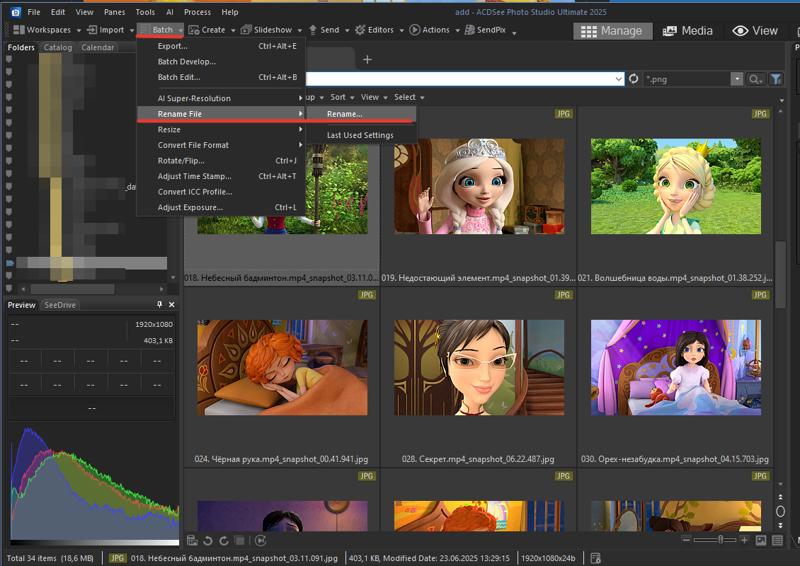
After that, sort your images into separate folders for each character. Next, rename all the files with the character's name. This is not mandatory, but it's advisable because the original screenshot filenames are quite long. You can use Windows Explorer for this by selecting all files and pressing F2, or use the "Batch Rename" function in viewers like ACDSee, which is very convenient.
Once you've organized and renamed the character folders, an important step awaits. Using Photoshop or any other graphics editor, crop your images to the dimensions 1024x1024, 768x1024, and 1024x768.
For me, the most convenient way to do this is in Photoshop, as you can set up quick presets. Here's how:
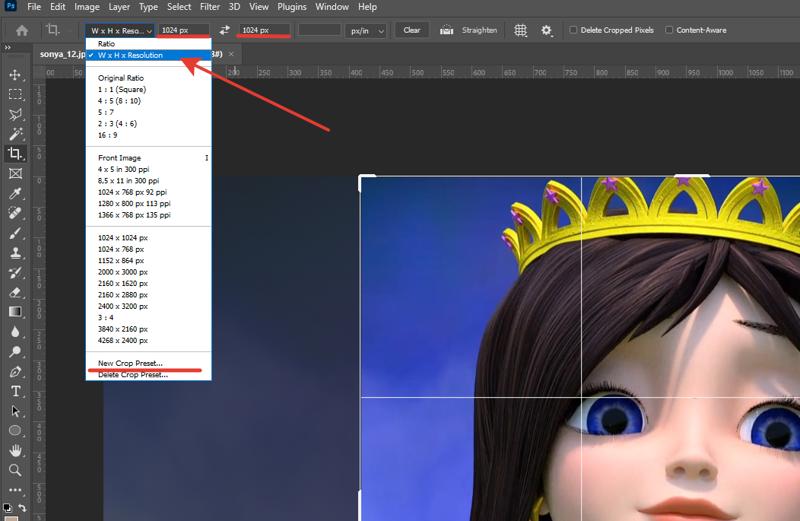
Open an image in Photoshop, select the Crop Tool, choose the option from the dropdown list, and enter your desired settings in pixels. Then, open the list again and click "New Crop Preset." It will be saved and can be quickly accessed anytime.
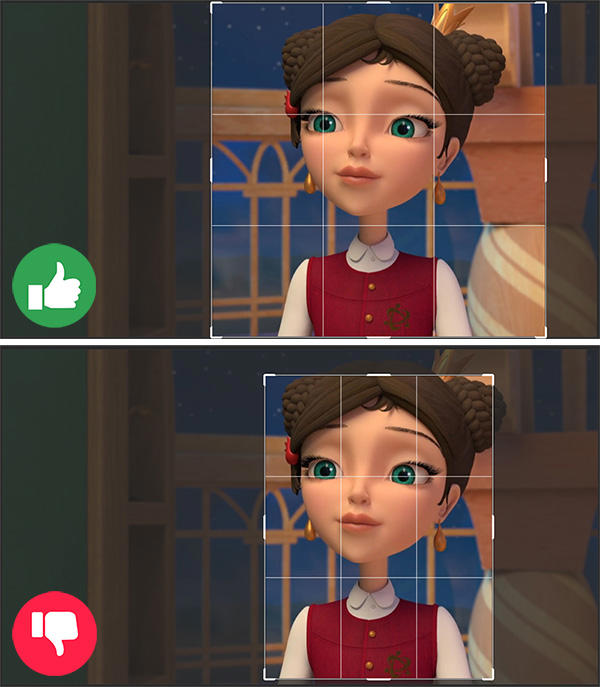
Leave space around the character! Don't frame them too tightly!
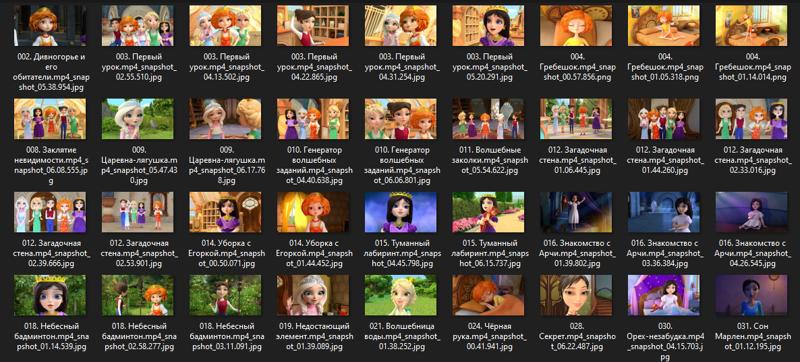
After you have processed all your frames this way, your folders should look something like this:
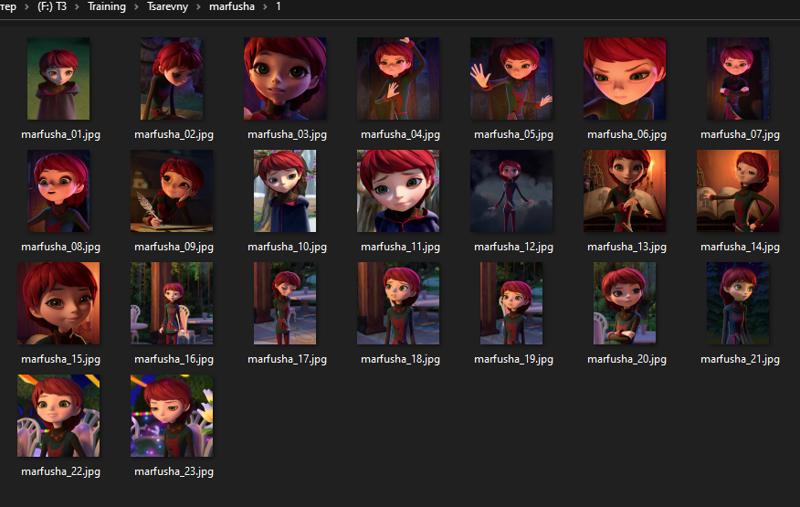
Double-check that all images conform to the 1024x1024, 768x1024, or 1024x768 dimensions. Why is this important? You are simplifying the work for the training algorithm, which will create only three different "buckets" instead of a hundred from images with various resolutions.
Next, create a separate folder, for example, "training," and move all your image folders into it:
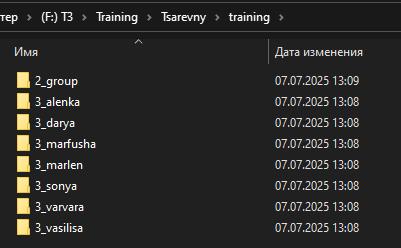
Name the folders like this: 3_yourcharacter. For the neural network, this means you are training something called "yourcharacter," and the contents of the folder should be reviewed 3 times per epoch.
You can have many such character folders in a LoRA, which allows us to create multi-character LoRAs.
IMPORTANT! If you don't have a separate folder with group shots, when you try to generate the characters together, the neural network will attempt to distribute the features of the characters among everyone in the frame, resulting in a mess.
That's why we create a 2_group folder, where the characters are together in the same frame.
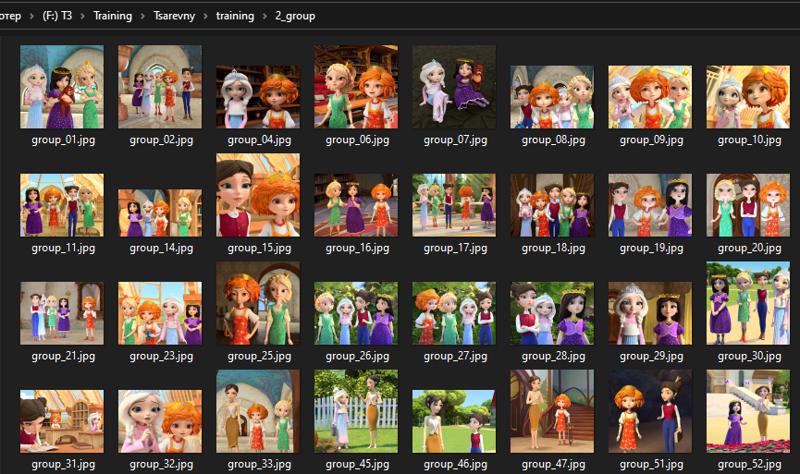
(I set the repetition to 2 for group shots, but it's generally recommended to use 4 or 5, as these frames are more difficult for the neural network).
You're doing great, your dataset is halfway ready! Now for the difficult and very important part: tagging.
3. Tagging
Yeah, this won't be easy) But this part is crucial for the proper functioning of the LoRA.
If you have Automatic1111 or WebUI Forge on your computer, you will need the Tagger extension.
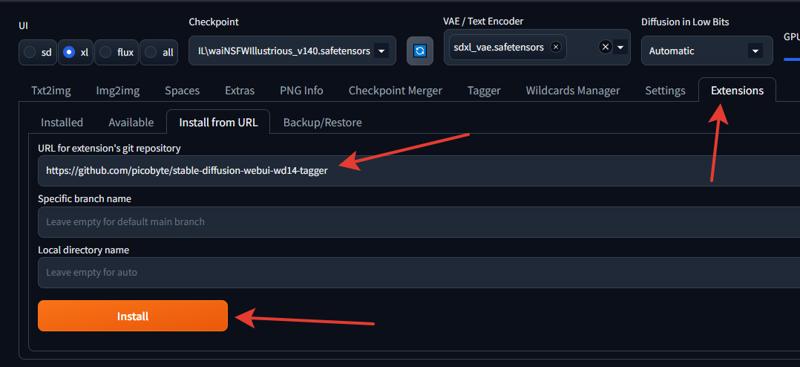
Just copy this link into the field and click "Install." Don't forget to restart.
I won't describe other tagging methods, as I haven't used them, sorry about that.
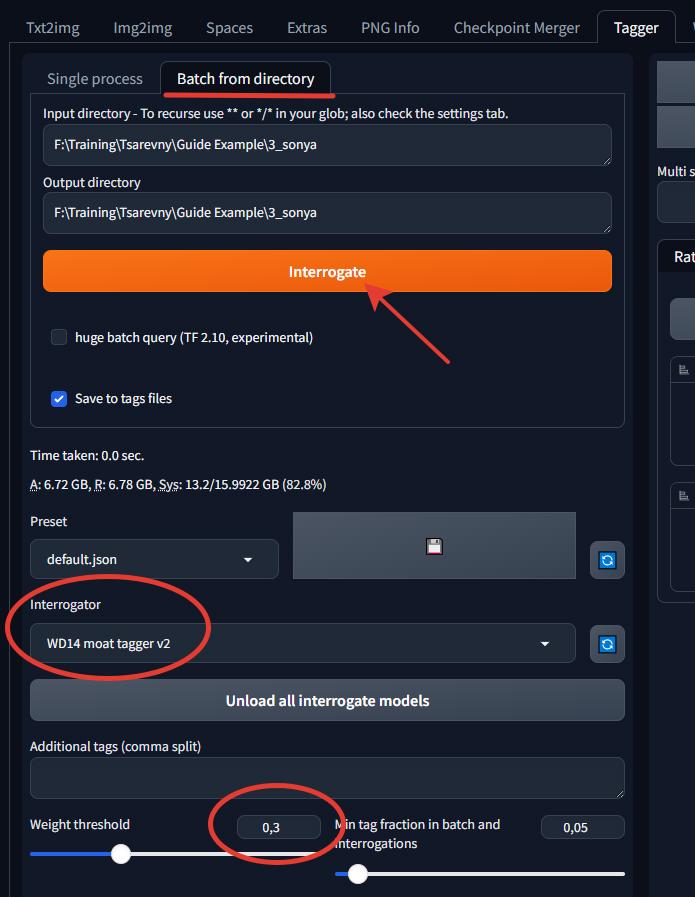
On the Tagger tab, enter the path to your folder and select "Interrogator WD14 moat tagger v2." Set the "Weight threshold" to 0.3 or so. Don't add anything else, no additional tags for now; that comes in the next steps. Click "Interrogate."
3.1 Processing Tags in BooruDatasetTagManager
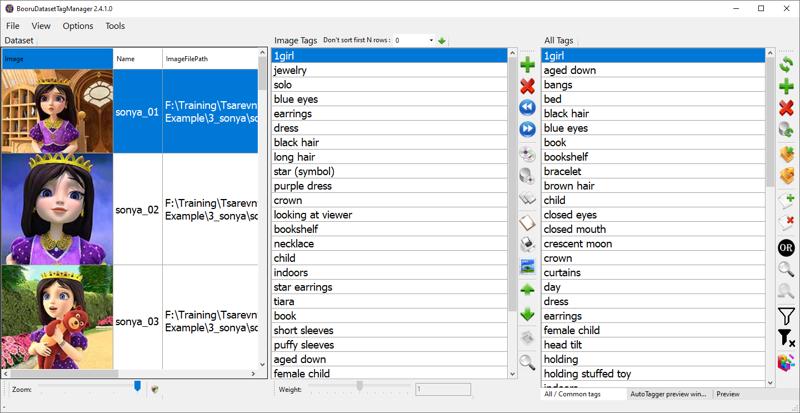
Next, you'll need a handy utility called BooruDatasetTagManager.
This is a separate application where we will edit our .txt files. You can learn how it works on the author's GitHub page, where everything is well-documented. I'll give a brief instruction.
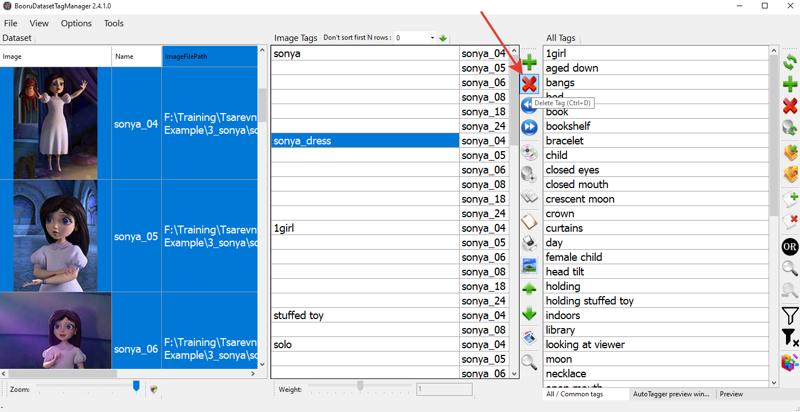
Go to File -> Load Folder and open your first folder. Let's use Princess Sonya as an example.
First, add the main trigger word: sonya. To do this, click the plus sign on the "All Tags" tab.
Be sure to place the trigger word at the very top position!

Excellent! Next, decide what the neural network will understand by this word. Think of it this way: things that are NOT described in the image, the neural network will "bake" into the word it doesn't know, which in our example is sonya.
(Well, not exactly, the word sonya is not completely unknown to it, but there is no clear association with it, and we are providing it in this LoRA).
Our Sonya is a girl with long, dark brown hair and blue eyes, so I REMOVE from the general tag list EVERYTHING related to hairstyle, hair color, and eye color.
This is not mandatory, and if you want, you can leave the tags related to appearance, but be prepared to write them in the prompt for every generation, otherwise the hairstyle or eye color will be random.
You can also safely remove basic tags like lips, dress, jewelry, etc., because there are usually more specific tags.
Hold down Ctrl, select the unnecessary tags in the common list, and delete them.

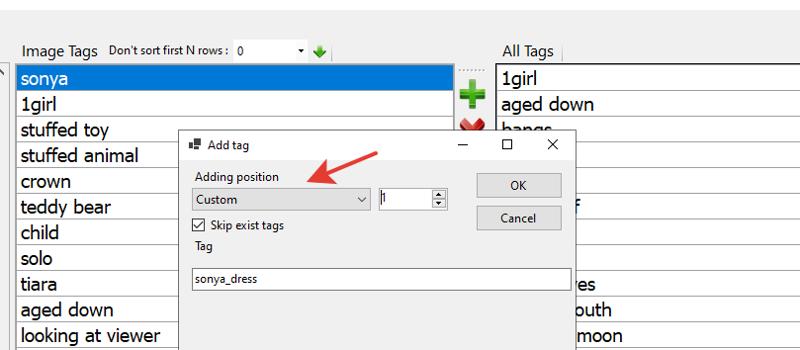
Next, Sonya usually wears her purple dress, but we don't want to bake this dress into the character, so we describe it separately. For the dress, I've designated a separate tag: sonya_dress. I didn't use the general tag purple dress because her outfit is patterned, unique, and doesn't fit the general description. (I could be wrong, but this works for me).
Again, for the neural network to understand what we are baking under this tag, we remove all tags related to her dress: dress, puffy sleeves, star (symbol), and anything else you find. Then, add the sonya_dress tag to the list, but this time at position one (i.e., after position zero).
Now, pay close attention! In our dataset, Sonya is not always wearing her dress, and this is a plus! It's because we can let the neural network know what sonya_dress is and on which images it is not present.
So, using Ctrl, select the images where Sonya is dressed differently and remove the tag:
One of Sonya's distinctive features is her star-shaped earrings, so make sure the tag star earrings is present wherever they are visible. Otherwise, remember, if you don't describe them separately, these earrings will be "baked" into the sonya tag!
Next, carefully review the tag list and look for incorrect, erroneous tags or those related to items you want to bake into the tag.
For example, Sonya has a crown, but the tagger added the tag "tiara"—either delete or replace it. You can also delete age tags or replace them all with a single tag like child or young.
In the end, you should have a fairly short list of tags for the character:
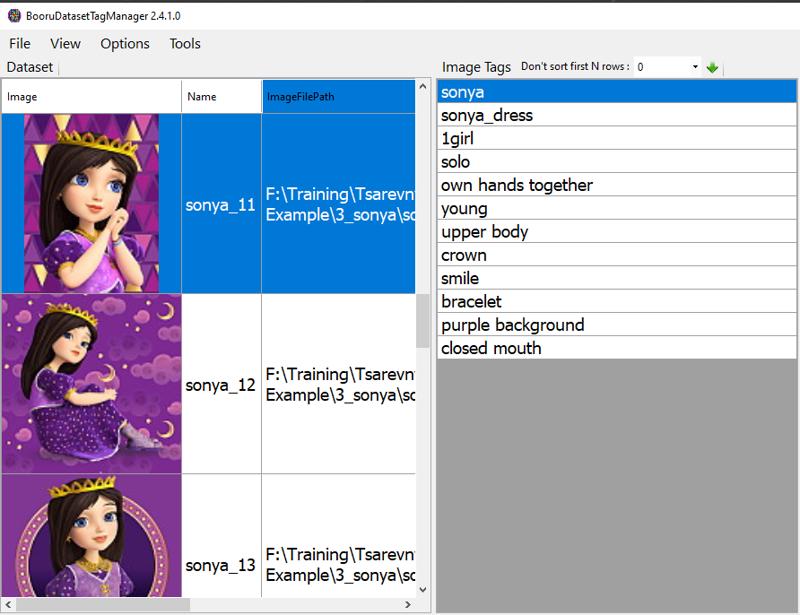
These are the tags into which characteristics are "baked," and others that describe the frame or can be customized. I repeat, if you want, no one is stopping you from describing hair color or hairstyle, but be prepared to type all these characteristics into the prompt time and time again.
If you're interested, I have attached an archive with the Training Data to the model.
When you are finished with the tags, press Ctrl + S. Excellent, one character down, six more to go! :D Well, that's six for me, hopefully you have fewer!
3.2 Tagging Group Shots
In this case, it's the same process. You remove any unnecessary character description tags like blonde hair, blue eyes, etc. Then you add the tags for the characters present in the frame and their clothing.

3.3 Adding a Negative Prompt
In my case, the source is a 3D animated series with not-so-great graphics; the characters and especially the hair look "plasticky." Therefore, it makes sense to add tags that will tell the model these details are undesirable.
Let's go back to BooruDatasetTagManager and open our main folder (the program will scan all subfolders). In the "All Tags" section, click + and add --n 3d to the end of the tags.
Then, in the same way, add the tags plastic and low quality.
In the end, your description should look like this:
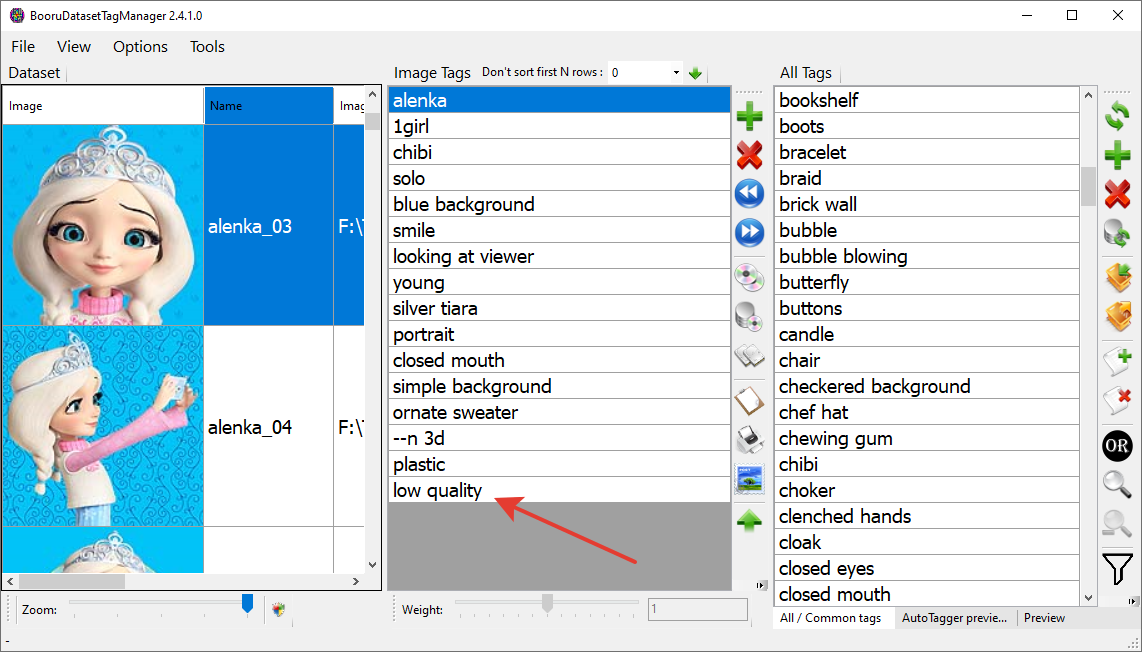
I should mention that in your case, a negative prompt might not be necessary, but if your source material is of poor quality or you don't like the style, you can try adding corresponding negative tags to the end of the list. And this exact syntax works.
4. Training
The manual part of the work is almost done. Let's finally move on to the training settings.
I trained using the only method I know: locally, through the kohya_ss interface. You can also install this program through the Stability Matrix launcher, which is a very convenient tool.
4.1 Base Setup
If you're too lazy to figure it out, just launch the program and follow these steps:
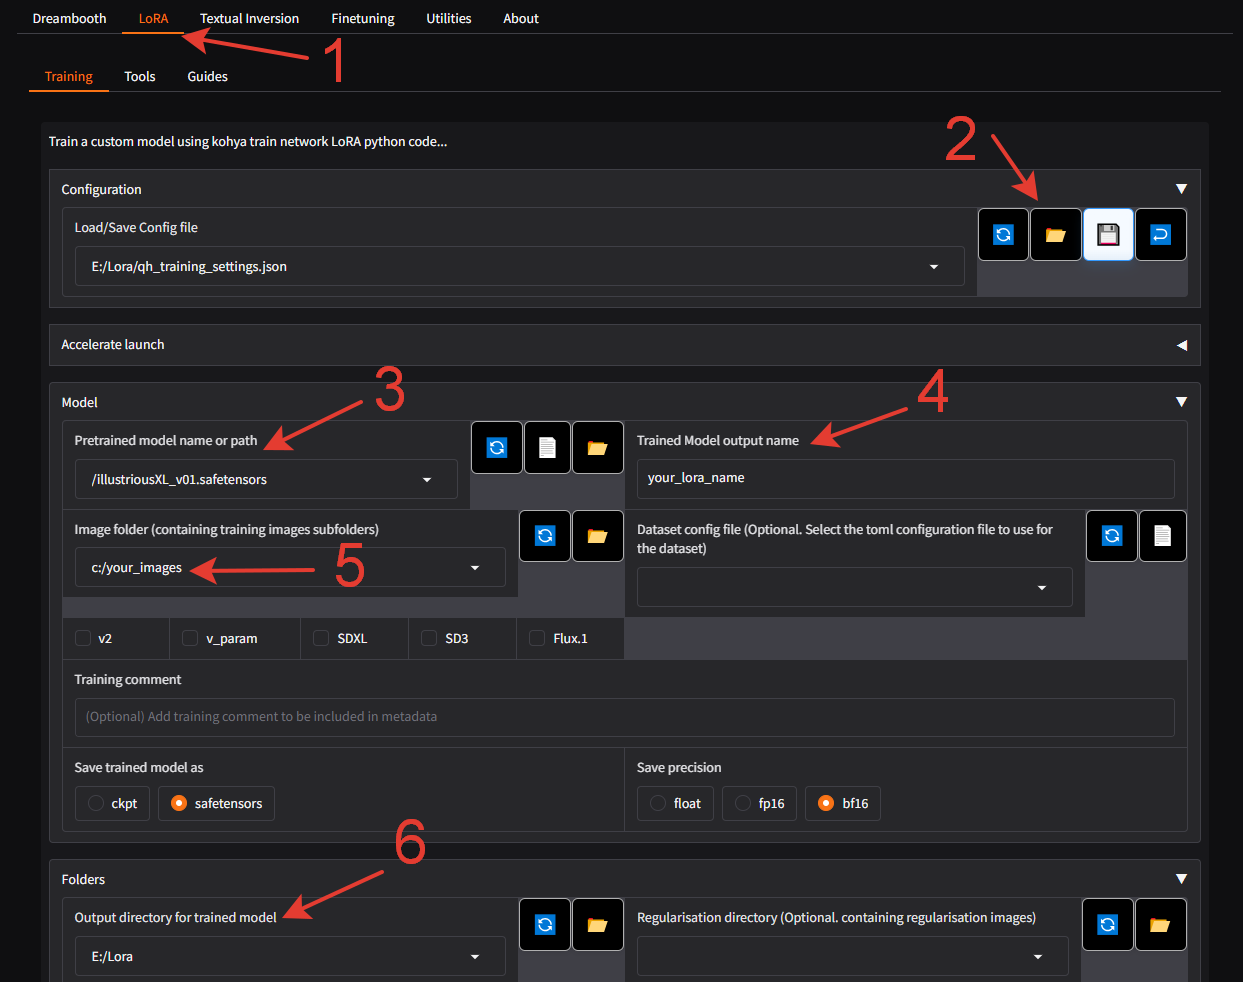
Switch to the LoRa tab—don't forget!
Open the settings file, which you will find in the attachments to this article.
Specify the path to the base version of Illustrious.
Enter the name of your model.
Specify the path to the folder containing your image folders
Attention!
If you have a 20-series graphics card, it may crash with an error. Try another attached file labeled lowvram.
If you have a 30 series RTX card, try switching Save precision to fp16.
All that's left is to specify the path where your LoRA will be saved.
That's it! Then click the "Start Training" button at the bottom of the page! Depending on the power of your graphics card, the number of characters, and images, the training time can vary greatly.
4.2 A Few Details
If you're interested in what's under the hood, I'll briefly go over the settings, but I'm no expert!
Train batch size: The number of images viewed simultaneously. A value from 2 to 4 will be sufficient, although you are welcome to experiment.
Max train epochs: It's better not to set too many epochs, as it will lead to overtraining. 25 epochs are usually enough, and in the folder names, I put
3_sonya, meaning the neural network reviews the folder 3 times per epoch.Optimizer: So far, Prodigy completely satisfies me. It captures the style and various features perfectly, without messing up clothes and details. I used to struggle with AdamW, and I wouldn't wish the pain of getting anything decent out of it on my worst enemy. Maybe it works better with other models, or I couldn't find the "golden" settings, but no thanks. Horrible artifacts during generation, issues with clothing, problems with style. So for Illustrious, Prodigy is your friend.
Network Dim / Network Alpha: These parameters control the model's capacity and flexibility, respectively. They are usually set in a 2:1 ratio, for example, 32:16.
If you have many characters, it makes sense to increase the Network Dim to 48 or 64. The LoRA with the Princesses, as you can see, is twice as large precisely because I set the Dim to 64.
32:16 is a standard working value, but you can try lowering it to 16:8; sometimes it might even work better.
I won't delve into the other parameters; these settings work for me, and I have little time for experiments :D
If you have any questions left, ask them in the comments, and I will add the answers to the article.