![[ComfyUI] Simple Prompt & LORA Tester with Jobs](https://image.civitai.com/xG1nkqKTMzGDvpLrqFT7WA/ed03b2b9-60f2-4ff4-9d9b-291f356f0d70/width=1320/26273a7f-55d7-418b-bc74-826be73ade0d.jpeg)
This is beginner friendly automation workflow for ComfyUI.
If you wished for a simple way to find your favorite LORA strength, here it is.
This workflow allows to create many renders in one Run with multiple different parameters:
different LORA
different model and clip values for LORA
different prompts
any value you want to change
We will start from basics.
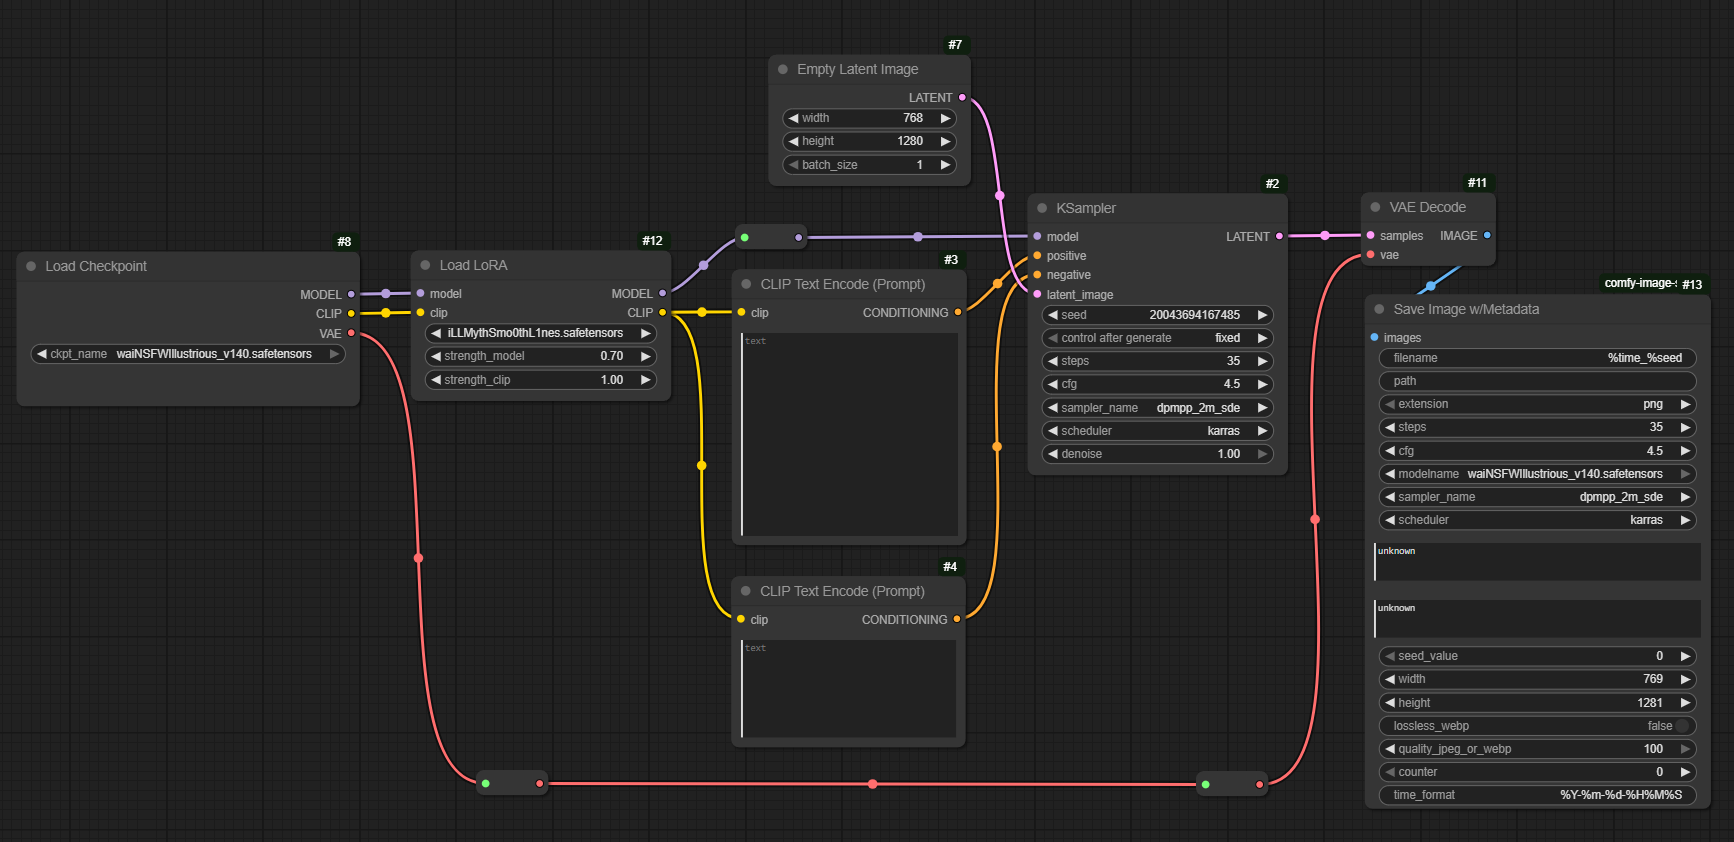
This is basic graph for generation with "Save Image w/Metadata" in output.
Based on incoming TOS, all renders must have meta included, so here it is.
We will use some custom nodes (use ComfyUI Manager, or clone them from GitHub):
comfyui-job-iterator - https://github.com/ali1234/comfyui-job-iterator
Core Custom Node required for this workflow to workSave Image with Generation Metadata - https://github.com/giriss/comfy-image-saver
Node for Image with Metadata. It's useful if you want to reload the whole workflow from one single image.Basic data handling - https://github.com/StableLlama/ComfyUI-basic_data_handling
Nodes used for converting types of values and simple math.WAS Node Suite (Revised) - https://github.com/ltdrdata/was-node-suite-comfyui
Nodes used for text handling in this workflow.
Now, we will implement Job Nodes into the graph.
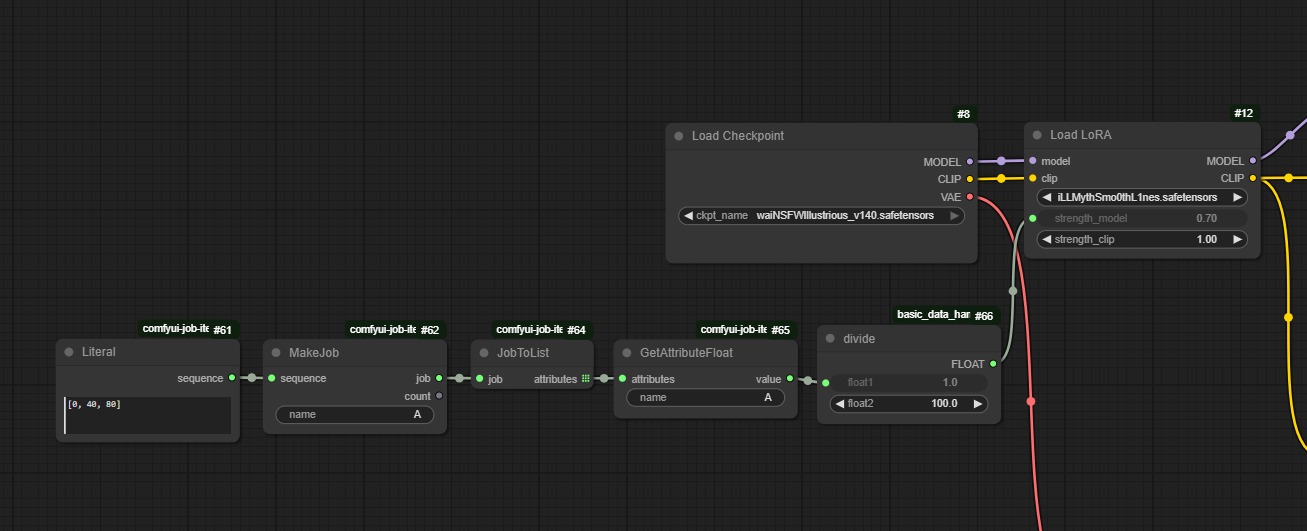
Only five nodes for now,
Literal - Input a string of values, which will change each generation.
MakeJob - Naming the Attribute
JobToList - Turning Attributes into Jobs (each job is one generation)
GetAttributeFloat - Getting Attribute in specific type (in this case Float)
Divide - It's simpler to input whole numbers in "Literal" and later "Divide" them by 100, to get proper values for LORA strength.
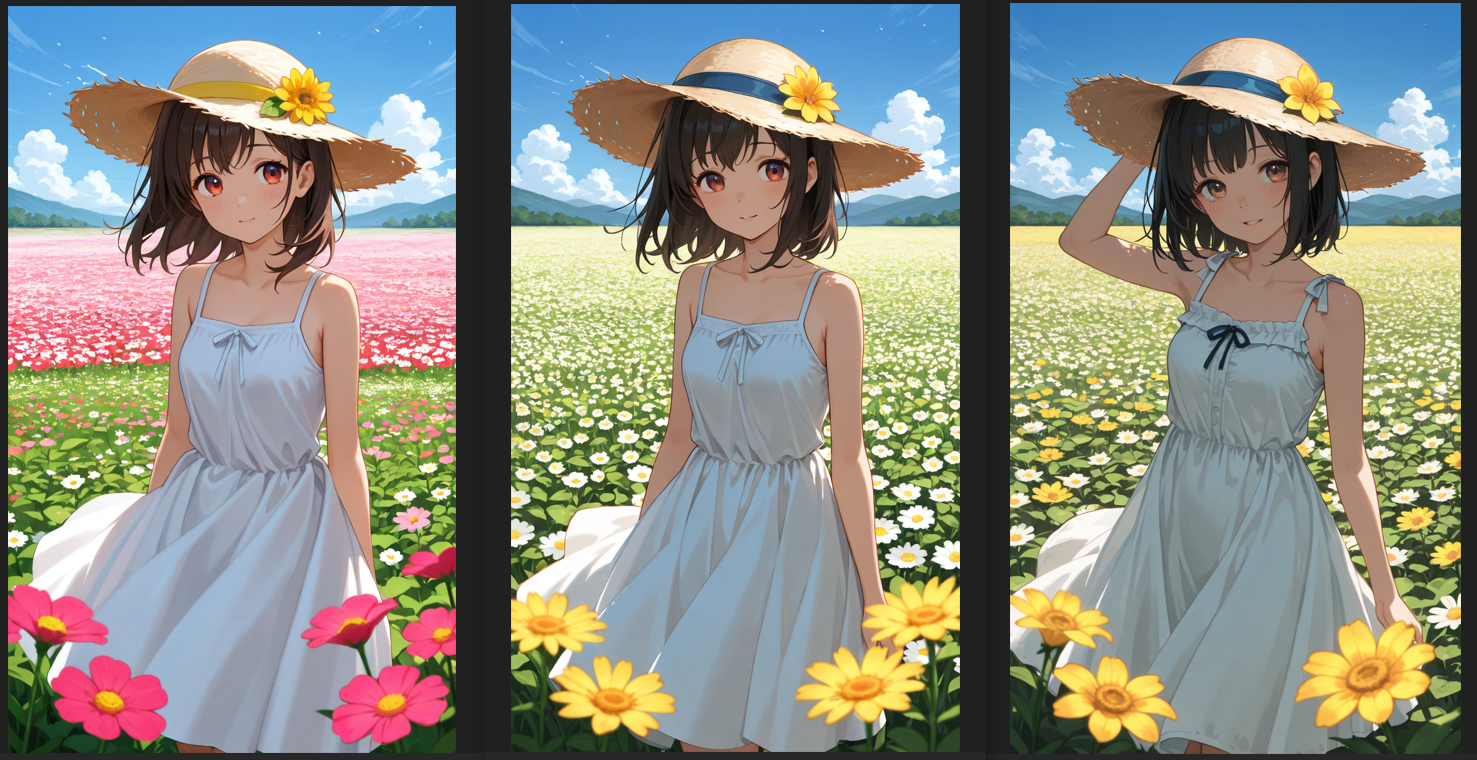
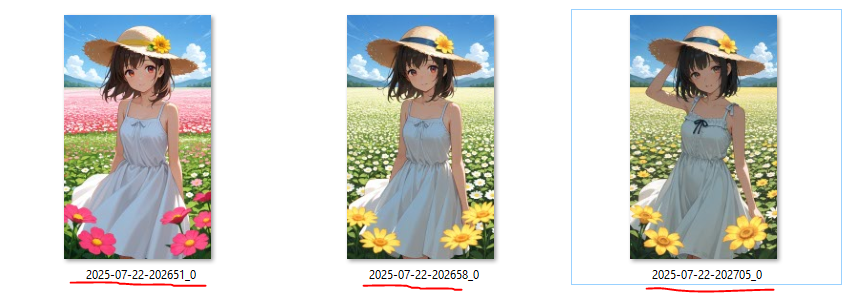
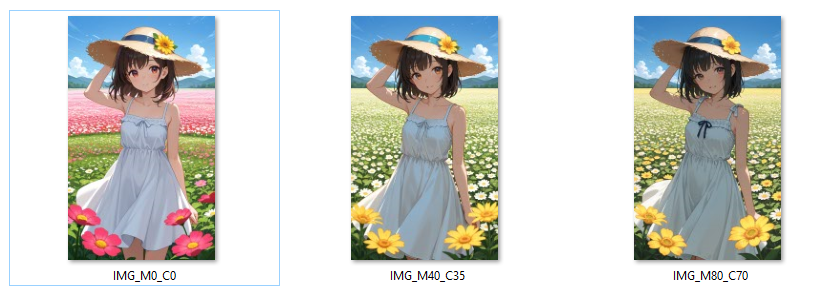
With just this simple setup, we get three renders, one for each value in Literal.
As You probably noticed, values are input into "Strenght_value" for LORA (Velvet's Mythic Fantasy Style)
The first image has [0], second [40] and third [80].
Very simple and fast way to generate multiple renders and compare, which value is your favorite.
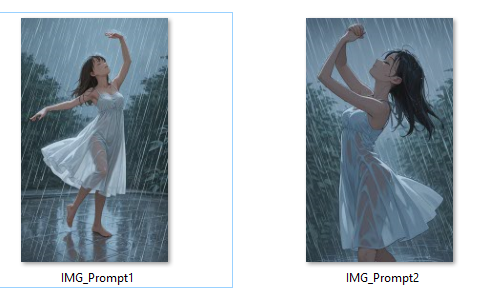
To make it clear and obvious which one is which, let's do something with the naming of renders.
We can use our "A" value. It's a Float, so we need to convert it into String and after that we can add "IMG_M" or whatever you want, using "Concatenate" node.
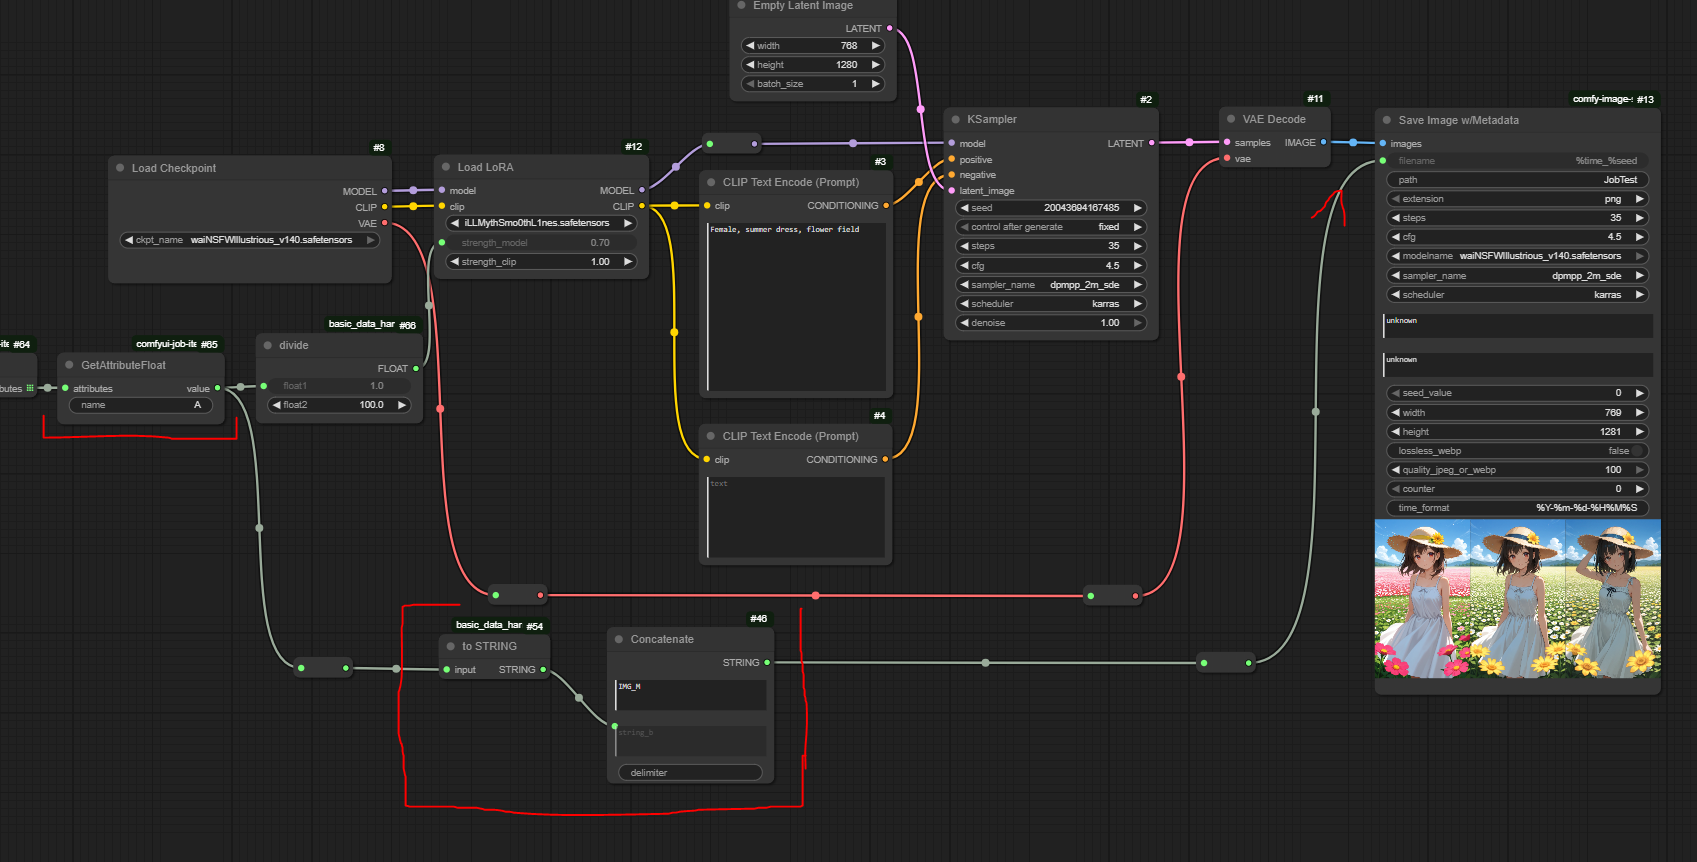

Much better
Those were basics, now we can get to the real meat and potato.
How about testing "strength_model" and "strength_clip"?
MULTIPLE ATTRIBUTES
We can create multiple Attributes and Combine them in two possible ways:
product
zip
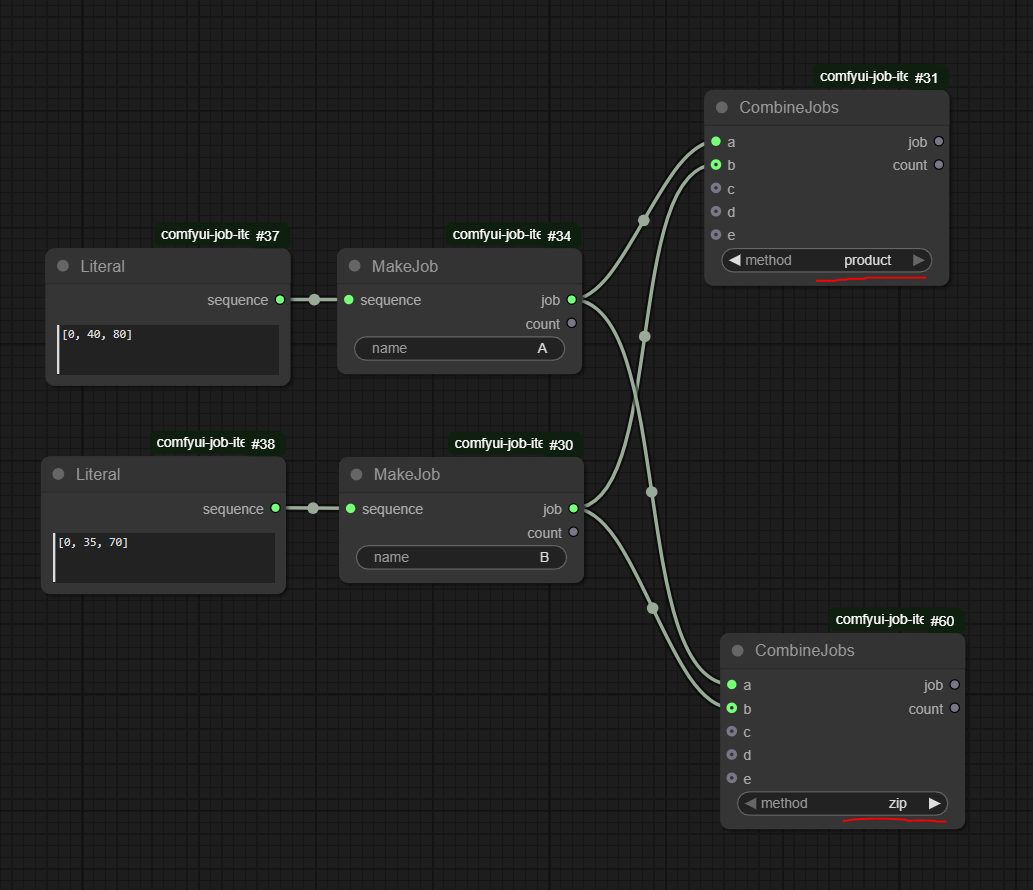
In this example we have to literals groups:
A = 0, 40, 80
B = 0, 35, 70
Product - generate for us every possible combination of jobs
(0,0), (0,35), (0,70), (40,0), (40, 35), (40, 70), (80, 0), (80, 35), (80, 70).
Zip - generate for us combination of first with first, second with second, etc.
(0,0), (40, 35), (80, 70)
Product is good, when you want to test many combinations. Zip, when you want to be more precise.
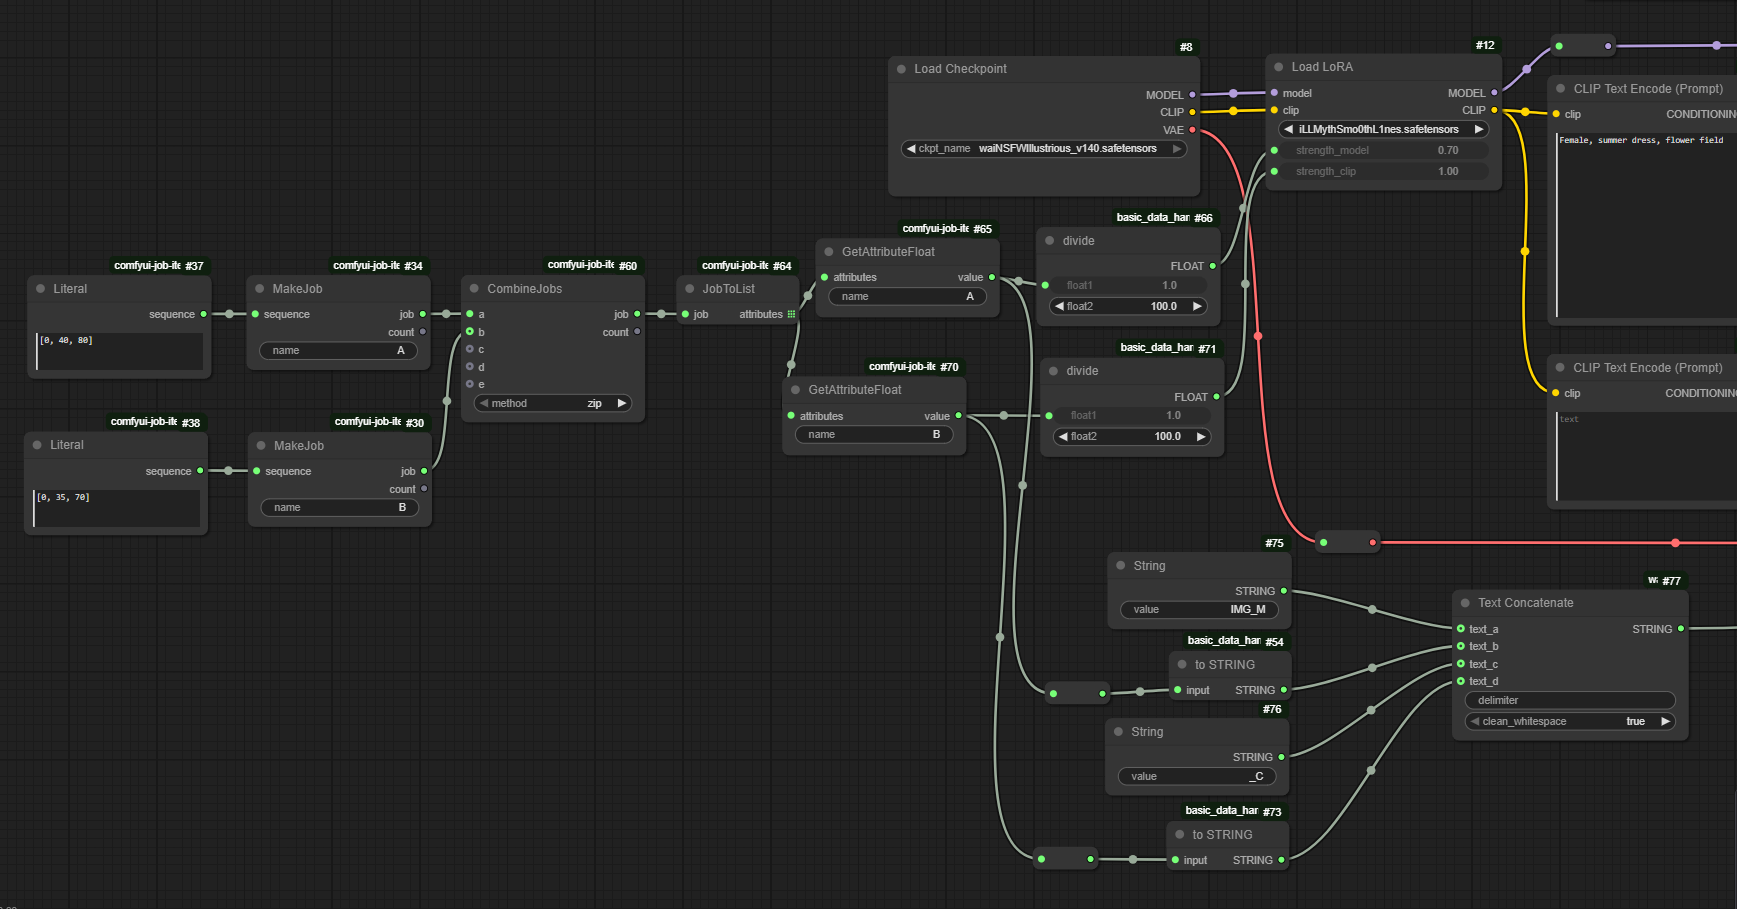
Here is example, how to use it in Clip and Model strength and naming:
And final renders with naming using Zip method:
PROMPT COMBINATIONS
We can use "Literal" to also include simple strings.
After combining those strings into jobs, we can "concatenate" them into "Clip Text" of our prompt.
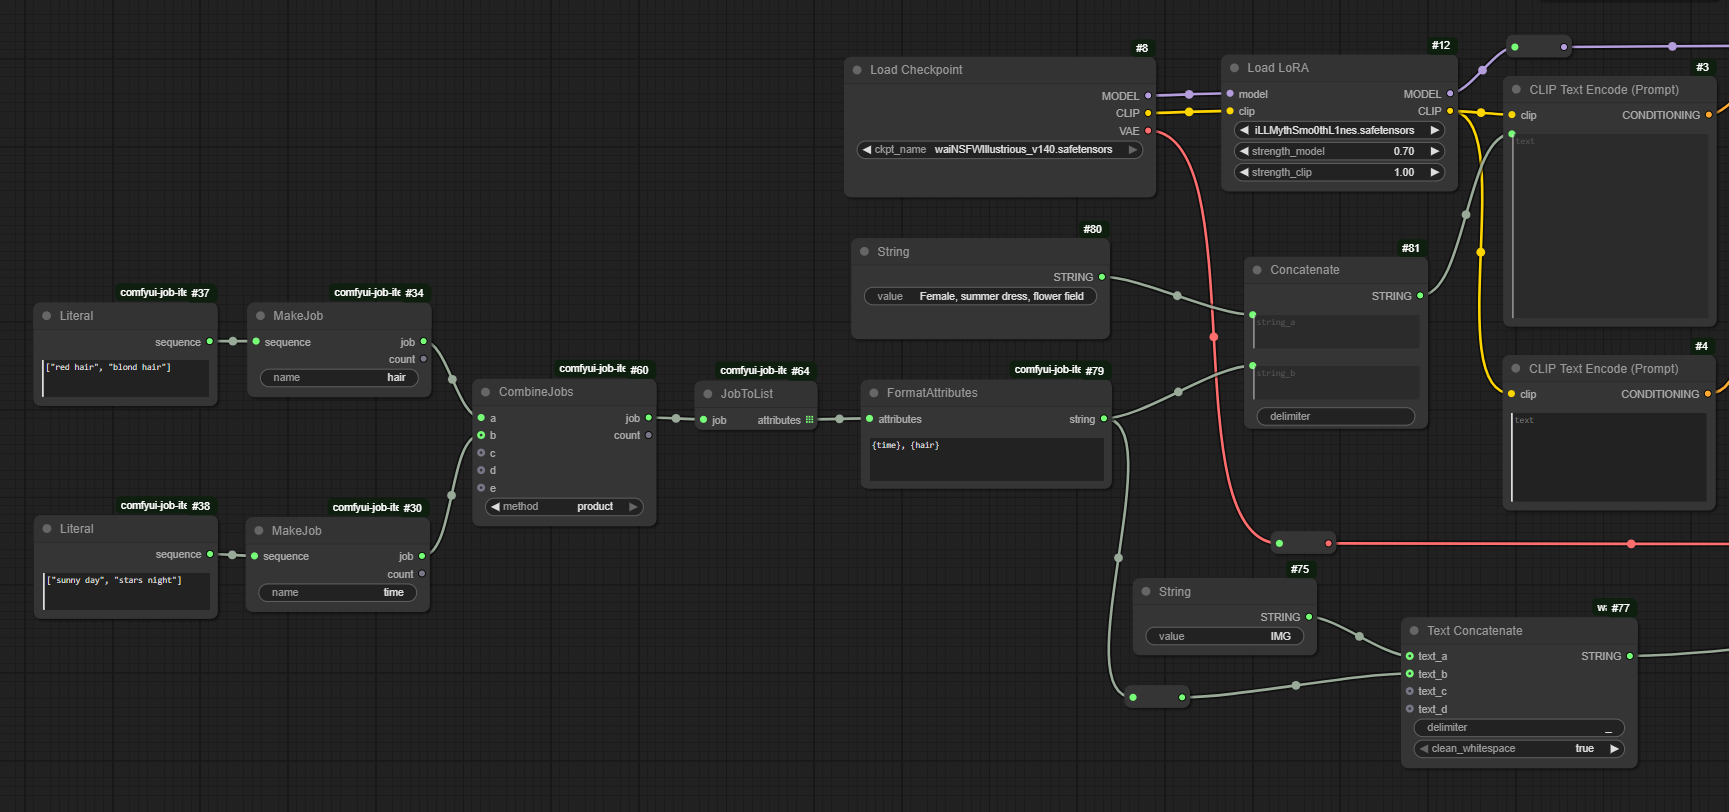
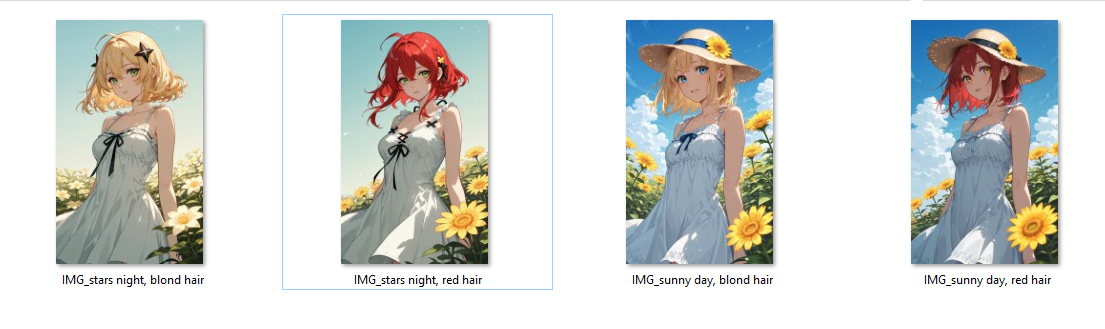
Renders using "product" method, gave us all possible combinations.
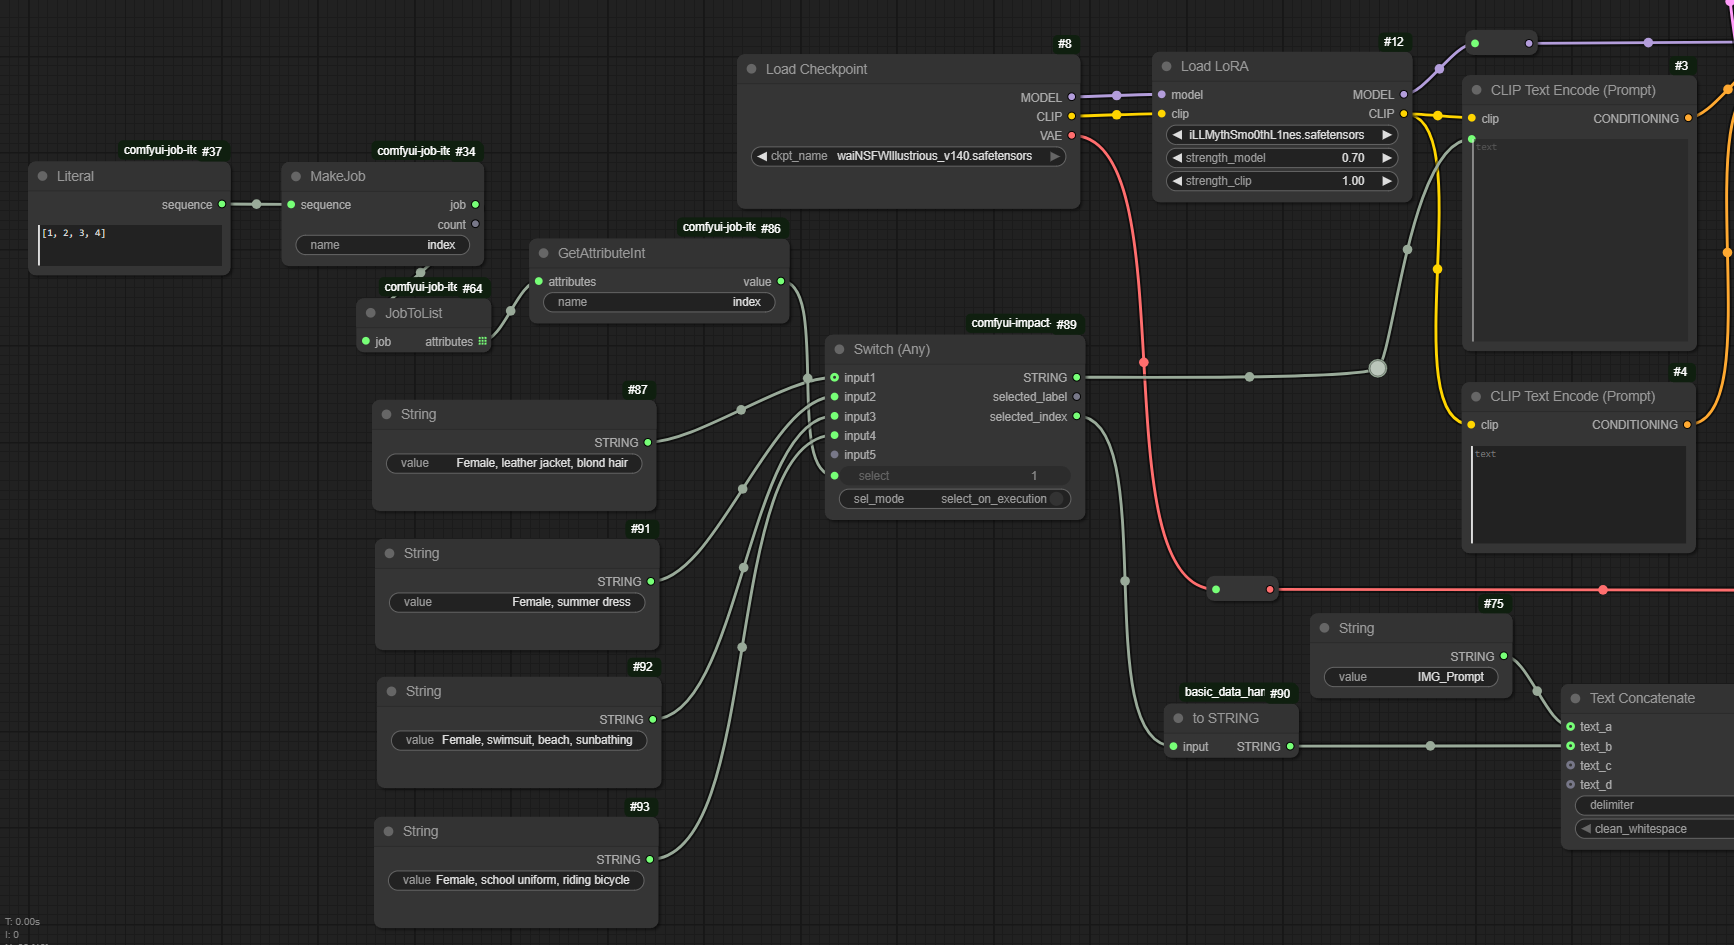
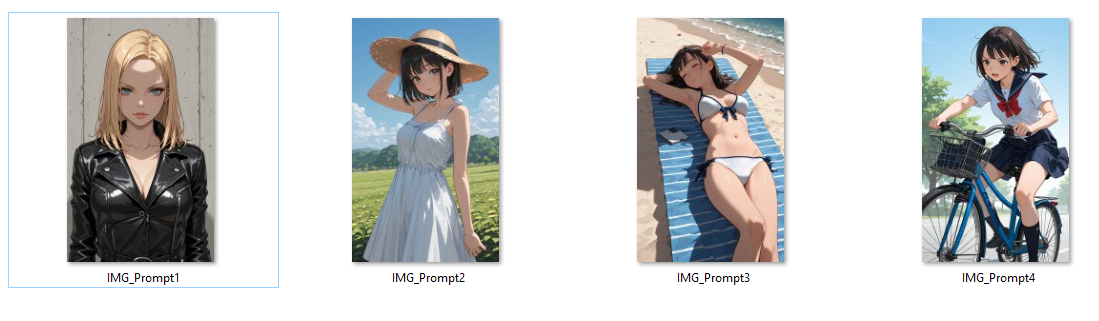
SWITCHING PROMPTS
Using Switch (Any) and "Literal" as index numbers, you can change the prompt each generation. Using combined methods and multiple attributes, it's a simple way to mix in many different ways.
Workflow is simple, requiring understanding of a few nodes, but gives a wide range of options to generate many renders, while you are away from the computer.
And final renders:
Here is an example how to swap checkpoints, if you would like to test how your prompt will look many styles:

And renders in two different checkpoints: