Hey everyone,
Let's be honest. The single biggest barrier to getting started with ComfyUI is the setup. Dependency errors, outdated guides, endless model downloads, and cryptic command-line fixes... it's enough to make anyone quit before they even start.
Today, that ends.
I've engineered a solution to bypass the frustration completely. I'm giving away a one-click RunPod template that deploys a complete, pre-configured, and fully-loaded ComfyUI environment directly into your browser.
I call it The Midnight Lab. It’s your personal AI art studio in the cloud, ready to go in minutes.

What's In The Box? The Ultimate Starter Pack, For Free.
This isn't an empty ComfyUI instance. I've pre-installed and configured everything you need to start creating professional-quality art with the new FLUX models immediately. This will save you hours of setup and gigabytes of downloads.
✅ Fully Updated ComfyUI: The latest version, ready to run.
✅ ComfyUI Manager Pre-Installed: The essential tool for managing your setup is already there.
✅ All Essential Custom Nodes: All nodes required for my powerful starter workflows are already installed and working.
✅ Core FLUX Models Ready-to-Go: I've included the official FLUX.1-schnell fp8 model, the required text encoders, and the VAE. That's over 15GB of models, pre-downloaded and placed in the correct folders for you.
✅ A Suite of My Best Starter Workflows: You get a collection of my powerful free workflows, ready to load and run immediately.
Get Your FREE One-Click ComfyUI Lab on My Patreon
The Deployment Link & ID
This is everything you need to get started.
🔥 Get $10 Free Credit! 🔥
If you're new to RunPod, use my referral link to sign up. You'll get $10 in free credits, which is more than enough to experiment and generate a ton of art for free!
Referral Link: THE MIDNIGHT LAB << [ PATREON ]
I've posted the full guide, the deployment link, and a step-by-step walkthrough on my Patreon. This isn't a members-only post; it's public and free for the entire community as a thank you for all your support.
You can get the free guide and the one-click template link right now from my public Patreon post:
>> Get Your FREE One-Click ComfyUI Lab Here <<
The Full Guide: From Launch to Creation
Here is the detailed, step-by-step process to get you up and running.
Part 1: Launching Your Lab
Click the deployment link in my Patreon post. This will take you to the RunPod deployment page.
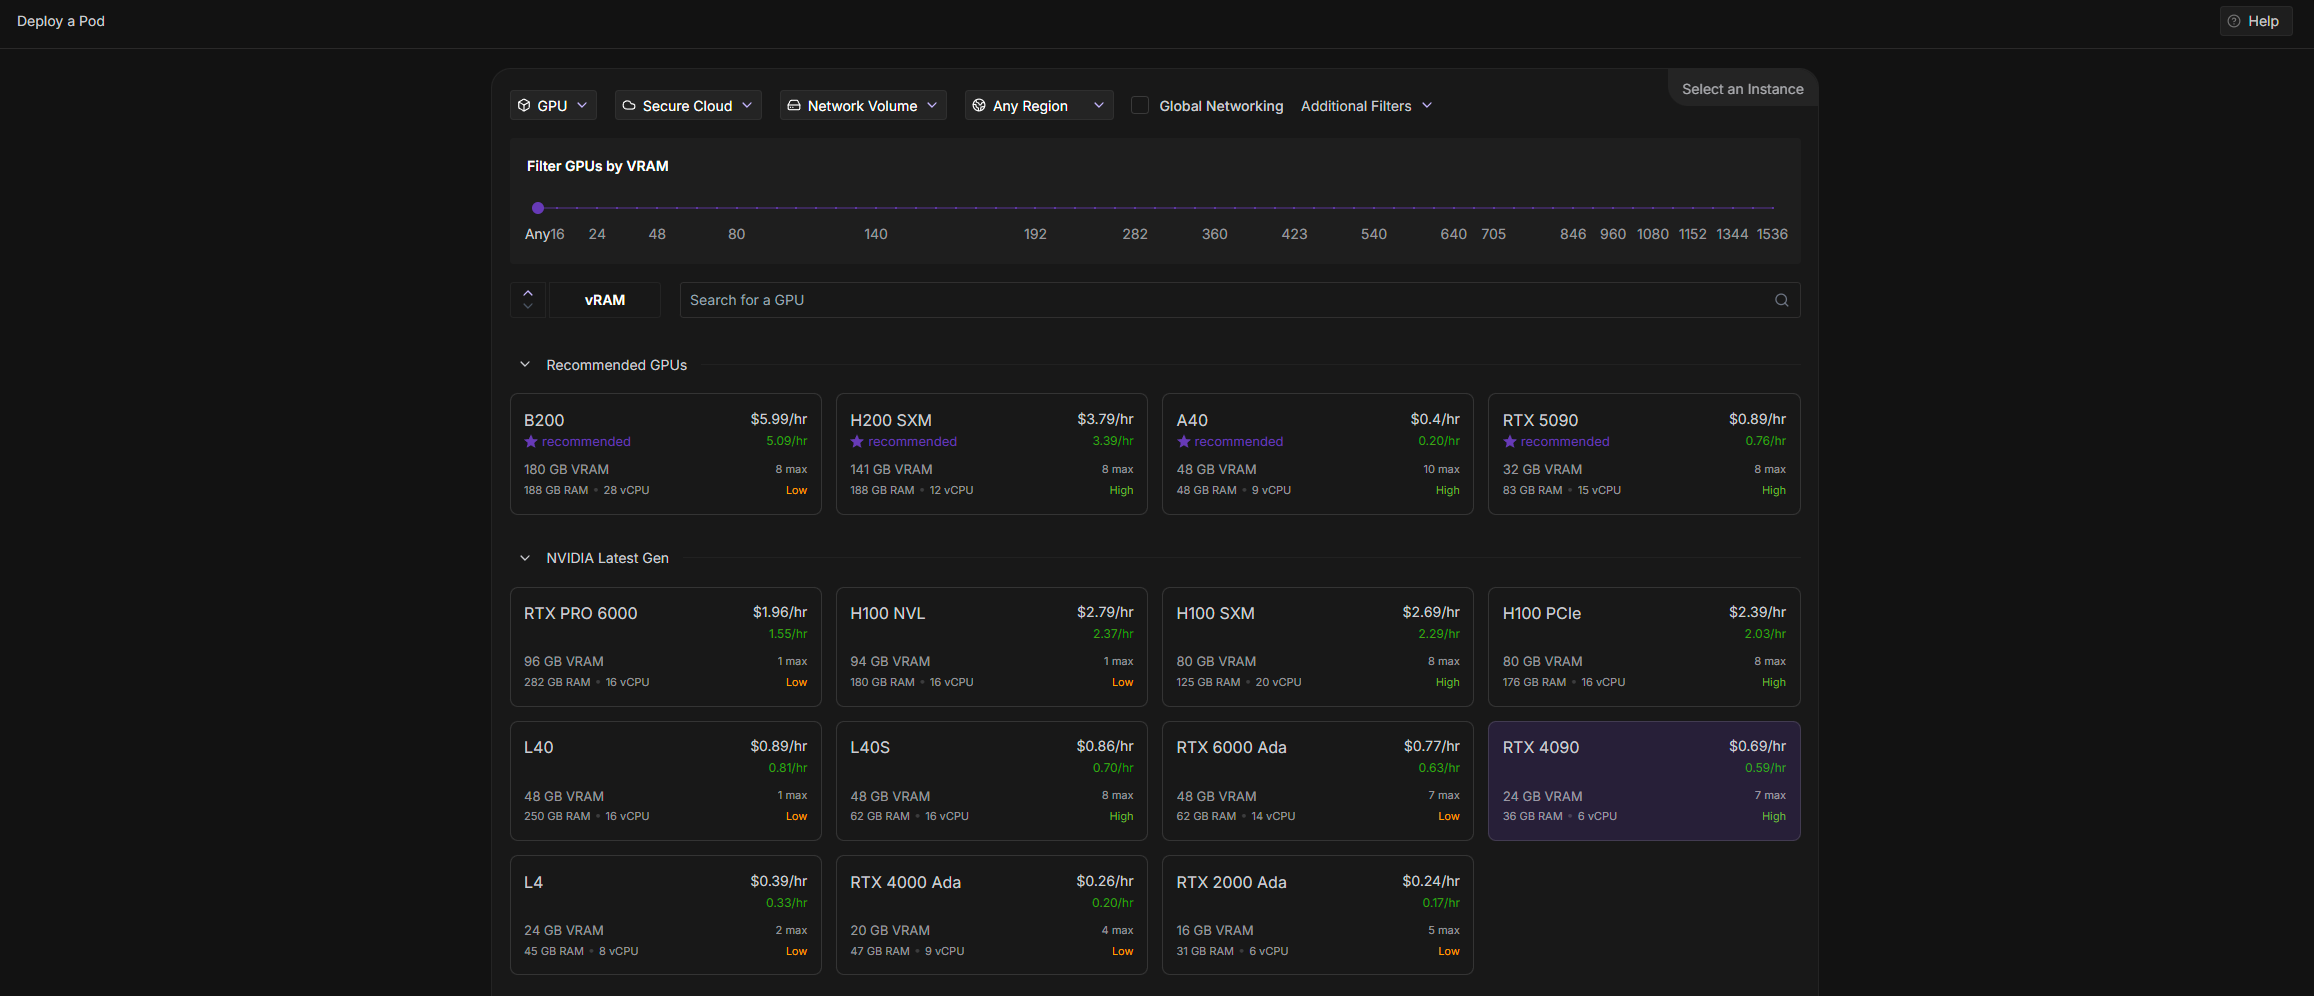
Choose Your Power. On the deployment page, select a GPU that fits your budget. For my starter workflows, an RTX 2080 Ada (16 GB VRAM) is a great, cost-effective choice.
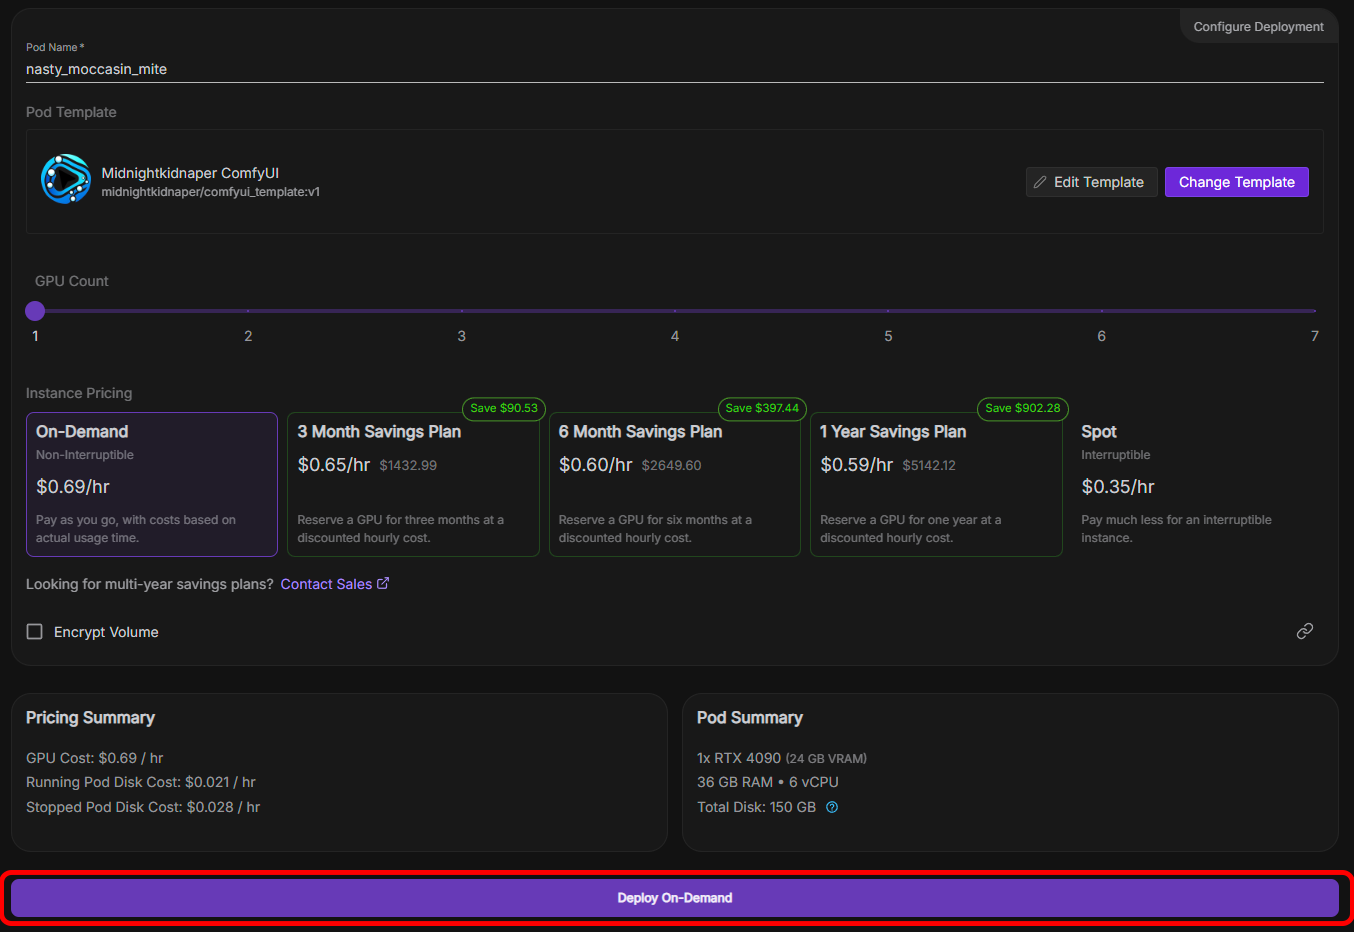
Deploy the Studio. My template is pre-configured with 50GB of container disk and 100GB of volume disk, so you don't need to change any settings. Simply click "Deploy On-Demand".
Part 2: Accessing Your AI Studio
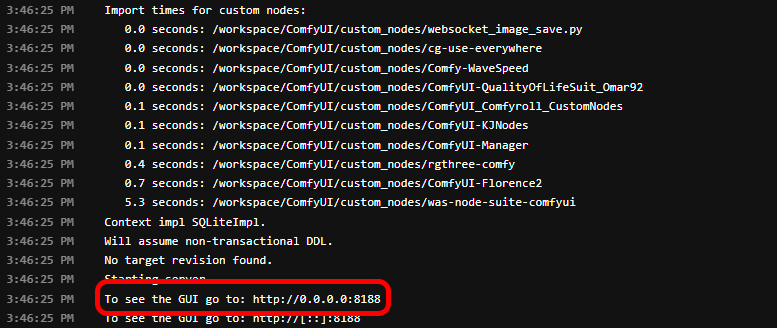
Wait for the Signal. Your pod will now build. You can monitor the progress in the "Logs" tab. After a few minutes, the logs will show a message: "To see the GUI go to: http://0.0.0.0:8188". This means your ComfyUI lab is ready to launch.
Connect to ComfyUI. Click the "Connect" button on your pod dashboard. Under "HTTP Services", you will see a link next to "Port 8188 -> ComfyUI". Click it.
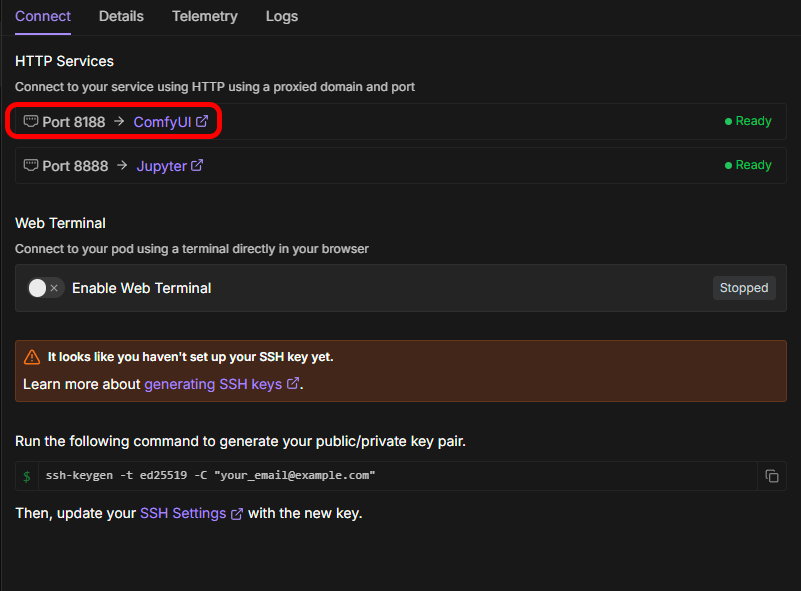
You're In! A new browser tab will open with a fully-loaded ComfyUI interface. Congratulations, your personal AI art studio is now online!
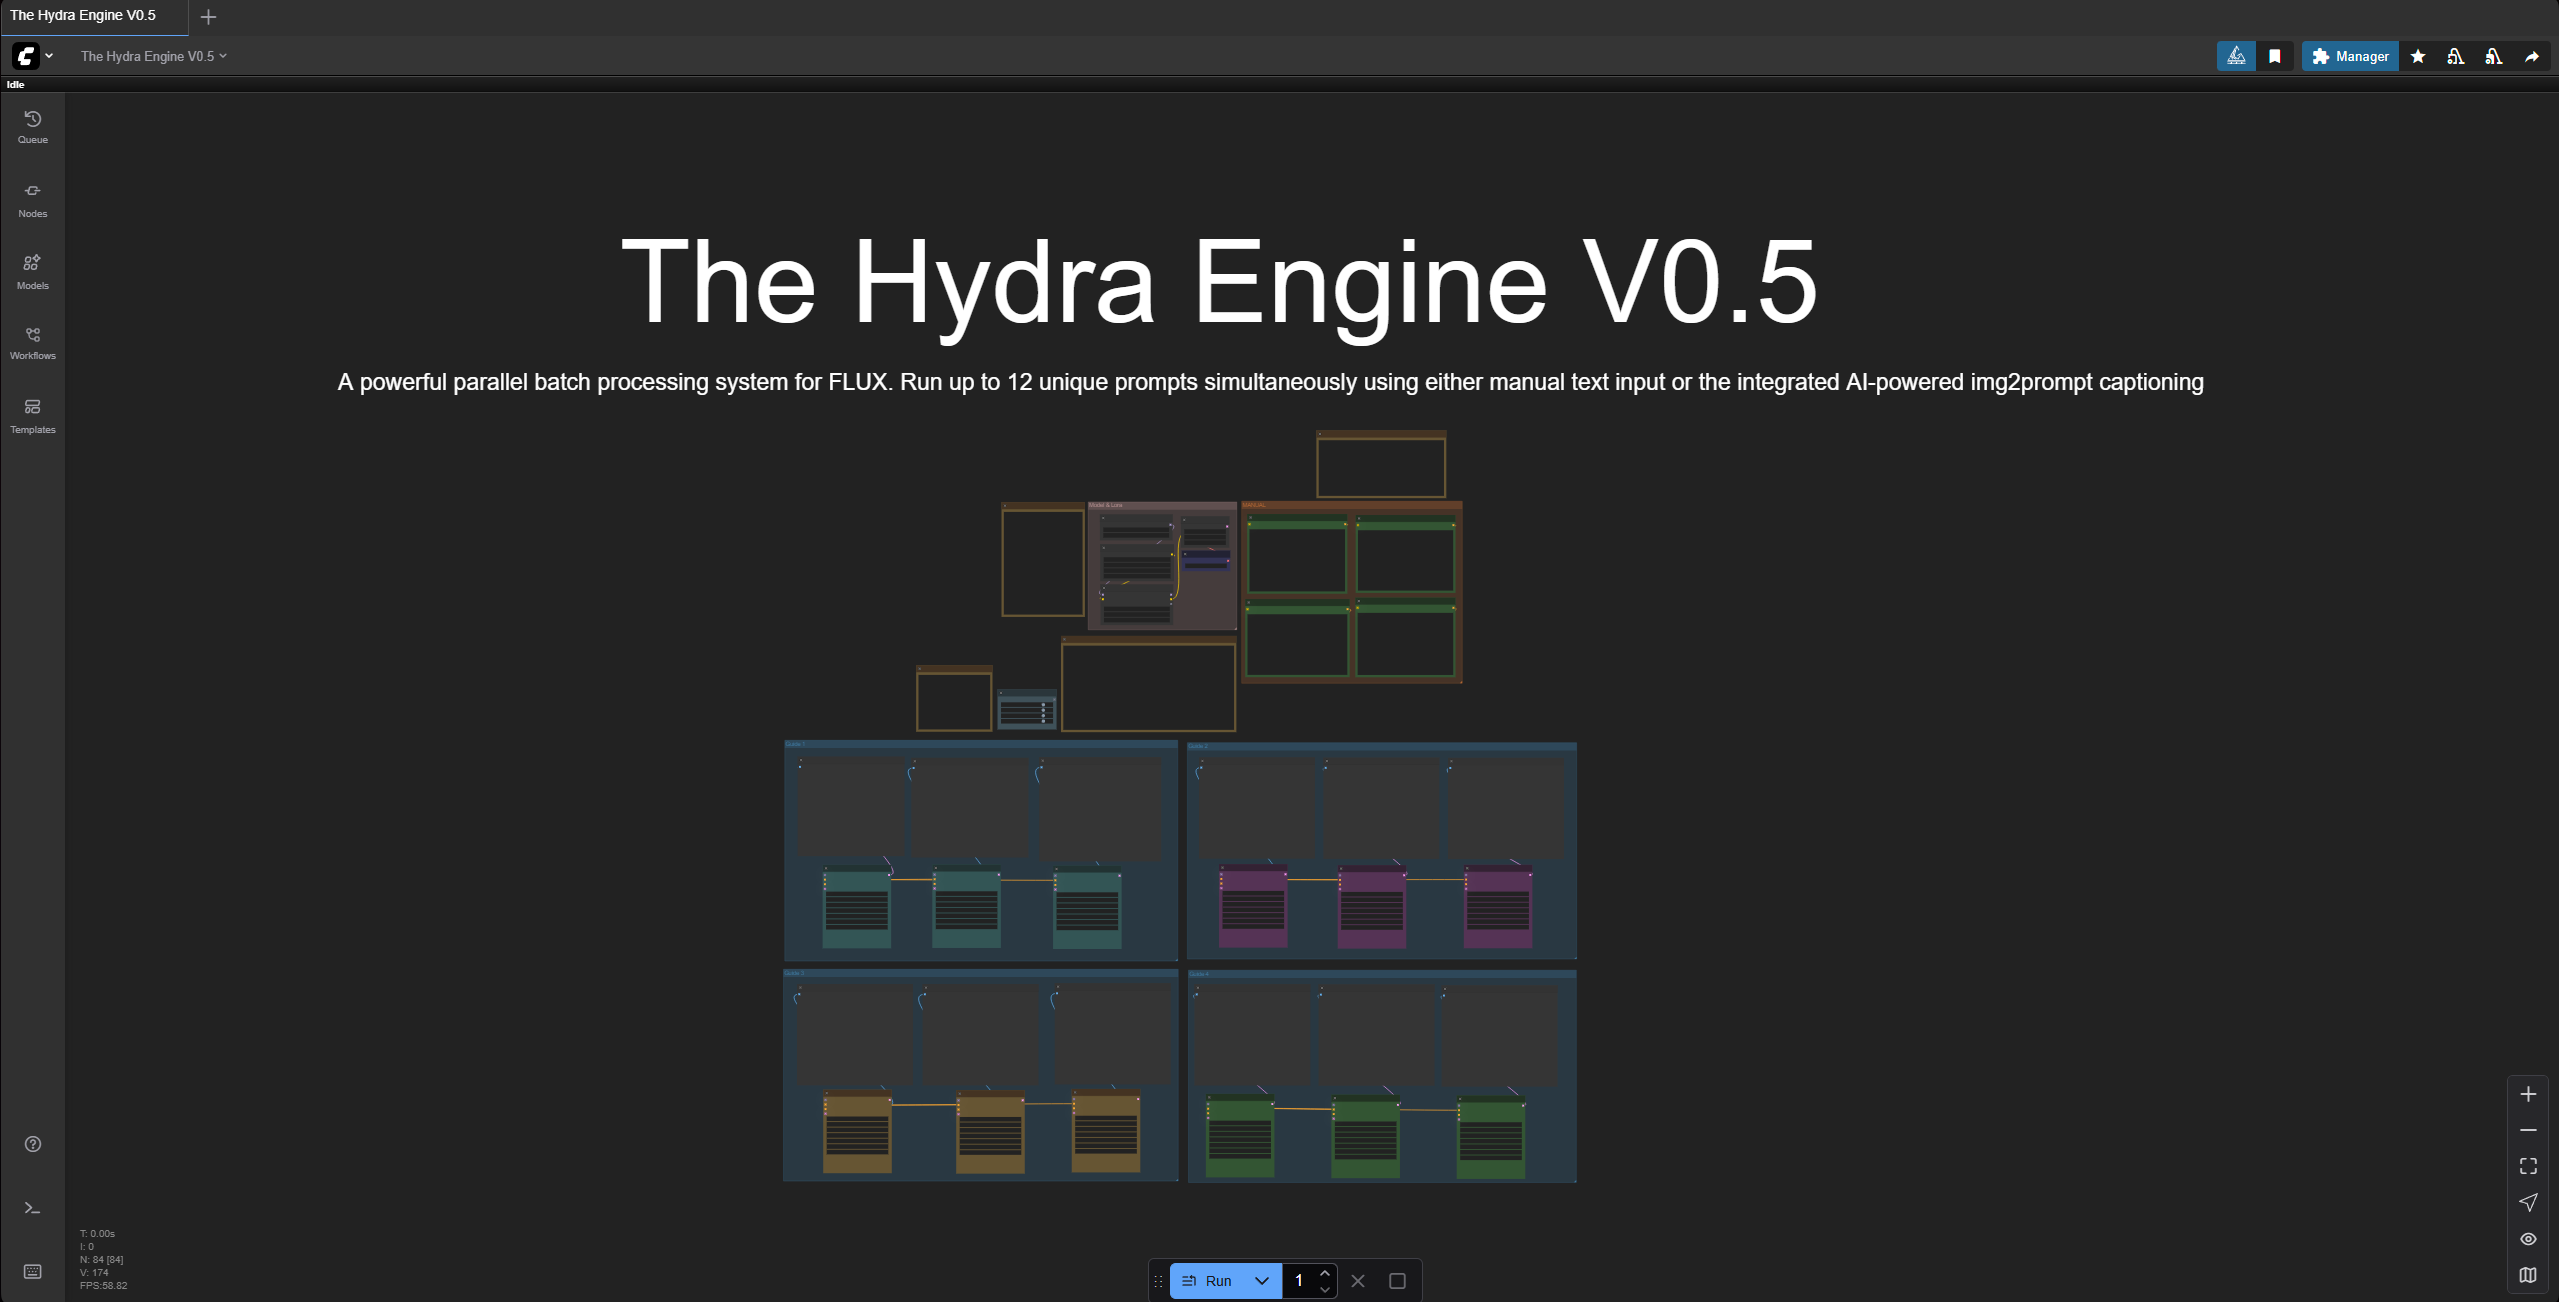
Part 3: Loading and Running Your First Workflow
When ComfyUI loads, you will see a default workflow on the canvas. You can start creating right away!
To load one of my other pre-installed workflows, simply drag the .json file from your computer or the RunPod volume storage directly onto the canvas.
Pro-User Guide: Adding Your Own Custom Models
Your lab is ready to be expanded. Here are the two best ways to add your own custom checkpoints, LoRAs, or other models.
First, click "Connect" on your pod and connect to Jupyter Lab (Port 8888).
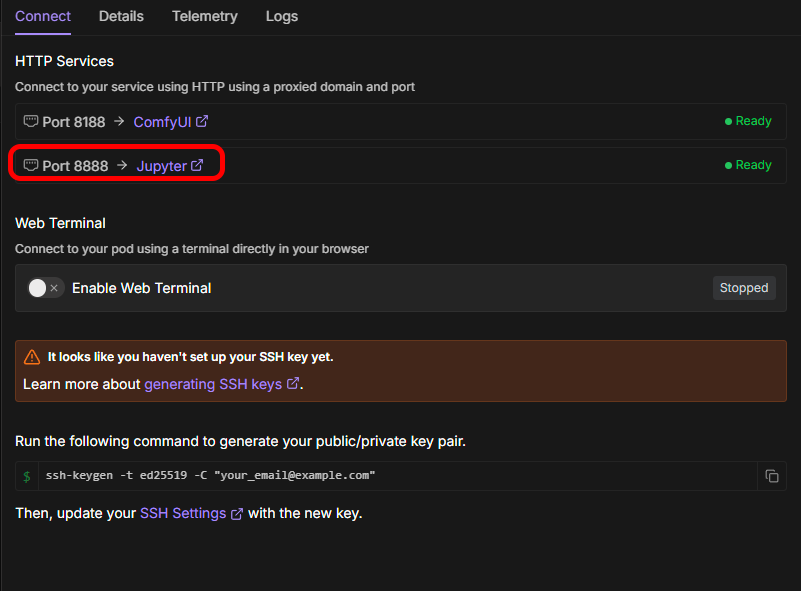
Method A: The Easy Way (Direct Upload)
Using the file browser on the left of the Jupyter Lab interface, navigate to the correct models folder, for example: ComfyUI/models/checkpoints/ or ComfyUI/models/loras/.
Simply drag and drop your .safetensors files from your computer directly into the file browser. This is great for smaller files like LoRAs.
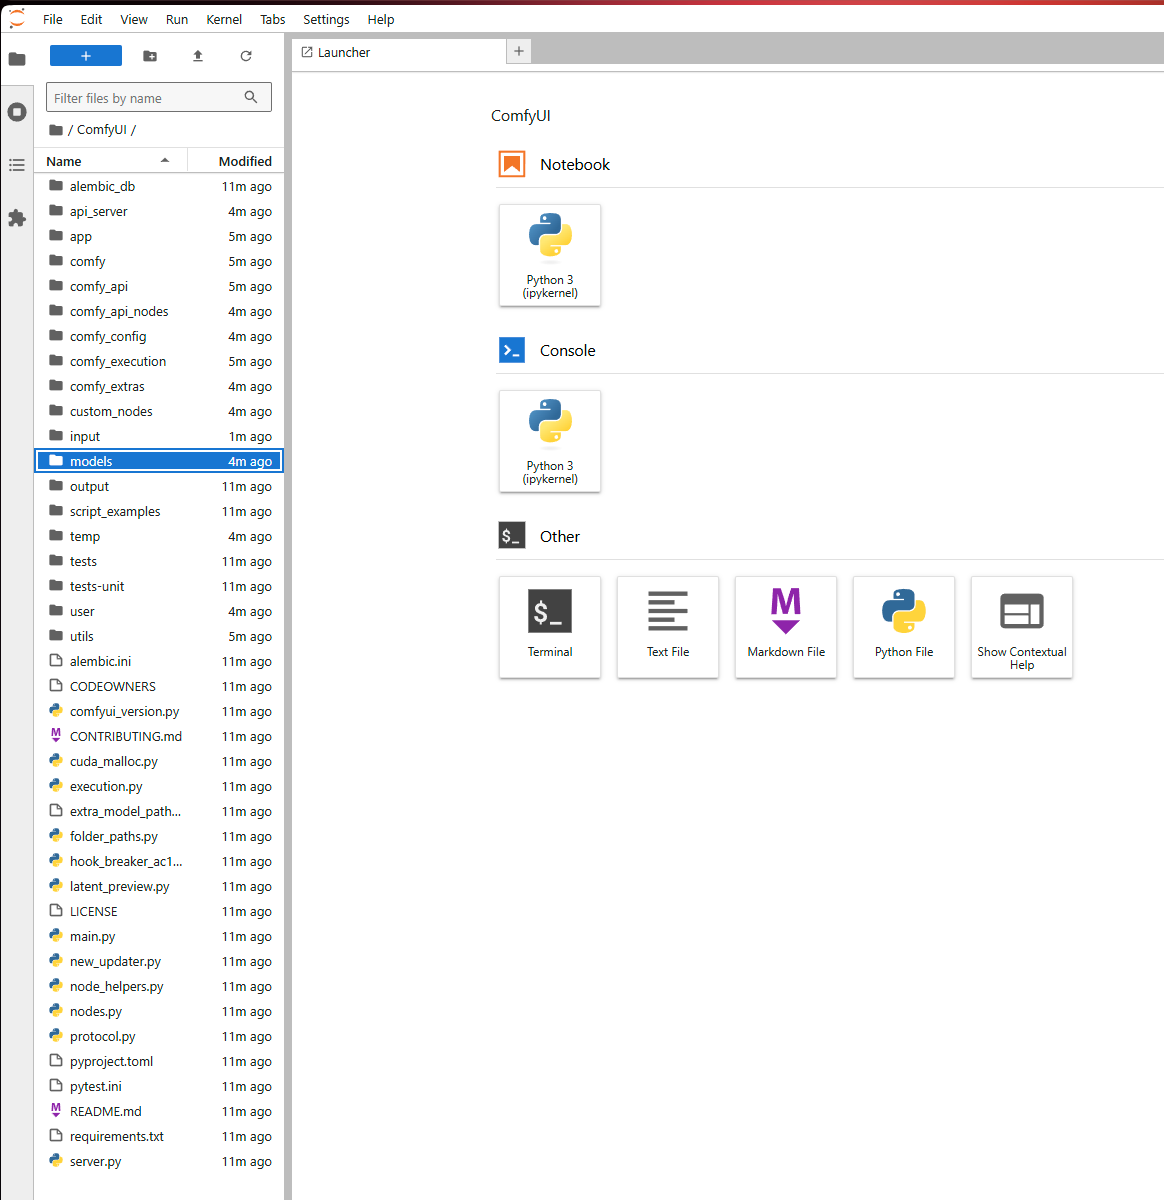
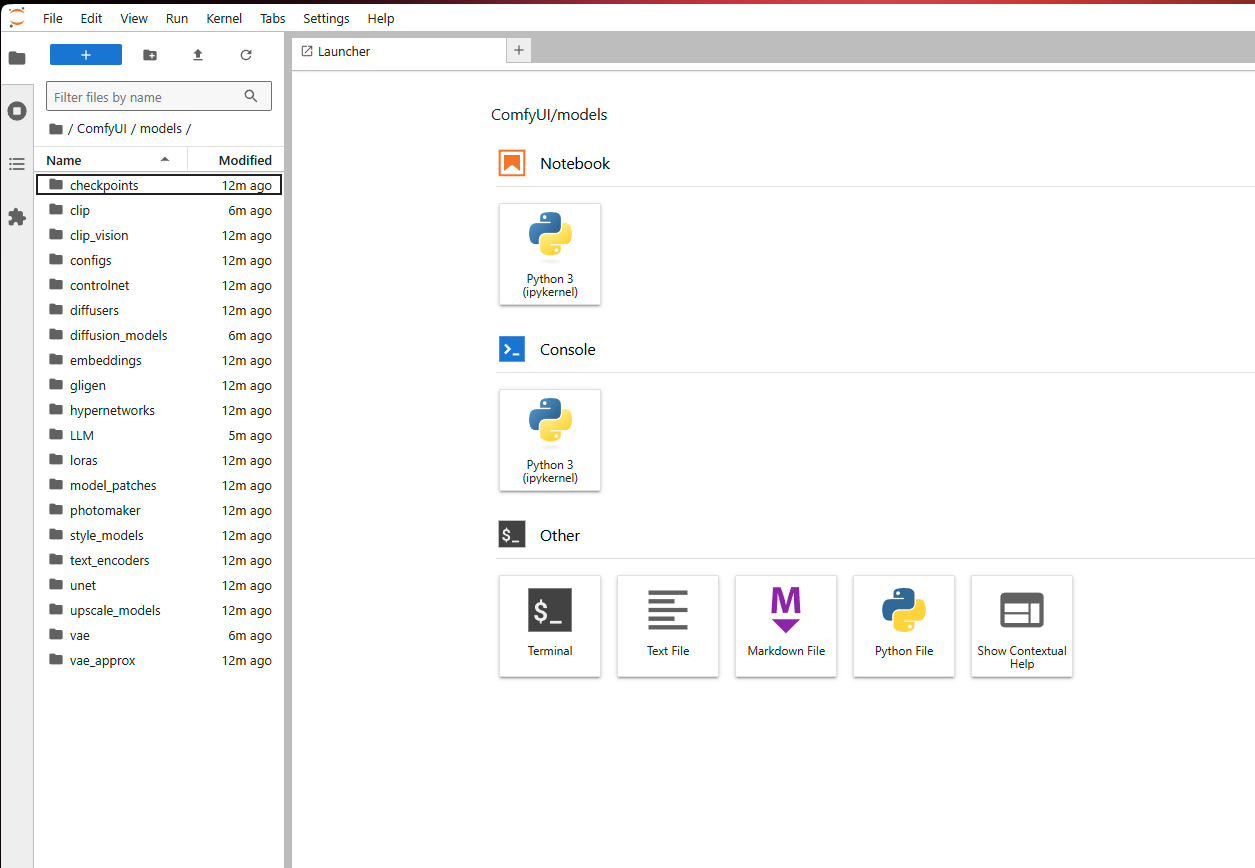
Method B: The Pro Way (Terminal Download)
This is the fastest method for downloading large files directly from the web.
In the Jupyter Lab launcher, click the "Terminal" icon to open a new command-line terminal.
Use the wget command to download files. This is incredibly powerful for sites like Civitai.
For Civitai: Get the download link for your model and your API token. Then run:
codeBash
wget -O ComfyUI/models/loras/Your-Lora-Name.safetensors "https://civitai.com/api/download/models/[MODEL_ID]?type=Model&format=SafeTensor&token=[YOUR_TOKEN]"For Hugging Face: Use the huggingface-cli tool. For example:
codeBash
huggingface-cli download user/model_name model_file.safetensors --local-dir ComfyUI/models/checkpoints/

Ready for the Pro-Level Blueprints?
Your Midnight Lab is now up and running. It's the perfect environment to run the most advanced systems. My paid tiers on Patreon give you exclusive access to the "pro-level blueprints"—workflows like The 4K Influencer Studio, The Muse Engine, and The Aura Engine. They plug directly into the lab you just launched.
Happy generating!
midnightkidnaper


![Skip the Install: Launch a Fully-Loaded ComfyUI Lab in One Click [Runpod Template]](https://image.civitai.com/xG1nkqKTMzGDvpLrqFT7WA/669b0e03-98de-4c28-bc53-3f86a216d11a/width=1320/666d7bfc-5320-46d7-9919-bff58e9305b8.jpeg)