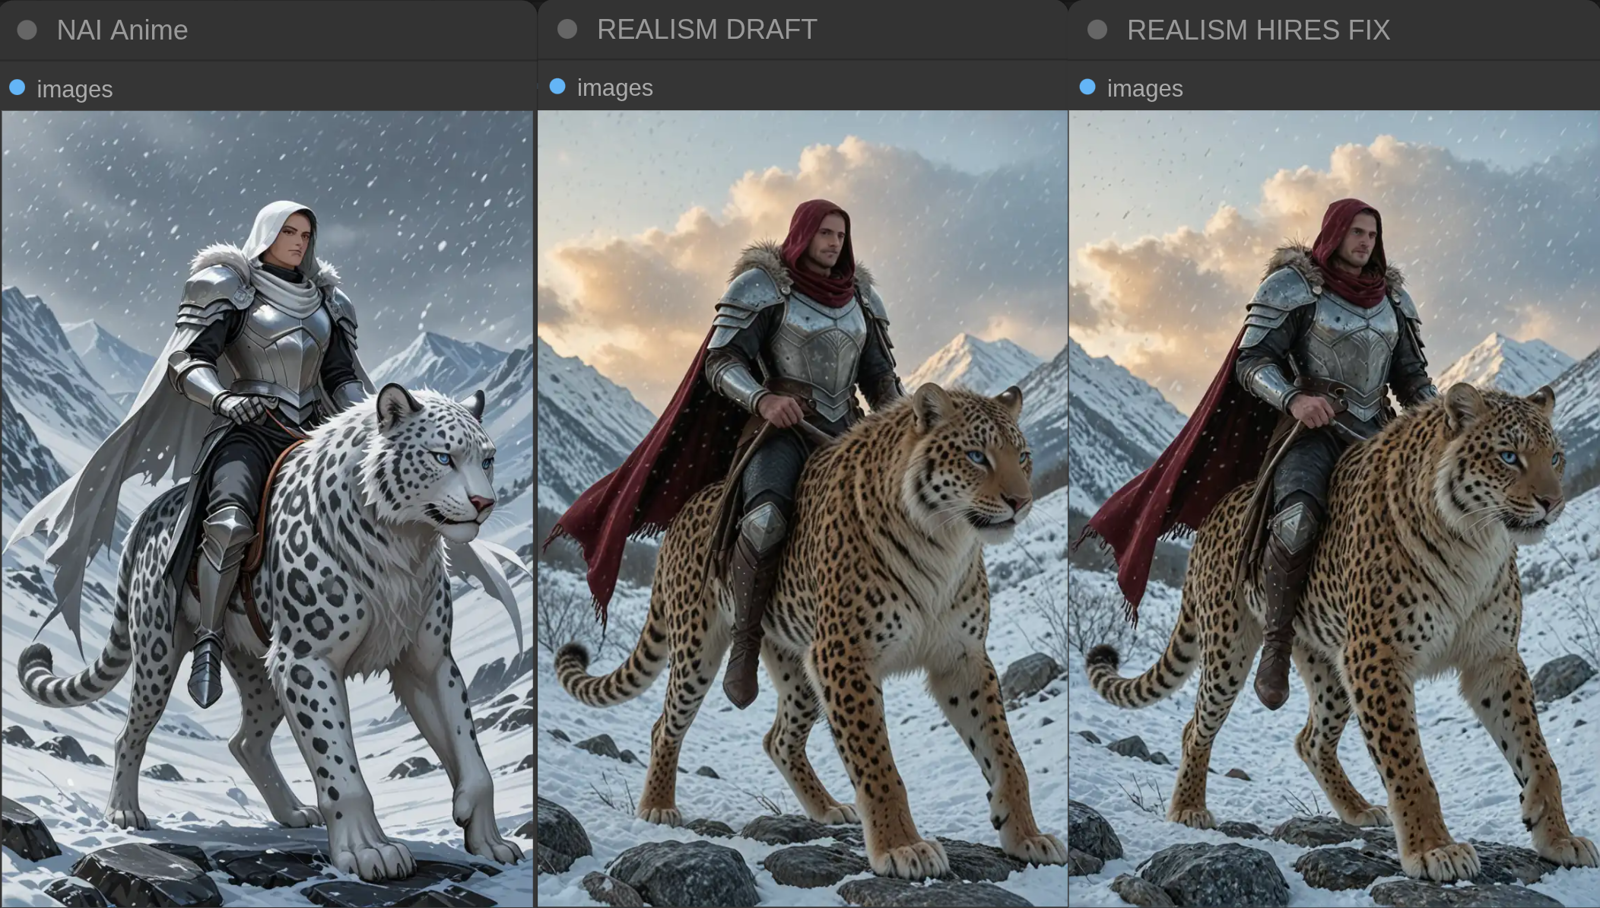
This article describes my latest ComfyUI workflow converting any style images into phtorealism.
It is the response to the comment in similar article by @Sateluco.
TL;DR;
I've created the simple workflow that takes image from first pass (can be render of any style checkpoint) then converts it into Canny Edge at high resolution. This Canny Edge image is used as a control for second pass render. Second pass realistic render produces the rough realistic image with lower details and many imperfections. Second pass render gets upscaled with Remacri upscaler then reduced to 2..2.5 MPx resolution before third pass. Third pass plays a role of HiRes Fix in A1111 + it make polishing of dirty textures and deformed edges. Finally you get the composition and characters from 1st pass (composition changes are constrained by the params in ControlNet module) and apply photorealistic colors and textures to it. As you can see on the image above it can change the narrative slightly.
Feel free to post your samples to the page of the workflow described below.
Models used in workflow
Workflow explained
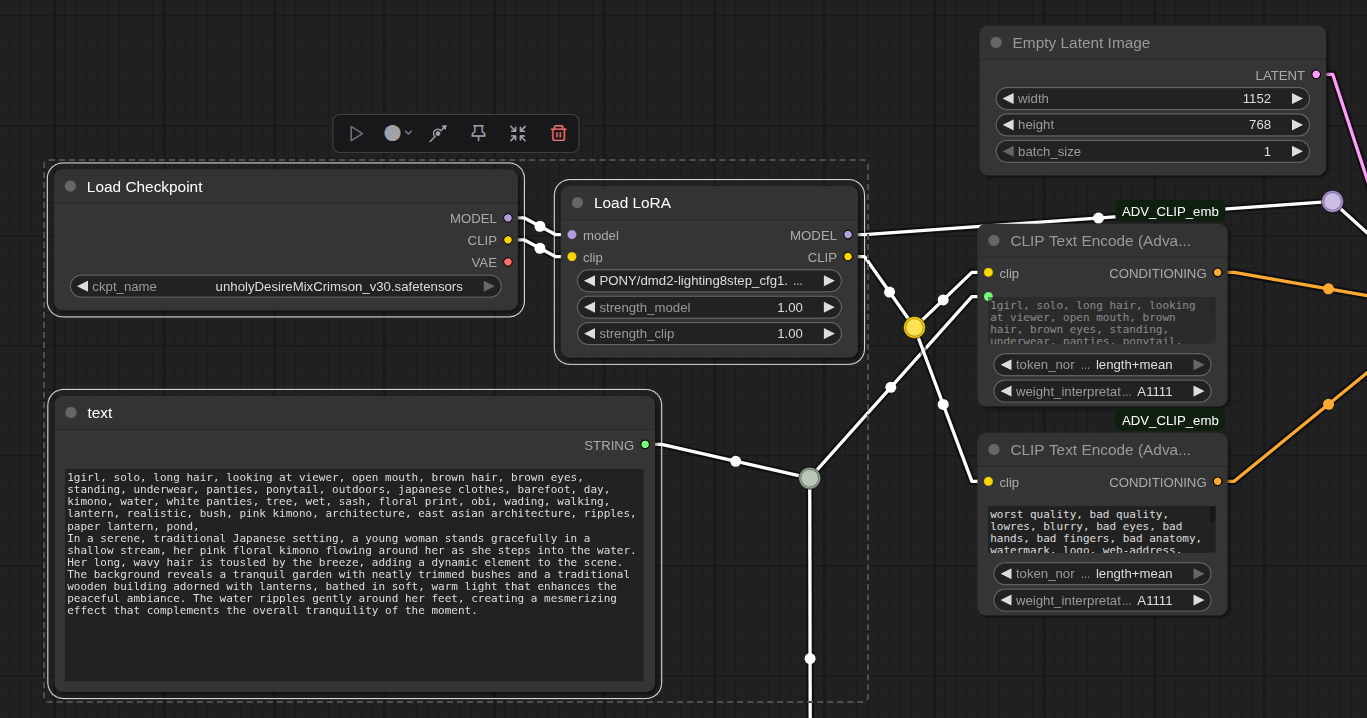
[NOTHING INTERESTING HERE] just loading 1st pass model (NAI checkpoint). And preparing the shared Text Multiline primitive with common prompt for all passes. I am using the CLIP Text Encode Advanced because it emulates the best weighting mode (A1111 WebUI prompt conversion).
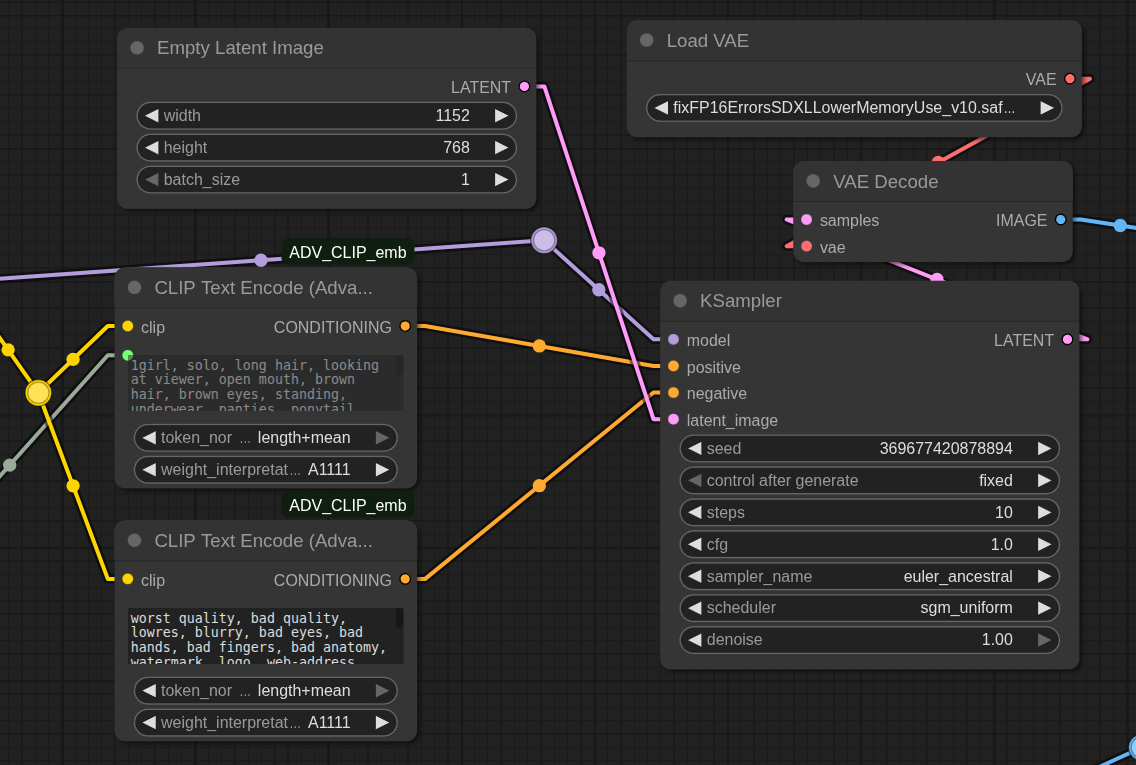
Here we go with 1st pass render. Pay attention to "Load VAE". This VAE automatically switches to Tiled VAE if regular VAE generates Out of Memory exception. This VAE is commonly baked in into all CinEro models.
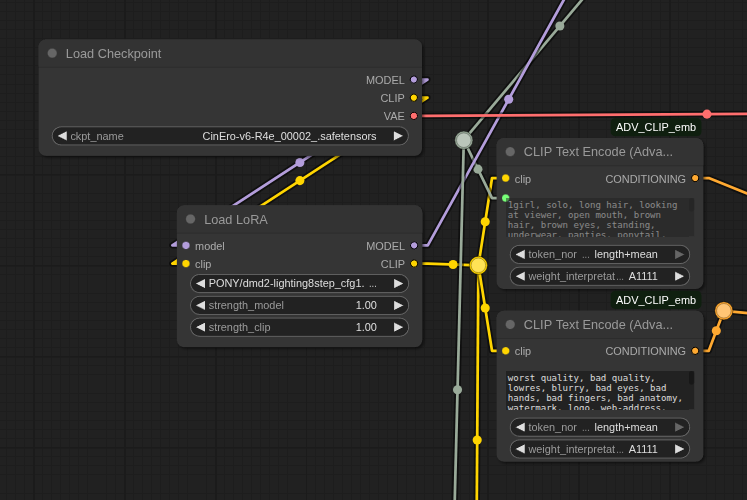
Now let's load realistic checkpoint (CinEro-v6-R4e in this case). Pay attention to "Load Lora". Here and in 1st pass models loading we use DMD2 Lightning 8steps LORA. This is crucial to make the conversion as fast as possible without quality degradation. You can remove this LORA and fallback to regular Sampler and Scheduler with much higher steps and time consumption.
Here is the 2nd pass. We use Canny Edge image as a control. We use an Empty Latent to render a new image from scratch. You can use an image from 1st pass if you want transfer some degree of style. In that case you need to tune the KSampler Denoise parameter to adjust the similarity between 1st pass and 2nd pass. As we use DMD2 Lightning 8 steps we can set the the "steps" parameter of KSampler to values in [7..16]. I prefer 10 or 12. Steps 16 and more can lead to overbaked image with very high contrast (experiment with caution).
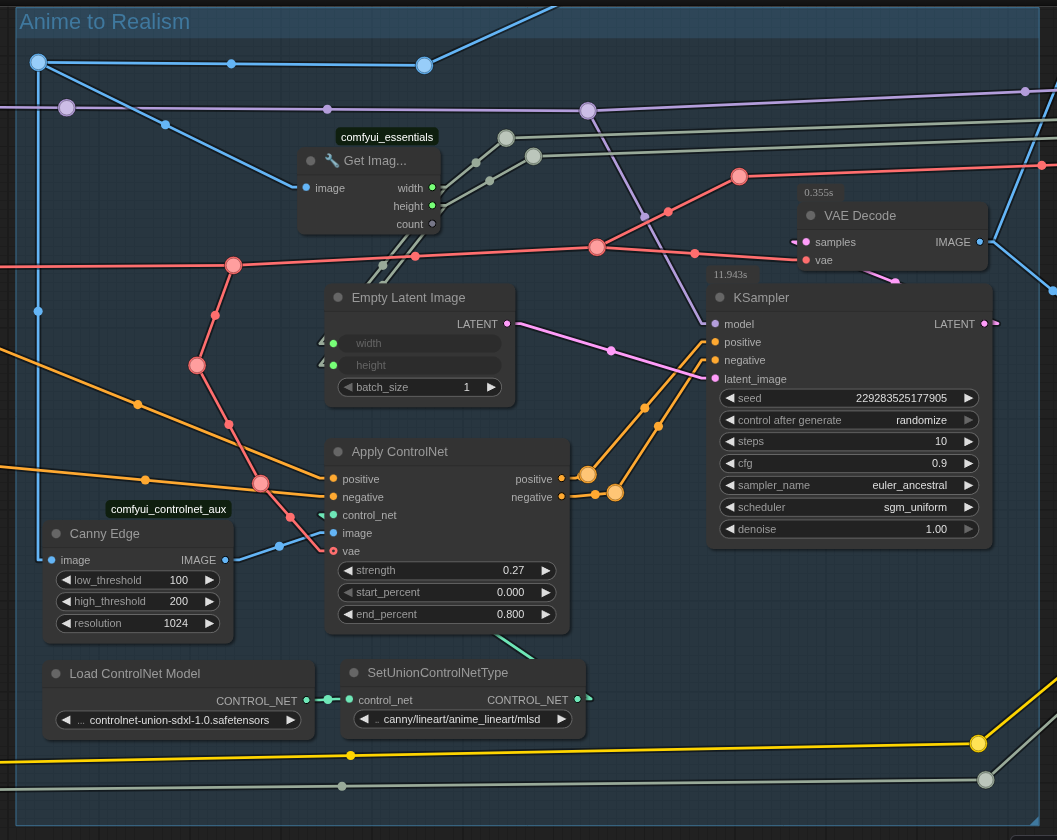
For the 3rd pass we could use another ControlNet mode (Tile) with the same Union SDXL model. Tile ControlNet accepts the blurred original image (there is a Tile pre-processor which just makes blur) and forces the KSampler to render higher details than the non-blurred image had. You can also use the original image as input for this ControlNet mode.
Anyway, for the simplicity I decided to use regular I2I render with a very low Denoise. But before encoding the 2nd pass render into the Latent I'm doing Upscale with Remacri. It produces 4x image - double by each side. And it is TOO MUCH. So, I downscale this image into 2..2.5 MPx resolution. Then KSampler is doing the final polishing.
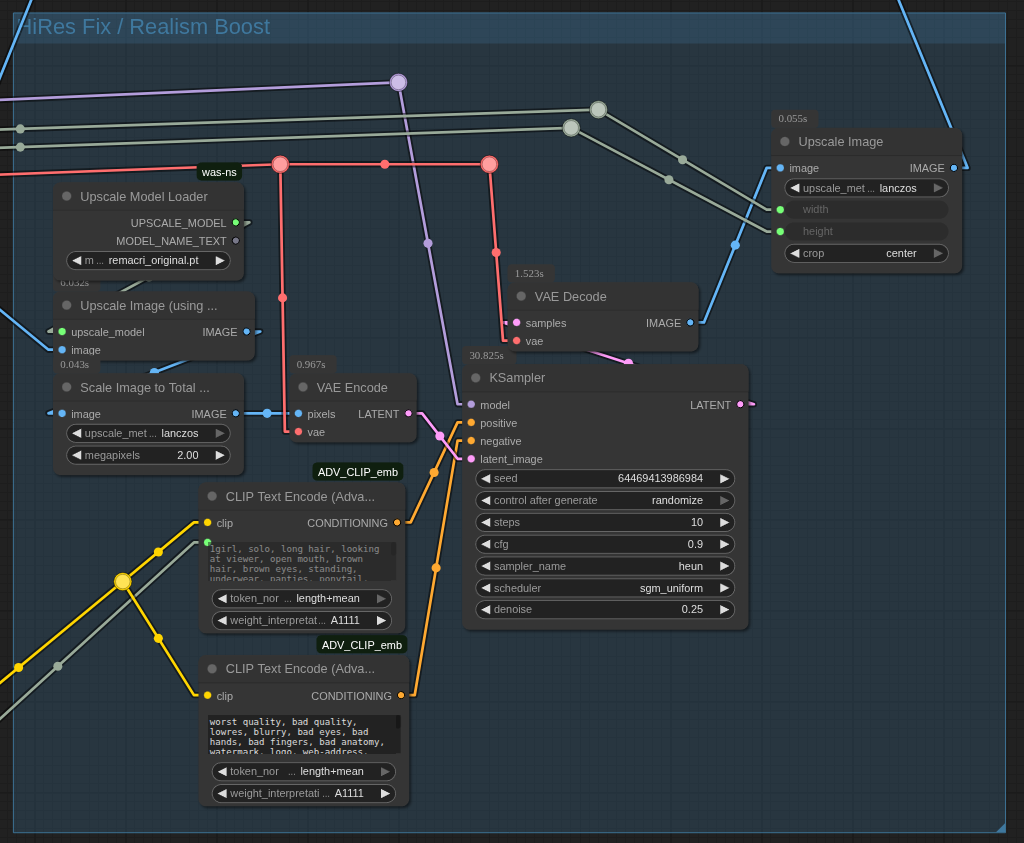
If you need the fastest conversion I can recommend you to reduce the Downscale resolution to smth in [1.5...1.8] MPx resolution and set the passes steps to 7 | 7 | 8. This will make the conversion blazing fast.
Comments / feature requests are welcome. Hope this information is useful to you.


