My Process of Creating AI-Generated Images
A personal tutorial and behind-the-scenes look at how I build complex scenes
Creating high-quality AI-generated images isn’t just about typing a few prompts and hoping for the best. For me, it’s a process that combines planning, reference building, and multiple refinement stages until the final picture looks the way I envisioned it.
In this article, I’ll walk you through my workflow step by step — the exact tools I use, how I prepare my references, and why each step matters. This isn’t just a tutorial; it’s also a peek into my personal creative process, with examples along the way.
Step 1: Building the Pose with ControlNet References
When I want to create a complex scene with multiple characters or poses that are hard to prompt for directly, I don’t leave it up to chance. Instead, I start by building a ControlNet reference image.
For this, I use Posemy.art, a free online posing tool. It allows me to arrange 3D mannequins, adjust their proportions, and set up accurate body positions that I can later feed into ControlNet. This gives me precise control over character poses and prevents the AI from producing awkward or broken anatomy.
Here’s an example of a base setup in Posemy.art:
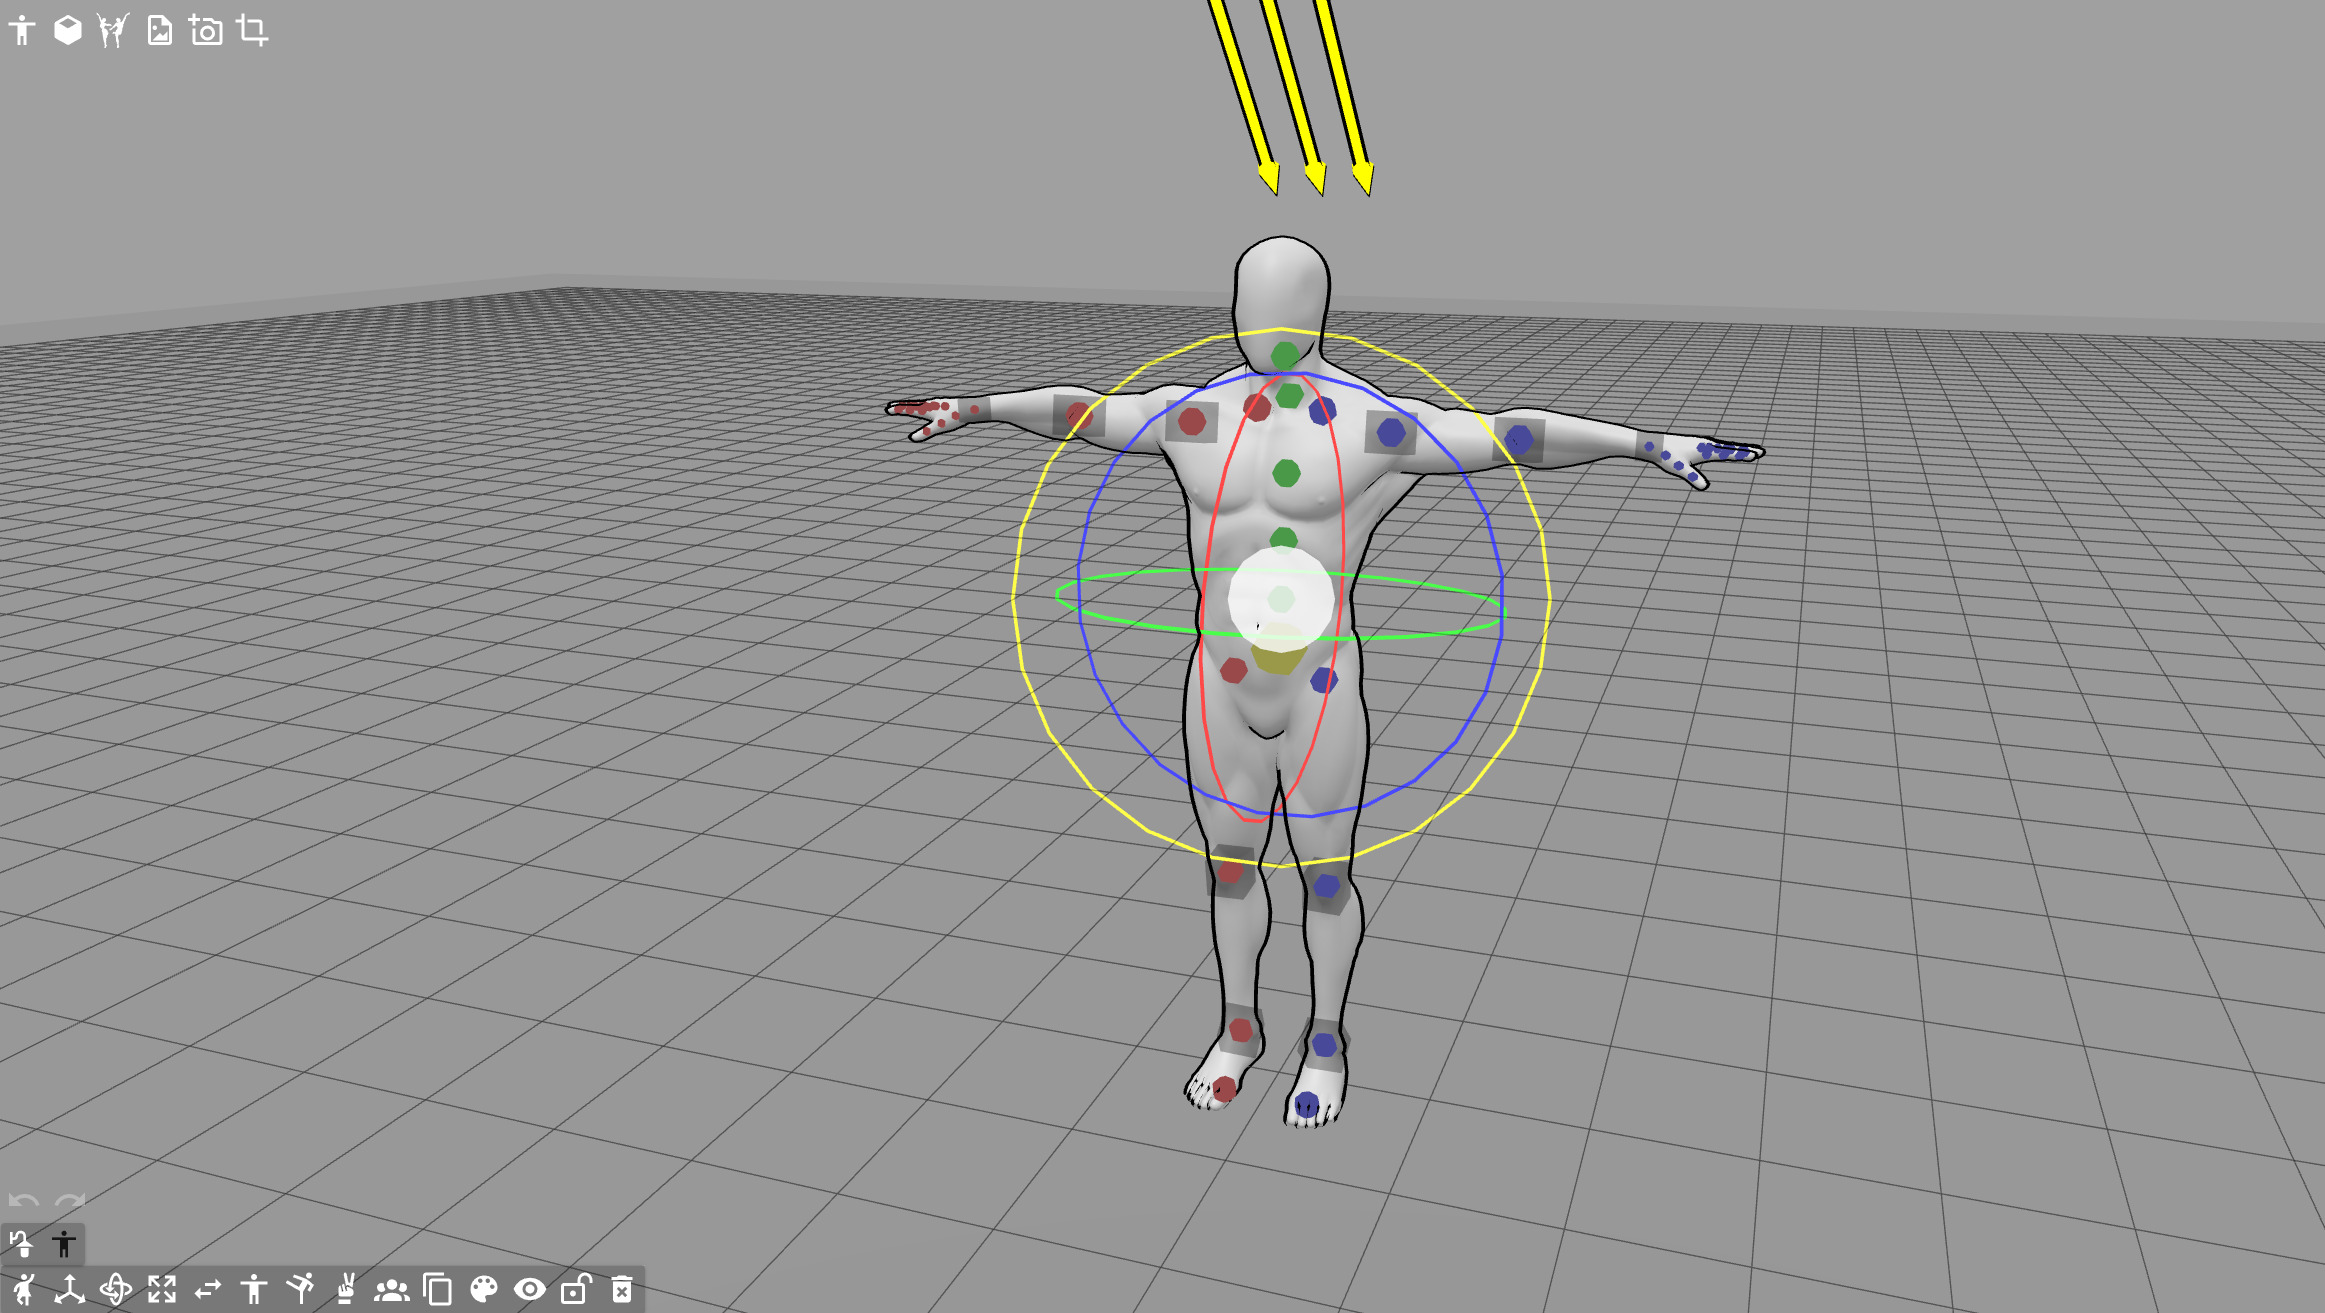
By creating these ControlNet base images, I make sure the AI has a strong structural guide before I even start prompting details like clothing, lighting, or style.
Step 2: Exporting ControlNet Reference Maps
After setting up the full scene with both characters in Posemy.art, I don’t export them together. Instead, I split the process into two runs — one for each character. This way, the background stays the same, but the ControlNet maps only contain the character I’m currently working on.
For the tutorial, I’ll show you the workflow with just one character. The method is identical for the second.
Here’s how it looks step by step:
Pose setup in Posemy.art – the full two-character scene before splitting.
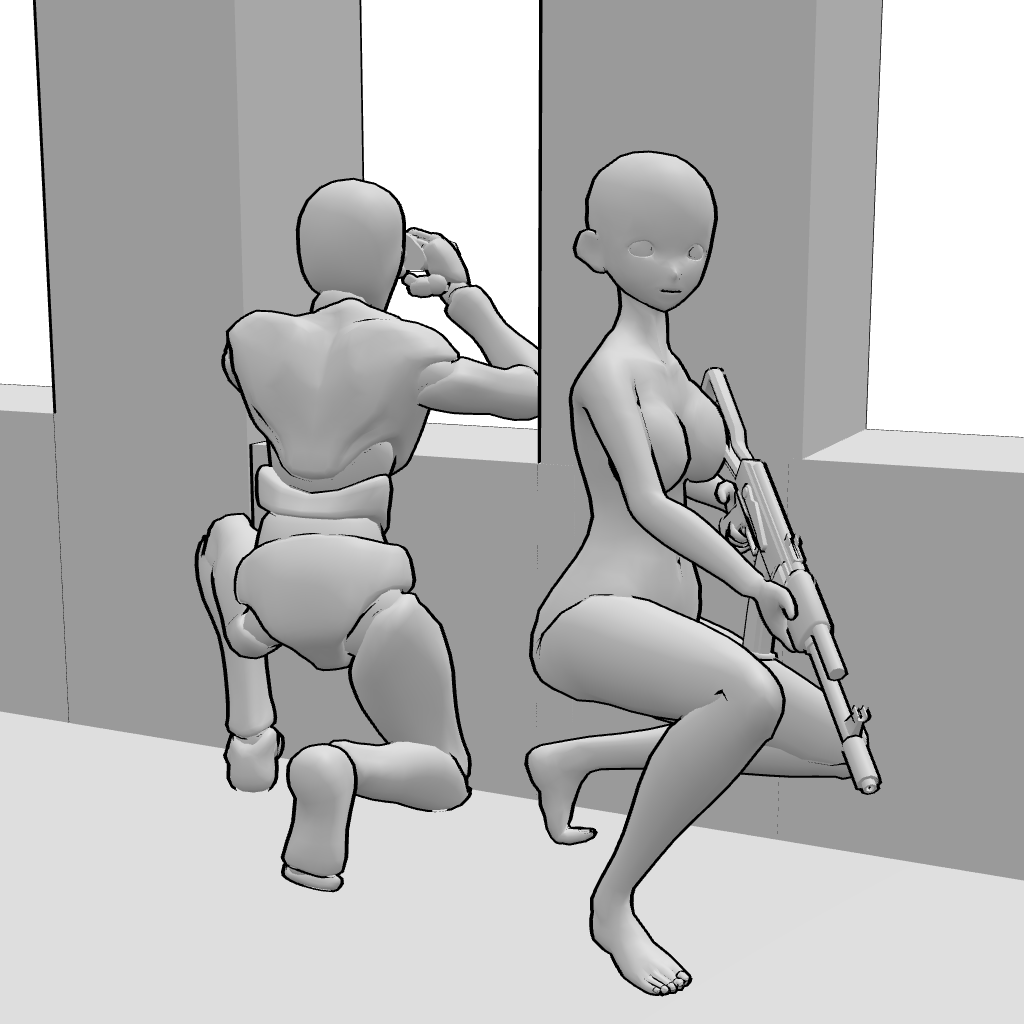
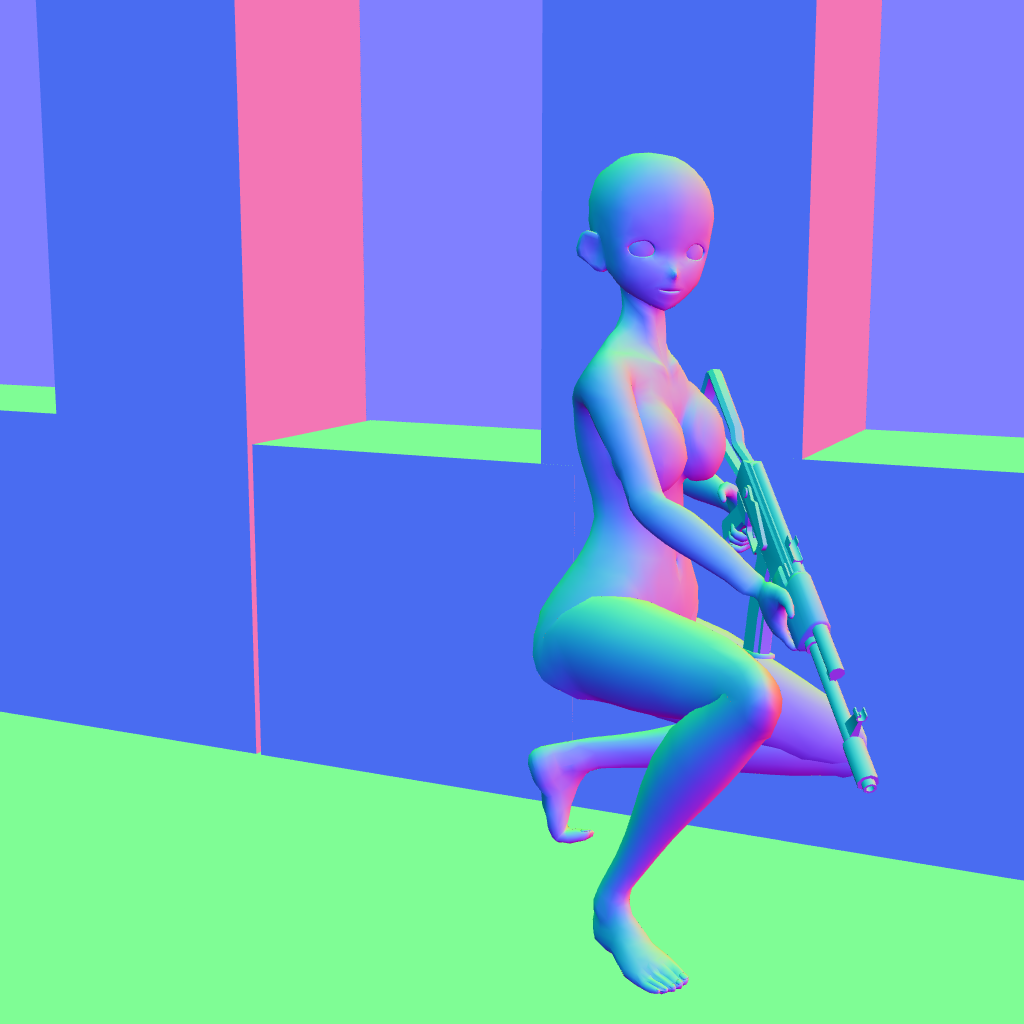
Delete one character and export ControlNet maps for the remaining one:
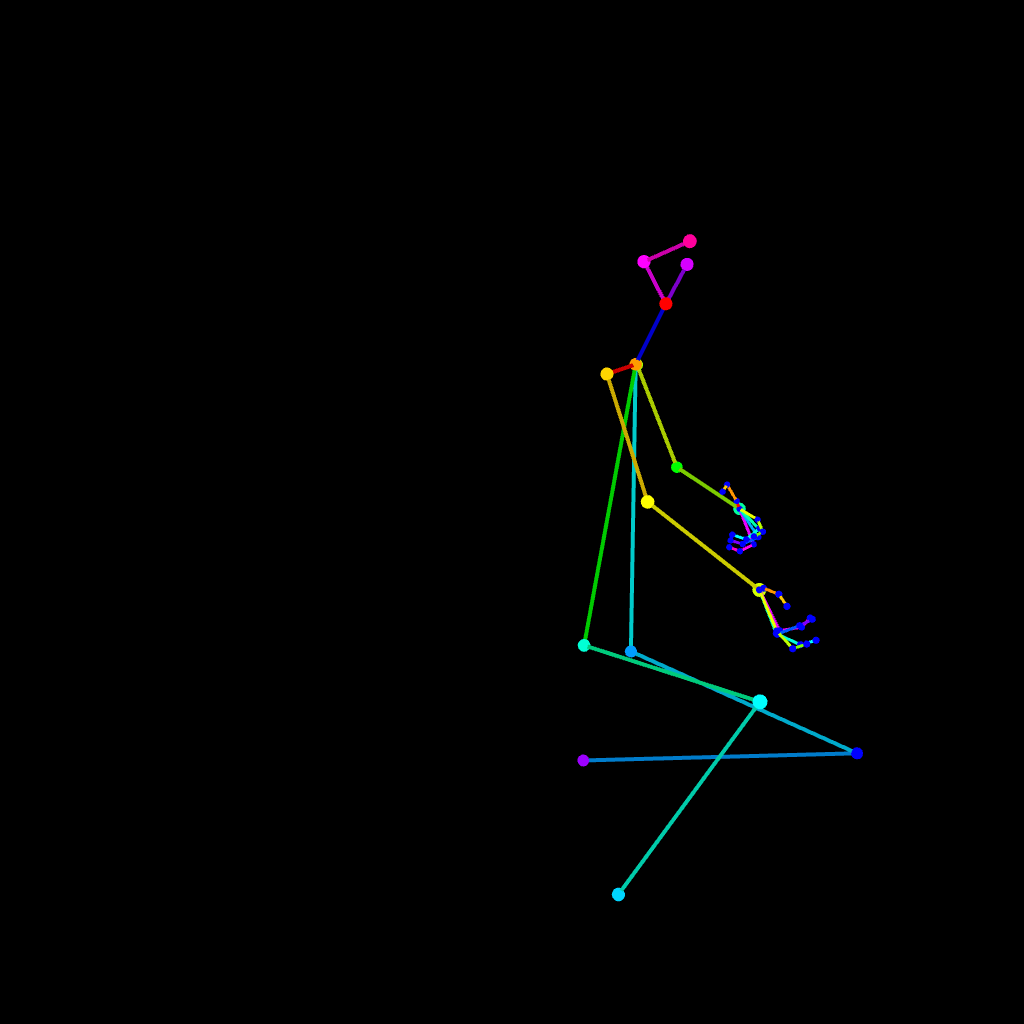
OpenPose (stick-figure skeleton of the pose)
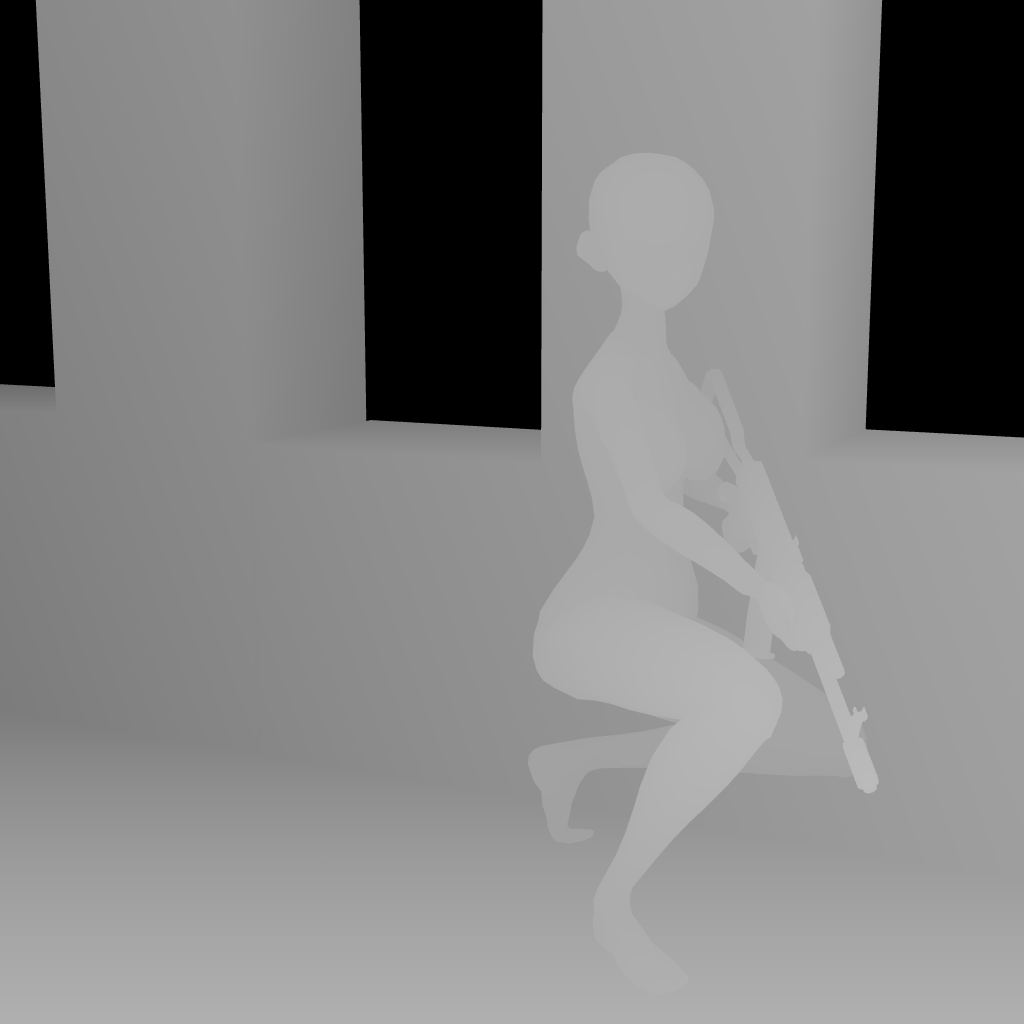
Depth Map (shading by distance from the camera)
Normal Map (rainbow surface orientation)
Canny Map (black-and-white outlines)
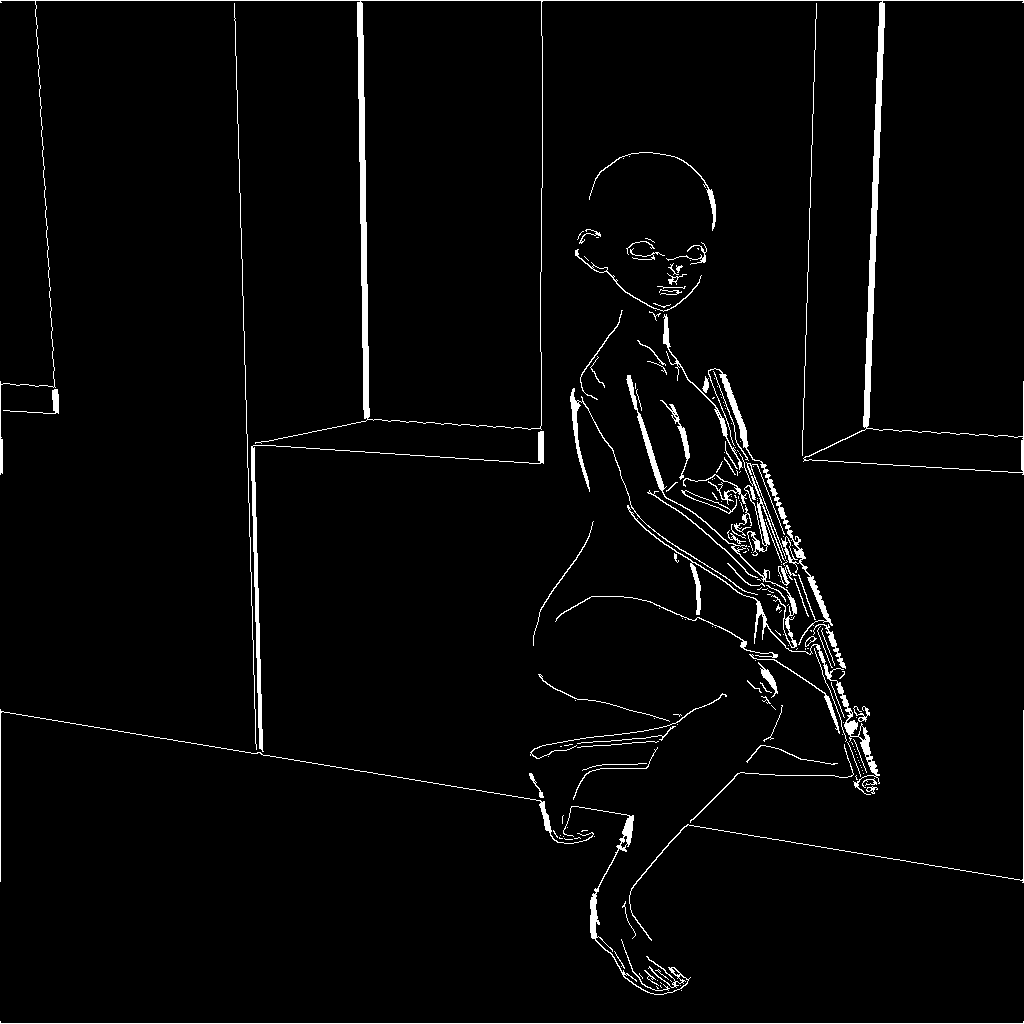
With these references in hand, I import them into ComfyUI ControlNet and begin the actual generation process. I start prompting the scene and focus one the first character, in this case the female.
The important part here is that the background and lighting prompts stay the same for both characters — only the character-specific details (like clothing, hairstyle, equipment, etc.) change. This keeps both renders consistent and makes them fit naturally into the same environment.
Once the setup is ready, my workflow looks like this:
Base Generation (KSampler) – I run a first pass with one KSampler to get a clean, raw image using the ControlNet maps as guidance.
Refinement (Daemon Detailer) – I immediately feed that raw result into three Daemon Detailer variations:
Standard Daemon Detailer
Daemon Detailer Sigma
Lying Daemon Detailer
Selection – From these four images (1 raw + 3 refined), I pick the one that best matches my vision.
High-Res Fix & Upscale – Finally, I upscale the chosen image, adding sharper details and pushing it toward the final quality I want.
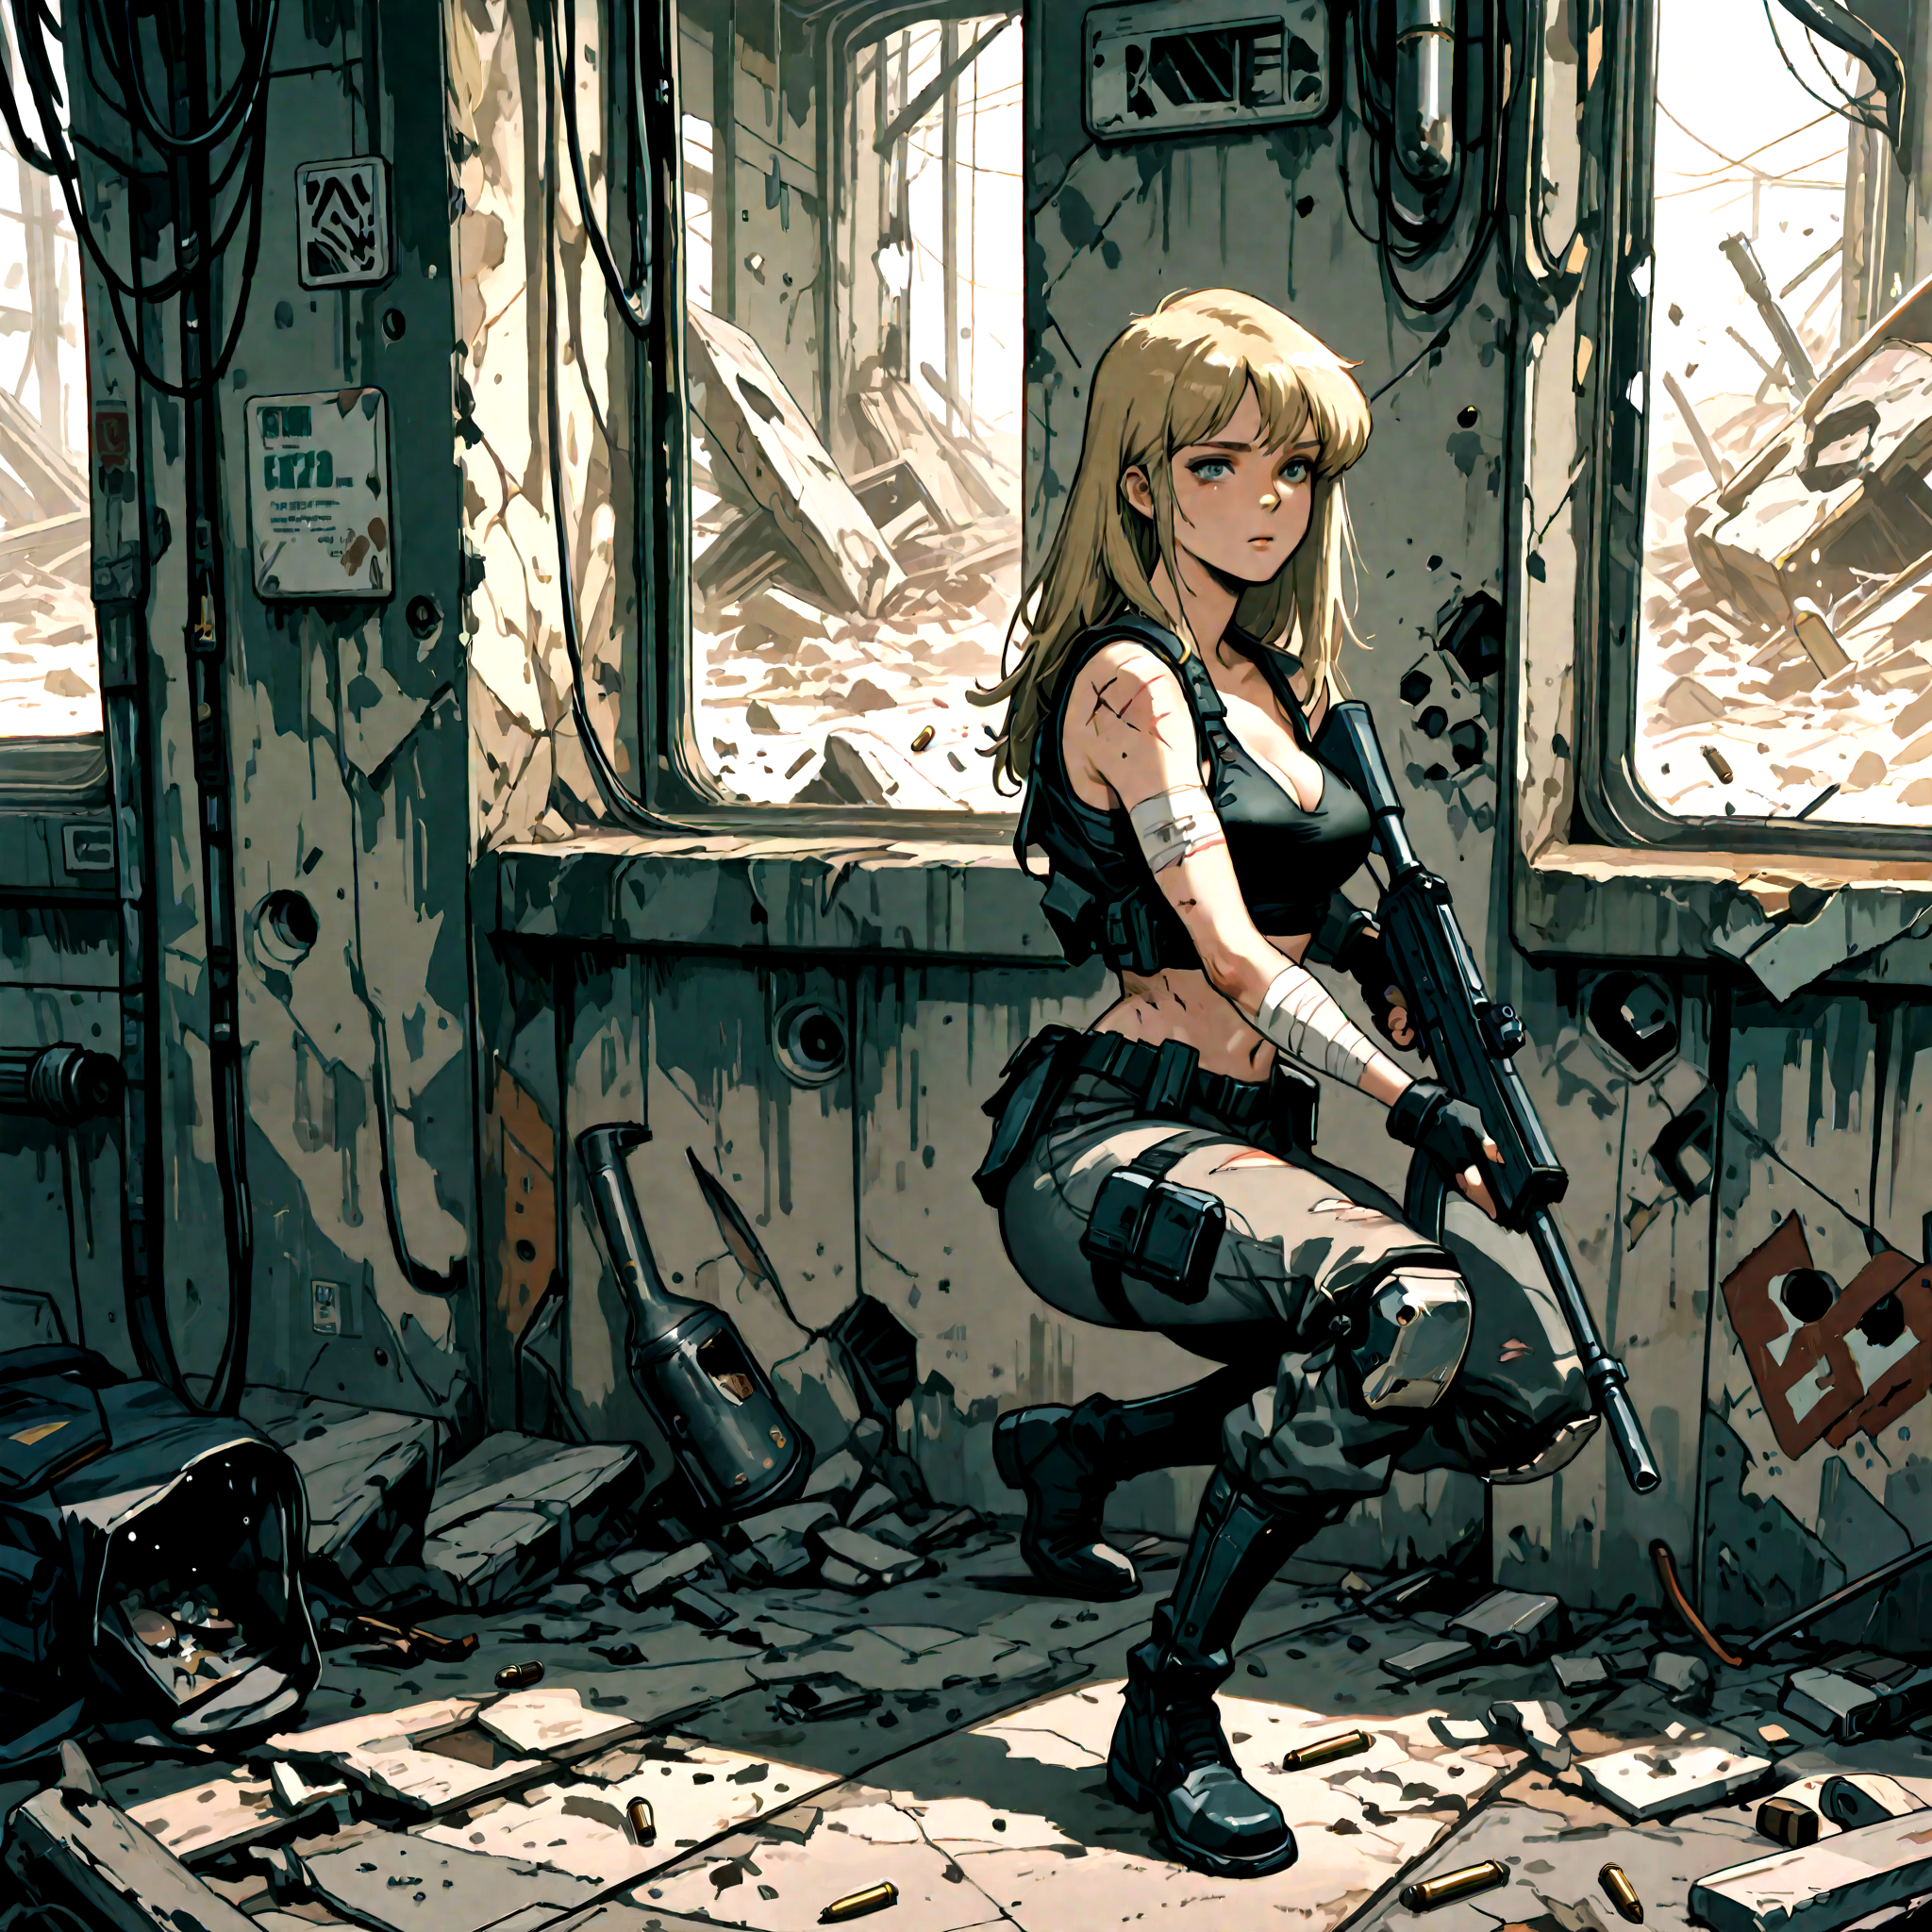
This way, I always end up with multiple strong candidates but only carry the best one forward. At this point, one character is fully rendered — and I repeat the same method for the second.
Step 3: Refining the Image with Style LoRAs and External Tools
After I’ve chosen the best candidate from the first round (KSampler + Daemon Detailer + upscale), I move into the refinement phase. This is where I polish the picture, enhance details, and push the style closer to what I want.
Style LoRAs and Second Generation Pass
The refinement starts by running the image through my 4-KSampler workflow again. But this time, instead of generating from scratch, I feed the previously chosen render back in as latent input.
From there, I apply style LoRAs to control the look and tone — adjusting things like shading, line quality, or overall aesthetic. This step takes the image from “good” to “exactly the style I’m aiming for.”
External Tools: TopazAI Bloom
Once I’ve selected my refined candidate, I run it through TopazAI Bloom Upscaler. This tool allows me to add micro-detail and texture, making the render look sharper and slightly more realistic without breaking the anime feel.
Face Detail Enhancements
Finally, I use a FaceDetailer pass to clean up facial features. This step fixes artifacts, smooths skin, and sharpens eyes, so the character looks more alive and consistent with the rest of the image.
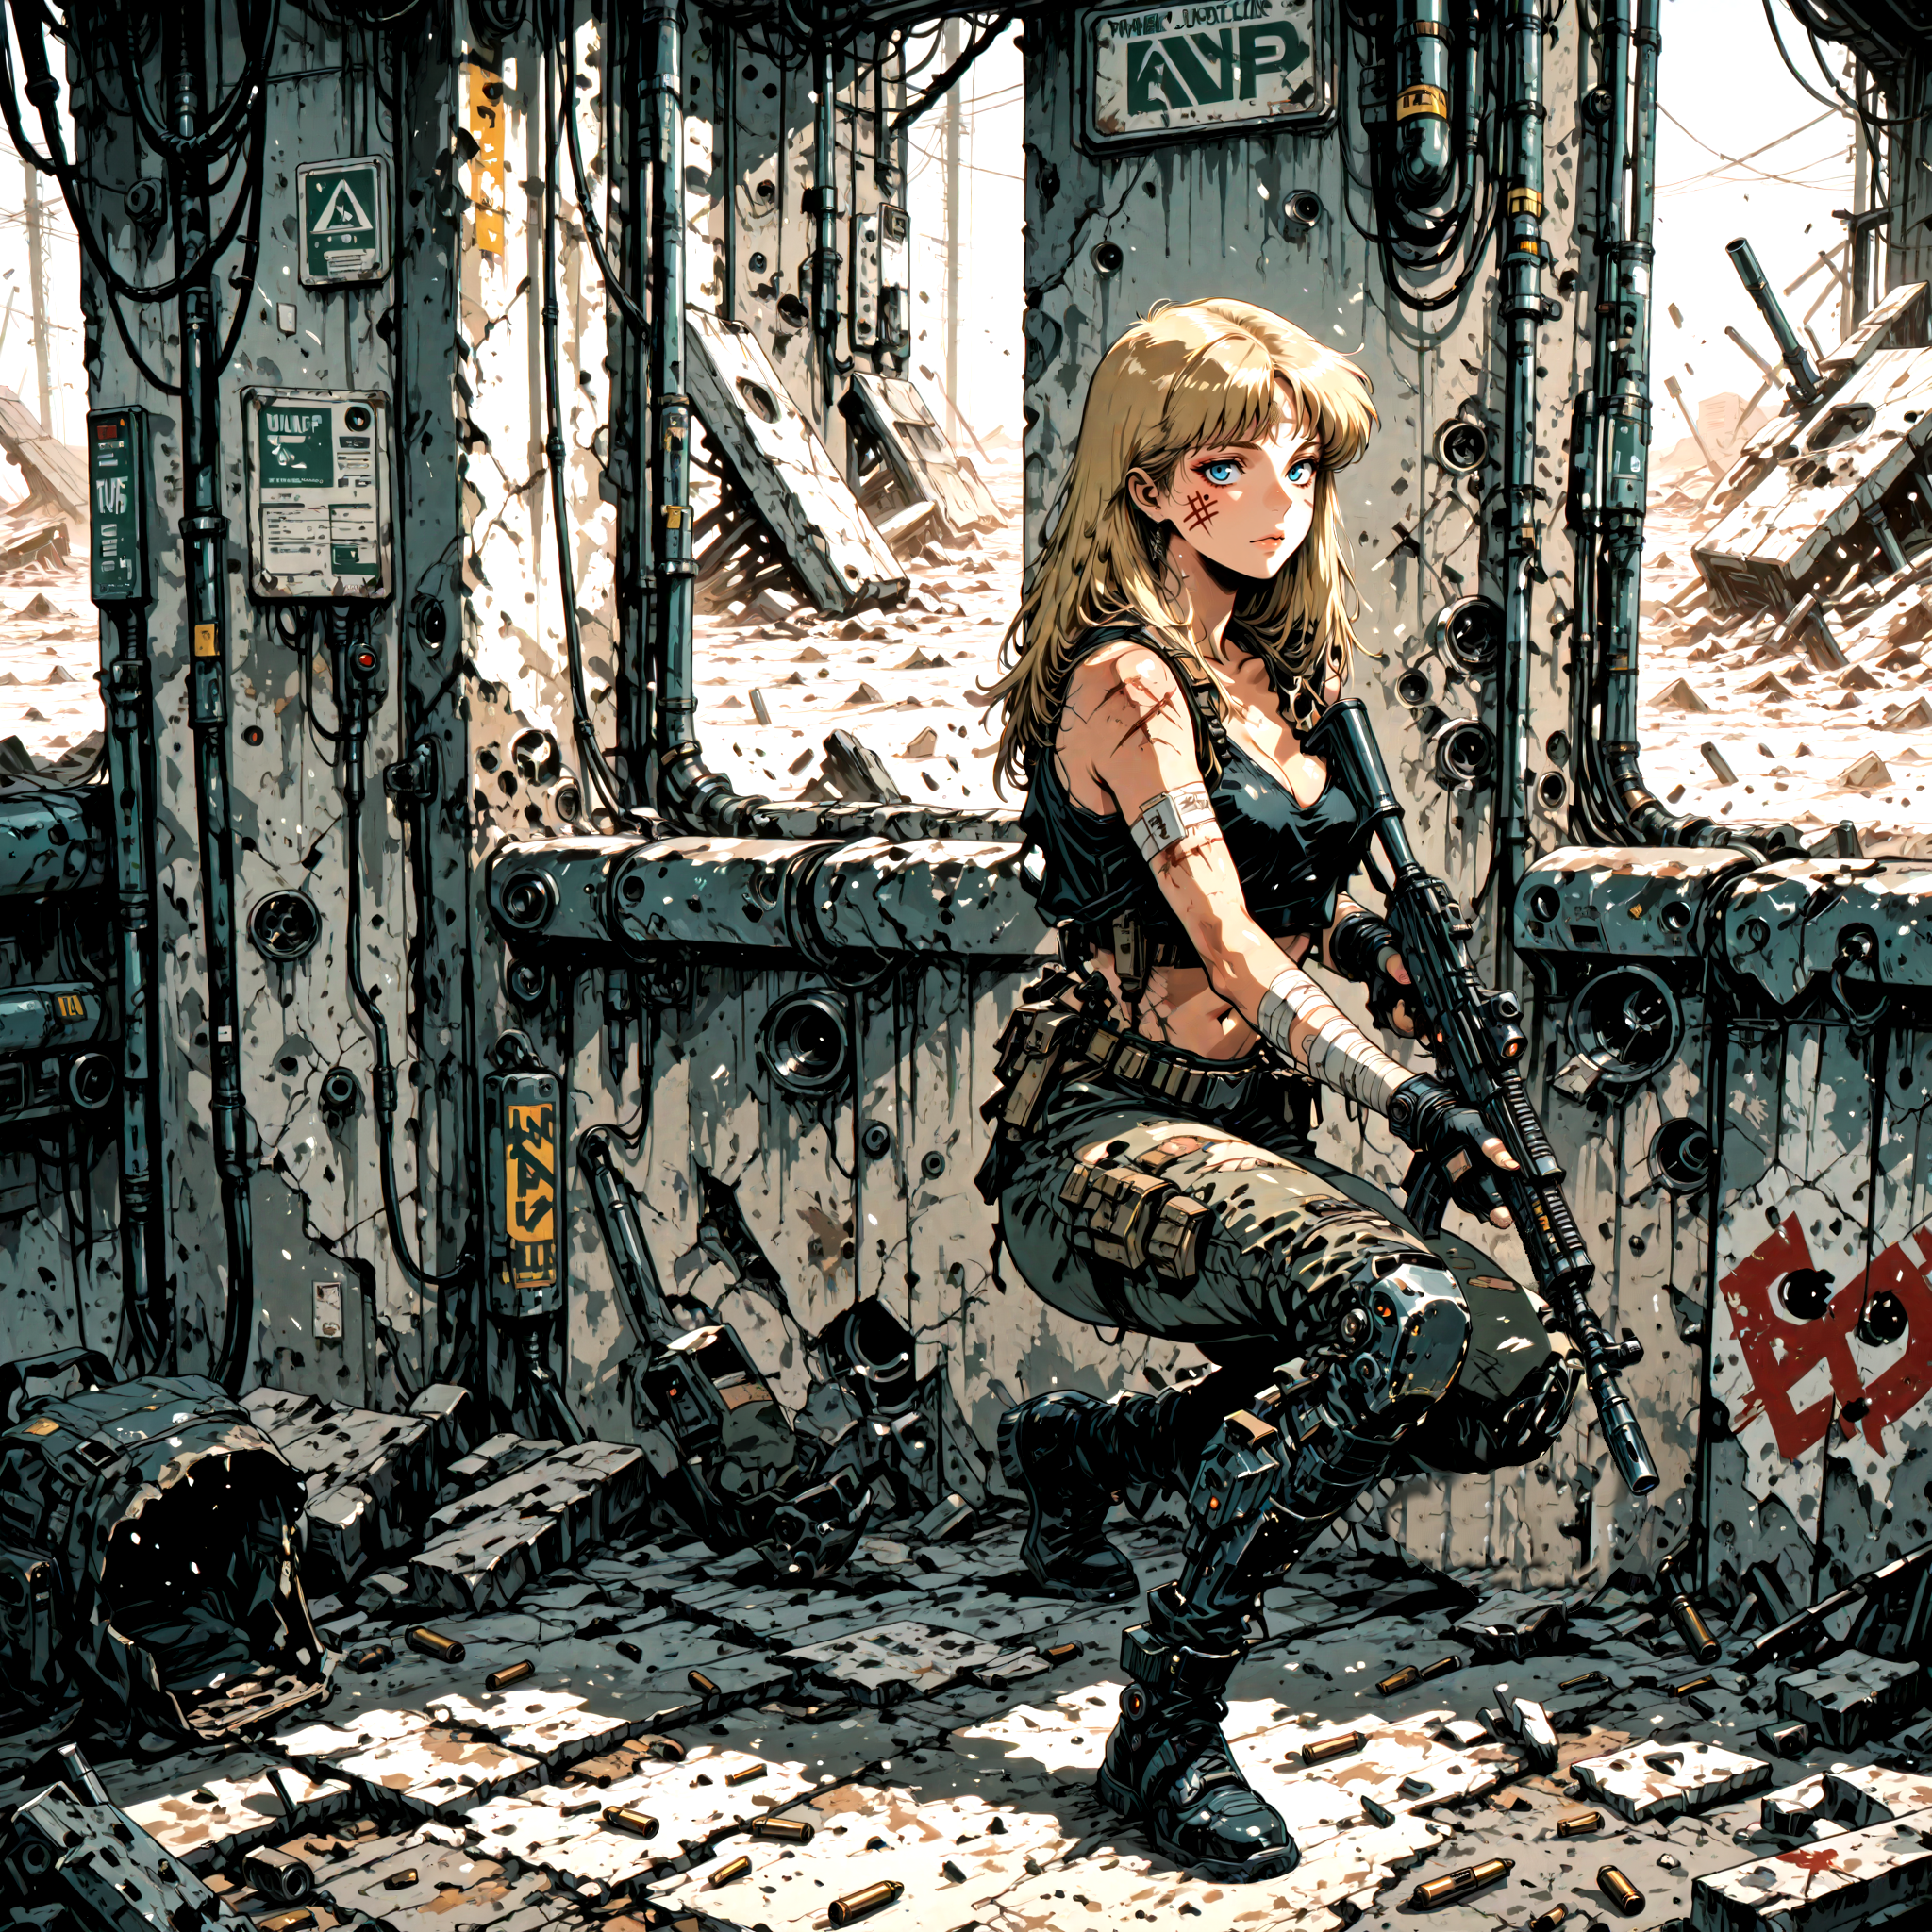
( final refined version afterseconde pass with lorA´s+ TopazAI + FaceDetailer)
Step 4: Combining Both Characters into One Scene
After refining both the male and female versions separately, it’s time to merge them into a single image — just like I planned back in Posemy.art.
For this step, I use GIMP (a free alternative to Photoshop). The process is straightforward but powerful:
Choose the stronger background – I compare both single-character renders and decide which one has the cleaner or better background. That image becomes the base layer.
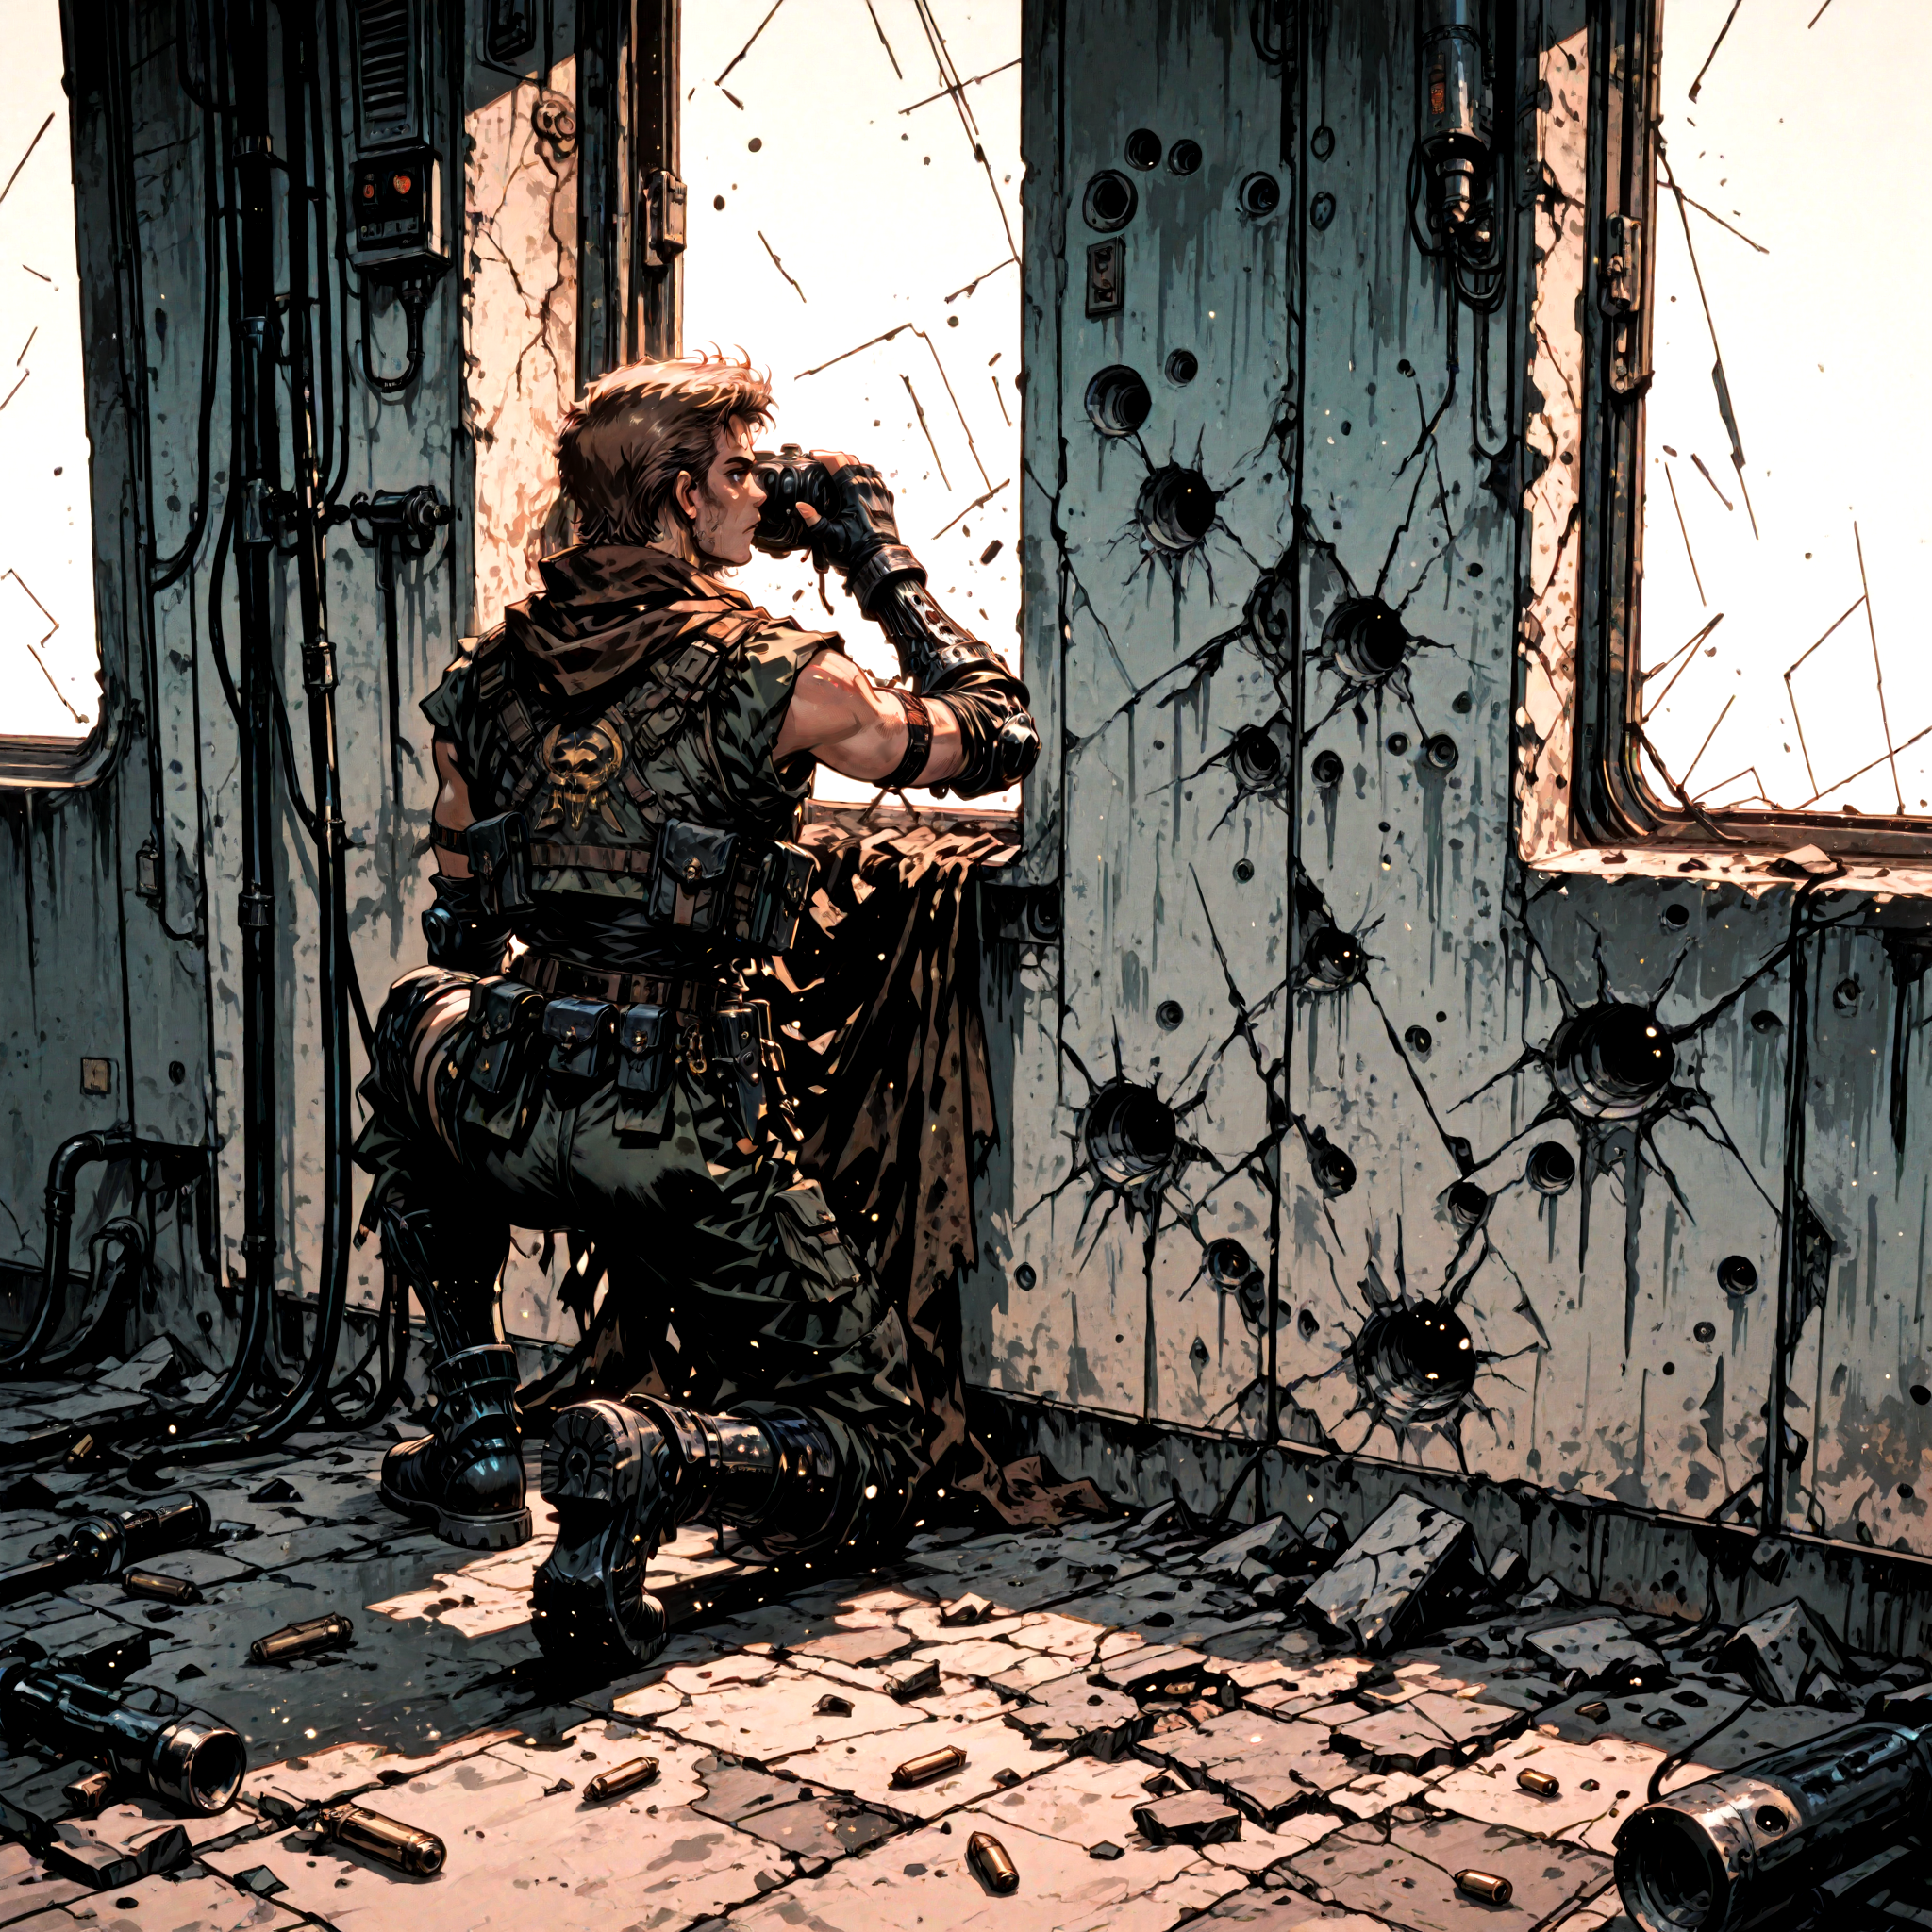
(male character render)
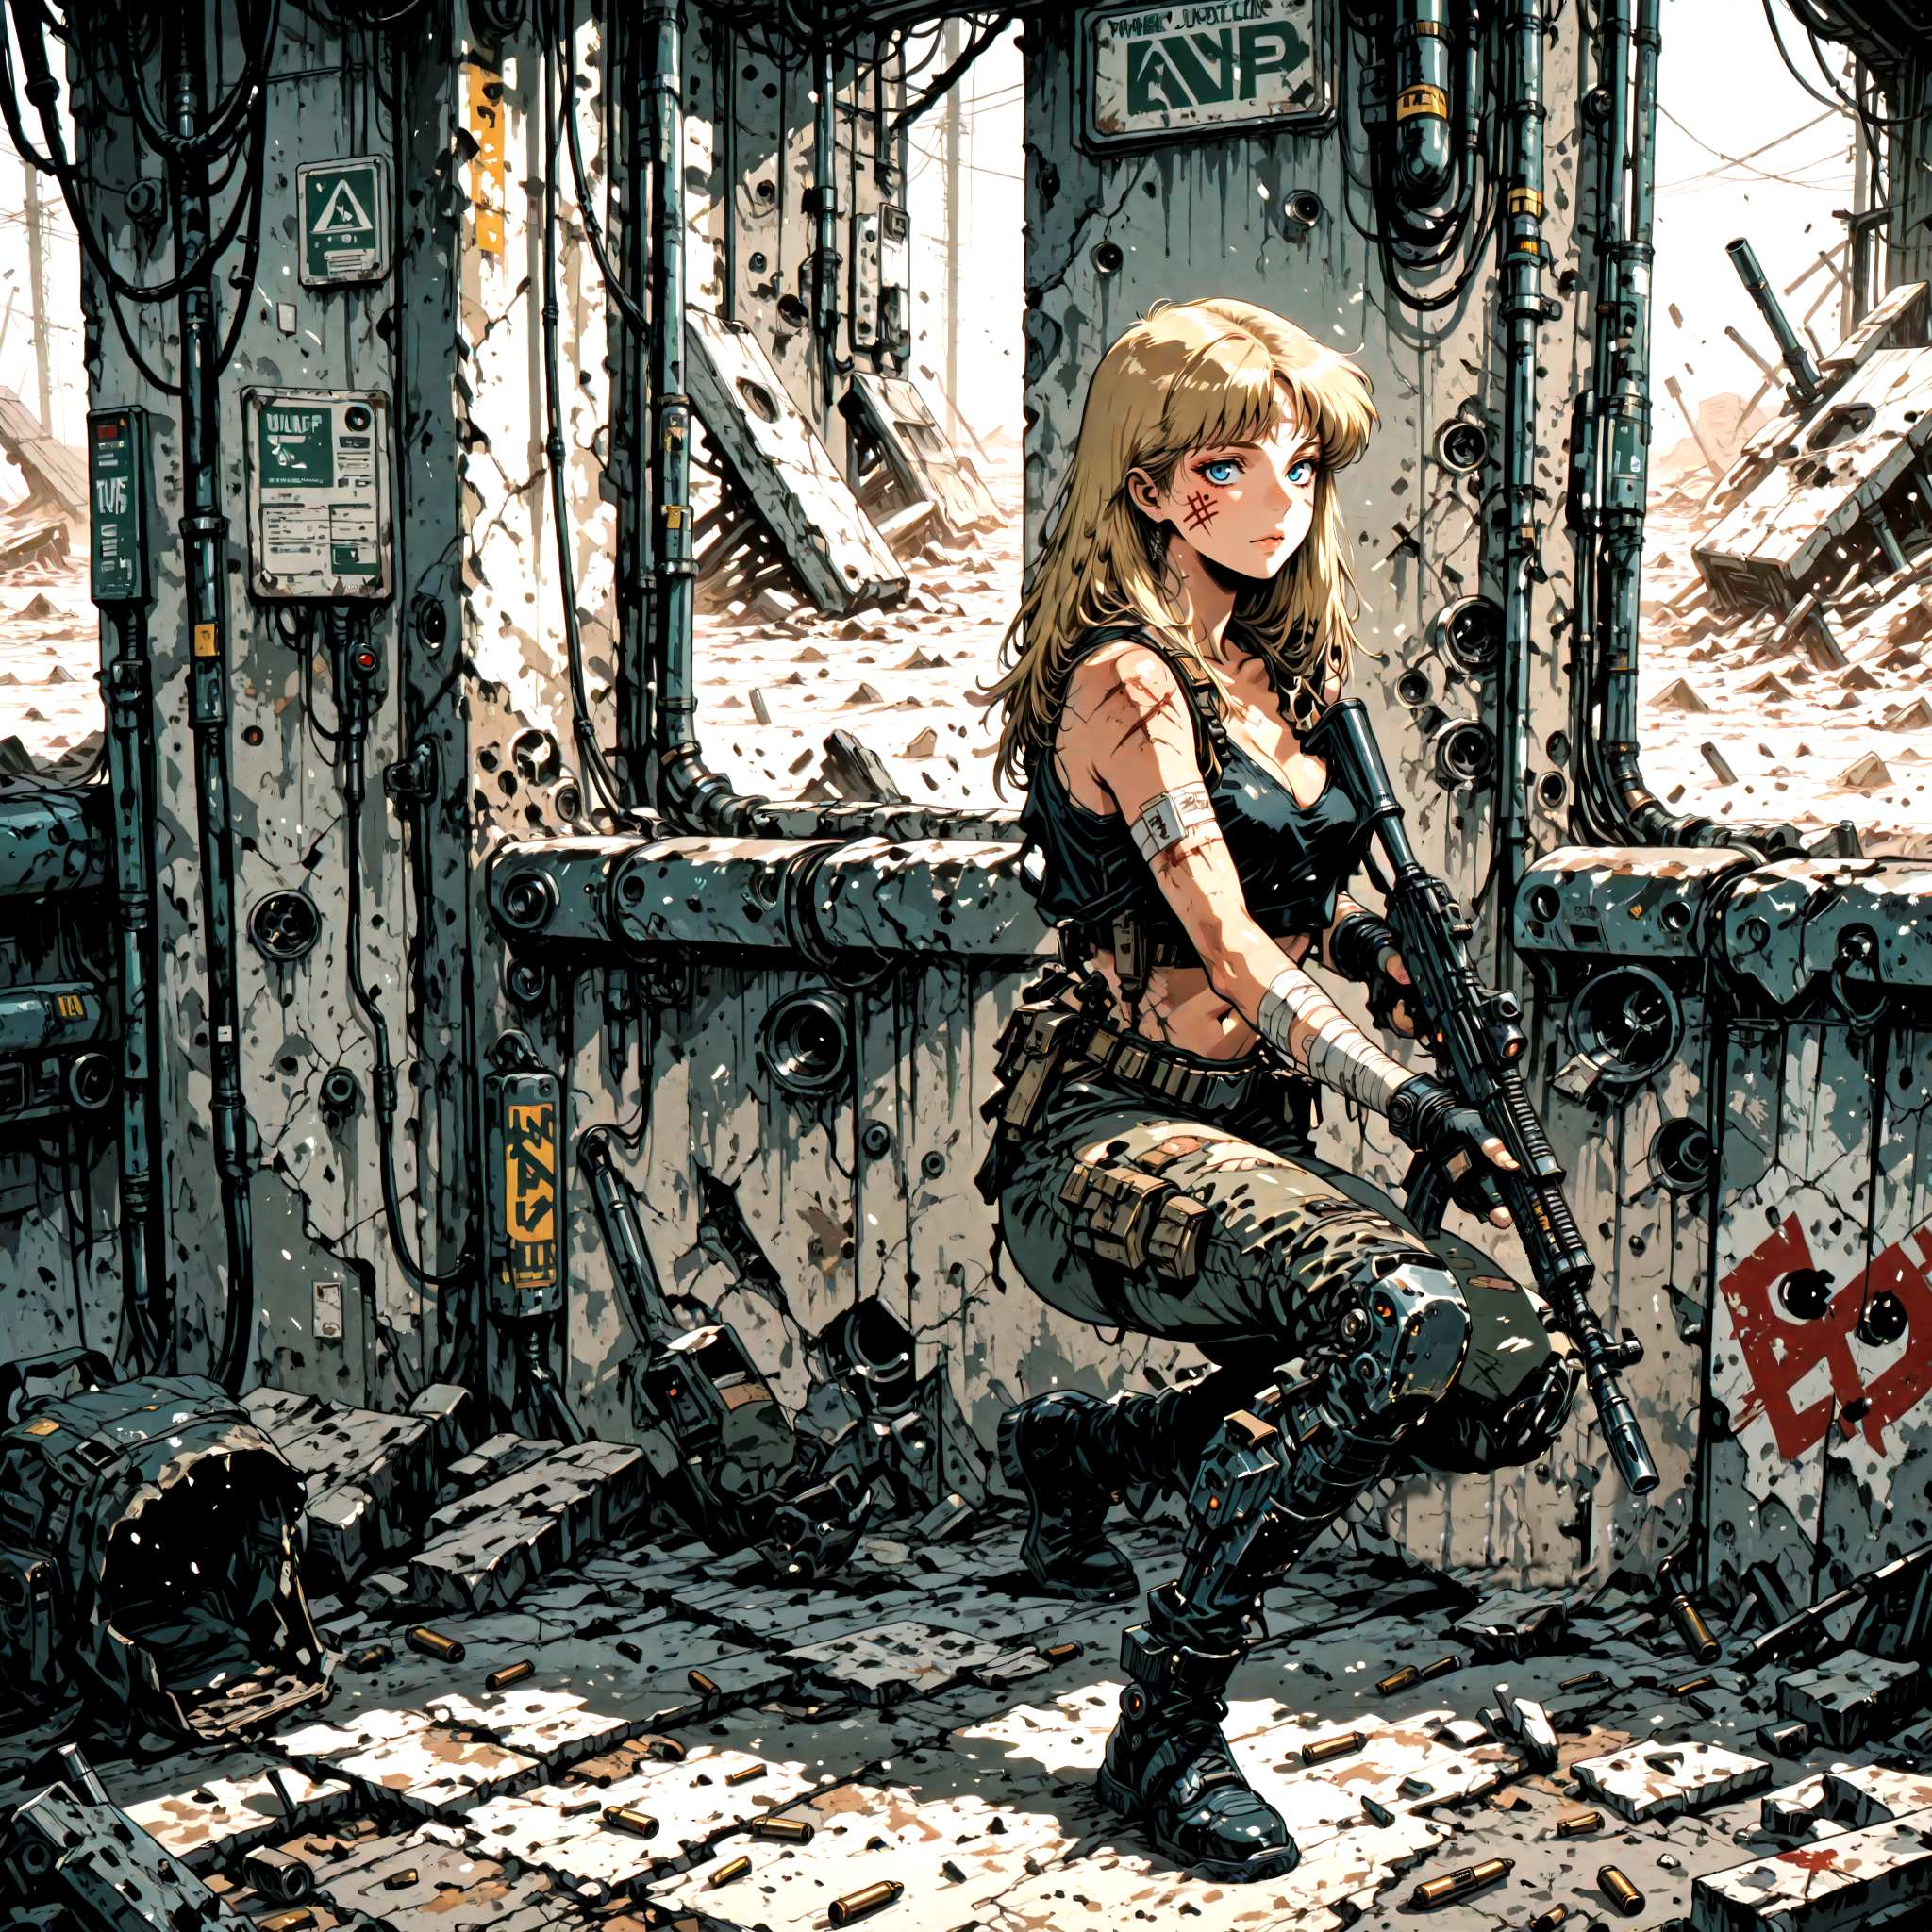
(female character render)
Cut and paste – I carefully cut one character out of their render and paste them into the other image.
Manual adjustments – With both characters now in one picture, I refine the details:
Redraw or erase hands if the AI produced awkward results.
Remove unwanted artifacts or clutter.
Adjust shadows and lighting so both characters feel naturally lit in the same environment.
Final filters – Once I’m happy with the composite, I send the image back into ComfyUI for a last round of filters and adjustments.
The result: a fully realized scene that matches the exact vision I sketched out in Posemy.art at the very beginning.
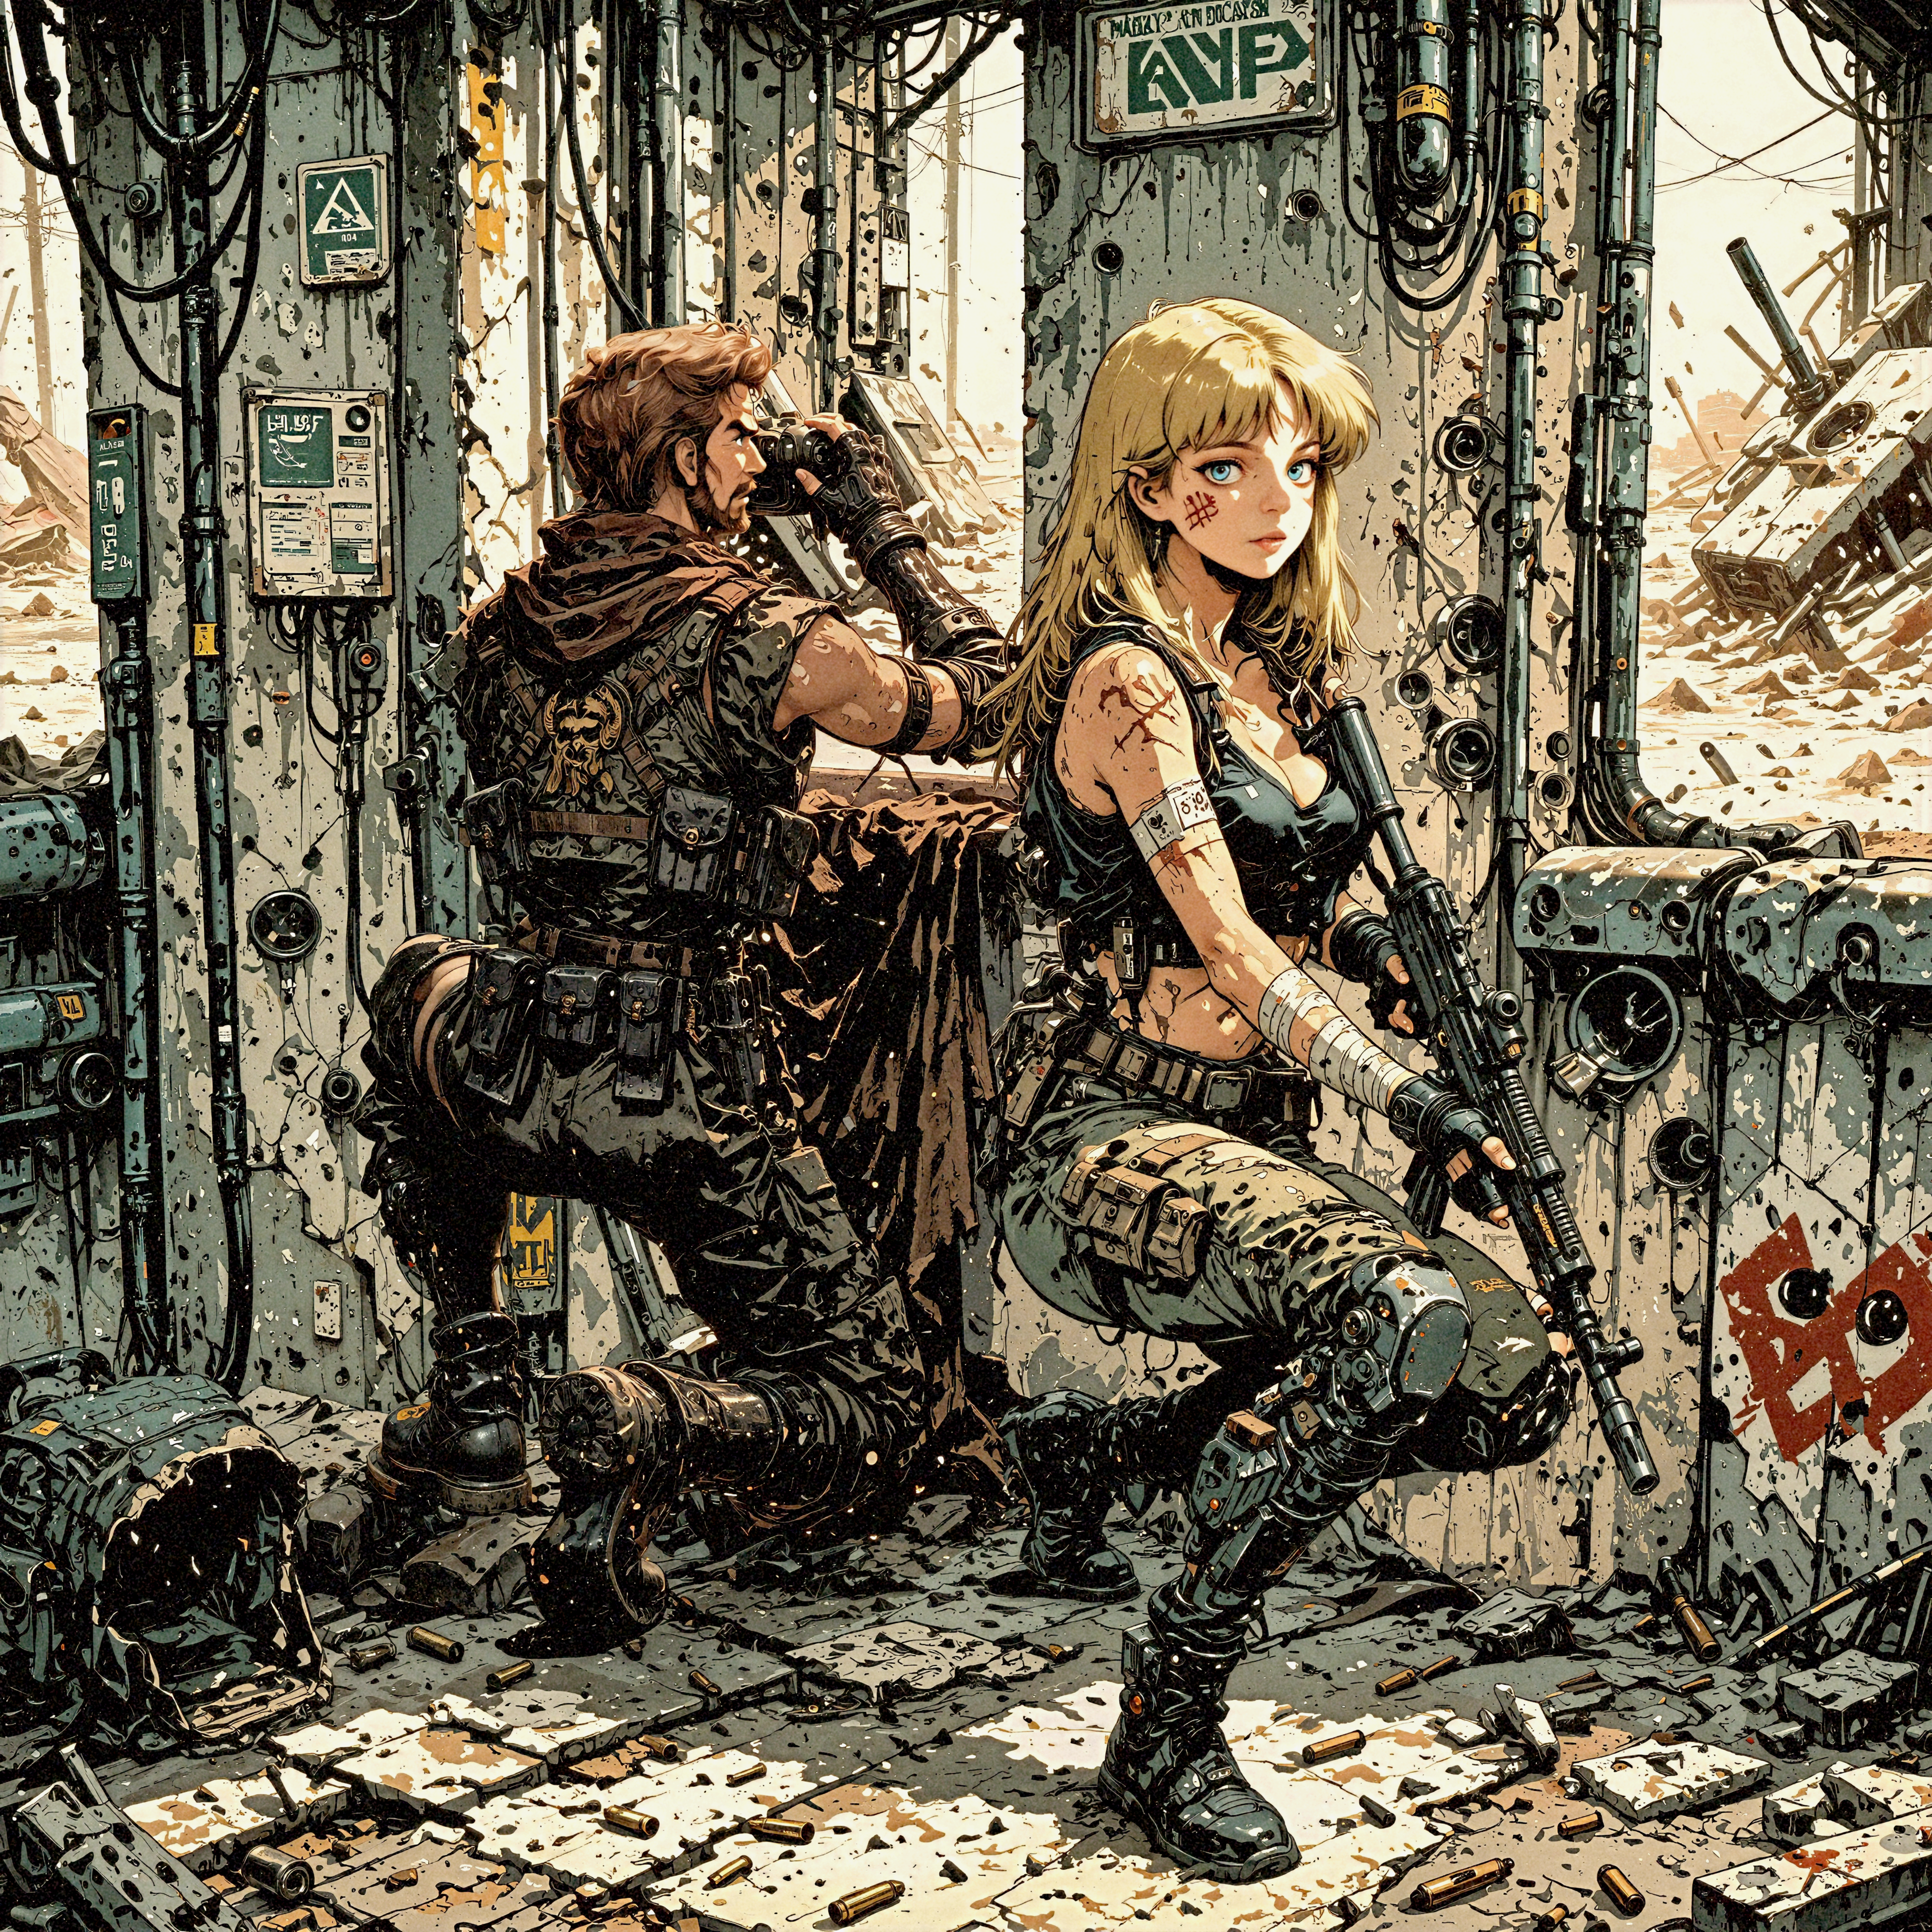
(final combined scene with both characters)
Final Thoughts
What might look like “just an AI picture” at the end is actually the result of a structured, multi-step workflow. Instead of relying on luck or a single prompt, I break the process down:
Plan the scene in Posemy.art so I know exactly what I want before I start.
Export ControlNet maps for each character separately, keeping backgrounds and lighting consistent.
Generate and refine with multiple passes (KSampler + Daemon Detailer + High-Res Fix + style LoRAs).
Enhance details using external tools like TopazAI and FaceDetailer.
Merge and polish both characters in GIMP, adjusting artifacts, lighting, and shadows until they look natural together.
This workflow takes more time than just hitting “generate,” but it also gives me full creative control. I can decide exactly where each character goes, how they look, and how they interact — something that’s almost impossible to achieve in a single generation.
In the end, it’s not just about making a picture, but about realizing a vision. AI is the brush, but the process is still in the artist’s hands.
Closing Words
I hope this walkthrough gave you some insight into how I approach complex AI scenes and why I work the way I do. If you try out parts of this process yourself, you’ll see that breaking things down into smaller steps makes the final result both more consistent and more personal.
Thanks for taking the time to follow along with my workflow — and I hope it inspires you to push your own AI creations further.
