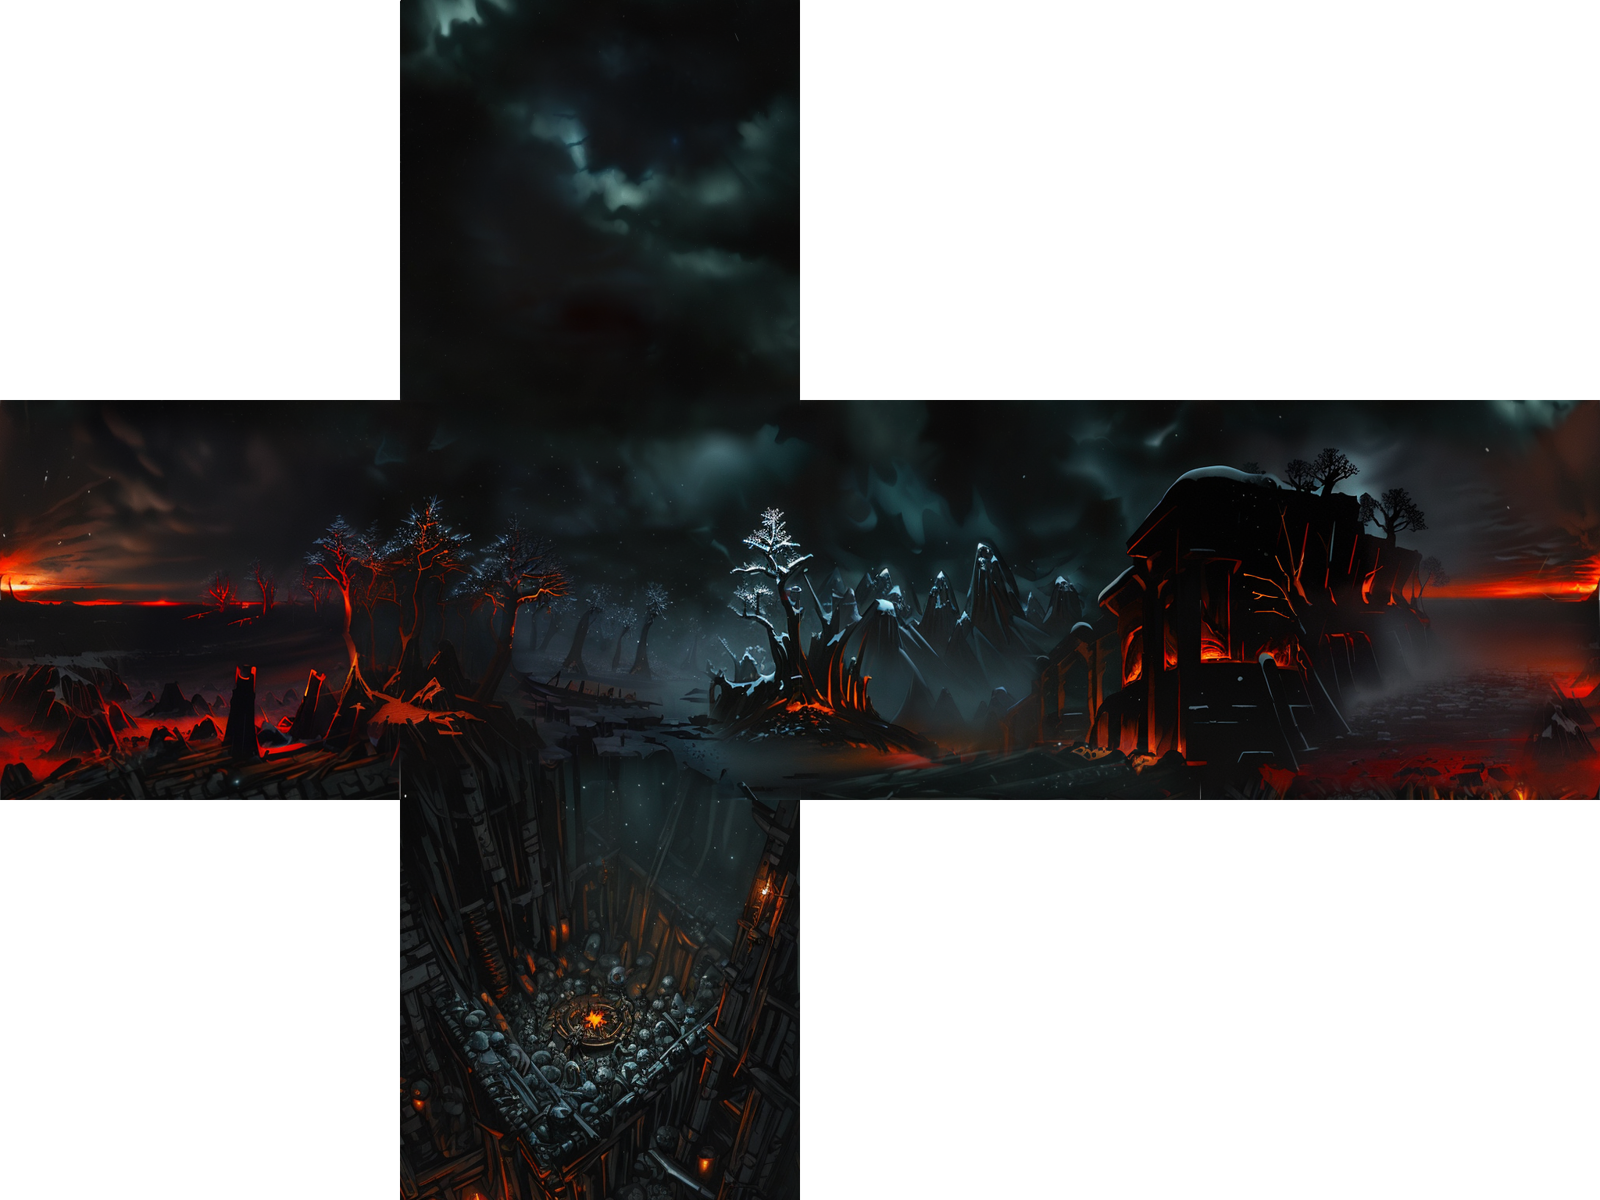
For a few years now I've had a hobby of making TF2 maps. Here are some of my works:
https://tf2maps.net/downloads/cp_bruhstbowl.12163/
https://tf2maps.net/downloads/pl_boatload.13076/
Because I'm still fond of my hobby, this guide will focus particularly on making Source engine sky textures. The texture alignment (which faces conect to which other ones) may be different in other engines, and some engines may not use cube-projected skies at all.
Step 1: Generate and save your 6 images
To help us visualise where each image will be in relation to each other, I'll start with BlockadeLabs SkyboxAI, but do note that using txt2img or starting with an existing sky texture is just as valid.
Here's the skybox I created: https://skybox.blockadelabs.com/11999f7a797eab389957e362213170c0
We encounter our first problem here - SkyboxAI generates a panorama, but we want a cubemap! Luckily, there are a few online tools for converting panoramas to cubemaps.
I use this one.
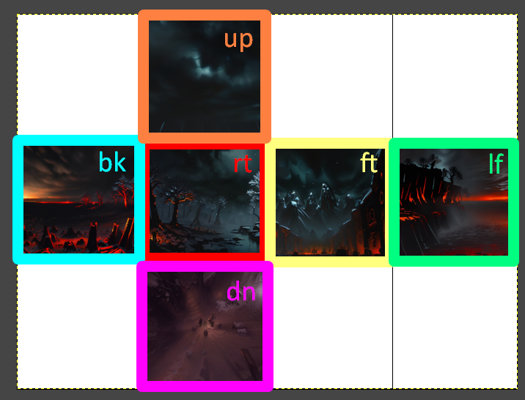
Here's our first glance at how our image layout will look:
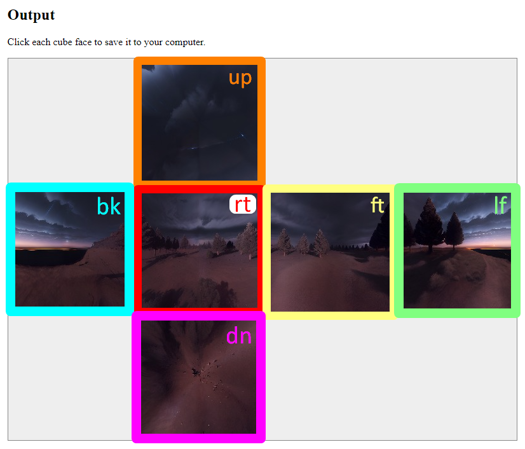
This also gives us a glance at the folder naming structure I'll be using.
Create a new folder in your location of preference. Mine is "C:\Desktop\custom textures\".
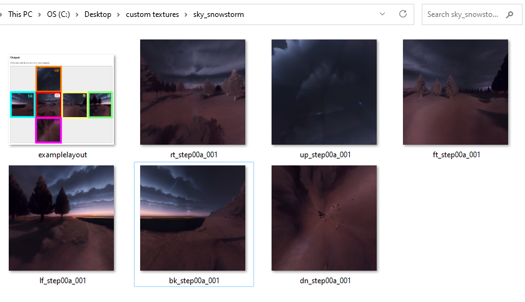
In this new folder (I called mine sky_snowstorm), save the image faces from the cubemap website, and give them the name I've drawn on them, plus _step00a_001. Example: up_step00a_001, ft_step00a_001.
Here's what the final output looks like for me:
Step 2: Re-generate/stylise your images
Now, we can drag these textures from this folder into Stable Diffusion's img2img, where we can start to infuse them with whatever style we want.
Stable Diffusion will also conveniently convert them from 1536x1536 (a resolution that won't work in Source) to 512x512 (a resolution that will).
The way that my naming system works is that I'll increment the step number to be 1 more than the image I'm basing it off, so if I'm using a "step00" image as input, I'll save the result as "step01".
So, the result images will be up_step01a_001, ft_step01a_001 and so on.
The model I'll be using is DreamShaper_4BakedVae.safetensors.
The prompt I'll be using is "(((snowing, snowstorm, falling snowflakes))), (videogame sky texture, best skyboxes, highly detailed photo of clouds), ((midnight, dark sky, dark clouds)), rimlight, lit from the side by blue moonlight, 1810s christmas painting, ((extremely dark)), distant dead trees on top of black rocks" with the negative prompt "((pink sky, fog, mist, hyperrealistic, cliff, quarry, mesa)), ((buildings, town, city, houses, cottages))".
I'll also be using a generic quality style, my Half-Life 2 Concept Art LoRA (with a weight of 1) and v1 of this awesome Darkest Dungeon LoRA (with a weight of 0.5).
I also used random seeds and changed the prompt around a little per image (adding "air exchange, grey-red sky" for lf and bk, changing the prompt to have no trees for up and dn). Don't worry, our method means that won't cause any major issues.
It can be particularly challenging to get up and dn to look the way you want. This is where the fact that we're using img2img comes in handy, because we can turn down the denoising strength or use ControlNet. For this sky texture's "dn" I had to turn the denoising strength all the way down to 0.4!
Step 3: Lay out your images
You'll need an image editing program. I use GIMP, because it's free.
Create a 2048x1536 project.
GIMP has a really handy grid feature, which we'll want to have on:
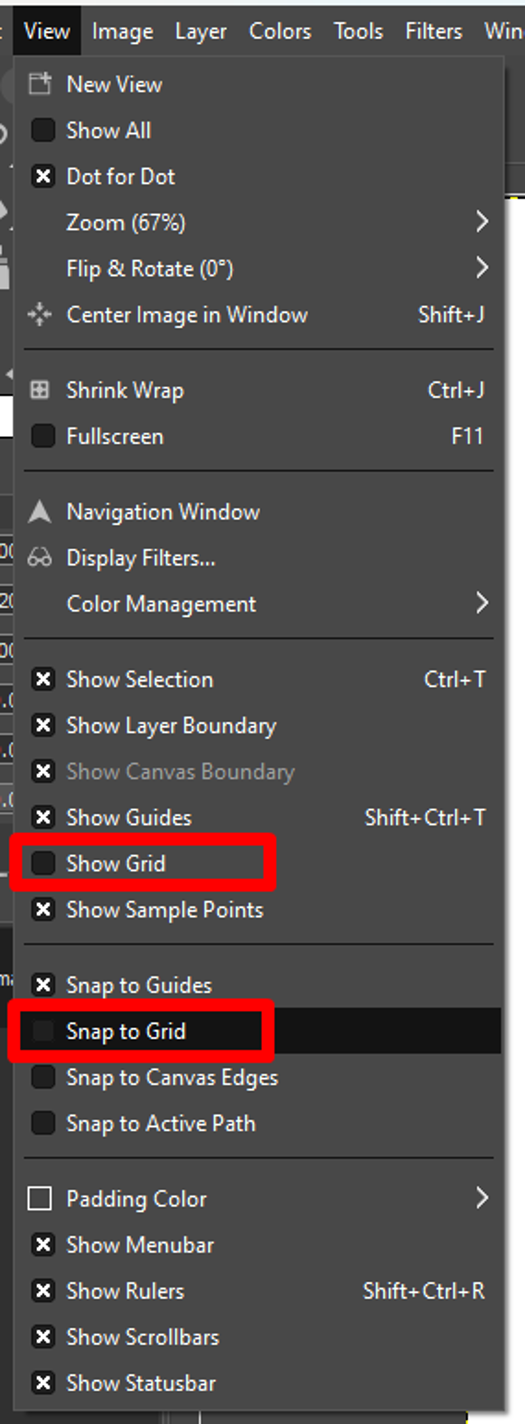
We'll also want to set it to 512 pixels:
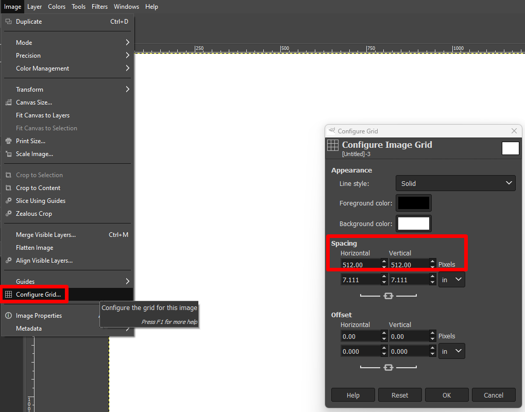
Using this grid, we can drag our six re-generated images (up_step01a_001, dn_step01a_001, etc...) into GIMP, making sure to follow the exact same layout as earlier:
Don't worry if your images don't match up perfectly yet!
That's exactly what we're about to fix.
Go back to Image > Configure Grid and set it to 256. This will let us select the halfway point between two images.
Make a new folder in your equivalent of sky_snowstorm and name it "combined".
We want to make the following combinations:
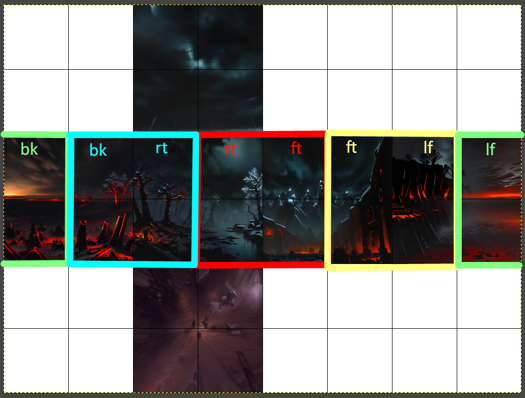
Making the first three is pretty simple.
Here's an example with "rtft":
Select the region:
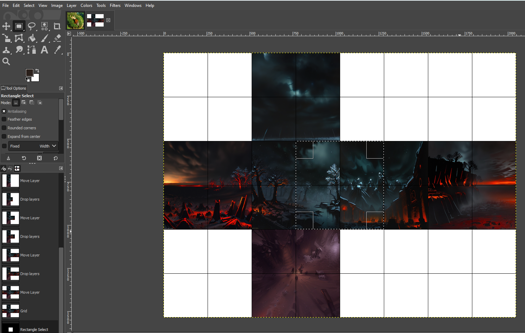
Click Image > Crop to Selection:
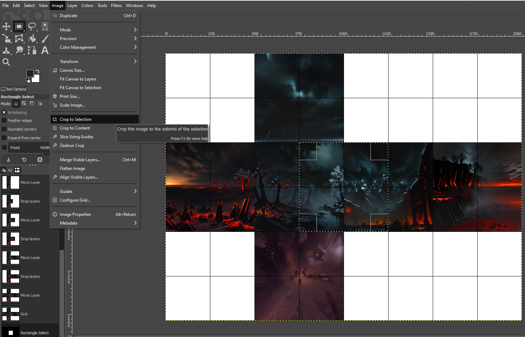
Export the image into the combined folder:
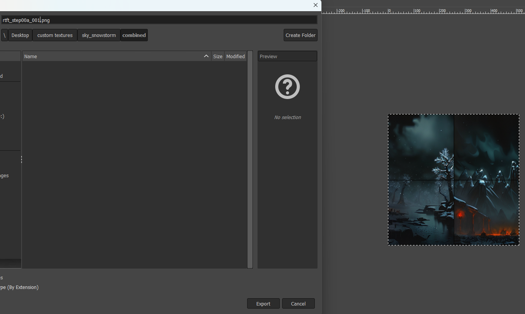
Make sure to use Ctrl-Z to undo the cropping, and...
Done!
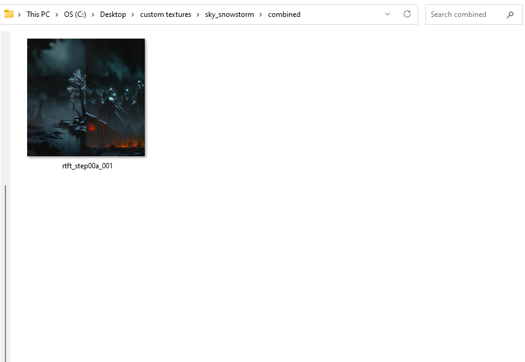
The process for making the lfbk combination is a little harder:
Make copies of your lf and bk images in a little bit of empty space:
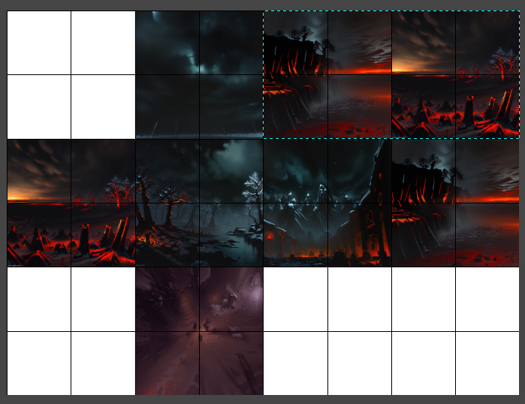
Select the region between them:
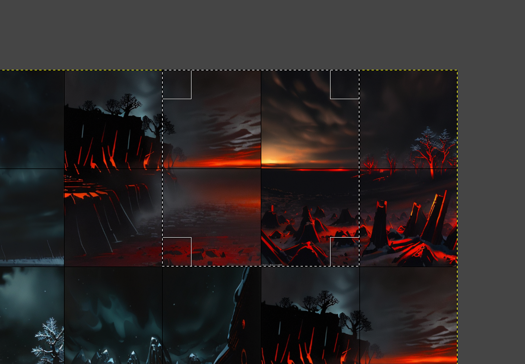
Crop to selection, export, undo:
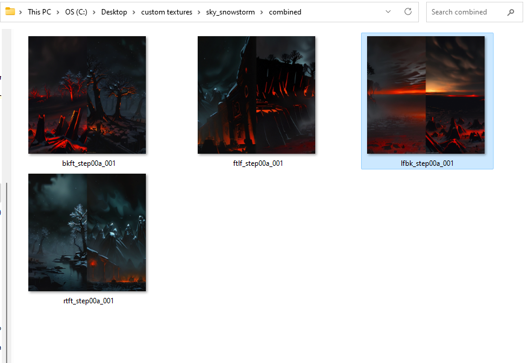
Step 4: Re-regenerate your images
Now that we have four combined images, we can throw them back into Stable Diffusion, this time with a denoising strength of around 0.5 or 0.55.
This will smartly "fix" the ugly seam between the two images:
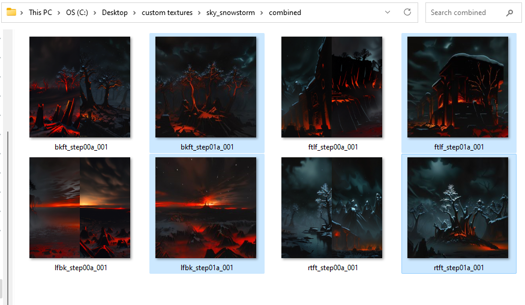
Great!
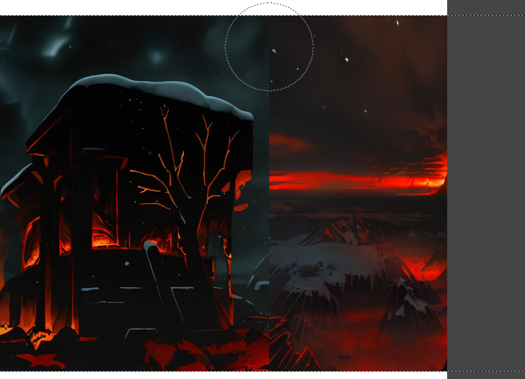
But when we put these back into GIMP, you may notice that we've just created new seams:
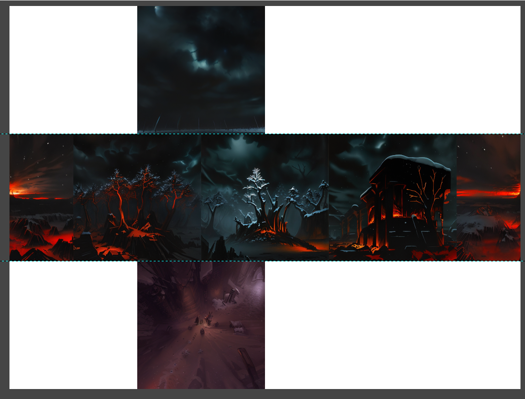
This is still no problem! All we need to do is right-click on the layer for each of our combined images and click "Add Alpha Channel":
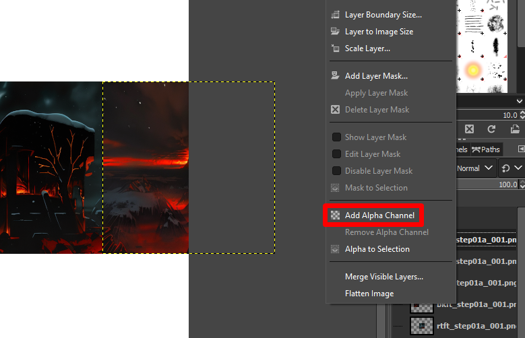
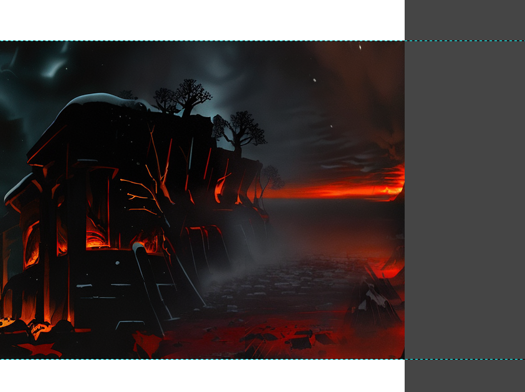
Then we can use the Eraser tool (with a 50% hardness brush) to erase the joins between each of them, so that the original images show underneath.
Before:
After:
After repeating this with the other three seams, we get a completely seamless strip:
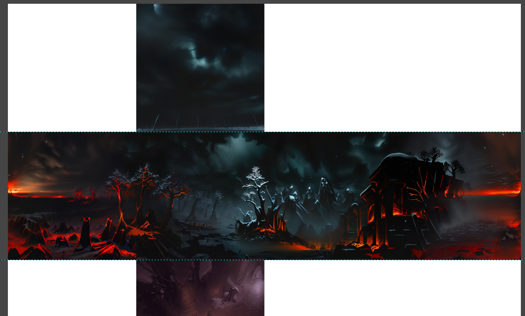
Fantastic! Let's get to exporting:
Step 5: Export your images
Using the same method as earlier, select your rt, ft, lf and bk images and export them.
A quick refresher:
Select the region:
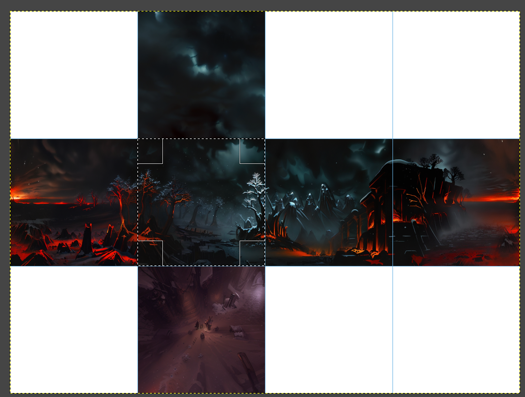
Crop to Selection:
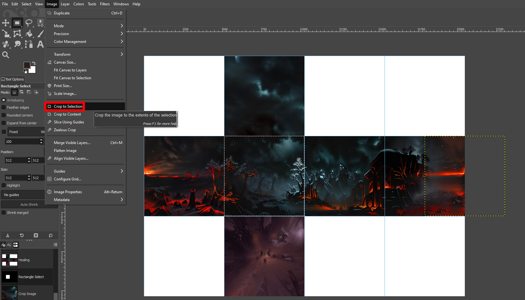
Export:
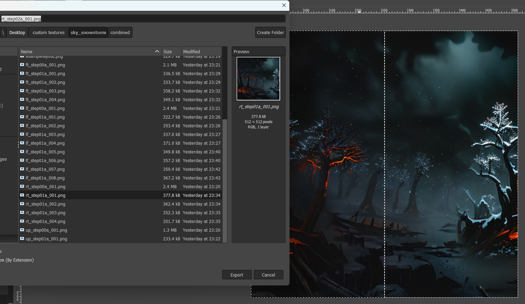
Undo and repeat for the other three horizontal images.
The reason why we're not doing this for "up" and "dn" is because they actually don't align with the four horizontal images. We need to do more layouting work.
Step 6: Lay out your images... again
Create a new folder in your equivalent of sky_snowstorm, and name it "combined2".
Create a new, 1536x1536 GIMP project and remember to set up a 512x512 grid.
Drag your "up_step01a_001" image into the centre of the new project:
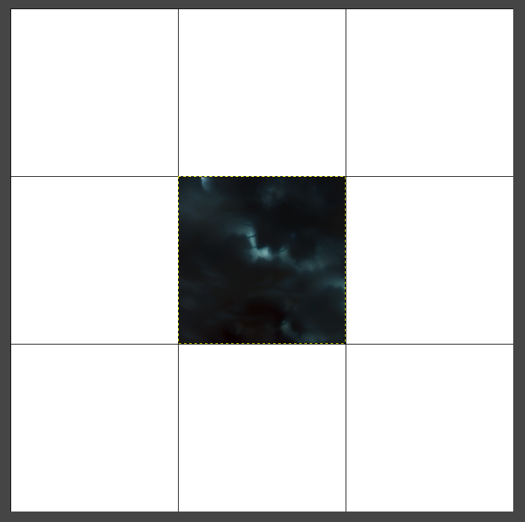
Now, look for the "rt_step02a_001" image that you should have just exported in Step 5, and place it right below "up_step01a_001" in this new project:
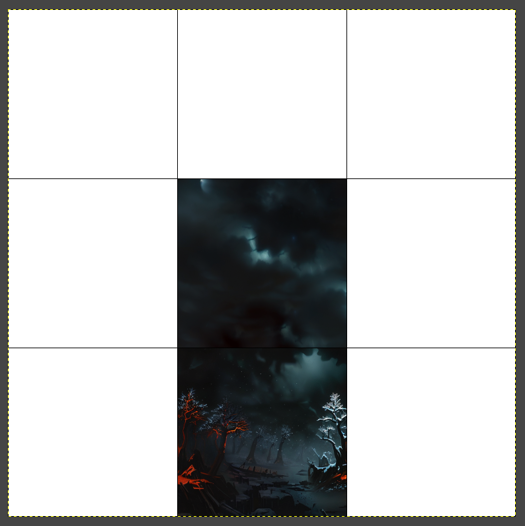
Aligning the other three is going to be complex.
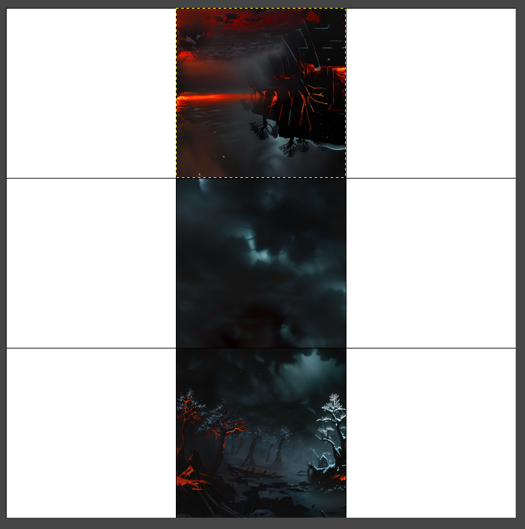
The simplest is "lf_step02a_001". Rotate it 180 degrees (Ctrl-R gives you the Rotate tool in GIMP) and put it above "up_step01a_001":
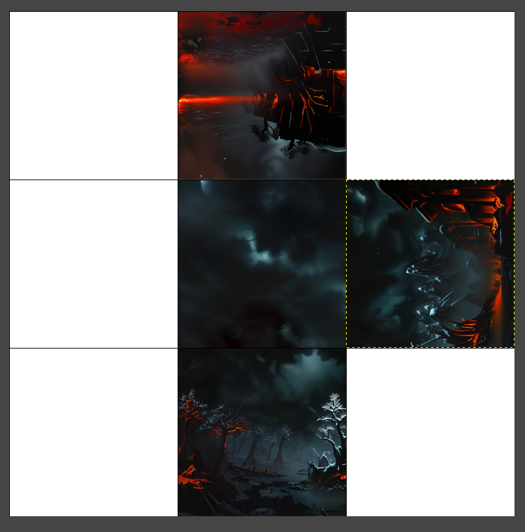
Next, "ft_step02a_001". Put it on the right of "up_step01a_001" and rotate it -90 degrees so that it looks like this:
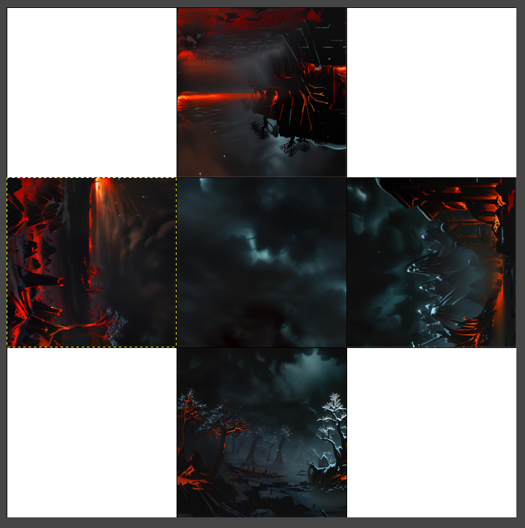
Finally, "bk_step02a_001". Put it on the left of "up_step01a_001" and rotate it 90 degrees so that it looks like this:
Now, set the grid to 256 and select this region:
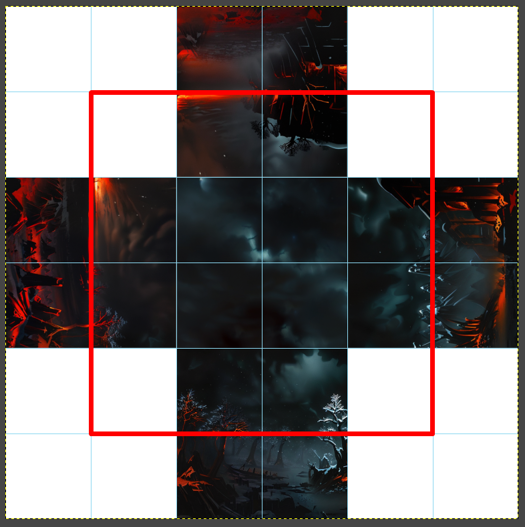
Then, Crop to Selection and export it into the new "combined2" folder as "upall_step00a_001".
As it happens, we've actually created an 1024x1024 image that we can throw into Stable Diffusion, to give us the following result:
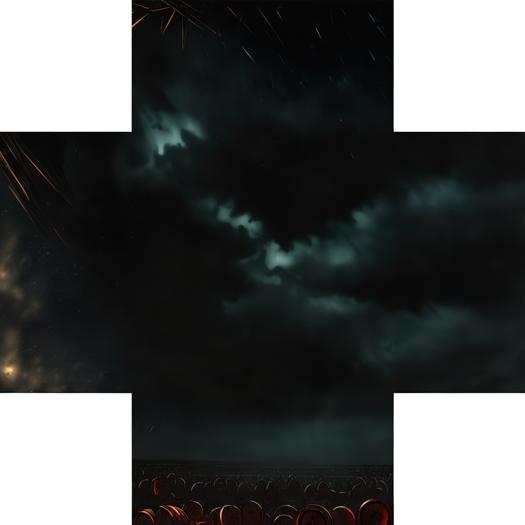
So, we can use the same method to remove seams as before, except a little different:
Drag this new image ("upall_step01a_001") into your original project, add an alpha channel to it and duplicate it four times.
The first copy should be overlaid over "up_step01a_001":
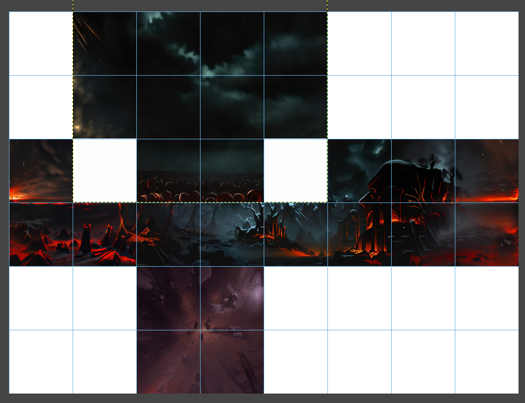
Then, select the "up" part of the image, hit Ctrl-I to invert the selection, and hit Delete.
This will give us this result:
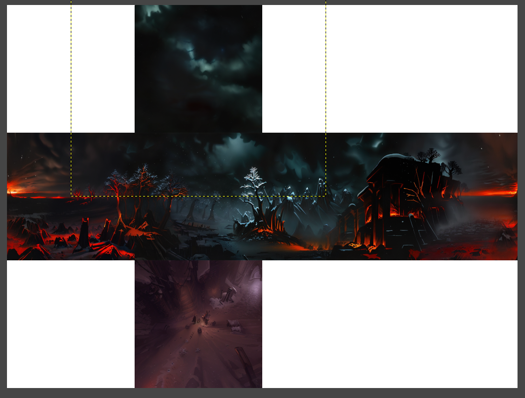
For the second copy, overlay it over the same place, but select this region instead:
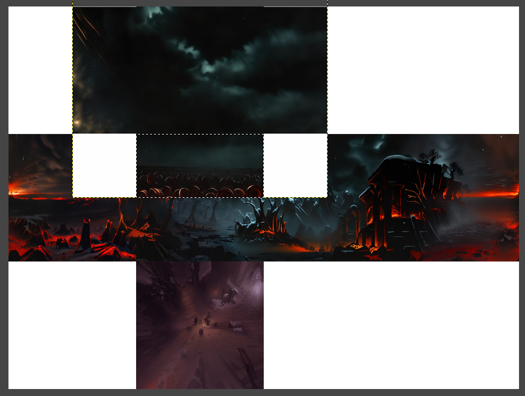
Then invert, delete, and use the eraser tool to make it fit better with the texture below it:
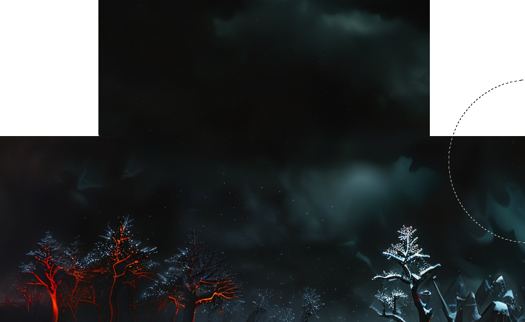
For the third copy, we want to overlay it over here:
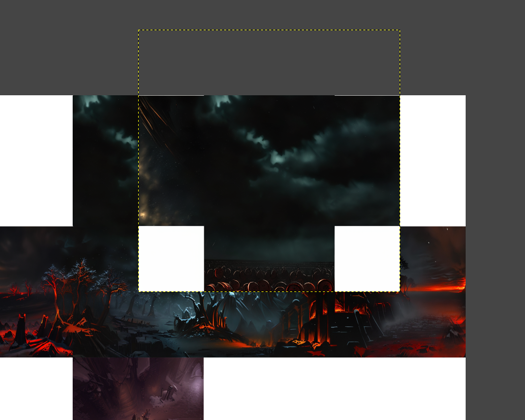
Use Shift-R to rotate it 90 degrees, then select this region, invert and delete:
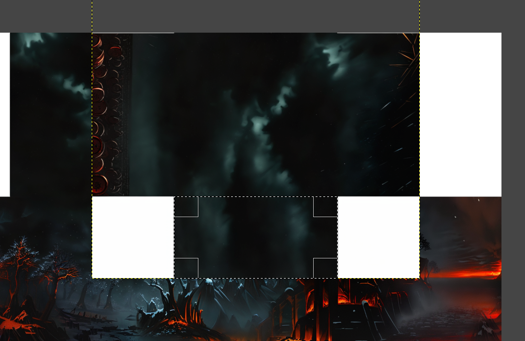
For the fourth copy, we want to overlay it over here:
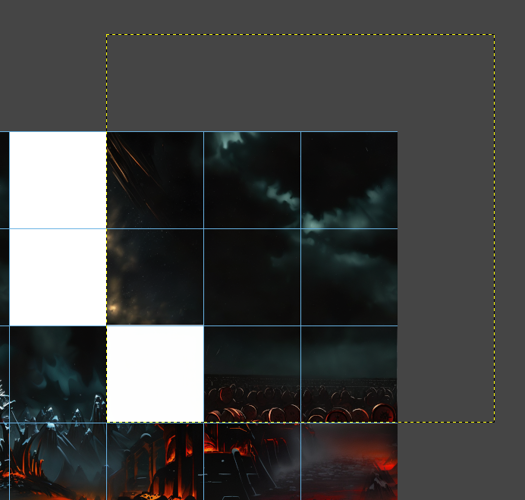
Then rotate it 180 degrees, select this region, invert and delete:
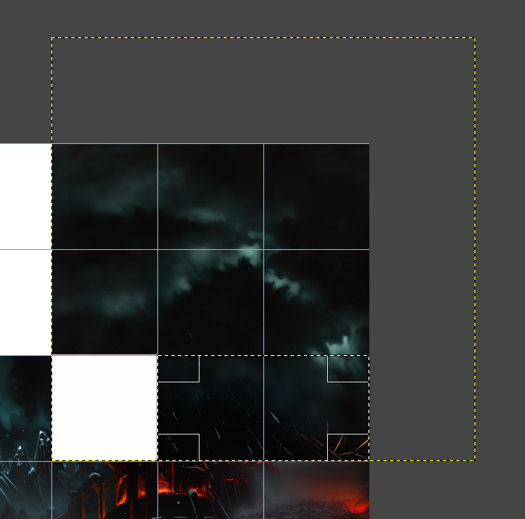
For the fifth and final copy, overlay it over here:
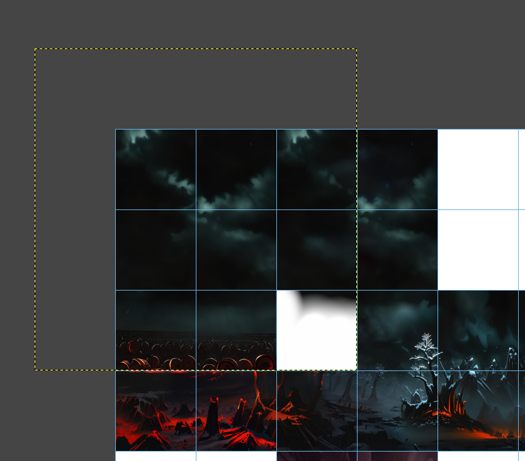
Then rotate it -90 degrees, select the usual bottom region, invert, delete and use the eraser to smooth it out.
When erasering these overlays, make sure to create a shape something like this:
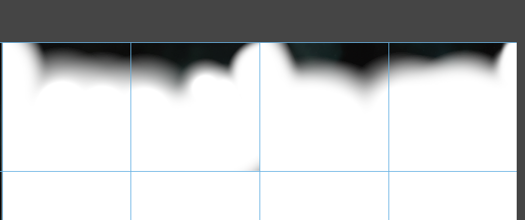
This shape ensures that no new horizontal seams will be created by these overlays.
Finally - and as exhausting as that was - you need to repeat this WHOLE step, but with the "dn" texture instead of the "up" texture.
Here's roughly what the layout for the project should look like for that:
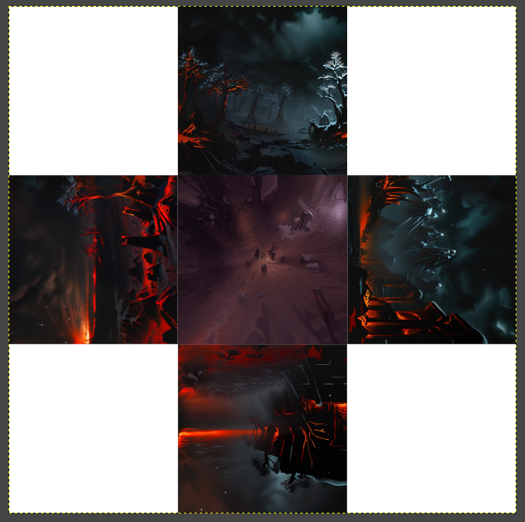
You can build this off the "upall" project by simply dragging "dn_step01a_001" into the project and putting it on top of "up_step01a_001". Then, you swap the positions of "lf_step02a_001" and "rt_step02a_001", and you rotate "bk_step02a_001" 180 degrees (and also rotate "ft_step02a_001" 180 degrees).
You'll also need to rotate the combined image differently for "dn".
Phew, that was a lot of work! But thankfully, we're ready for the reward:
Step 7: Export your images for Source
Set the grid to 512.
Select each individual image, crop to selection, and export. You remember how, right?
This time we'll call them "sky_snowstorm_01rt", "sky_snowstorm_01up" and so on.
This is so that Source will properly recognise which textures to reference when you type "sky_snowstorm_01" in Hammer.
MAKE SURE you name the "lf" face "sky_snowstorm_01lf" instead of "sky_snowstorm_01lt". This has tripped me up in the past.
I'll be exporting them as TGA for this step, but I'm not sure if it's actually necessary.
Now, you'll need a super-old program called VTFEdit, which you can download here.
Open it up, hit Ctrl-I and navigate to your newly exported TGA files.
Upon opening one, you should see a message like this:
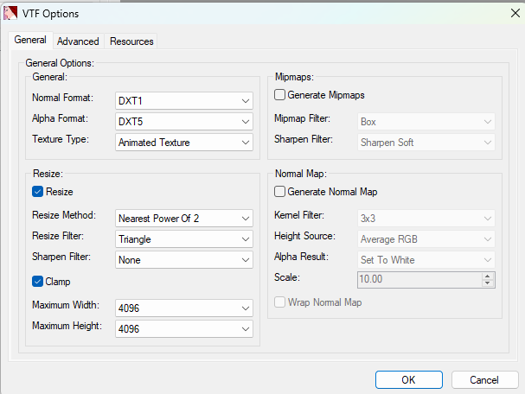
If it looks like mine, you should be fine to just hit "OK".
You should see your image pop up in the window.
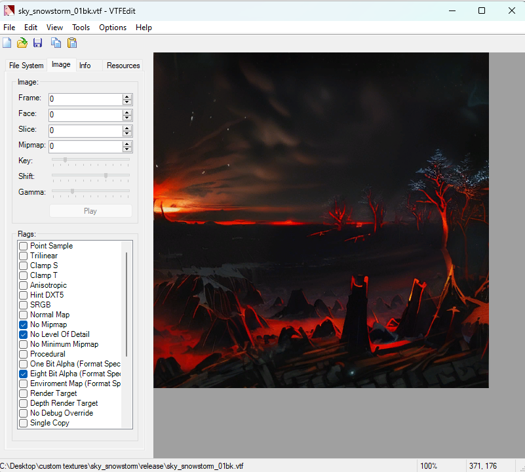
Hit Ctrl-S, and save it with the same name (e.g. "sky_snowstorm_01bk") in the same folder you got it from.
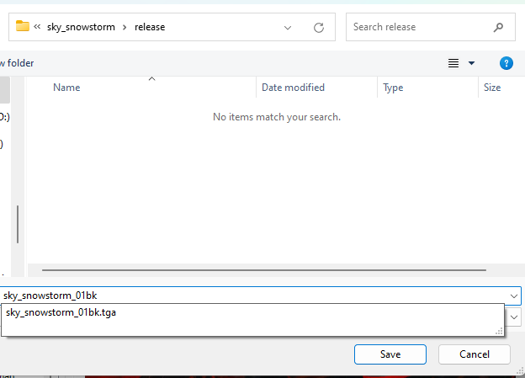
You should now see a VTF file in that folder. That means you did it right, and can now repeat it for the other 5 TGA files.
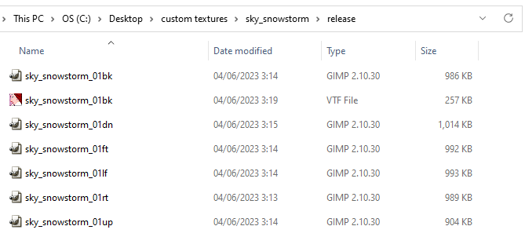
We'll now need a VMT file.
Go back to VTFEdit and hit Ctrl-N.
This will create a new VMT file.
Here's an example VMT you can copy in to replace the default text Ctrl-N gives you:
sky
{
	$basetexture "skybox/sky_snowstorm_01bk"
	$nofog 1
	$ignorez 1
	%keywords "customsky"
	$basetexturetransform "center 0 0 scale 1 1 rotate 0 translate 0 0"
	$hdrbasetexture "skybox/sky_snowstorm_01bk"
}
All you should need to do is replace "sky_snowstorm_01bk" with the name of the VTF you want this VMT to be "for".
Since this is for sky_snowstorm_01bk, I'll hit Ctrl-S, and save it as "sky_snowstorm_01bk" in the same "release" folder the VTFs are in.
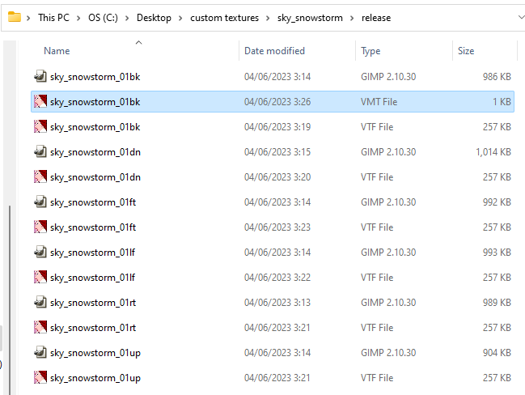
Now all I need to do is copy this VMT, rename it to "sky_snowstorm_01dn", open it and replace "sky_snowstorm_01bk" with "sky_snowstorm_01dn".
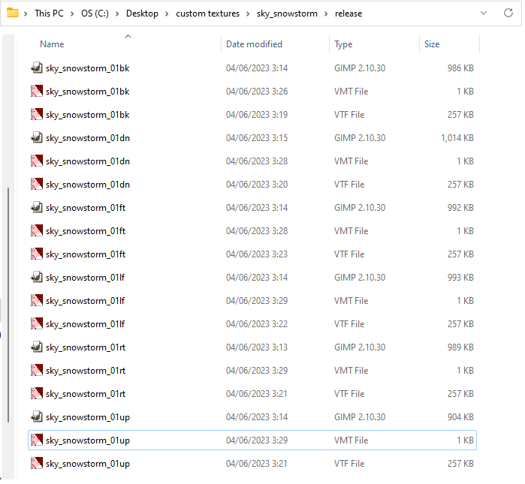
Then, repeat for the other four textures.
Once you're done, you should have a healthy-looking folder of VTFs and VMTs like this:
But we're not done. We need to move it to a specific folder in the game files of the game we want it to appear in. I'll use my favourite game, Team Fortress 2.
Follow this address by through your "This PC" button in Windows Explorer:

This will be different if you've installed TF2 on a different hard drive. For instance: "D:\SteamLibrary\steamapps\common\Team Fortress 2\tf\".
Once we're here, we want to find a folder called "materials". Create it if it doesn't exist already.
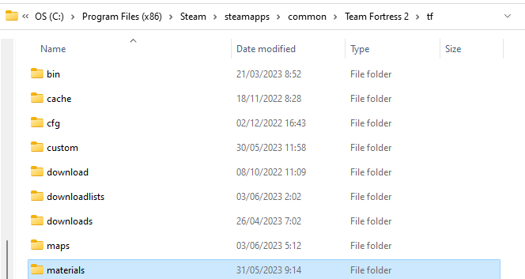
Open it, and find or create a folder called "skybox".
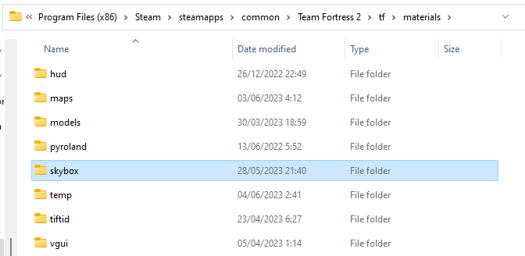
Now, drag your VTF and VMT files from whatever folder you're storing them in ("release" for me) to this "skybox" folder.
The textures should be ready now! But how do we see them?
We need to use a program called Hammer. This is Source's map editor, and making maps with it is a whole other rabbit hole that I fell down 7 years ago.
This playlist should give you a good start.
Once you have Hammer open, go to Map > Map Properties:
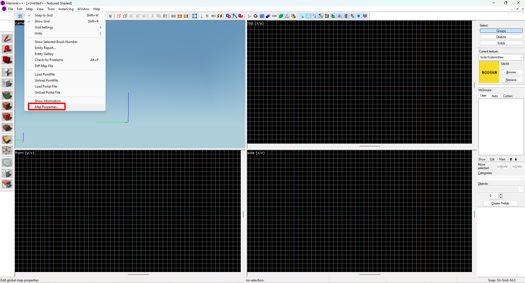
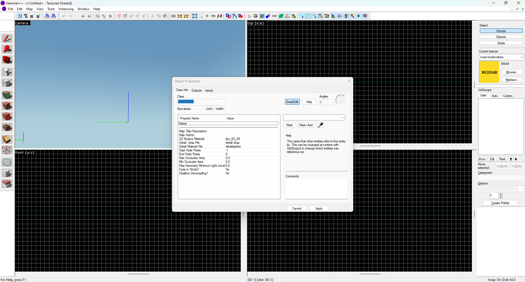
Clicking this will open this window:
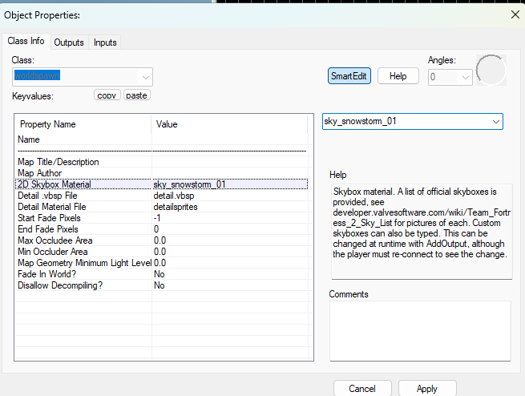
We'll want to change "2D Skybox Material" from "sky_tf2_04" or "sky_day01_01" or whatever it is to our custom skybox - in my case, sky_snowstorm_01. Luckily, this is as simple as selecting the property and typing a quick line of text:
Since I'm using a cool community-made version of Hammer called Hammer++, I can immediately see what the skybox looks like:

We can even travel to a map I've made, or a decompiled official map, and see how it looks there (after a brief modification of the light_environment entity):
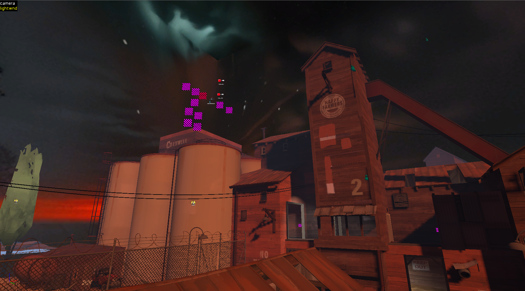
And Done!
This particular sky texture is not perfect. The trees are a little too grainy (probably as a result of my particular LoRA combo), and they look MASSIVE next to any actual map geometry.
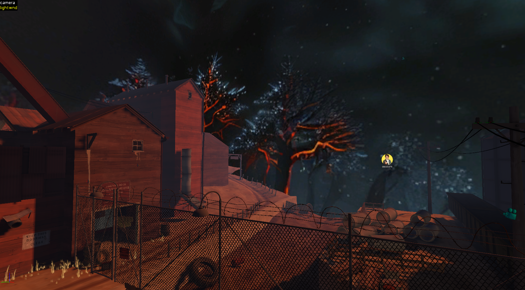
The sky itself also has a lot of weird blobby stuff cause I didn't use particularly amazing gens in the interest of having more time to actually write the guide as opposed to making the skybox.
The bottom image is also a great example of how Stable Diffusion poorly understands perspective and tries to always generate scenes from side-on.
But, if you have the time and patience to modify this method slightly and generate each face at 1024x1024, or if you're just more of a wiz with Stable Diffusion than I am, or if you're willing to paint over the final result to make it look better, you can achieve a really, really good result a lot faster than if you'd painted it from scratch.

