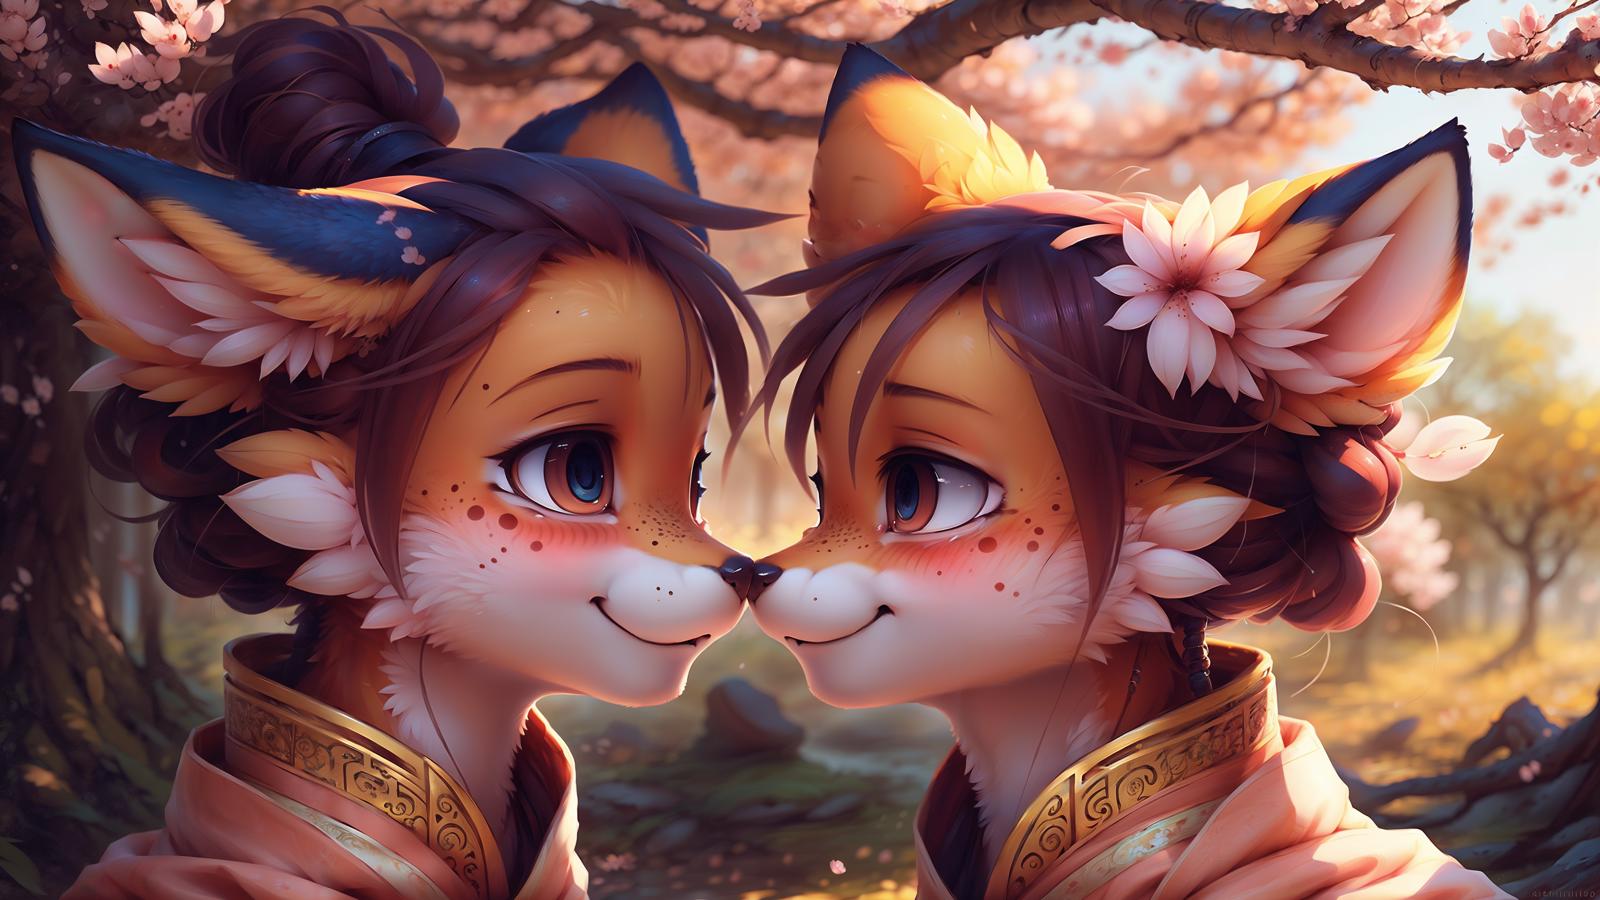
The last model of this version is finished and named "Coconut Ultimate Realistic".
As always I report that this model is based on Fluffyrock, but I want to say - this model emphasizes realism, so if you enter the names of various artists, they will only make stylistic changes. Perhaps this can be corrected by adding "anime" to the prompt, etc. Maybe.
Recommended settings:
SD VAE vae-ft-ema-560000-ema-pruned.safetensors
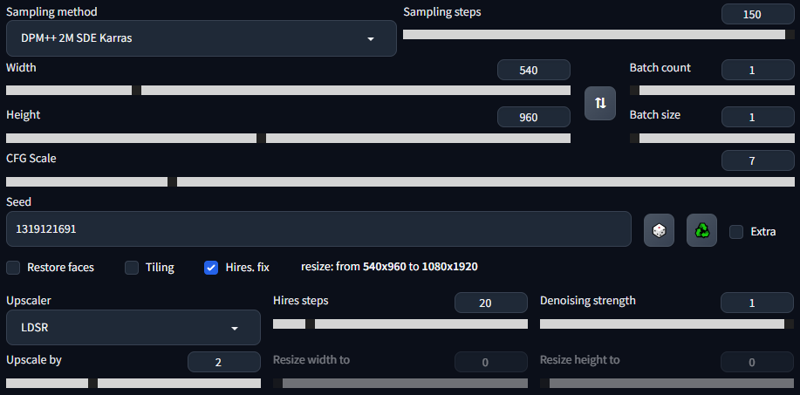
DPM++ 2M SDE Karras, 20(150 is recommended for this sampler) steps, 768x512 or 1024x768, CFG Scale 6-7
Hires.fix 4x_Valar_v1 4x_foolhardy_Remacri or LDSR, Hires steps 20 (if you have good PC you can use 150 steps, it's better but long), Denoising strength 0.35-0.45 (0.35 is recommended for Coconut Ultimate Realistic)
How to make your prompt great again:
0) Install addons:
sd-webui-controlnet - How do you even generate without it?
Ultimate SD Upscale - An ultimatum script that will help you generate art in 16K.
TiledDiffusion with Tiled VAE - If you have a powerful cruiser-level PC, you can use it instead of Ultimate SD Upscale
Depth Maps - For easy retrieval of the depth mask from your artwork.
Upscaler need to add in to stable-diffusion-webui\models\ESRGAN
4x_Valar - High quality for a small price Version outdated.
4x_foolhardy_Remacri - Currently the highest quality. Good alternative to Valar.
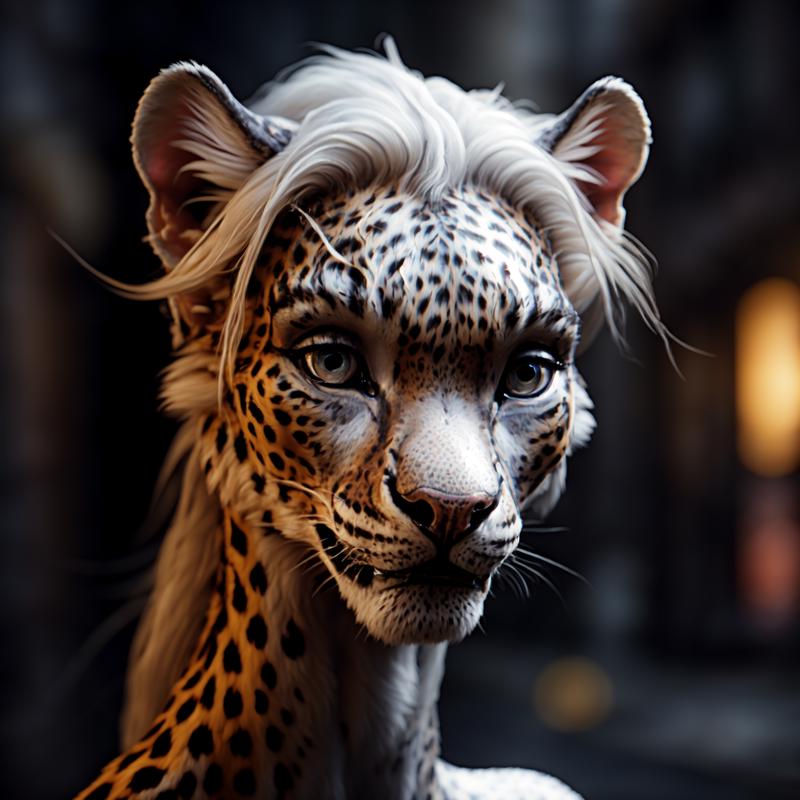
Examples of Upscaler without ControlNet:
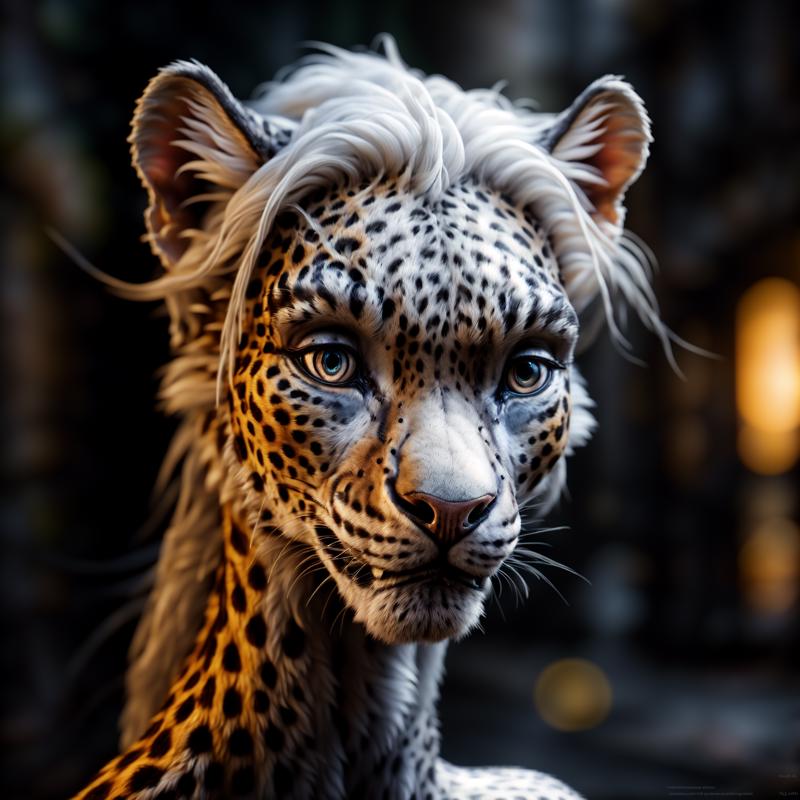
With ControlNet:
Step 1) Use the settings described above when generating your first art.
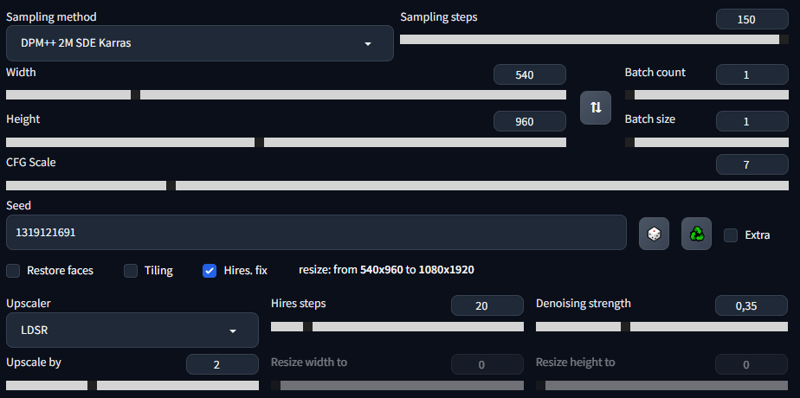
Step 2) In Hires.fix set the value Denoising strength to 100%.
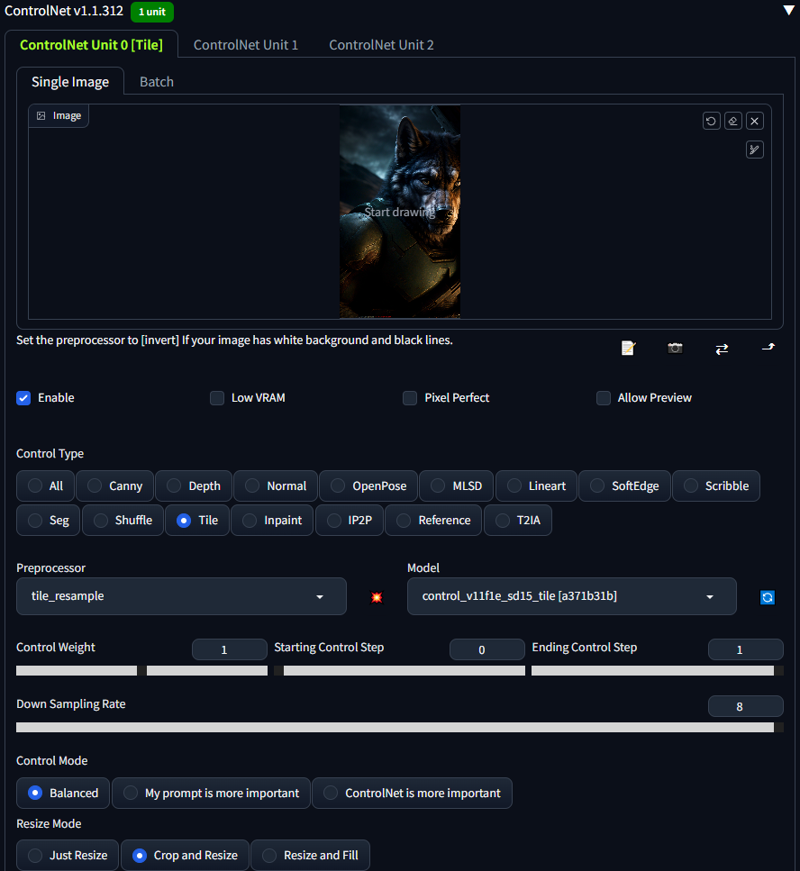
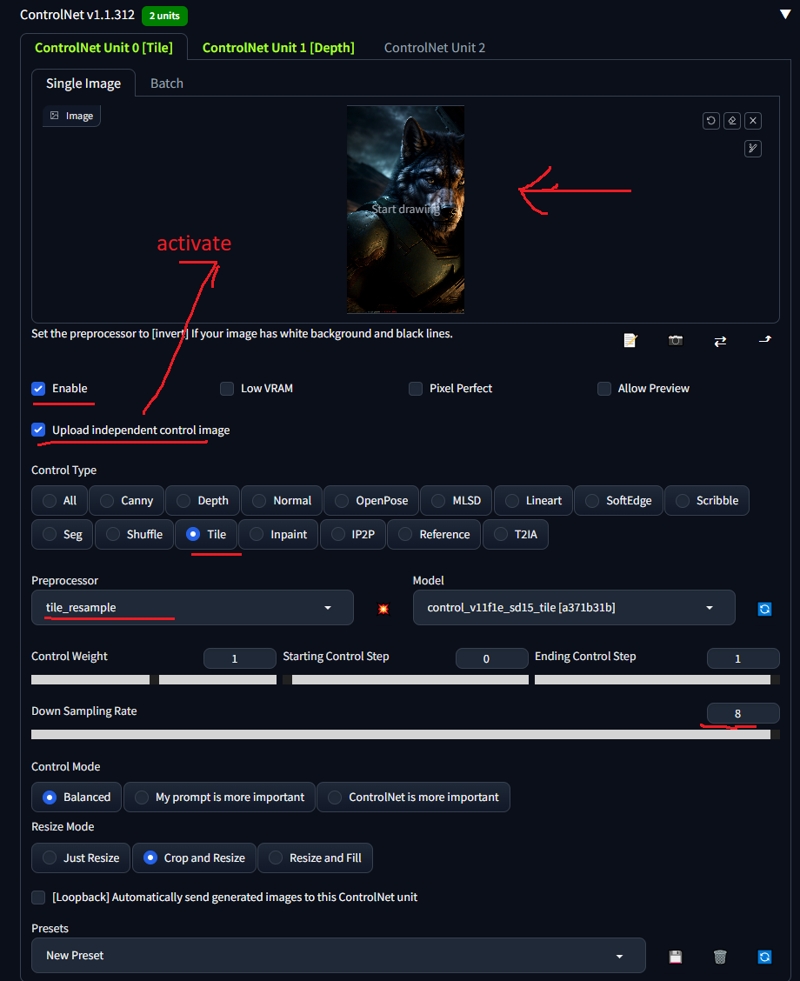
Add the first art to the ControlNet, turn it on, select Tile and set the Down Sampling Rate to 8. You can also play around with the Preprocessor and choose the desired result.
After receiving the second art, send it to I2I.
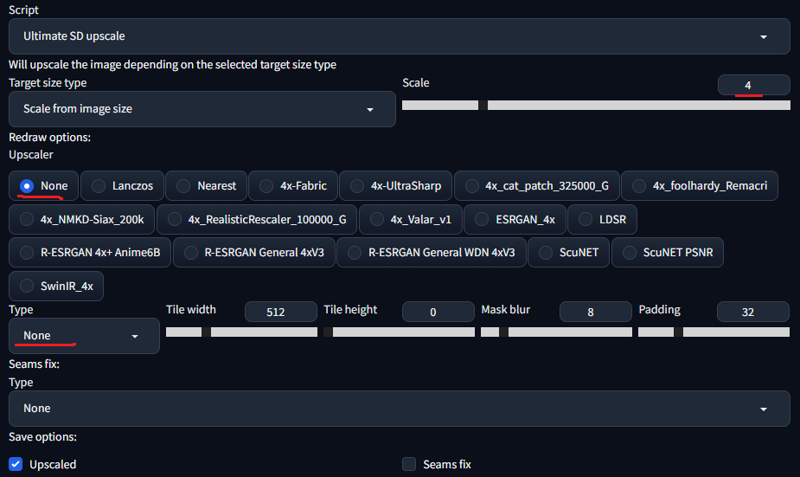
Step 3.1 Optional) You can create depth mask for yourself if you want. To do this, go to the Ultimate SD upscale script, set Scale to 4, select Upscaler as None, Type as None. Click Generate.
Now go to the Depth tab and drop the generated sheet there. Turn off Boost, select dpt_beit_large_512 (midas 3.1) in Model and click Generate.
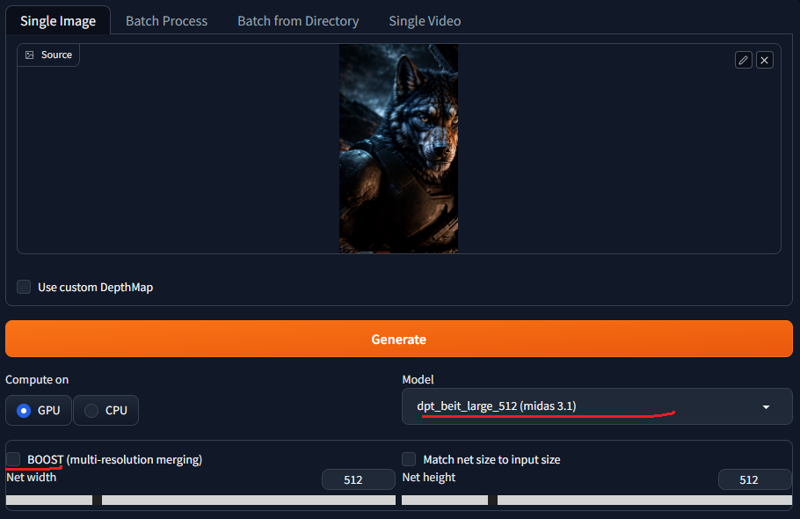
The resulting depth mask is located in the folder stable-diffusion-webui\outputs\extras-images.
Step 3.2) Make sure all parameters are set correctly. Steps can be set above 20 if you are sure you have the patience. The change in quality is minor, but it's there and can play a role if you're going to be generating at 16K. Denoising strength should be set to 0.35, if you are confident - 0.45.
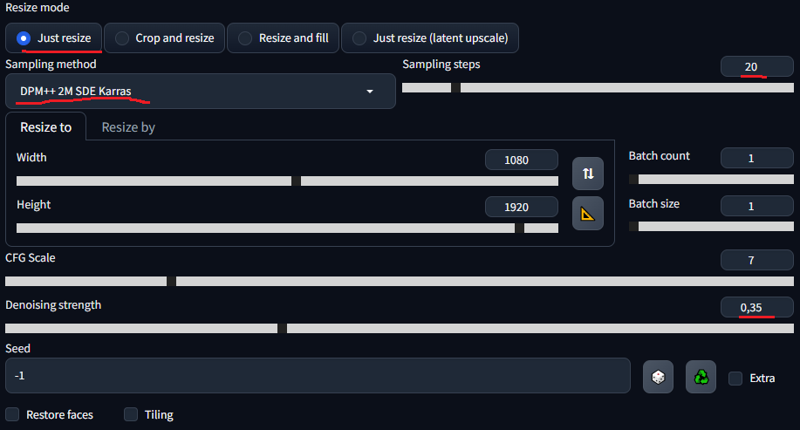
N.B! If extra eyes on the body, ghosts and other heresy appear after generation, then reduce Denoising strength!
Upload your first art from (Step 1) to ControlNet. Click Enable and tick below, select Control Type Tile, Preprocessor must be tile_resampler (If you select others, seams will be clearly visible) for the Ultimate SD Upscaler script or tile_colorfix if you use Tiled Diffusion. Down Sampling Rate is still at 8.
N.B! If you drop the second art you got in (Step 2) while using ControlNet, it will cause haze and mess up subsequent generations! Don't do this, use the art from (Step 1).
You can change Control Mode if needed. If you choose the second option, the prompt will have a stronger effect and generate more details, which may be redundant. If you don't want to reduce the denoise, you can choose the third option, then the influence of the prompt will be reduced and the appearance of artifacts will become insignificant, but not a fact.
If you generated a depth mask as described in (Step 3.1), then in the second tab, set Depth in the Control Type section.
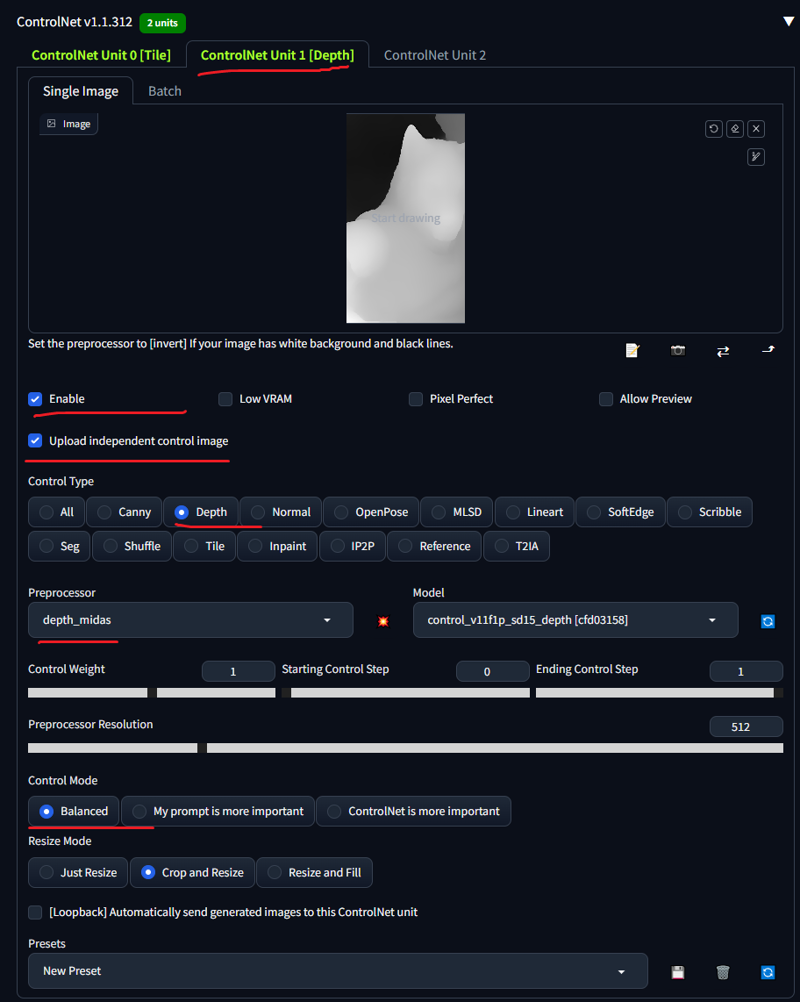
You don't know how to add another tab to ControlNet? Go to Settings>ControlNet>Multi ControlNet: Max models amount (requires restart). Add as many as you need. God, how tired I am of writing this, I must not forget to delete it.
Step 4.1) If you use the Ultimate SD Upscaler script, then use the settings as in the picture below. Custom size must be set manually, because with Scale from image size x2 it will eat a few pixels or add extra ones. I have no idea why this is happening, so I advise you to set manually if you are a perfectionist and want to follow the standard format for screens. Upscaler 4x_valar_v1 4x_foolhardy_Remacri or LDSR. Type set chess, Tile width set 960.
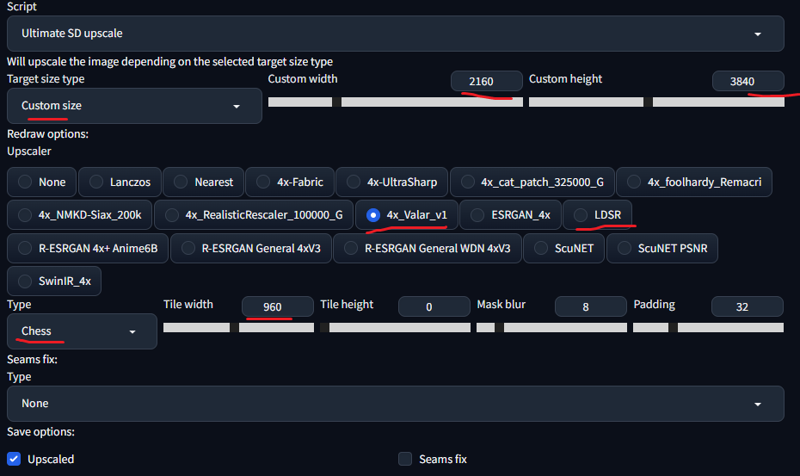
N.B. You can re-upscale your art with the same denoise or lower, at 1:1 resolution. Simply move the resulting art to i2i and press GENERATE. There is a possibility that the art will turn out better, or there will be too many details and it will become too sharp. You can also fix the art work in Photoshop using the transparency of the layers. Here is an example of the first generation:

An example of what happens with a second upscaling:

Here is the final result after working in Photoshop. There are a lot of jambs, but it looks much better:

Step 4.2) If you use the Tiled Diffusion... I do not use it, but I can offer this option and pray that everything will work out:
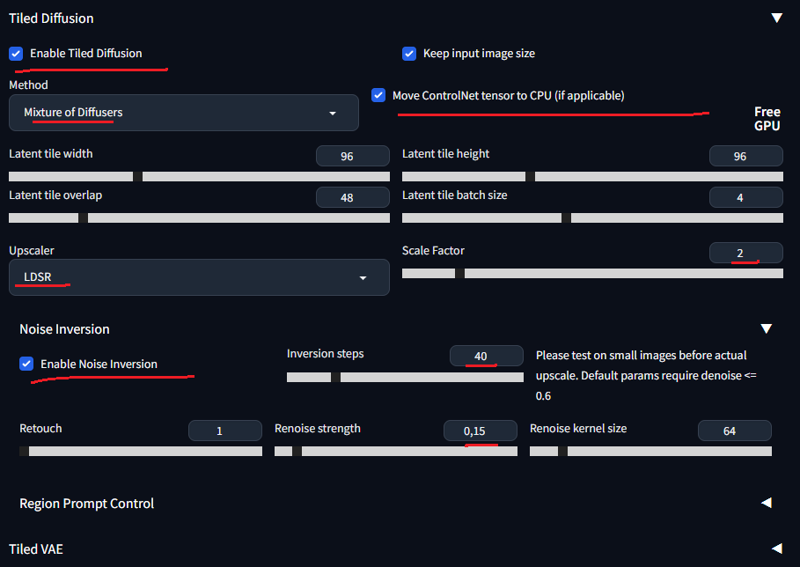
Step 5) Press the Generate button.
Step 6) ????
Step 7) PROFIT!
P.S. If you want to generate your 4K art in 8K or 16K then just upload it with .png extension to I2I. In Scale from image size, you can already safely set x2, but I would play it safe and put 7680 ✕ 4320 (4320 ✕ 7680).
N.B. If you are using the Ultimate SD Upscaler script and you are going to upscale art in 8K and 16K, then I highly recommend using different Tile width settings like 512, 640, 768 for different generation iteration. This will help avoid seams, since different tile sizes will capture the seams of previous generations and smooth them out.
