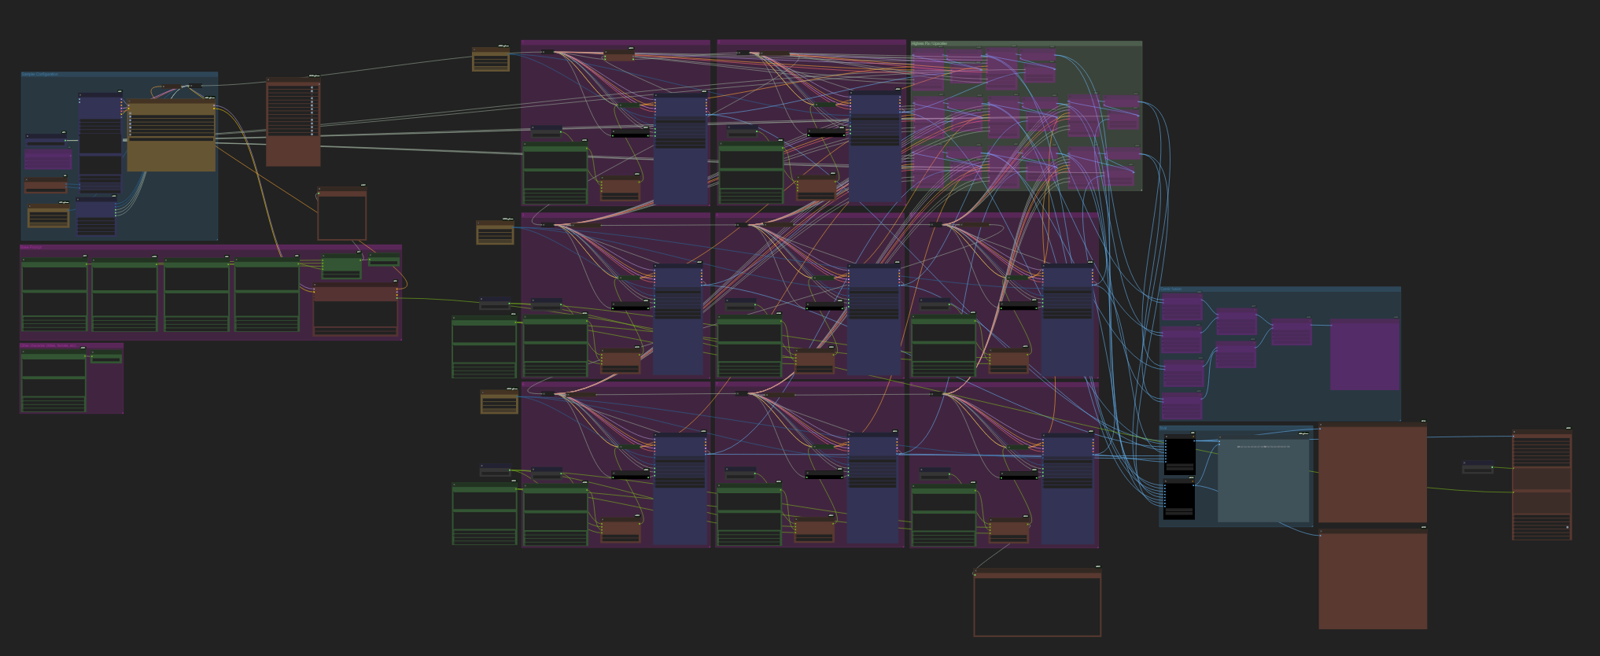
🎬 ComfyUI Tutorial – “Comic Creator - TEXT to SEQUENCE Workflow – Multi-Image Storytelling, Wildcards, LoRAs & Comic Layout” Workflow Guide
Create coherent multi-image stories with structured prompts, dynamic wildcards, and a cinematic narrative flow — all inside ComfyUI. You can get it here : https://civitai.com/models/1884978/comic-creator-text-to-sequence-workflow-multi-image-storytelling-wildcards-loras-and-comic-layout-comfyui
🧩 What is “Text to Sequence”?
This workflow is designed to generate a sequence of connected images, forming a small visual story or progression.
Each part of the sequence shares global context but allows for individual variation in style, camera angle, or detail.
You can then refine each individual image prompt to add variation, extra detail, or dynamic elements.
This approach becomes incredibly powerful when combined with wildcards.
🧠 Workflow Structure Overview
The workflow is divided into three main parts:
1. Base Setup
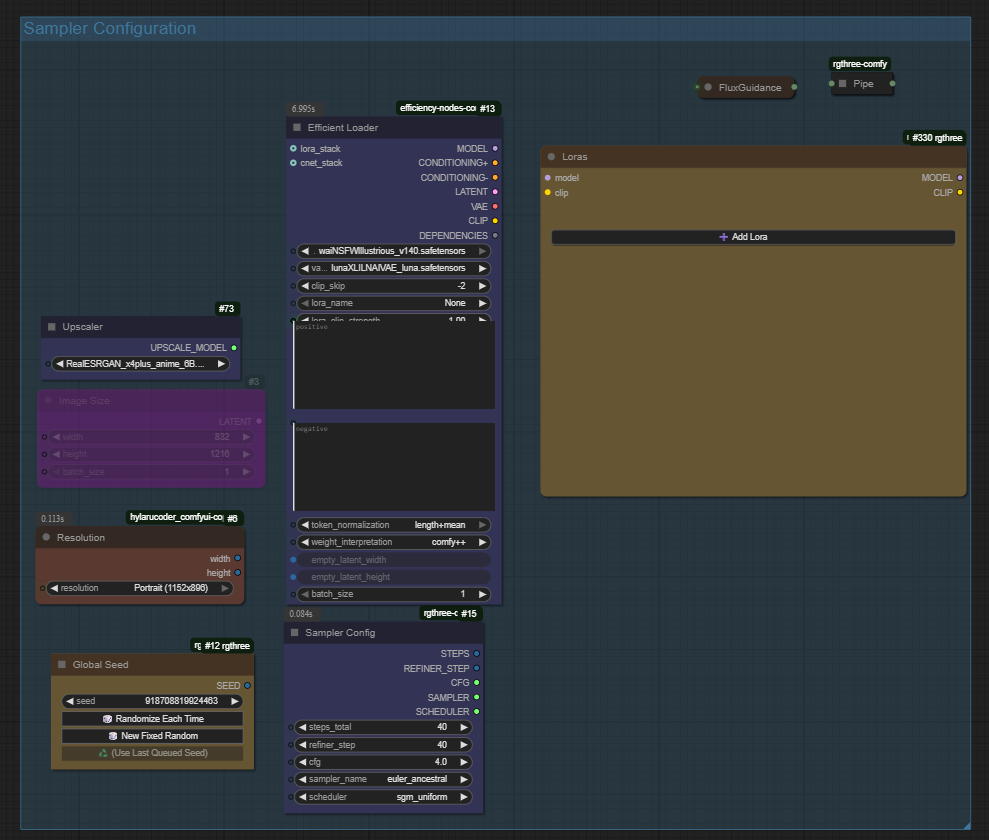
Core building blocks defining the context of your scene.
Each ImpactWildcardProcessor node controls one aspect of your image:
Node Purpose Base Quality, composition, rendering style Character Main subject’s physical traits Clothes Outfit and color palette Environment Background, mood, lighting Other Character Supporting figure or secondary subject
These wildcards can be selected manually or randomized to bring organic variety into your generation.
2. Prompt Assembly
The Bjornulf_CombineTexts nodes merge all your text fragments into a single structured prompt for each image:
Base + Character + Clothes + Environment + Other character
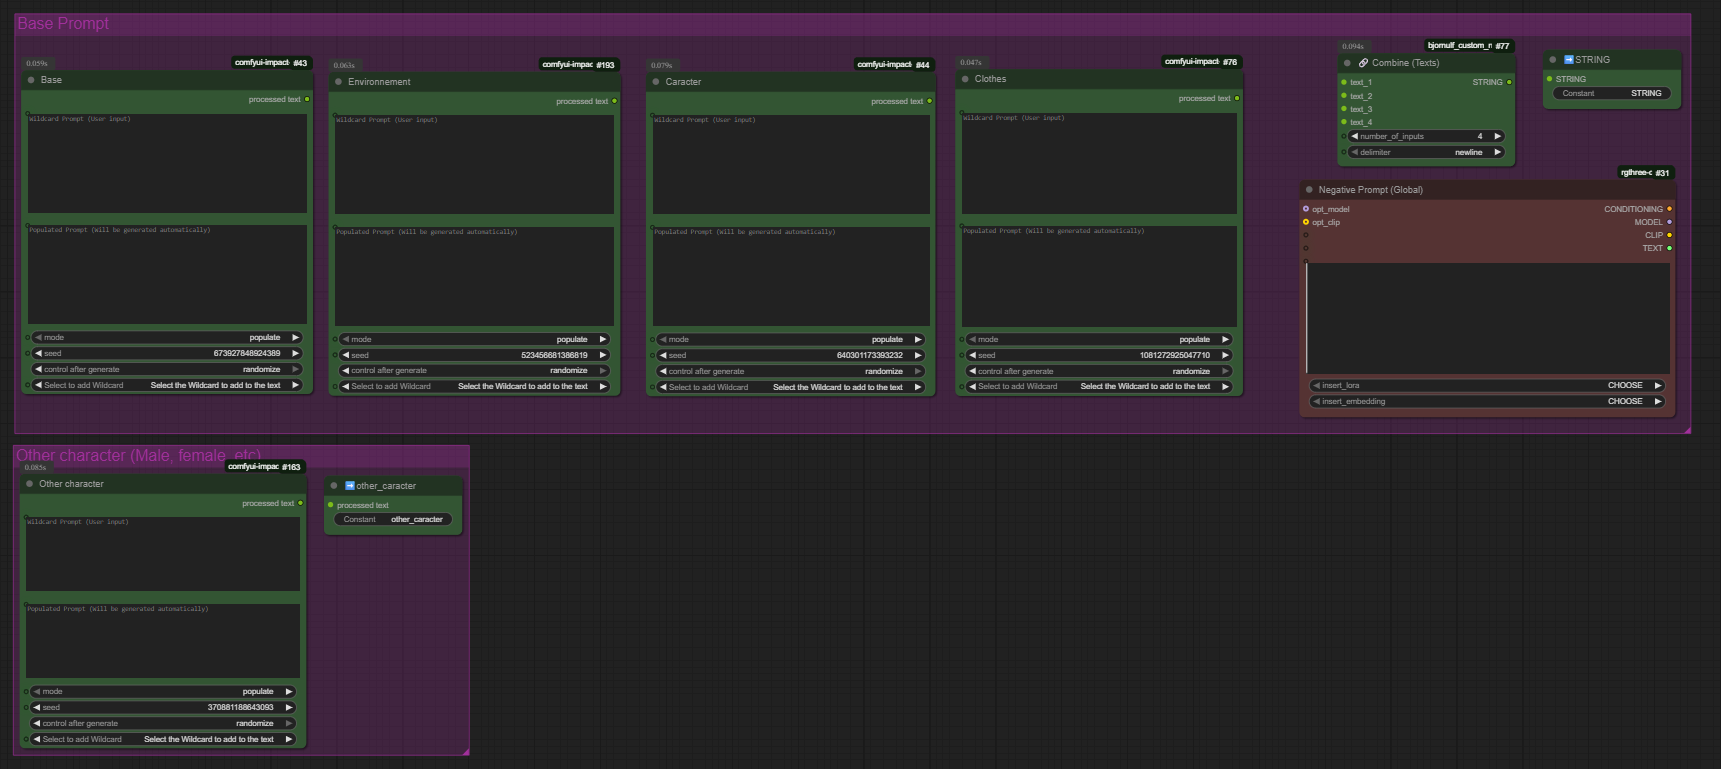
Then, the text is passed to Power Prompt (rgthree) nodes that handle:
Positive Prompts → What to show
Negative Prompts → What to avoid
Each image in your sequence has its own Power Prompt, allowing variation between shots while keeping a consistent base.
3. Image Generation & Sequence Output
Every prompt group generates one image in the sequence:
Image 1-2 → SFW section
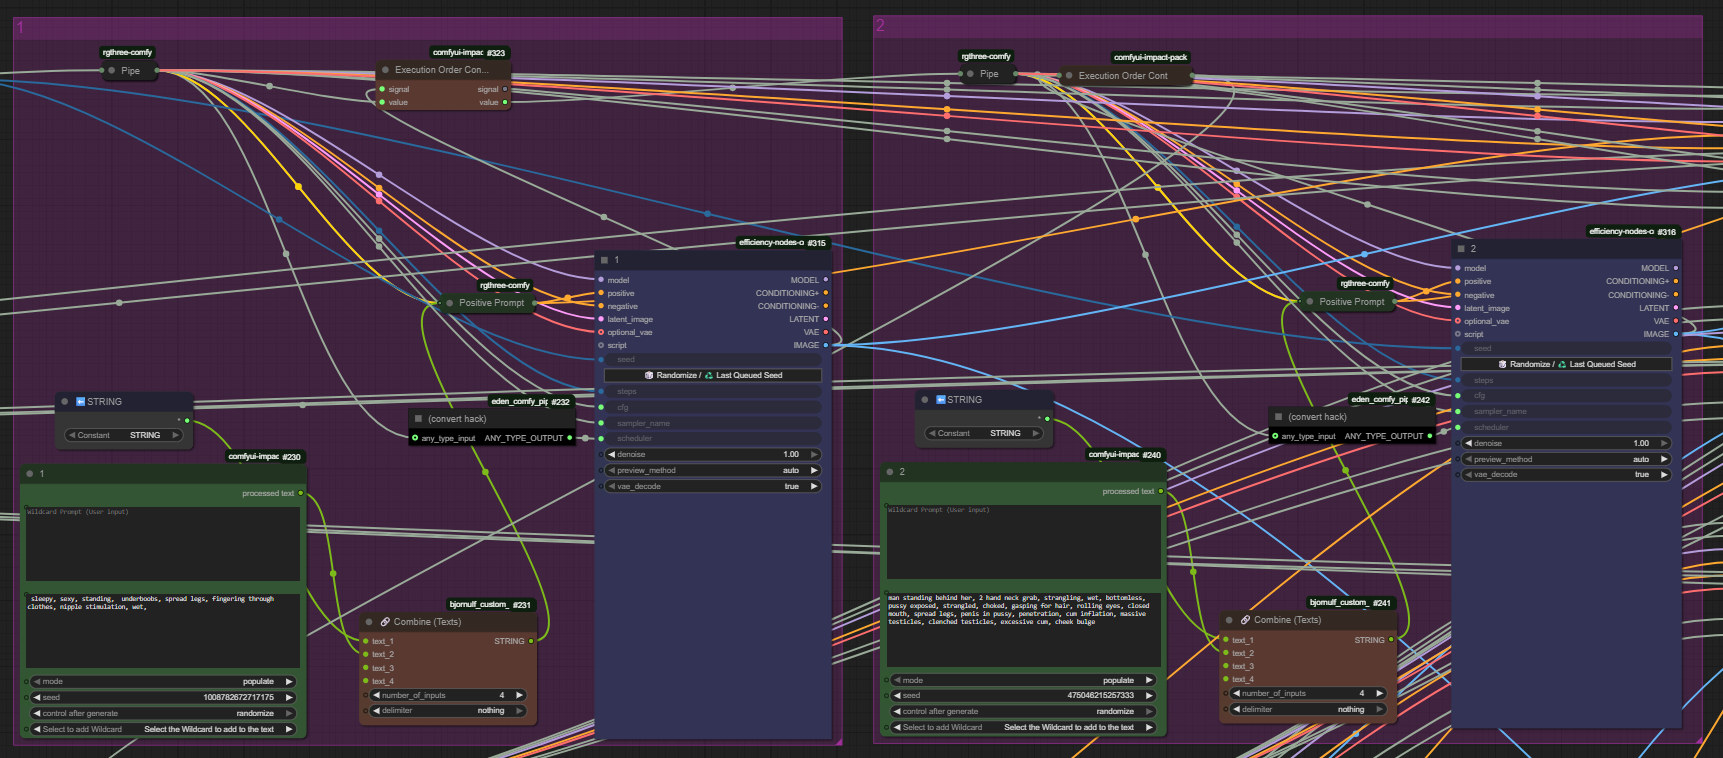
Image 3–5 → Preliminaries

Image 6–8 → Intercourse

All these are then combined using ImageConcatMulti nodes to create a final image strip, previewed at the end via the PreviewImage node.
You’ll get a film-strip style output, perfect for storytelling, comics, or visual progression scenes.
⚙️ Step-by-Step Usage
🪄 Step 1 — Load the Workflow
Open ComfyUI.
Drag and drop your file:
story_maker_02.jsonThe full “Text to Sequence” graph will load automatically.
🧩 Step 2 — Configure Your Wildcards
Once you installed "Impact Pack", goes to you custom node folder and go into "custom_nodes\comfyui-impact-pack\custom_wildcards" then place your wildcards here. You can get mine here : https://civitai.com/models/1937755/1000-wilcards-mittoshura-sfw-nsfw-poses-outfits-emotions
💡 Tip:
If you want a shared element across multiple images, put it directly in the global text field of the section.
For example:
nighttime, candlelight, dynamic lighting
Every image in that section will share these attributes.
🎨 Step 3 — Customize Individual Prompts
Open the Power Prompt (rgthree) nodes for each image and fine-tune details:
Add specific poses, camera angles, or emotions.
Example:
“close-up, over-the-shoulder view, faint smile, soft light.”
This gives you scene progression while keeping visual consistency.
🧰 Step 4 — Adjust Global Settings
You can tweak key generation parameters:
Setting Node Purpose Seed Global Seed Reproduce or randomize results CFG / Sampler Sampler Config Control fidelity & variation Resolution SDXLResolutionPresets Choose output size (e.g., Portrait 1152×896)
▶️ Step 5 — Generate Your Sequence
Once ready:
Press Queue Prompt or hit
Ctrl + Enter.ComfyUI will render all sections sequentially.
The final preview will display your full image sequence.
You now have a cohesive multi-image narrative, automatically generated and beautifully consistent.
6. Advanced Groups & Optional Features
The “Text to Sequence” workflow includes several specialized node groups that you can enable or disable depending on your creative goals.
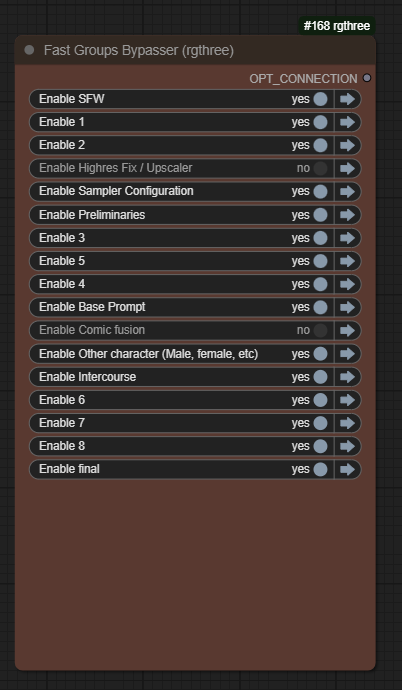
These groups give you finer control over quality, style, and how your final sequence is assembled.
🔹 HighRes Fix / Upscaler Group
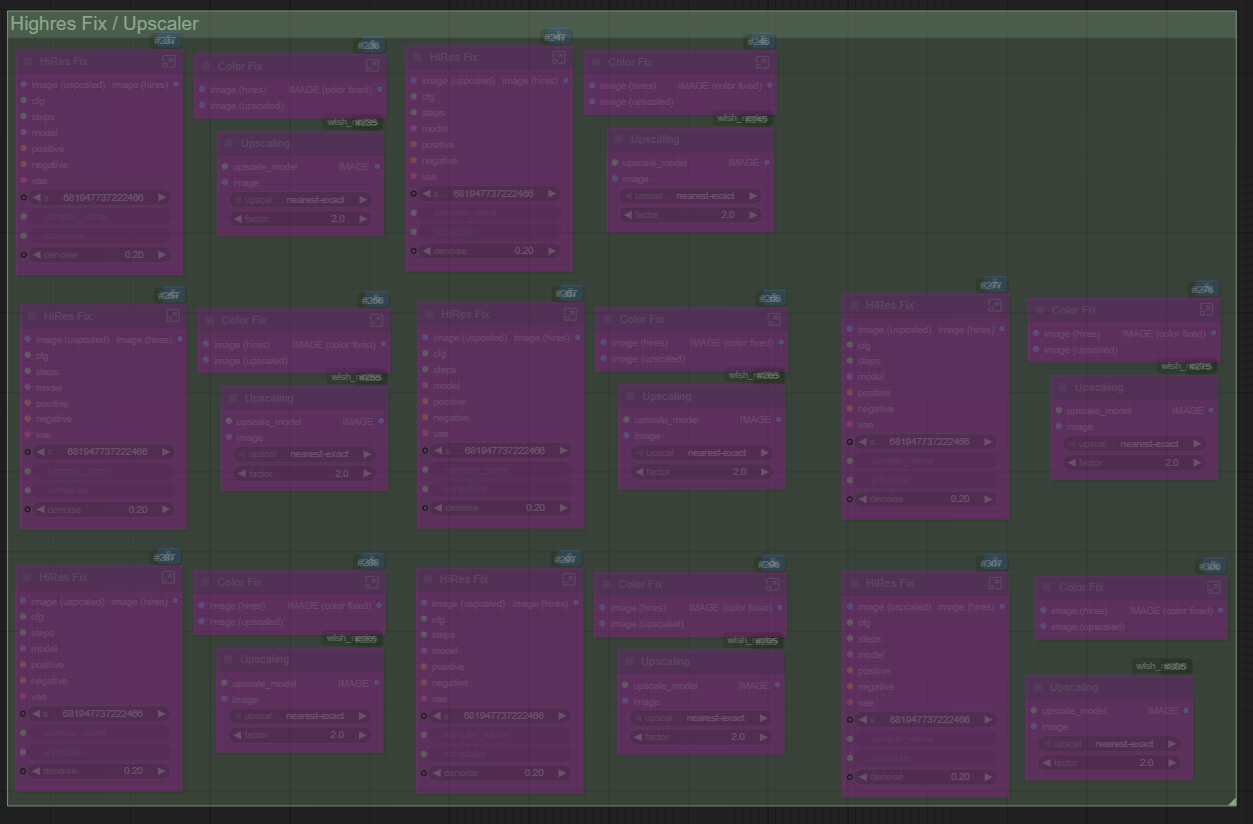
This group is designed to boost image fidelity and clean up details after your base images have been generated.
It’s ideal if you’re working with SDXL or if you want crisp, printable-quality results.
How it works:
After your base image is generated, it’s passed through an upscaler model (like 4x-UltraSharp, ESRGAN, Bsrgan, etc.).
The HighRes Fix re-renders details such as:
Hair strands
Clothing folds
Texture surfaces
Facial definition
It also sharpens lines and reduces compression artifacts.
Tips:
Activate this group after you’re satisfied with your base composition — it’s a finishing pass.
You can control the scale factor (e.g., 1.5x to 2x) and the denoise strength depending on how soft or sharp you want the upscaled output to be.
If you’re using a LoRA or style embedding, apply the same one during HighRes Fix to maintain visual consistency.
✅ Use this when you need gallery-ready or print-quality image sets.
🔹 Comic Fusion Group
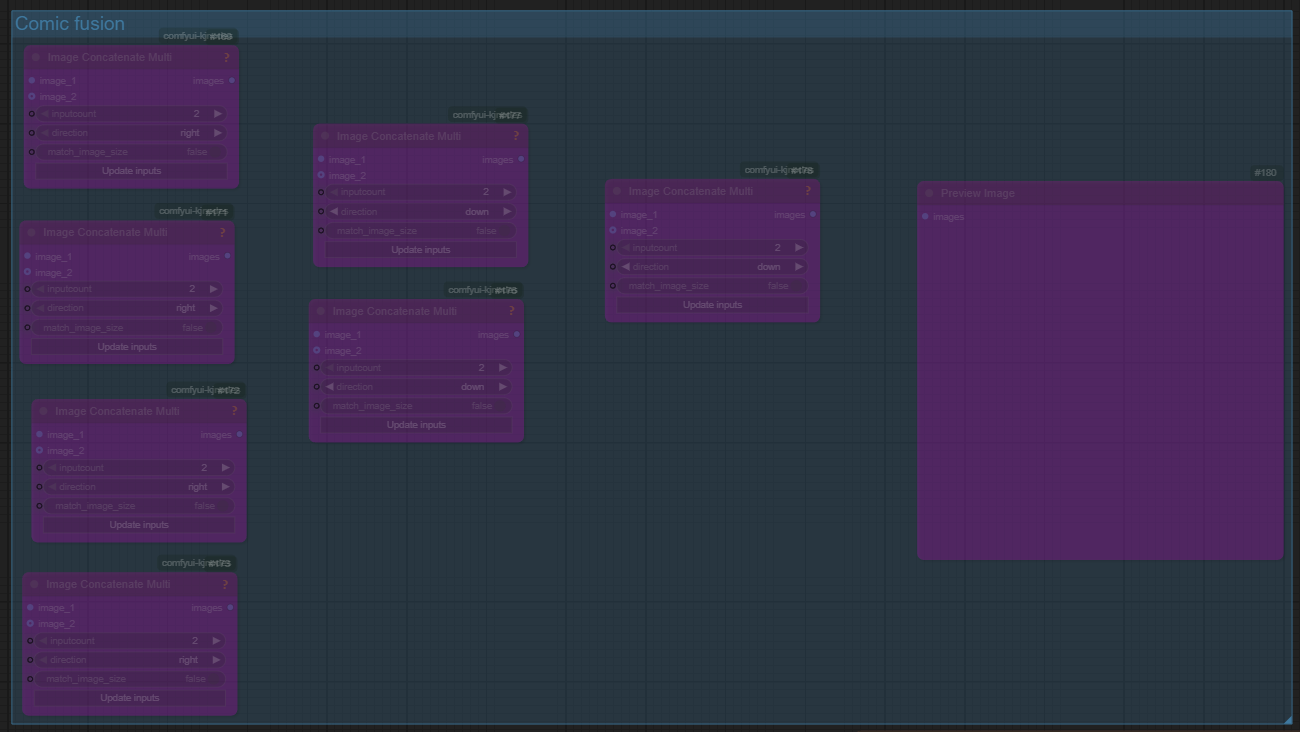
The Comic Fusion section is where all your generated frames come together into one final composition — your visual story strip.
Purpose:
This group uses a series of ImageConcatMulti nodes to merge multiple generated images into a single panoramic or grid-style image.
How it works:
Each image from your sequence (SFW → Preliminaries → Intercourse) is routed into this group.
ImageConcatMultistacks them horizontally or vertically (depending on your setup).The output is a cohesive “comic strip”, previewed in the final
PreviewImagenode.
Options:
You can adjust the concat direction:
Right→ creates a cinematic horizontal strip.Down→ stacks images vertically for a comic-page layout.
You can also choose whether to match image sizes automatically, ensuring a perfectly aligned composition.
💡 Pro Tip:
If you want to create multiple pages or storyboards, duplicate the Comic Fusion section and run each one with different sequences or character setups.
✅ Use this to produce cinematic sequences, story panels, or manga-like pages directly from your ComfyUI run.
🔹 Optional: Individual Group Control
Each major section (SFW, Preliminaries, Intercourse) can be independently enabled or muted.
This lets you:
Regenerate only a specific part of the sequence.
Skip sections you’re not currently refining.
Combine results from different runs to mix scenes dynamically.
🎞️ Section Breakdown Example
Section Purpose Prompt Example SFW Introduction / setup “Bedroom, morning light, stretching, relaxed pose” Preliminaries Build tension / interaction “Close-up, intense gaze, soft lighting” Intercourse Final or climax scene “Passionate, dynamic lighting, low camera angle”
Each section uses a global prompt + individual image-specific prompts for controlled variety.
💡 Why Use “Text to Sequence”?
✅ Structured storytelling with consistent characters
✅ Randomized or controlled variation via wildcards
✅ Clean and modular prompt assembly
✅ Seamless image concatenation and preview
✅ Works perfectly with LoRAs, embeddings, and SDXL
🧠 Pro Tips
Use LoRA stacking in the Power Prompt nodes to switch styles between sections (e.g., painterly for SFW, cinematic for Intercourse).
Keep lighting and background cues in your global prompt to maintain coherence.
Save your favorite wildcard combinations for reproducibility.
📸 Example Use Cases
Visual storytelling or short comics
Character-focused progression scenes
Training data sequences for narrative models
Consistent aesthetic sets for portfolio presentation
🪶 Final Thoughts
The “Text to Sequence” workflow turns ComfyUI into a story engine —
allowing you to combine creative control, structured logic, and the magic of randomization.
Whether you’re building subtle storytelling sets or dynamic NSFW series, this workflow gives you the perfect framework for cohesive, cinematic image generation.
.jpeg)

