


LoRA Basics
🌟 Hey there, happy folks! 🌟
Let's dive into the world of LoRA models, which are like magic pixies sprinkling their charm on standard checkpoint models! ✨💫 These little wonders are typically 10 to 100 times smaller, making them the dream come true for those with a treasure trove of models! 🧚🔮🌈
Welcome to this beginner-friendly tutorial on LoRA models! 🚀📚 We'll take you on a joyful journey to discover what LoRA models are, show you where to uncover these hidden gems, and guide you through their enchanting use in the AUTOMATIC1111 GUI! 🌟🗺️✨
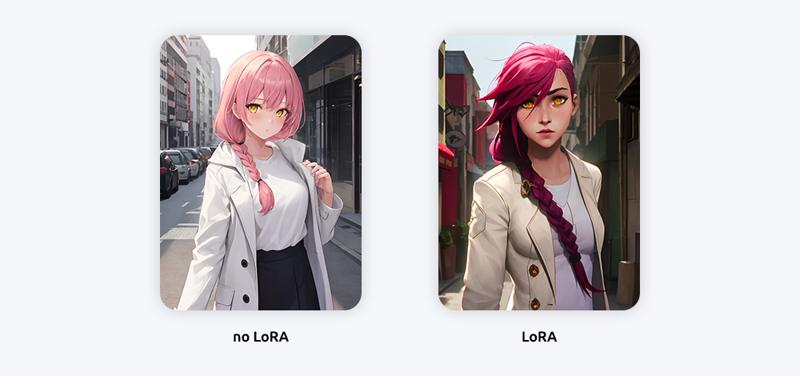
And to top it all off, we've got some dazzling demos of LoRA models waiting for you at the end! 🎉👀💃
Let's get ready for some magical modeling fun! 🌠🧙♂️🎊
What are LoRA models?
🌟 LoRA (Low-Rank Adaptation), the fine-tuning magician for Stable Diffusion models! 🧙✨
But you might wonder, what sets LoRA apart from other techniques like Dreambooth and textual inversion? Well, here's the scoop! 📢
LoRA strikes a fantastic balance between file size and training prowess. Dreambooth, while powerful, can lead to hefty model files (2-7 GBs), which can be quite the storage hog. On the other hand, textual inversions are super lightweight (around 100 KBs), but they come with limitations.
Now, here's where LoRA shines ✨: It falls right in the middle. The file size is much more manageable (2 – 200 MBs), and its training power is nothing to sneeze at!
Imagine all the Stable Diffusion enthusiasts out there, constantly grappling with the storage crunch. Large models quickly fill up your personal computer, making it tough to keep your model collection intact. 🖥️📦
But wait, there's more! Like textual inversion, you can't go solo with a LoRA model. It needs a trusty model checkpoint file by its side. LoRA works its magic by making stylish tweaks through subtle changes to its companion model file. 🎨✨
In a nutshell, LoRA is your secret weapon to customize AI art models without blowing up your local storage. It's like having your cake and eating it too! 🍰🚀🎨
How does LoRA work?
🌟 Let's uncover the enchanting secrets of LoRA! 🎩🐇
You see, LoRA specializes in making teeny-tiny adjustments to the most crucial part of Stable Diffusion models: the cross-attention layers, where the magic happens when images and prompts come together! 🪄📸
Now, here's the magic potion: these cross-attention layers contain weights arranged in matrices – just like numbers neatly organized in rows and columns, like your trusty Excel spreadsheet! 📊🔢
So, how on earth do LoRA model files stay small while holding the same number of weights? 🤔 Well, LoRA pulls off a nifty trick by breaking down a matrix into two smaller (low-rank) matrices. It's like a puzzle, fitting a lot fewer numbers in the same space! Let's peek at an example! 🧩🔍
Imagine a matrix with 1,000 rows and 2,000 columns, that's a whopping 2,000,000 numbers (1,000 x 2,000) to store in the model file! 😲 But LoRA says, "Hold my magic wand!" and transforms it into a 1,000-by-2 matrix and a 2-by-2,000 matrix. Voilà! Now you only need 6,000 numbers (1,000 x 2 + 2 x 2,000), which is 333 times less! That's the wizardry behind those compact LoRA files! 🧙♂️✨📦
In this mystical example, the rank of the matrices is 2. It's much smaller than the original dimensions, so they earn the title of "low-rank matrices." The rank can even be as low as 1! 🌟
But you might wonder, does this magical matrix-splitting harm the power of fine-tuning? Fear not, for the wise researchers have delved deep into this sorcery and found that it doesn't diminish the fine-tuning magic in the cross-attention layers. So, all's well in the realm of LoRA! 🌠🔮🧙♀️
How to use LoRA:
🚀 Let's embark on an exciting journey of using LoRA models with AUTOMATIC1111 Stable Diffusion GUI! 🌟
Good news first! AUTOMATIC1111 has native LoRA support, so no need to hassle with extensions. 🎉
Step 1: Install Your LoRA Model To get started, follow these simple steps:
📁 Put your LoRA model files in this magical folder:
stable-diffusion-webui/models/LoraStep 2: Bring Your LoRA Model to Life! Now, let's make that LoRA model shine:
📜 In your prompt, include this enchanting phrase:
<lora:filename:multiplier>Here's the breakdown:
filename should be the name of your LoRA model file, minus the extension (.safetensors, .pt, .bin, and the like).
multiplier is the magic number that applies the LoRA model's weight. The default is 1, and setting it to 0 switches off the model.
Wondering if you've got the filename right? No worries, we've got your back! Instead of typing it, simply click on the model button.
Here's the Spellcasting Moment:
Click on the "Lora" tab. Behold a list of your installed LoRA models. 👀
Choose the one that beckons to you.
Voilà! The LoRA phrase will appear in your prompt, ready to work its magic.
That's it! 🪄✨ You're all set to wield the power of LoRA!
Notes on Unleashing LoRA's Magic:
Tweak the multiplier to crank up or dial down the magic. Setting it to 0 puts the LoRA model to sleep.
Some LoRA models are Dreambooth-trained and require a trigger keyword. You'll find this keyword on the model's page.
Just like a magician with multiple tricks, you can use multiple LoRA models simultaneously, and they can even play nice with embeddings.
In AUTOMATIC1111, the LoRA phrase isn't a permanent part of the prompt. It disappears after the LoRA model works its wonders, so you can't use prompt syntax like [keyword1:keyword2:0.8] with them.
Now, go forth and create some enchanting AI art using LoRA! 🎨🌈🧙♂️