ComfyUI Tutorial – “Dynamic Multi-Character Workflow – ALL IN ONE Regional Prompts & Wildcards!” Workflow Guide
1. What is “Dynamic Multi-Character Workflow”?
The Illustratious Multi-Person Workflow is an all-in-one setup designed for multi-character generations in ComfyUI.
It allows you to control multiple subjects, each with their own prompts, poses, and regions, while keeping everything modular and clean.
The workflow integrates:
Regional Prompting for per-character control
Wildcards for dynamic randomization
Highres Fix for upscale refinement
Metadata embedding and optional ControlNet / Detailers
It’s perfect for creators who want to generate complex compositions (duos, trios, or groups) while keeping flexibility and style consistency. Get it here :
https://civitai.com/models/1669611?modelVersionId=2358176
2. Preconfiguration
2.1 Install ComfyUI
Make sure you’re running the latest version of ComfyUI (recommended 0.3.51 or higher). I highly recommend using the portable version of ComfyUI and not the desktop version.
You can install it from the official repository:
https://github.com/comfyanonymous/ComfyUI
Version I'm using :
2.2 Install Custome Nodes
This workflow requires several community nodes.
You can install them manually or via ComfyUI Manager (recommended).
Required Custom Nodes:
2.3 LoRA Manager
The LoRA Manager is one of the key nodes in this workflow.
It allows you to load, organize, and mix multiple LoRAs dynamically — which is essential when working with multi-character scenes or style blending. Be sure to get it here : Lora-Manager
How it works
Instead of manually chaining multiple Apply LoRA nodes, the LoRA Manager lets you:
Add several LoRAs into a single interface
Control each LoRA’s strength individually
Enable or disable them without breaking connections
Quickly swap characters or art styles across your workflow
This makes the process far more modular, especially when generating scenes involving multiple characters with distinct styles (e.g. “Anna Yanami” + “Yuzuhira”).
How to use it
Connect the LoRA Manager node between your Text Encoder and Model Loader.
Click “Add LoRA” to include one or more LoRAs.
Adjust the weight (strength) sliders for each — usually between
0.6and0.9for characters, or lower for styles.You can toggle LoRAs on/off depending on your prompt setup.
Why it’s useful
Keeps your graph clean and organized
Prevents broken connections when swapping models
Allows for batch testing of character/style combinations
Integrates smoothly with wildcards and regional prompts
In short, it’s the central hub for managing LoRAs efficiently, giving you full creative flexibility without clutter. Once you lauche Comfyui, go to "127.0.0.1:8188/loras" to access the lora manager.
3. How to use the workflow
3.1 Base setup
Load the
.jsonfile into ComfyUI.Choose your base Checkpoint Model (SDXL, SD1.5, or your preferred fine-tuned base).
Select the VAE and Sampler of your choice.
Set your output directory and resolution.

3.2 Prompt usage
Each character is defined by its own positive and negative prompt input.
You can describe poses, appearance, and outfit independently for each.
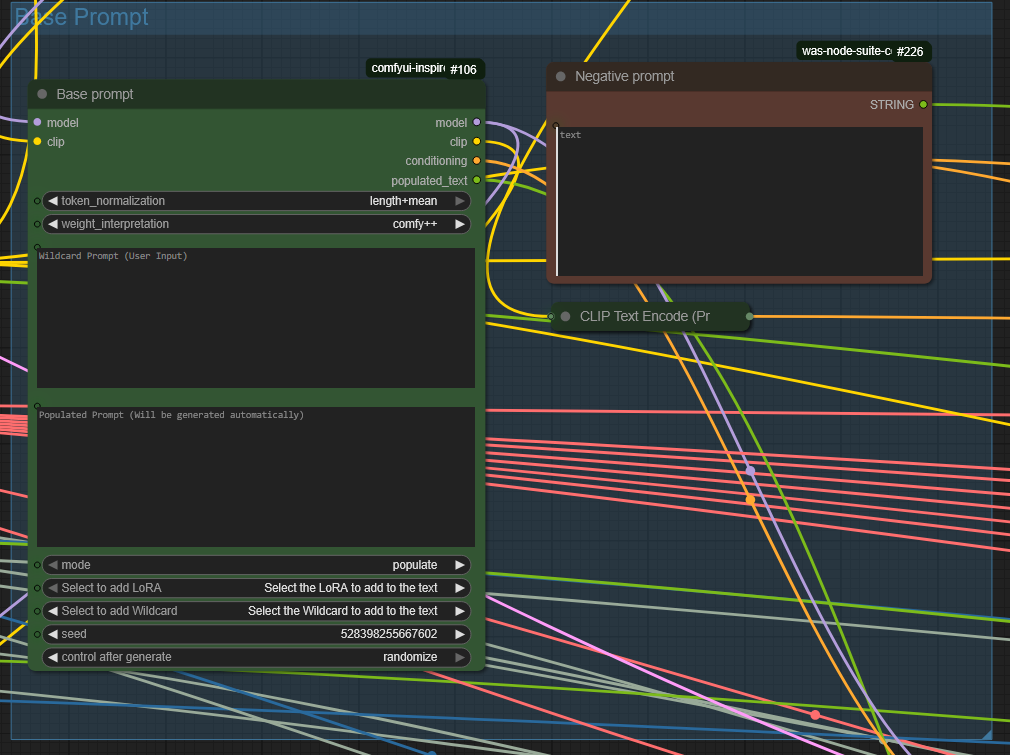
🔹 First, your Main Prompt should describe the overall scene — environment, general vibe, number of people, and any shared details (like lighting, style, background, camera angle, etc.).
🔹 Then, each Mask Prompt should describe only the specific character inside that mask region — appearance, pose, outfit, expression, etc.
You don’t need to repeat the full scene or mention other characters again inside each mask — just focus on the one it's targeting.
So:
Main prompt: “4girls, standing, beach, sunset, masterpiece, 8K, aesthetic”
Mask 1 prompt: “4girls, long pink hair, green bikini, side ponytail, shy expression”
Mask 2 prompt: “4girls, blue hair, black swimsuit, confident pose, hands on hips”
…and so on.
Each mask works like a mini prompt zone with laser focus.
3.3 Regional Prompt setup
The Regional Prompt nodes split your image into zones (left/right/center).
Each region corresponds to one character’s prompt.
This allows for perfect control over multiple subjects without prompt bleeding.
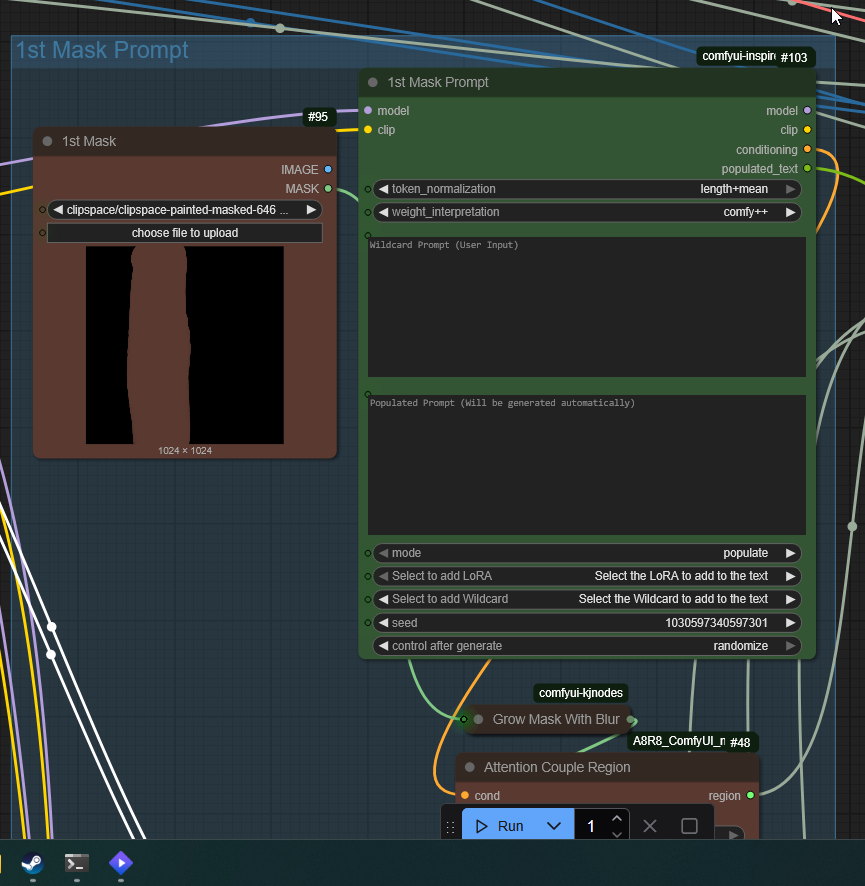
This feature is ideal for duos, group shots, or character interactions.
3.4 Masking setup
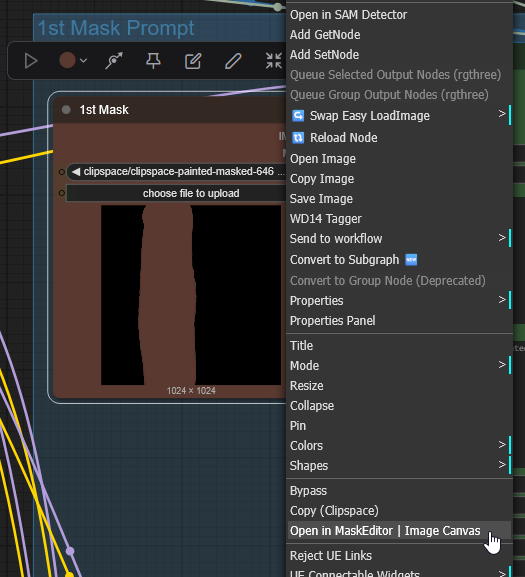
The masking system lets you control which areas each character or effect applies to. Masks are auto-generated based on your region definitions but can also be customized manually. First to input a black (or white) image of the resolution you've chosen (ex:1024x1024)

Use the Mask editor on Mask Preview node to draw your mask to define where your character will be and verify your separations before generation.
3.5 HighresFix
The built-in Highres Fix module allows you to upscale your image directly inside the workflow.
You can enable or disable it with a simple toggle.
Adjust:
Upscale factor (1.5x – 2x)
Denoise strength
Sampler and CFG for the second pass
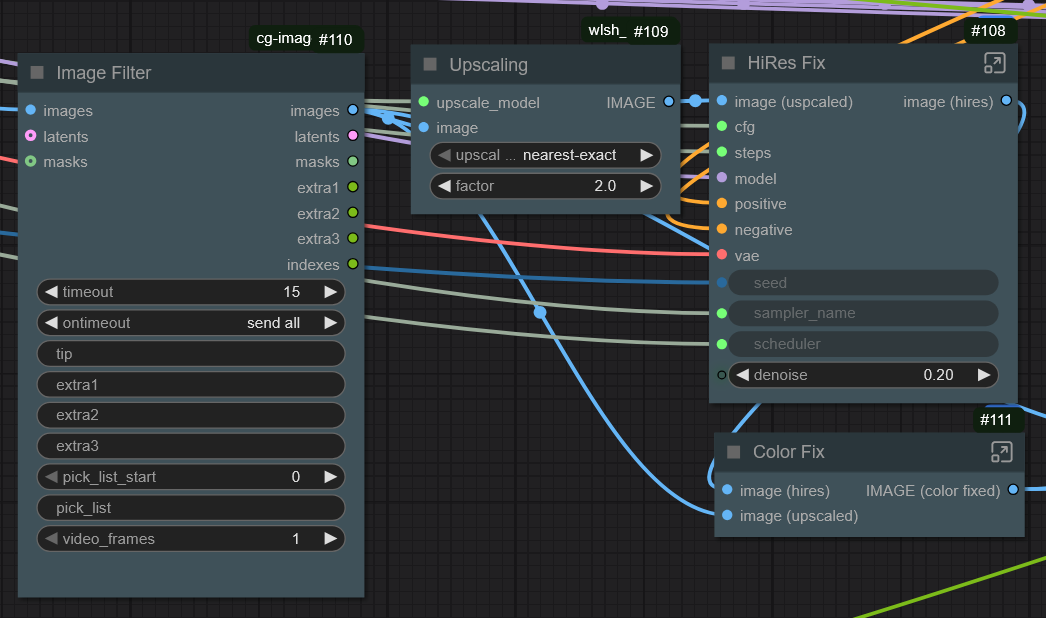
This produces sharper results and adds fine detail without reloading the workflow.
3.6. Advanced Groups
This workflow includes several specialized node groups that you can enable or disable depending on your creative goals.
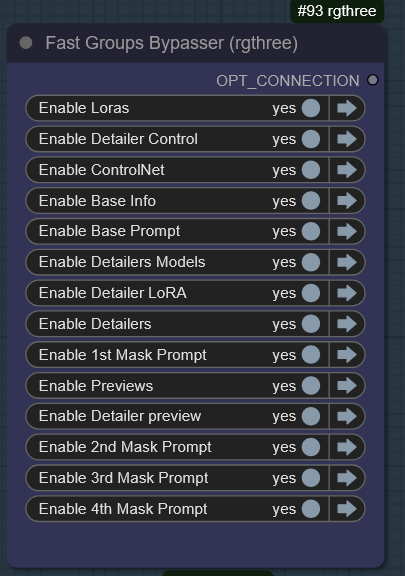
4. Optional feature
4.1 Configure Your Wildcards
Wildcards add variety to your generations automatically.
Once you installed "Impact Pack", goes to you custom node folder and go into "custom_nodes\comfyui-impact-pack\custom_wildcards" then place your wildcards here. You can get mine here : https://civitai.com/models/1937755/1000-wilcards-mittoshura-sfw-nsfw-poses-outfits-emotions
Every image in that section will share these attributes
Example:
clothing.txt
> school uniform
> kimono
> swimsuit
> cyber armor
Then use this in your prompt:
clothing__4.2 Control Net
You can connect ControlNet nodes for pose, depth, or segmentation guidance.
Simply drop your OpenPose or Canny reference image in the ControlNet loader.
It syncs with your regions for per-character control.

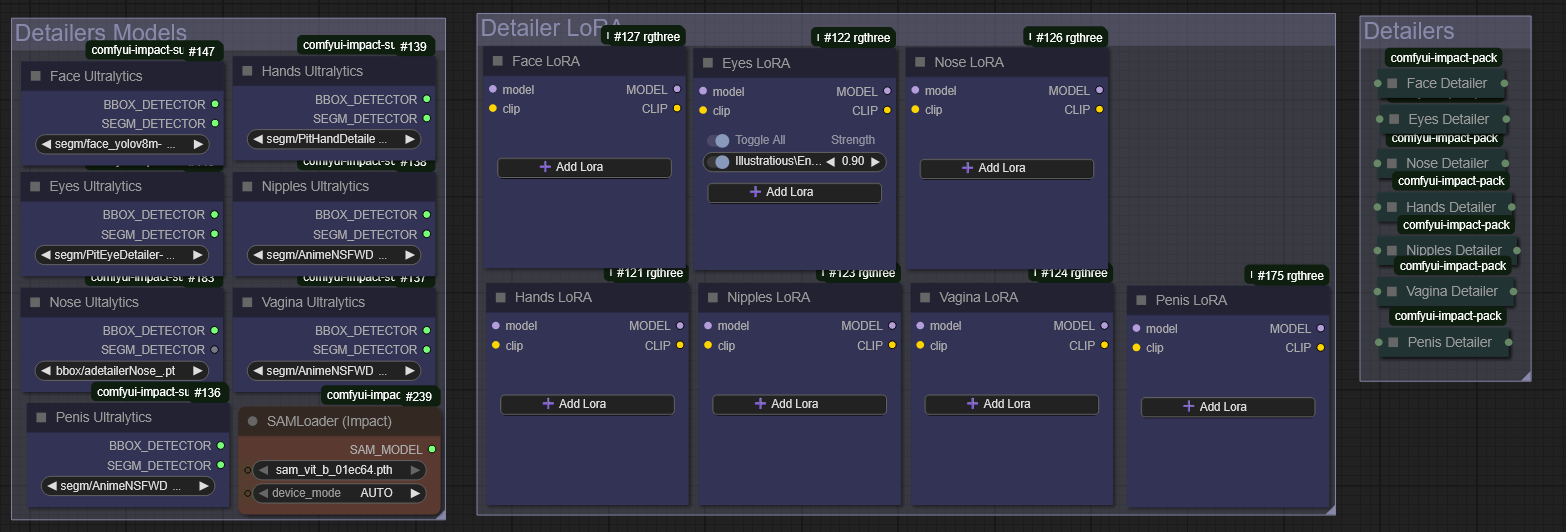
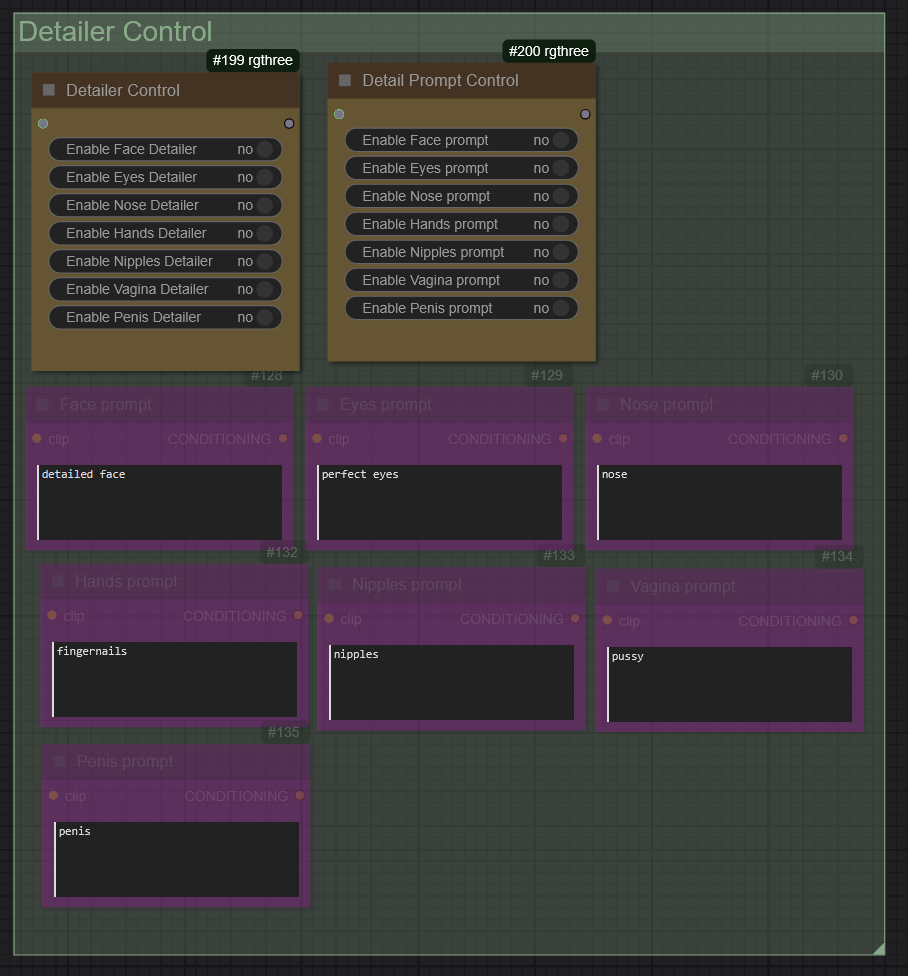
4.3 Detailers
Optional Face / Body Detailers or other parts can refine your output after the main diffusion pass.
Recommended for close-ups or NSFW work where precision matters.
Activate and desactivate eache on them on the detailer control group, you can also input prompt for each of the detailer to help him, like the color of the eyes :
Detailers Models i use in the workflow :
FACE
EYES
LIPS
NOSE
HANDS
NIPPLES
VAGINA
PENIS
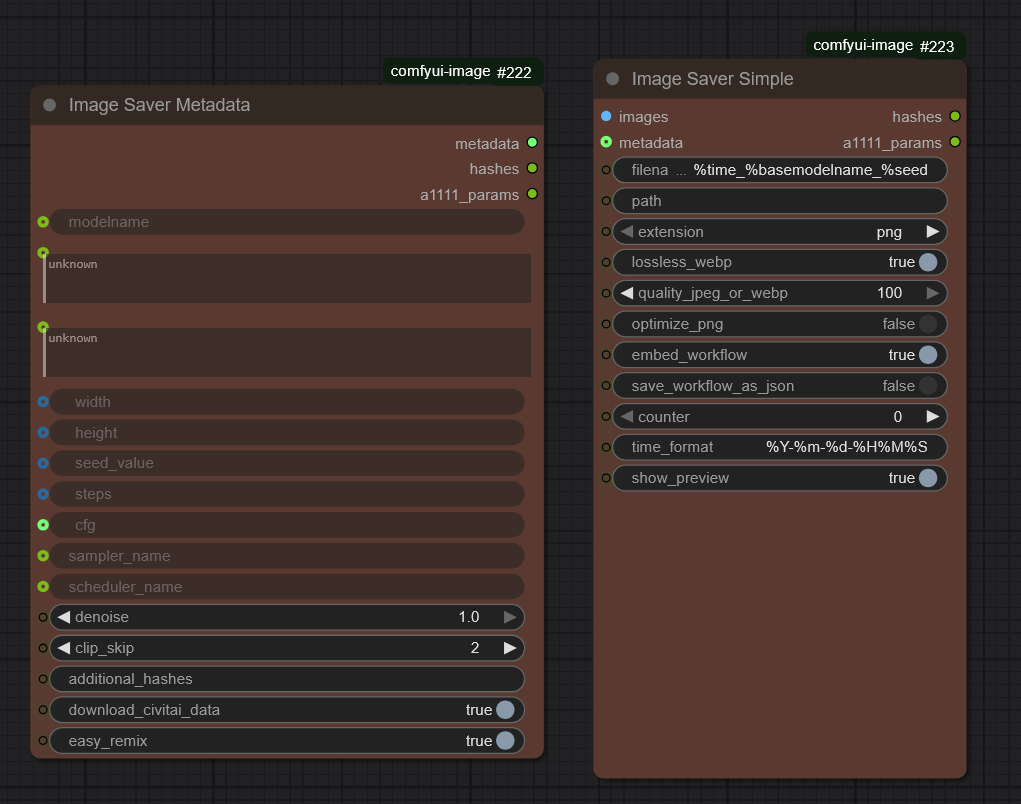
4.4 Metada Saver
The final step embeds prompt metadata directly into the generated image, so you can reload it later and rebuild your workflow context.
Perfect for archiving or sharing results.
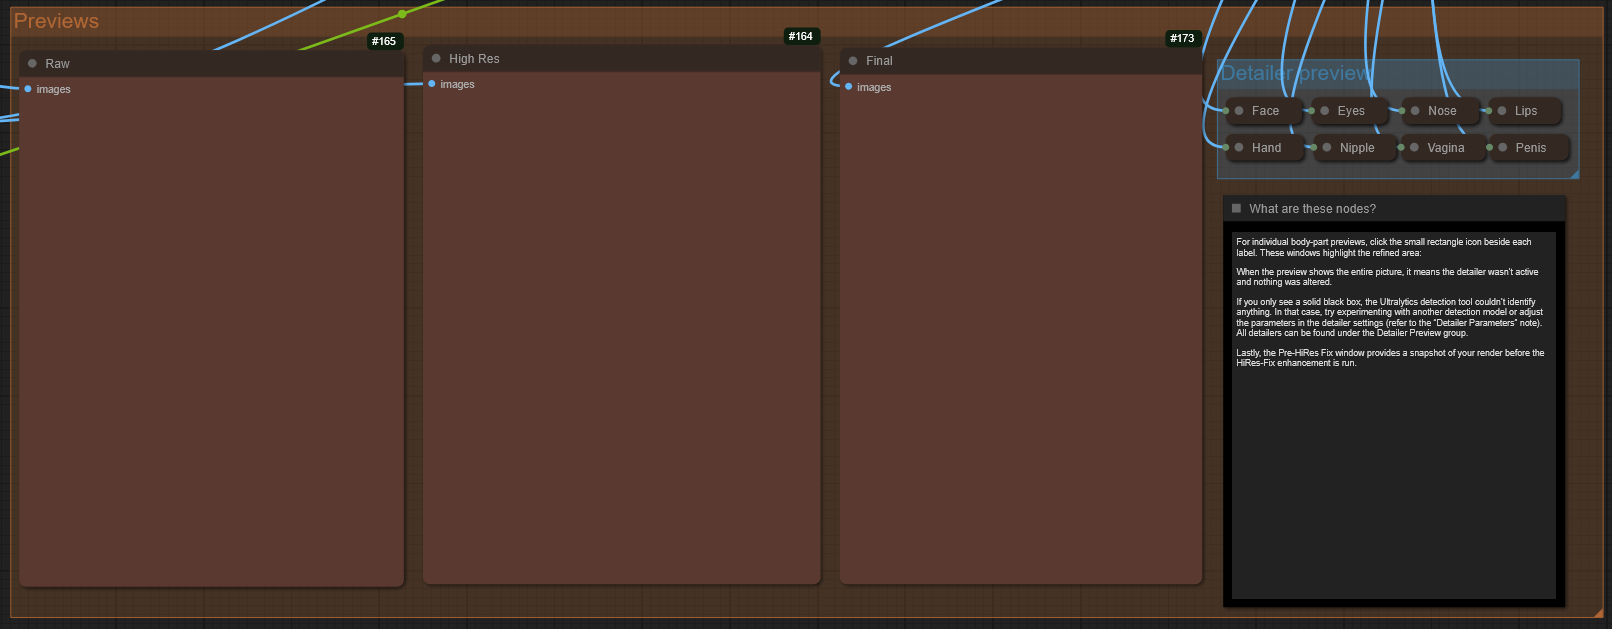
4.5 Preview
This is the section where you can preview your image though the different process, For individual body-part previews, click the small rectangle icon beside each label. These windows highlight the refined area:
5. Join the Discord!
Come hang out, share your AI art, give feedback, ask questions, or just vibe with the community.
It’s also the best place for troubleshooting, commissions, and sneak peeks of upcoming work.
.jpeg)
