RunPod templates are not always up-to-date or functioning properly. Installing "Automatic1111" or a similar GUI via VS Code on RunPod provides you with complete control over the installation. This is especially useful when you want to test the latest and greatest GUI tools but don't want to wait for RunPod to catch up with the open-source community. :)
☑️ Requirements
🔗 VS Code
🔗 Remote Development Extension for VS Code
🔗 Python Extension for VS Code
🔗 Remote Explorer Extension for VS Code
🔗 Runpod Account
🔗 Runpod Network Volume
GNU/Linux or MacOS
🔫 Tutorial
🔌 Connecting VS Code To Your Pod
Start a network volume with RunPod VS Code Server template

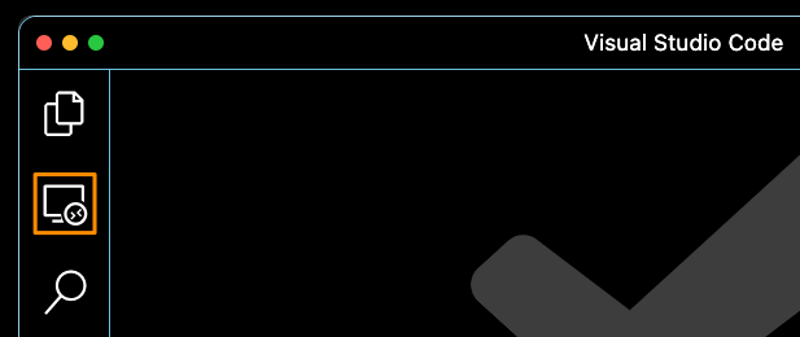
Open a new window in VS Code and select the Remote Explorer extension.
Select
Remotes (Tunnels/SSH)from the dropdown menu
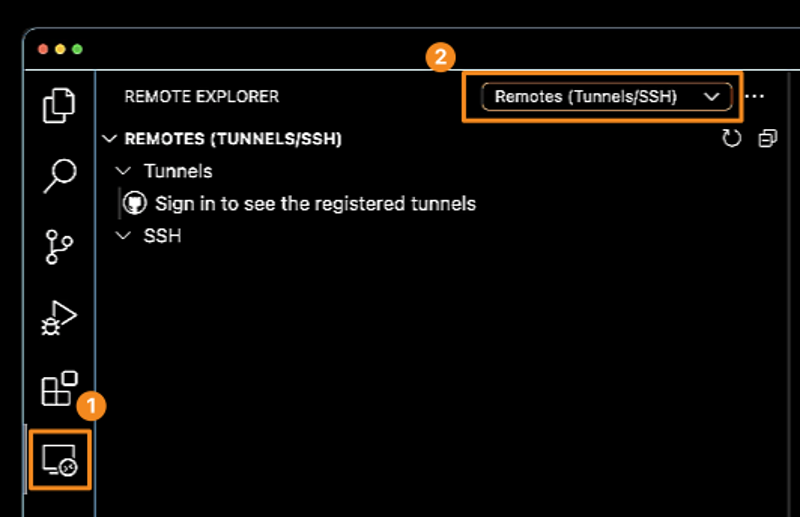
Hover over the SSH voice until a cog appears and click on it.

From the voices in the dropdown select:
/Users/<user>/.ssh/config

Navigate to
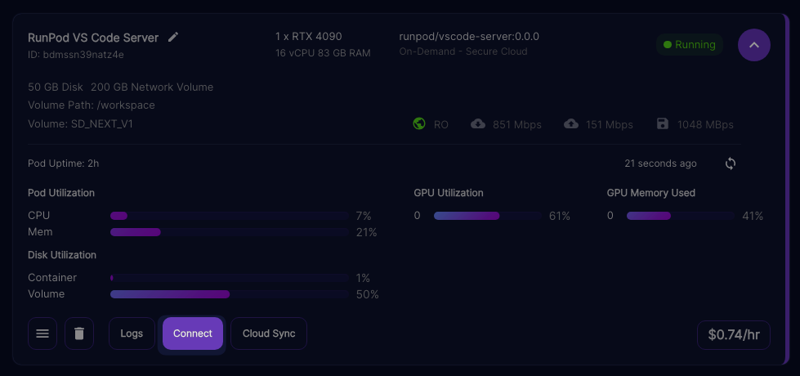
https://www.runpod.io/console/podsand click on the Connect button of your running pod instance.
From the
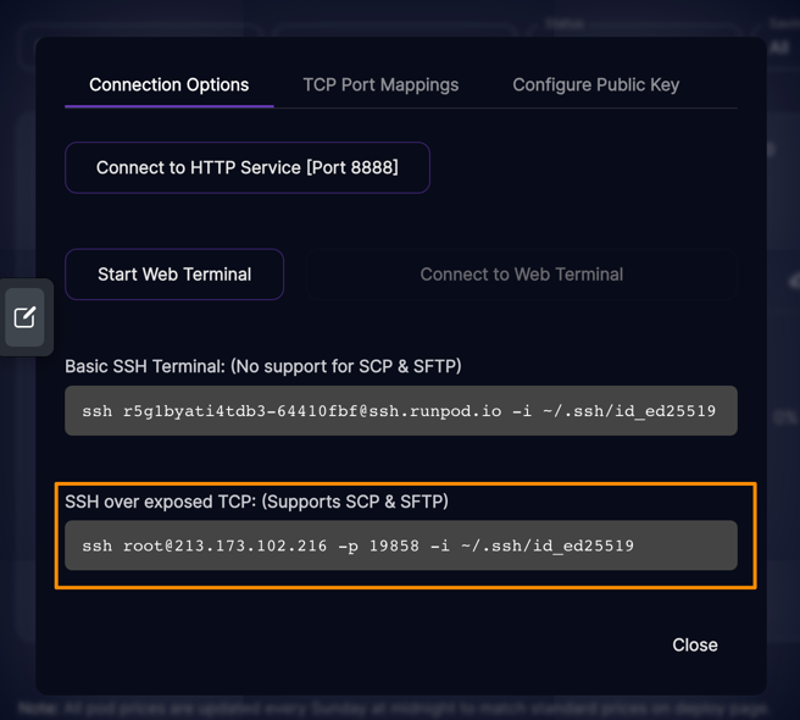
Connection Optionstab, copy the exposed TCP IP and port number.
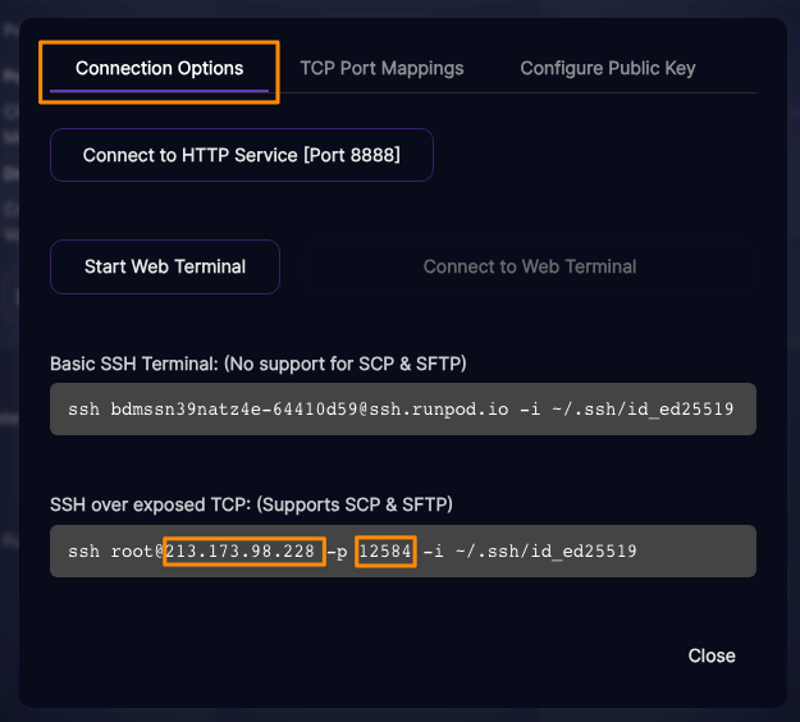
Paste the copied data into the appropriate fields, within the
/Users/<user>/.ssh/configfile opened previously
# Read more about SSH config files: https://linux.die.net/man/5/ssh_config
Host <any_name_of_your_choice_here>
    HostName <PASTE-IP-HERE>
    Port <PASTE-PORT-HERE>
    User root
Save with
⌘ + sor⌃ + sSteps 4 to 6 will have to be repeated each time you spin up a new pod, which will have different SSH connection details
🔒 Generating SSH Certificate
We will use the UNIX ssh-keygen command to generate an SSH key. ssh-keygen is a component of the Secure Shell (SSH) protocol suite used to generate, manage, and convert authentication keys
Navigate to
https://www.runpod.io/console/podsand click on the Connect button of your running pod instance.
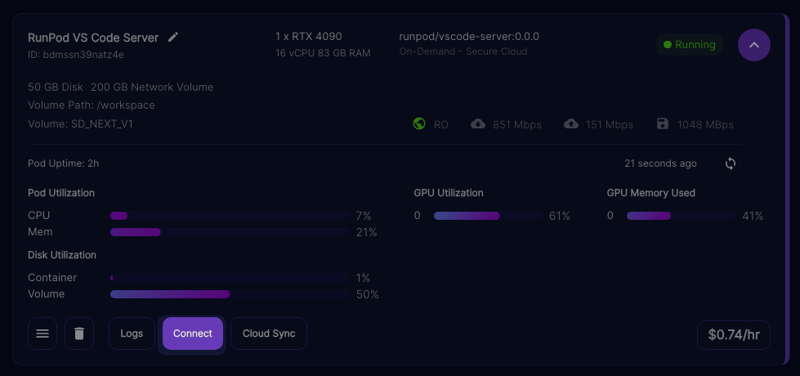
From the Connection Options tab, copy the entire command
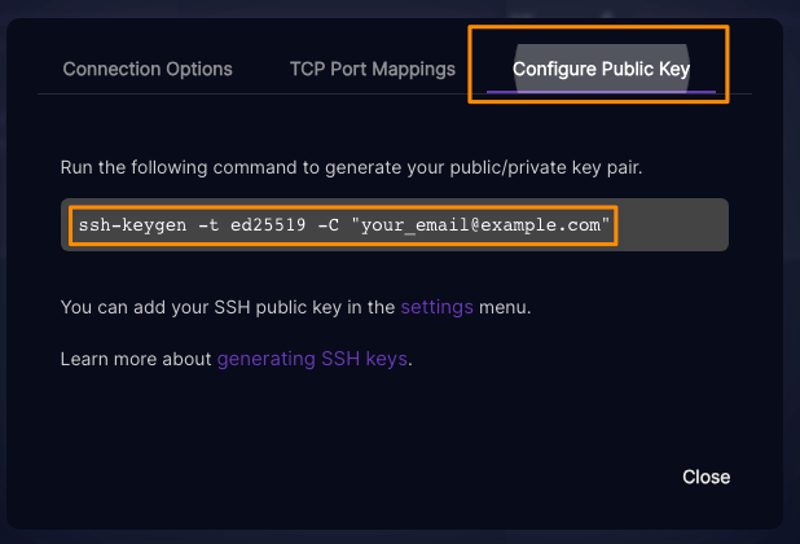
Open a terminal on your computer or within VS Code and paste the command adding your own email address. Press enter and add your password when required to do so.
ssh-keygen -t keytype -C "[email protected]"
Between the lines printed by the shell, you'll see one saying: Your public key has been saved in
/Users/<username>/.ssh/<filename>.pub. Copy the indicated path.

A full connection command will also be printed out, copy that too

Navigate to
https://www.runpod.io/console/user/settings>Settings>SSH Public Keys. Paste the key previously copied and clickUpdate Public Key.
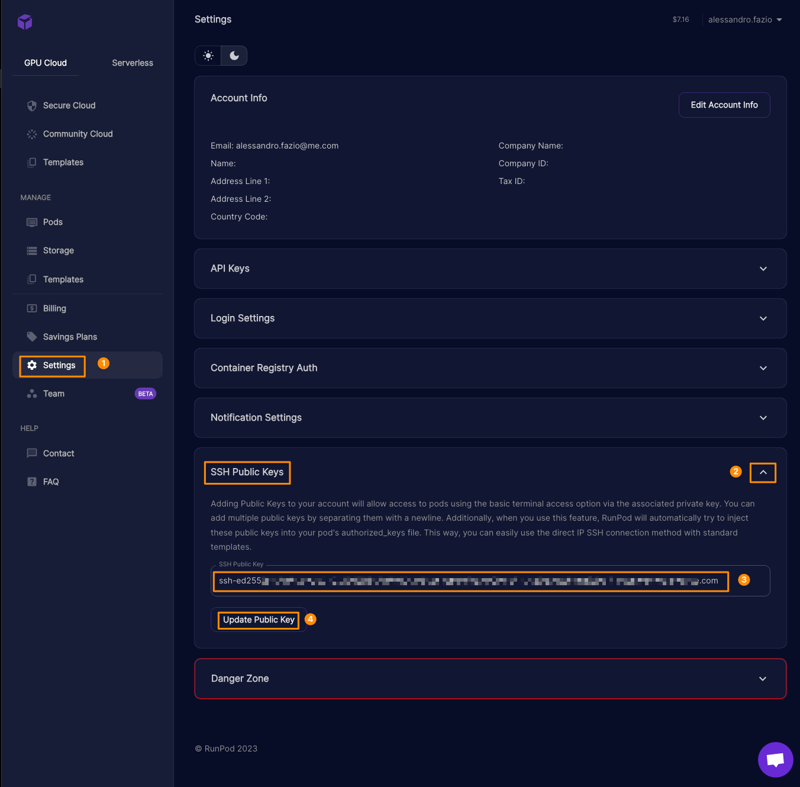
📶 Connect to your VS Code Server
Back in VS code, close the current window entirely and open a new one.
If a connection to your server it's already in the list, open the Remote Explorer extension and reconnect to the server by pressing on the arrow on its right side. If not, see step 3.

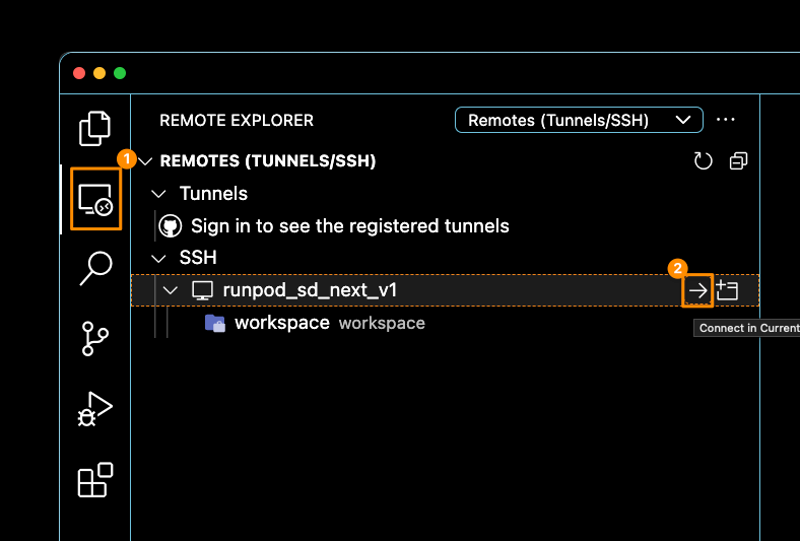
If an existing connection to your server is not present in the list, press the refresh button in the top right corner.
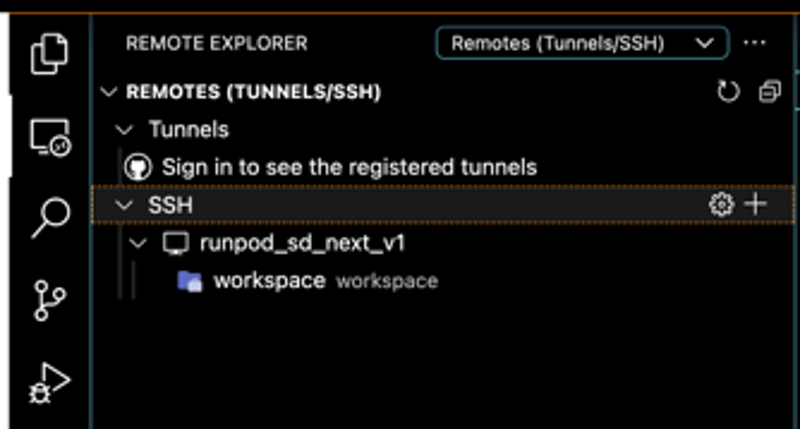
If you encounter any connection issues at this point, it normally helps to trash the pod entirely and create a new one. Once the new pod is running, you'll only have to update the connection details in
/Users/<user>/.ssh/config(see step 7 of Connecting VS Code To Your Pod).
Navigate to
https://www.runpod.io/console/podsand click on the Connect button of your running pod instance.
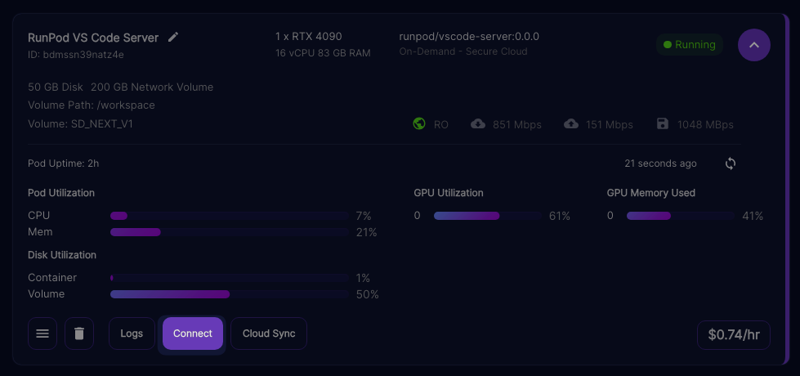
From the
Connection Optionstab, copy the entire command forSSH over exposed TCP: (Supports SCP & SFTP).
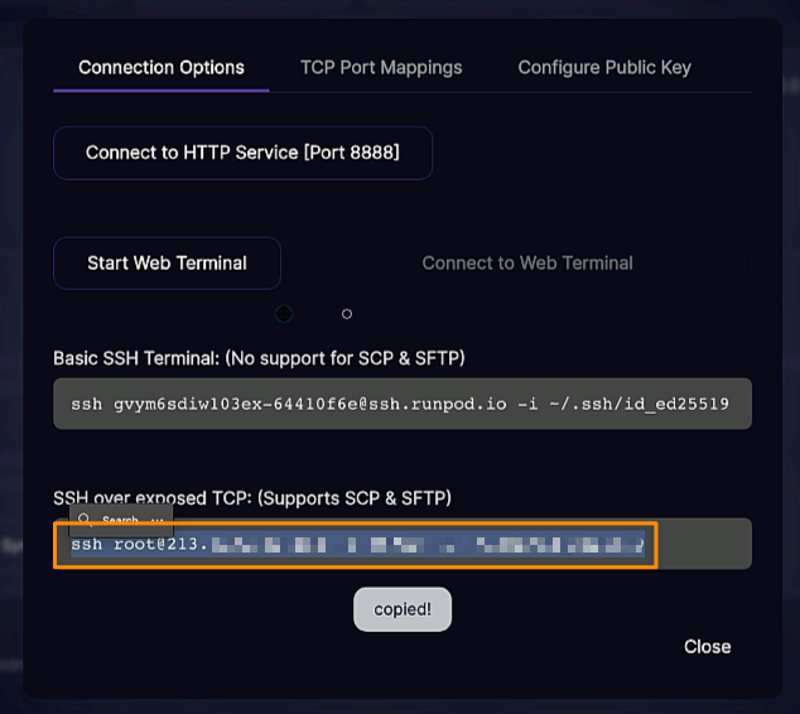
Open a terminal on your computer or within VS Code and paste the command copied previously.
Press enter and type yes when asked:
Are you sure you want to continue connecting.... Add a custom passphrase for key when required to do so.Please store this password securely somewhere. You'll be asked this password every time you connect to a server with the current template.
ssh [email protected] -p XXXXX -i ~/.ssh/id keytype
Back in VS code, close the current window entirely and open a new one. Then open the Remote Explorer extension and reconnect to the server by pressing on the arrow on its right side. (see step 7 of Generating SSH Certificate) When prompted, enter the reqruired passkey we just used within the system Terminal. After entering the passkey, you'll be finally connected to your Vs Code Server.

If you encounter any connection issues at this point, it normally helps to trash the pod entirely and create a new one. Once the new pod is running, you'll only have to update the connection details in
/Users/<user>/.ssh/config(see step 7 of Connecting VS Code To Your Pod).
🖥️ Setting Up Your Machine
Once connected to your RunPod VS Code server, open a terminal within VS Code by pressing
⇧ + ⌘ + Por⇧ + ⌘ + Pand typingCreate New Terminal.Once the terminal is open, type:
cd /workspaceand press⏎apt updatepress⏎.apt install -y vimand press⏎.
Type
vim /workspace/entrypoint.shand press⏎. Paste the following with⌃ + Vor⌘ + V
#!/usr/bin/env bash

# Update package lists
apt update

# Install required packages
apt install -y ffmpeg libsm6 libxext6 tmux rsync vim htop zip

# Install and upgrade gdown
pip install --upgrade gdown

# Tmux mouse support configuration
echo "set -g mouse on" > ~/.tmux.conf

# ComfyUI Requirements
pip install torch torchvision torchaudio --extra-index-url https://download.pytorch.org/whl/cu118 xformers
Then type :wq (copy pasting might not work) followed by ⏎.
Type the command
chmod +x entrypoint.shfollowed by⏎. This command modifies the permissions of the fileentrypoint.shto make it executable.Type
vim /workspace/boot.shand press⏎. Paste the following with⌃ + Vor⌘ + V
#!/usr/bin/env bash

# starts AUTOMATIC1111 webui
# to make this executable 👉 chmod +x boot.sh
# to execute boot.sh 👉 ./boot.sh

# Update package lists
apt update

# Navigate to the webui directory
cd /workspace/stable-diffusion-webui

# Install required packages to fix AttributeError
apt install -y ffmpeg libsm6 libxext6

# Start the webui
./webui.sh
Then type :wq (copy pasting might not work) followed by ⏎.
Type the command
chmod +x boot.shfollowed by⏎. This command modifies the permissions of the fileentrypoint.shto make it executable.Once the terminal is open, type:
cd /workspaceand press⏎./entrypoint.shand press⏎.🥳 Your environment is now ready
💽 Installing Automatic1111
Once connected open a terminal within VS Code by pressing
⇧ + ⌘ + Por⇧ + ⌘ + Pand typingCreate New Terminal.
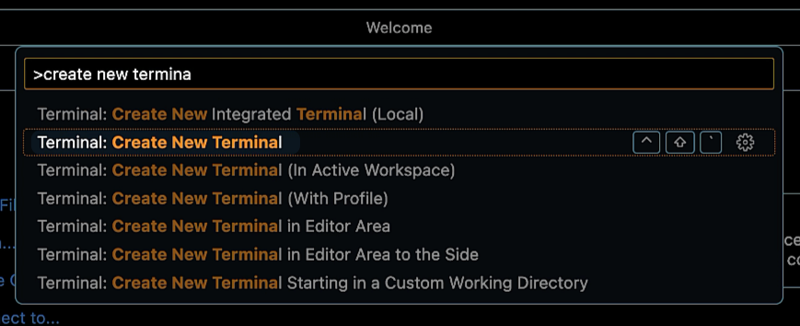
Once the terminal is open, type
cd /workspaceNavigate to Automatic1111 GitHub repository
https://github.com/AUTOMATIC1111/stable-diffusion-webuiand copy the .git URL
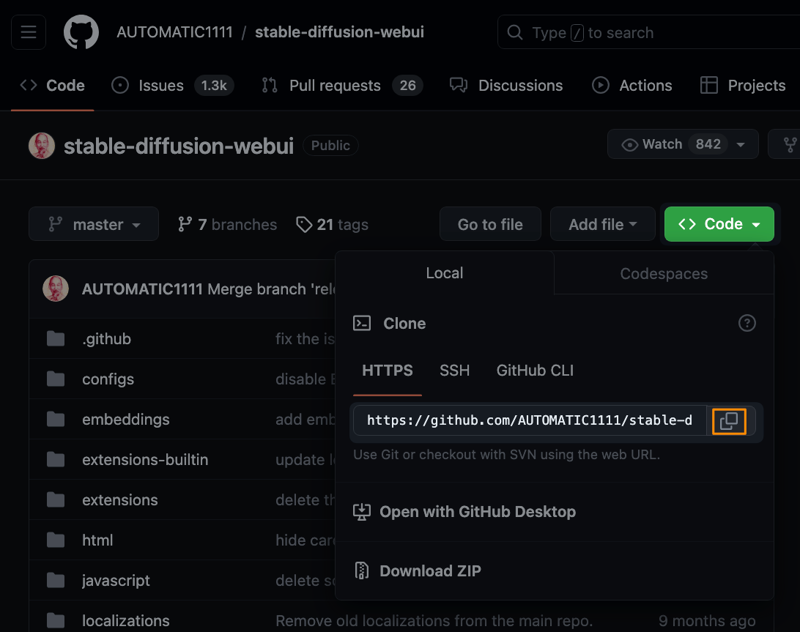
Within the VS Code terminal type
git clone https://github.com/AUTOMATIC1111/stable-diffusion-webuiand press⏎
🆕 Starting Your GUI for the First Time
Once the cloning is completed type cd
/workspace/stable-diffusion-webuiand press⏎. Then type./webui.shto start the application. As this is a first time start, requiring several installations, it will take a while. So sit back or grab a coffee. If prompted toDownload the default model? (y/N)typey.Type
./entrypoint.shfollowed by⏎. The script performs the following actions: Updates the package lists on a system using theaptpackage manager.
Installs several packages, including multimedia processing tools (
ffmpeg), libraries (libsm6,libxext6), system utilities (tmux,rsync,htop,psmisc), a text editor (vim), and a compression tool (zip).Installs and upgrades the
gdowntool usingpip, which is used for downloading files from Google Drive.Configures
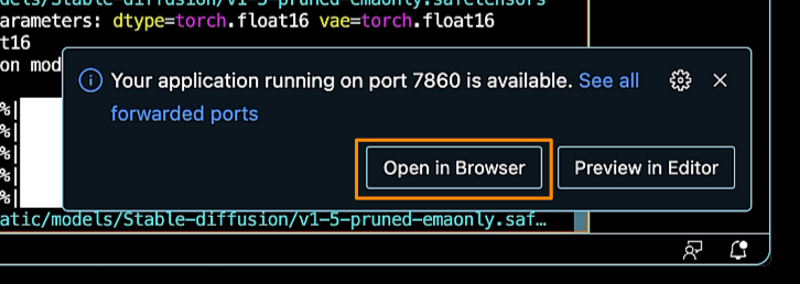
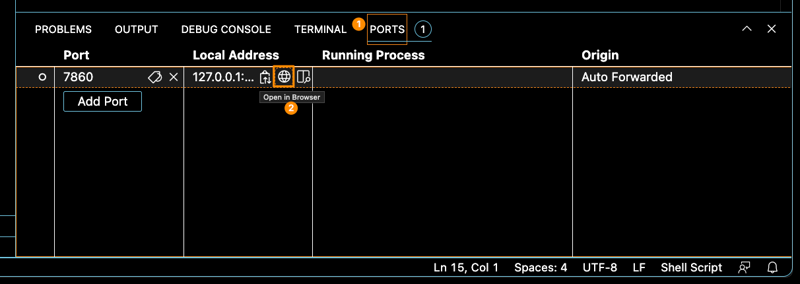
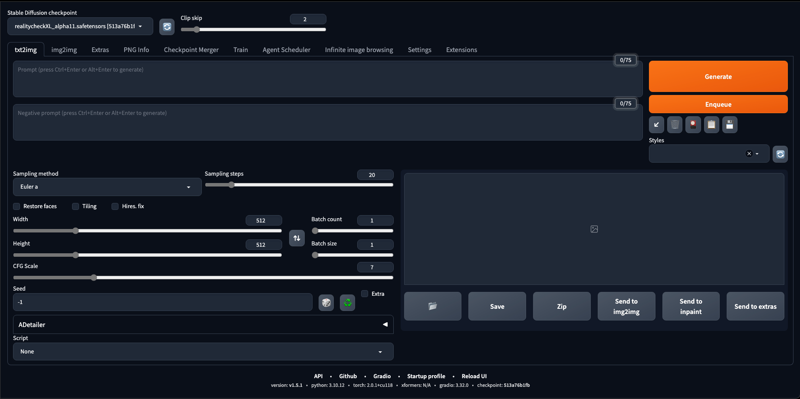
tmux(a terminal multiplexer) to support mouse interactions by creating or updating the~/.tmux.conffile. Starts the webui by calling./boot.shAt this point you should have received a notification within VS Code allowing you to open your instance of AUTOMATIC111 via web browser. By clicking on
...you'll be bable to access your machine. If this is not the case, check within the ports tab, for open ports. And by clicking on the globe icon, you'll access your machine.
🎨 Installing Models
Open a terminal in VS Code pressing
⌃ + ⇧ +and type:/workspace/stable-diffusion-webui/modelsto navigate to the models folder.In your web browser, navigate to a
.safetensorsmodel web page of your choice and grab the download URL.In VS Code terminal, type
wget <URL> --content-dispositionto download the model to your current folder.When the download is complete, simply refresh your checkpoints selector to have the model available in A1111.

I genuinely hope that this guide was helpful. If there are any queries you'd like to raise, or if you have any additional tips that could enrich this guide even further, I encourage you to post them in the comments. Your contributions are valuable and can help in refining and expanding this guide, as well as benefiting others who discover it. I appreciate your engagement and support — thank you!

