hello again ,this is my second article in continuation of This Article About Generating
here i want to show a simple ComfyUi Workflow and How to use Multiple Loras While Generating with comfyui.
things in this article :
basic workflow in comfyui (for simple img gen)
how to use a single lora while generating
how to use multiple loras during generation
also im going to keep in mind that you used the google colab method so my guide might be a little bit based on that. (btw just scroll to the lora part if youre interested in loras)
!! i Highly recommend reading this but if you already have Comfyui up on either colab or your system its all good !!
Update 1 : i wrote this article for using Flux and other Large models in comfyui colab Heres the link
PART ONE 1 : COMPONENTS
1 - 1 - Basic ComfyUi dashboard
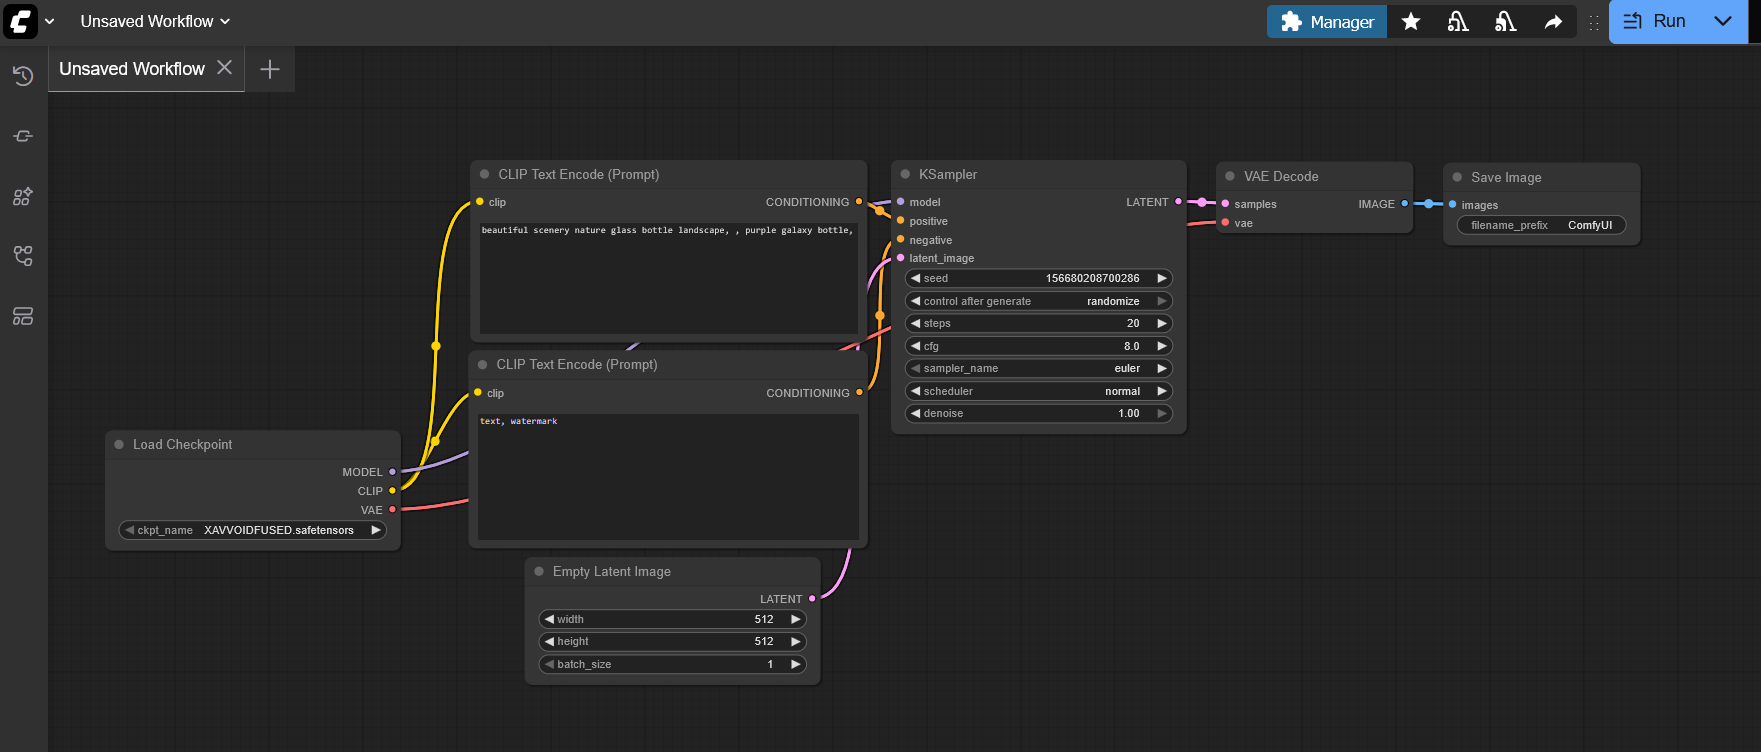
when you launch comfyui you probably meet something like this
a basic workflow that let you generate simple images.
now what if there was nothing there?
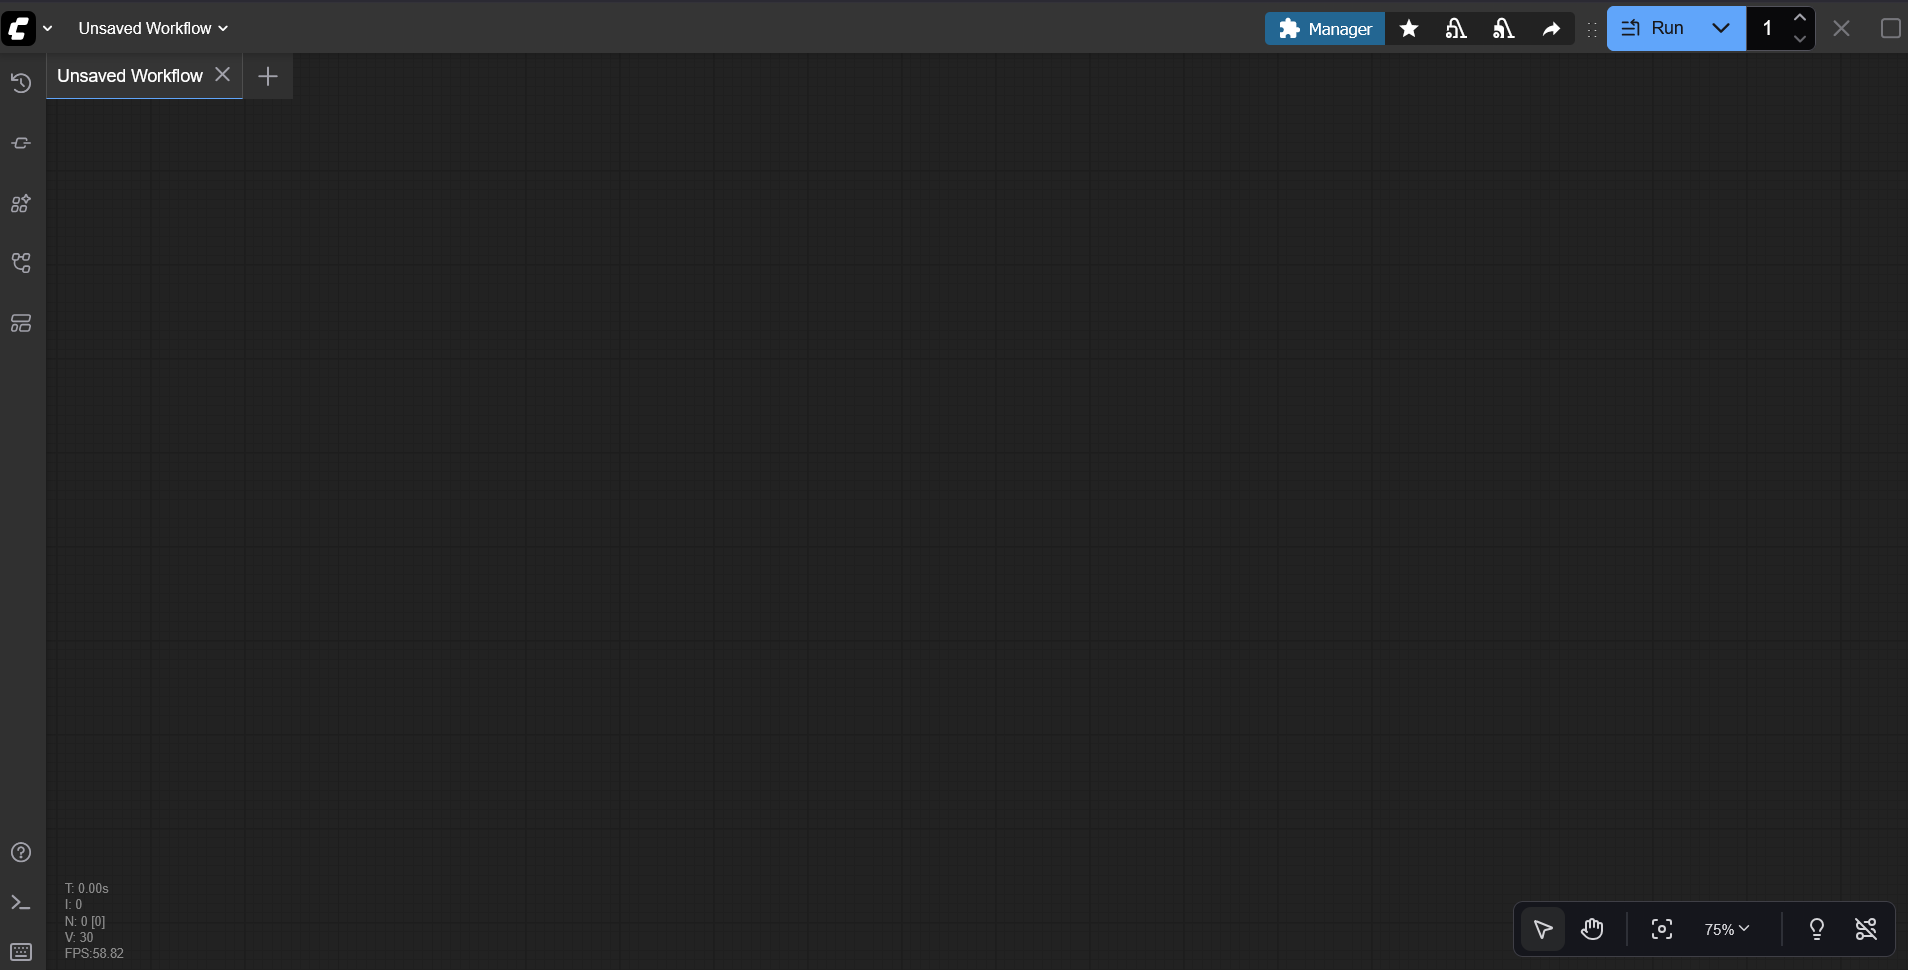
sometimes when i use colab without google drive to generate images i get a blank page so here we going to step by step insert our nodes and make our workflow (after this basic workflow ill show how to add loras)
1 - 2 - Library Nodes
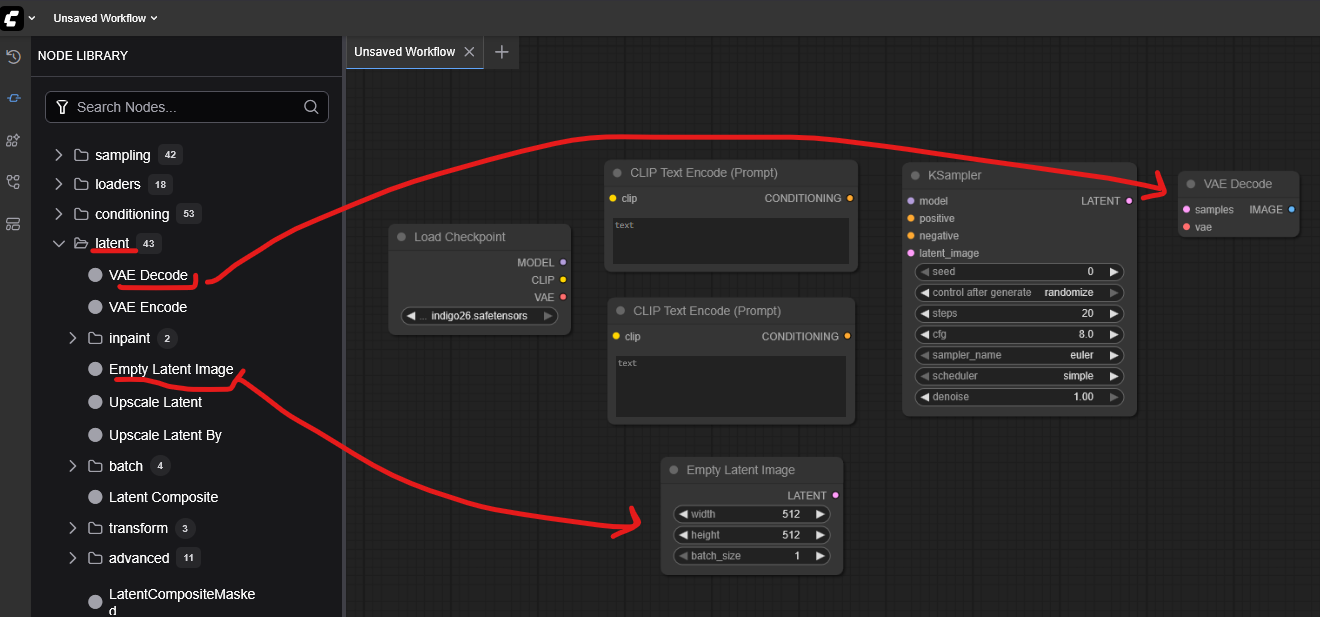
here you can select your nodes (your workflow building blocks)
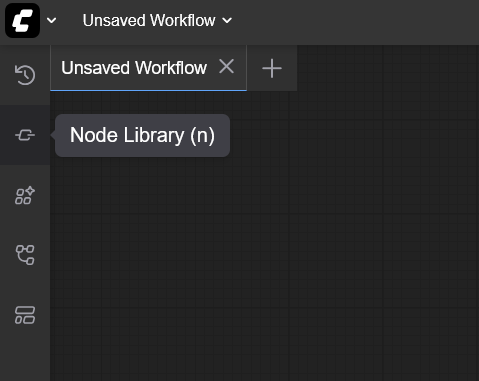
heres another picture when you selecting node library
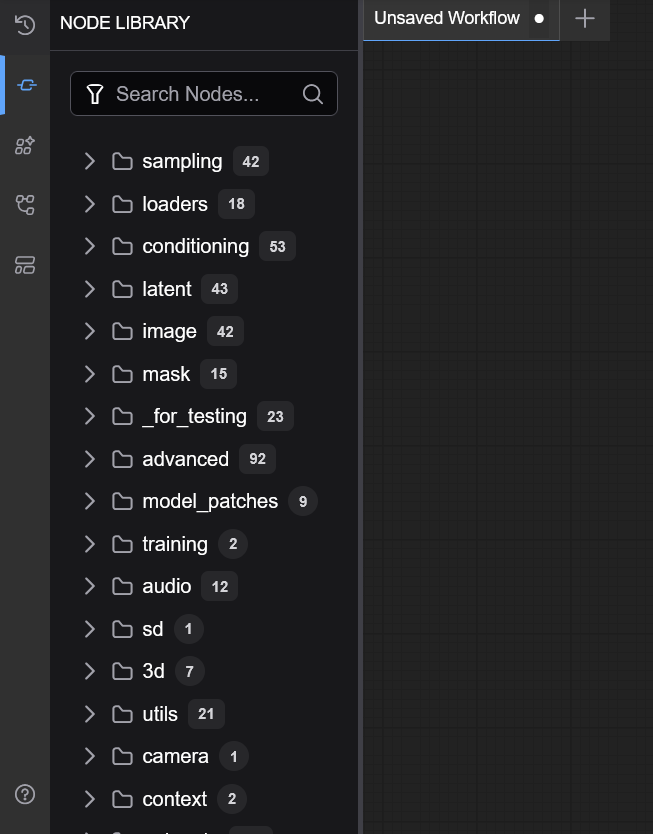
its alot options but dont worry we only working with few of them
im going to import nodes step by steps from top of the list
1 - 3 - Sampling Node
here we have 2 samplers
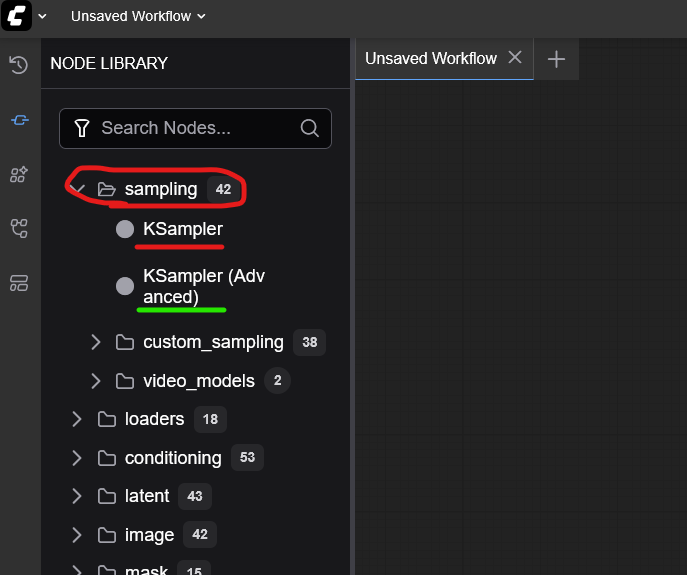
here we have 2 samplers ,Ksampler is the basic sampler , and the Ksampler(advanced) is a advanced version with more customizable settings. here we using a basic sampler.
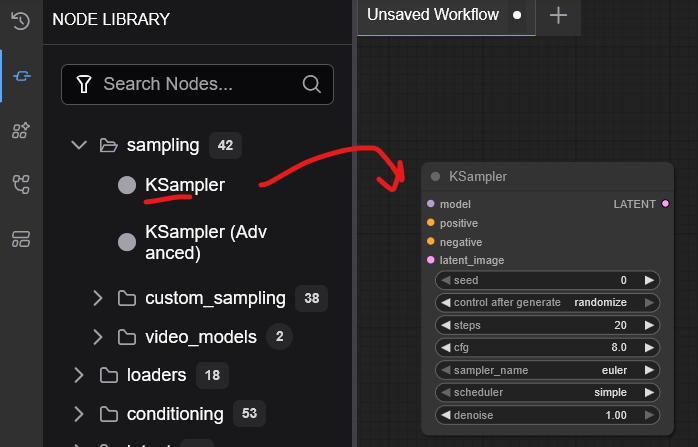
Select KSampler or drag it into the screen, it should look like this
1 - 4 - ComfyUI Loaders
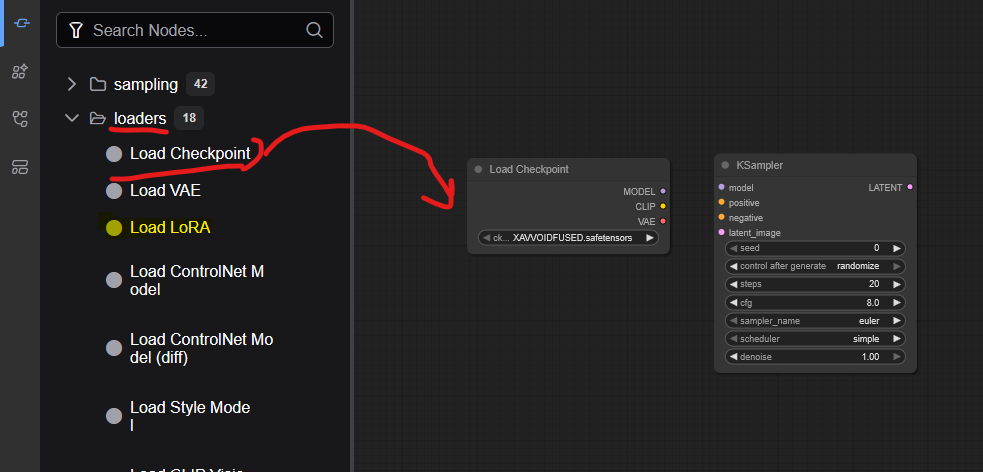
here we going to need a normal checkpoint loader to load our checkpoints into our workflow (as you see theres a lora loader too but we will get back to it)
1 - 5 - Conditions
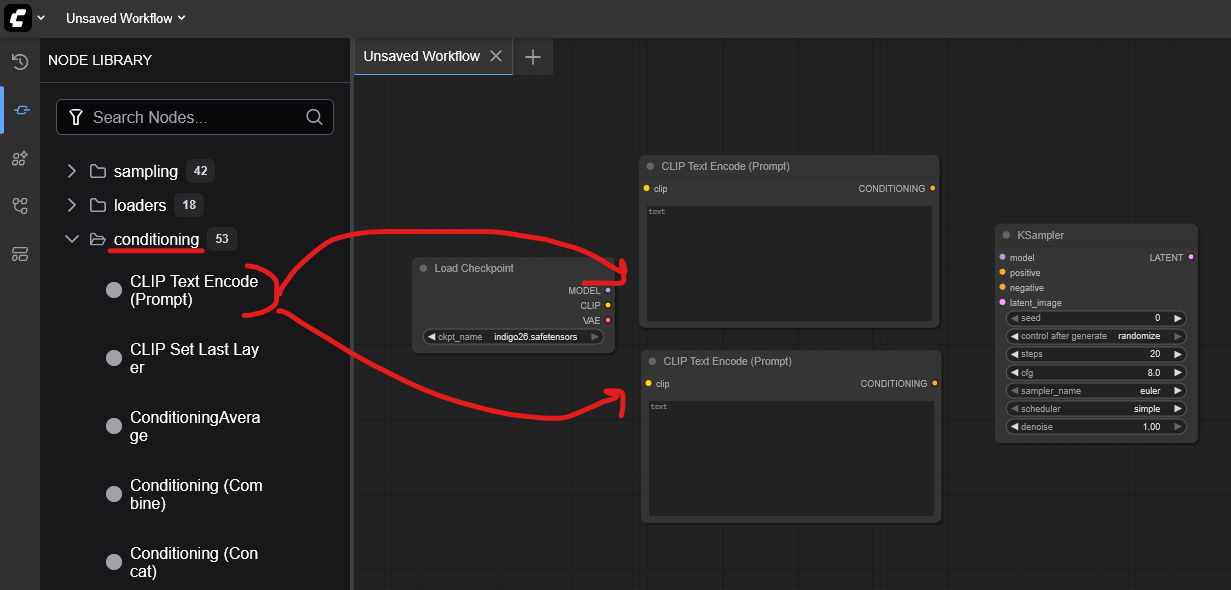
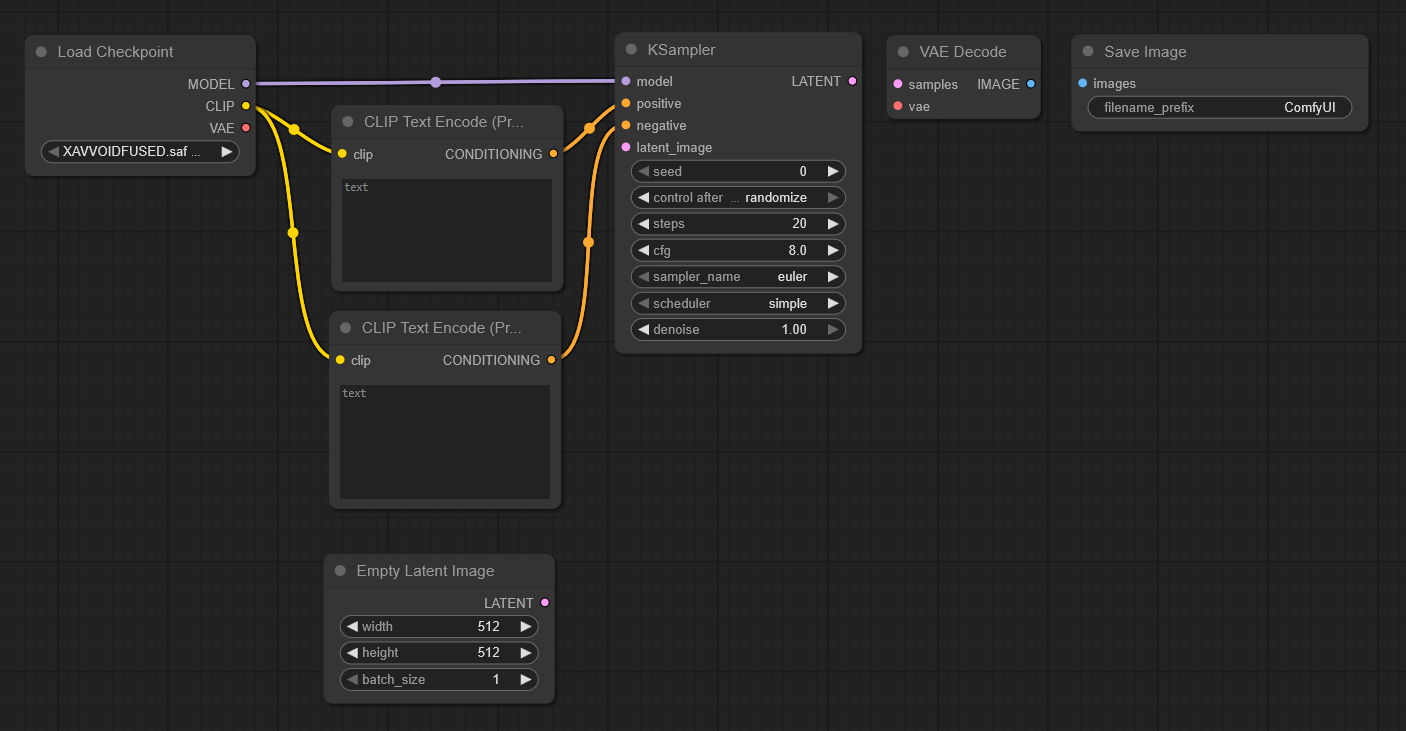
after that we have to add 2 condition box or prompt box , one for our positive prompts and what we want to see , and one for negative prompts
1 - 6 - Latents
after that you add your VAE Decoder and Empty Image Latent
1 - 7 - image output
lastly we add a image output , you can change filename prefix to change how it saves your images

PART 2 : CONNECTIONS
this part were going to connect things together , pretty short pretty simple , i seperated them for easier viewing
2 - 1 - Simple Prompt Connection
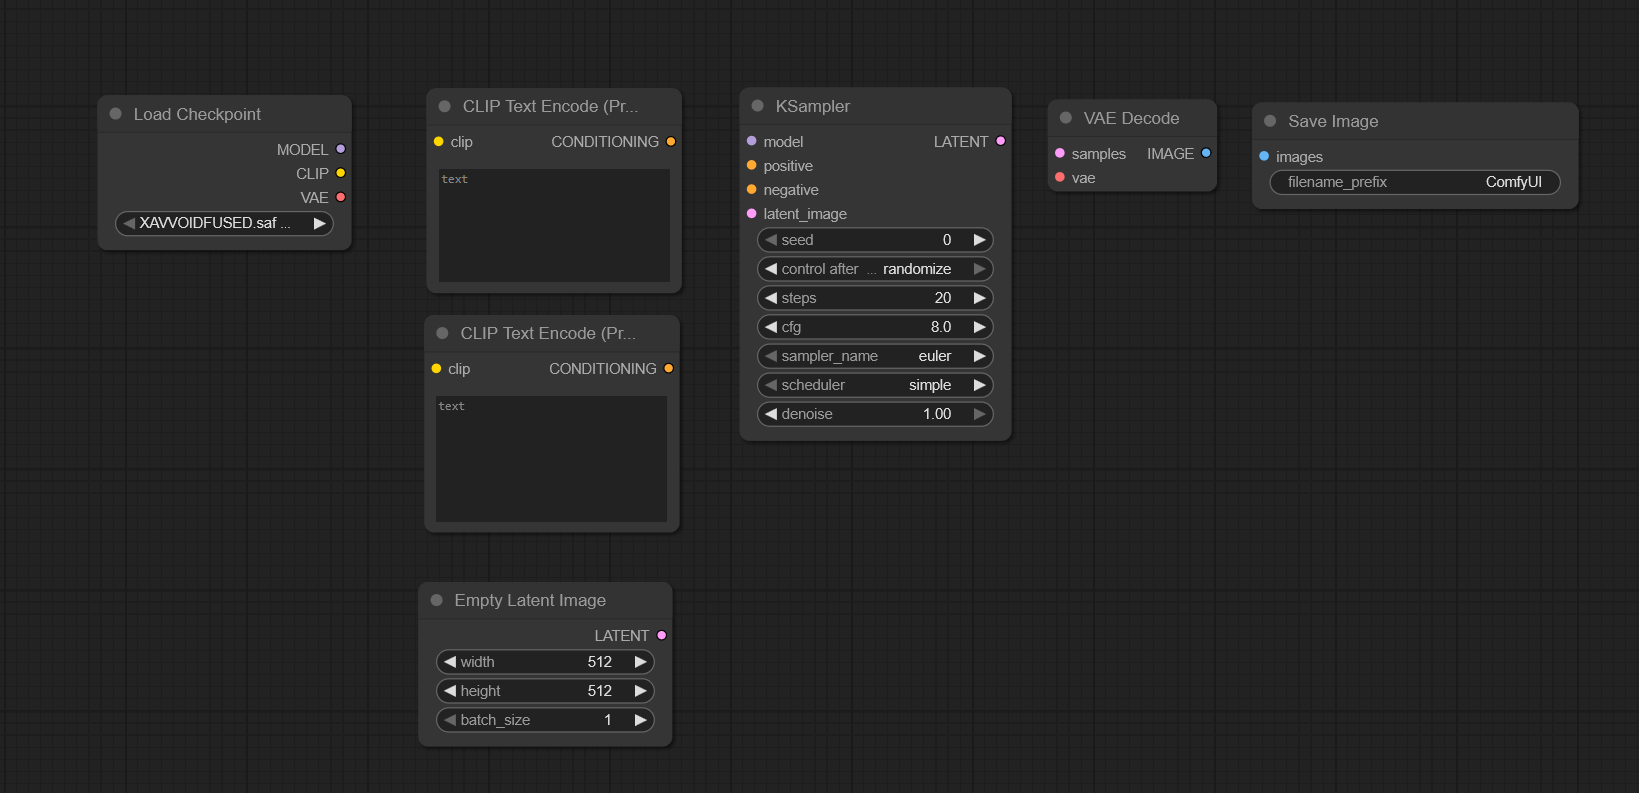
so we should have the nodes like bellow (i resized them for better view)
we going to connect the prompts to negative and positive like bellow
2 - 2 - VAE , Image and Latent
its kinda connect anything you see together lol
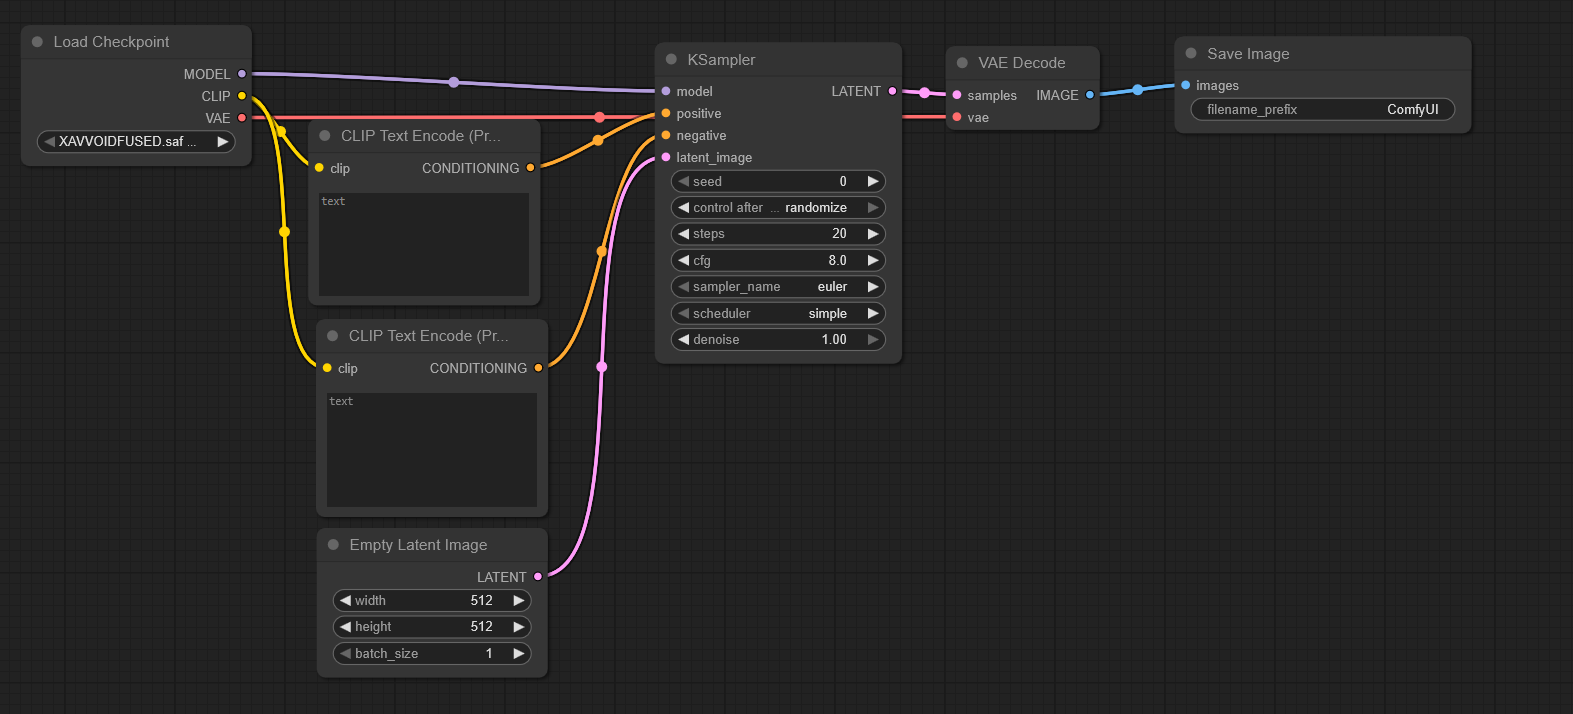
2 - 3 - Your Basic Image Generator
thats it ! you have your basic workflow which you can start generating , i wrote what each part do in my other article you can check it out
PART 3 : LORAS , AND MULTIPLE LORAS
here we add bunch of loras to our comfyui
3 - 1 - downloading loras
so by now im keeping in mind you been using colab and on cloud (if you locally installed comfyui and have few loras ,you can skip this part)
go to your second code block

red part you add your link between the " symbol and second part is the location it saves it in your comfyui folders , just remember to rename the file name youre downloading , like if im downloading a car lora it goes like
./models/loras/CAR.safetensors
so remember to rename the file you saving so it wont mess up your already downloaded loras
also i highly recommend downloading all the loras you want to use before hand so you dont have to connect/disconnect each time new lora you want to download
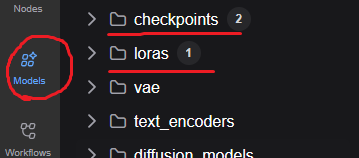
you can select loras or checkpoints from Models too , fyi
3 - 2 - Adding lora to workflow
open loaders nodes again and then
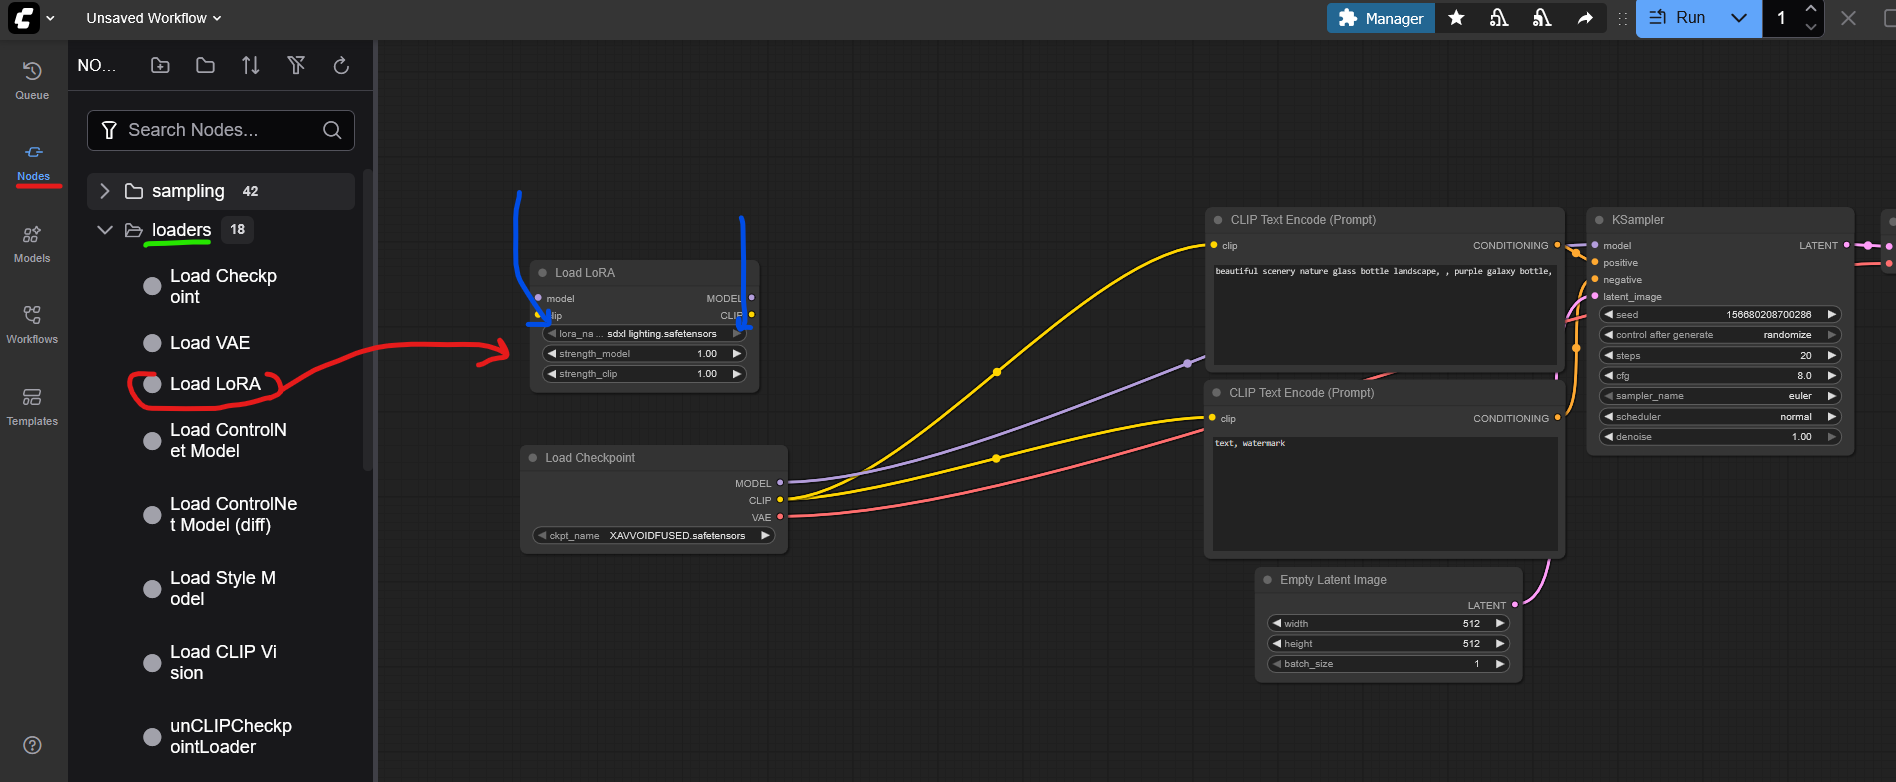
drag and drop your lora into the work flow you can change different loras with that part i pointed at (right now i only have one lora)
3 - 3 - Connecting lora
now you just have to connect your checkpoint loader through lora

3 - 4 - Multiple Loras
Multiple loras are like that too only diffrence is you have to connect them together like a train

and thats it ! we now have a simple workflow with diffrent loras
you can change the lora strenght and other values
Others - things and tips
im going to update here with things that didnt fit the article
1 - if the lora have trigger words you can check them from the lora page in civitai and use it in your prompt , it wont show up in comfyui sadly (At least that i know of)
if you like the article you can support me by checking my checkpoint here
make some cool stuff :D
this is the basic way to add multiple loras and a basic workflow in Comfyui
i wish you good lucks to you amazing creators


