From the Beginning
Unfortunately, with the recent changes to TensorArt, we were forced to relocate, and a major curiosity about the site was how a workflow ran behind the scenes for the images generated on the site. Unfortunately, after much searching on Reddit and forums, I never managed to actually create a workflow that came close to TensorArt's. Knowing that the site uses ComfyUI under the hood, it would be very easy to simply drag an image created in ComfyUI to magically create a wonderful workflow. However, the problem was deeper, and a huge popup always appeared showing which nodes were missing.
The problem is that TensorArt uses "custom nodes," so even searching online wasn't as easy as I imagined. It was then, after much effort, that I managed to replicate the exact same workflow configurations, recreating the same quality of the images generated on the site.
First, open the workflow in ComfyUI. A popup will appear showing which nodes are missing. Then, follow these steps:
1 - Click on ComfyUI Manager
2 - Click on Install Missing Custom Nodes
3 - Install each missing node and then restart ComfyUI
That's it, everything is now properly installed. If you still encounter errors even after installing all the nodes, check if ComfyUI is up to date. As I write this article, my version is 3.37.2
Understanding how everything works
Now we will examine what each node in the image means.
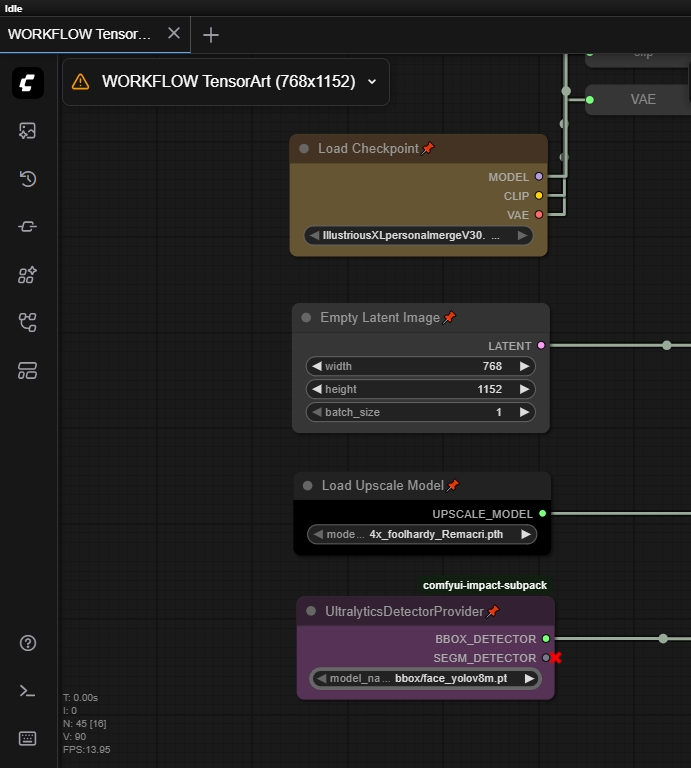
Load Checkpoint = This is where you will choose the model.
Empty Latent Image = The size of the image to be worked on. I will provide one workflow for download related to one image size (generally the standard sizes used in TensorArt): 768x1152 / 1024x1024 / 1152x768
Load Upscale Model = Here you choose the model. From various options, the one that mainly composes Civitai is 4x_foolhardy_Remacri / remacri
Ultranalytics Detector Provider = This is a node responsible for detecting and correcting something in the image. As chosen, this workflow is bbox/face_yolov8m.pt (responsible for detecting faces in the image and correcting them).
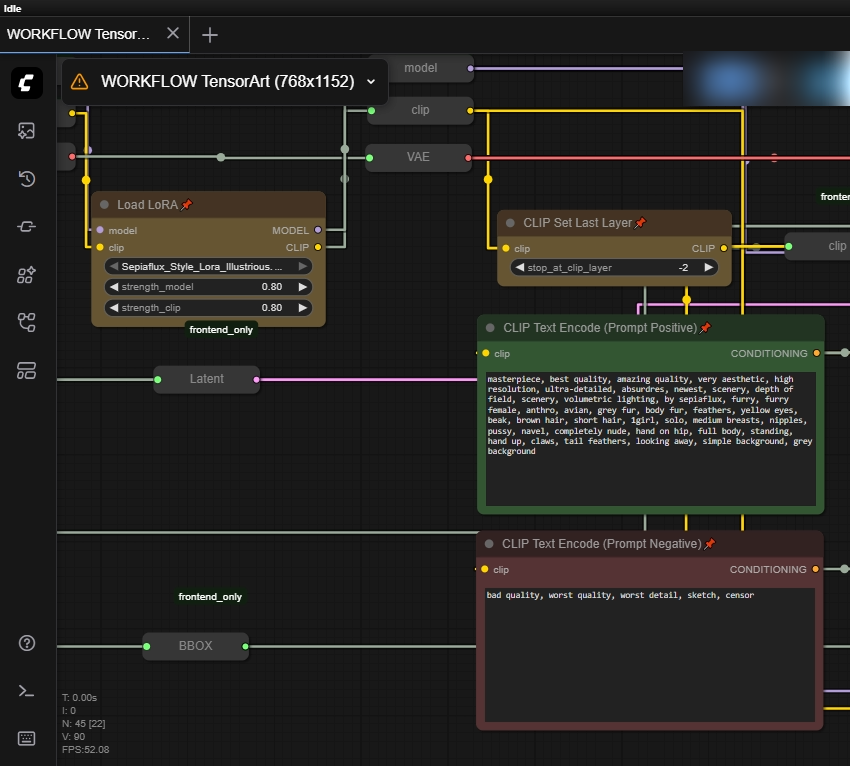
Load Lora = Here we will choose the Lora
Clip Set Last Layer = Controls the depth of models; generally, models created in SDXL accept "clip 2" by default, in ComfyUI this is equivalent to "clip -2"
NOTE: This is a very extensive subject and I suggest you look for more information in some articles or summaries on the internet. This link explains it in detail (https://graydient.ai/stable-diffusion-what-is-clipskip/)
Clip Text Encode = Here is the text encoding (prompt), I separated it into colors to distinguish the positive from the negative prompt
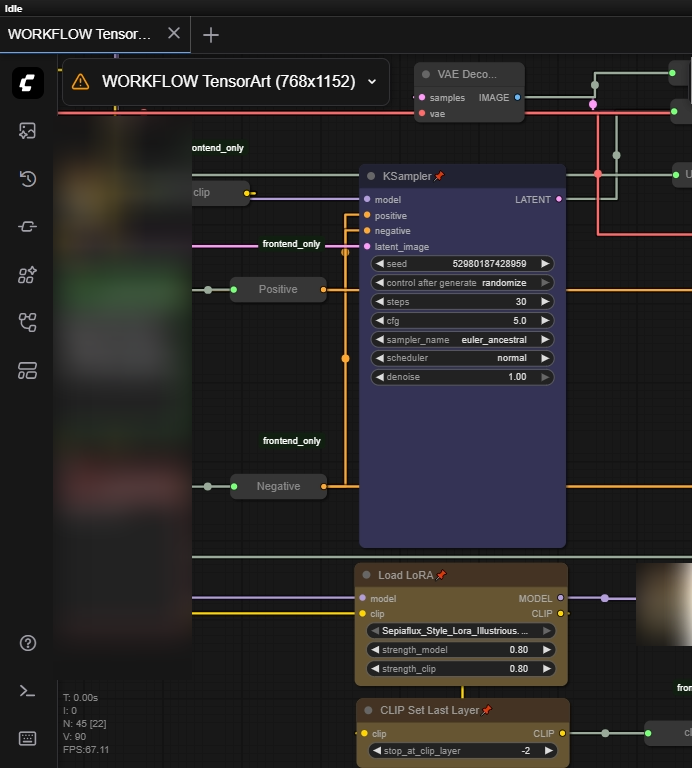
KSampler = this is where the "magic" happens, where you choose the steps, seed, cfg, sampler, denoise
Load Lora = here again we choose the same Lora from the previous step, remembering to have the same settings as the previous step
Clip Set Last Layer = same settings as before
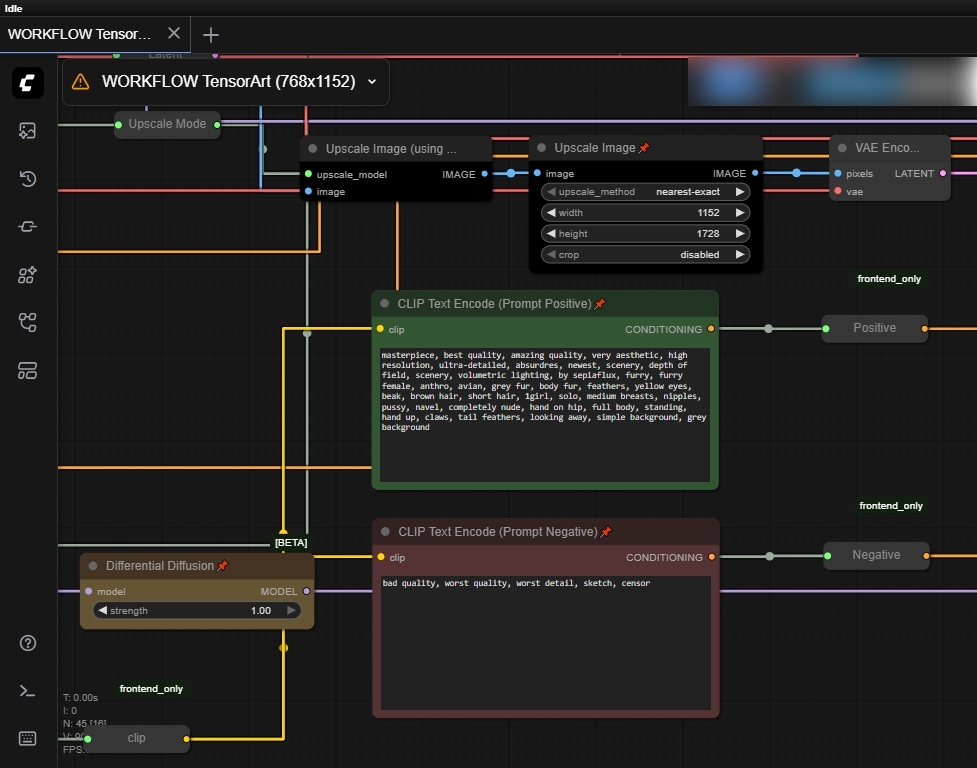
Upscale Image = node responsible for defining an increase in the image size without losing detail. I recommend leaving the same characteristics as the workflow if you don't know what you're doing, but in this workflow, since the initial image size was set to 768x1152, I set the Upscale to 1.5x the original size, so the final result will be 1152x1728.
Clip Text Encode = node containing the positive and negative prompts. In this step, repeat the same prompts as the initial step (if you use a different prompt than the initial step, the image will not have a satisfactory final result).
Differential Diffusion = a method that allows you to control the intensity of the edit of each pixel of an image using a "change map" as input. By default, we will leave the weight at "1.00".
NOTE: For more details on Differential Diffusion, I recommend reading this article (https://differential-diffusion.github.io/).
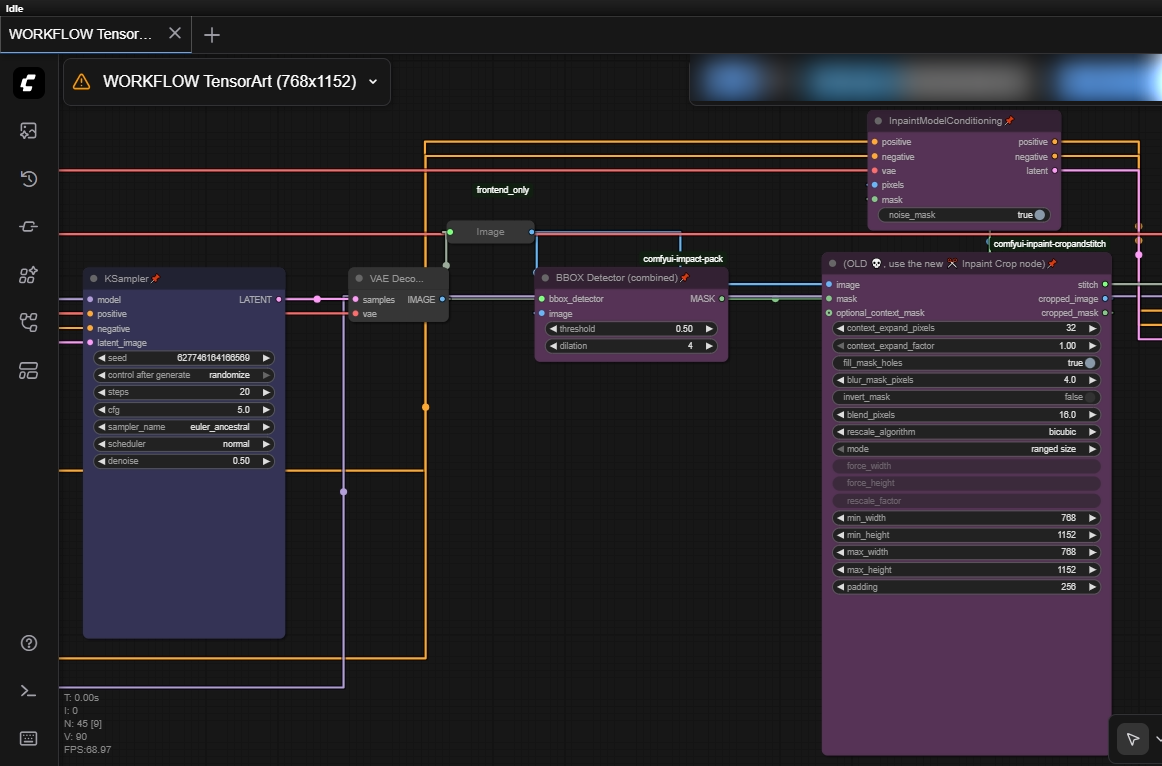
KSampler = repeat the same settings as the initial step, just one detail: in steps, I usually leave it at a lower value than the original "20" and the denoise at "0.50" (this is not a rule).
BBOX Detector (combined) = node that accurately detects the "box" segment of the object (in our case, it's the face in the image). You can leave the default workflow values, and it will always work.
NOTE: For more details on the settings, I recommend this article (https://www.runcomfy.com/comfyui-nodes/ComfyUI-Impact-Pack/BboxDetectorCombined_v2)
Inpaint Crop node = node responsible for separating the "face" segment by cropping the image. This is where the magic happens in the restoration and detailing process of the face. In the last options, named min_width / min_height / max_width / max_height, you will enter the respective height and width values related to the image in the first step. In this workflow example, the initial size is 768x1152.
NOTE 1: In the min_width / min_height / max_width / max_height options, NEVER enter values above the initial size because ComfyUI may crash during the image inpaint process.
NOTE 2: For more details on crop inpaint settings, I recommend this article (https://www.runcomfy.com/comfyui-nodes/ComfyUI-Inpaint-CropAndStitch/InpaintCrop).
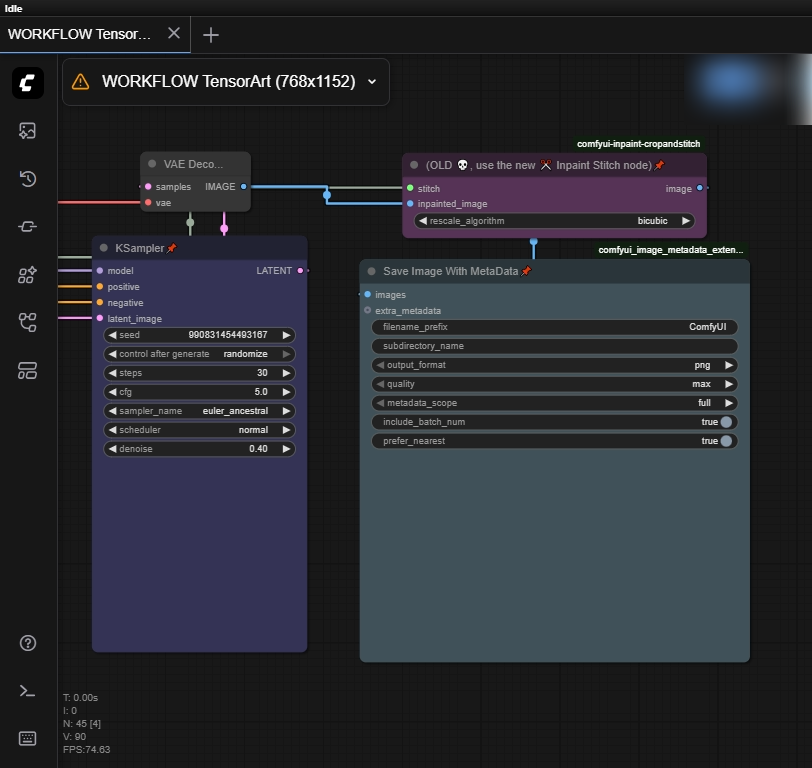
KSampler = Repeat the same settings as the initial step, just one detail: in denoise, I usually leave it at a lower value than the original "0.40". If a box or borders appear on the character's face, I recommend decreasing this value. Remember that the higher the value (from 0.1 onwards), the greater the changes added to the character's face. Generally, values between "0.1" and "0.2" add few details.
Inpaint Stitch node = This node stitches the painted image back onto the original image without altering the unmasked areas.
NOTE: For more general details about the Inpaint Crop node, I recommend reading the author's own work with video examples on GitHub (https://github.com/lquesada/ComfyUI-Inpaint-CropAndStitch).
Save Image With MetaData = Adds metadata to the image after image generation is complete. A perfect node for those who upload images to sites like Civitai. Some details may not appear when uploading the image to Civitai, such as the negative prompt, so I recommend you upload the image to another site that displays the image metadata in full, such as this site (https://www.metadata2go.com/view-metadata).
Finally, it's over...
I hope I've explained everything as clearly as possible, and for comparison purposes I'll include images of my website setup.
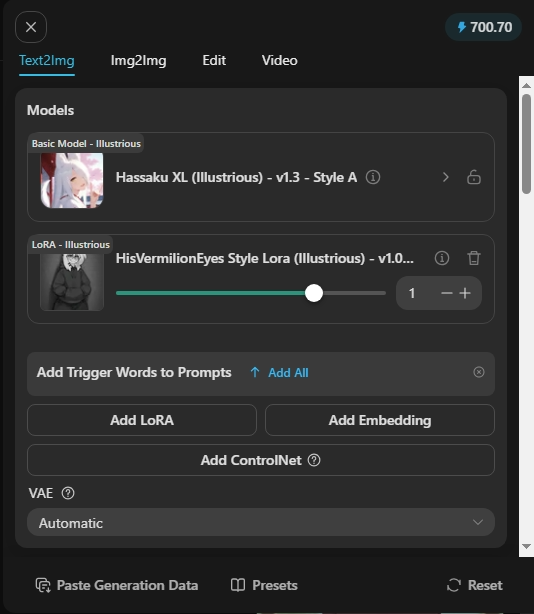
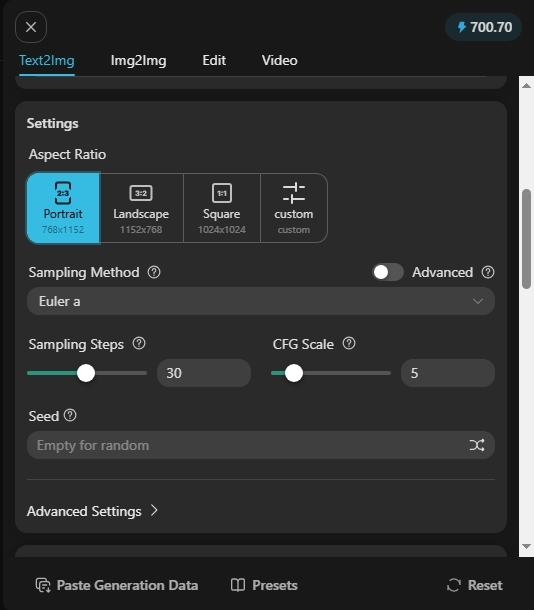
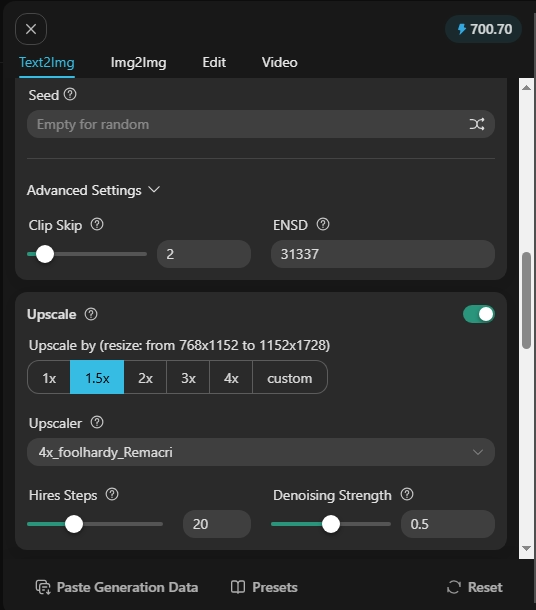
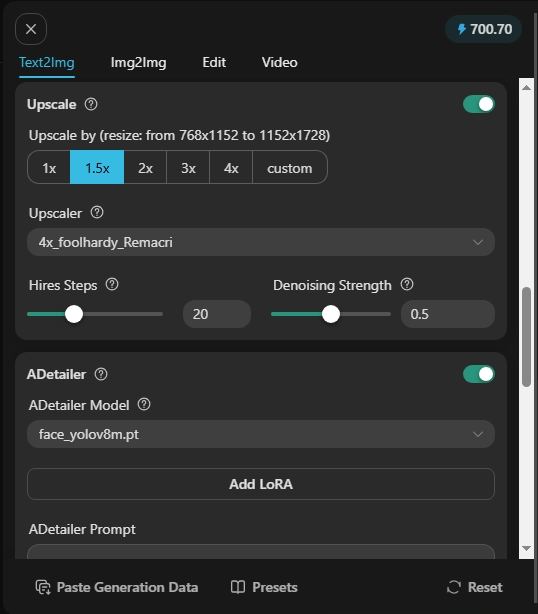
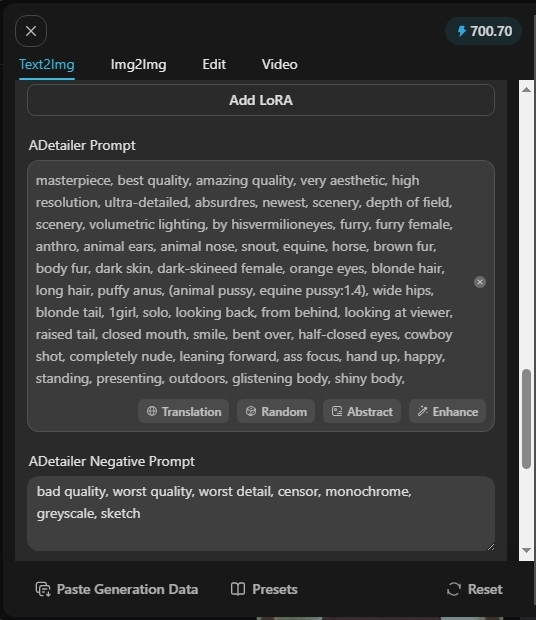
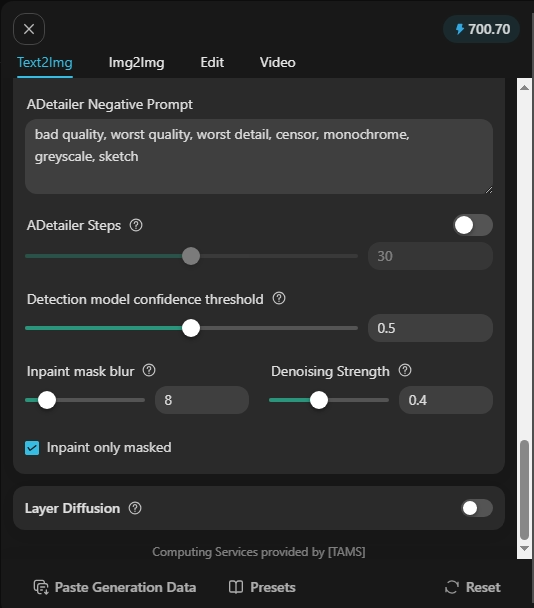
If you have any questions, feel free to write them in the comments; I'll be available whenever possible. 😁✌️
Update
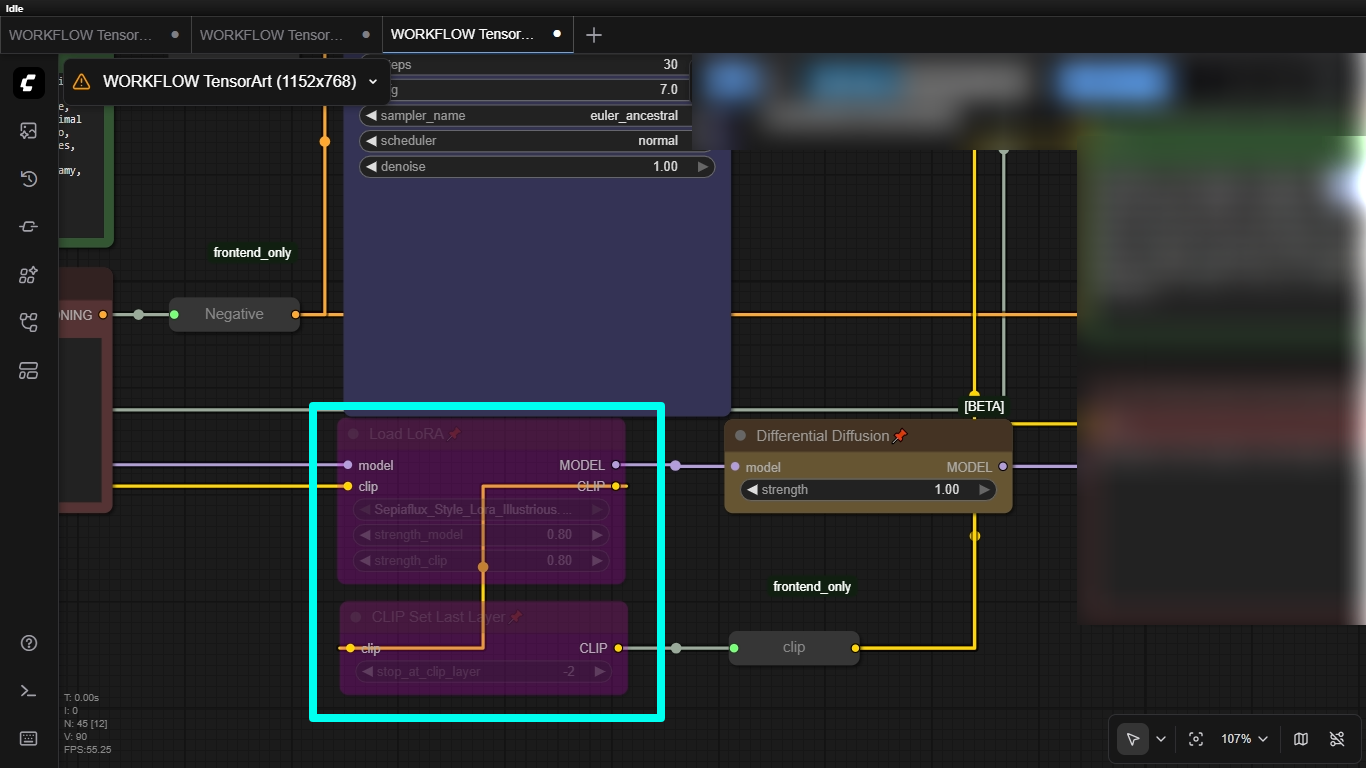
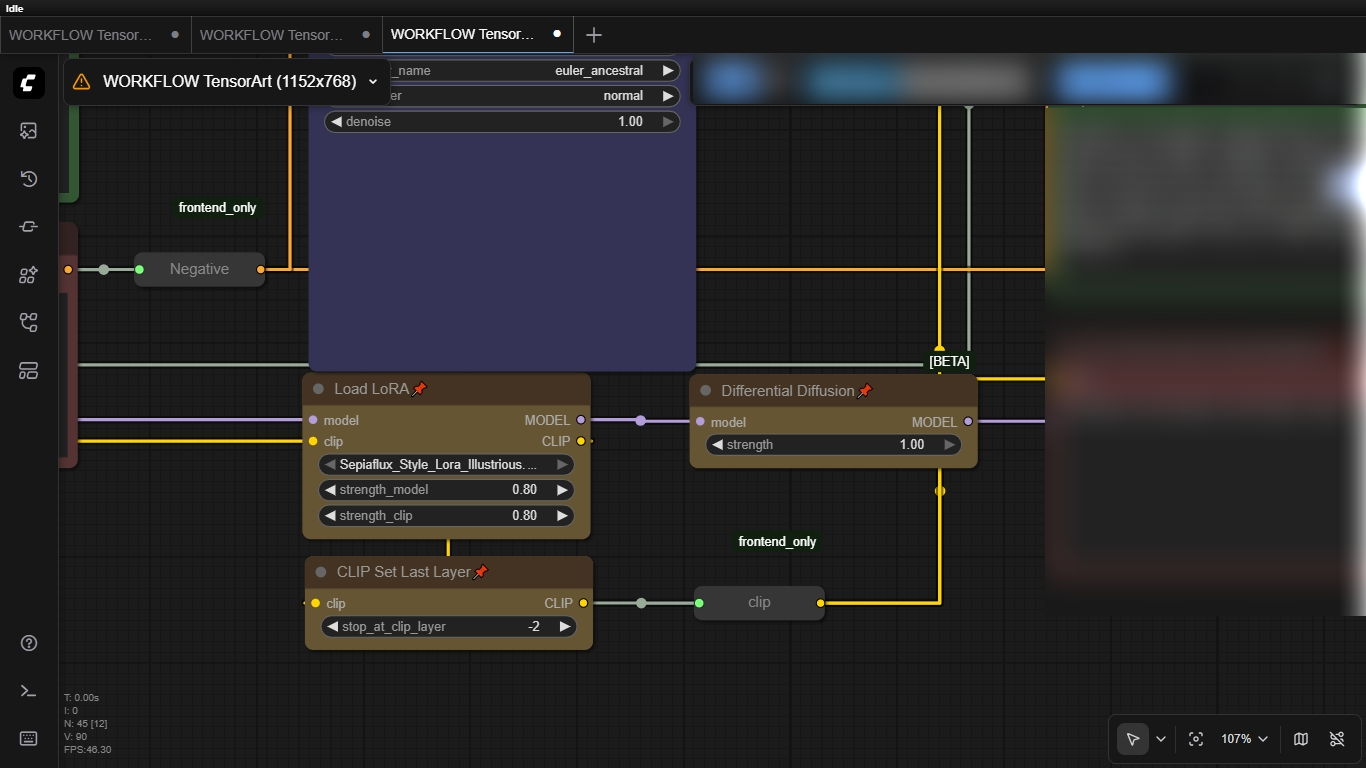
I noticed that the workflow had some issues where the image was slightly different from the original TensorArt creation. I discovered that I had added an extra LoRa node, so I'll teach you a very simple technique that won't disrupt the workflow:
1) 1) In the part where there is the second node "Load Lora" and "Clip Set Last Layer" below the first "K-Sampler", right-click on the node and in the menu click on "Bypass", do this with both nodes
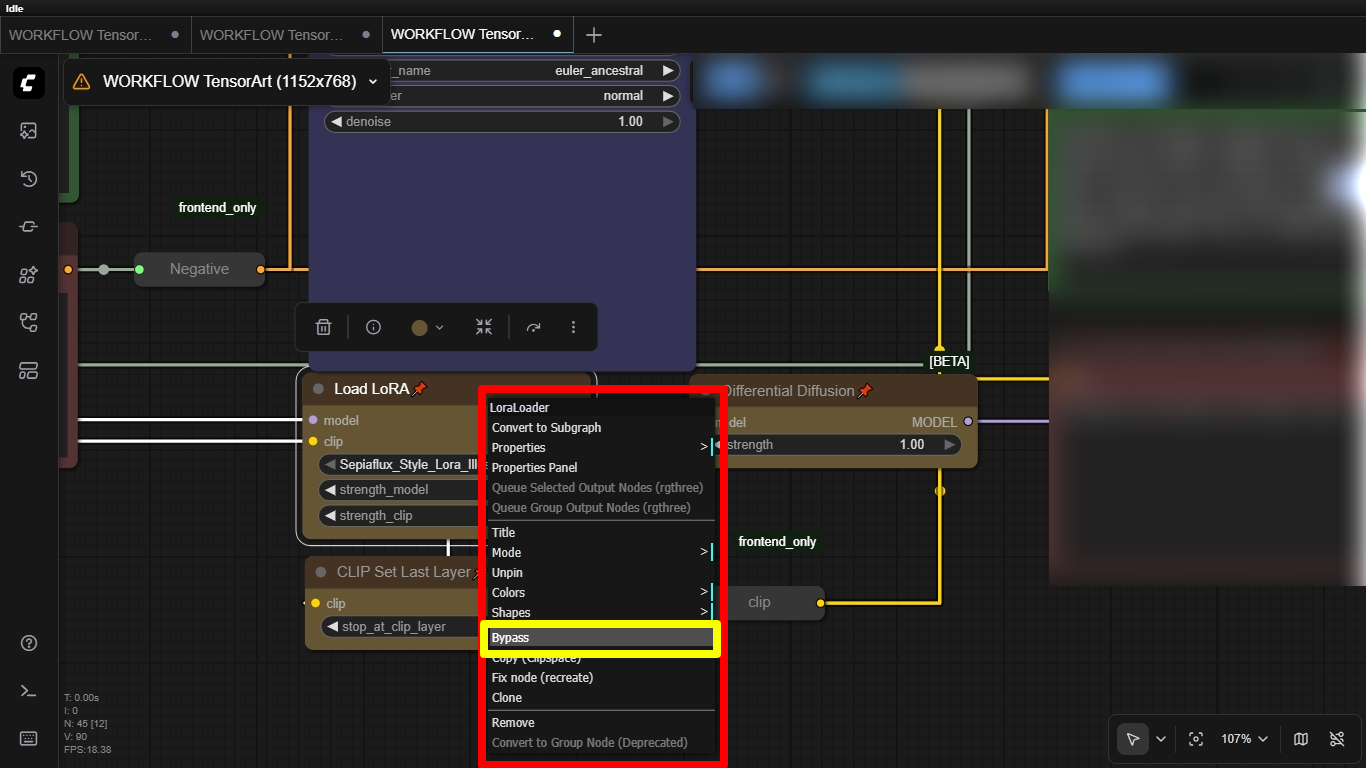
2) After doing this, note that the nodes will turn purple and semi-transparent, what you did was "deactivate" these 2 nodes and continue the workflow without interrupting, generally when you disable the node at some point the workflow stops and shows where the error is, Bypass "hides" the node but lets the path/work pass without interrupting
