

If you’ve been curious about Z-Image Turbo but didn’t want to babysit an all-night training job, good news: it’s fast, light on VRAM, and honestly pretty fun to tinker with.
I spun up a LoRA for a simple character concept in about an hour, and the results were solid—even on the distilled release.
Here’s the exact path I took, what I’d tweak next time, and a few “wish I knew this sooner” tips so you can get your own LoRA up and running with the Ostris AI Toolkit.
👉 Check out the YouTube video if you want a visual demo 👈
Why Z-Image Turbo caught my eye
It’s surprisingly efficient. You don’t need a 32GB monster to play.
It “learns” small concepts quickly—you can see your subject emerge in the first 1,000–1,500 steps.
Even before the base model lands, the distilled version is already good enough to make personal LoRAs that feel usable.
My test: a small “teacher” character set I previously used for a Flux LoRA. Nine images. No captions.
Minimal setup.
Let’s go.
Spin up the toolkit (RunPod + Ostris)
I used RunPod with the official Ostris AI Toolkit template. It’s a one-click setup and you’re straight into a browser UI—no fiddly installs.
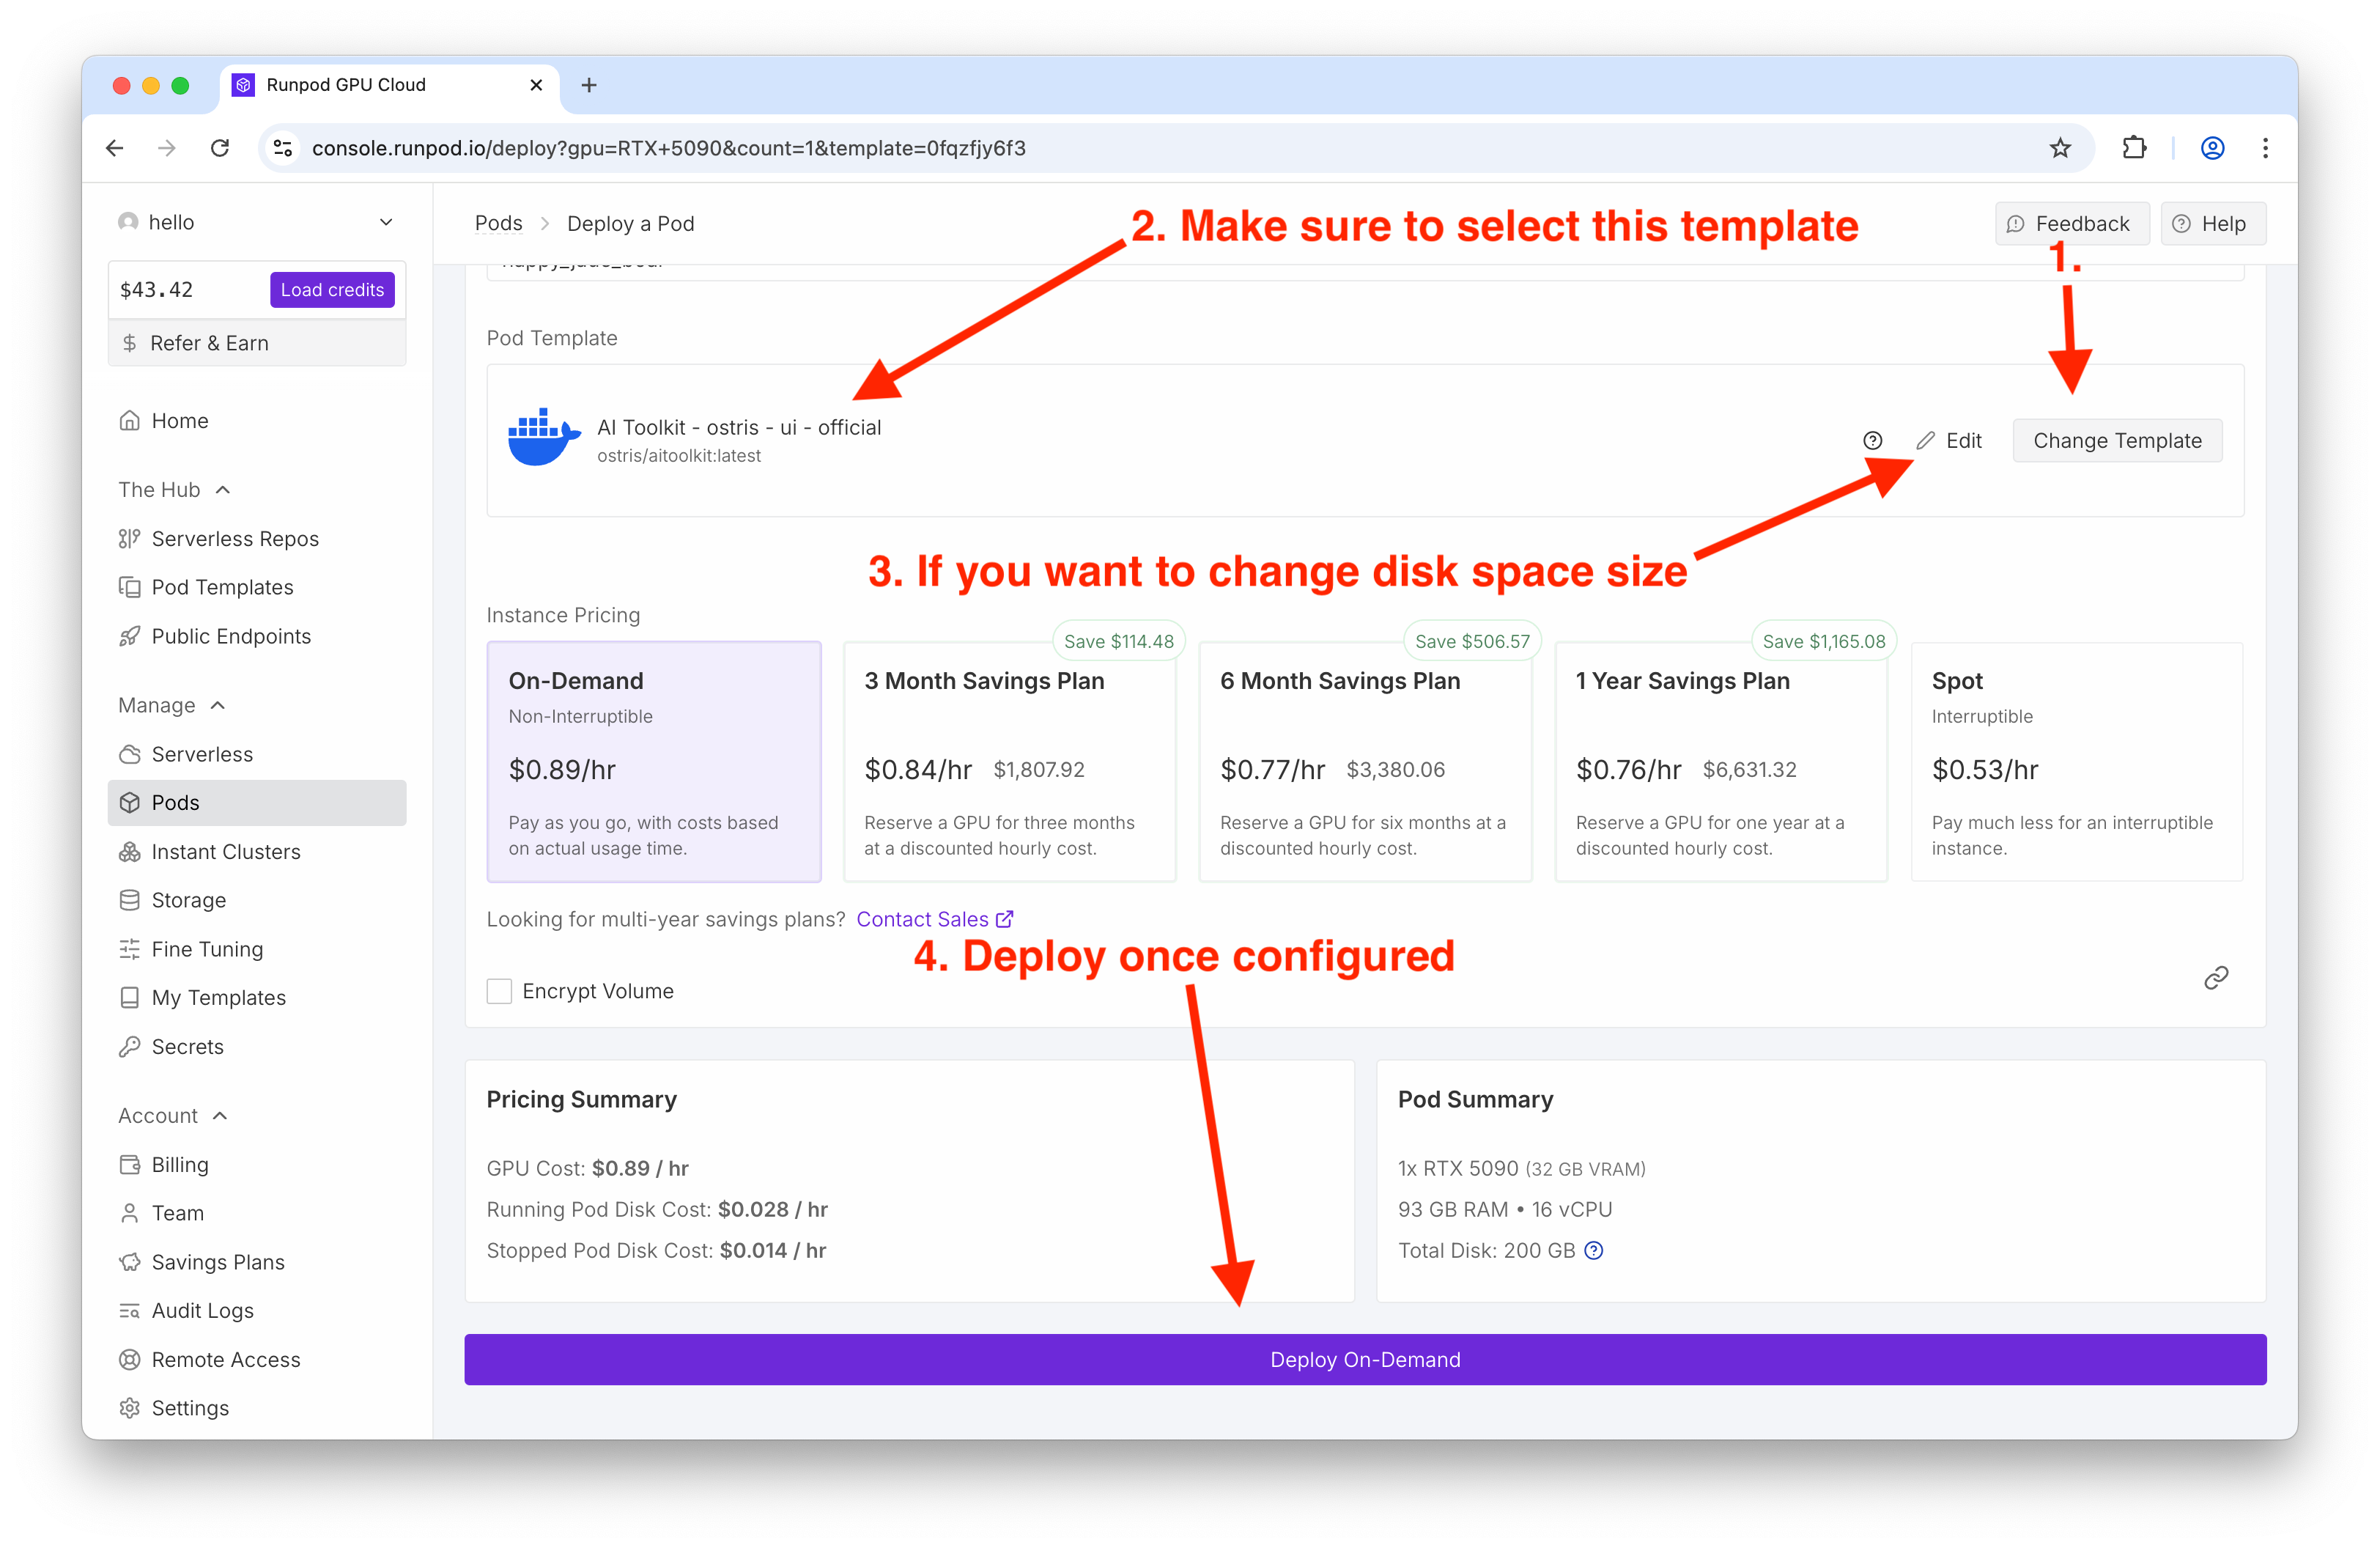
What I used:
Template: Ostris AI Toolkit (latest)
GPU: RTX 5090
Disk: default was fine for me
Tip: If your card is tight on memory, there’s a low-VRAM mode toggle in the Ostris UI you can enable later.
Build a mini dataset that still teaches the model
Inside the Ostris UI, jump to Datasets and create one for your concept. I named mine "teach3r" - helps me remember how I plan to call it in prompts later and is a new concept for the model to learn.
Count: 9 images (variety in angles and outfits helps)
Captions: I skipped them for this test
Resolution: I left images as-is and let training handle size

With a tiny dataset, diversity matters more than quantity.
The training settings that actually mattered
Open New Training Job and wire things up. Here’s what made the difference for me:
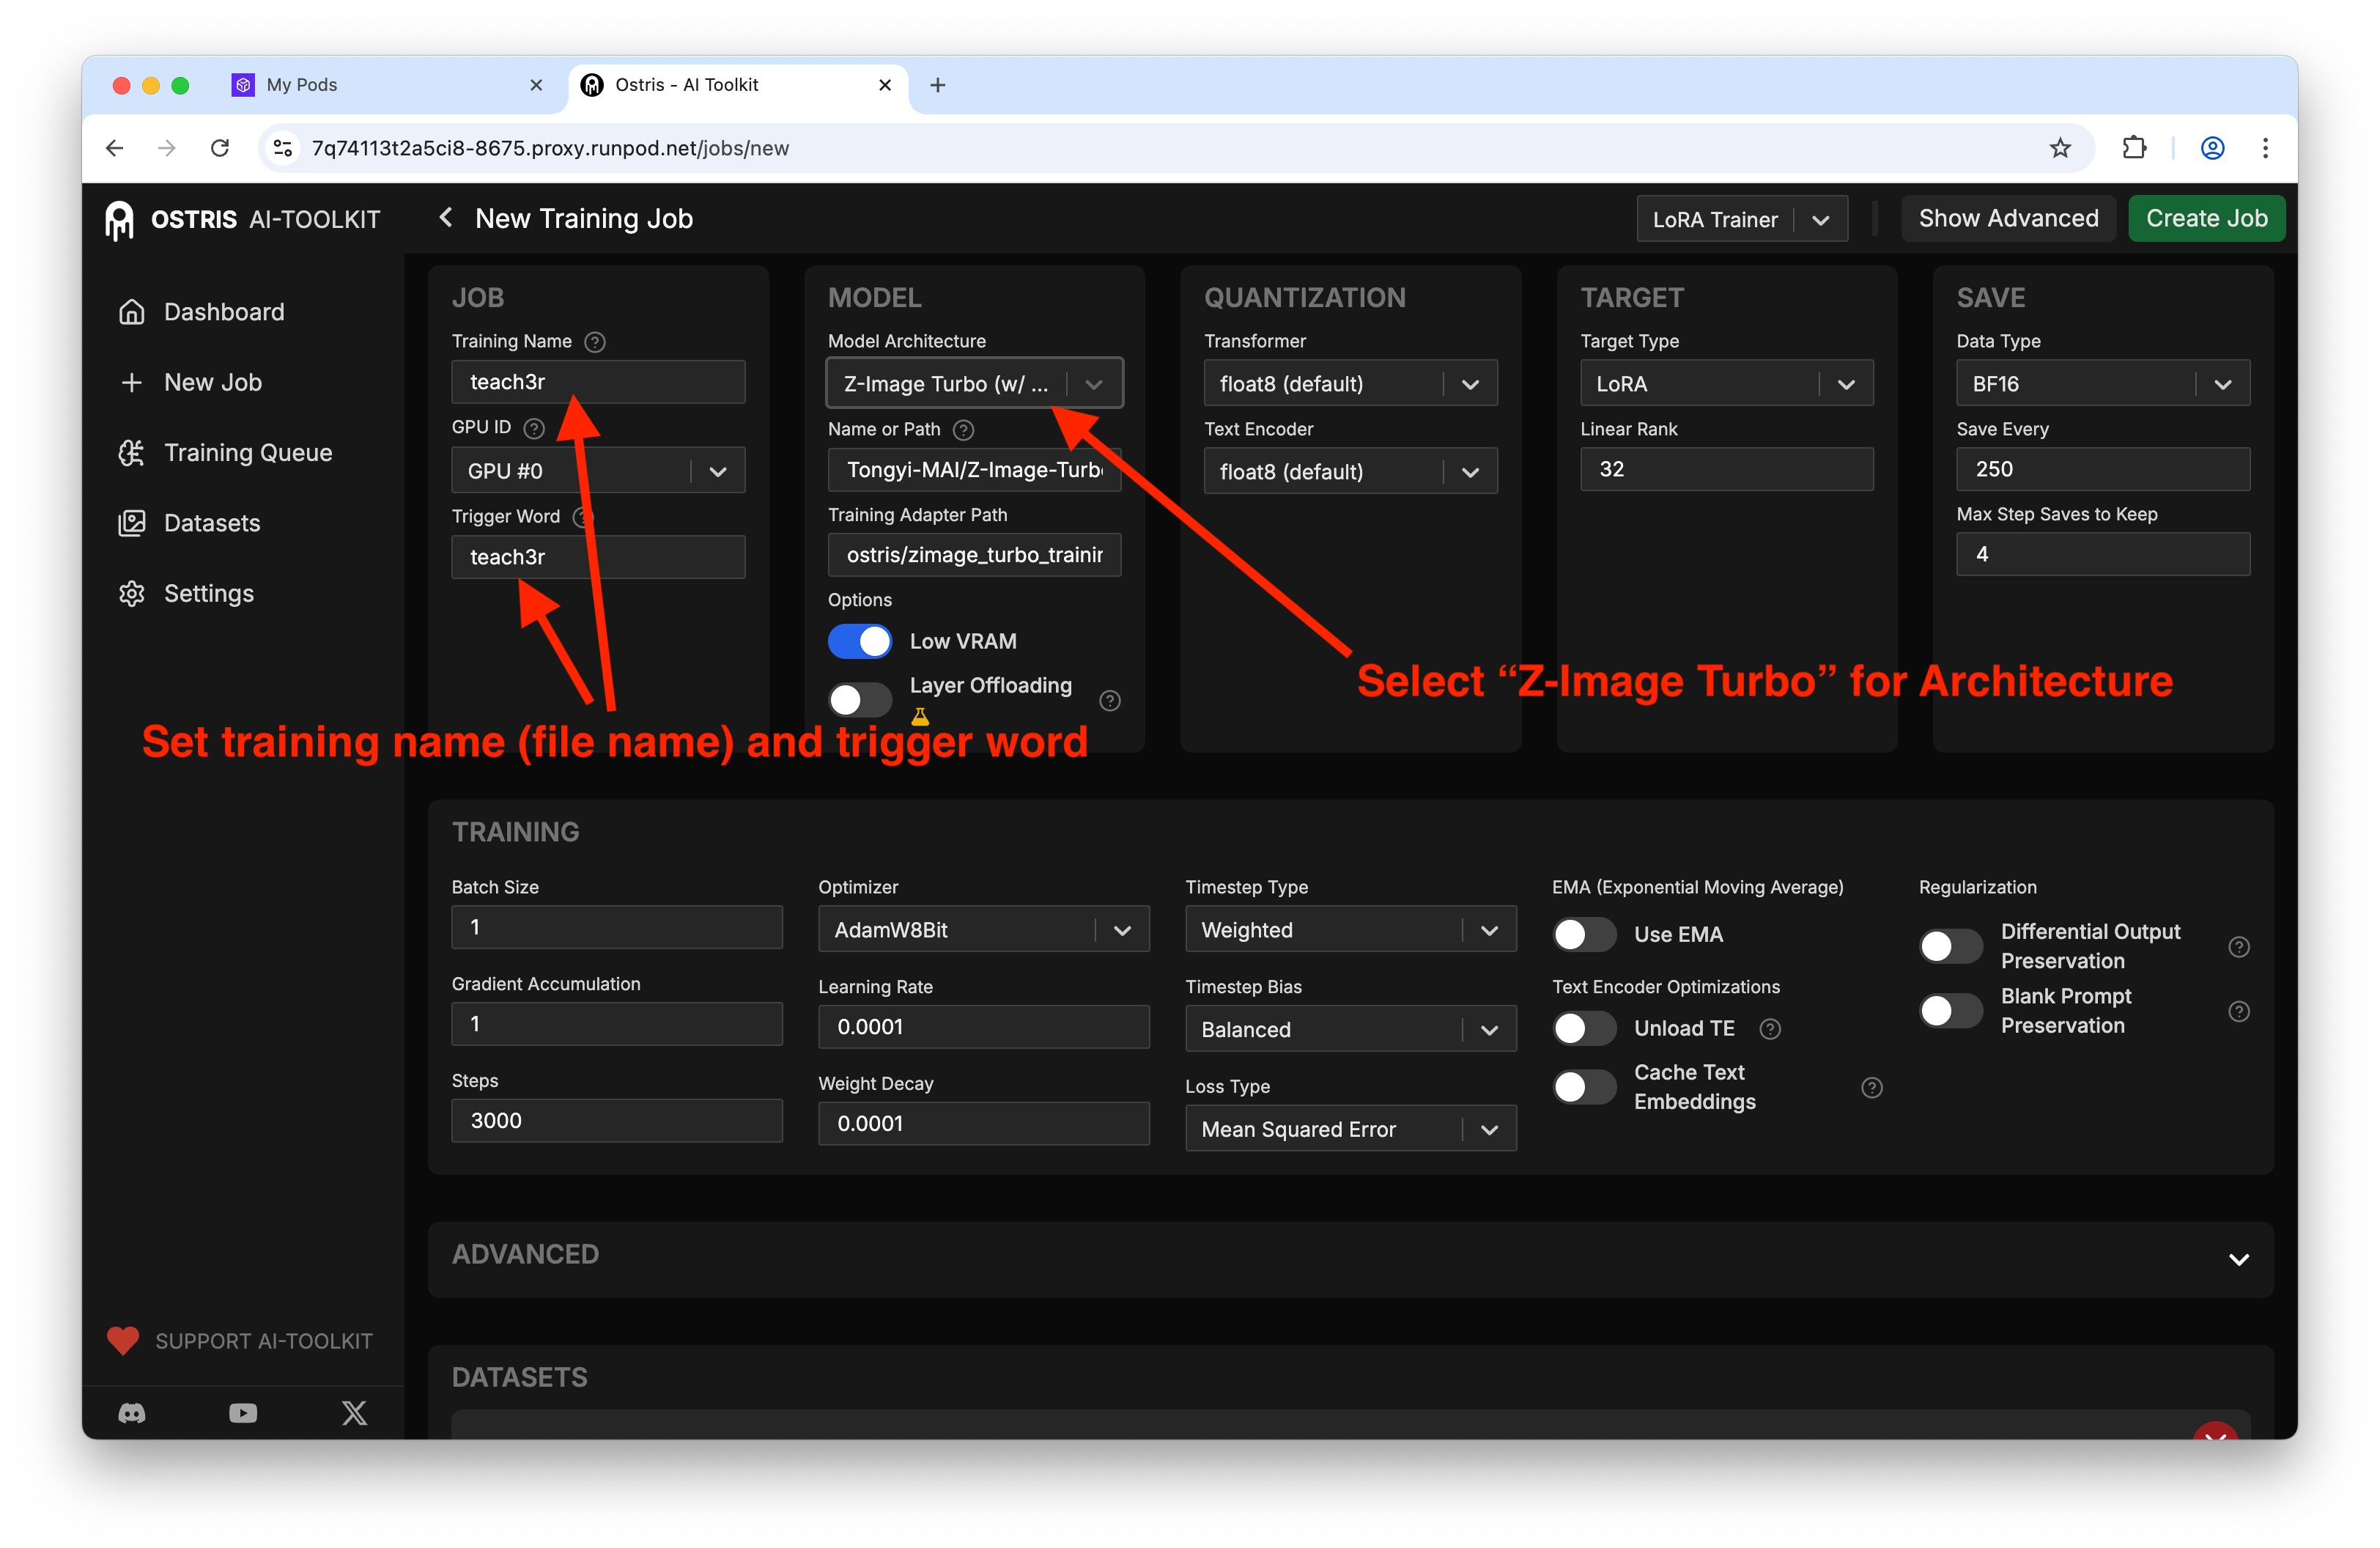
Model architecture: Z-Image Turbo (with training adapter)
Steps: 3000 (landed around ~1 hour on a 5090)
Output: LoRA
Training name + trigger: I matched the dataset name so I wouldn’t forget it in prompts
Resolution: 1024 × 1024 (consistent with the UI defaults)
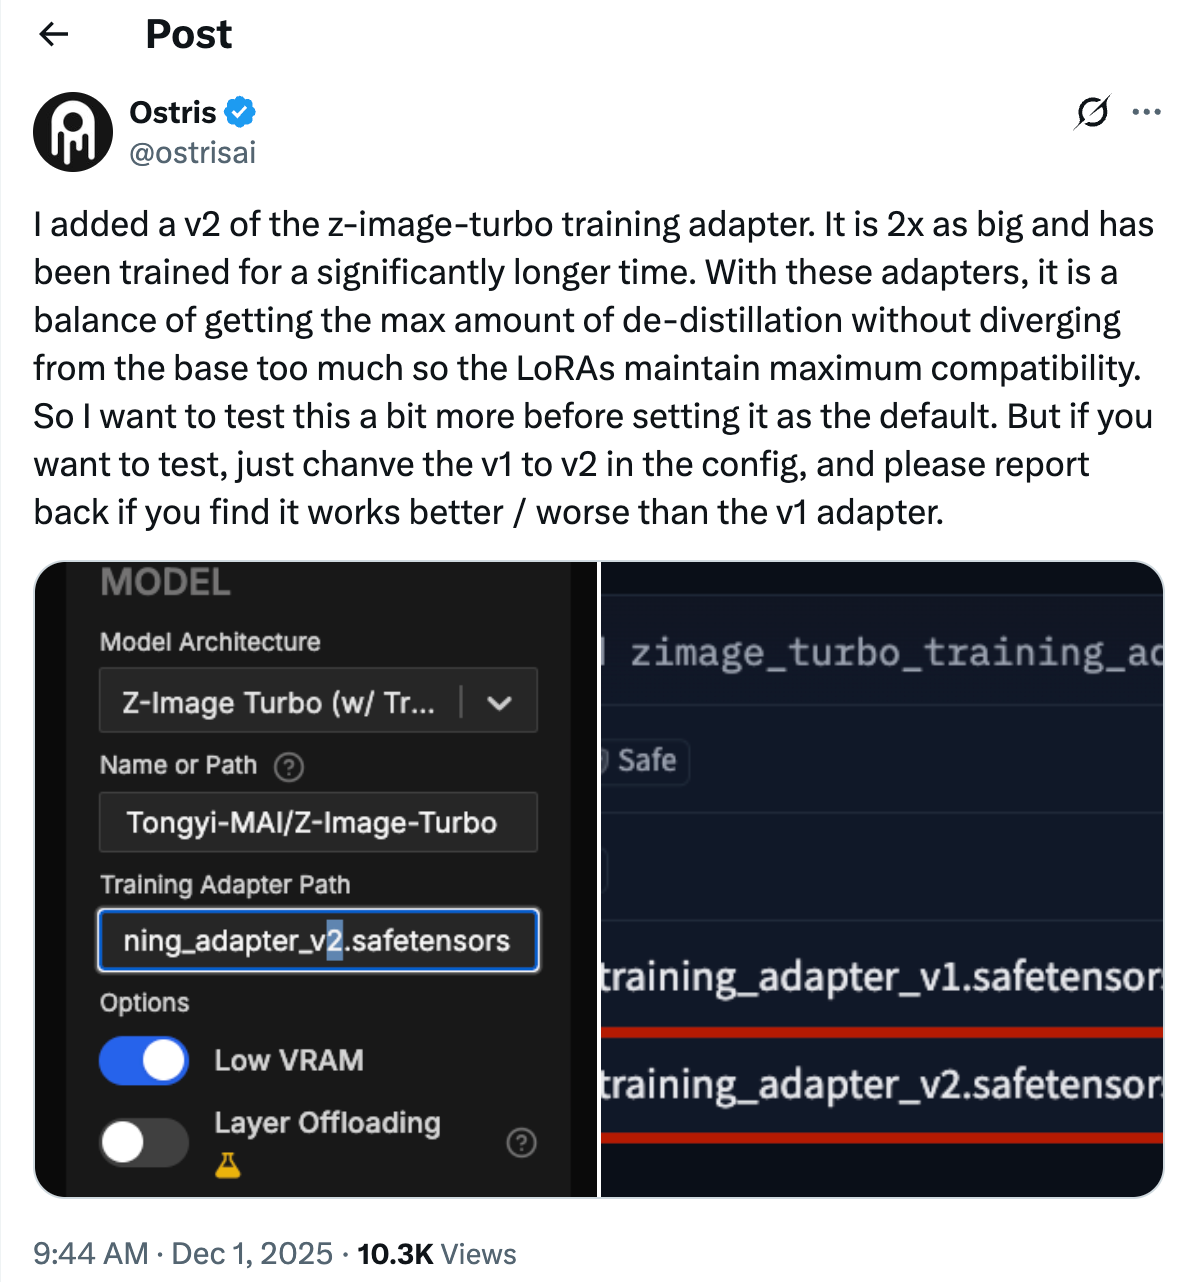
There’s a new adapter in testing. If you’re feeling adventurous, swap the path from v1 to v2:
Now select your dataset:
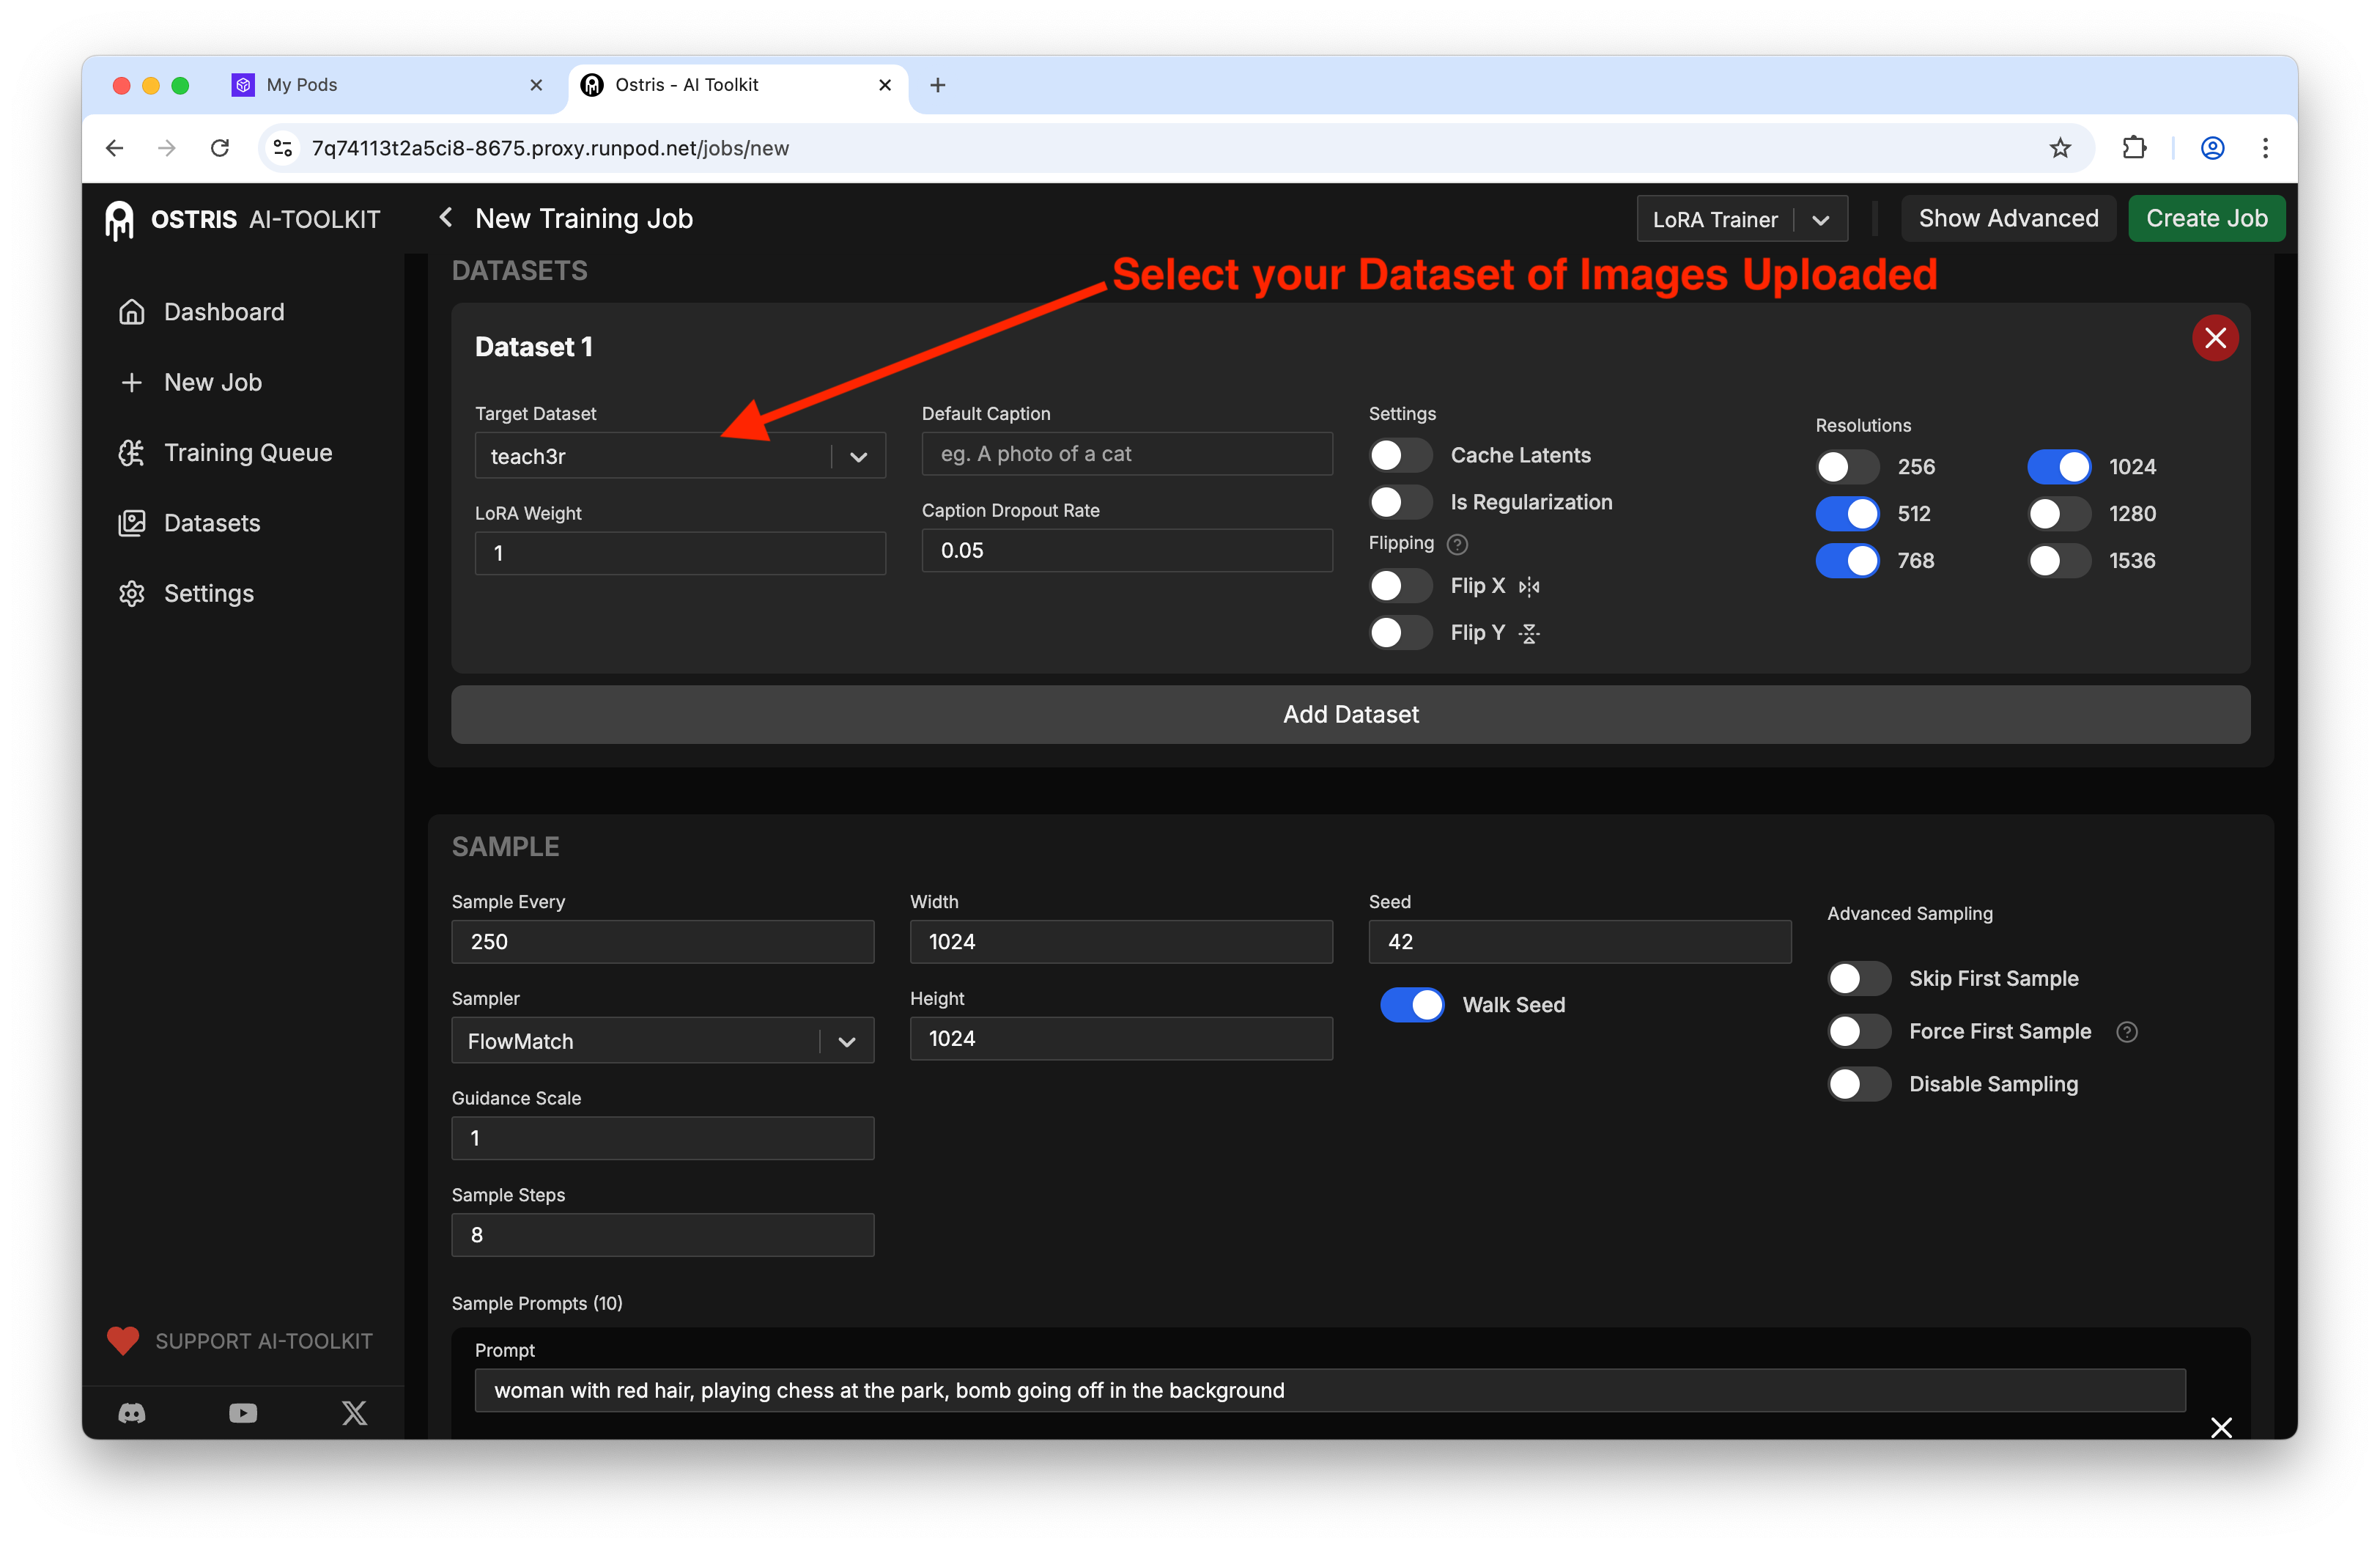
Set up sample prompts so you can “peek” at progress:
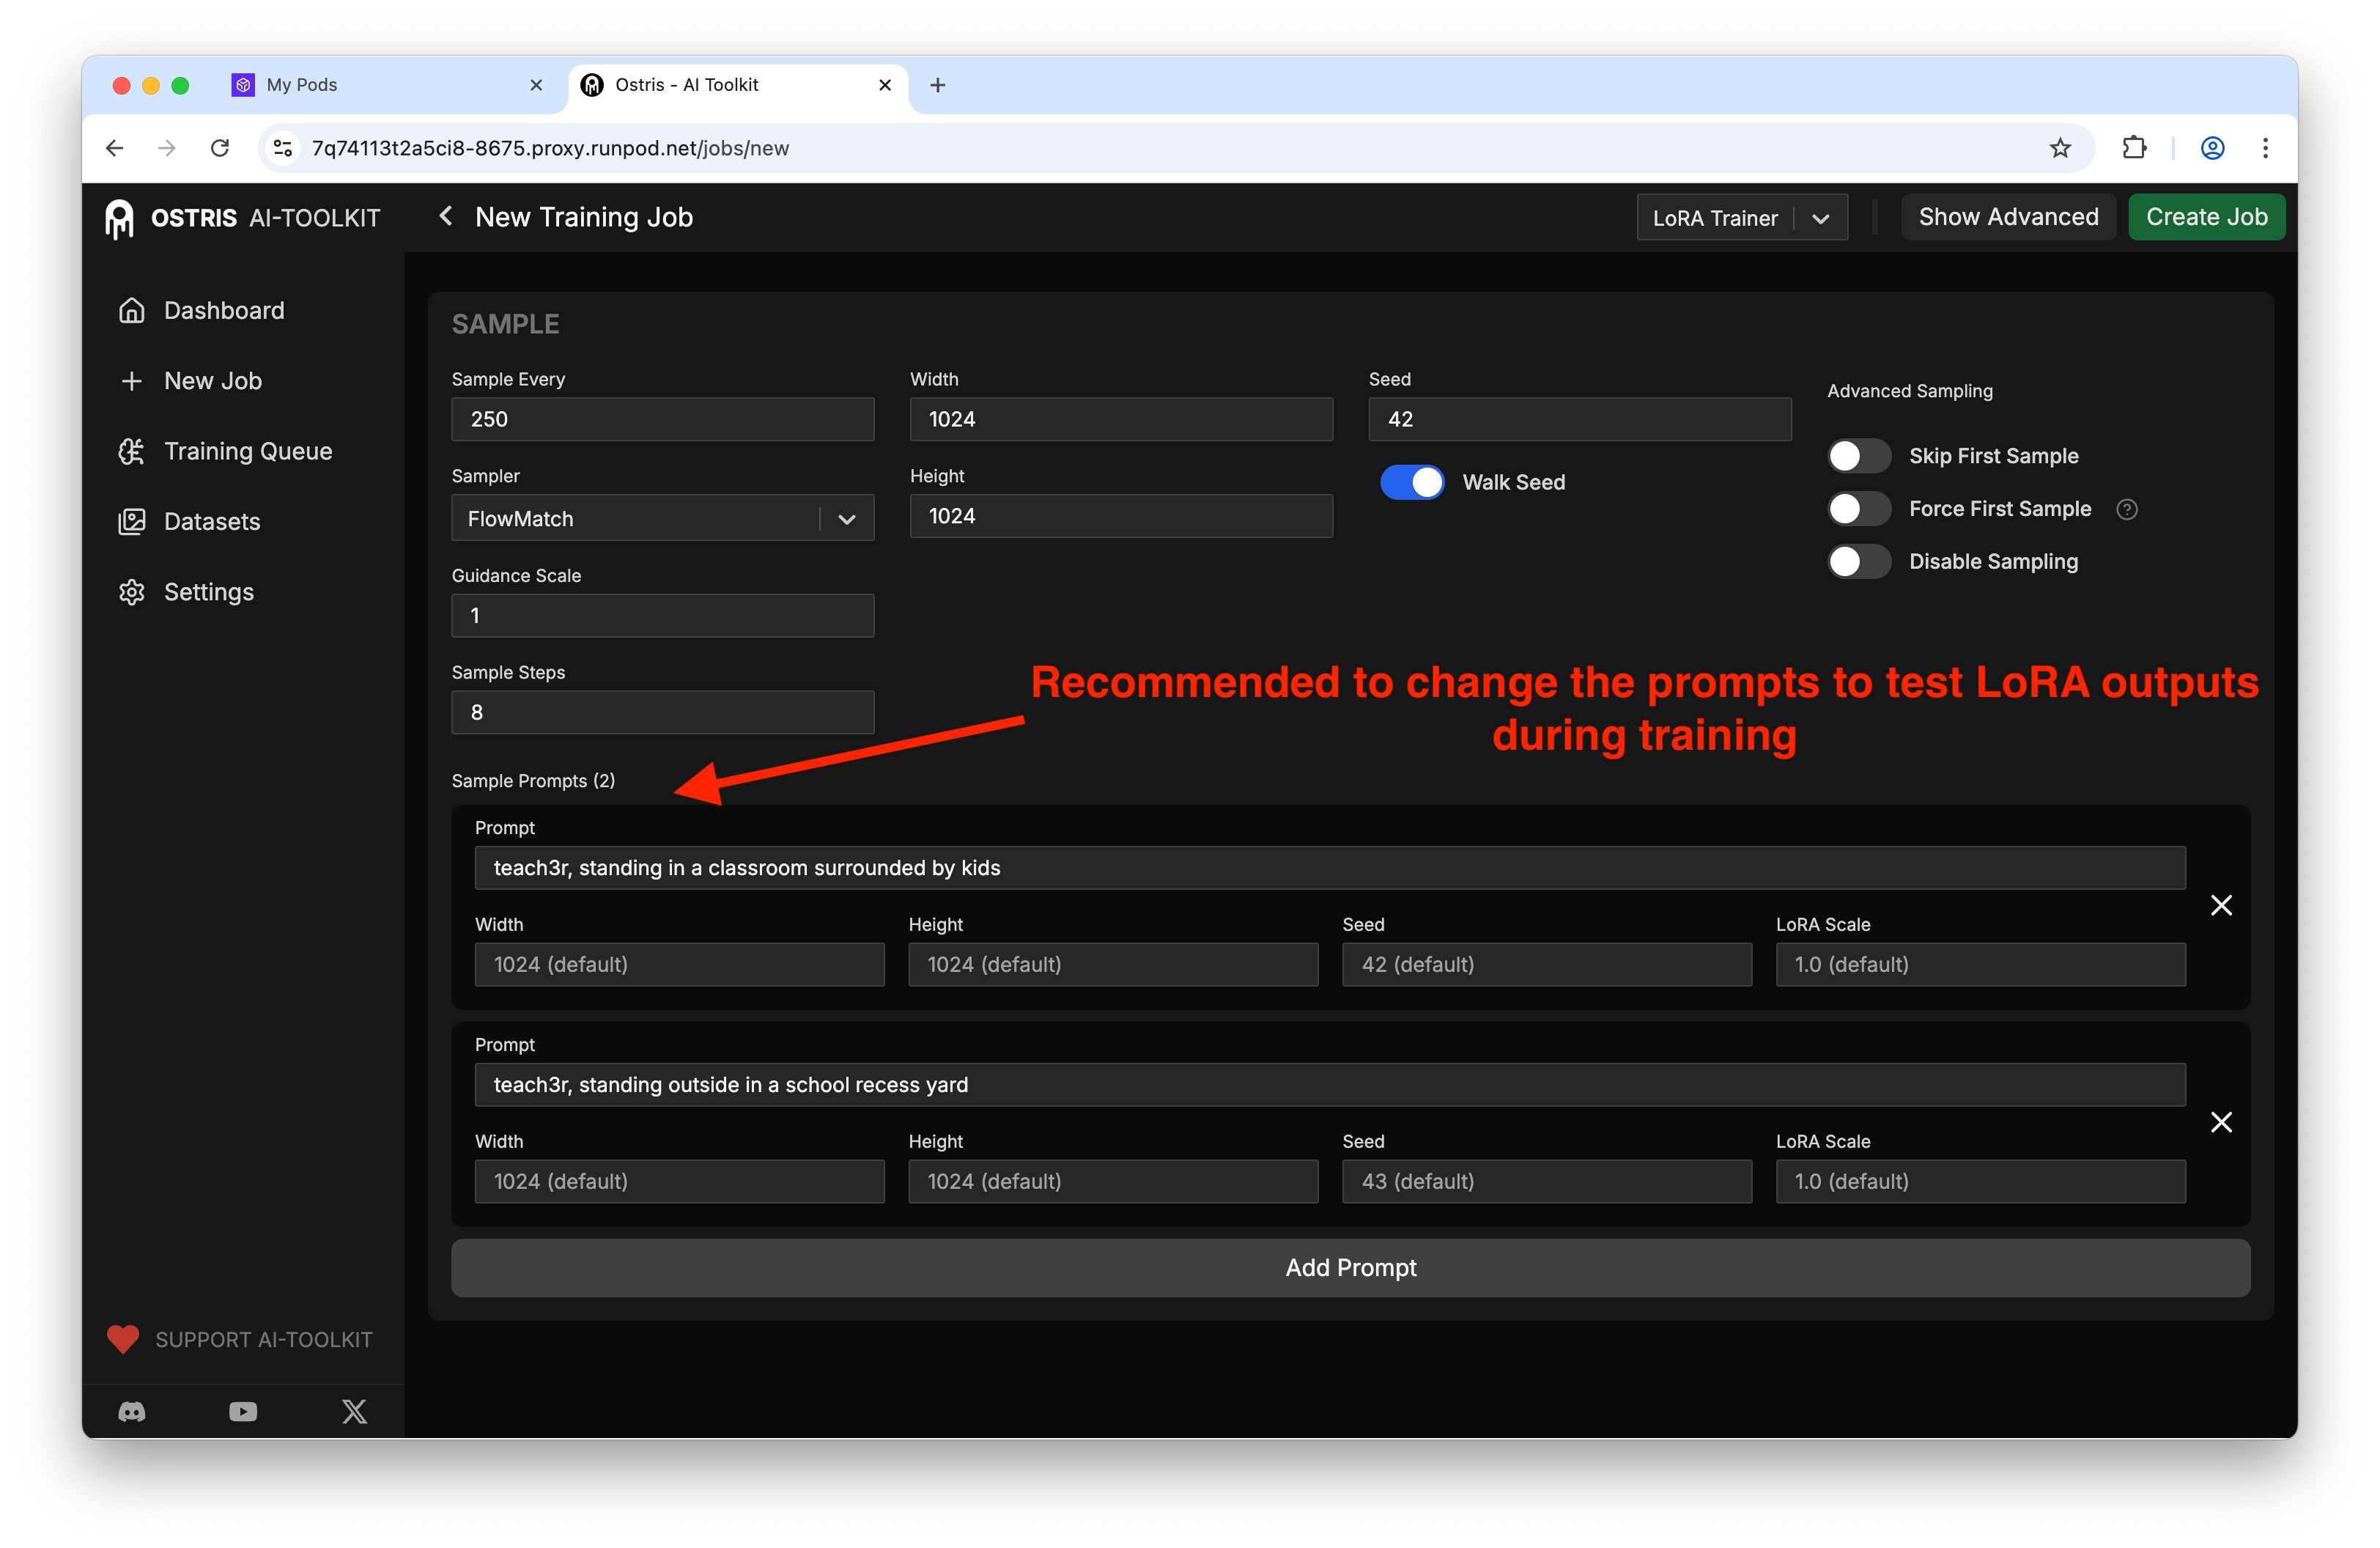
My sample config:
Sample every: 250 steps
Width × Height: 1024 × 1024
Seed: 42
Prompts: whatever you want here, be sure to include the trigger word
LoRA weight: 0.7–1.0 to see how strong it hits
Pro tip: If you forget to put your trigger word, your early samples look like the base model and it’s hard to tell what’s working.
Hit go and babysit (a little)
Click Create Job, jump to Training Queue, and press Start.
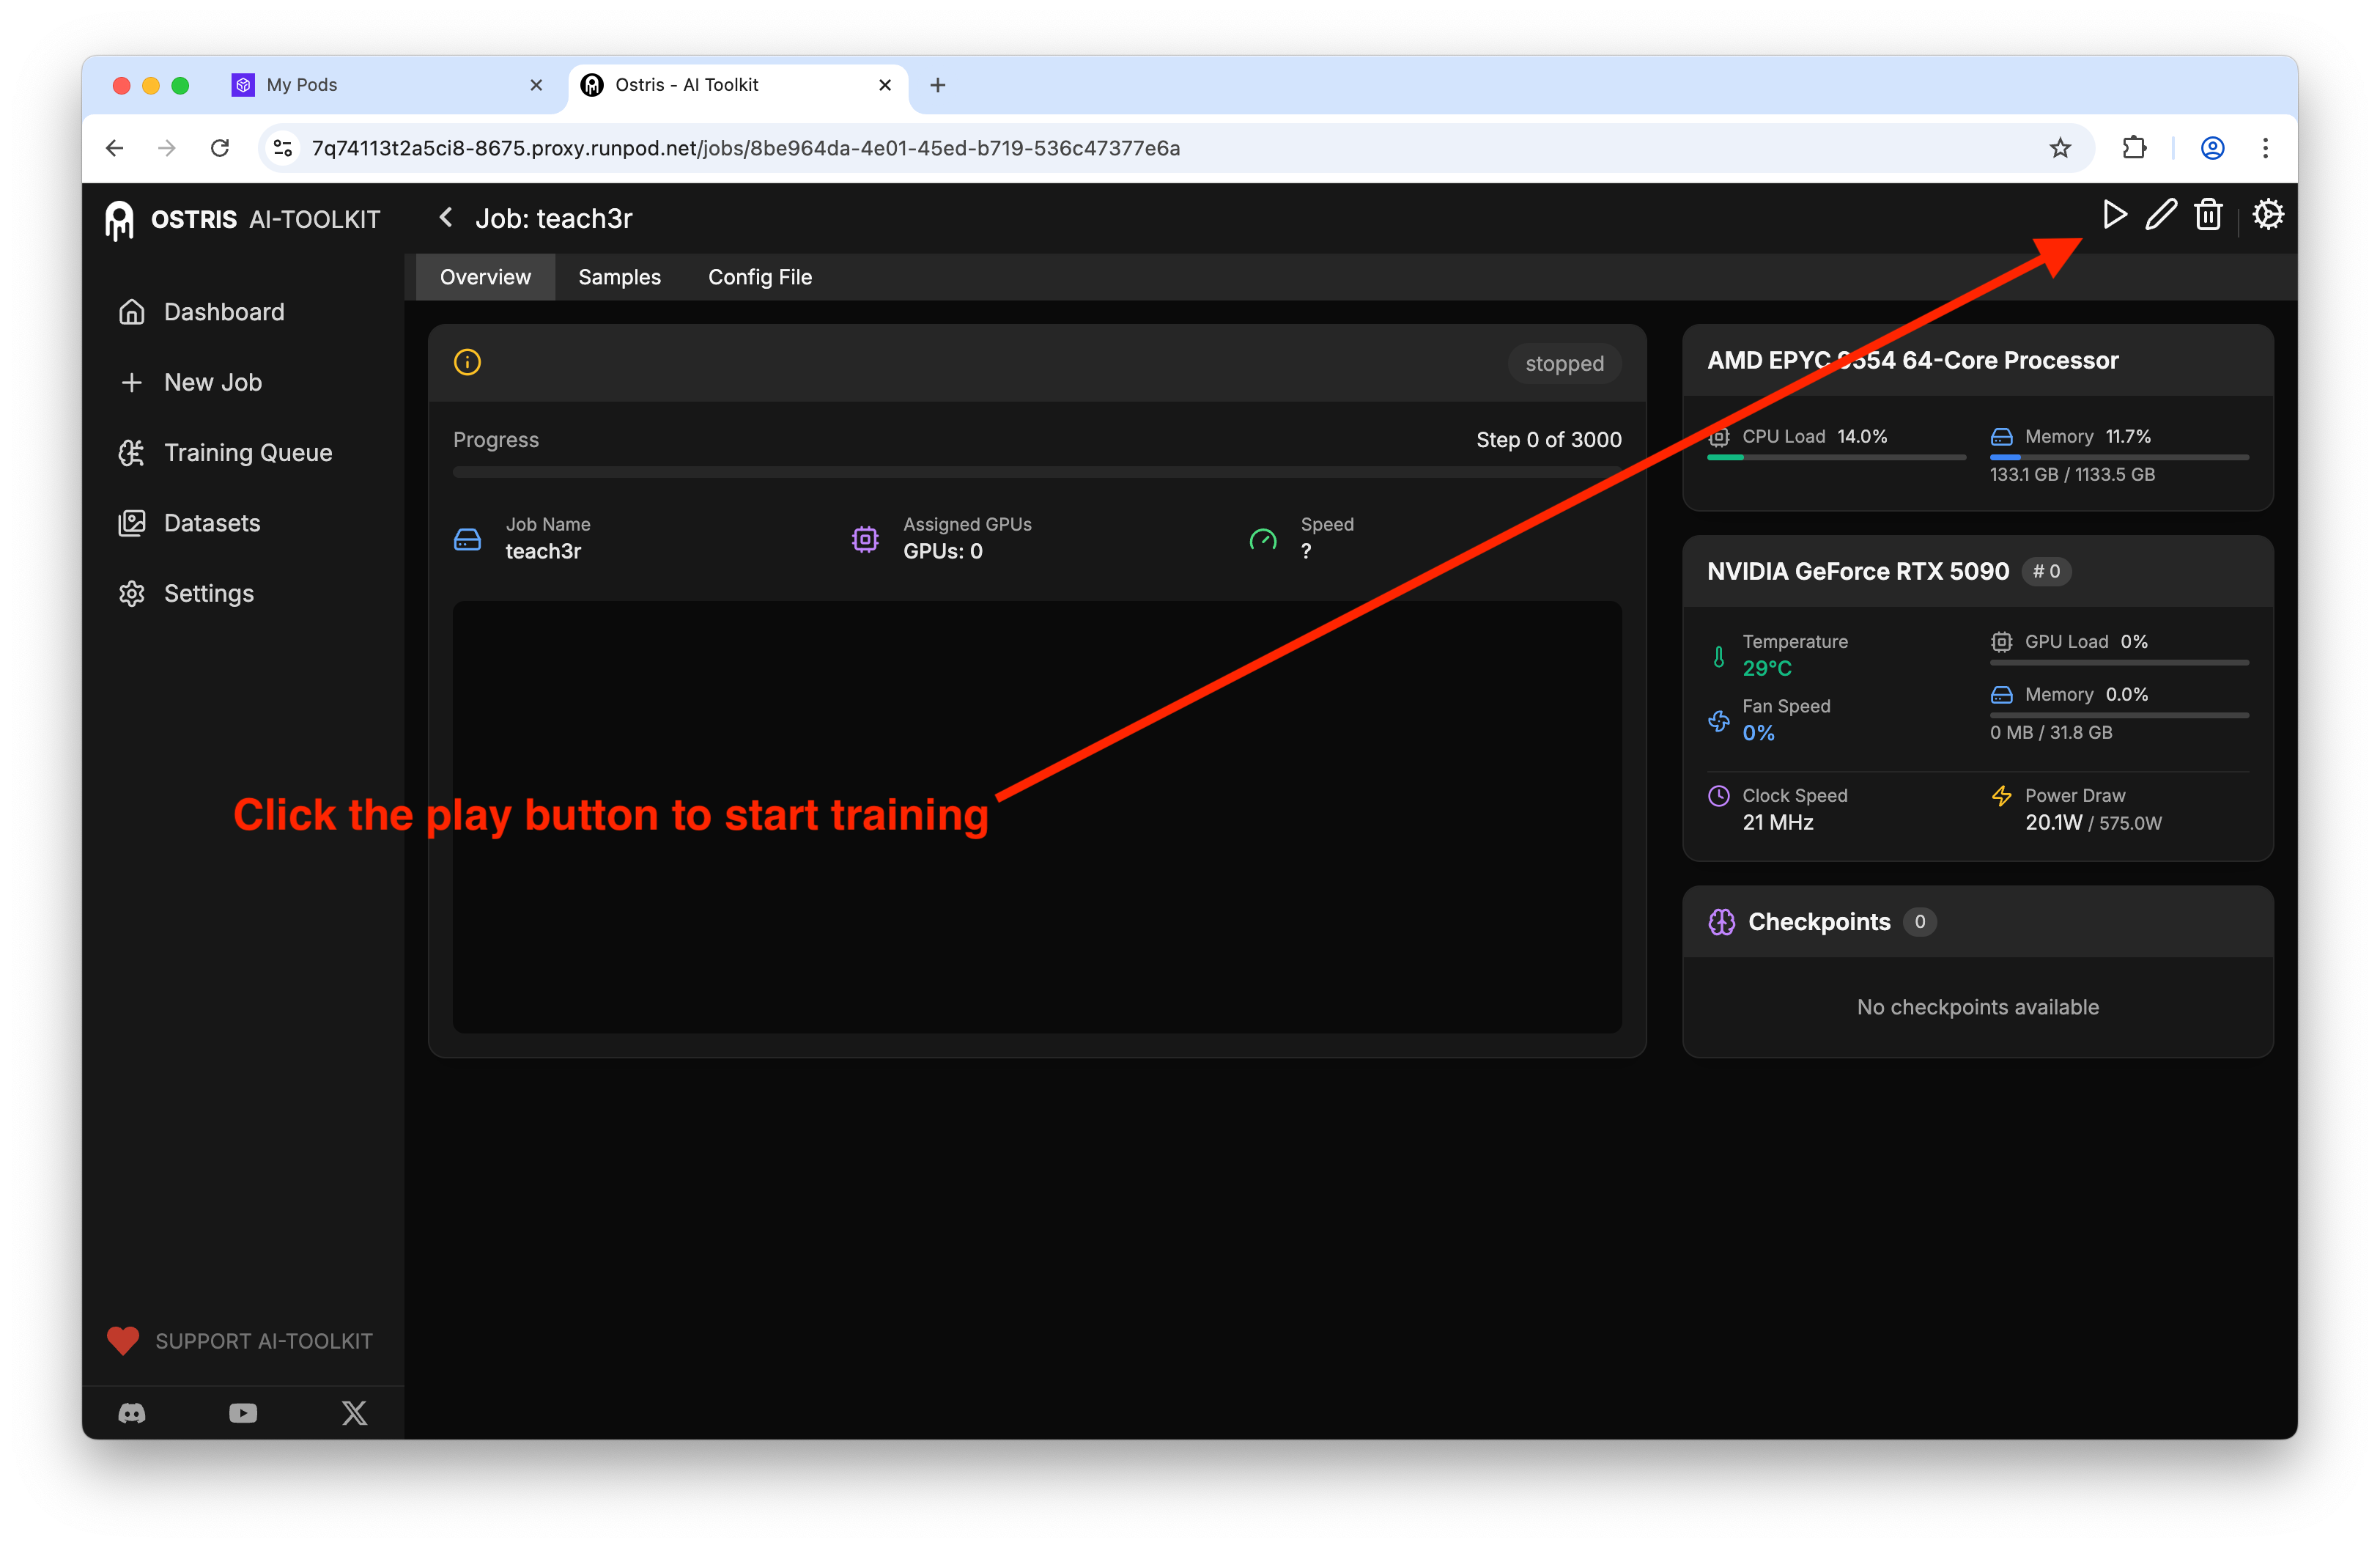
On a 5090 I clocked ~1 hour for 3k steps. I kept the tab open and checked the sample images every so often.
The “ohhh it’s learning” phase kicked in around 1k–1.5k steps. If you’re not seeing the concept appear by 2k, your dataset might be too uniform or the trigger word isn’t in your prompts.
Did it learn the concept? Check samples
The Samples tab is where you can literally watch your character morph from generic to “oh, that’s my subject.”
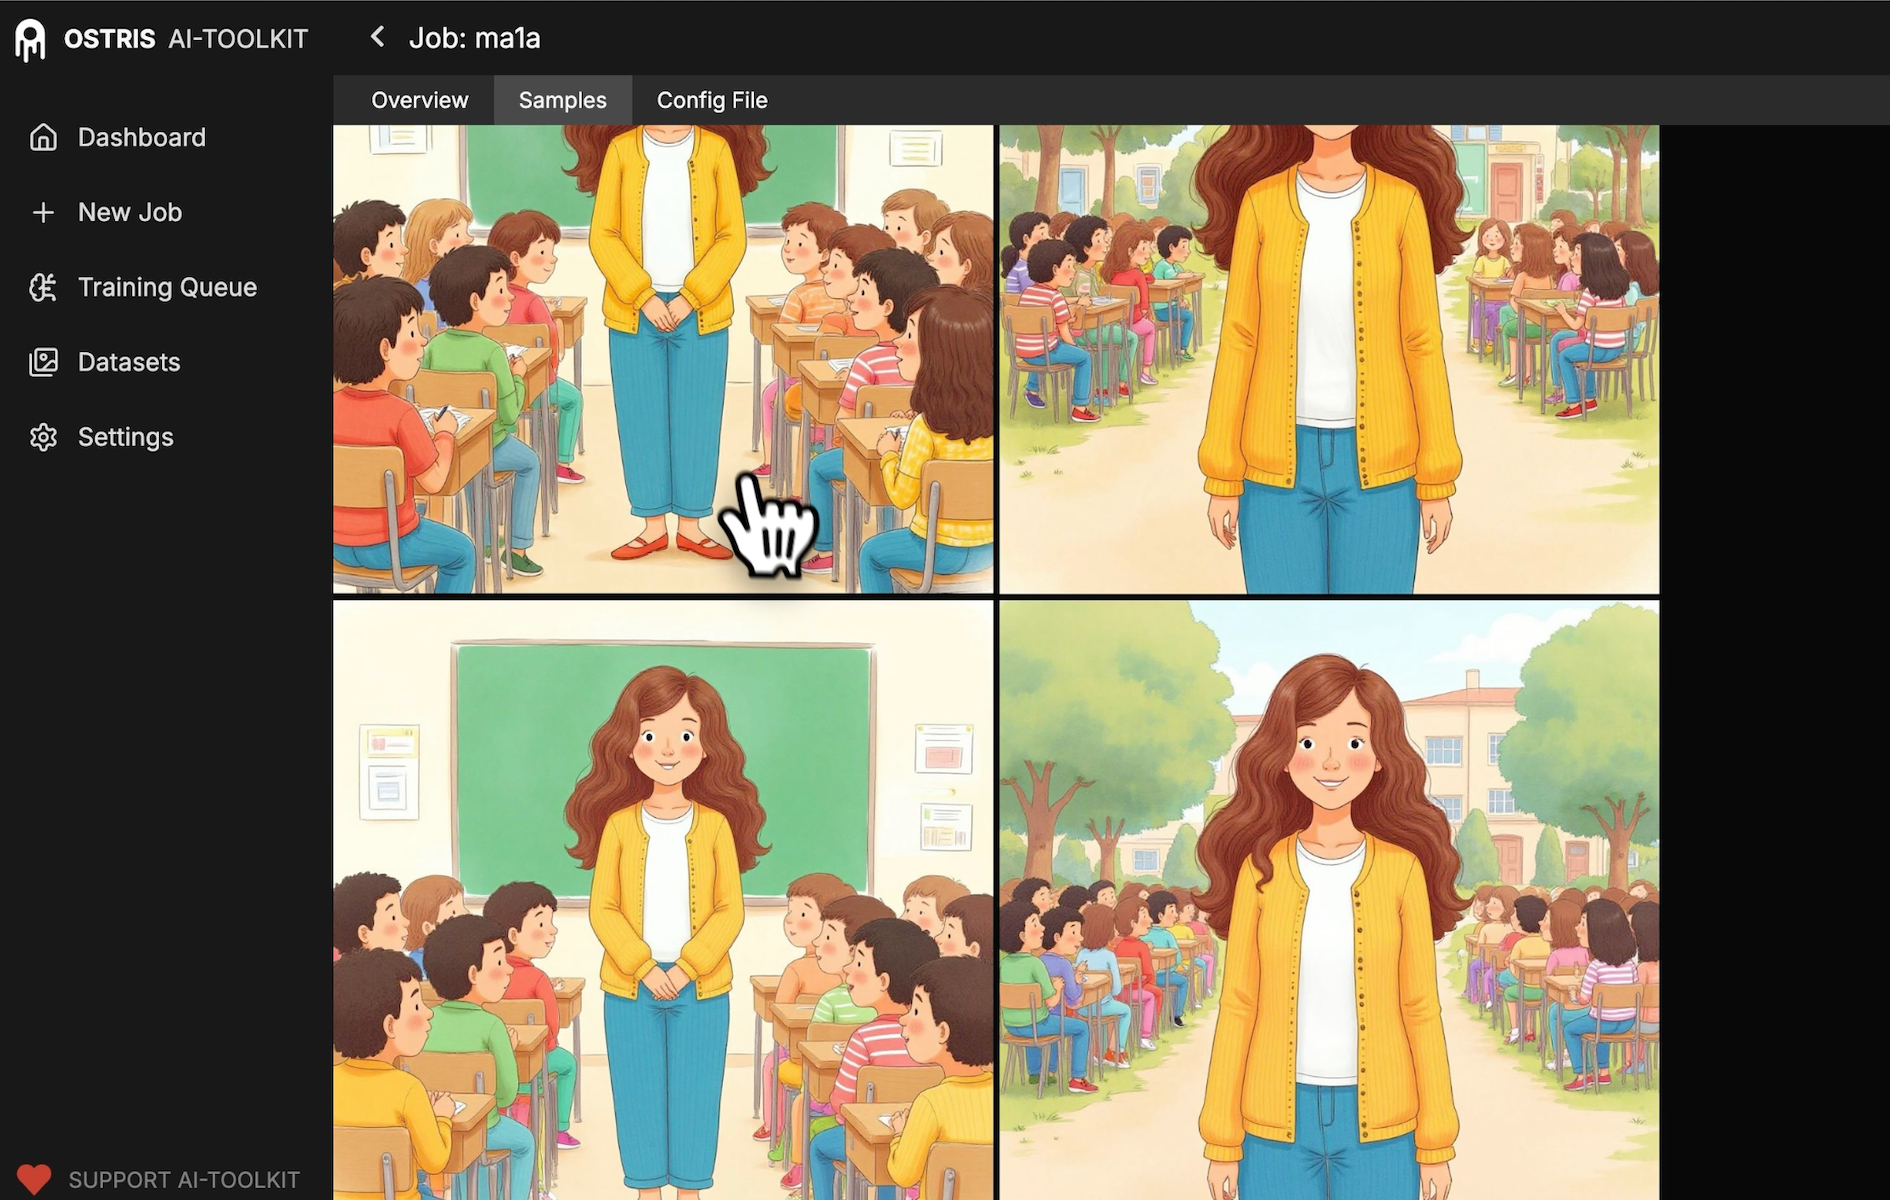
What I look for:
Facial consistency across poses
Hair/clothing cues from the dataset appearing reliably
Fewer “base model” faces over time
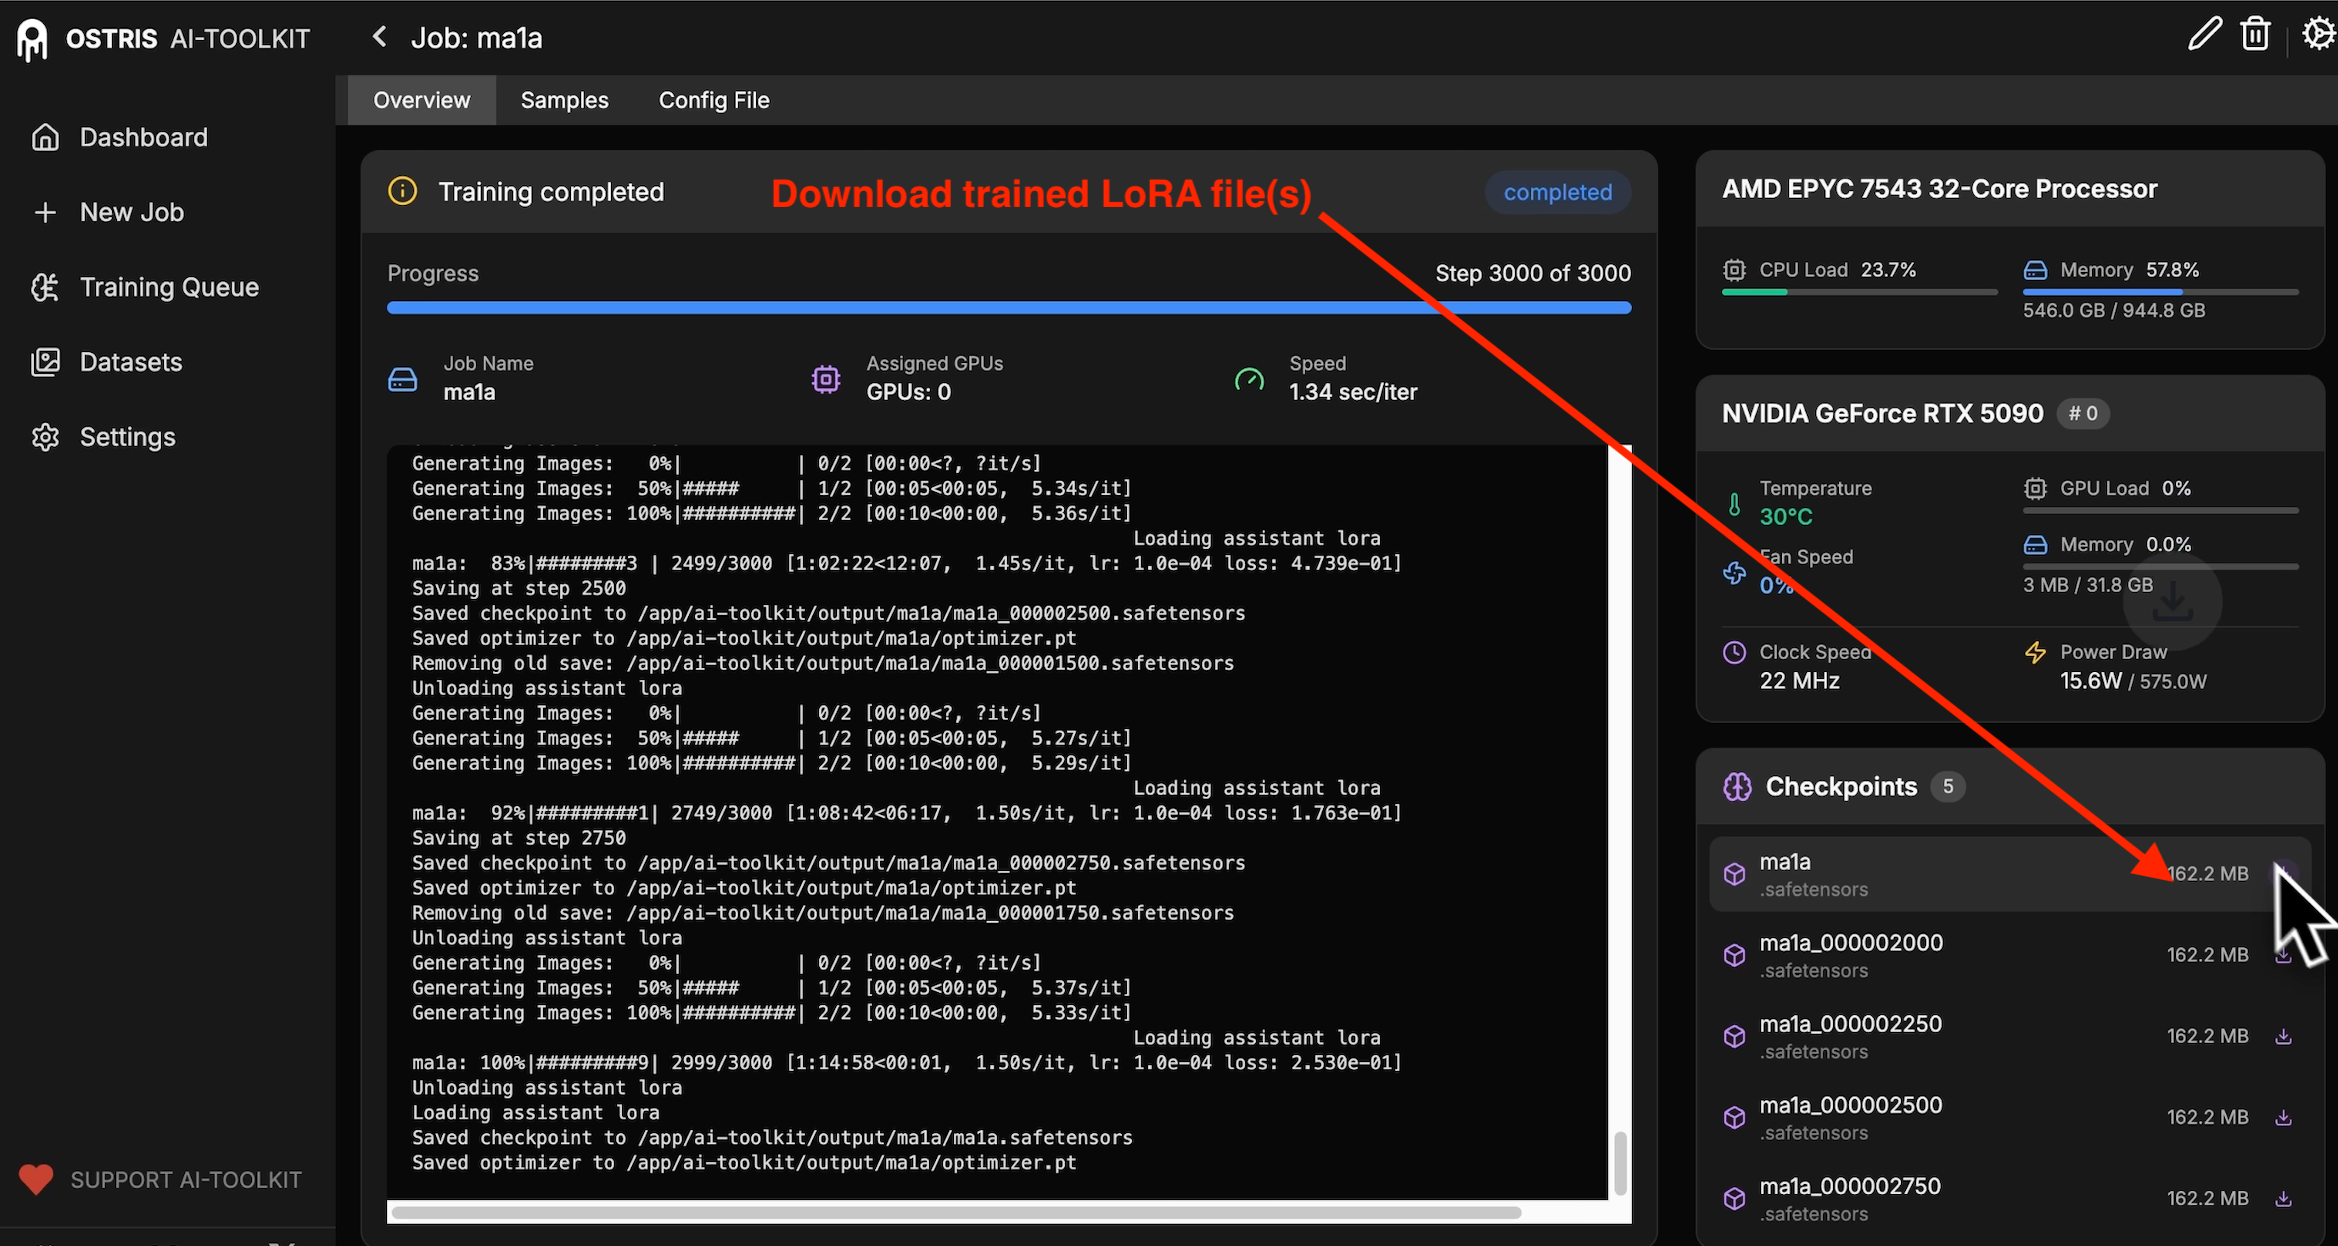
Download your LoRA
Grab it from Overview → Checkpoints. You’ll see the latest file ready to go.
Drop it into ComfyUI (or your favorite workflow)
I tested mine in ComfyUI with a simple prompt and a LoRA weight around 0.8.
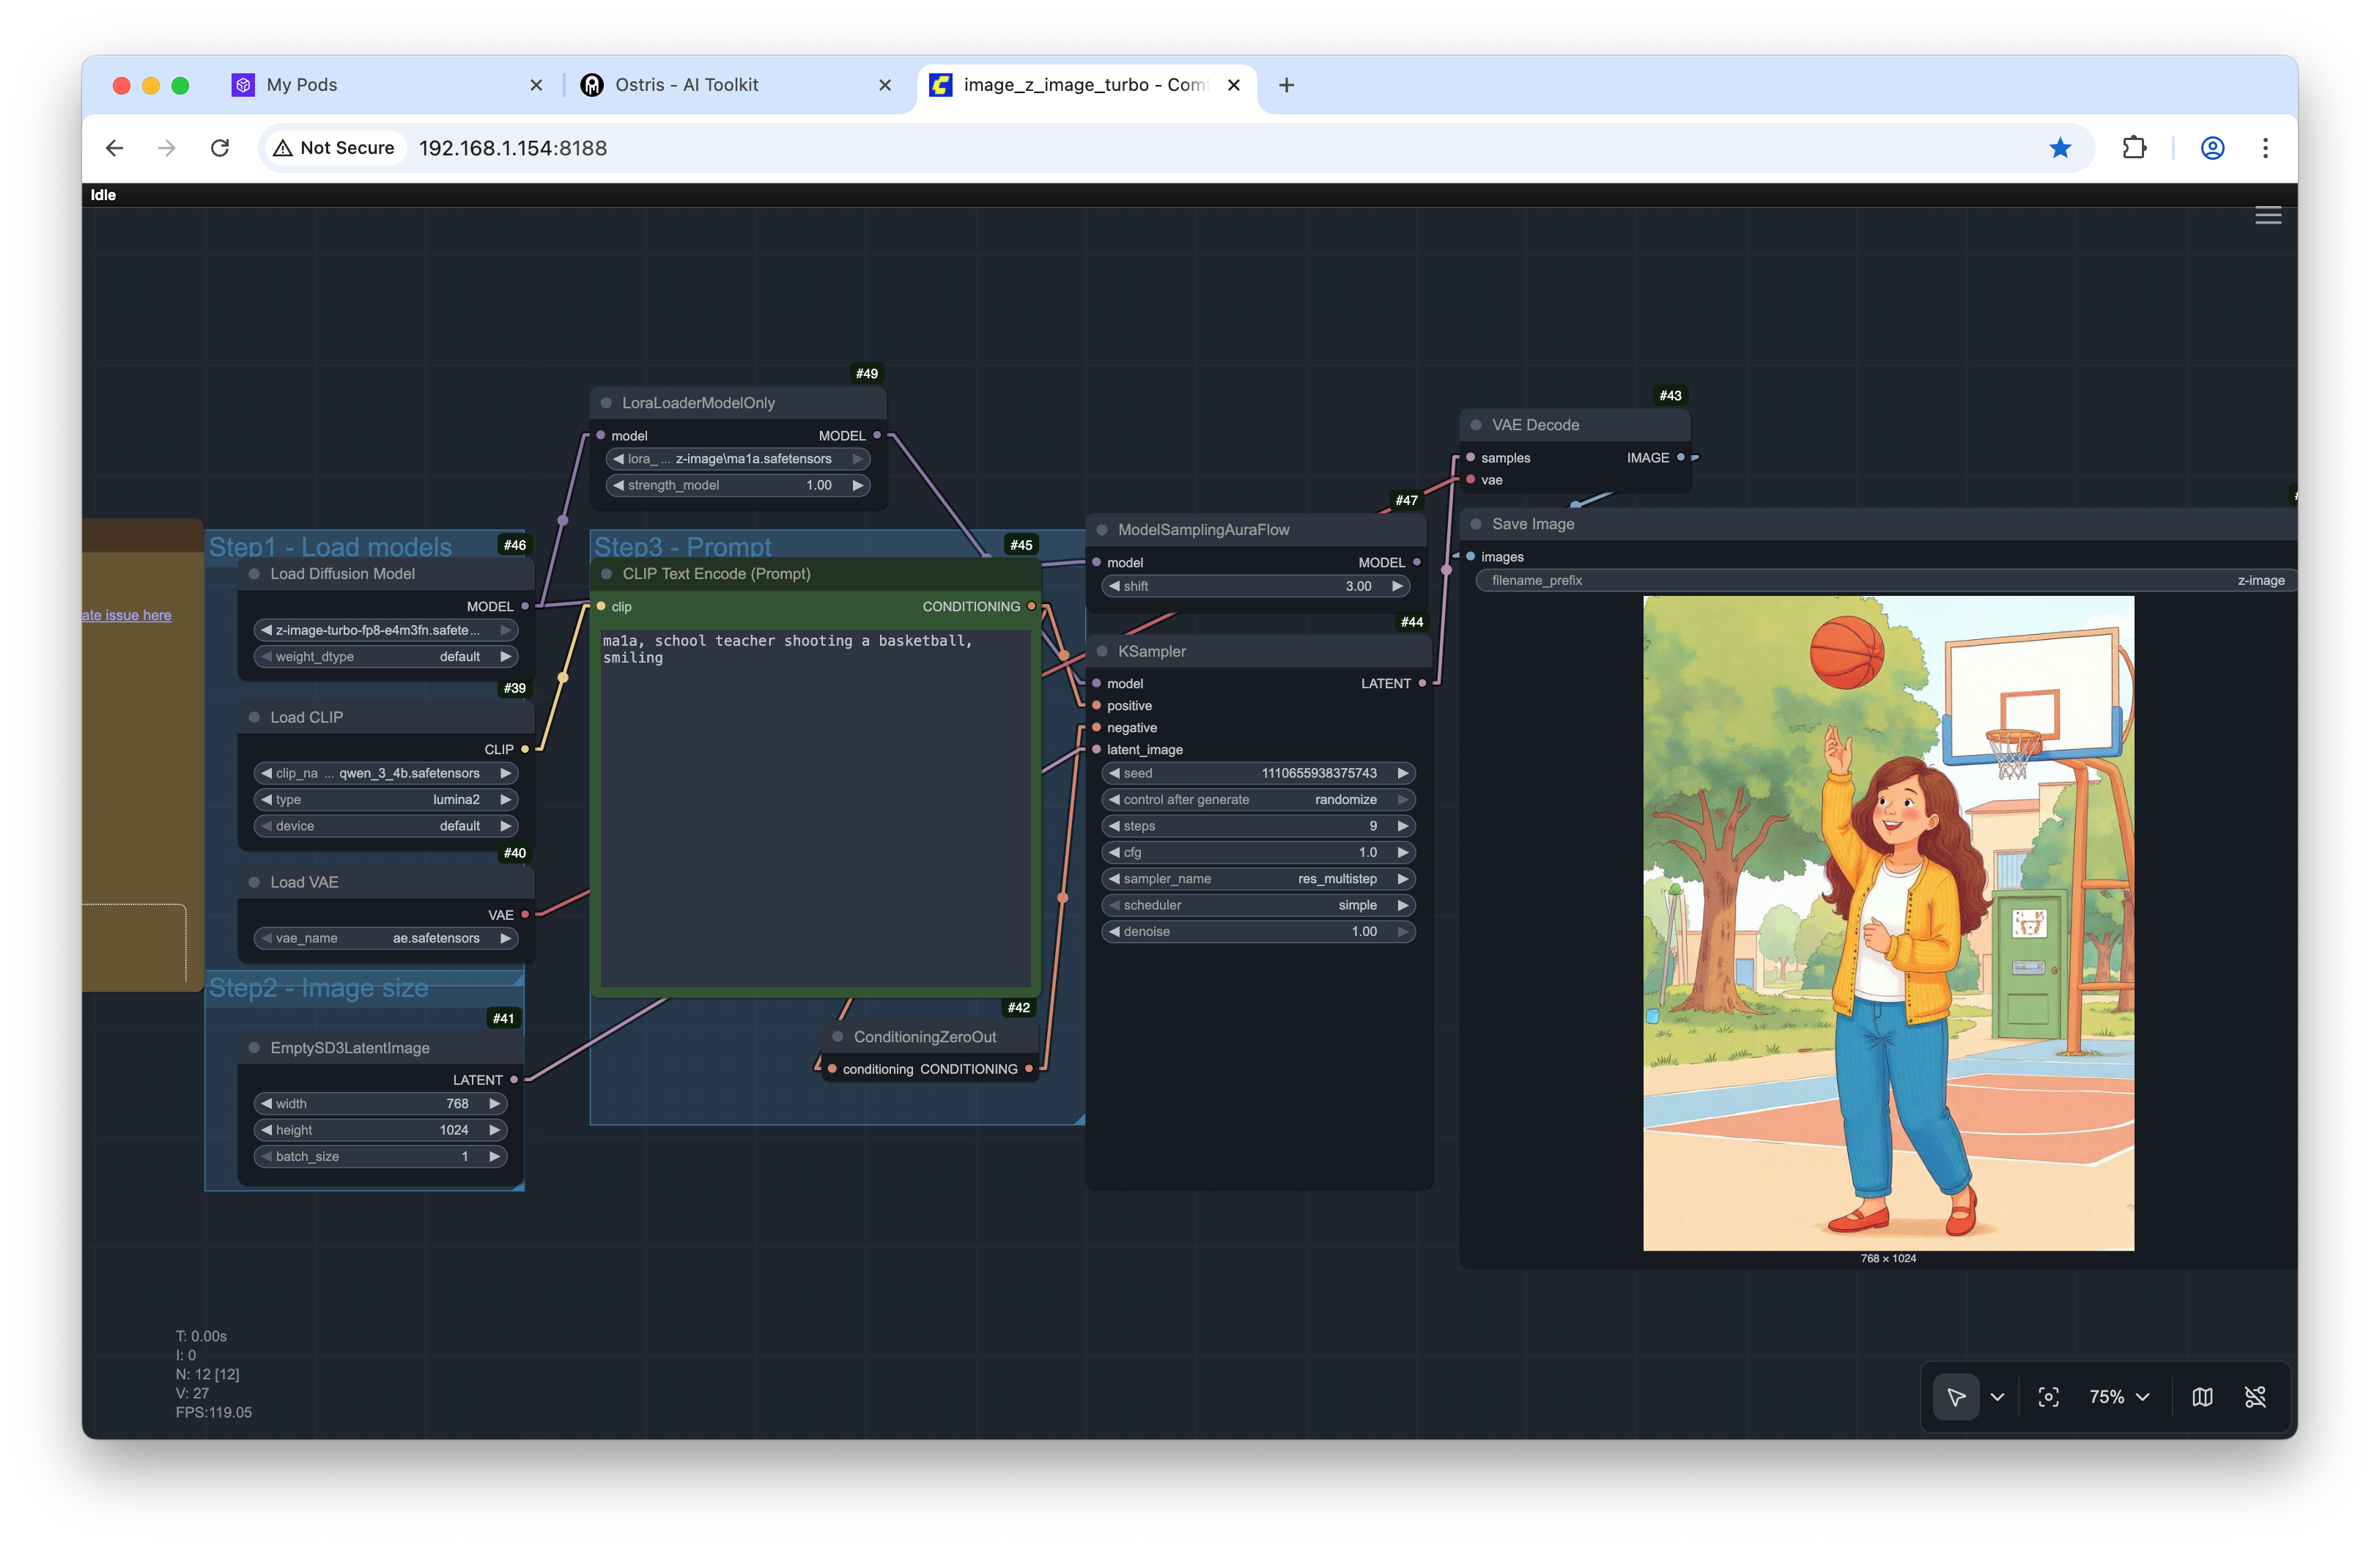
Example prompt I tried in ComfyUI:
teach3r, schoolteacher shooting a basketball, smilingResult sample:
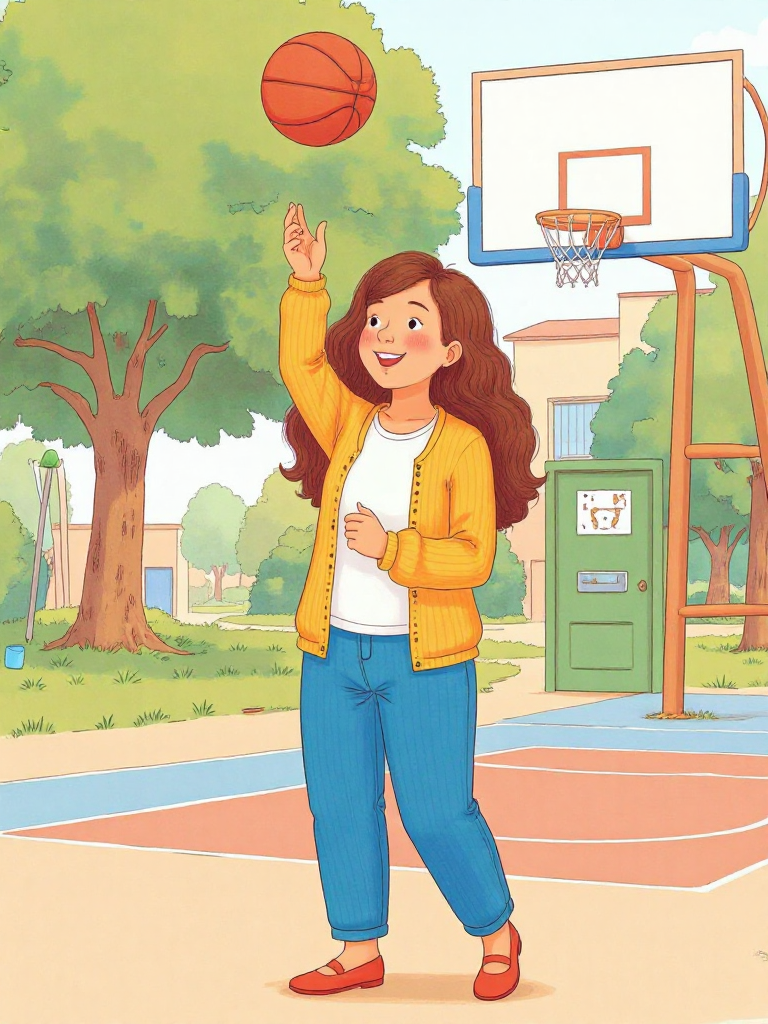
Note: I did get a couple odd background artifacts (a weird door sneaking into an outdoor scene). Quick inpainting pass could clean this up - or better prompting :-).
Don’t be shy about using your usual fix-up tools after generation.
What I’d tweak next time
Try the new training adapter (v2) to compare sharpness/consistency.
Write one-line captions only for the outliers (e.g., “glasses” or “ponytail”) to stabilize specific details without overfitting.
Keep two sample prompts: one “portrait” and one “action” so you can spot weaknesses early.
If you’re VRAM-limited, enable the low-VRAM option in the UI and bump samples to every 500 steps instead of 250 to reduce interruptions.
Quick cheat sheet
Platform: RunPod + Ostris AI Toolkit (latest)
Model: Z-Image Turbo (distilled)
Dataset: ~9 diverse images, no captions required
Resolution: 1024 × 1024
Steps: ~3000 (≈1 hour on a 5090)
Samples: every 250 steps, seed 42
Trigger word: put it first in your prompts
LoRA weight: start at 0.7–1.0
Optional: try training_adapter_v2.safetensors
Give it a go
If you’ve got an idea for a character, style, or prop, Z-Image Turbo makes it easy to test fast without a giant setup. Start tiny, watch the samples, and adjust on the fly. If you try the v2 adapter or find a killer prompt combo, drop it in the comments—I wanna see what you build!