


If you find our articles informative, please follow me to receive updates. It would be even better if you could also follow our ko-fi, where there are many more articles and tutorials that I believe would be very beneficial for you!
如果你觉得我们的文章有料,请关注我获得更新通知,
如果能同时关注我们的 ko-fi 就更好了,
那里有多得多的文章和教程! 相信能使您获益良多.
For collaboration and article reprint inquiries, please send an email to [email protected]
合作和文章转载 请发送邮件至 [email protected]
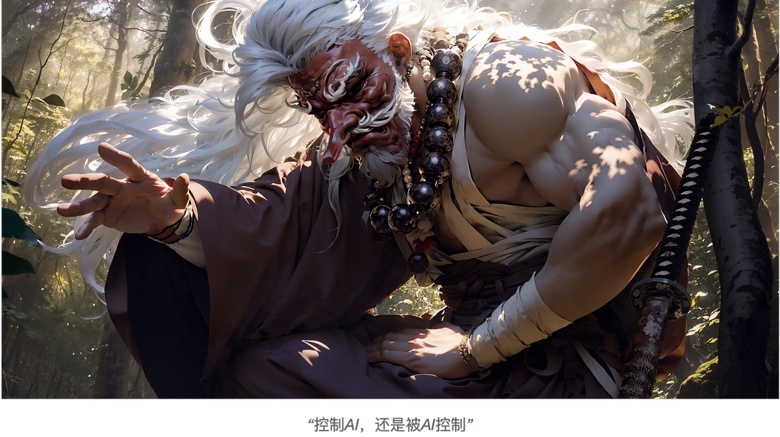
By: Mazz
This tutorial is a detailed explanation of a workflow, mainly about how to use Stable Diffusion for image generation, image fusion, adding details, and upscaling during the creation process.
Before ReadingMake sure you have installed and are proficient in using the following tools:

This tutorial is for individuals who aspire to have full control over their creative process.
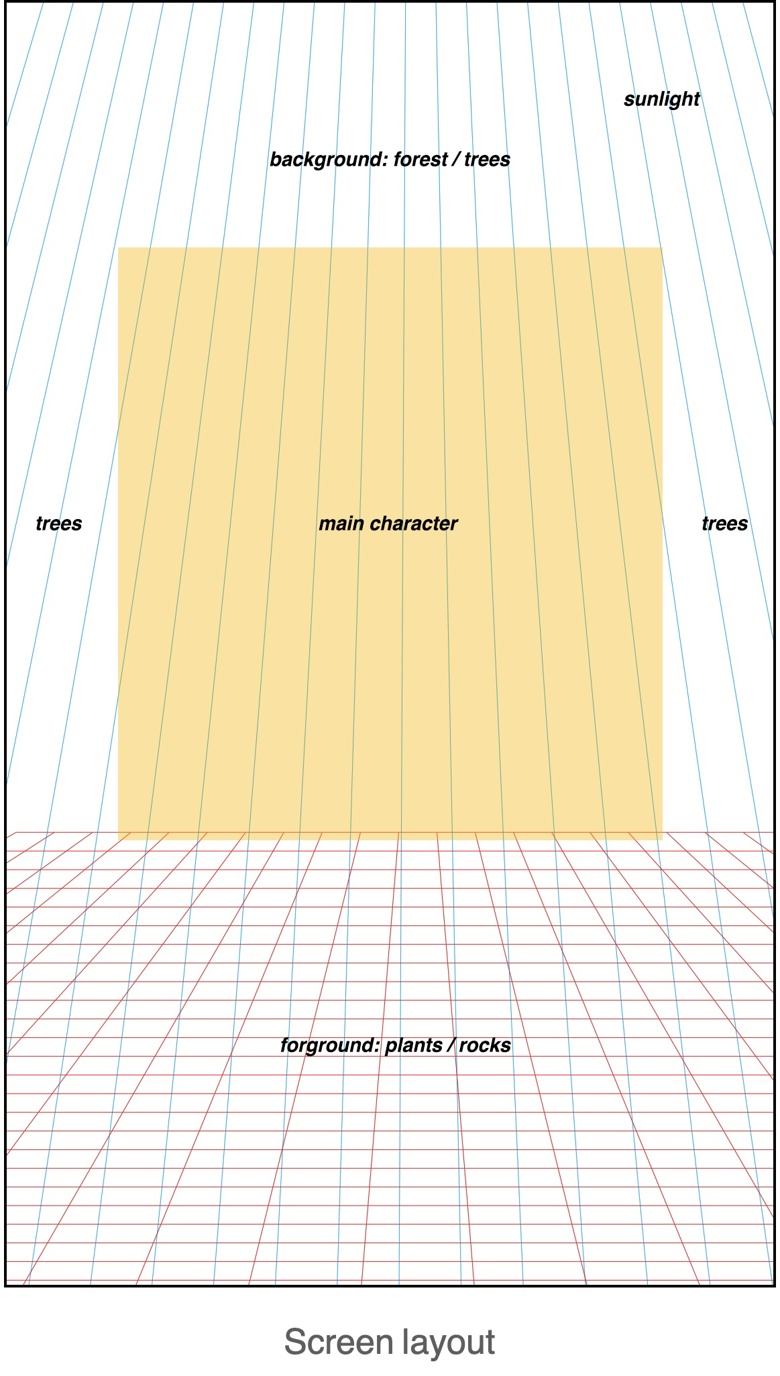
Step 1: Concept and Composition
Theme: Depicting an image of a retired hermit living in the mountains.Composition: Using a vertical composition, with an initial aspect ratio of 1152*1920px.Elements: The background is a forest with sunlight, the midground consists of the main character, stones, and various items, and the foreground includes plants and land.Camera: Low-angle shot, focused on the midground with the foreground blurred.
Step 2: Background drawing
Get some forest and stone image materials, and composite them in Photoshop, add light, roughly process them into the desired composition and perspective angle.Use Stable Diffusion img2img to generate the initial background image.Note that there is no need to pay attention to any details of the image at this time. Even if there are some errors in the generated image, there is no need to repair them.
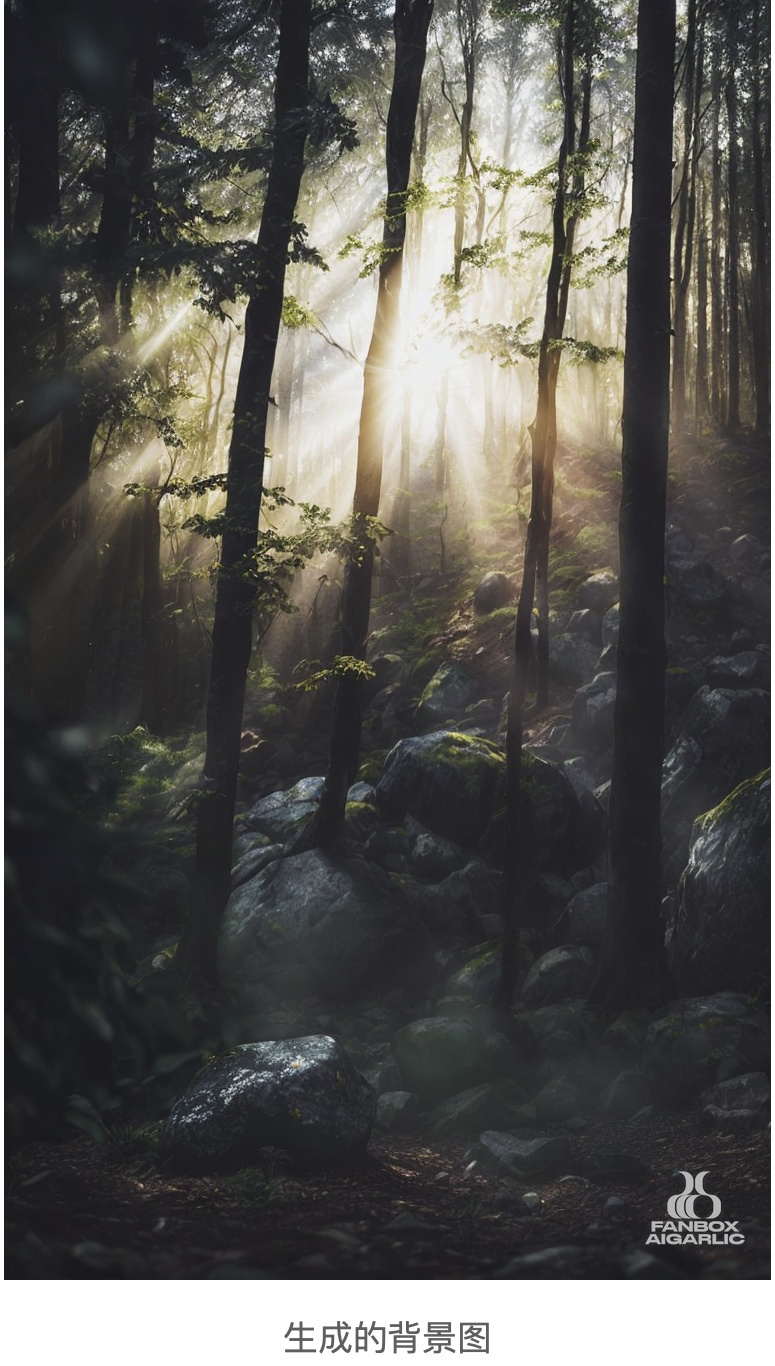
Prompt: masterpiece, best quality, low angle, depth of field, a forest with sunbeams shining through the trees, rocks laying on the ground in the foreground
Step 3: Character Design
First, we need to determine the character's movement. Here, based on the sketch, I adjusted the posture using the 3D character model in Clip Studio Pro. You can also use other 3D pose software to generate character posture.Then we need to use ControlNet's Openpose extension to generate the character posture.To control the character's color, a suitable color image can be put into img2img and the denoising strength should be adjusted to 0.9 or above to use it as a color palette. Of course, you can also draw a basic color draft and put it into img2img, or use plugins like ControlNet Color to control the color.During this process, img2img needs to be iterated repeatedly, and forest and light elements in the background should be added as appropriate, in order to facilitate the future integration of the character and the background. After the character is roughly determined, simple integration is done in Photoshop and then img2img is used to continue generating the image. This process still requires iterative adjustments, and should be combined with inpainting and inpainting sketch
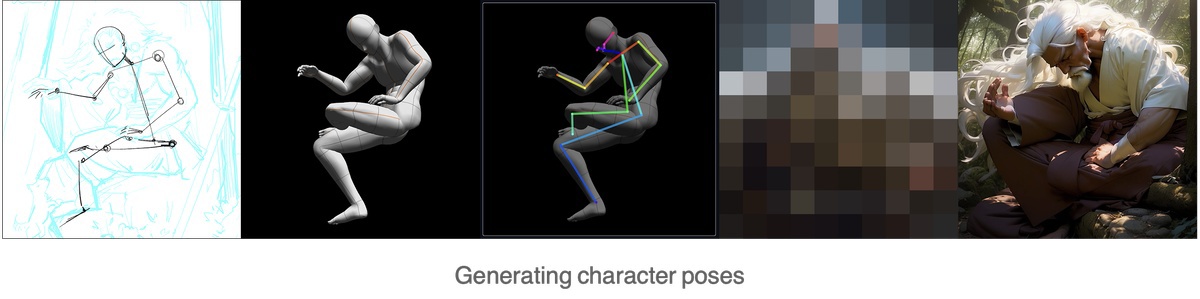
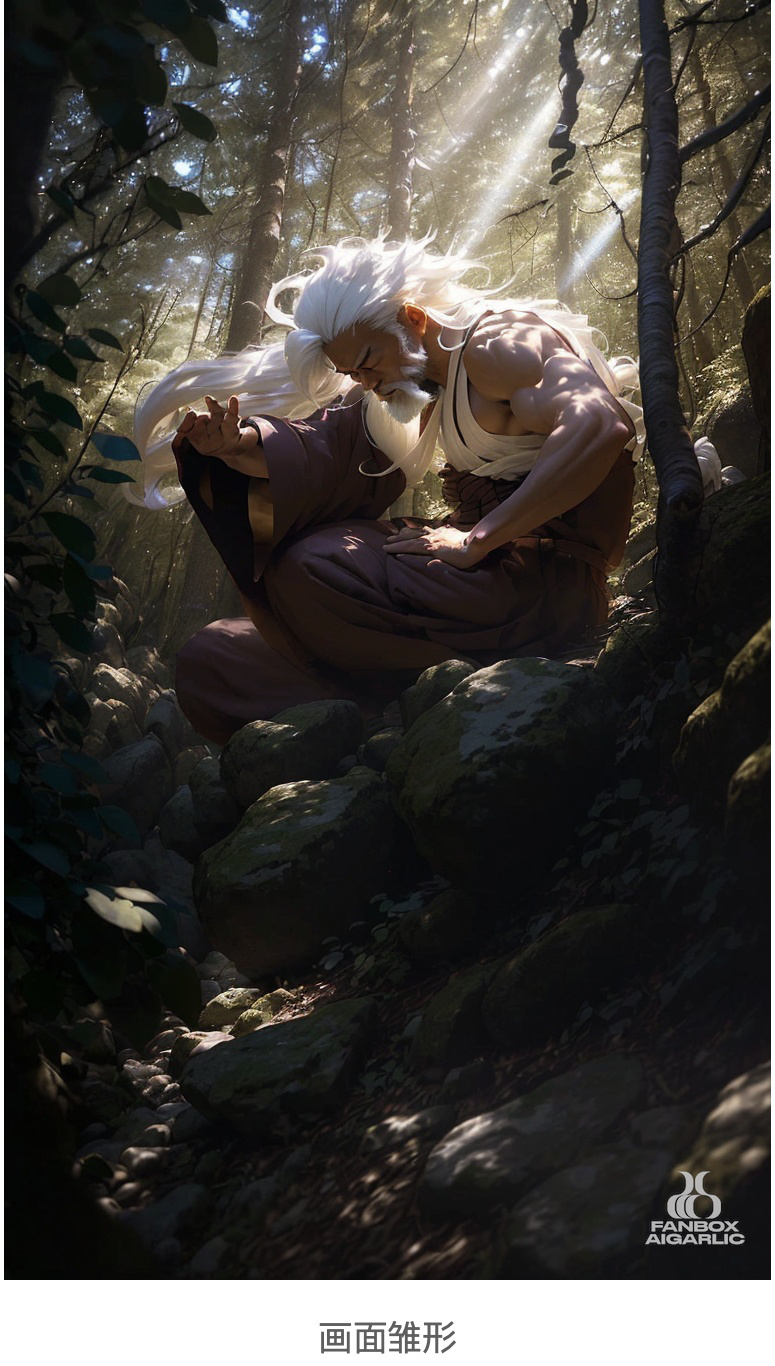
At this point, the basic form of the image is already there. There are problems with the facial angle and hands, but there is no need to rush to modify them.
Prompt: masterpiece, best quality, 1male, japanese monk, back lighting, ((rim light)), long hair, white hair, floating hair, white beard, long beard, meditation, in the forest with sunbeams shining through the trees, rocks laying on the ground in the foreground, depth of field, low angle
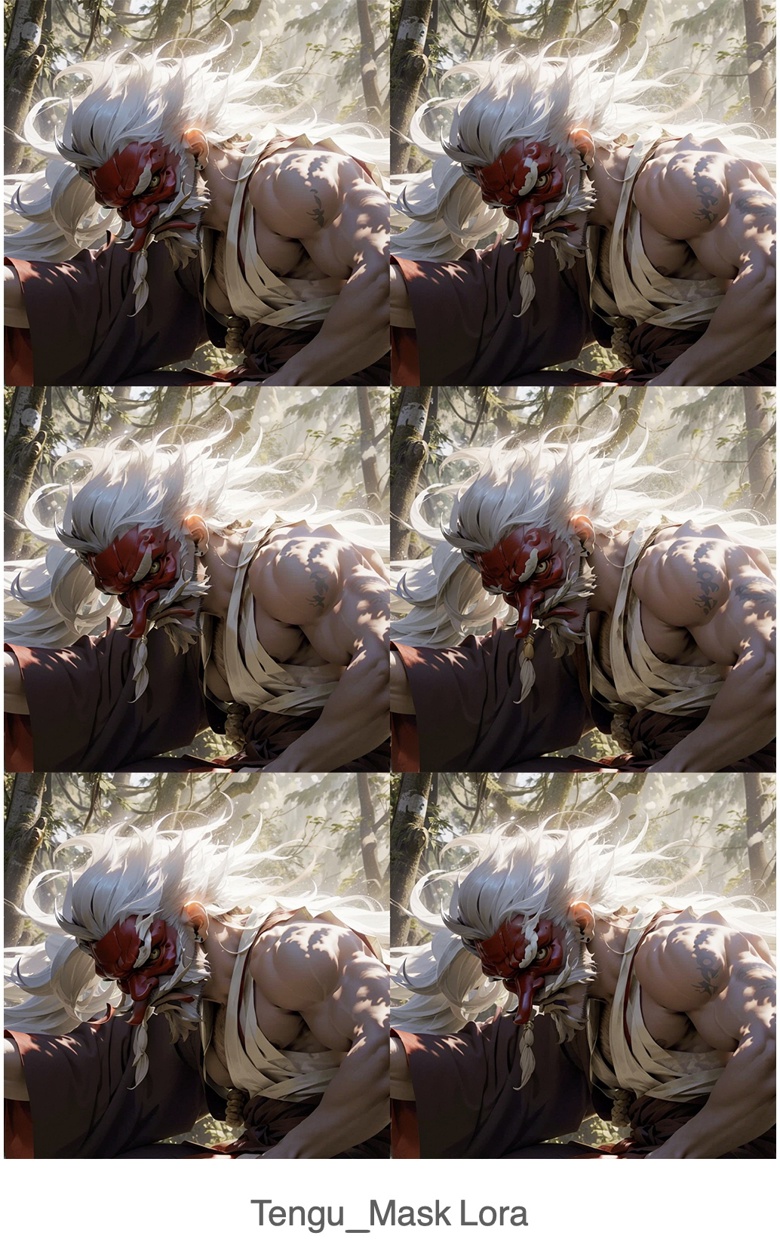
Step 4: Tengu
Now we need to have the old man wear the Tengu mask. Since Stable Diffusion does not have a suitable model and Lora can easily generate Tengu masks, I have trained a dedicated Lora for this purpose. When using Lora, an inpainting sketch is required for redrawing, or the mask can be cropped and simple hand-drawn in Photoshop before being redrawn in img2img. Note that the redraw area should be small to avoid Lora style contaminating other elements of the picture. The most direct way to draw special items that Stable Diffusion cannot recognize and draw well is to make your own Lora.
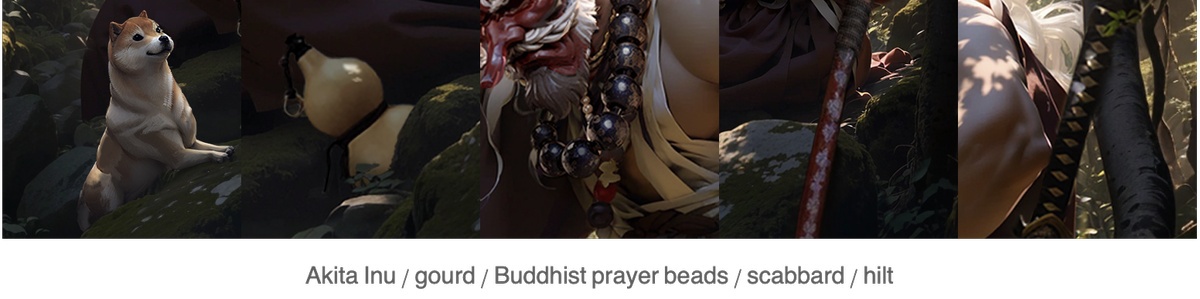
Step 5: Other items
Continuing with the previous approach, add other items one by one to the scene.The method is still to use Photoshop to add materials to the partial area of the picture or use Inpaiting Sketch to draw objects, and then iterate multiple times with img2img until the satisfactory effect is achieved. After that, merge it in Photoshop, and finally use img2img to generate the overall image again.When drawing partial objects, you can use different models and Lora according to your needs, without worrying about changes in the overall style.
Step 6: Local Corrections
Corrections to objects including hands, object proportions, etc.Correction to the background: Because AI cannot understand the occlusion relationships of objects, there may be dislocation in the trees in the background. We need to manually fix the continuity of tree trunks that have been occluded.At this point, we have a complete picture with no obvious flaws.
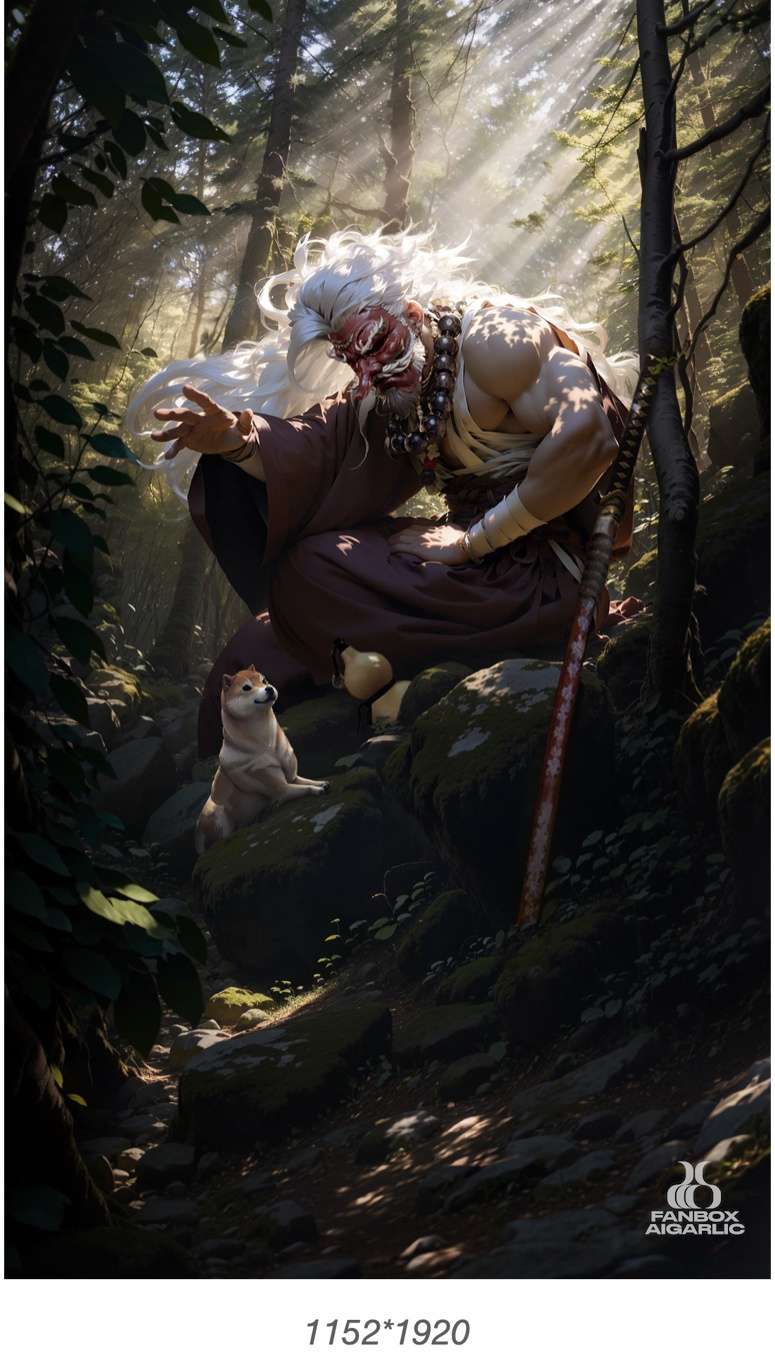
Prompt: masterpiece, best quality, 1male, japanese monk with a tengu mask and large beads necklace, a little puppy, a katana, a gourd, back lighting, ((rim light)), long hair, white hair, white beard, long beard, meditation, (textured clothing), ultra detailed, in the forest with sunbeams shining through the trees, rocks laying on the ground in the foreground, depth of field, low angle
Step 7: upscale
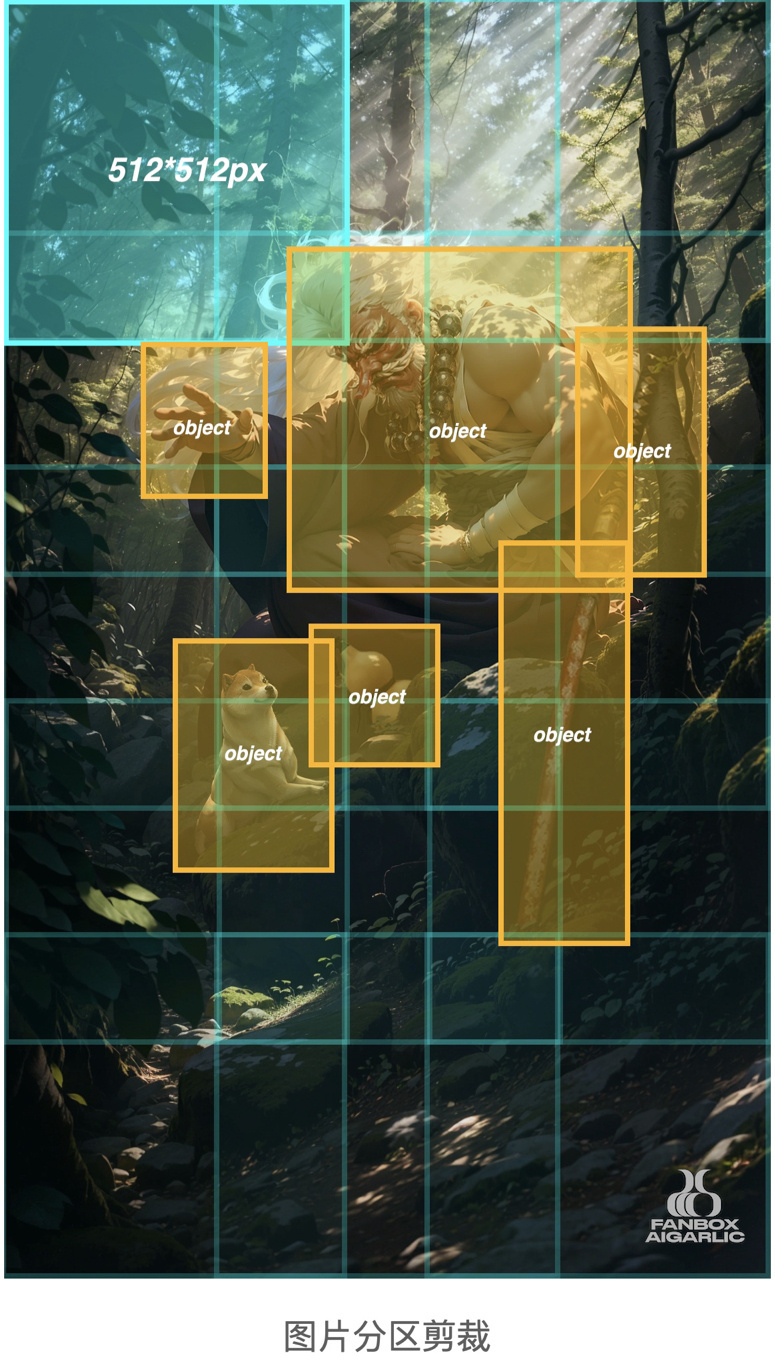
There are several methods for magnification: + Using Extra> Upscaler for magnification - cannot increase detail + Using Ultimate SD upscale for magnification - prone to errors for complex scenes with many elements + Using ControlNet Tile + Ultimate SD upscale for magnification - also prone to errors for complex scenesSo this time, we need to use manual partition magnification. Use Photoshop to evenly clip the screen into local graphics of 512 512pxUse Stable Diffusion img2img to generate 1920 1920px graphics one by one, and control the denoising between 0.39-0.49.Then use img2img to magnify important objects separately, with a magnification of 1920/512=3.75.During the process of partition magnification, you can use ControlNet and Ultimate SD upscaler to add more details.
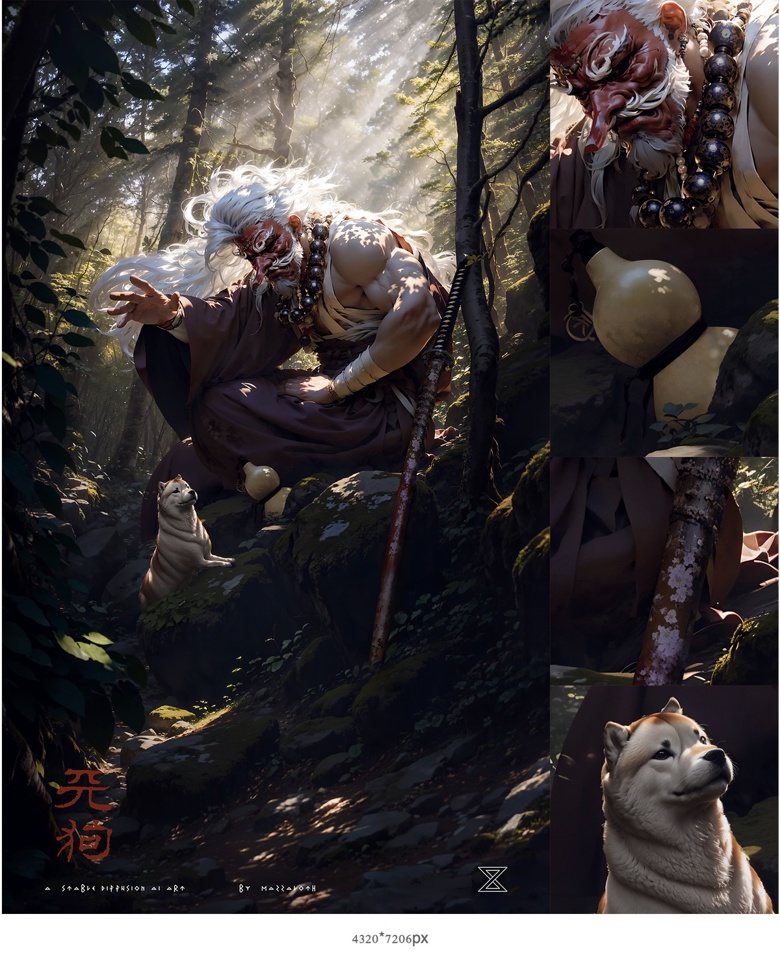
Finally, use Photoshop to combine, refine and color the magnified local graphics.At this point, all the work is done! Let's see the final effect.
Final words
Current AI drawing tools like Stable Diffusion are still unable to handle complex images with rich elements. Especially when precise requirements are needed for the image, using a single img2img cannot generate satisfactory results. The core of this workflow is to let the AI do only one thing in each step, thereby improving the AI's precise understanding of instructions. In addition, this workflow is similar to the traditional painting process of "from the whole to the part," which is more friendly to painters who are used to hand-drawing. Furthermore, since 90% of the work is controlled by the author himself, the AI does not have too much freedom to play, which embodies the essence of creation for the author. The model and Lora used in this workflow: Model: Lyriel V1.5 / DreamShaper V1.5 Lora: NijiExpressive V1.0 / MazzNohMask V0.5