

Note: If you use the attached workflow you will need to install the “Image Compare” node via ComfyUI Manager.
I wanted to share a very simple inpainting method I’ve been experimenting using with Z Image Turbo. I’m still fairly new to both ComfyUI and Z Image, so this workflow is intentionally basic. When I was learning, I struggled to find anything that focused on just straightforward inpainting without extra complexity.
One thing to note: since this workflow does not use a separate latent image node, the generation size will default to the size of the image you load. That said, for quick edits and simple inpainting, this setup has worked well.
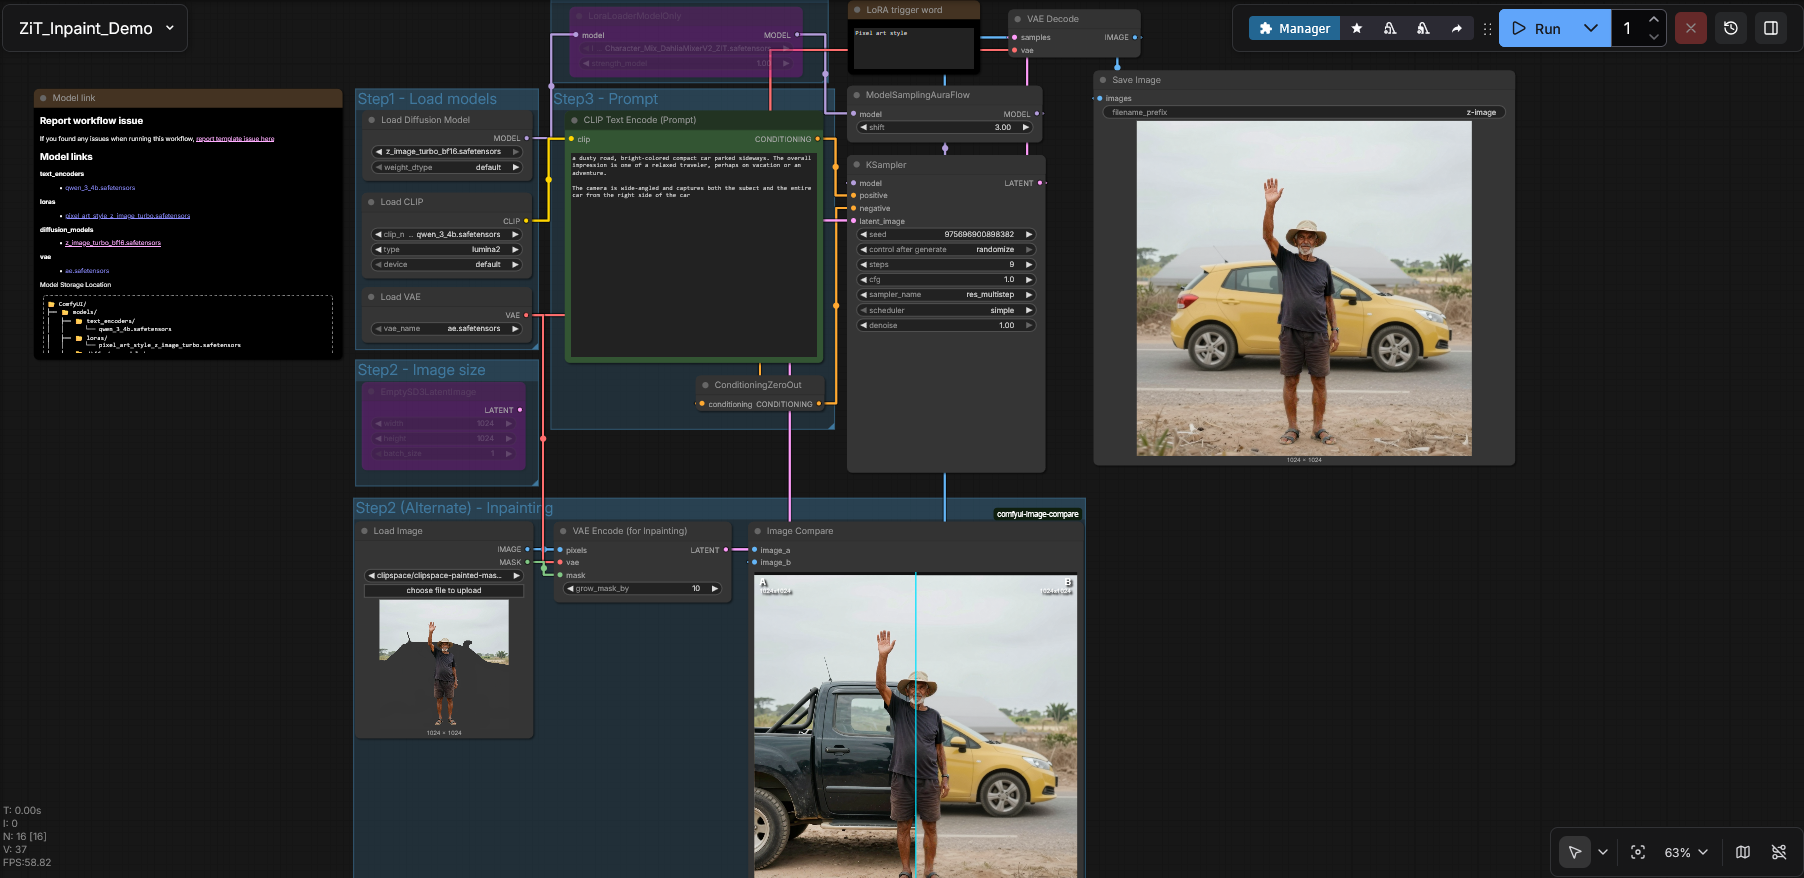
Example of the workflow:
Before:

After (Masking could have probably been better on my half here for this):

Manual Setup Steps (Updated to set both Max Scale and Batching)
If you prefer to build it yourself instead of importing a workflow, here are the steps:
Base setup
Start with the ZiT Image to Text template.
Delete or disconnect:
EmptySD3LatentImage
Add the inpainting nodes
Add a Load Image node
Add a VAE Encode (for inpainting) node
Add a Repeat Latent Batch node
Add a ImageScaleToMaxDimension node (to control input/output sizes)
Connections
Load Image → VAE Encode (for inpainting)
Image→PixelsMask→Mask
Load Image → ImageScaleToMaxDimension
Image→Pixels
ImageScaleToMaxDimension → VAE Encode (for inpainting)
Image→image
Load VAE → VAE Encode (for inpainting)
VAE→vae
VAE Encode (for inpainting) → Repeat Latent Batch
Latent→Samples
Repeat Latent Batch → KSampler
Latent→latent_image
Continue as normal
From KSampler, continue the workflow into VAE Decode and your usual preview/output nodes.
Optional: Image Comparison
(Optional – install the “Image Compare” node via ComfyUI Manager)
Connect:
image_a→ IMAGE from ImageScaleToMaxDimensionimage_b→ IMAGE from VAE Decode
This allows you to quickly compare the original image to the inpainted result.
Update: I attached a slightly more updated, corrected workflow. I added the ability to set the resolution of the file and ability to batch. The attached workflow was updated. I had also had a Lora set for testing that also can confuse people It was not needed for this.
Instructions should be updated to reflect a better version of the workflow. I consider all of this to be a kind of WIP as I too am new to all of this with ComfyUI.