Hi all,
Yes this is kind of long, but I promise it's got good info that I have had a really hard time finding!
I noticed this pretty quickly when using SDXL (I never tried 1.5 or earlier). As a graphic designer/photographer, It annoyed me very much.
You want a dark nighttime scene and SDXL renders a bright-ass moon to brighten up the picture! A snowy afternoon scene is not almost all bright snow, it's rather dark! What gives?
Eye candy, here's what you can't get without the tricks I'll go over:
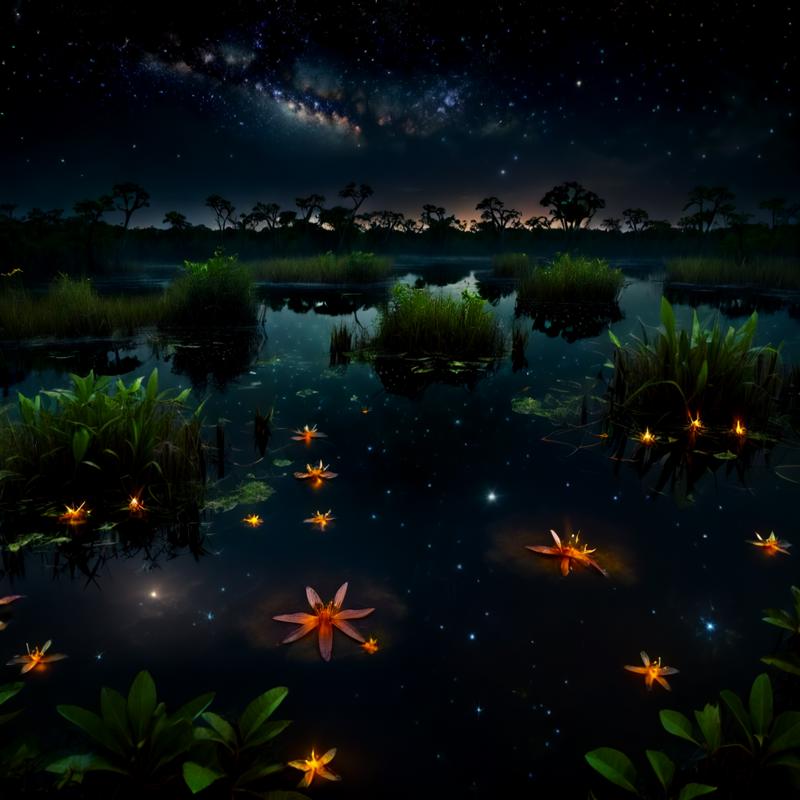
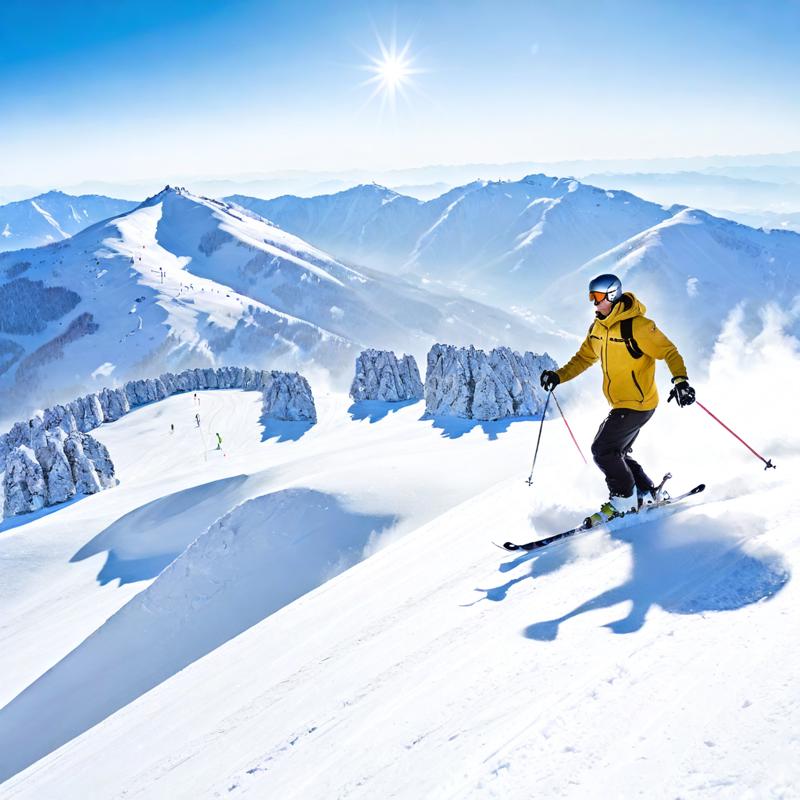
Both of these use the "Alt" method (explained below) and brightness around -5 and +5 (dark and bright) note that there's always a point that is 100% white and 100% black, but the mid tones skew darker or brighter, drastically. That's the point! And it's impossible to do normally.
Here's "bright" skiing image, with similar parameters, but without any tricks:
(Regular keywords with no modifiers, this is as good as you can manage.)
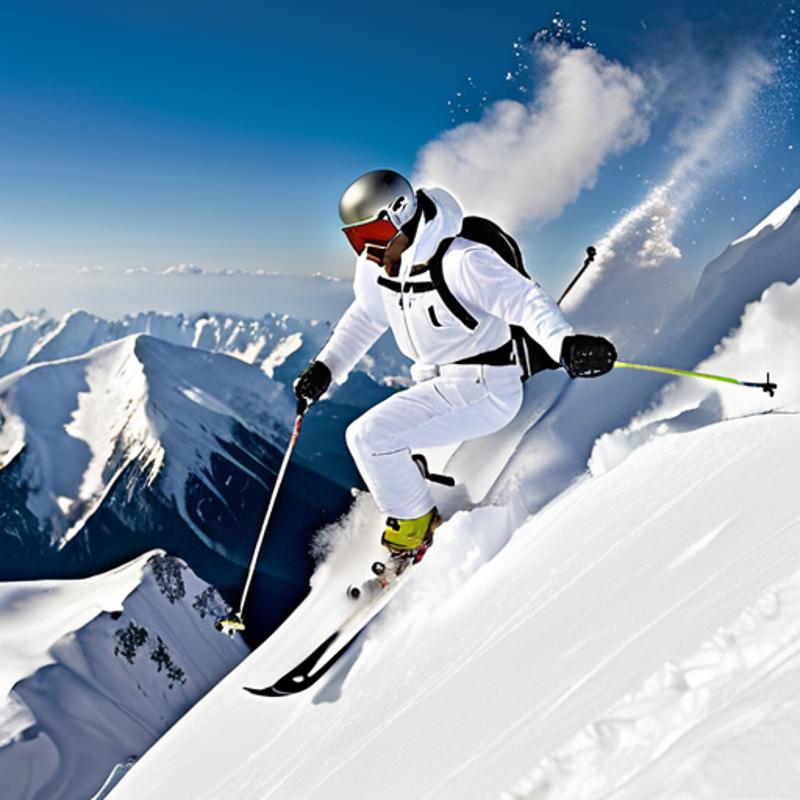
Hey, that's way darker than I wanted! Trust me, you can't use keywords to get it much brighter, the average brightness is 50%, guaranteed by AI law.
Here's what I mean, using the Image > Curves tool in photoshop:
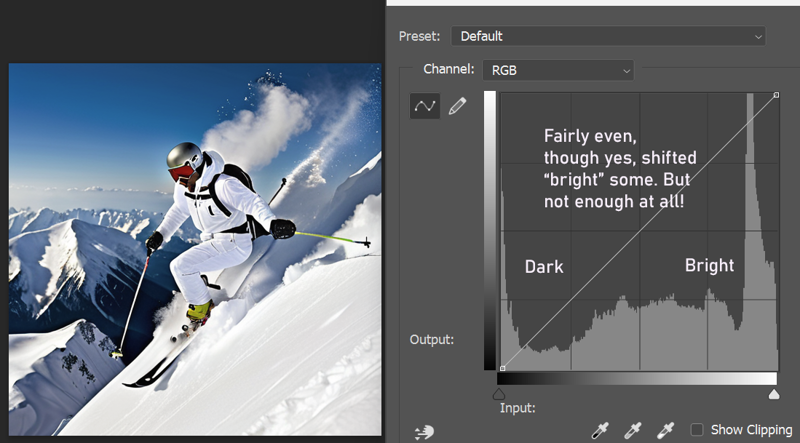
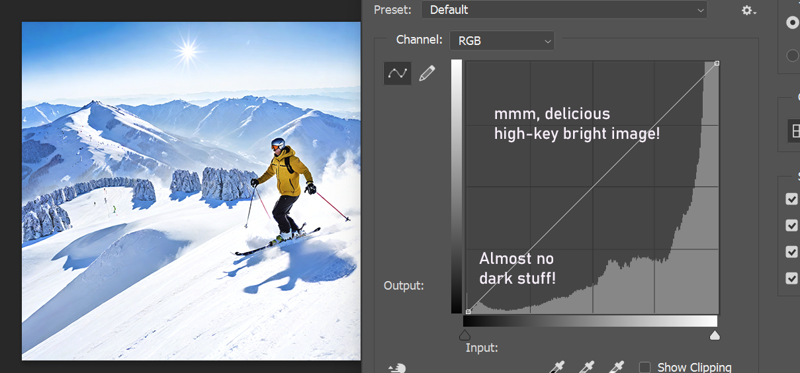
See what I mean? Keep reading, I'll explain how to do it once and for all!
The official solution sucks!
Ok, I looked in to this a LOT. Stable Diffusion has a thing called a NOISE OFFSET that controls the initial noisy image that gets turned into your cool picture through refinement steps.
Without any noise offset, SDXL will "expose" your image (think like in a camera) so the average of all pixel values is 50% (or 0.5). So middle grey. Generally fine, but if you're going for a mood, pretty much give up now.
Luckily there's a few ways to fix this. 1.5 had LoRA's that would allow you to control contrast and exposure, but I haven't found anything to do that, except the Demo LoRA that comes with SDXL.
You can find it here:
https://civitai.com/models/137511/sdxl-offset-example-lora
In reality this does very little in practice. (Or perhaps I'm using it wrong, but I have examples below.)
Here's what the info that comes with it says:
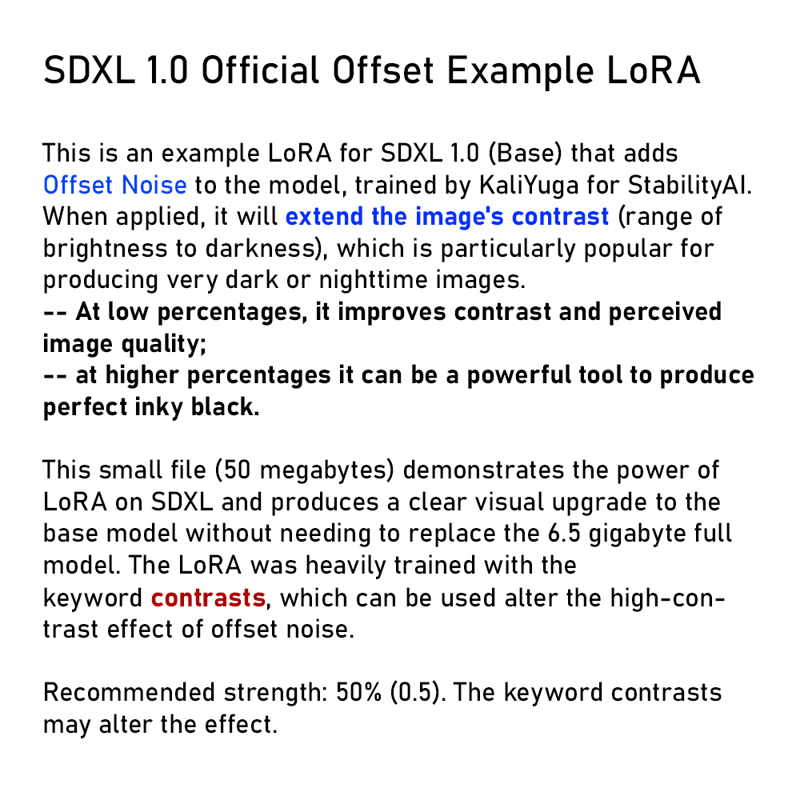
OK Cool, that would be handy.
I've tried it out quite a bit, and again - it doesn't do much.
First the prompt, with no keyword used.
framed art on a gallery wall portraying a framed beautiful acrylic painting of a rainbow over a bucolic farm at sunset, <lora:__sd_xl_offset_example-lora_1.0:0.01>

And with Contrasts keyword:
framed art on a gallery wall portraying a framed beautiful acrylic painting of a rainbow over a bucolic farm at sunset, contrasts, <lora:__sd_xl_offset_example-lora_1.0:0.01>

So that sucks. It doesn't make a load of difference. Use it, set it to like 0.5 - 1.0 and use the contrasts keyword.
OK so, what's the solution? I got you covered, never fear.
In your extensions (if you're using Automatic1111, like I do)...
grab Vectorscope:

Install it, restart, and you'll see a tab at the bottom just above scripts.
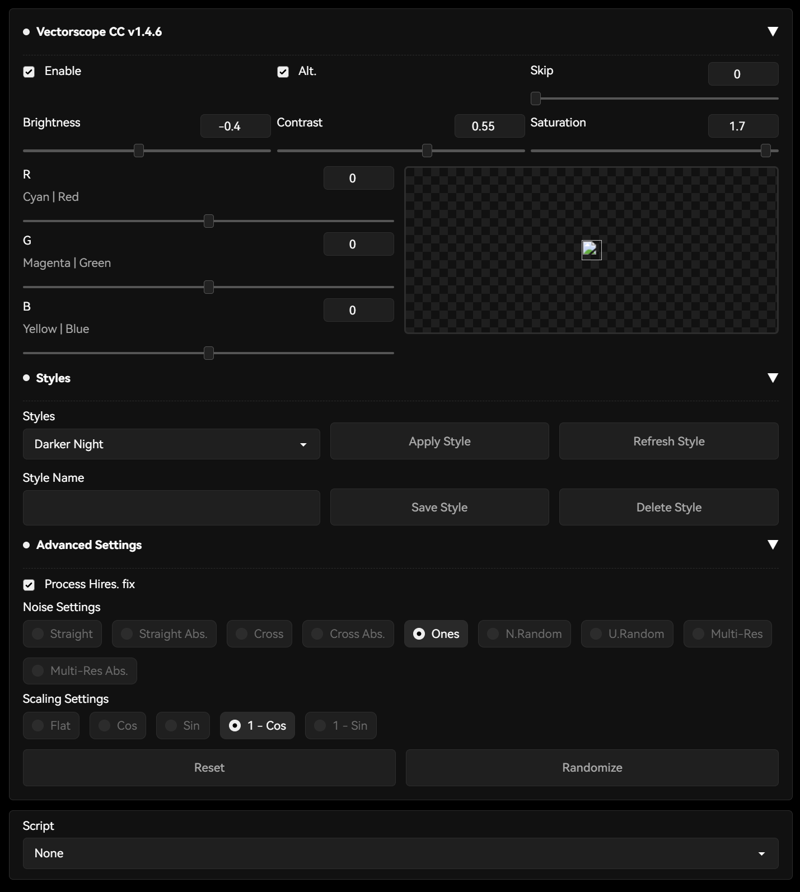
Woot!
This gives you control over brightness, contrast and saturation and it works WELL.
It even lets you render out FULL HDR (there's a Script added that gives you the ability to render with bracketed exposures just like a good camera, you need to merge them but photoshop has that covered. you'll end up with VERY wide dynamic range. I have tried it and it is SO delicious, but I digress.)
How to use it!
Again, use the Offset LoRA, (because it helps give this more to work with, play with your settings but I just use it around 0.5-0.9, and I probably should just leave it on 1 and forget it.)
First, use it (tick "Enable"), then click "Alt" - it makes the effect more powerful. We're going for a really obvious impact here, everything else is degrees of less impact.
Brightness from -6 to +6, best I can tell it's roughly about like number of camera stops (exposure).
Contrast is just that, and so is Saturation. I crank saturation up to max all the time, or nearly so. Play with contrast and exposure to get the effect you want.
RGB, color-shift your image - basically, you can color correct while you render! nifty, though I don't use it much. Perhaps + some for R to make skin tones pop.
Advanced settings, if you're using ALT, you want to also set these. Per the documentation, with ALT enabled, "Ones" and "1-Cos" are the best settings. For math reasons. It's how the plugin modifies the noise as it resolves the image.
You can see it working! Toward the end of the renders, your image will shift toward your settings here (especially if you made dramatic changes in vectorscope). It doesn't alter the beginning of your render, OFFSET LoRA does that. It shifts things towards the end (kind of looks like the last 25%).
I use this all the time now and I hope you enjoy this! Let me know if you have fun and it helps your renders!
DISCLAIMER - Not all LoRAs, Checkpoints and Sampling Methods work well with it, but 90% seem to, so don't stress too much about it. The 3-letter samplers are apparently incompatible. (See the vectorscope notes on their github for details.)
Have fun and I appreciate your feedback, let me know if this cured a headache.
I look forward to all your deliciously contrasty high-key and low-key images.
Eat cheese!


