
In this article I want to show some steps to create sprites in Unity using:
Stable Diffusion (https://github.com/AUTOMATIC1111/stable-diffusion-webui.git)
Stable Diffusion interfaceControl Net (https://github.com/lllyasviel/ControlNet)
Plug-in to generate my images in a precise positionAfter Detailer (https://github.com/Bing-su/adetailer)
Plug-in to improve the faces
As a Checkpoint as used CamelliaMix_Line (https://civitai.com/models/44195/camelliamixline)
Another tools that I use are:
Krita 5.2 (open source software for drawing available at https://krita.org/)
Unity 2021.3.25f1 available at https://unity.com/ (free Personal license)
To install Stable diffusion check out my other article here : https://misterm.itch.io/mr-visual-taleforge/devlog/610874/how-to-install-and-run-stable-diffusion-on-your-computer
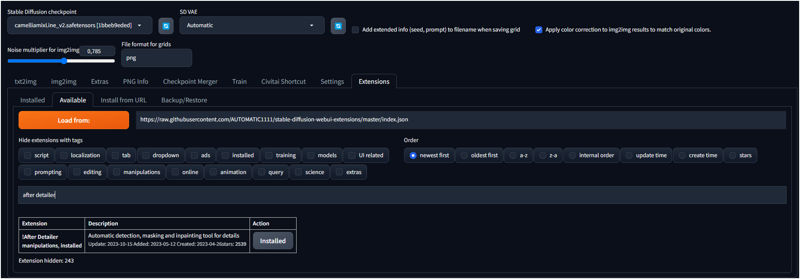
To install the plugin ControlNet and After detail from the Extension >> Available page:
ControlNet
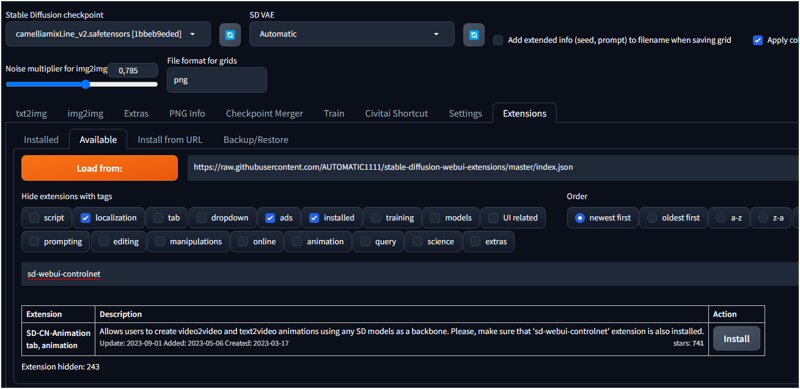
After Detailer
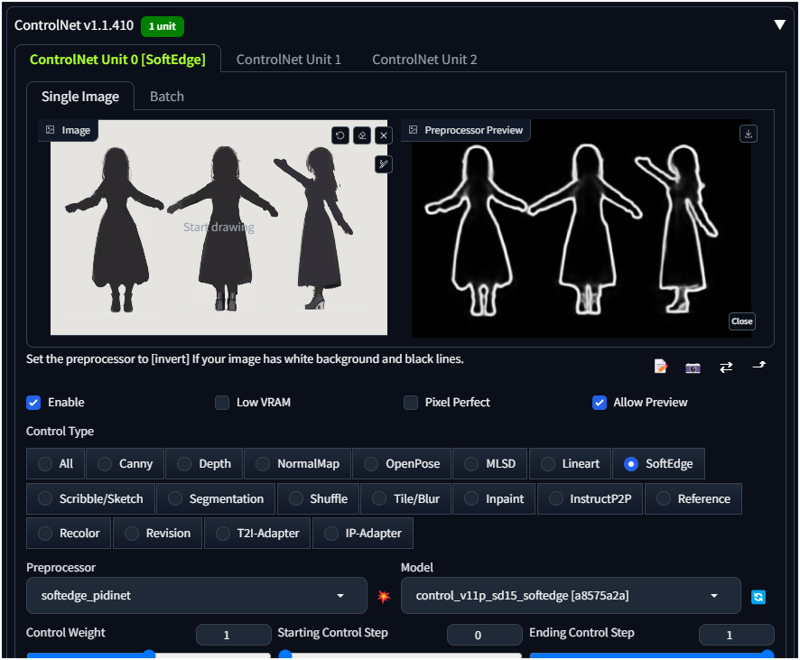
In Krita create a mask image (768x512)
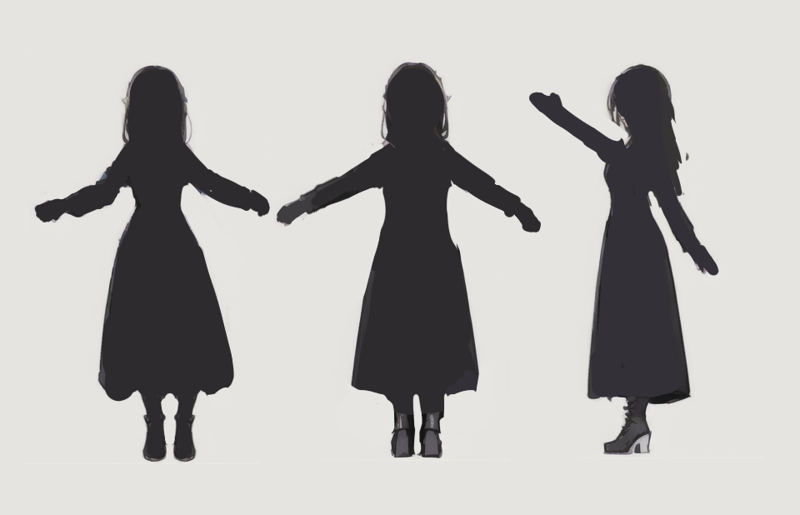
Then I set the image in controlNet and I enabled it with the option "SoftEdge"
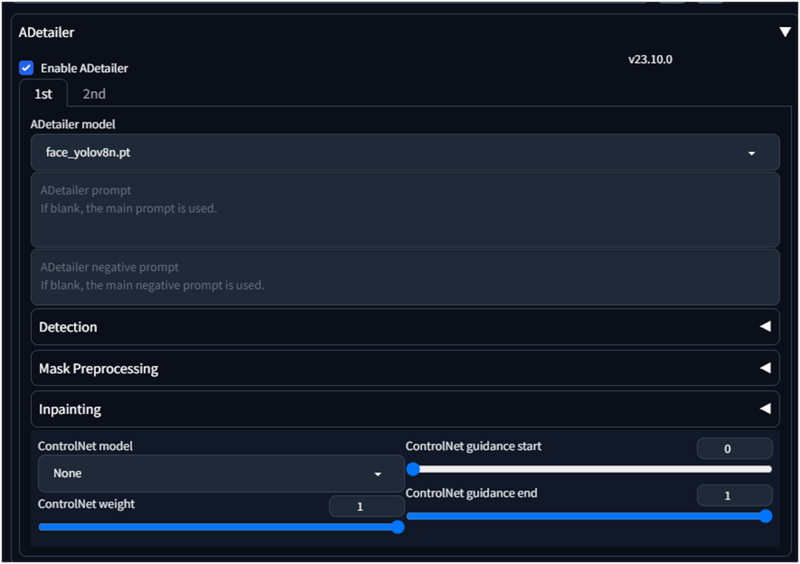
I setup ADetailer with a really easy option with improvement of the face.
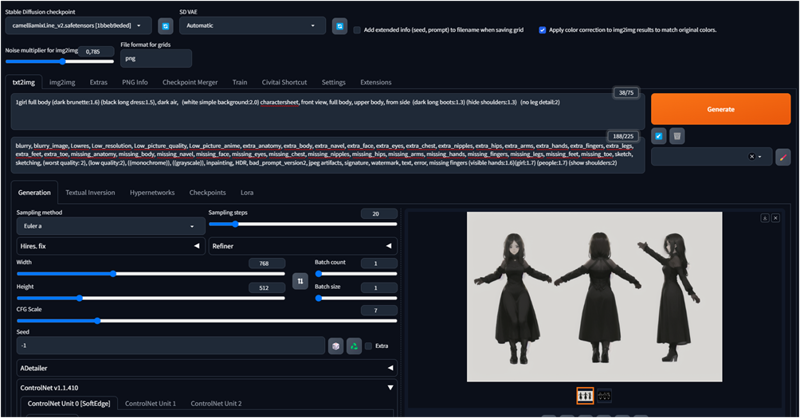
I wrote my prompt and negative and execute Stable diffusion.
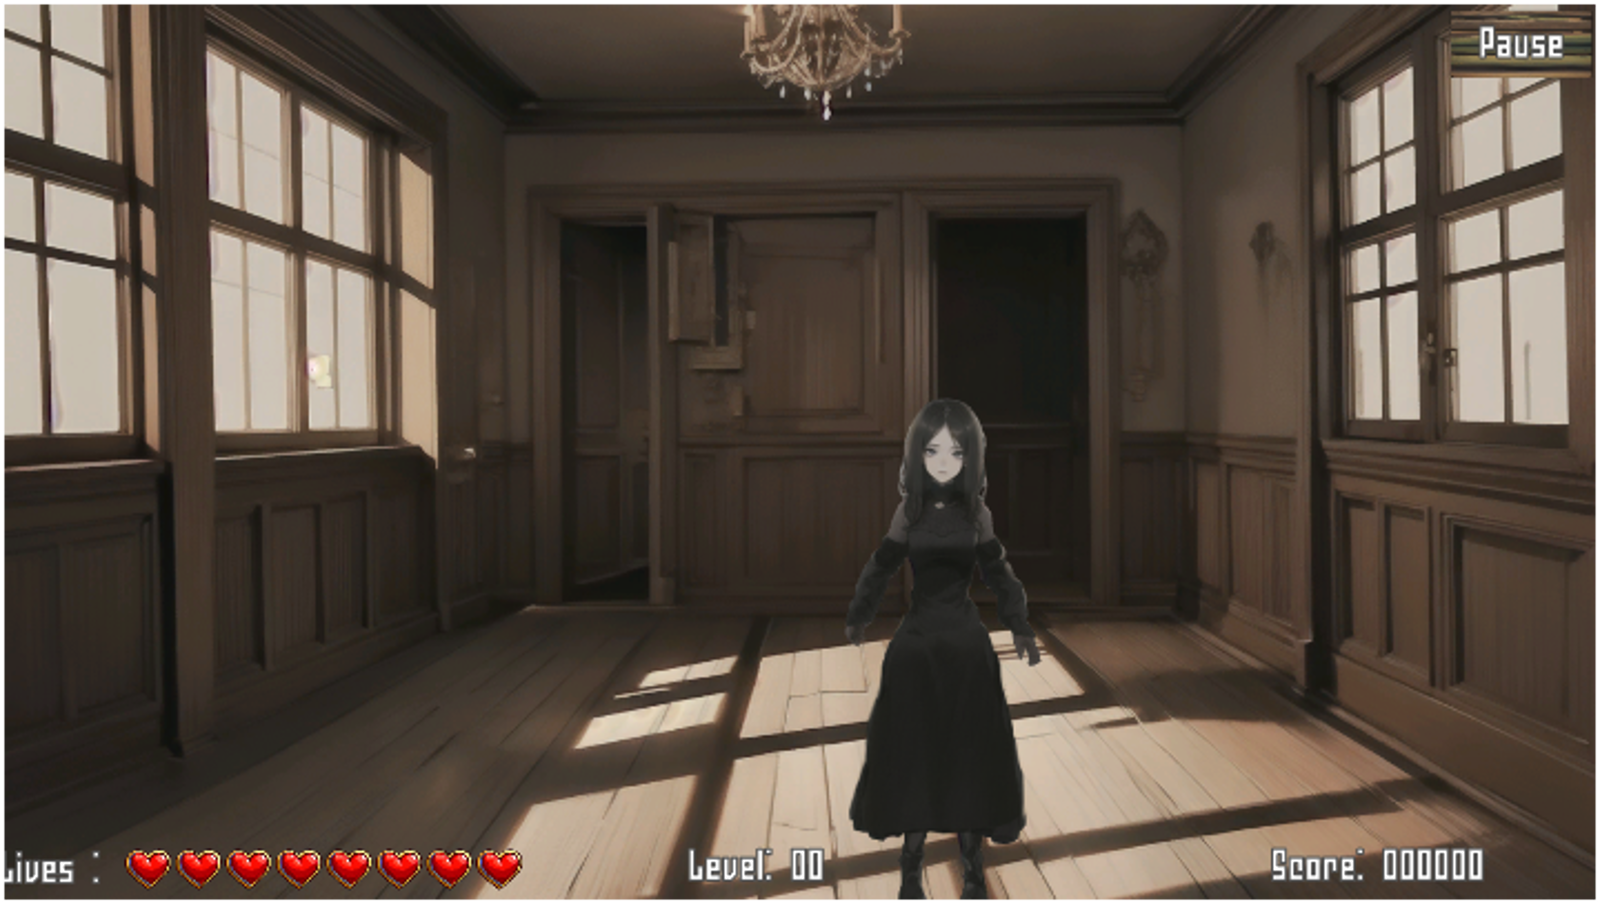
Then I got my new game character.
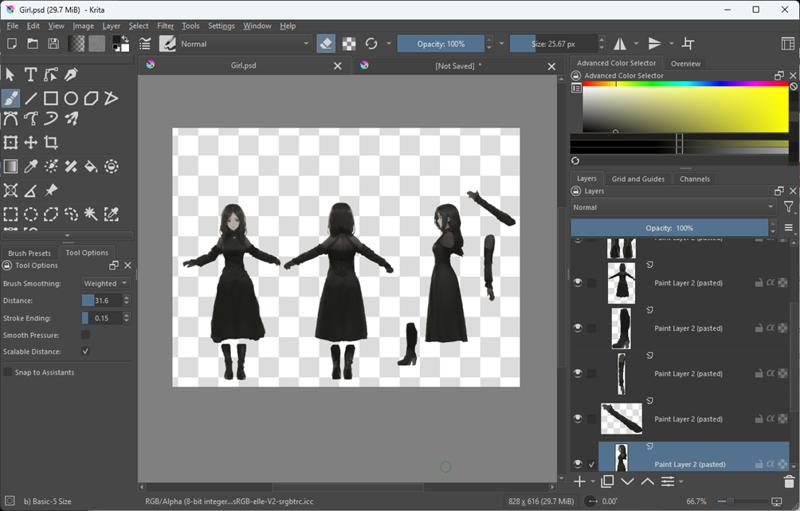
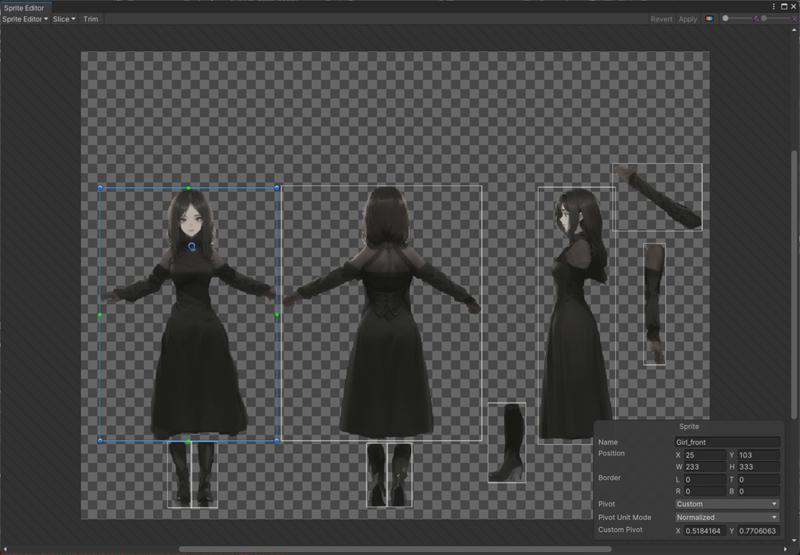
I open the image in Krita and there I removed the background and split the sprite in some pieces.
Then I have saved it into Unity folder.
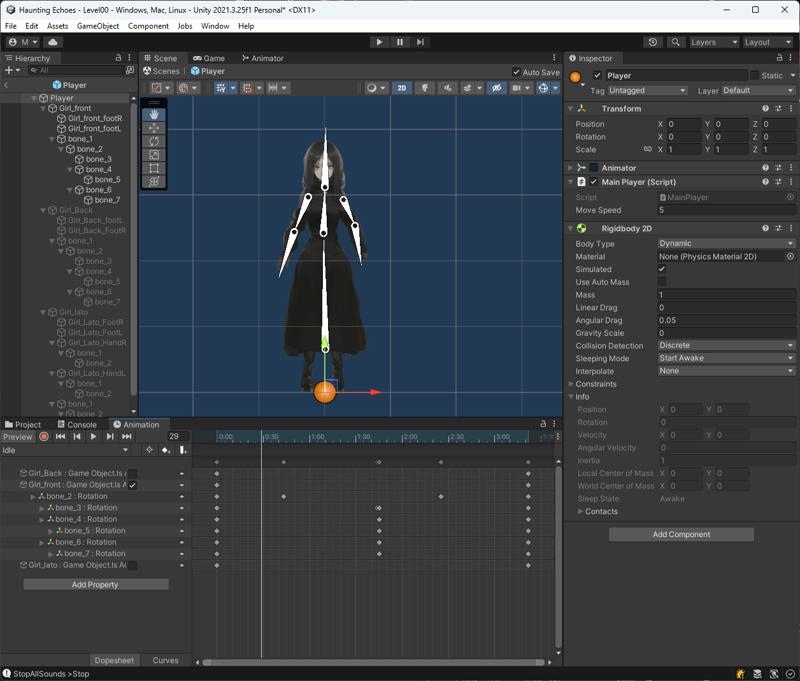
In unity I setup the image in the "Sprite Editor" cutting the different pieces.
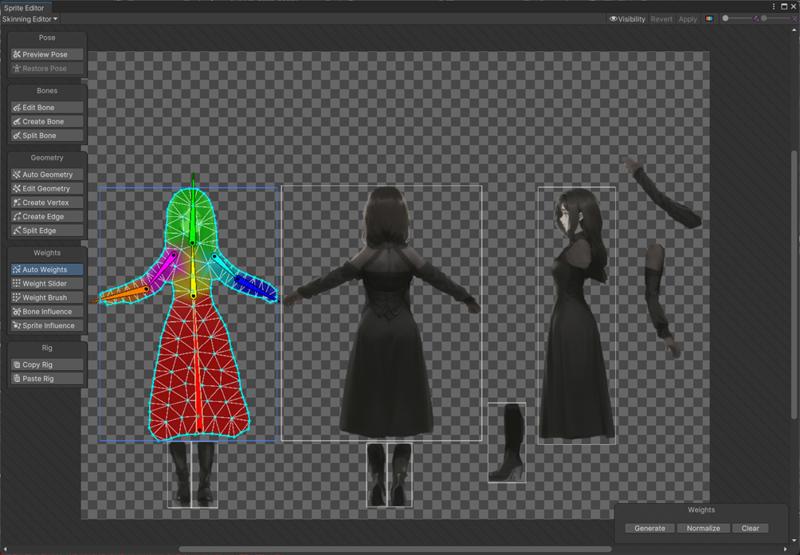
Then I setup the Geometry in the "Skinning Editor"
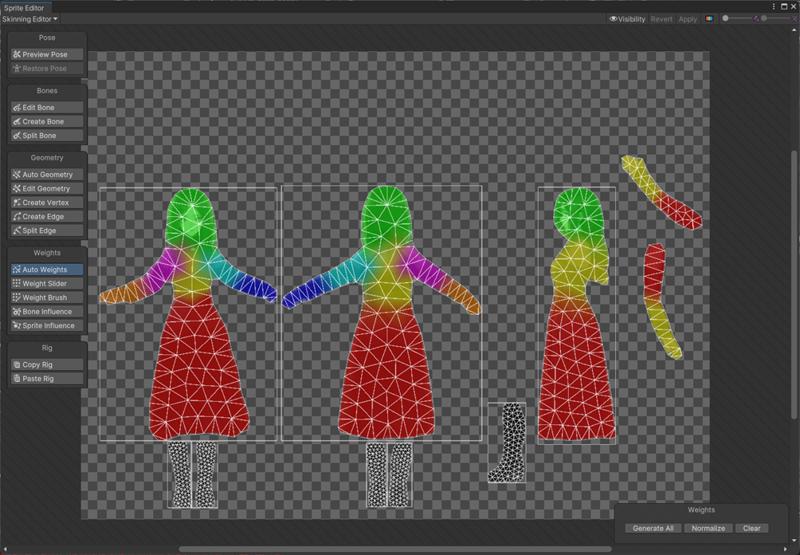
and add some bones, to each bones I setup the weight on the geometry.
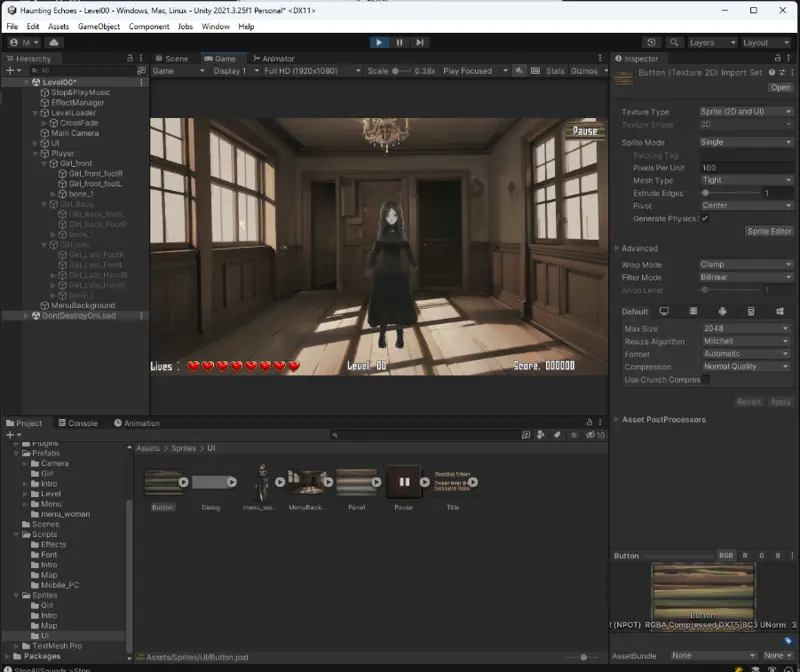
Then I added the images to the screen composing the different player positions.
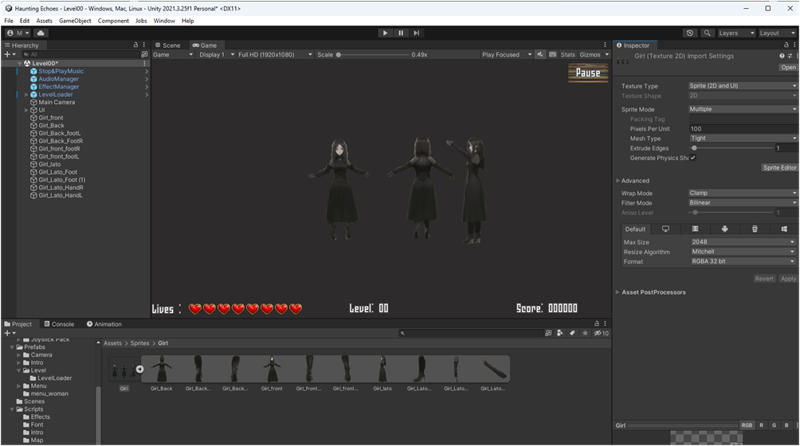
I put all together and I created a Prefab
The I added animation for the different movements.
You have to add the "Sprite Skin" to the object and when you clic "create bones" it creates all the bones, then you can create your animations.
A this point he player is ready for the game.
Add the Movements for the player and you can enjoy your game.
Another suggestion :To speed up your code go to ChatGPT
I wrote :
I need an unity c# code to move a RPG character in x and y. I have also 3 animation, up , down and one animation to go to right and left (i need to flip).
ChatGPT Answer:
To create Unity C# code for moving an RPG character in the X and Y axes with animations for going up, down, right, and left (with flipping), you can follow these steps. First, ensure that you have your character sprite and animations ready. You'll also need to attach a Rigidbody2D component to your character if it's a 2D game. Here's a sample script to get you started:
using UnityEngine;
public class RPGCharacterController : MonoBehaviour
{
public float moveSpeed = 5f;
// Adjust this to set your character's movement speed
private Rigidbody2D rb;
private Animator animator;
private SpriteRenderer spriteRenderer;
private Vector2 moveDirection = Vector2.zero;

void Start() {
rb = GetComponent<Rigidbody2D>();
animator = GetComponent<Animator>();
spriteRenderer = GetComponent<SpriteRenderer>();
}

void Update()
{
// Get input from the player
float horizontalInput = Input.GetAxis("Horizontal");
float verticalInput = Input.GetAxis("Vertical");
// Calculate movement direction
moveDirection = new Vector2(horizontalInput, verticalInput).normalized;
// Update animations
if (moveDirection != Vector2.zero) {
animator.SetFloat("Horizontal", moveDirection.x);
animator.SetFloat("Vertical", moveDirection.y);
}
// Flip the character sprite if moving left
if (horizontalInput < 0) spriteRenderer.flipX = true;
else if (horizontalInput > 0) spriteRenderer.flipX = false;
}

void FixedUpdate() {
// Move the character
rb.velocity = moveDirection * moveSpeed;
}
}
In this script:
Attach this script to your RPG character GameObject.
Set your character's movement speed in the
moveSpeedvariable in the Inspector.Create Animator parameters named "Horizontal" and "Vertical" (Float type) in your Animator Controller for blending between the animations.
Attach your character's Rigidbody2D component and Animator component to the script.
Make sure your "up," "down," "left," and "right" animations are set up in your Animator Controller, and the parameters are properly linked to blend between them based on the "Horizontal" and "Vertical" values.
The script will detect player input for movement and change the character's animation based on the input direction.
It also flips the character sprite when moving left using the
flipXproperty of the SpriteRenderer.
Remember to adjust the character's animations, Animator Controller, and Input settings to match your project's setup.
The code is not perfect, but it gives you a quick way to setup the main part, then you can update it.
Update 22-10-2023 : Game released at: https://misterm.itch.io/haunting-echoes-escape-from-the-enchanted-manor