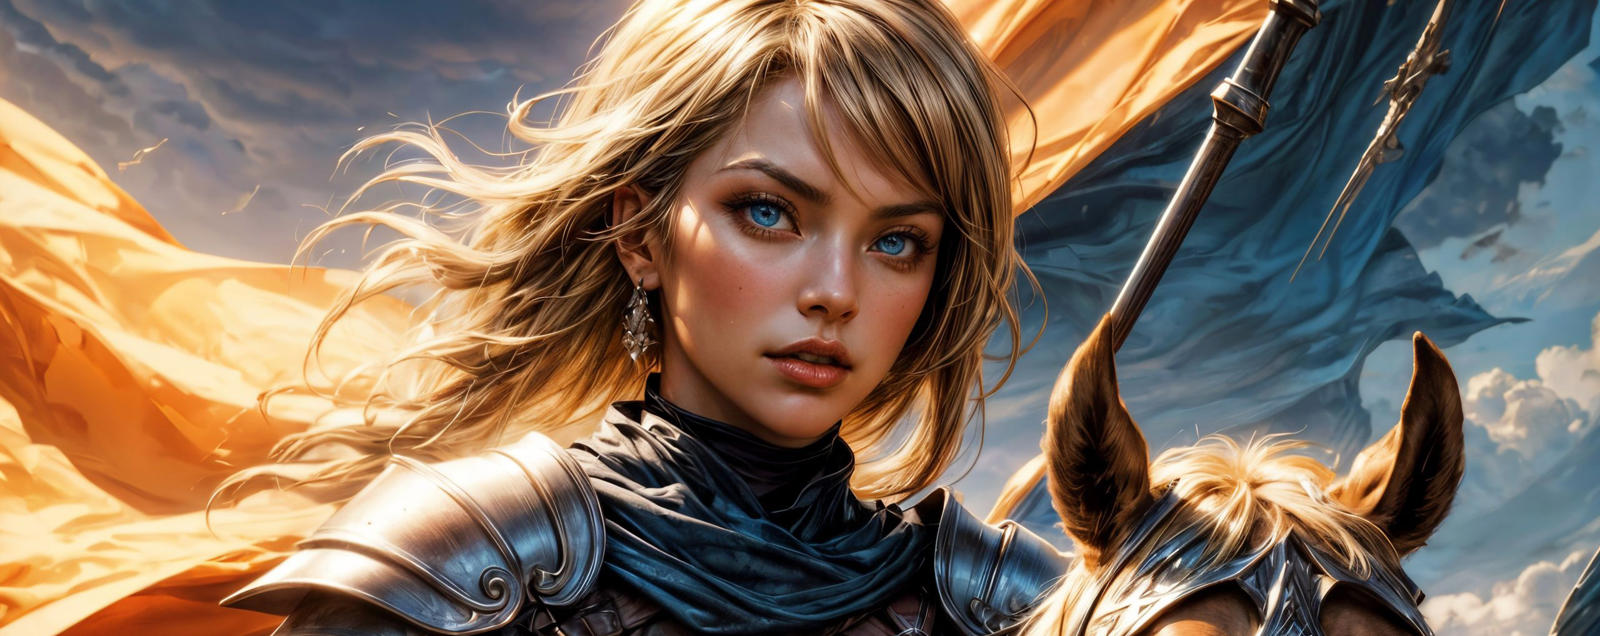
First of all I would like to thank @uberlord on CivitAI for this idea. Check out his profile for his amazing work!!
What is Hybrid Workflow?
Almost all workflows follow one principle.
Generate at lower resolution
Upscale
In a Hybrid Workflow, SDXL checkpoint will be used for generating images, while SD 1.5 will be used to upscale the images.
Why Hybrid Workflow?
SDXL:
Better at composition and understanding prompt
Generated images are softer
Consumes more VRAM
SD 1.5:
Not that great at composition and understanding prompt
Generated images are crisp
Consumes less VRAM
With the hybrid workflow we will try to achieve best of both the SD versions.
Prerequisites for this tutorial:
Any detail enhancer LoRAs for SD 1.5 (Example Add More Details)
Step-by-step Guide
Step1: Generate image with SDXL checkpoint
Which checkpoint to use is perfectly your discretion. For 2.5D style I prefer
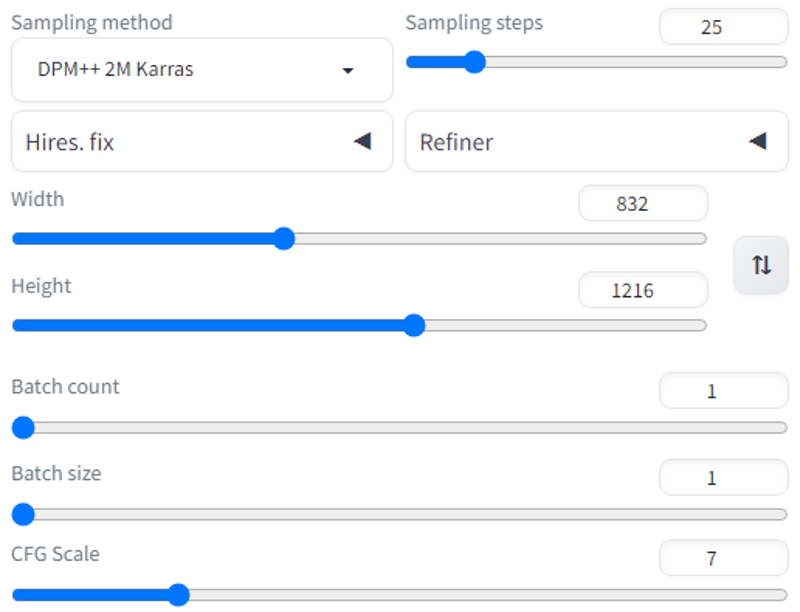
With your favorite SDXL checkpoint loaded, go to txt2img and put a good prompt, apply the following settings. You may optionally put any other SDXL recommended image resolution here.
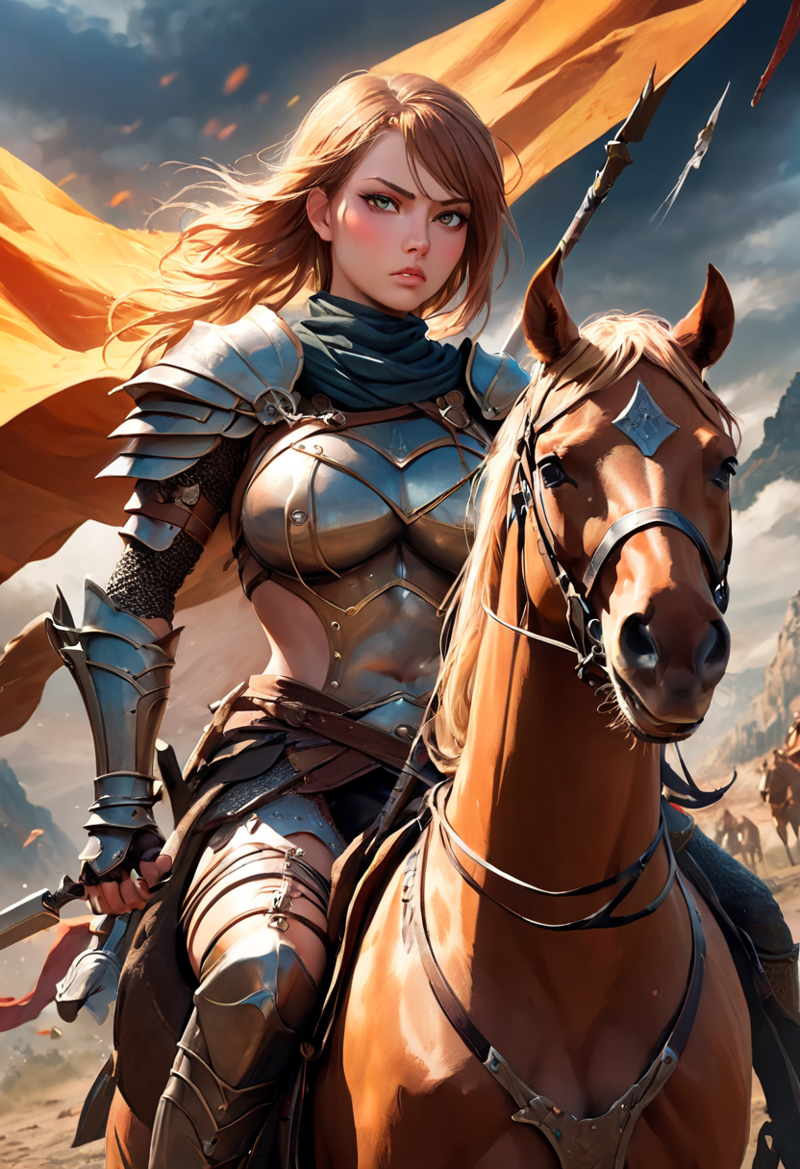
Outcome:
Please note that SDXL arguably gives better results with more number of steps. But since out goal of achieving finer details will be fulfilled by next steps, we can easily do with lower number of steps.
Step2: First Upscale
Enhance the prompt! Add keywords to enhance details. You may also add detail enhancer LoRAs.
Example below:
high detail, epic, realistic, cinematic lighting, dynamic composition, 4k resolution, masterpiece , hyperrealistic art, extremely high-resolution details, photographic, realism pushed to extreme, fine texture, incredibly lifelike, <lora:more_details:0.8>
Now, switch to SD1.5 based checkpoint. For 2.5D I prefer the following:
Send your favorite image to img2img and modify settings as shown below:
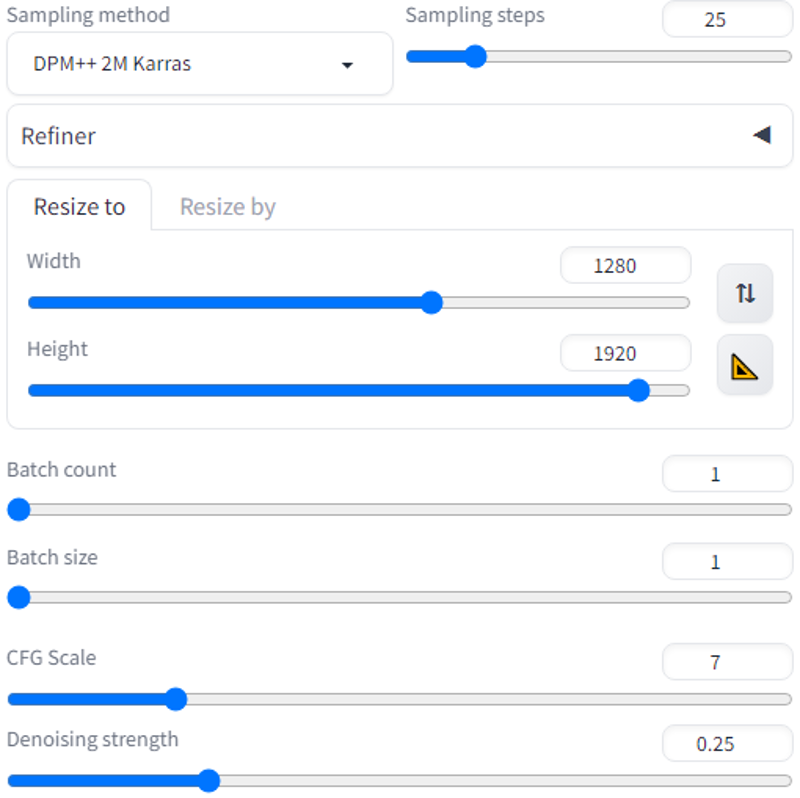
TIP: DPM ++2M Karras would give you more conservative result, while Eular a can surprise you with much more creative, crisp but altered image.
Also turn on ADetailer to refine the character's face at every step. ADetailer settings are as below:
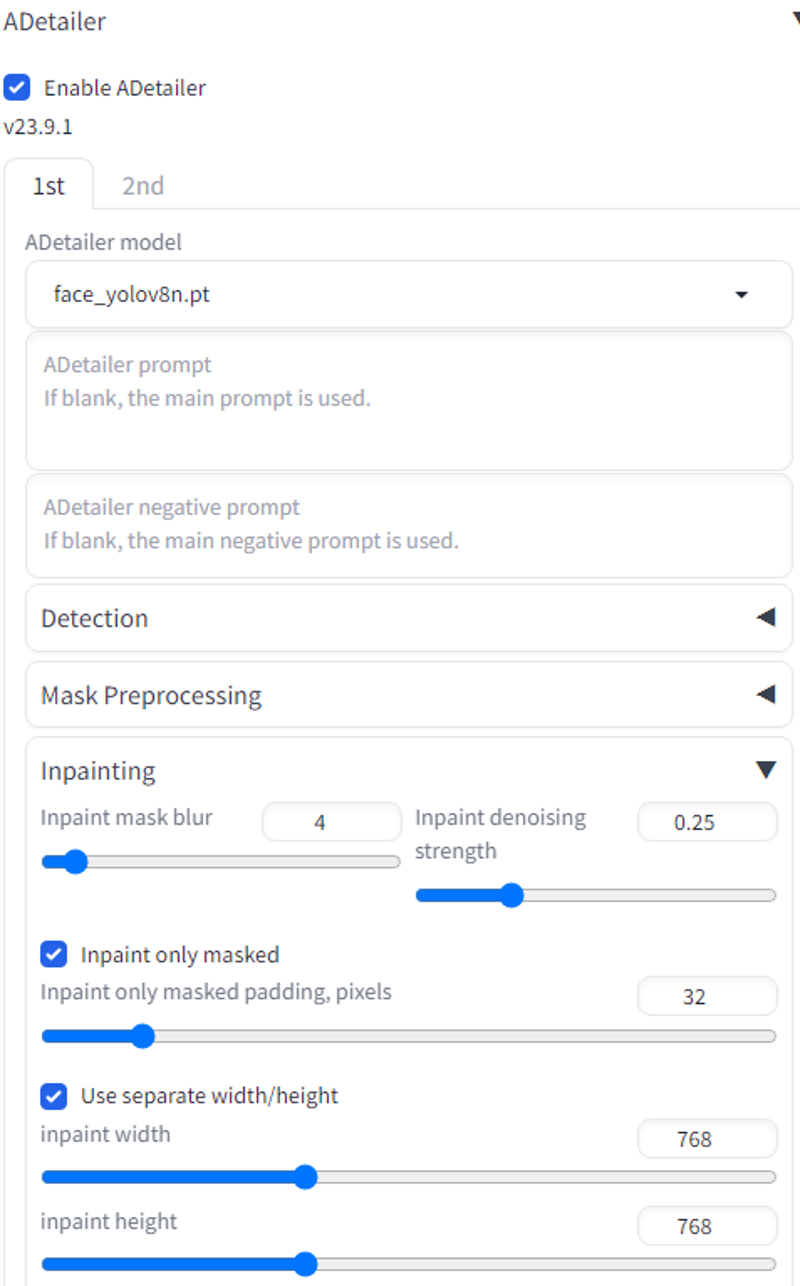
Now, turn on 'Loopback' script at default settings. The script generates an image, sends it back again for processing. The next run will have a modified denoising strength based on settings.
Loopback will output 4 images at default setting. Pick your favorite one for the next step, or play with the settings until you get satisfactory result.
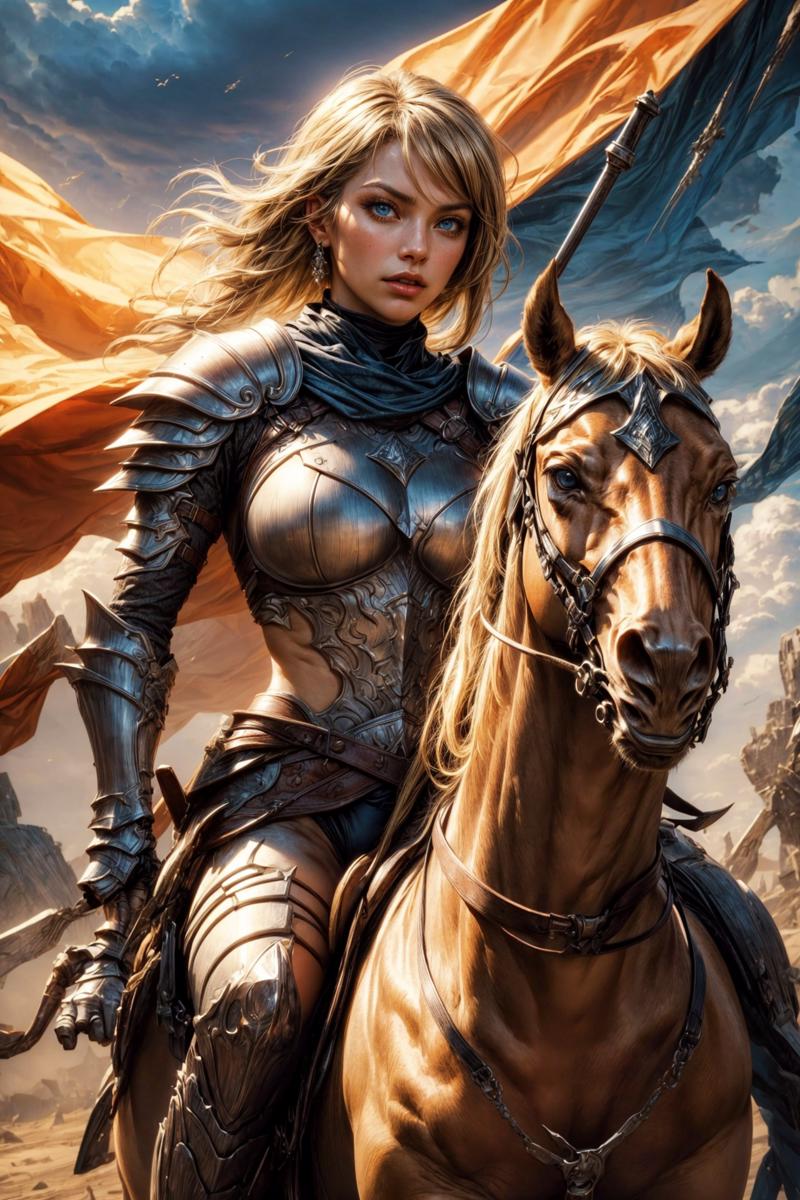
Following is the output that of Step 2. Notice the increased details and crisper image.
Step3: Second Upscale
This step is optional. Please continue if you want even larger and detailed image.
Send your image to img2img with the following settings
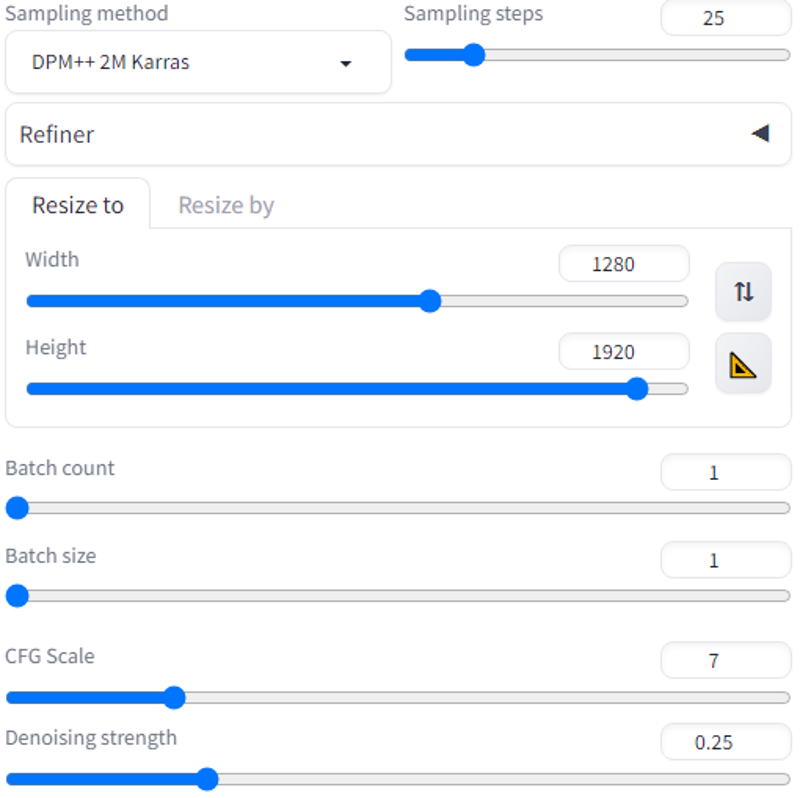
Keep ADetailer enabled, but de-select 'Use separate width/height'

Enable Ultimate SD Upscaler script with the following settings.
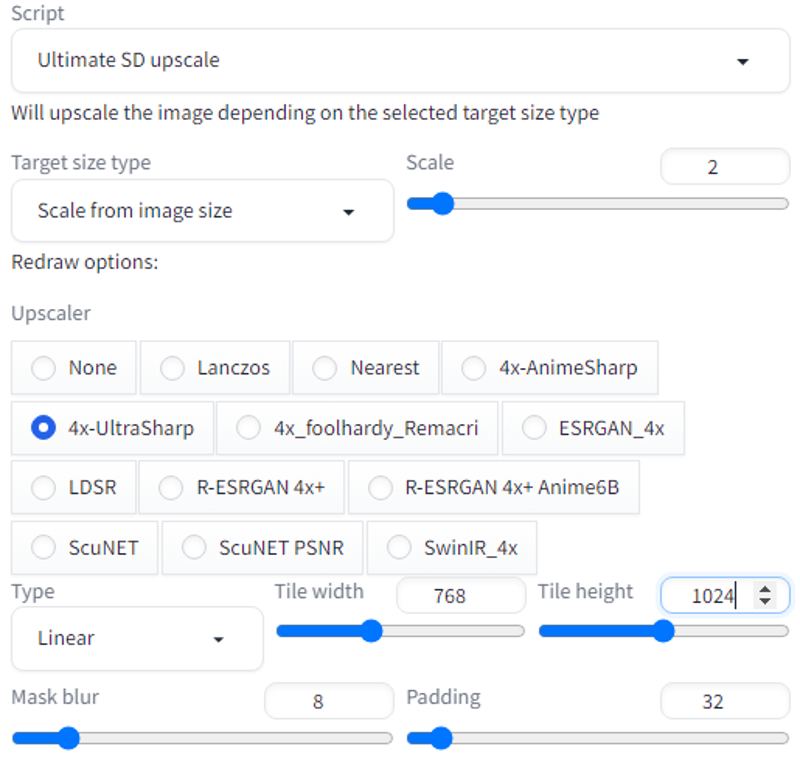
And generate! This should give you a very detailed, high resolution image.
Check the final outcome here: https://civitai.com/images/3071593
Do try this workflow and let me also know your valuable inputs.

