02/22/2024 UPDATE:
Just in case anyone still stumbles upon this, controlnet for SDXL has improved so much by now that you basically don't need this trick with two or more CNs anymore. Canny at 1 works just as fine now (in forge at least... I didn't test the other UIs yet but should be about the same).
You might still find something useful here in terms of Photoshop, preparations of CN images and working with perspective, but other than that this article is now completely outdated.
SDXL's successor Stable Cascade even gets text right from the get go a lot of the time, so you also might want to look into that as well. There is a comfyUI workflow on here that passes it through SDXL for better quality if you are interested.
11/23/2023 UPDATE:
Slight correction update at the beginning of Prompting.
11/12/2023 UPDATE:
(At least) Two alternatives have been released by now: a SDXL text logo Lora, you can find here and a QR code Monster CN model for SDXL found here. The first one is good if you don't need too much control over your text, while the second is better for hiding the text in an image.
~*~
First of all a disclaimer: I'm not an expert. Far from it actually. I just did a lot of text generation with SDXL models and realised in my last reddit post that many aren't aware of the SDXL CN models' capabilities yet.
So here a few of my observations, possible use cases and Photoshop tips that might apply to other art software as well. I'm using A1111, so I'll concentrate on that. Many things should also apply to ComfyUI but I don't have much experience with that, so I couldn't say.
While I'm rather fluid in English, it isn't my first language, so there might be mistakes. I'm going to do my best but please keep that in mind.
What do you need beforehand?
Obviously basic SD knowledge. Know how to use weights, what a CFG scale is and so on.
If you've never used Controlnet before, please watch one of the many introduction videos on Youtube or follow one of the guides online. A good one for example is by Sebastian Kamph which you can find here.
The CN models I use mostly are depth and softedge, additionally canny if I keep getting very faulty results. The smallest versions (loras for depth and canny) work well enough, so I suggest getting those if your VRAM is limited like mine, but you might as well experiment. Softedge only has one SDXL version as far as I know.
Apart from that, some basic Photoshop/other art software knowledge. I'm going to explain in detail how I achieved a result, but I won't tell you what layers are or where to find certain tools. Just get familiar with your program and you should be good.
Patience.
No, really. It's amazing if it works but the road to success might be a long one.
Additional stuff I use
The XL more art-full Lora by ledadu. It's essentially like the 1.5 more detail Lora just crazier. It makes your image more interesting/adds a bunch of stuff. Use the prompt "bat" and it's going batshit crazy (pun intended) at weight 1.
The extension One Button Prompt by AIrjen for prompt exploration.
Perfect if you aren't sure yet what kinda prompts are going to work with your CN image or you aren't sure yet what to do. It's directly available in A1111.
Dynamic Prompts, available in A1111 as well. Same reason as OBP, but with a bit more control. It randomly pulls a prompt from a list, a wildcard, for you. There are other options as well like "prompt magic" but I mostly use it for wildcards.
You can either download some or make lists on your own. Simply ask ChatGPT for a list of animals for example, copy/paste them into Editor, save them under wildcards in the dynamic prompts extension folder and you are ready to use them.
Fonts by Adobe Fonts or free ones from fontsquirrel.
Hardware stuff
Because I'm using at least two controlnets, you most likely won't be able to follow the guide under 10 gb VRAM. Even with that it might be difficult with A1111.
Activating Low VRAM helps, but even with that I was just over 8 VRAM with two controlnets and no lora.
These are my command line args: --autolaunch --no-half-vae --theme dark --medvram --xformers
If anyone knows how to improve these for lower VRAM users, please share :)
With at least 12 VRAM you shouldn't run into any trouble. I've got a RTX 3060 and only get CUDA errors when I crank up the image size too high or choose a bigger depth lora.
General Tips for the impatient and advanced users
If you already have a good grasp on SD and your art software, you can skip the rest of the guide and only take the following to heart.
General SDXL CN advice
Especially when it comes to text, CN is very fickle. A difference in weight of 0.1 can already make or break your image. Using at least two controlnets is essential to get good results with text, because you can use them at low weights and thus reduce quality loss/ restriction of creativity.
CNs and weights: a good starting point is depth at 0.4 and softedge at 0.3 or vice versa. How well it works always depends on your CN image and how complicated your prompt is. If your text keeps breaking, you may also add canny at 0.3.
Others might work as well. You can just use softedge at a higher weight for example, but that makes the image rather fuzzy in my experience.
always use the preview option if you use a preprocessor and start with low steps, so you won't lose too much time on finding the right combination. Pixel perfect gives you good results for most images, but if the preview looks faulty, try adjusting the resolution by hand.
Make several generations. In one image a huge chunk of a letter might be missing, but the next will be perfect. Like I said, extremely fickle.
It doesn't work? Give up. You aren't an anime protagonist with the power of friendship. You're ALLOWED to give up. For the time being at least.
Take a good look at your outputs. Compare them with the CN preview. Where are the errors coming from? Open up the image in your software and try to correct it. Sometimes it only needs an additional line to make it work. Choose something that will make sense to the AI.
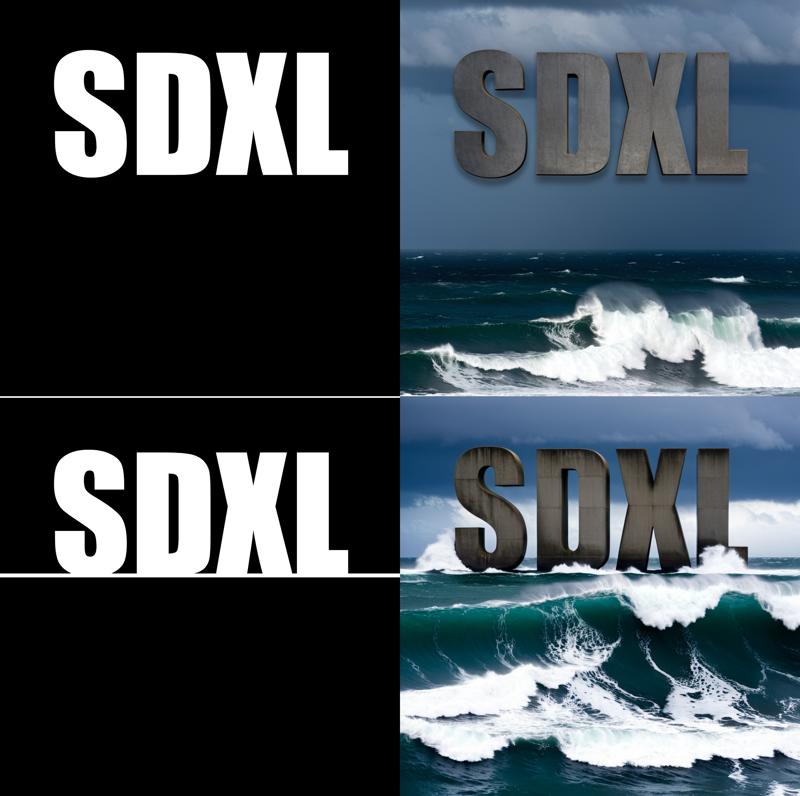
You can download a preprocessed image as well and manually edit it. Just make sure to use it without preprocessor when you load it into CN next time.
Use the refiner if your lines turn out too wonky. It can really help here.
Photobash your output: if you've got elements you liked but they are in different images, you can cut them out and combine them in your art software. Pass them through img to img afterwards. How high the denoise has to be depends on how different the images (especially the lighting) is. Usually 35 to 45 is enough. If the image changes too much and the text gets destroyed, use a controlnet with the original CN image you used for the first generations. A low canny or softedge is usually enough.
Keep things simple. SD can do a lot with simple shapes. If you want a road leading up to some letters, just add two additional lines. As long as the perspective checks out, the AI will know what to do.
If you're unsure what's going to work, search for an image online that fits the perspective, copy/paste it on top of your image, make a new layer and make the lines on top. Delete the reference image and bam!, you've got an image that is sure to work:

Prompt: photograph of a road leading up to a stone monument, extremely detailed, Nikon d3300, 100mm, Vivid Colors, dramatic, dramatic lighting, vignette, highly detailed, high budget, bokeh, cinemascope, moody, epic, gorgeous, film grain, grainy, <lora:xl_more_art-full_v1:0.3>
Negative prompt: anime, cartoon, graphic, text, painting, crayon, graphite, abstract, glitch, deformed, mutated, ugly, disfigured, blur, blurry, depth of field, cartoon, painting, illustration, (worst quality, low quality, normal quality:2)depth: 0.6, no preprocessor
softedge: 0.6, pidinet
canny: 0.45, canny
(I didn't bother correcting the slightly faulty question mark here, but if you want to the clone stamp tool (photoshop) or a bit of painting and img to img/inpainting usually does the trick. For an example check Step 3 in the beginner level.)
Prompting
Most of the time, you just need to describe the scene you want.
Unless you have an extremely detailed CN image, avoid using prompts like "written words x", "the letters x" or "spelling the word x". It rarely helps and tends to cause random artifacts instead. SD needs a lot less to work with.
Newer SDXL models seem to do better with text, which means prompts like "letters spelling x" works quite well now.
Examples for prompts that can work:
Stone: "a stone monument standing/lying in/on a flower field", "floating stones in the air", "marble bricks in the sea"
Metal plate/sign: "a bronze plate", "a golden plate with embedded letters on a stone monument" (SD is VERY bad at generating embedded or engraved letters with CN. Unless you're very lucky, it most likely won't work without additional editing. If anyone figures out a better working prompt, please share!)
Wooden sign: "a wooden sign with red paint", "birch wood sign"
Glowing sign: "a neon sign", "a slightly damaged red neon sign", "a pink neon sign with wires"
(adding the SDXL styles "neon noir" or "neon punk" will add a nice touch)
Fabric: "stitching", "intricate stitches"
useful adjectives to make everything look more interesting: "damaged", "rusty", "old", "scratched up", "battered", "faded", "torn", "polished", "weathered", "glowing", etc.
Wildcards are perfect to add a detail like this and explore!
I'm still working on prompts for liquids and smoke. You can simply try "water" and "smoke" but the results I got were either not pleasant enough to look at (in my opinion anyway) or the letters weren't easily enough to distinguish anymore. If I find something that works better, I'll update the guide.
So, having that out of the way, let's generate!
Beginner Level: Plain Text
Step 1: Prepare your CN image
Open up your art program and create a simply image in your desired output resolution. To get the best results, please pick one of the recommended SDXL sizes as seen here.
For our examples, we'll be oh so basic and choose 1024x1024 px with a black background.
Why black? Because the better the contrast the easier it will be for SD to understand your input. You can use completely normal images too, but if the important shapes aren't clearly distinguishable already, you might want to increase the contrast in Photoshop.
BUT for now we're on easy mode and that means plain white text on black:
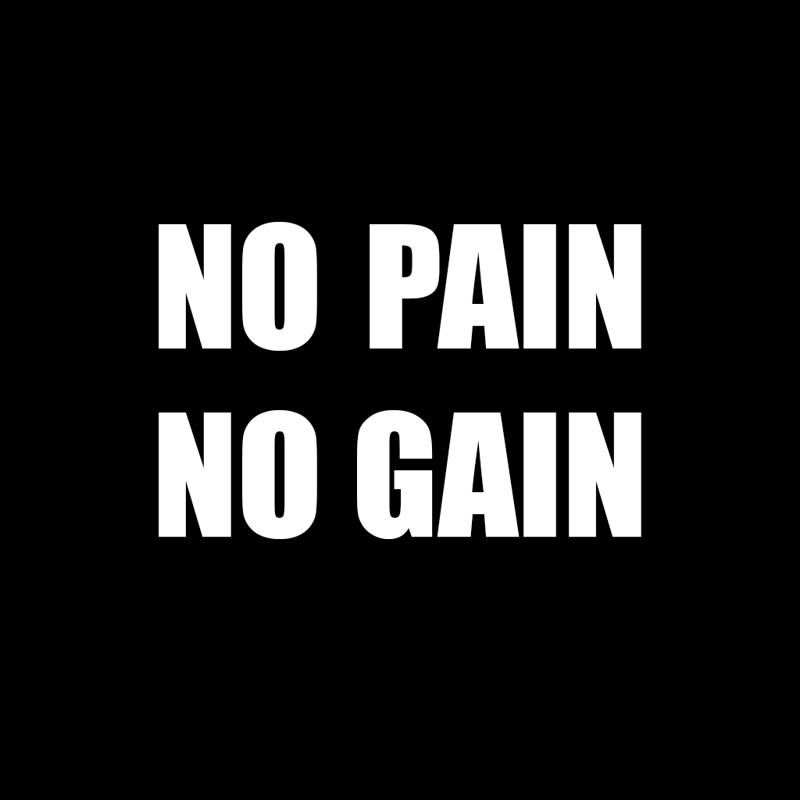
Choose a font that fits what you want to do. The letters should be clearly distinguishable. Fonts with lots of swirls might be difficult to make out later, so always keep the later output in mind.
I've chosen the simple font "impact" for this. It's perfect for signs, stone letters and anything else with sharp edges. Easy for the AI to pick up.
Format the text in a way that's pleasant to look at. Here I used "justify all" to shape the text in a perfect box. It basically adds spaces to make everything fit the text box:

Flatten your image (Layer->Flatten in Photoshop)
Save it either as png or jpg file.
Step 2: Prompting and choosing the right CN options
Prompting is easy. As stated before, in most cases you simply need to describe your scene. For our example I chose the following prompt:
P: cinematic film still photograph, yellow aerial view of a stone monument on an island, Snowing, shallow depth of field, Flustered, Moonlight, Slow Shutter Speed, Fujicolor C200, F/5, dramatic, dramatic lighting <lora:xl_more_art-full_v1:1> . shallow depth of field, vignette, highly detailed, high budget, bokeh, cinemascope, moody, epic, gorgeous, film grain, grainy
N: anime, cartoon, graphic, text, painting, crayon, graphite, abstract, glitch, deformed, mutated, ugly, disfigured, blur, blurry, depth of field, cartoon, painting, illustration, (worst quality, low quality, normal quality:2)
The bold parts are the only words I put into One Button Prompt. Starting like this is perfect if you don't have a clear idea yet, what you want to do.
For the CN options, you can start with very low weights like 0.4 or even 0.3 for each CN. Lower is better because it gives SD more freedom to transform your text. 0.3 for depth and 0.4 for softedge is usually a good starting point.
As for preprocessors: Use the preview to see how it picks up your image. Either go with the one where the text is best readable or even pick none. That's the advantage of using white text on black. Especially with depth it works quite well. Pixel perfect gives you good results for most images, but if the preview looks faulty, try adjusting the resolution.
For our image, we use 0.4 depth without preprocessor and 0.3 softedge with pidisafe. Last one with pixel perfect, for depth without preprocessor it shouldn't matter.
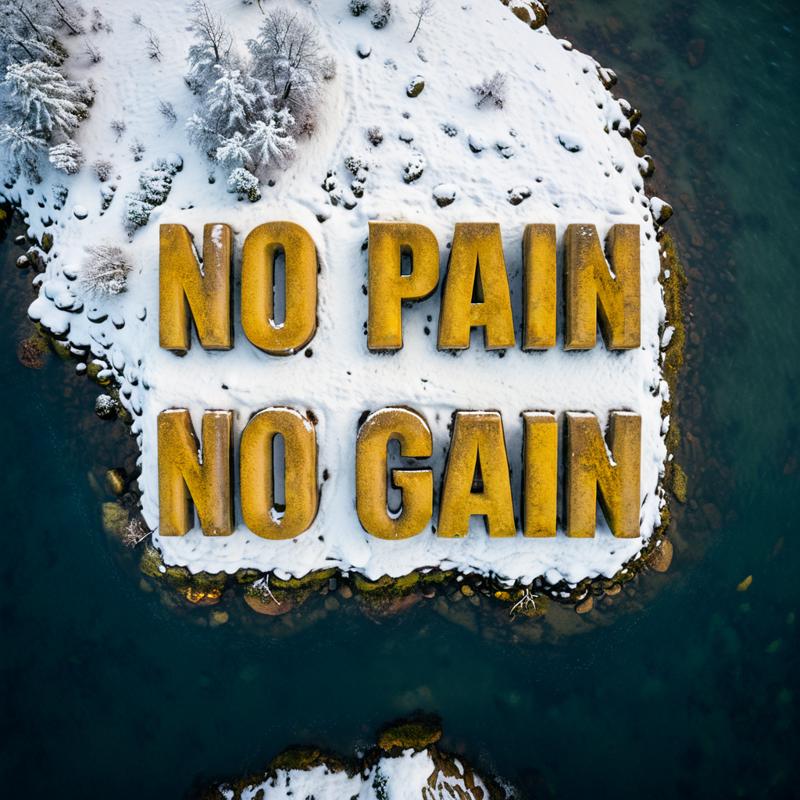
And we are done!
Step 3 (optional): Fix small mistakes
If your image ends up faulty in only a small place, you can either use the remove tool and/or clone stamp tool (Photoshop) or fix it by drawing over the part with similar colors and running it through img to img/inpaint it with the same prompt, but without Loras. If you need to go high on denoise, add a controlnet like canny with the original black and white image on a low weight (0.3 or 0.4) for extra restraint.

(Note: I usually edit by hand and thus am terrible at inpainting, so if you need more information on this topic, you might want to follow a guide by someone else.)
Intermediate Level: Adding perspective
SD is pretty good at making sense by adding just a tiny bit of guidance. In this example, we'll do so by adding simple shapes.
Step 1: Prepare your CN image with transformed text and simple shapes
Create a new image in your art software with 1024x1024 px and a black background
Since working with perspective isn't easy, we'll use a reference image of a street. Pick a random one that fits the perspective you want, generate one or go to google maps and make a screenshot of a suitable place. In our example we do the latter.
Copy/paste it onto your black image and turn it around a bit if you need to straighten it out.
Click on the Rectangle tool (Photoshop). Make sure, "pixels" is selected in the tool bar and create a new layer over your reference image.

Make a white rectangle that fits the longer side of the wall.
Go to edit -> transform -> distort and adjust the left corners.
Add two additional white lines with the line tool over the edges of the sidewalk.
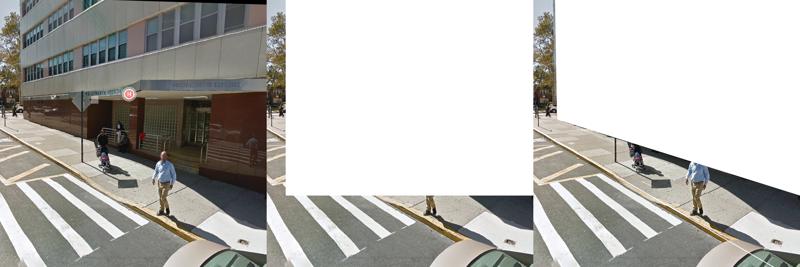
Delete your reference image.
Choose an easy to read font. I used "smoothy" in the example but that one seems to be only available to Adobe users.
If you need some good and free fonts fontsquirrel is a good site.
Add your text in black. Make sure, the words aren't too far apart. To bring them closer together, you can edit the text under character -> set leading
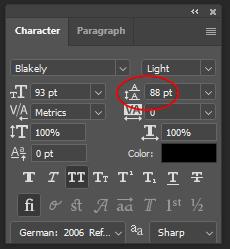
Rasterize the text (right-click on the text layer -> rasterize type).
in the menu go to edit -> tranform -> distort
Transform the text just like you did with the rectangle
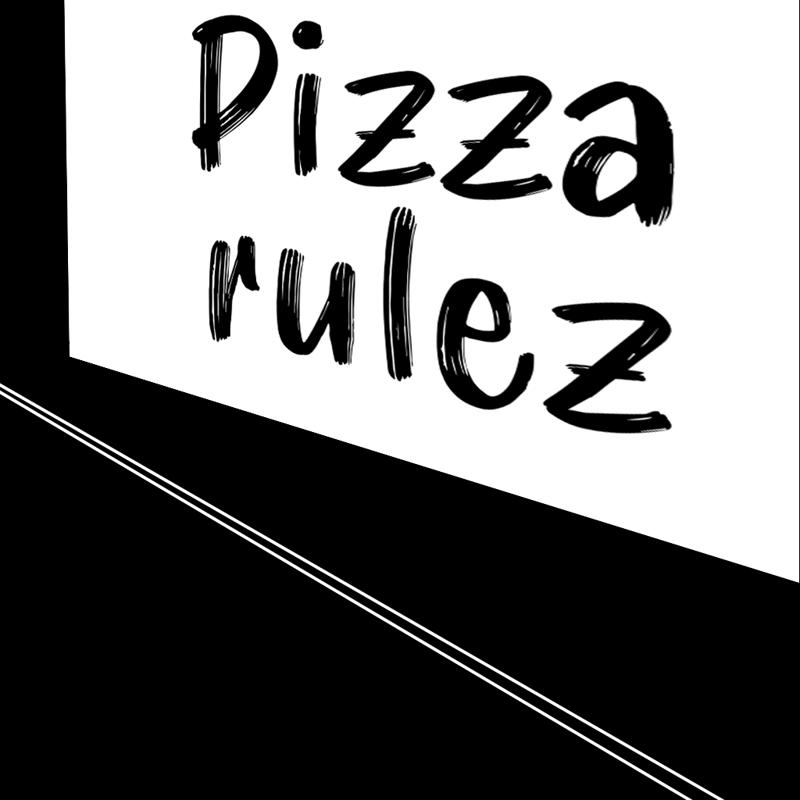
Alternatively, you might also add the text on the white rectangle, merge the layers and then transform them together afterwards. This way leaves a bit more freedom, while the other ensures perfect perspective.
Flatten your image and save it.
Step 2: Prompting and Controlnet
P: Graffiti style photograph of a pizza themed graffiti on a wall, beside a street, sidewalk, car in the background, <lora:xl_more_art-full_v1:0.5> . Street art, vibrant, urban, detailed, tag, mural
N: ugly, deformed, noisy, blurry, low contrast, anime, cartoon, graphic, painting, crayon, graphite, abstract, glitch, deformed, mutated, ugly, disfigured, child, kid, deformed, low contrast, noisy, ugly, morbid, worst quality, low quality, lowres, poorly drawn, mutation, bad proportions, disfigured, malformed
(Note: You most likely won't need a long negative like this. I'm just a careless prompter and like to add SDXL styles.)
CN options:
Depth: 0.5, no preprocessor
Softedge: 0.4, pidinet
Canny: 0.5, canny
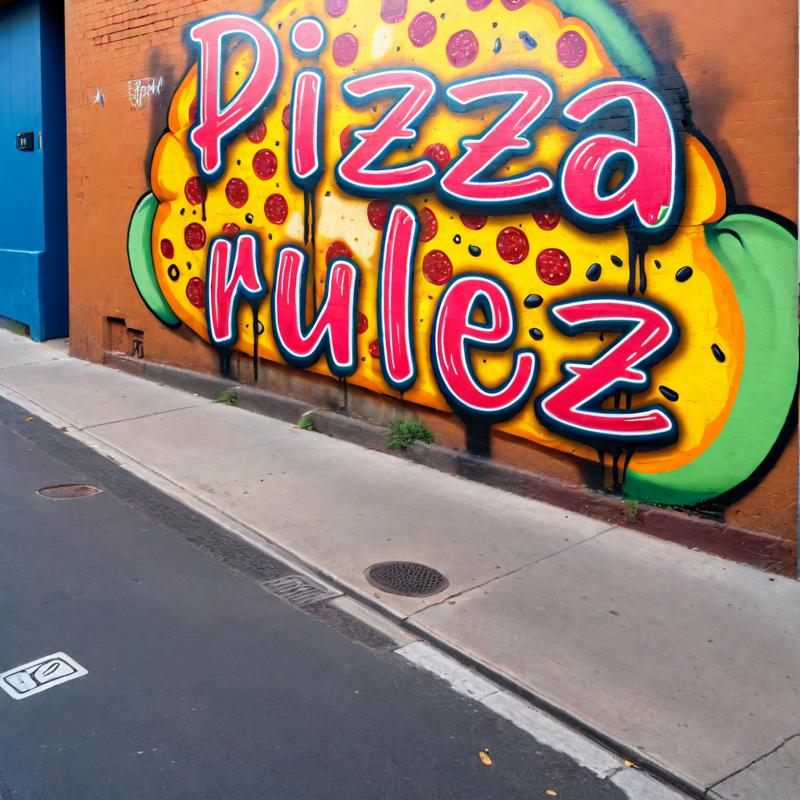
If your lines turn out too wonky, try adding the SDXL refiner or put the output image through img to img. Add a CN of the original b/w image with a low weight if you do the latter. Canny might do the trick.
Step 3: Fixing mistakes
If you want to fix something like the sidewalk in the image, you can do so with inpainting.
Click on the polygonal lasso tool and select the places where you want the edges to be.
Fill the selection on a new layer with a slightly darker color than the sidewalk.
Add vertical lines in a fitting color with the line tool (hold shift and drag).
Flatten the image and save. Now we have something like this:
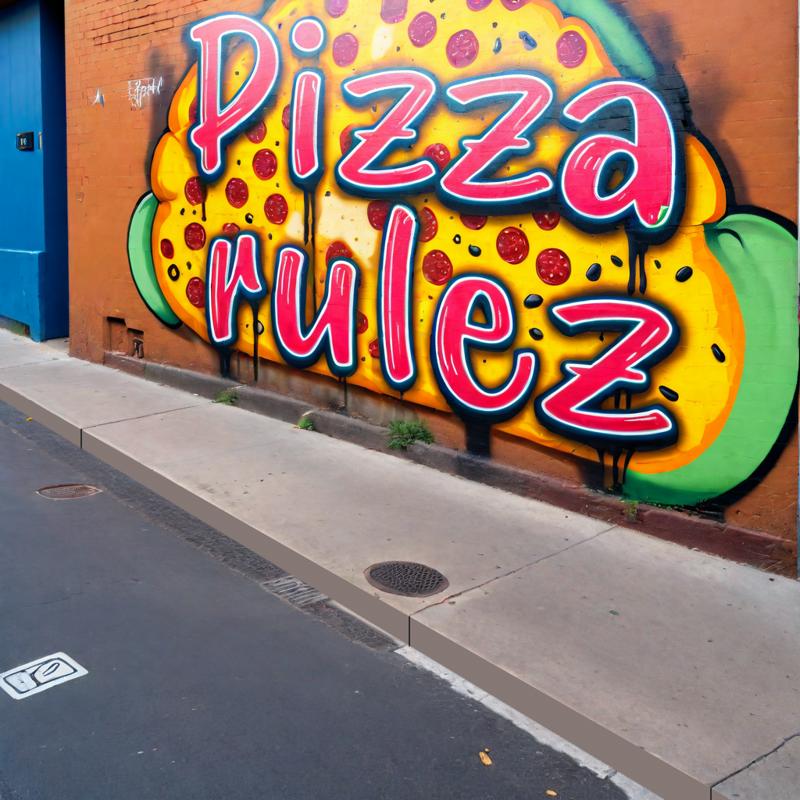
Looks better already but not good enough. Load it into the inpaint tab of img to img and mask the area you just added in your art software.
Select only masked. Since we aren't doing anything difficult, a high denoise of 0.65 will work.
Enter a prompt like "dirty concrete" and hit generate.
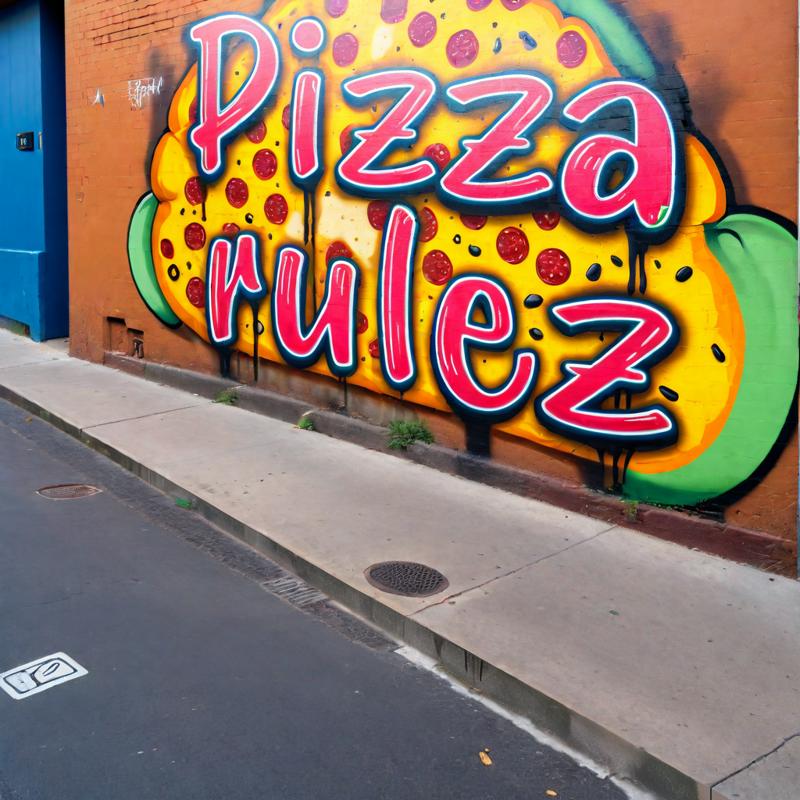
If you want to, you can fix up more but for an example this is good enough, I think.
Advanced Level: Creating CN images with the help of vectors and warped text
Let's be honest now: Most of us wouldn't be able to draw a straight line if their life depended on it.
But fortunately, thanks to vectors we don't have to.
Step 1: Prepare your CN image with vectors
Prepare your black 1024x1024 px image as always.
Make sure, you have got a brush selected with which you want to draw later. For our example we'll choose a a normal round brush in size 7.
Right-click on the pen tool (quill pen like icon) and select curvature.
Click four times on your image in the form of a heart. You'll notice the line curves on its own into this form:
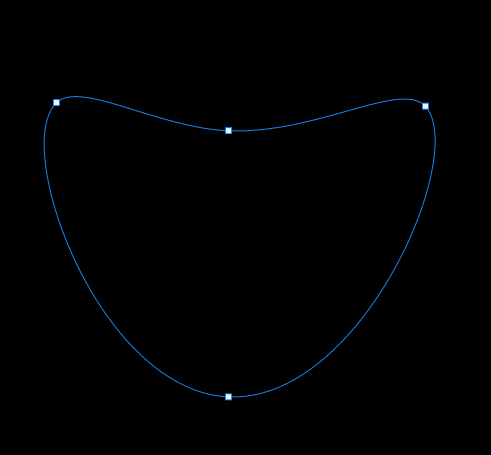
Double-click on the anchor points in the middle to turn them into edges.
Drag the anchor points to get the shape you want. We'll go with this:
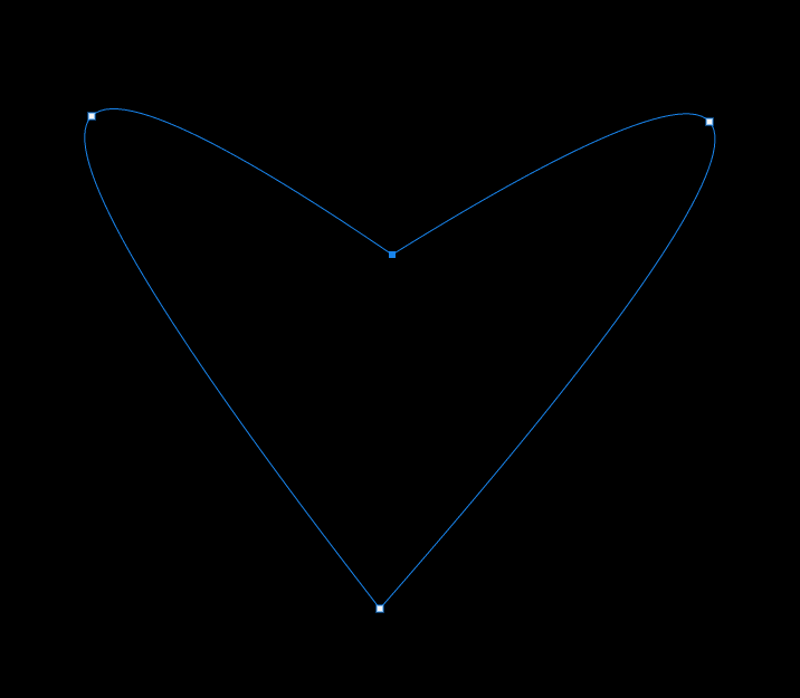
Now you can do a lot of things like choosing the text tool and clicking on the out- or inside of the heart. That will place the text along the shape or fill it out with words. To learn more about this, please look at another tutorial. A good one is here.
If you want to, you can also add more anchor points and make it rounder by simply clicking on the path.
Right-click on the image while the pen tool is still selected and choose stroke path.
This is why we had to select the right brush first. Select brush in the dropdown menu and press ok.
(Simulate pressure would change the thickness of the brush towards the end. We want our image to be clearly visible, so we won't do that now.)
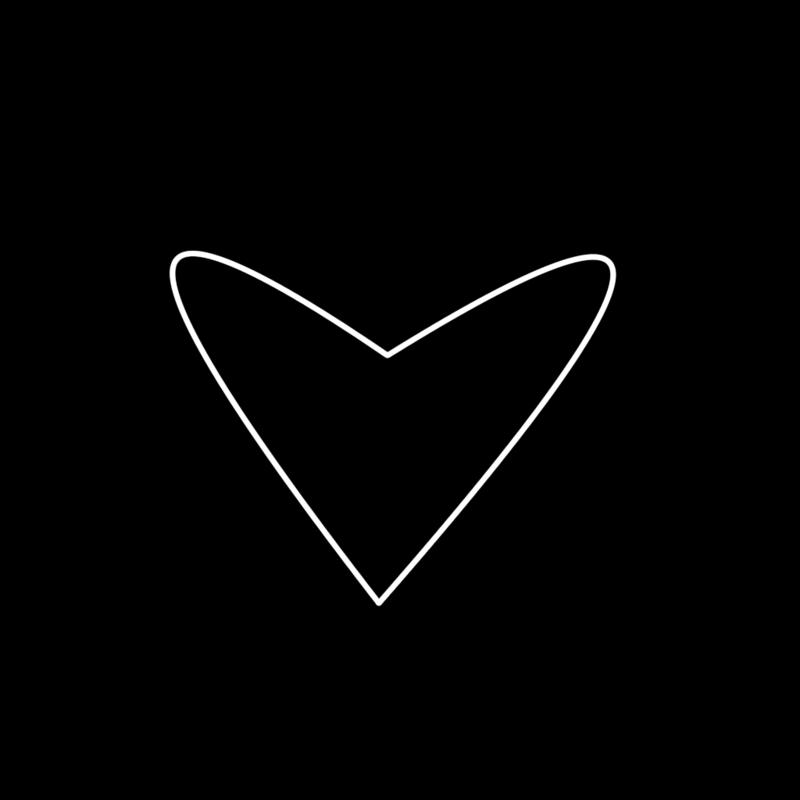
Right-click on the image and delete the path.
Select the Bucket Tool and fill out the heart with white.
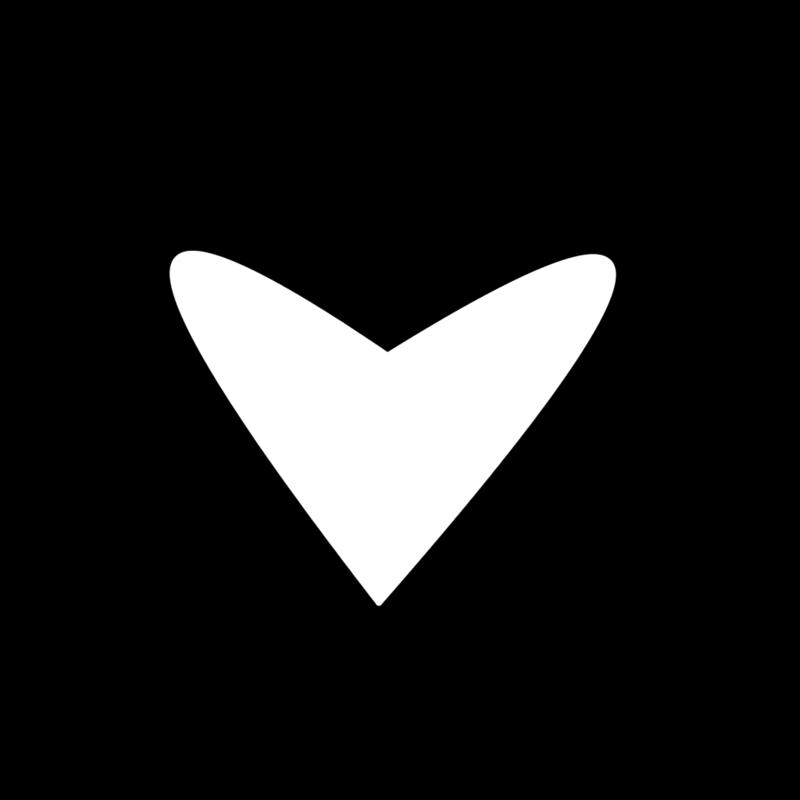
Step 2: Add and warp text
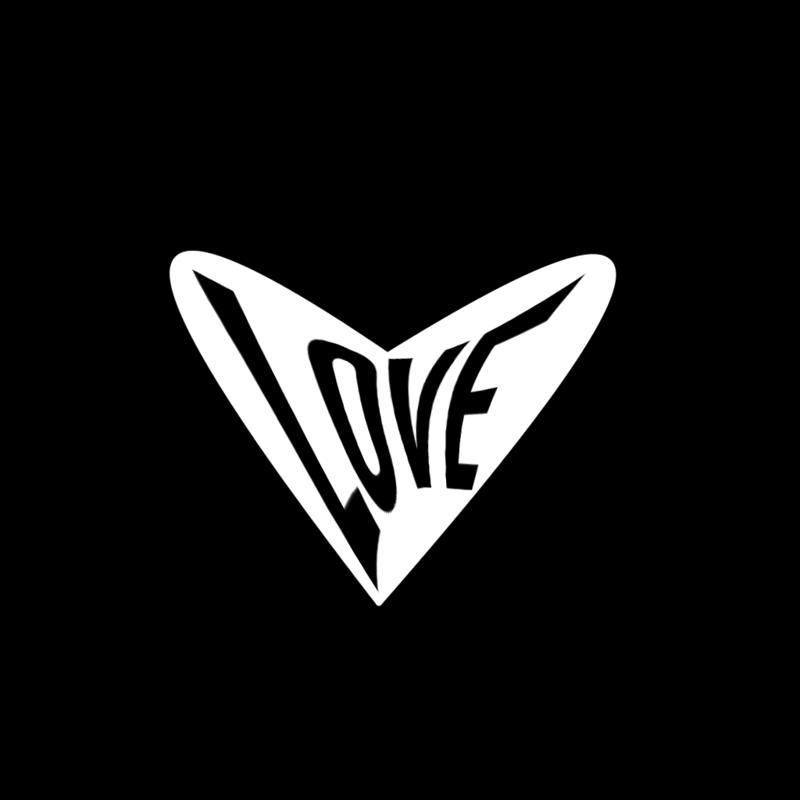
Choose the Text Tool and add a word of your choice in black in the middle of the heart.
Rasterize the text layer by right clicking on it.
In the menu go to Edit -> tranform and choose warp.
Shape the text however you want.
If you don't reach the desired result, you may also use puppet warp or the liquify tool. Both is a bit more complicated, so we won't do that for now, but you might want to play around with it in the future.
Step 3: Prompting and choosing the right CN options
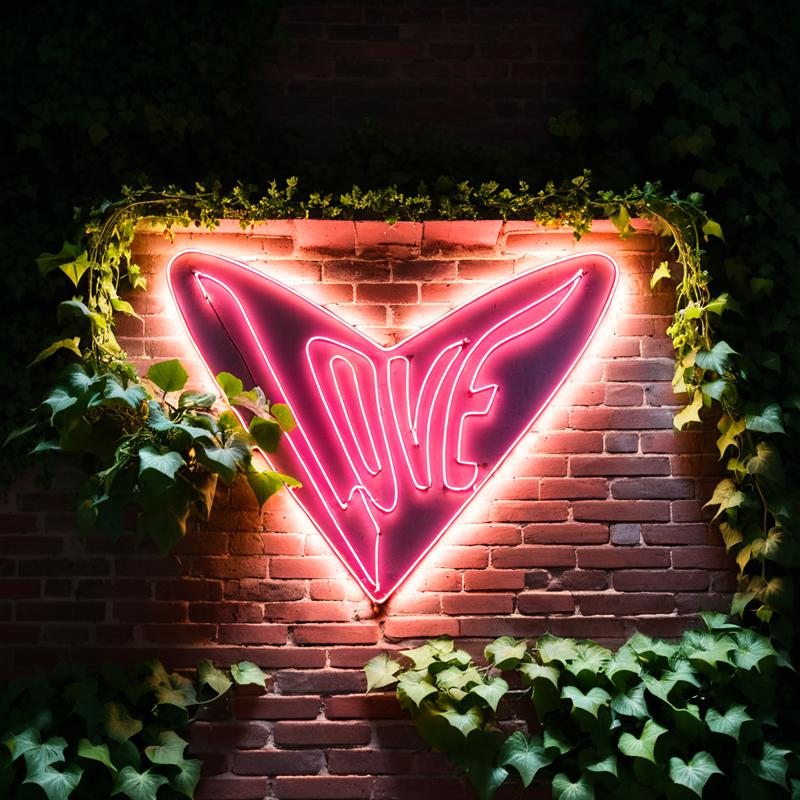
P: photograph of a neon sign at a brick wall at night, plants, ivy, <lora:xl_more_art-full_v1:0.5>
N: ugly, deformed, noisy, blurry, low contrast, anime, cartoon, graphic, painting, crayon, graphite, abstract, glitch, deformed, mutated, ugly, disfigured, child, kid, deformed, low contrast, noisy, ugly, morbid, worst quality, low quality, lowres, poorly drawn, mutation, bad proportions, disfigured, malformed
CN options:
Depth: 0.3, no preprocessor
Softedge: 0.6, pidisafe
Other examples
Generating b/w image material
While it's great to make your own shapes with vectors, there is a much easier way to get the shape you want.
Just enter your subject, "cat head" in our first example, and select the SDXL style "Silhouette" (if you don't have that extension, it should be available directly in A1111). You should get an image like this:
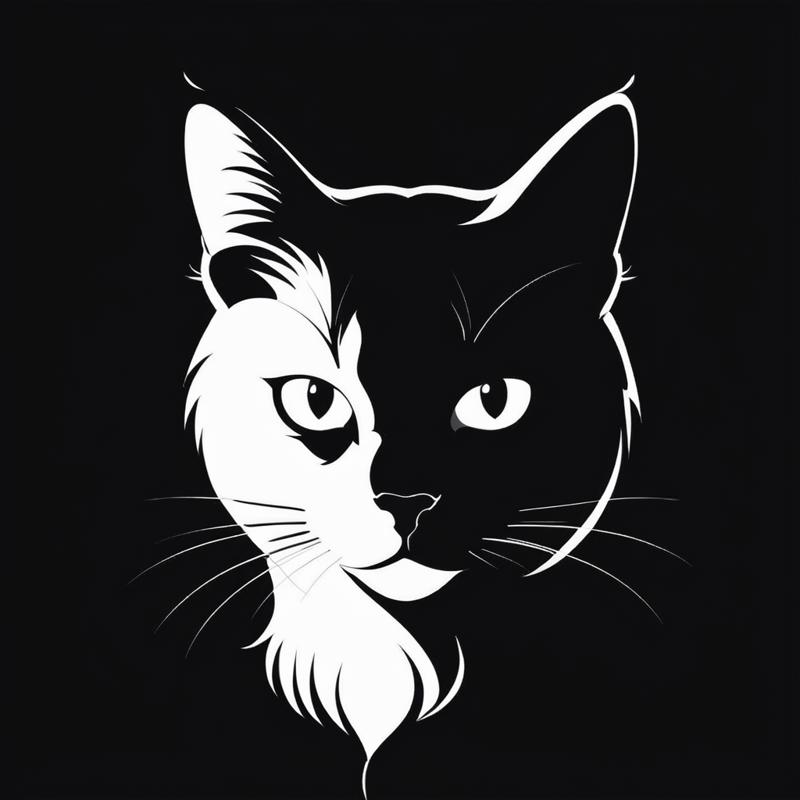
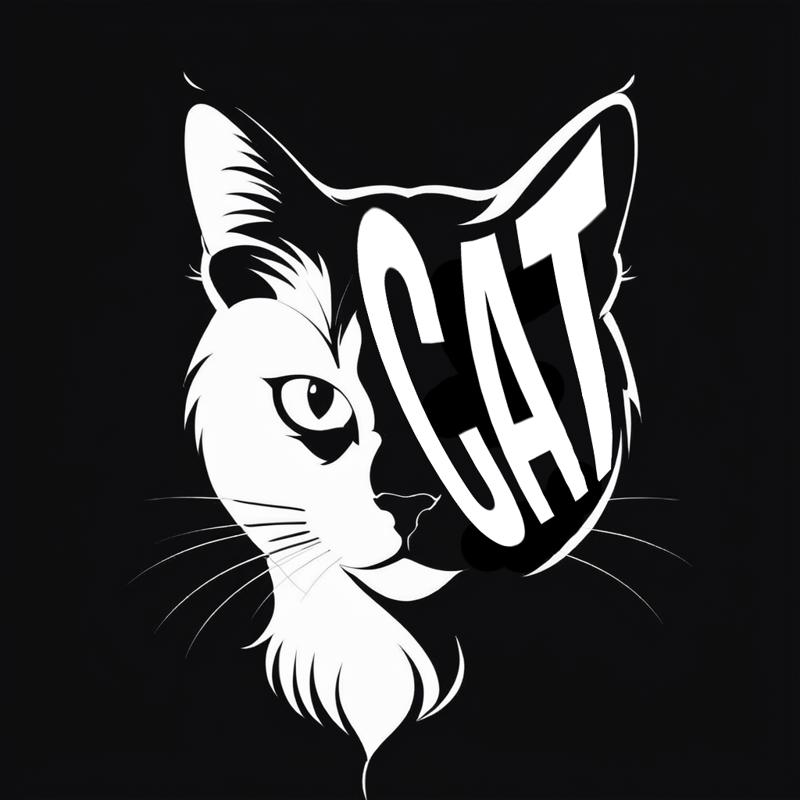
Paint over the places where you want your text to be later. Here we will paint over the eye and whiskers with black.
Just like in the last example add text and shape it to your image. You should end up with something like this:
Prompt: a mechanical cat head, <lora:xl_more_art-full_v1:0.5>
SDXL style steampunk activated.
Controlnets:
We don't need SD to add insane stuff, so the weight can be a little higher on depth:
Depth: 0.6, no preprocessor
Softedge: 0.6, pidisafe
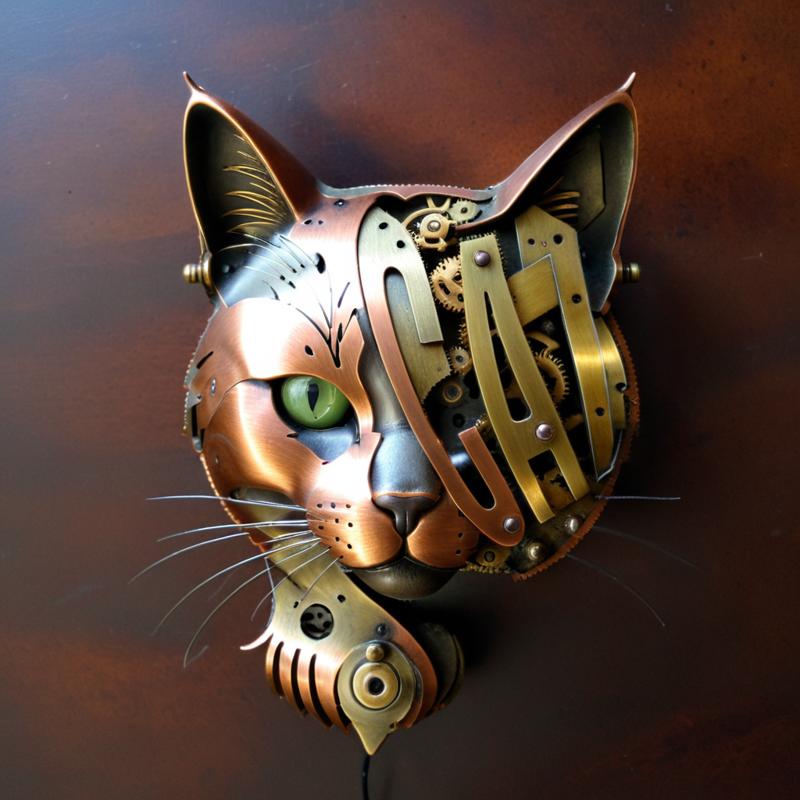
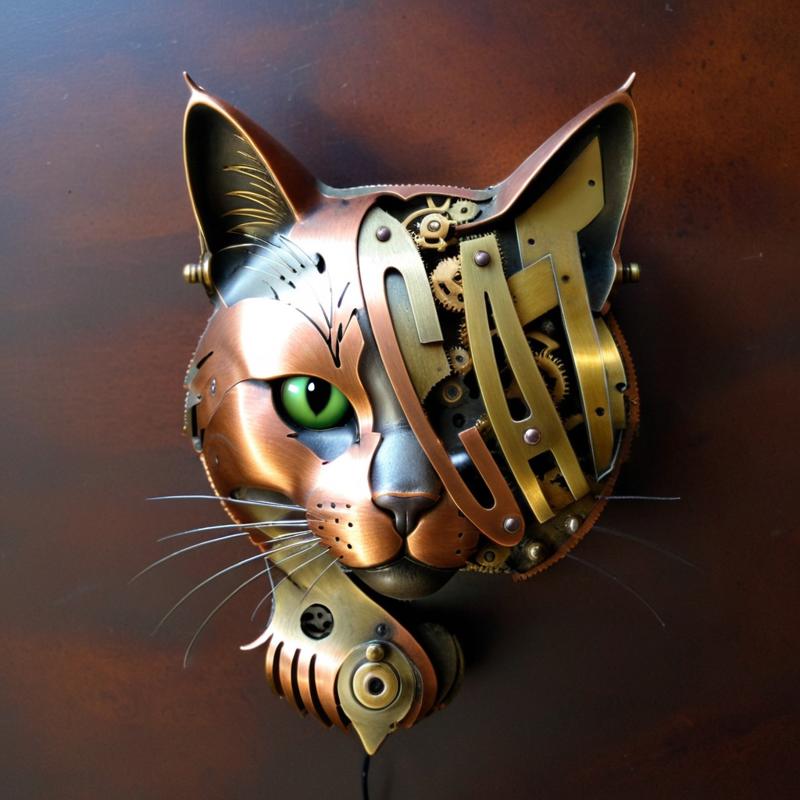
Fix mistakes however you see fit. I moved/removed a few screws, inpainted the eye and ear.
Changing text to fit the image you want
Sometimes it's hard to get the result you want just by prompting. That is especially true if you want to heavily alter the text.
For an example, I will use my old Spiderman image:
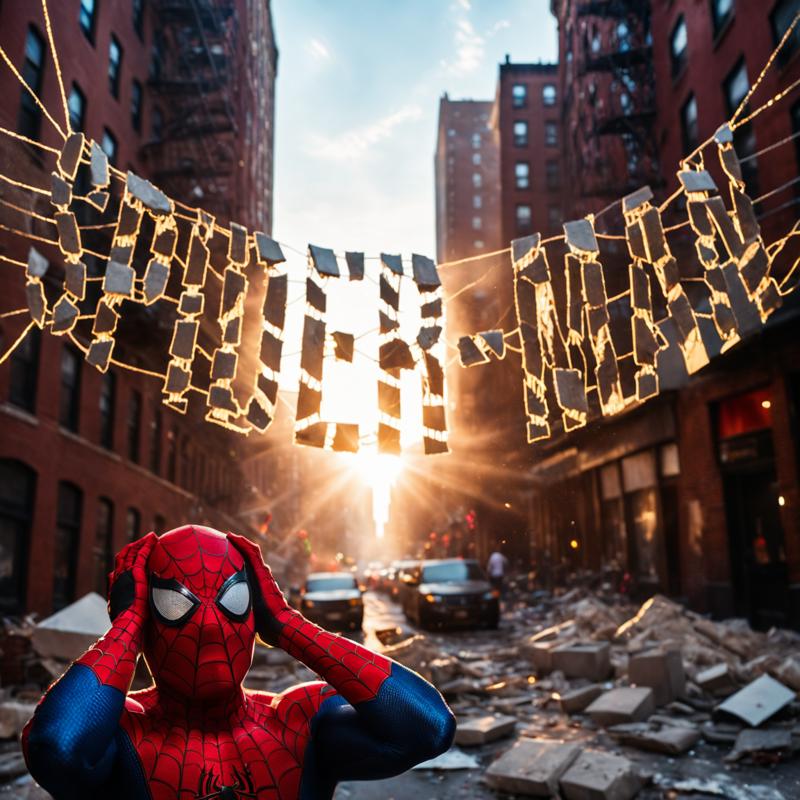
To get this effect, I simply transformed the text with the normal transform options (create warped text -> style arc), rasterized it (right-click on text layer -> rasterize type), erased a few places with the normal eraser and added the webs with the line tool.
The spiderman was a simple screenshot. I removed the background, painted it over to give the AI more freedom (for adjusting lighting and such), then added the original eyes on top of it just in case.
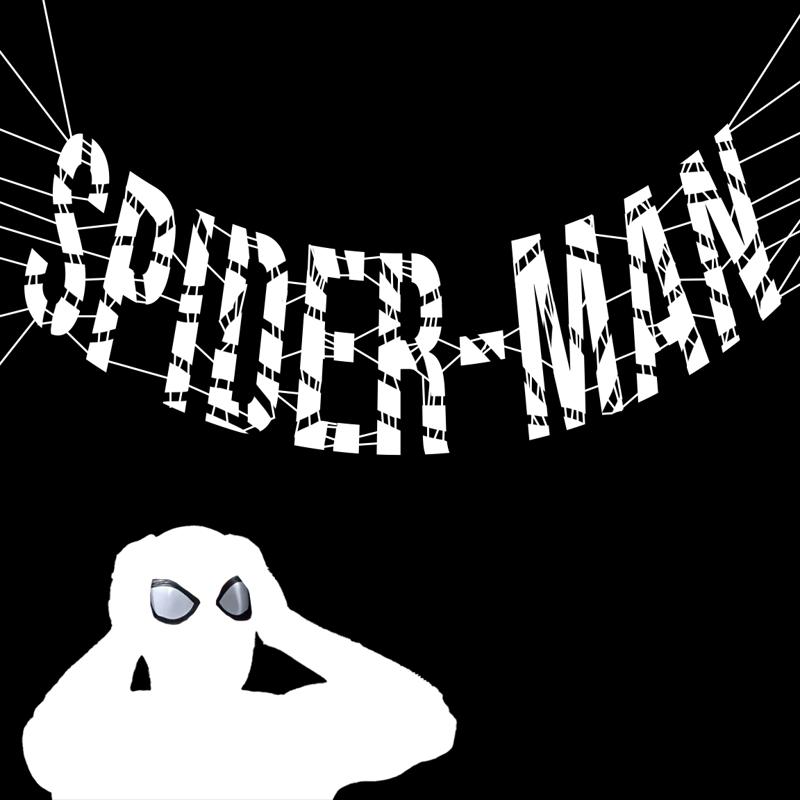
Prompt:
cinematic film still photograph of spider-man holding his head, bricks held together by spiderwebs high over a street in the background, sunlight shining through, destroyed New York,(fire:1.2), debris, chaos<lora:xl_more_art-full_v1:0.5>, vibrant colors . shallow depth of field, vignette, highly detailed, high budget, bokeh, cinemascope, moody, epic, gorgeous, film grain, grainy
Negative prompt: anime, cartoon, graphic, text, painting, crayon, graphite, abstract, glitch, deformed, mutated, ugly, disfigured, child, kid, deformed, glitch, low contrast, noisy, ugly, morbid, worst quality, low quality, lowres, poorly drawn, blurry, mutation, deformed, bad anatomy, bad proportions, disfigured, malformed, extra fingers, extra arms
CN:
Depth: 0.6, no preprocessor
Softedge: 0.4, hed
And that's all there is to it, really. Much easier than endless prompting :)
Combining stock images with generations and text
One very easy way to guide SD is by using vector images. There are a lot of free ones available on the internet. In my example I used some from Adobe stock but you can go to sites like pixabay instead or simply generate your own/ make some with vectors like in the advanced level.
If they aren't purely black and white you can either use them as they are or desaturate them (image -> adjustments -> desaturate). Go to image -> adjustments -> levels afterwards and move the left and right arrows to adjust. The middle one is usually left alone.
(This is how manga scans are prepared for scanlations by the way. You can remove the noise while keeping the original lineart unhurt.)
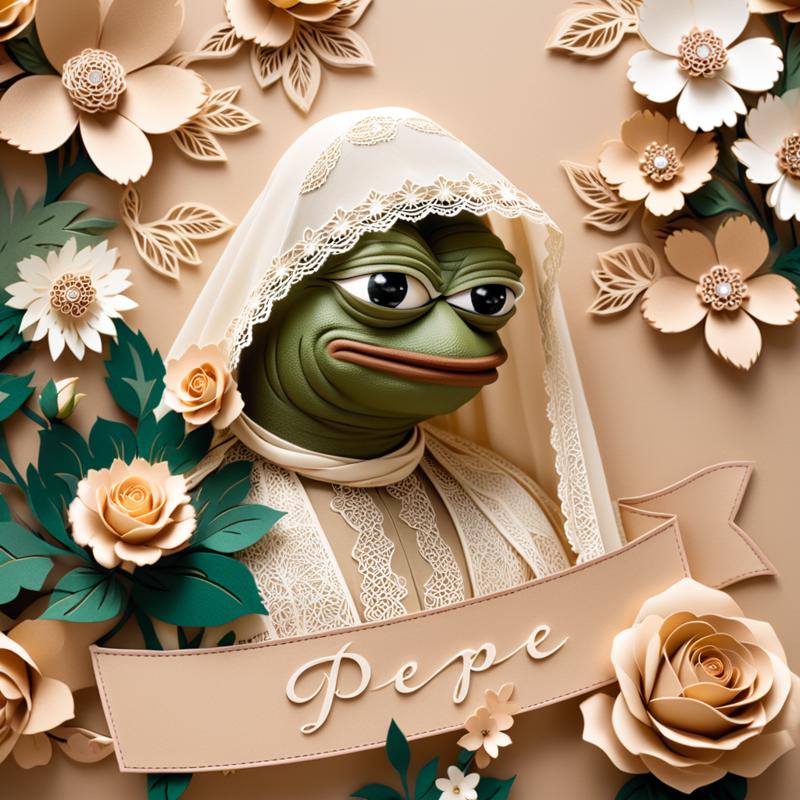
Generate the center piece of your image. We will go with good old Pepe in our last example.
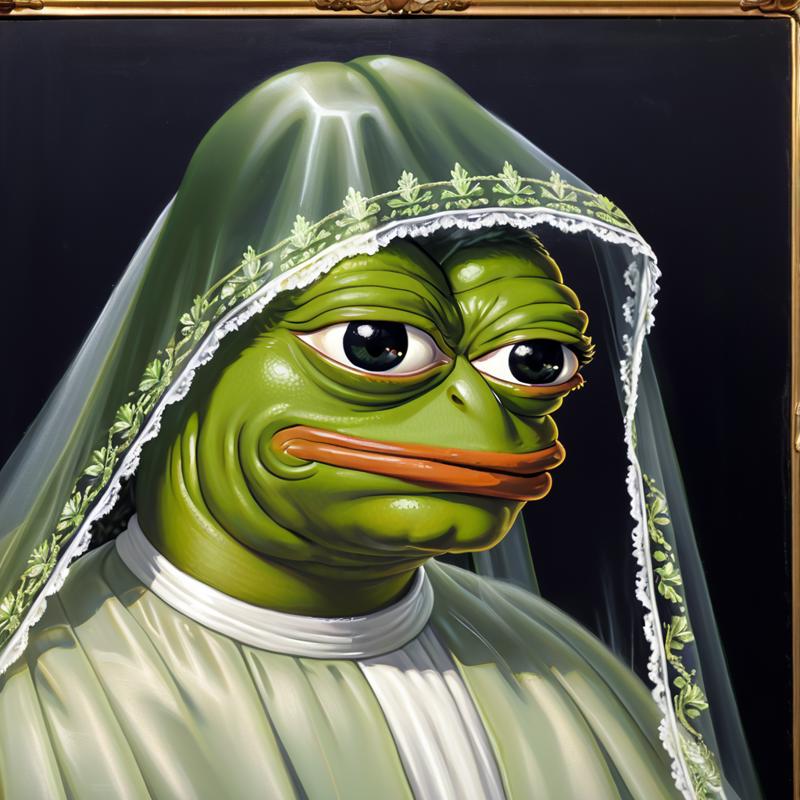
oil portrait of pepe the frog wearing a veil <lora:xl_more_art-full_v1:0.5> <lora:pepe_frog SDXL:1>
Negative prompt: nsfw, child, kid
Steps: 36, Sampler: DPM++ 2M SDE Karras, CFG scale: 7, Seed: 288836751, Size: 1024x1024, Model hash: d25fb39f3f, Model: albedobaseXL_v11, VAE hash: 235745af8d, VAE: sdxl_vae.safetensors, Clip skip: 2, Lora hashes: "xl_more_art-full_v1: fe3b4816be83, pepe_frog SDXL: 13185df7b7a7", Version: v1.6.0
You can find the Lora I used here.
Now you go into your art program and combine your subject with any graphics you want. If it doesn't support vector files, you'll most likely be asked to rasterize them (like in Photoshop... they have to sell illustrator somehow, hm?).
Arrange them in a way that they are clearly distinguishable. Knowing how to properly use the selection tools really help here, so definitely get familiar with that if you aren't already :)
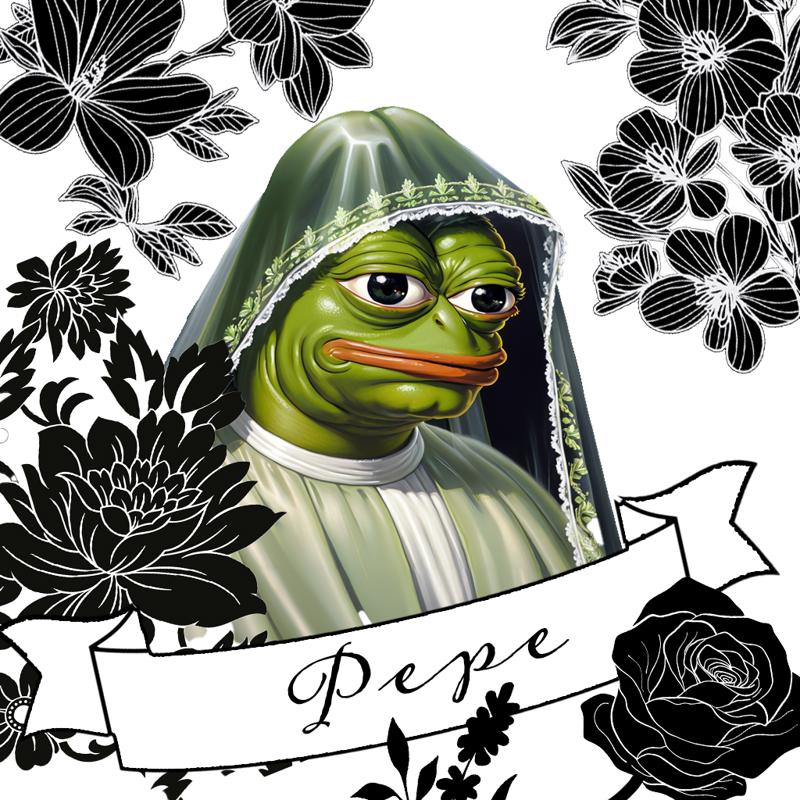
The real fun begins now.
I decided to play with the style selector a bit more, so my prompt was simply this:
P: illustration of pepe the frog wearing a veil, a brown fabric banner with (stitched letters:1.5), beige background, flowers, a rose <lora:xl_more_art-full_v1:0.5> <lora:pepe_frog SDXL:1>
N: nsfw, child, kid
Plus the Kirigami style.
CN:
Depth: 0.4, zoe
Softedge: 0.4, hed
That gave me this:
Some parting words
This became a tiny bit longer than I had intended... (took me three days, dammit!) but I hope some of you will get something out of it.
I'll attach all of the finished images and CN images in a zip file, so you can immediately experiment with them.
If you have any questions, feel free to ask but try to find tutorials online first, if it has to do with editing images or the general use of your art software. There are Youtube videos on pretty much anything and it's usually easier just watching those instead of me explaining.
Also please reach out if I made a mistake somewhere, you have other observations or some new revelations about how to reach a certain result. Only a slight difference in weight of one of the CNs might change the whole image, which makes it hard to find the right combination.
Like I said: it's fickle and a lot of trial and error. You have to find that one sweet spot where the text stays readable and the AI isn't too restricted.
But enough of that. Have fun and stay creative! :)


