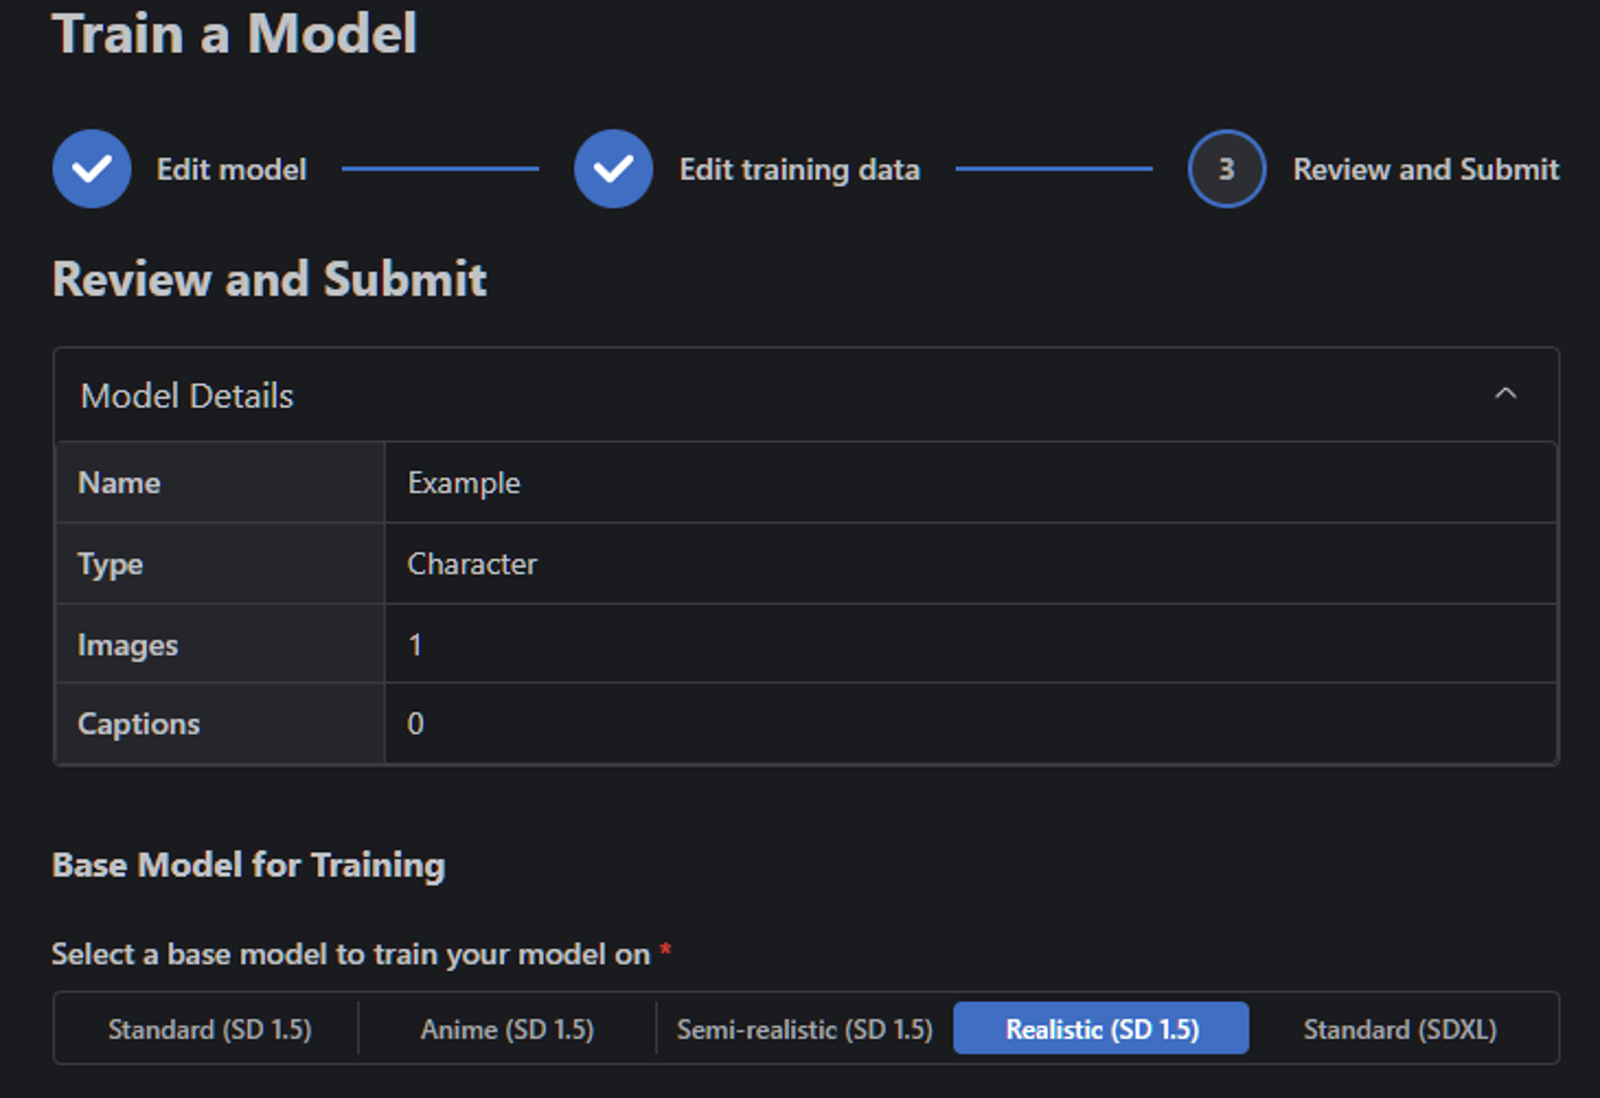
As someone who had never trained LoRAs before (only 4GB VRAM), I've found the on-site trainer to be remarkably easy to use and produces great results. I've used it to train LoRAs with as low as 30 images, to as high as 700+ images, and am fairly satisfied with the results.
However I couldn't find any info on using the site trainer, and most LoRA training guides are super-technical stuff for features the site trainer doesn't have. So here we are.
In this guide I'm going to keep it short and sweet, because there isn't much to configure in the site trainer and it really just boils down to your image dataset and captioning techniques.
Tools to Use:
Data-Set-All-In-One - This is the bread and butter of your image organizing / captioning. Extremely simple and user-friendly tool to use, made by Part_LoRAs, go show his account some love. It can also resize, auto-crop to subject, and even do a bit of 'upscaling' on small images.
Free Video to JPG Converter - Converts entire video files to JPG frames. Yes, you could just manually screenshot vids, but by converting all frames to jpg, you can arrange by file size in the output folder, and the images with the highest size will likely be the "highest quality" (least artifacts). This is super useful for cellphone recordings, TikTok videos, etc.
A coffee press and good roasted beans. Let the grinds sit for a couple minutes, stirring it gently, then letting it sit for another minute before pouring.
How many images for a good character LoRA?
A good LoRA can be trained on just between 5 - 15 high-quality images from different angles. This would be around 5 - 10 closeup headshots, and another 5 - 10 mid-length / full-body shots.
Of course, more images with more varied poses, backgrounds, and clothing can help add additional info to the final result, and allow for more prompt variety.
However, too many images will "overcook" or "overfit" the LoRA, and it will probably start interpreting things you didn't intend. You'll get problems like oversaturated images, blown-out lighting, or parts of different photos merged together (in a bad way).
So for a single person (character LoRA), around 10 - 20 images is good for a strong character likeness (face + half-length portrait), and around 30 - 100+ if you want to tag them in a variety of scenes, poses, and clothing styles.
If you're training on a style or concept, YMMV. My 700+ image LoRA was "multi-concept", so I had a bit more variety in my captions.
TLDR:
If you only want to generate headshots / half-length portraits, than you only need around 10 - 20 headshots and half-length portraits.
If you want to produce high-quality 'photorealism' from a variety of angles, try to use around 70 - 100 photos from a variety of angles.
What's the best captioning practice?
I honestly couldn't tell you. Hop on CivitAI discord and ask different people in the #training channel, there's different answers. However what works for me is keeping it simple.
So for example, I have 20 images of myself. I'm going to caption them all:
"a photo of akti88,"You can easily do this in the Data-Set-All-In-One tool for your first initial captioning:
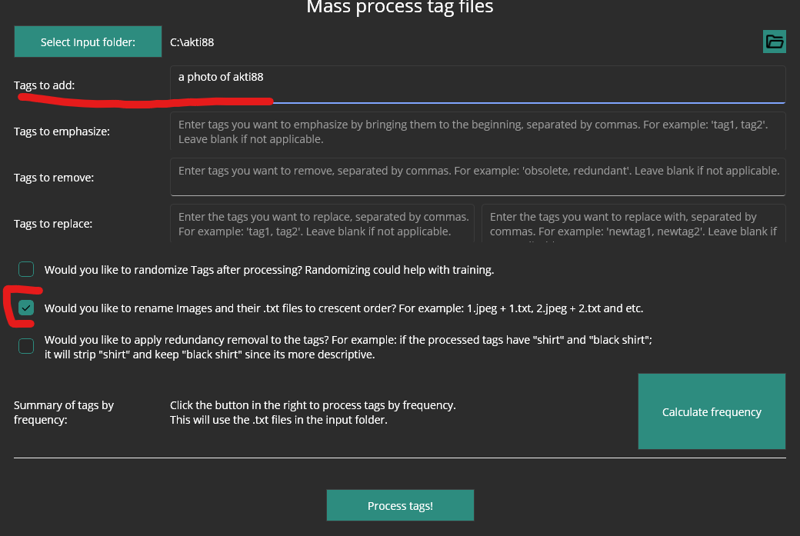
Then you'll go to the Tag/Caption editor and go through them 1-by-1, adding additional tags like:
"a photo of akti88, from behind"
"a photo of akti88, sitting"
"a photo of akti88, laying down, from above"
And if I have a large dataset (50 - 100 images) I'll get a little more precise, like:
"a photo of akti88, hands on hips,white t-shirt,jeans"
"a photo of akti88, sitting on sofa, legs crossed, holding bong"
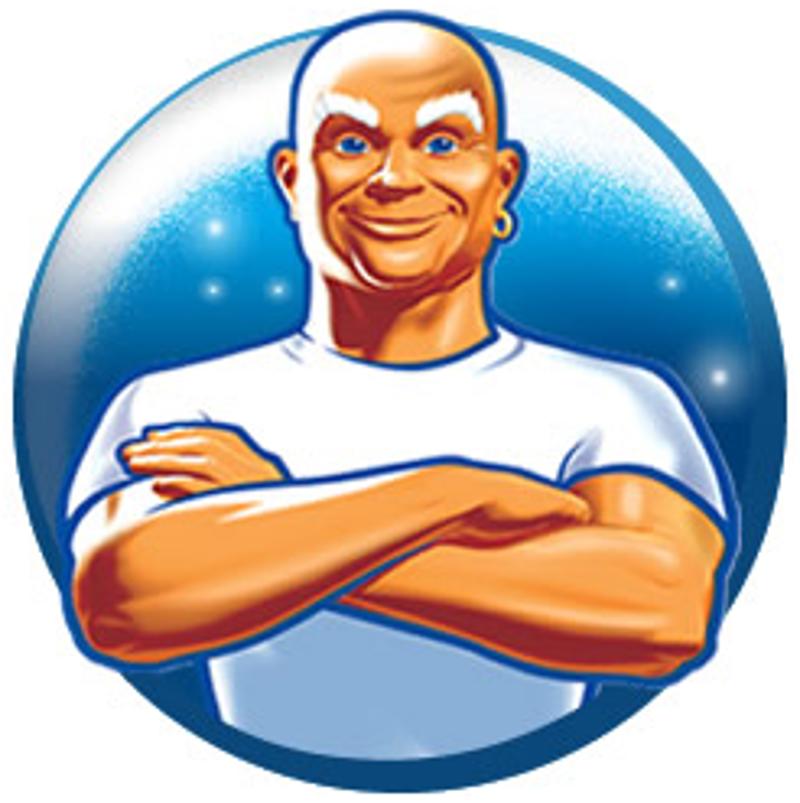
a photo of mrclean, looking at viewer, arms folded, white shirt, upper body shot
Because the basic idea of tagging is that:
1) You're telling the model what to train itself on (a photo of akti88, the person)
2) Small details, like clothing type (red shirt, denim jeans, standing in kitchen, standing on beach, etc.) - This way, your LoRA will separate the person from the additional details.
ELI5 Explanation - If you have 30 images of Akti88 standing on the beach next to a palm tree, and you only caption each photo "a photo of akti88", then SD is much more likely to also produce the beach + palm tree in every output, because it associated those with "a photo of akti88".
Whereas if you specifically caption "photo of akti88,standing,on beach,palm tree" then SD will much more easily change those things in your generations. However, you must KEEP IT SIMPLE. Only tag important things (clothing type, background). If they have long hair in some photos, and curly hair in other photos, caption appropriately.
You don't need to tag things like "brown eyes" or "pale skin" for every photo because AI will naturally associate those things with the person as it trains. So only caption the person + important things about them that change throughout your dataset.
Of course you can use the "Generate Tags" tool, but because its tuned more for anime features / details it will include extra stuff you'll have to remove / manually go through.
Best Workflow I've Found (Updated Nov. 18, 2023)
I'm going to lay out my workflow, start to finish, for creating a high quality character LoRA that works well in the most popular checkpoints in different art styles (Animerge, EpicPhotoGasm, etc).
Step 1: Gather images. 10 - 20 is "good enough" but I'd rather have much larger variety. Therefore grab as many as you can of the subject you're training for.
Videos are a great resource for gathering additional angles of the subject, that is why I recommended the Video to JPG frame converter tool.
You mainly want headshots, half-length portraits, and full-body shots. Your objective is to train AI on the person's face and body shape. The background and clothes they're wearing are just added info.
Headshots and half-length portraits should be high quality, full-length portraits can be a little blurrier. You can train a handful of blurry or low-quality photos if they contain useful poses or angles, but make sure you have more high quality than low.
You don't need images of them sitting, laying down, etc. because AI can "guess" what the person looks like in that pose, but it helps to add those images if you have them, especially if your objective is photorealism (not drawn / anime style).
Step 2: Go through all the images you've gathered, and decide which ones are the best quality. If you gathered like 200 images of the subject, just double-check and optimize your dataset for anything that doesn't feel necessary in the end.
Step 3: Make a backup copy of your folder containing all images.
Manually crop out any other people besides your subject.
If other people's limbs are in the photos, go ahead and just paint the entire background white. Then you can just say "white background" in the captions.
Now launch the Data-Set-All-In-One tool linked in the intro. Run the auto-crop tool on your entire folder of images.
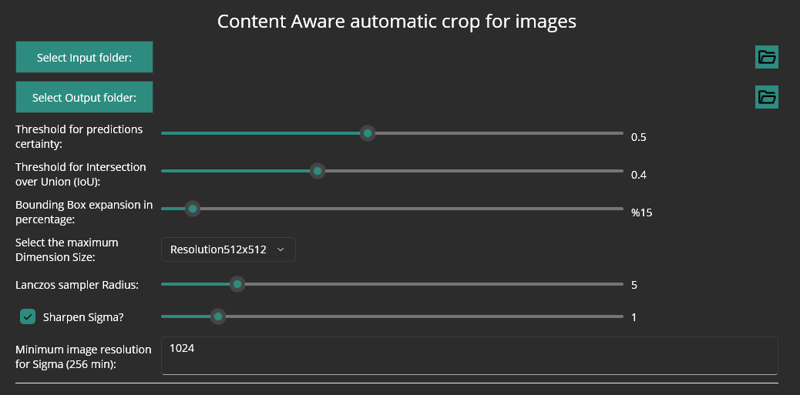
Open the output folder, and separate the low resolution images (below 512x) from the high resolution images into another folder. Run the resizer tool on the low-res image folder, to either 512 or 768. Also add Lanczos resampling (around 5 strength + 1 strength for the two sliders).
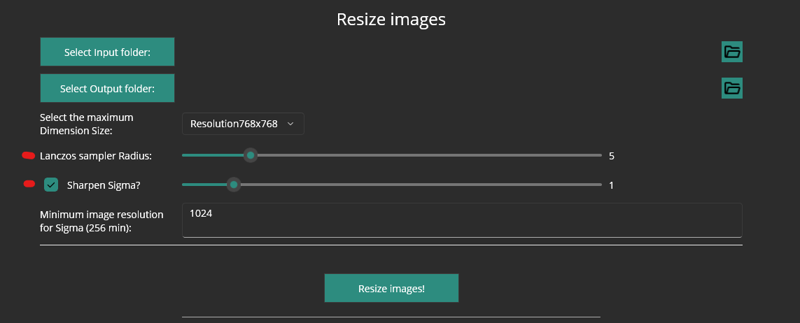
Step 4: Use the Edit Captions tab (not Generate Captions), load in your folder, and scroll through each photo 1 by 1. This will automatically create a .txt file for each photo as you scroll through them.
Go to the Caption Processing tab, and add "photo of blabla" to the "Captions to Add" field, then hit Process. Go back to the Edit Captions tab and scroll through them all again, this time adding extra captions (from behind, wearing red shirt, etc.)
Useful Tricks:
For the very best photos in your dataset, e.g. a few really high-quality face shots, add a tag like "bestface1". So in the future you can prompt like "photo of blabla, wearing white shirt, bestface1" - and the output will try to use those reference points. Only do this for a few of the actual best, do it sparingly.
As mentioned earlier, you can include some useful blurry, grainy photos in your dataset, as long as you have a higher ratio of high-quality images. However you should tag them blurry, low-quality because SD inherently knows these terms.
You can delete the backgrounds and just upload transparent .pngs of your subject. This should theoretically lead to more focused and higher-quality results, as the AI will train exclusively on the person and not worry about any background stuff. YMMV.
Uploading for Training
So you have all your images carefully hand-captioned, they're all in numerical order (1.jpg + 1.txt, etc), you've zipped them up, and now you just need to run the CivitAI trainer.
So what settings do you need to tweak?
Well, this is self-explanatory, although for photorealism you can try either Standard or Realistic.

As for all this stuff, literally just leave on default, except maybe Epochs and Num Repeats.
Generally speaking you want about 10 steps per image - but at the same time, community advice says you want around 1500 - 2500 steps. The math doesn't add up, right? 20 images x 10 steps = 200 steps, wtf?
Well that's where Epochs and Num Repeats come into play. Num Repeats is basically how many times the model goes back and repeats its training, so 20 images x 10 steps = 200 x 3 repeats = 600 steps. And then Epochs also increase the number of steps.
On a LoRa of around 150 images, I used 10 epochs and 2 repeats, which came out to around 2800 steps or so, and the final result was pretty impressive (for me).
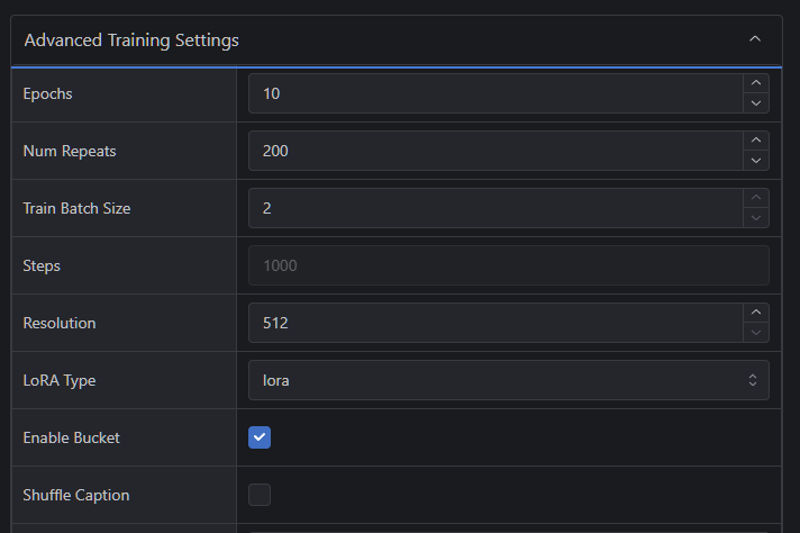
In any case, after that you just let the model do its thing, andddd.....yeah. That's really all there is to it.
If you want to get into more advanced LoRA training stuff, then I imagine you'd want to use a more advanced training tool. But I'm satisfied with CivitAI's for my purposes.
Which Epoch to download?
CivitAI will recommend the last trained Epoch as the one to download, but it may not always be the best choice.
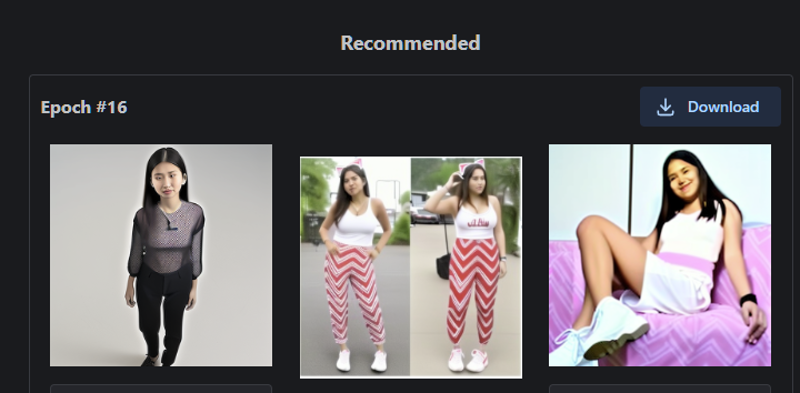
The preview images are approximates from randomizing your image captions (prompts) - so while they can give you an idea of what the final LoRA outputs, it's not 100% accurate.
You should download at least 3 different epochs - the recommended, and a couple earlier ones - then test them all using the same prompt/seeds. E.g. in the above I grabbed Epoch #16, #14, and #12.
This is because the final epoch may have "overcooked", whereas an earlier epoch gives better results. Its trial and error, really.

