🎥 Video demo links
👉 Tutorial conditional masking CLICK HERE (YouTube)
👉 Tutorial update LCM: LINK HERE (YouTube)
**** Update 15/2/2024: you can run FOR FREE the updated workflow with LCM Lora in OpenArt.ai
Workflow development and tutorials not only take part of my time, but also consume resources. Please consider a donation or to use the services of one of my affiliate links:
🚨 Use Runpod and I will get credits! 🤗
Run ComfyUI without installation with:
**** Update 19/1/2024: It seems some changes in the GrowMaskWithBlur were swapping some of the values/parameters, please use/download the version 2 of the workflows ****
**** I have updated and added a workflow to use LCM Lora. The description does not explain it. The corresponding LCM Lora model is also needed for the Lora ****
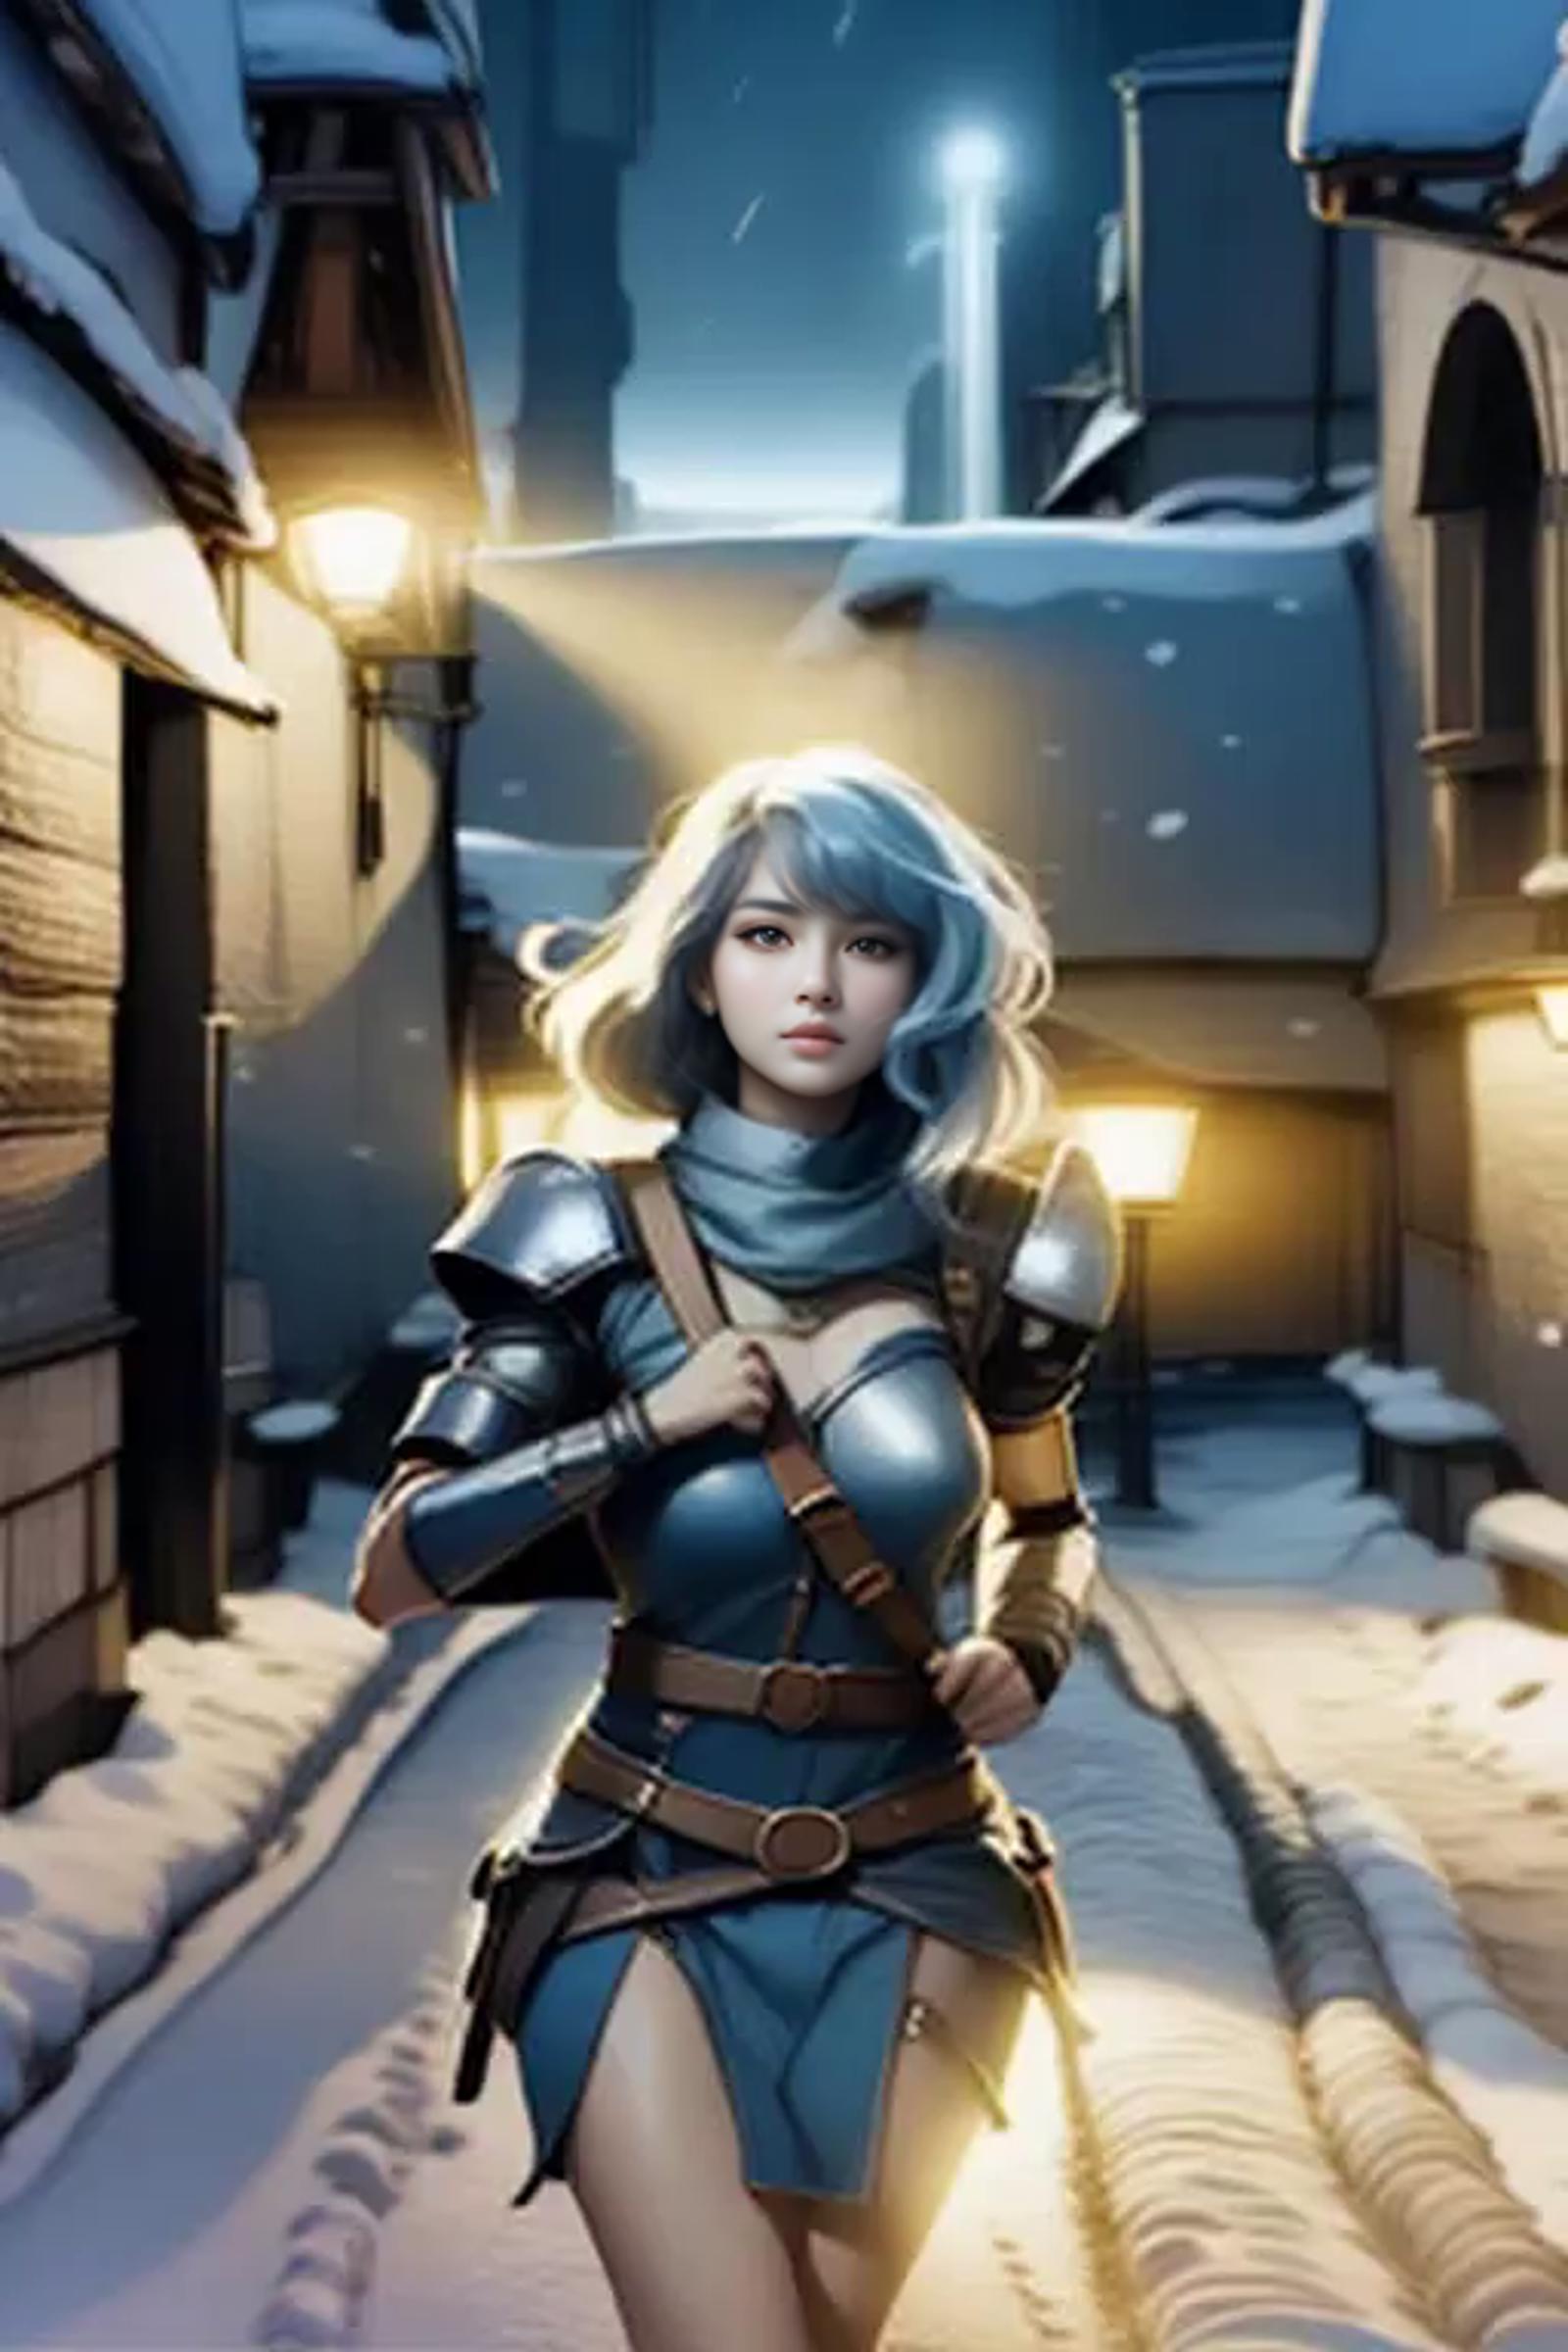
With this method, you can create animations where you change the background of the image of the main character. For example, the Lora character is in a city/town, and now you want to use a winter background. Instead of creating separated workflows for the foreground and background and then blending them, I find that blending them first and then running it via AnimateDiff, the blending results is more homogeneous.
Requirements and Initial workflow (Step 0)
For this workflow, the main assumptions are that you have installed ComfyUI and have ComfyUI Manager, so the different custom nodes, models and assets can be used.
The files that can be used are found in the attachments on the top right:
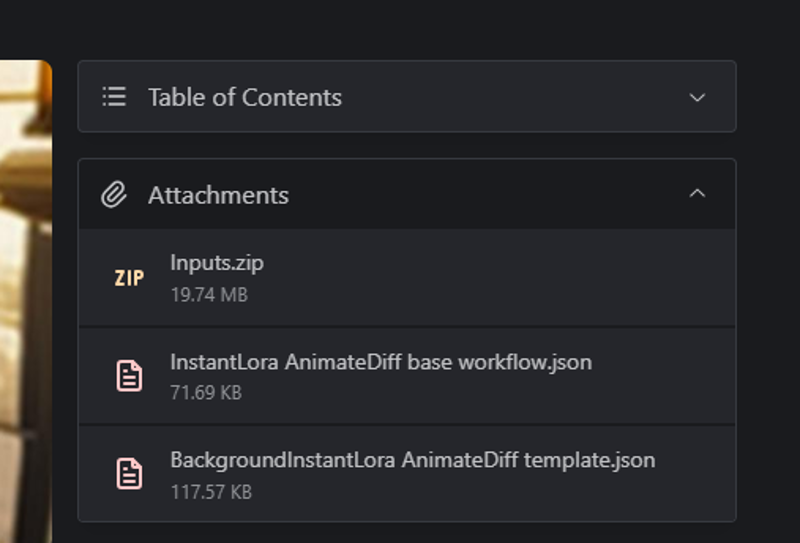
Copy in the input folder:
Base images
Openpose, depth maps and MLSD drawings in their folders
(alternatively, the controlnet assets can be directly created from vide/frame sequences using the corresponding preprocessors)
Drag and drop the Base Instant Lora-AnimateDiff workflow over ComfyUI
Go to Install Missing Nodes and install all the missing nodes
ComfyUI Impact Pack
ComfyUI ControlNet Auxiliary Preprocessor
WAS Node Suite
ComfyUI IP Adapter Plus
ComfyUI Advanced ControlNet
AnimateDiff Evolved
ComfyUI VideoHelper Suite
KJNodes for ComfyUI
For this example, the following models are required (use the ones you want for your animation)
DreamShaper v8
vae-ft-mse-840000-ema-pruned VAE
ClipVision model for IP-Adapter
IP Adapter plus SD1.5
Motion Lora: mm-stabilized-mid
Upscale RealESRGANx2
ControlNet models (for SD 1.5)
OpenPose
Depth Maps
M-LSD
Other models will automatically be downloaded as you use the custom nodes (VTI-B, person_yolov8m, etc.).
Step 1: Create your scene
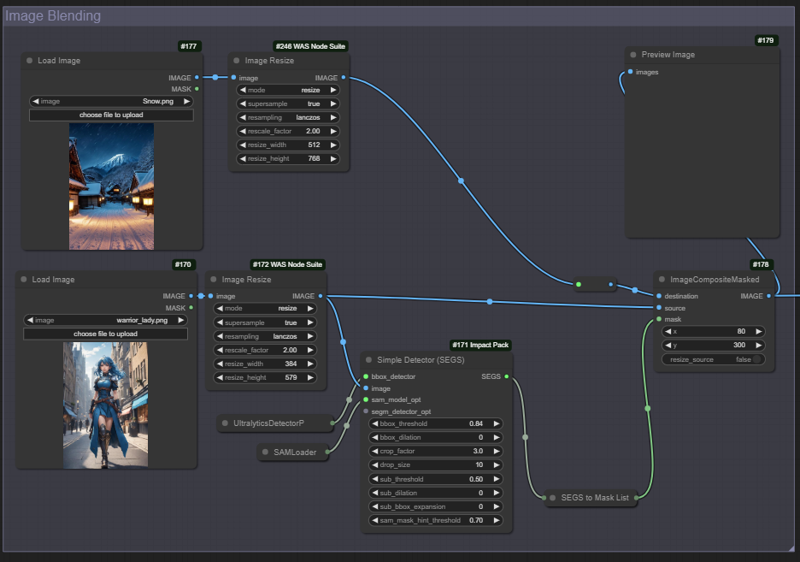
Bypass all the animation modes, so you only run the Image Blending Group to prepare the scene
Blend your subject/character with the background. For people, you can use use a SAM detector. Alternatively, you can mask directly over the image (use the SAM or the mask editor, by right clicking over the image). In this case, you will need to reconnect the mask output from the image to the mask input of the image composite masked node.
Adjust the position of the composition (change x and y): you want that the mask and the foreground character occupy the same are, approximately, to minimize the artifacts (in my case, I struggled getting double arms, which I had to post process later)
Step 2: Test the animation workflow
Activate the Animation Groups
Check the models used (checkpoint, VAE, AnimateDiff, IP Adapter, Clipvision, ControlNet) and the directoy in Load images (for the openpose controlnet) are all loaded correctly.
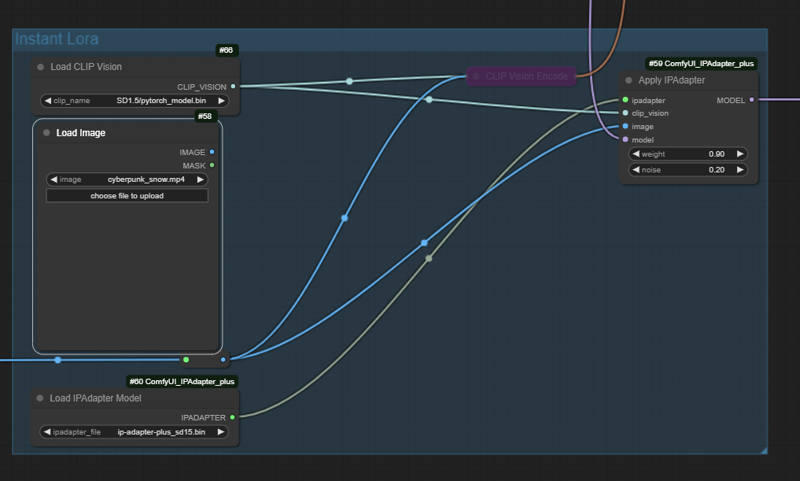
Connect the resulting image to the Instant Lora Animation workflow (Apply IPA Adapter).
You can also copy the resulting image from the composition and paste it to the Load Image node via ClipSpace
I found that the CLIP Vision Encode may direct too much the Lora, so I have deactivated. You can, of course, change it
Change the Number of Frames node to 4 (for testing purposes)
Run the workflow and check it runs without errors
The most usual error is that some of the models are not present or incorrectly loaded (for example the wrong controlnet model). Check for the nodes which result in a purple border.
Step 3: Add the ControlNets for the background
Running the workflow without controlnet is possible, and results may still be very nice. That is true normally for relatively static backgrounds. However, in this example a lady is running/walking, so we choose to (try to) have more control using a ControlNet sequence for the foreground, and one for the background.
Create a ControlNet sequence (1 or more) for the foreground character
Create another ControlNet sequence (1 or more) for the background.
The number and type of Controlnet will depend on your composition. In this example, for the character we will use an DWPose/Openpose skeleton frame sequence. The skeletons will be used for the next step (creating the mask of the object).
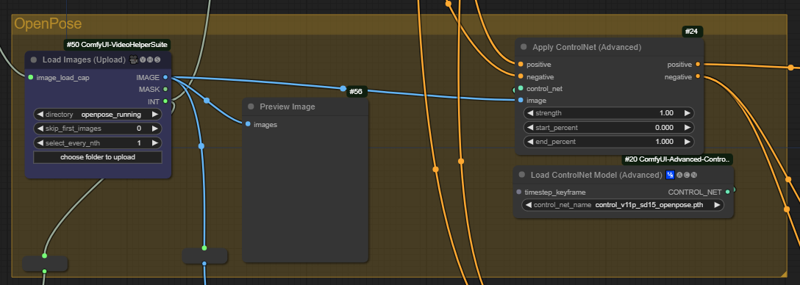
For the background, depth maps and edge detection ControlNet work quite ok. The choice in this example are Zoe Depth maps and MLSD lines. Note that these two controlnet nodes connect the conditioning with each other, but are not connected with the OpenPose of the foreground.
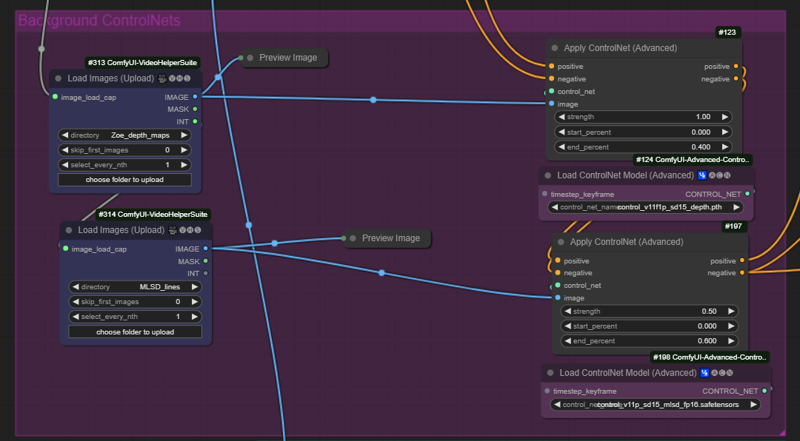
Step 4: Create a mask for your character (and inverse mask for the background)
Create a mask for the foreground using the Controlnet poses. This will be used later in combination with the forefround ControlNet sequence (openpose)
Use the color to Mask (with the settings below) to convert your openpose skeleton to a mask
Use the Growth mask, with some blur, to have a shape which will be used to draw your hero.
The inverted mask will be use for the background Controlnet sequence.
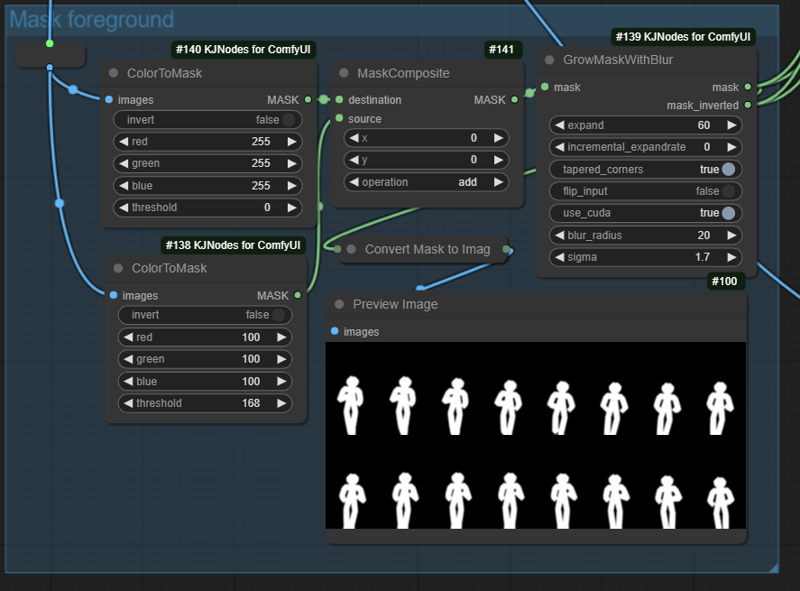
In general, I find out that you want to have a relatively big mask (60 or, even better 100), but I guess this will depend on your animation. I have not changed the blur radius and sigma (results are good, so far)
I think it should be possible to achieve similar results by doing SAM detection of the body (if original frames are used), but I struggled making it work (with different workflow), and once this worked I did not change it.
Step 5: Mask conditioning
In this step we are doing two things:
Applying conditioning masks for the foreground and background
Combining the conditionings of the positive and the negative prompt.
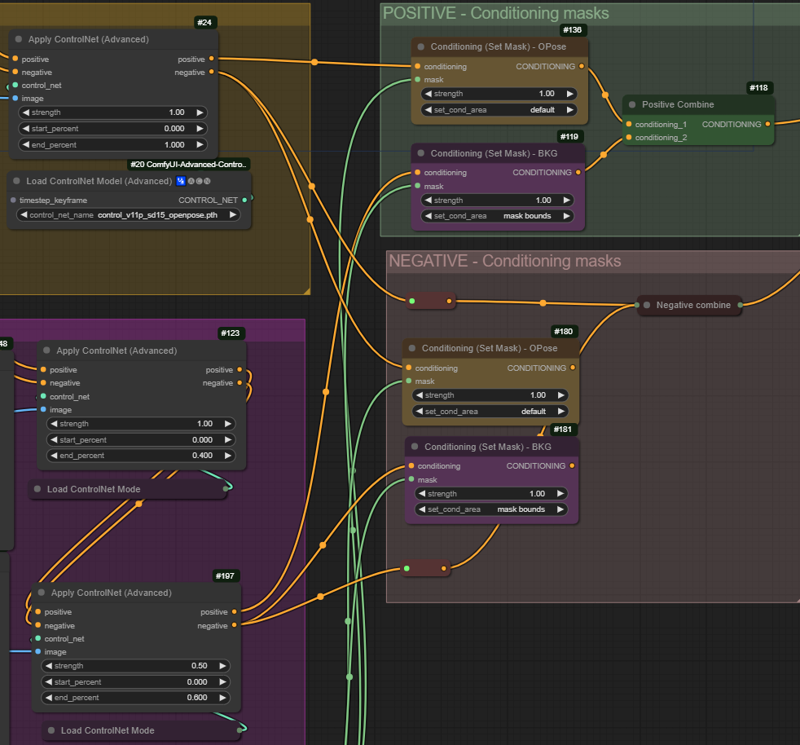
First, let's see how we apply the conditioning masks:
Foreground positive conditioning (openpose)
Connect the output positive from the ControlNet to the input conditioning of the Conditioning (Set Mask) Node.
Connect the mask output node from the GrowMaskwithBlur node to the mas input from the Conditioning (Set Mask) Node.
Make sure the set_cond_area is set to default
Background positive conditioning
Connect the output positive from the (last) ControlNet to the input conditioning of the Conditioning (Set Mask) Node.
Connect the mask_inverted output node from the GrowMaskwithBlur node to the mas inut from the Conditioning (Set Mask) Node.
Make sure the set_cond_area is set to mask bounds
Note that we keep the 'default' for the foreground, and that for the background we use the inverted mask.
The negative conditionings are applied in the same way, but connecting the negative outputs of the ControlNet sequences
Second step is to use the Conditioning Combine nodes:
Connect the two (positive) conditionings from the Conditioning set mask nodes to the Conditioning Combine inputs.
Connect the (positive) combine output to the positive input of the Ksampler
For the negatives, I found out that combining the set masks provide a brighter animation. For this choice I choose to use directly the negative outputs of the controlnet nodes (foreground/background). I guess that, depending on the animation, it may be better to do differently.
To summarize, the connections should be:
For positive Ksampler, use the combine of:
Conditioned mask of the positive Foreground controlnet positive + mask (default)
Conditioned mask of the positive Background controlnet positive + inverted mask (mask bounds)
For the negative Ksample, use the combine of:
Conditioned mask of the negative Foreground controlnet positive + mask (default)
Conditioned mask of the negative Background controlnet positive + inverted mask (mask bounds)
OR just combine the negatives of the foreground and background.
Sometimes it becomes messy and if connections are not right strange figures (e.g. only the face) may appear. It is good to do a small run test, but do 8 or 12 frames to generate a complete context length of AnimateDiff, to avoid many artifacts in the scene. Check and change also the controlnet settings to right values.
Step 6: Running the workflow
Run the workflow: start using small amount of frames, so you can fine tune different settings of the workflow
FaceDetailer and Interpolation: the workflow template also has a FaceDetailer module and an interpolation module. I am using normally SD 1.5 and the faces typically need to be refined. With interpolation, you can increase the smoothness of the animation by adding one extra frame between frames and later increasing the frame rate of the animation.
Polishing: as in many animations with a denoise of 1, sometimes artifacts appear in some frames. In this example, some frames show extra arms. These can be removed individually using frame interpolations, inpainting and/or using a regular photo/video editor.
Acknowledgements
Well, this workflow is based in several workflows/nodes/ideas from many others....however, I think the workflow is a combination of:
AnimateDiff and AnimateDiff evolved githubs (for the animation) and the many videos in youtube
AloeVera's Instant Lora Method (in Civit.ai) - and the many videos in youtube
Dr.Lt.Data (for FaceDetailer and the SAM segmentation use)
toyxyz for the masking trick which allows to do the conditional masking nicely
Kajai for the mask manipulation nodes, and for the method to upscale the face (a variation is provided here)
