Beginning
Although AnimateDiff can provide modeling of animation streams, the differences in the images produced by Stable Diffusion still cause a lot of flickering and incoherence. As far as the current tools are concerned, IPAdapter with ControlNet OpenPose is the best solution to compensate for this problem.
Preparation
You can use my Workflow directly for testing, and you can refer to my previous post [ComfyUI] AnimateDiff Image Flow for the installation part.
In addition, FreeU is used in this workflow and is highly recommended to be installed.
ComfyUI has a built-in FreeU Node that can be used!
The IPAdapter also requires an additional installation. The author has two versions, both of which can be used, but the old one has not been updated since then.
Before using the IPAdapter, please download the relevant model files.
SD1.5 requires the following files,
ip-adapter_sd15_light.bin This model can be used when your Prompt is more important than the input reference image.
ip-adapter-plus_sd15.bin Choose this model when you want to refer to the overall style.
ip-adapter-plus-face_sd15.bin Use this model when you want to reference only the face.
SDXL requires the following files,
ip-adapter_sdxl_vit-h.bin Although the SDXL base model is used, the SD1.5 Text Encoder is required to use this model.
ip-adapter-plus_sdxl_vit-h.bin Same as above.
ip-adapter-plus-face_sdxl_vit-h.bin Same as above, but this is for face only.
Please put the above files under custom_nodes/ComfyUI_IPAdapter_plus/models or custom_nodes/IPAdapter-ComfyUI/models.
In addition, since we need the CLIP tool, please put the following two files under ComfyUI/models/clip_vision/, you can change the file name to distinguish SD1.5 or SDXL.
SD1.5 model This file is required for SDXL models that end with _vit-h.
AnimateDiff + IPAdapter
Let's look at the general AnimateDiff settings first,

Since we need to use the IPAdapter part, we need to find a place to put it. Please note that the example here is using the IPAdapter-ComfyUI version, you can also change it to ComfyUI IPAdapter plus.
Here is the flow of connecting the IPAdapter to ControlNet,
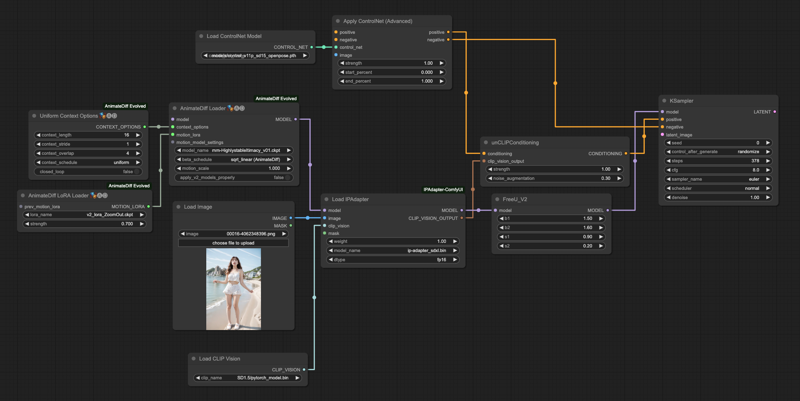
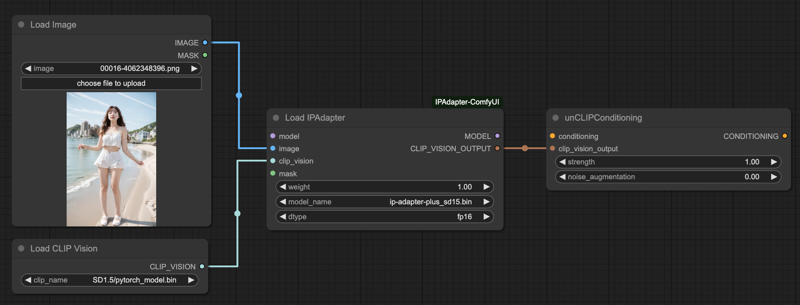
The connection method of the two IPAdapters is similar, here we give you two comparisons for reference,
IPAdapter-ComfyUI
ComfyUI IPAdapter plus
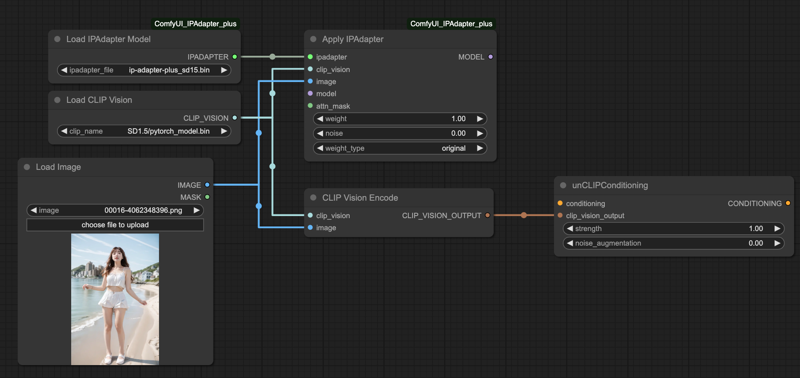
This gives you an idea of how AnimateDiff connects to the IPAdapter.
ControlNet + IPAdapter
Next, what we import from the IPAdapter needs to be controlled by an OpenPose ControlNet for better output.

If your image input source is originally a skeleton image, then you don't need the DWPreprocessor. But since my input source is a movie file, I leave it to the preprocessor to process the image for me.
The unCLIPConditioning (positive) prompt in the IPAdapter needs to be connected to the ControlNet side, the following schematic flow is for your reference, so that our IPAdapter will enter the ControlNet control.

AnimateDiff Motion Lora
For a smoother animation, I used Motion Lora to do a little gradient effect. If you don't want it, it's fine, it's not mandatory to use it.
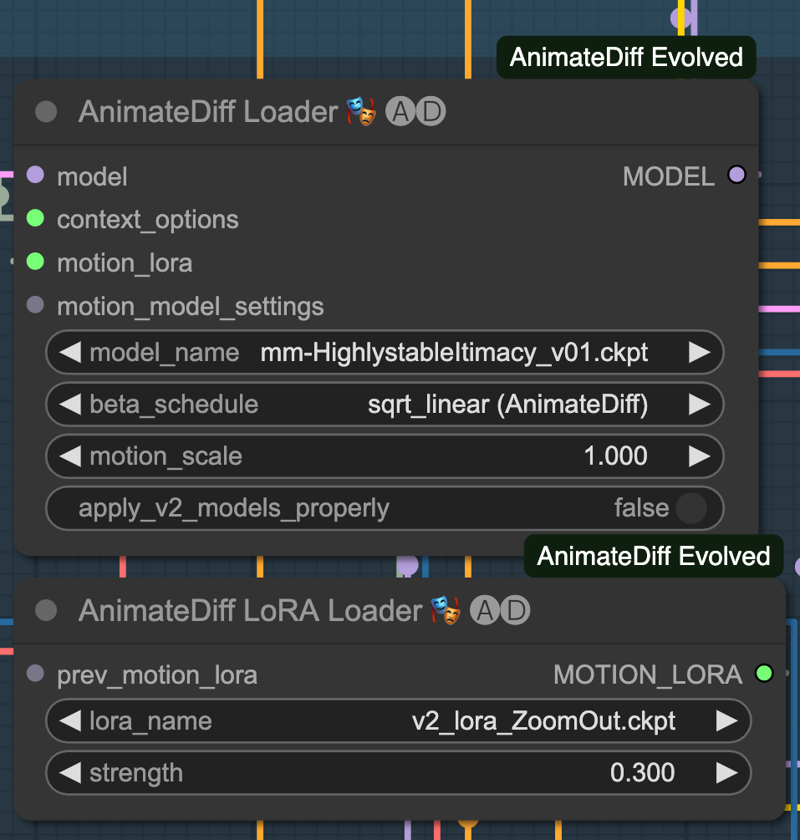
I chose v2_lora_ZoomOut.ckpt for this effect, you can try other dynamic Lora effects on your own. Because I don't want him to have too much effect on the screen, I only give him 0.3 weight.
In practice, if your overall movement is quite complex, it is recommended not to use it.
Grouping Processes
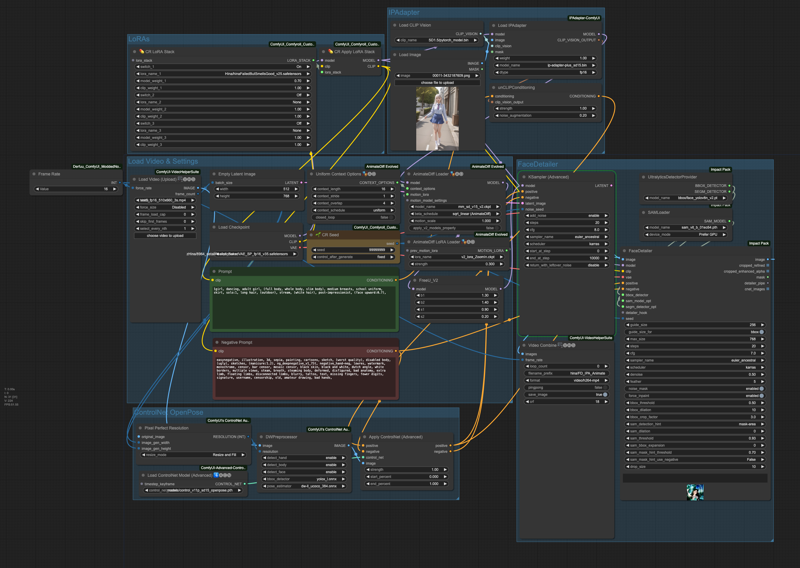
Finally, let's put the processes together.
Read the movie, model, cue, and set up the AnimateDiff Loader.
Set up the IPAdapter.
Set up ControlNet.
Set up Lora, or
byPassit if you don't want it.Set the final output, fix the face.
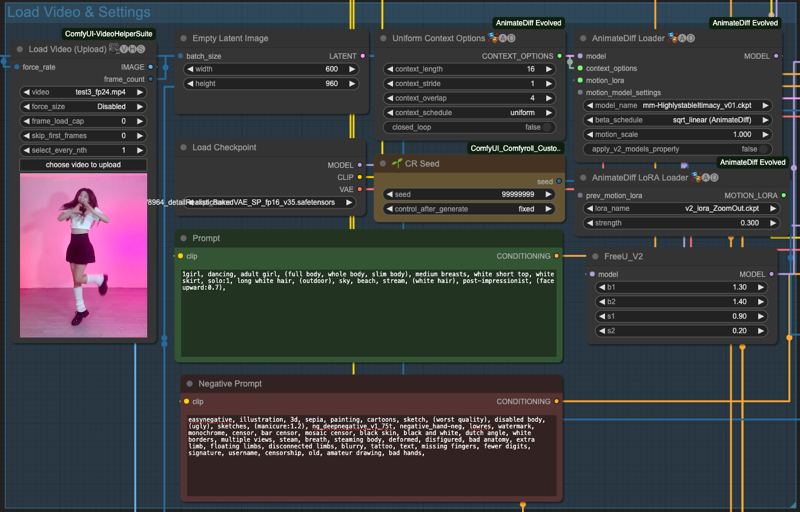
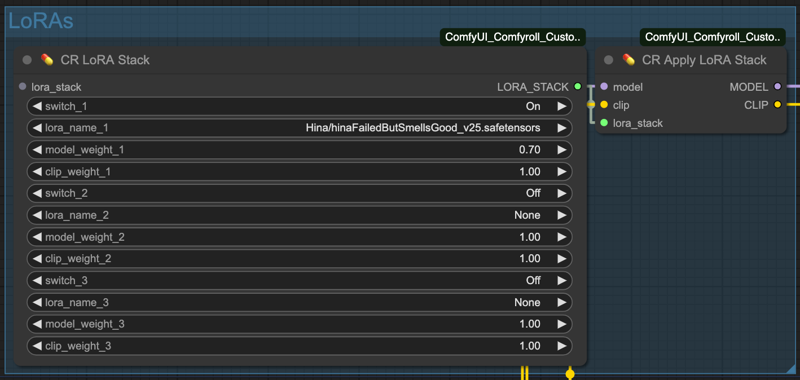
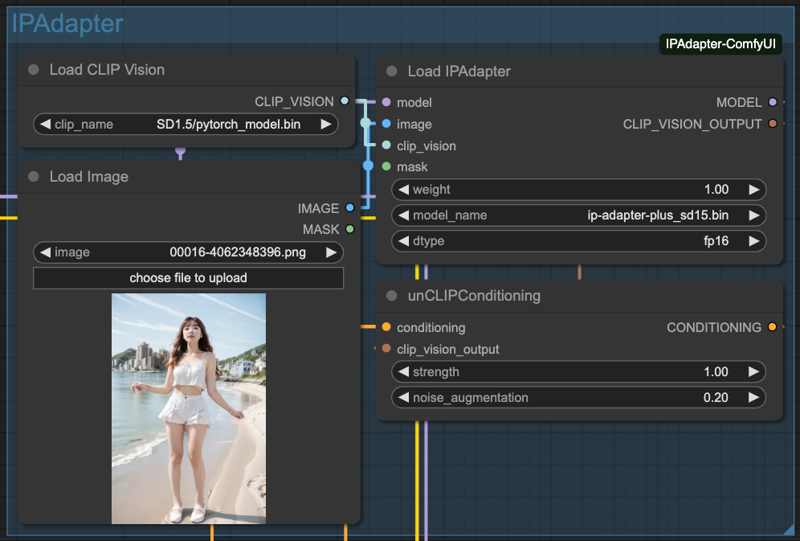
Finally, we do the output with FaceDetailer,
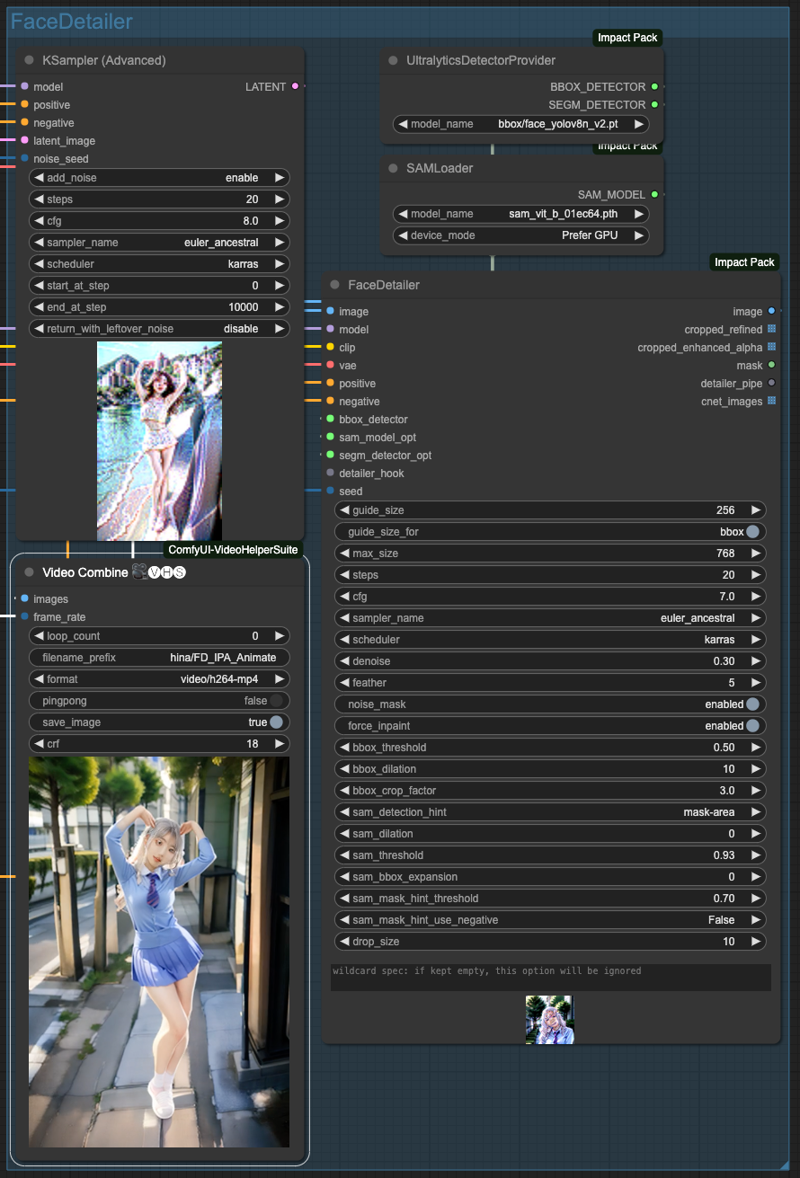
Conclusion
The reason why we only use OpenPose here is that we are using IPAdapter to reference the overall style, so if we add ControlNet like SoftEdge or Lineart, it will interfere with the whole IPAdapter reference result.
Of course, this is not always the case, and if your original image source is not very complex, you can achieve good results by using one or two more ControlNets.
Here is my workflow, you can also download JSON file from attachments,


![[ComfyUI] AnimateDiff with IPAdapter and OpenPose](https://image.civitai.com/xG1nkqKTMzGDvpLrqFT7WA/d25dd781-2b58-4eb9-acbe-b9e704ffc34c/width=1320/d25dd781-2b58-4eb9-acbe-b9e704ffc34c.jpeg)