

![[A1111] AnimateDiff with IPAdapter and OpenPose](https://image.civitai.com/xG1nkqKTMzGDvpLrqFT7WA/24cc560d-de1a-4f07-b80a-28686a1b7d27/width=1320/24cc560d-de1a-4f07-b80a-28686a1b7d27.jpeg)
First of all, this operation consumes a lot of VRAM. When I created a short video, after loading ControlNet calculation, the whole VRAM ate up about 16GB. If you don't have enough VRAM, it's better to use ComfyUI's method.
A1111 with AnimateDiff
The installation is similar to ComfyUI, please install the following Extensions first.
It is also highly recommended to install FreeU,
AnimateDiff models
Motion models and Motion Lora can be downloaded here,
https://huggingface.co/guoyww/animatediff/tree/main
In addition to recommend a few, can be used to generate animated action models,
These model files need to be placed in this folder,extensions/sd-webui-animatediff/model
If you are downloading the action Lora, you need to put it here,extensions/sd-webui-animatediff/model/Lora
After downloading, if you need to use ControlNet, please put the files you need here,models/ControlNet
Of course, your main model needs to be in models/Stable-diffusion . If you have VAE, you need to put it in models/VAE .
AnimateDiff's WebUI
Once everything is installed, you will have an AnimateDiff interface,
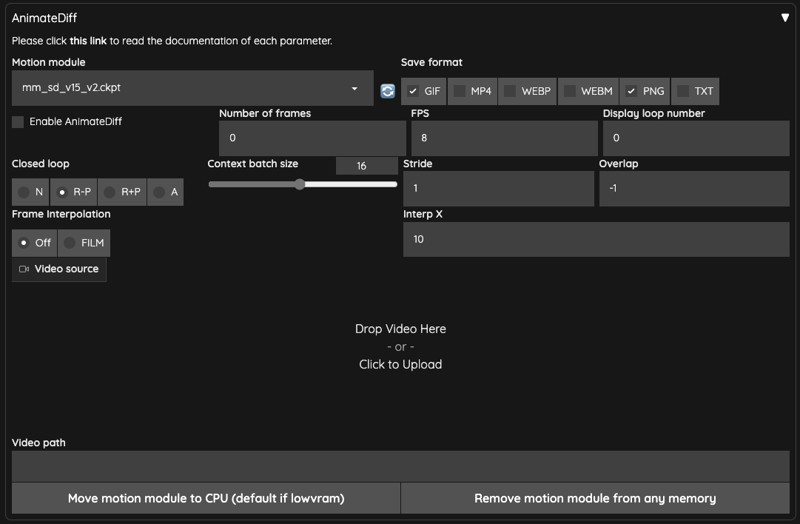
Enable AnimateDiffRemember to check the box if you want to enable it.Motion moduleMotion module is the place to select the motion model.Save formatSave the output format,TXTcan be checked if you want to save text information.Number of framesDefault is0,when you useVideo sourceorVideo path, it will be calculated automatically and filled in. Otherwise, it will calculate the number according to theContext batch size. Please don't use a number close to theContext batch sizeContext batch size, the kit author explains in #213 .FPSThe number of frames per second.Display loop numberIf you choose to outputGIF, this means how many times you want to replay, default0means replay continuously.Context batch sizeIndicates how many frames AnimateDiff will process at a time,16is a good value by default. Please note! Different action models will limit the maximum value of this number.Closed looptries to make a loop animation, there are four algorithms, it should be noted that when theNumber of framesless than or equal to theContext batch size, it will not work.NNot used, valid whenNumber of frames(except0) is less than theContext batch size.R-PReduces the amount of context in the loop animation and does not interpolate when using Prompt Travel.R+PReduce the amount of context in the loop animation and use Prompt Travel to do Interpolated.AThe beginning of the frame will be connected to the last frame to do the loop animation, using the Prompt Travel way to do the frame insertion action (Interpolated).
StrideThis thing is hard to explain, the main purpose is to make sure AnimateDiff can keep time synchronized between frames as much as possible, by default it uses1. You can refer to the original author's description of WebUI Parameters for more details. The same as ComfyUI, this setting seems to have no effect on vid2vid.OverlapSets the number of frames to be reserved for overlaying each time AnimateDiff processes an image, by default-1, it will use the number ofContext batch size / 4. This setting is only valid ifNumber of framesis greater than theContext batch sizeorNumber of framesis0.Frame InterpolationDefault isOFF, If you are usingFILM, you will use Deforum to make up the frame after AnimateDiff.Interp XWhen usingFrame Interpolation = FILM, takes the X number of output frames and adds them to the input frames. It will stretch the whole movie and you need to speed up the movie after output.Video SourceYou can upload video here.Video PathIf you don't have any video to upload, you can input the path of the video here, you need to split the video into frames and put it here.Move motion module to CPU (default if lowvram)In case of low VRAM, move the model to system memory.Remove motion module from any memoryRemove motion module from any memory.
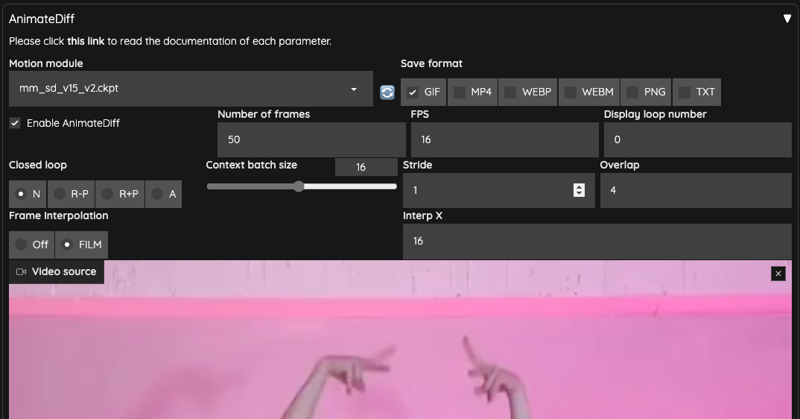
After we upload the movie, some of the above parameters will be brought in automatically,
ControlNet
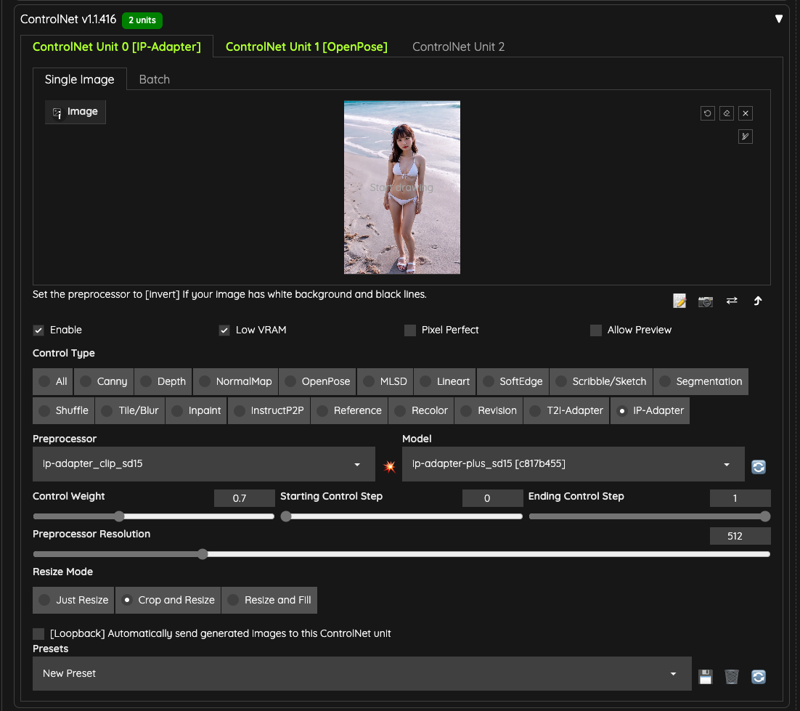
Next, we need to prepare two ControlNet for use,
OpenPose
IPAdapter
I'm using IPAdapter here, and I've chosen the model ip-adapter-plus_sd15 and set the weight to 0.7 to avoid too high weight to interfere with the output.
In addition, I have prepared the same number of OpenPose skeleton diagrams as the uploaded movie and placed them in the /output/openpose folder for this ControlNet to read,
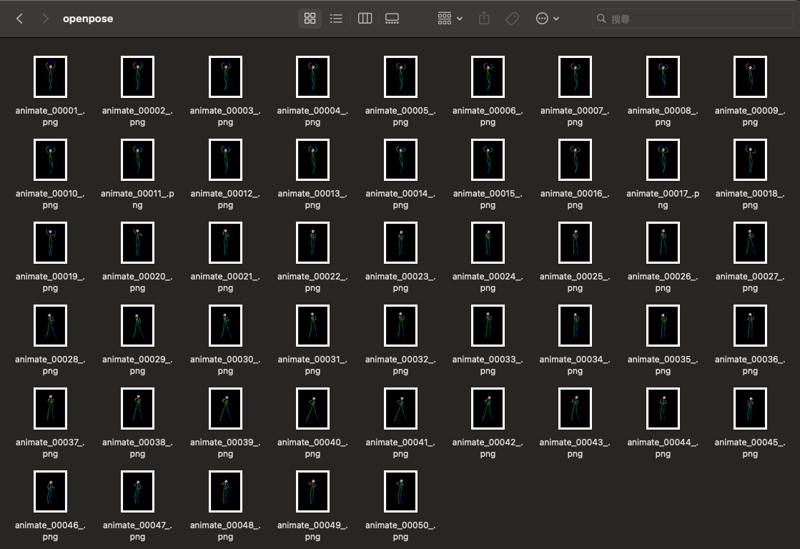

If you have no idea to generate the skeleton images, you can also using the ControlNet preprocessor like DWPose to processing the image to the skeletons.
If you are using the preprocessor, keep in mind the batch input images are export from your video using other tools, like FFmpeg or etc. You need export all frames from your video.
Text2Image Settings
Please pay attention to theBatch sizes, which are explained a little bit here,
The difference between A1111 and ComfyUI is that ComfyUI counts the whole process as one
Batch Counts, so in ComfyUI, you need to set theBatch sizesto be the same as the number of frames read in, so the animation won't be unsmooth.In A1111, according to the
Number of framesread by AnimateDiff plug-in, and the source of ControlNet OpenPose you prepared, take this article as an example, you will have50drawing steps.If your
Batch sizes/Batch Countsare set to 1, then all of T2I will only be done50times.For example, in the video that follows this post, the
Batch sizesis set to4, which means that the T2I process will generate50 x 4 = 200, a total of200images.Since AnimateDiff has modified the i2ibatch, AnimateDiff will take these 200 images to do the algorithm in the image processing part (whether or not this is actually the case needs to look at the source code in detail, it's just my personal speculation at the moment).According to the extension github write-up, modifying
Batch Sizeshas no effect at the moment, maybe it will be supported in the future.You do not need to change batch size at all when you are using this extension. We are currently developing approach to support batch size on WebUI in the near future.
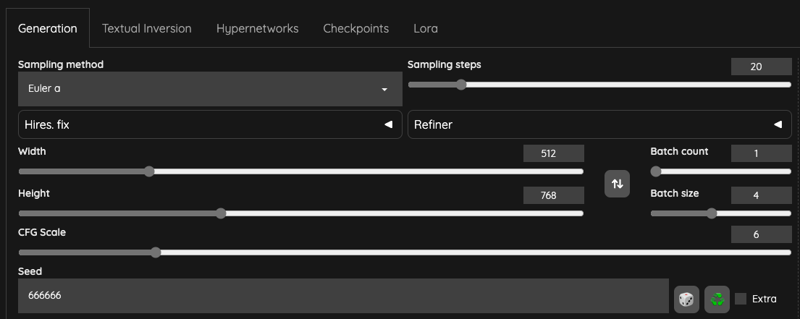
Please keep the Seed setting at a fixed value, because you don't want to output pictures with completely different styles.
ADetailer
Finally, we use the ADetailer to repair the face,
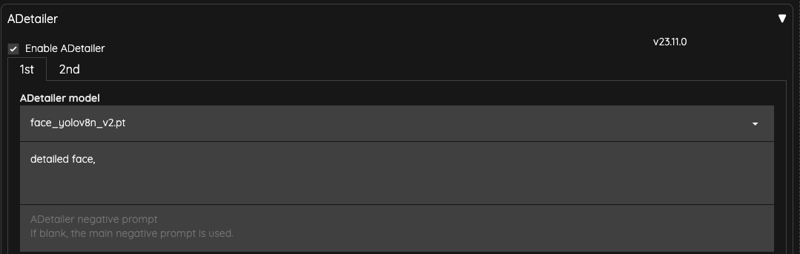
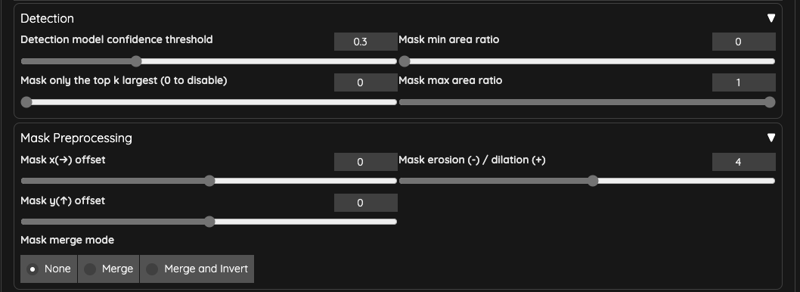
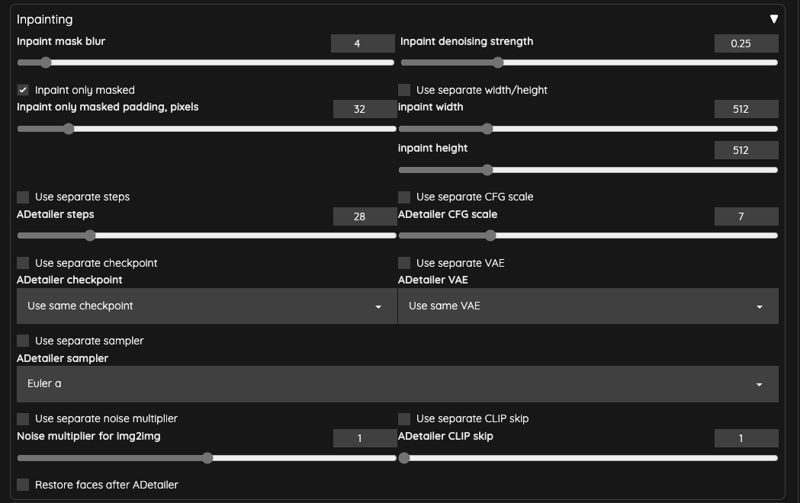
I lowered the ADetailer's Inpaint denosing strength to 0.25 to make sure the face doesn't get overpainted and cause flickering problems.
Generating
For the prompt part, since we are using IPAdapter, we can throw the IPAdapter image to PNGInfo to get our prompt, and then do the modification for the prompt.
Finally, let's take a look at the output,

Animate GIF: https://i.imgur.com/2rNP0SX.gif
These three videos have been processed separately, the output FPS is 16FPS, the rest of the different output settings are as follows,
Frame Interpolation = NO,Batch Size = 1Frame Interpolation = FILM,Batch Size = 4Frame Interpolation = FILM,Batch Size = 4,Stride = 4
You will find that the overall smoothness of the animation will be significantly better when using a higher Batch Size .
Batch Size
When you don't use vid2vid, but use text output to GIF, your Batch Size will determine the number of words in the GIF (not the Batch Counts), which is also explained in the author's Batch Size section.
If you are using ControlV2V, then increasing the Batch Size a little bit will bring you good results, you can try it more often.
Frame Interpolation = FILM / Intrp X
When turning on Frame Interpolation = FILM , for the purposes of this post, I used the default value of Interp X = 10 , The Number of frames read by the original movie is 50, and we end up with a GIF file that contains a total of 491 frames.
In other words, each frame of our original video is added about 10 frames after enable, so the final output GIF file will become a slow motion video.
The actual code operation is like this,
film_in_between_frames_count = calculate_frames_to_add(len(frame_list), params.interp_x)Source code: film_in_between_frames_count.
So, the original video is about 3.2 seconds, and after the end of the frame-up action, it will be stretched into a 30.2 seconds video, and you will need to use other tools to shorten the whole movie back to the original length.
If you have installed FFmpeg, you can use setpts to speed up the movie. In the case of the movie in this post, this will shorten it to the same speed as the original movie.
ffmpeg -i input.mp4 -filter:v "setpts=0.1*PTS" output.mp4Additional Settings
If you're using --xformers and you're having problems, you can adjust the settings of AnimateDiff to use sdp instead, which may solve the problem.

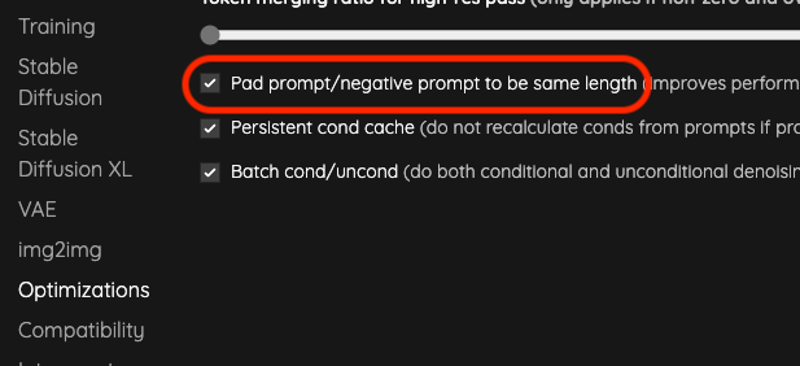
Another point is that because it uses vid2vid with t2i, if you have problems generating images, turning on this setting may solve them, and it will also bring a little performance optimization.
Conclusion
The operation of A1111's AnimateDiff and ComfyUI is actually not very different, the only difference is that A1111 has packed the intermediate places that need to be linked, which can save some time.
If VRAM is really tight, it's better to switch to ComfyUI, or else the length (total frames) of the movie will be lowered each time, and then you can use the movie editing software to string the files together.