
This guide is based and also inspired by the article [Insights for Intermediates] - How to craft the images you want with A1111 . i recommend reading that first as my methods involve some of RestlessDiffusion 's method.
So to start off; When you type in a prompt there is quite literally an infinite amount of ways comfy can interpret your prompt. So instead of ever getting what you want you will only get closer and closer to what you want. Take a look at this graph for example.

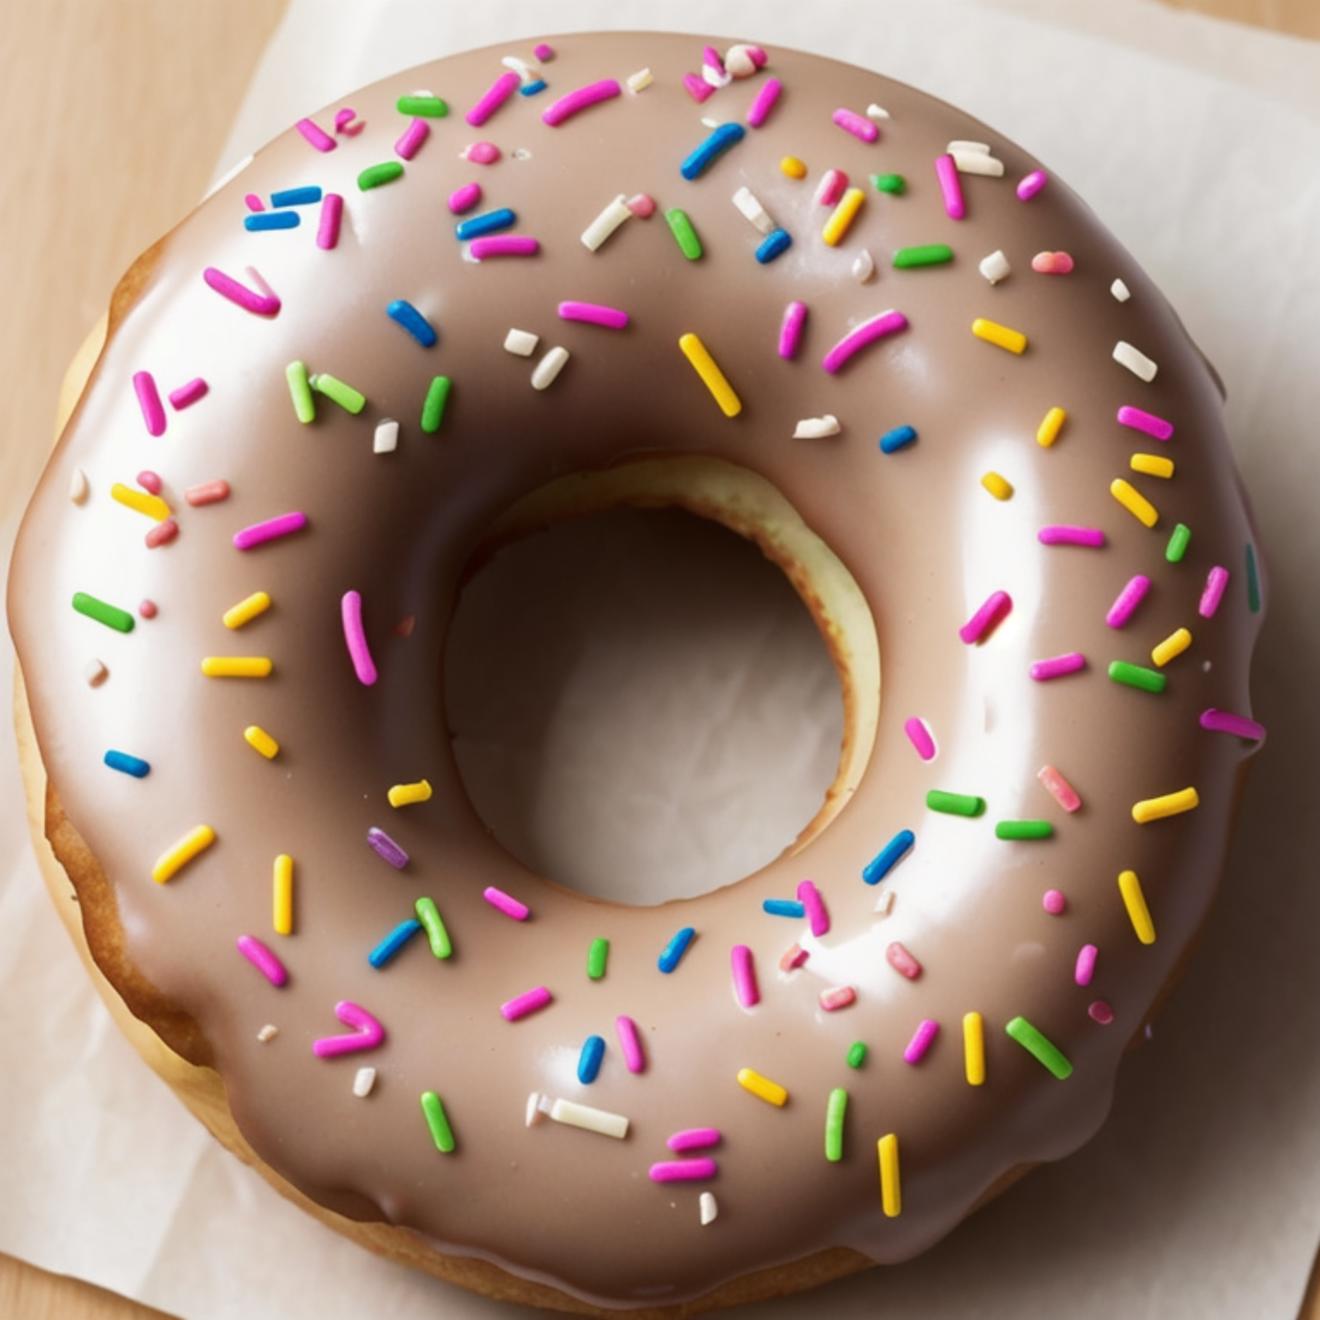
The red dot represents what you want and the blue circle represents all the possible outcomes of your prompt. so like if i was to type in "donuts" then there's different sizes, styles, colors, and icings.

Pretty much you could also have a donut with human teeth growing out of it, or a person with donut hands. You may be saying "well that's why you specify the prompt as much as possible" but that might actually end up inadvertently causing teeth donuts or so and what you want might not even be in the realm of possibility's anymore. This software is not stupid, it knows exactly what you mean by donut, but if you don't specify what you don't want and what you do want most of the time it will assume the latter.
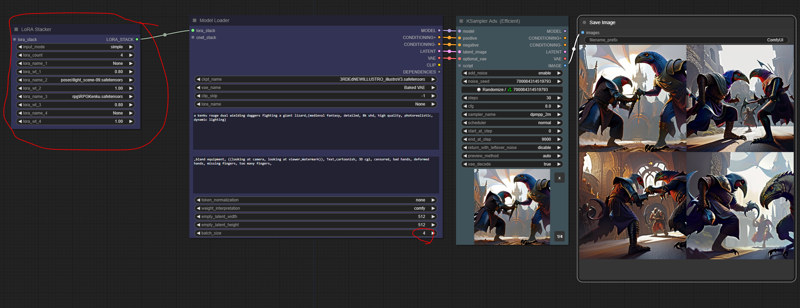
Now this is where loras and specific models come into play. when you use them you significantly decrease the blue circle as shown below.

but still that only gets you closer to what you want and while extremely helpful sometimes more is needed.
What I've come to discover is that if you want get that circle even smaller you have to give comfy guide lines. using a mix of controlnet, img2img, and inpainting you can create some very dynamic pieces that would be close to impossible to get on a single generation alone, even with XL.
step1: Start with a rough draft

it can be any size but 512x512 is recommended, make sure to add your loras in the rough draft since its the most crucial part. set your batch size to 4 and just keep generating until you see an image thats going in the right direction of what you want. Also if you have a specific pose you want to use put the controlnet pose in at this point aswell.
Step 2: Refining the rough draft
Now that you have a rough idea of what you want (pun intended) its time to put it into img2img controlnet and refine it.
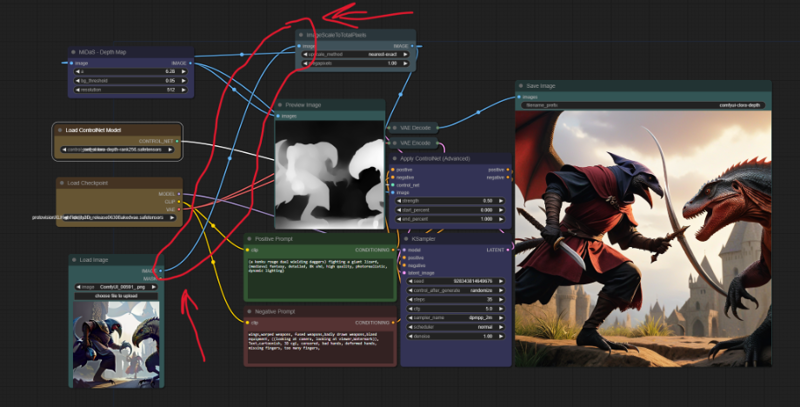
I'll share my workflow at the end of this but be sure to use the ImageScaleToTotalPixels node or just upscale the base image to 1024x1024. the more pixels you have the more youl be able to edit your image. basically this will make comfy have an easier time changing things in your model to what you want. Set the Controlnet strength to .75 to give it just enough wiggle room and 5-8 cfg depending how detailed your prompt is. ive found the when you have alot of specifications there tends to be contradictions that you arnt aware of and a lower cfg lets comfy ignore your unreasonable demands and put in the ones it can.
Now you wanna take that output image and put it in as the new input image and refine it again then fix the seed. This is were you want to make slight changes to your prompt and play with the cfg and controlnet strengths to get your image even closer to what you want.

Step 3: Final refine
After tweaking your settings and getting it even closer to what you want you wanna take that new image and put it in the input but this time add a high res fix to it which should fix the majority of the remaining issues. I recommend 1.5 upscale and .75 denoise with the ttl_nn upscaler model. again i'll attach my workflow at the end of this.

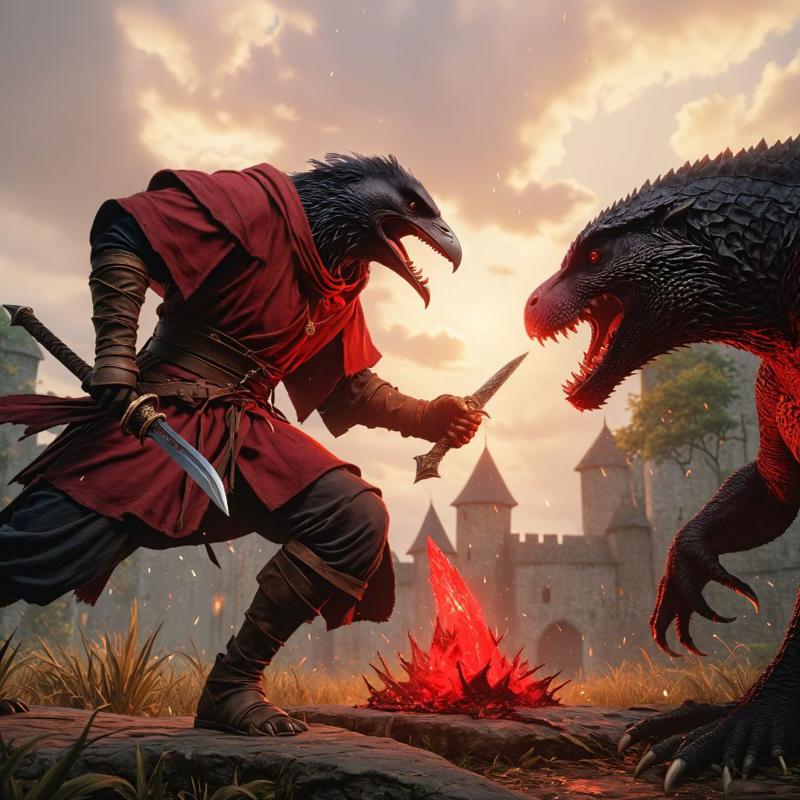
For most of my renders at this point have come out perfectly (pretty close to what I want) with ought any further editing needed but for the ones that still need additional touching up, like the example I'm currently using, I use inpainting.
Step 4: Inpaint the small details.
So when you have to inpaint you should make sure its only small details hear and there otherwise you might aswell save some time and go back to step 2. for me it was only the wings, head, and dagger. For lack of a better method I switch back to stable diffusion for my inpainting. be sure to match the steps and sampler that the previous image was generated with to avoid out of place looking features.
The wings and head were an easy fix, which only left the dagger. for things like these i find it best to delete the feature thats already there and use the "fill" Option to inpaint a rough image of what you want. Im no expert but as far as i can tell Fill adds items to the image regardless of whats already there.

For example if i were to use "original" then SD would try to figure out a way to use the sun and the characters and hand make a dagger which usually ends up as a warped mess. using "fill" will just put the dagger in, granted it will look out of place but thats why after you get somewhat of the image you want switch back to "original" and turn on controlnet>depth> and prioritize prompt. always gotta give it a little wiggle room lol. and then you should have a nice final image.
step 5: Upscale that bad boi
This is optional But I like to upscale the final image by like 4 or 6 so its suitable for instagram, wallpapers, posters, etc.
Over all its far easier and less time consuming to guide your generations into a what you want than trying to get it in one go. this is especially useful for commissions that need to be a certain way with no exceptions.
The workflow files should be attached also idk why people think this but the comfy community doesn't horde workflows. the thing is that most people understand that it is extremely beneficial for people to learn the nodes and how comfy works rather than just giving them a workflow. Throught my time using it ive had a countless amount of questions and never have i met anyone that wasnt willing to walk me through it let alone not answer me. but for the sake of putting these rumors to rest the workflows are attached but i emplore anyone new to comfy to try and recreate said workflows and understand how they work.
well i think thats about it. feel free to message me with any questions
Additional notes:
The controlnet workflow is based off of somone els's, i forgot who which is why i didnt give them credit
Refine with an XL model for best results
If for watever reason the node manager isnt able to identify the nodes and models used; update the manager and comfy and that should fix the problem
Yes the donut was generated with just "donut" as the prompt
Happy Holidays!